

Aerovent IM-120 User Manual
8" Min.
4"
Membrane
Mastic
Mastic
Existing
Roofing
Roof Structure
Ventilator
Base
IM-120
April 2007
General Installation, Operation and Maintenance Instructions For Aerovent Products
Model 53, 40C and SV40 Roof Ventilators
Installation
1. Check for possible damage in shipment to roof ventilator.
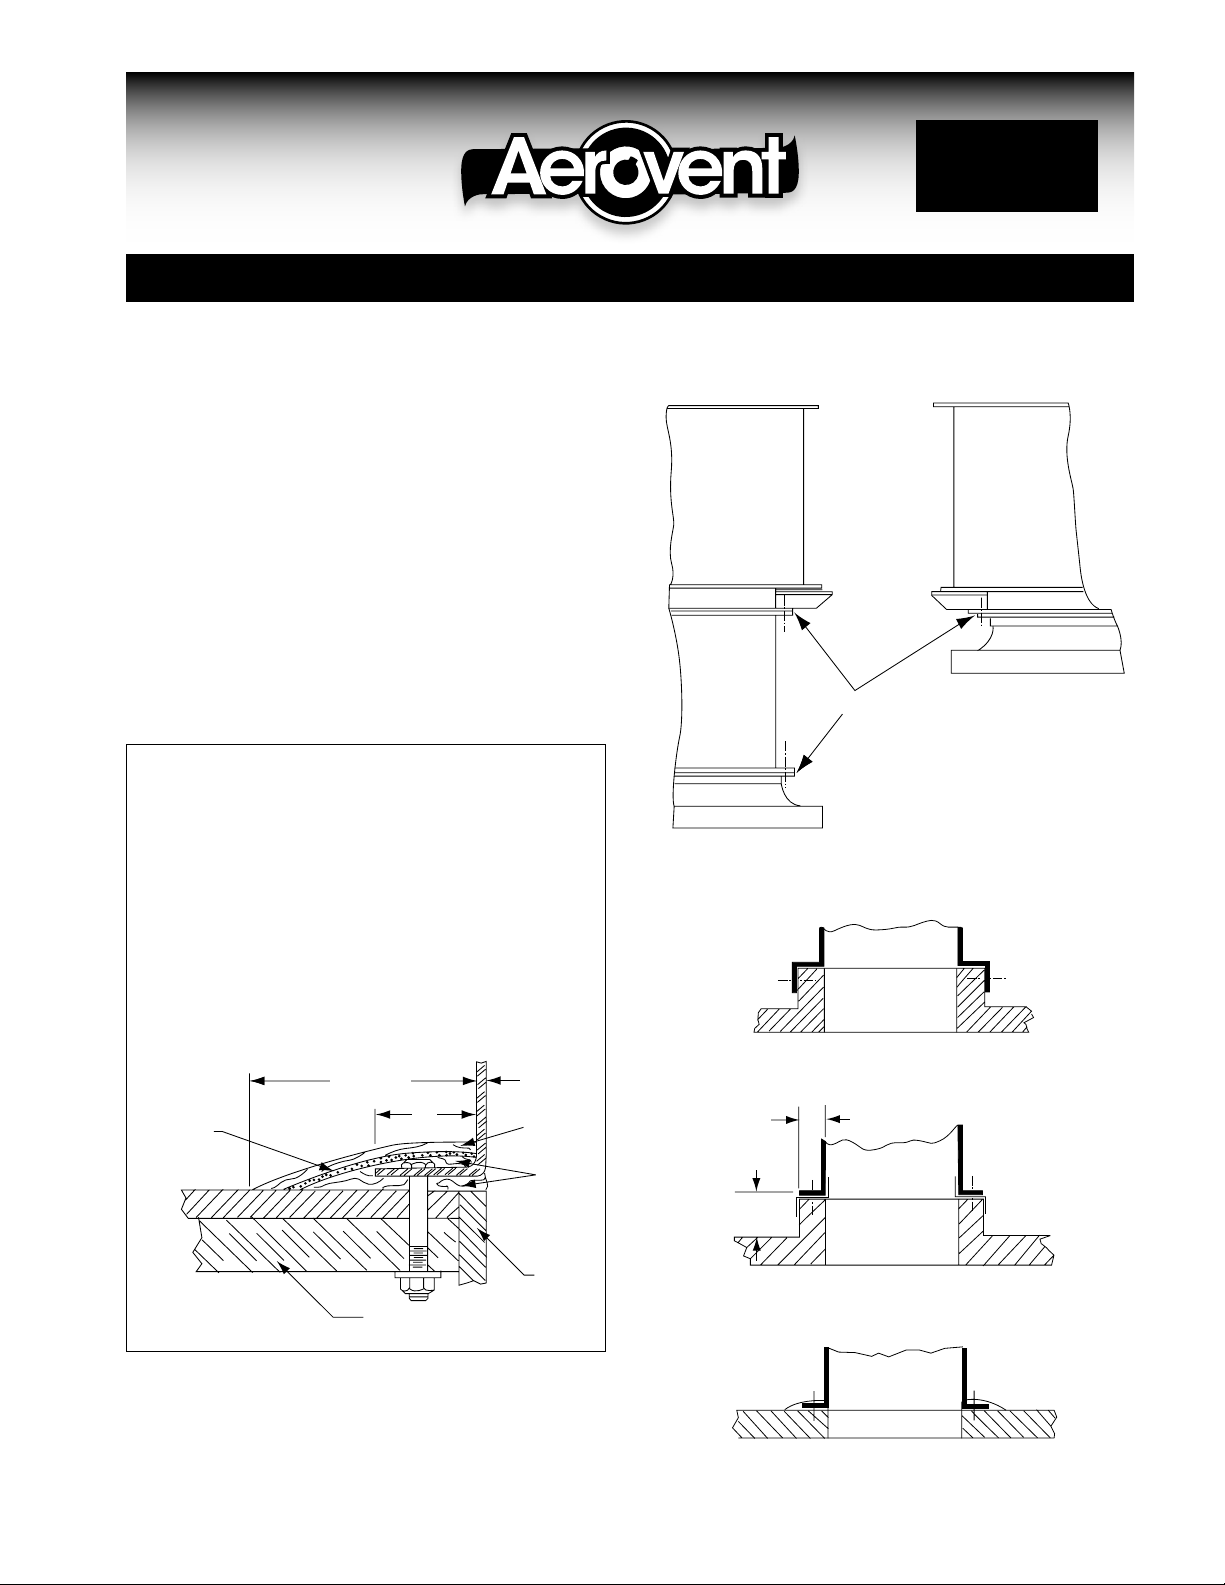
2. Assemble stack cap section, fan and curb base.
3. Caulk between flanges of damper section, fan section
and curb base (see illustration).
4. Install assembled ventilator onto roof curb. Secure
ventilator to curb with bolts (see illustration).
5. Check propeller for proper rotation.
6. Make certain dampers operate smoothly and are free
from obstruction.
STACK
CAP
SECTION
FAN
CAULK
STACK
CAP
SECTION
CURB BASE
Model 53
Detail of Mounting
Flat Type Curb Base on Existing Roof
Use Hydro Shield and heavy-duty glass membrane — Addex Corporation (or equal).
1. Set ventilator curb base in mastic.
2. Apply mastic over curb base flange.
3. Work membrane into mastic.
4. Trowel mastic over membrane and work in
.
CURB BASE
Model 40C & SV40
STD. CURB BASE
4"
6" MIN.
Field Procedure: Caulk ventilator at locations where indicated
to prevent leakage.
Caulk
Seam
ROOF CURB
New Roof
Caulk
FLAT TYPE
CURB BASE
ROOF CURB
New Roof
FLAT TYPE
CURB BASE
Seam
Flashing
Existing Roof
©2007 Aerovent

Care and Maintenance
Good fan maintenance requires regular and systematic
inspection of all fan parts. Severity of the application
should determine frequency of inspection.
Regular fan maintenance should include the following:
1. Propeller — The propeller in an axial flow fan must
be kept reasonably clean if it is to perform properly. Fans handling fresh air for ventilating purposes
will seldom need cleaning. Fans exhausting process
air should be cleaned as required. Dirt or chemical
deposits will usually build up on a propeller evenly,
and they present no problem to performance or operation until they become thick enough to break away
in crust-like pieces. When this happens, the propeller
may be thrown out of balance and the resulting vibration could be serious. The dirt or chemical deposits
should be removed by solvent cleaning or scraping.
If the propeller has been coated, be careful not to
cut through this protective covering. If the propeller
shows excessive wear, it should be replaced immediately. Refer to General Installation and Maintenance
IM-100 for proper procedure in removing and replacing the propeller.
2. V-Belt Drive — Check V-belt drive for proper alignment and tension. See General Installation and
Maintenance IM-101 for instructions.
3. Fan Bearings — Lubricate the bearings (if belt driven).
Bearing lubrication instructions are detailed in IM-
100.
4. Screws and Bolts — Check tightness of all screws
and bolts throughout the ventilator assembly.
5. Stack Cap — Periodically check damper blades and
remove accumulated dirt. Check bronze damper bearings for smooth operation.
®
5MPP04/07
AEROVENT | WWW.AEROVENT.COM
5959 Trenton Lane N | Minneapolis, MN 55442 | Phone: 763-551-7500 | Fax: 763-551-7501
 Loading...