

Page 1

G
G
Planting & Growing Guide
arden
arden
S
S
tarter
tarter
ray
ray
T
T
English
NOTE:
Do not unwrap Tray until you are ready to plant your seeds. The plastic
cover retains moisture that is critical for easy planting and fast germination.
Page 2

Contents
Introduction
Garden Starter Tray Basics .........................2
What’s Inside .............................................2
Additional Supplies ..................................... 3
Planning Your Garden–
Seed Selection
Sample Gardens .........................................3
Your Seed Planting Schedule
Last Frost Date ............................................4
Rate of Growth ........................................... 4
When to Transplant.....................................4
Seeding Your Garden Starter Tray
Tray Layout ................................................. 6
Number of Seeds ........................................ 7
Seed Depth ...............................................8
Changing Dibble Size ............................8
Place Seeds in Grow Sponge ......................9
Moving Seedlings to Your
Outdoor Garden
Hardening Off .......................................... 14
When to Plant ........................................... 14
Water Garden ........................................... 14
Transplanting Seedlings ............................. 15
Caring For Young Seedlings
Daily Watering ......................................... 16
Frost ........................................................ 16
What to Expect ......................................... 16
Appendices
Troubleshooting ........................................ 16
Prepare for Your Next
Garden Starter Tray ................................... 18
Blank Planting Schedule ............................ 19
Blank 6- and 7-Pod Tray Layout ................. 21
Blank Space•Saver 6 Tray Layout ...............22
Blank Seeding Log .....................................23
Setting Up Your AeroGarden
Place Tray in AeroGarden ......................... 11
Tending Your Seedlings
Add Water ................................................ 12
Add Nutrients ........................................... 12
Thin Plants ................................................ 13
Planning Your Outdoor
Vegetable Garden
Prepare Your Soil ...................................... 13
Plant Size .................................................. 13
Garden Plans ............................................ 13
Photos of Garden Starter Tray for
AeroGarden 6 and all 7-Pod model
AeroGardens are shown throughout this
Guide to accompany instructions.
The same instructions apply to
Space•Saver 6 Garden Starter Tray.
Additional blank Planting Schedules,
Seeding Logs, Tray Layouts and
Quick Start Guides are available at
www.aerogardensupport.com
Page 3

The Garden Starter Tray enables
you to use your AeroGarden to
start seedlings for transplanting
into an outdoor garden. In just
a small amount of space,
with
minimal care, you can now start
up to 66 seedlings
(36 seedlings
for Space•Saver 6 models) and
get a jump-start on the outdoor
gardening season.
This Guide will assist you in deciding what to grow, when to start your seeds,
how to seed the Garden Starter Tray and how to care for and transplant your
seedlings to an outdoor soil garden or containers. We recommend that you
read this entire Guide before starting your seeds.
Introduction
Garden Starter Tray Basics
The Garden Starter Tray has supplies for starting 36 or 66 seedlings (depending on model you are using) –
enough to start a summer vegetable or butterfly flower garden for your yard.
What’s Inside (66 Seedling Garden Starter Tray shown)
Grow Sponge Opening
Seed Tray
Do not unwrap Tray until
you are ready to plant your
seeds. The plastic cover re-
moisture that is critical
tains
!
for easy planting and fast
germination.
Small Nutrient
Tablets (4)
Biodegradable, pre-moistened
Grow Sponge with Dibble
(36 or 66)
Large Nutrient
Tablets (6)
2
Page 4
Introduction (Continued)
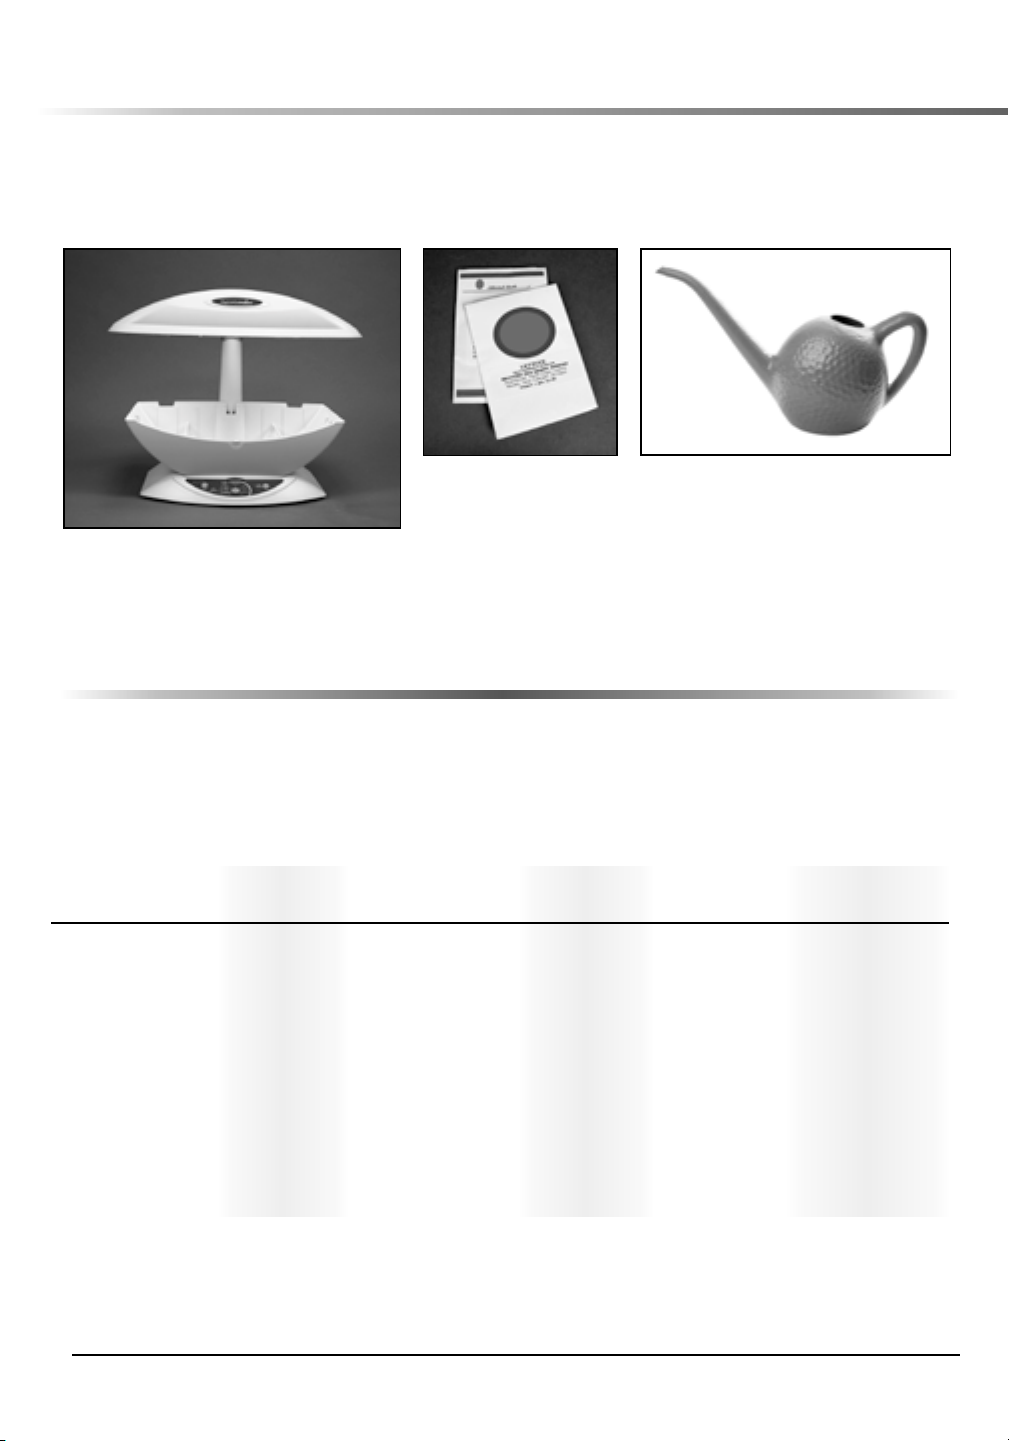
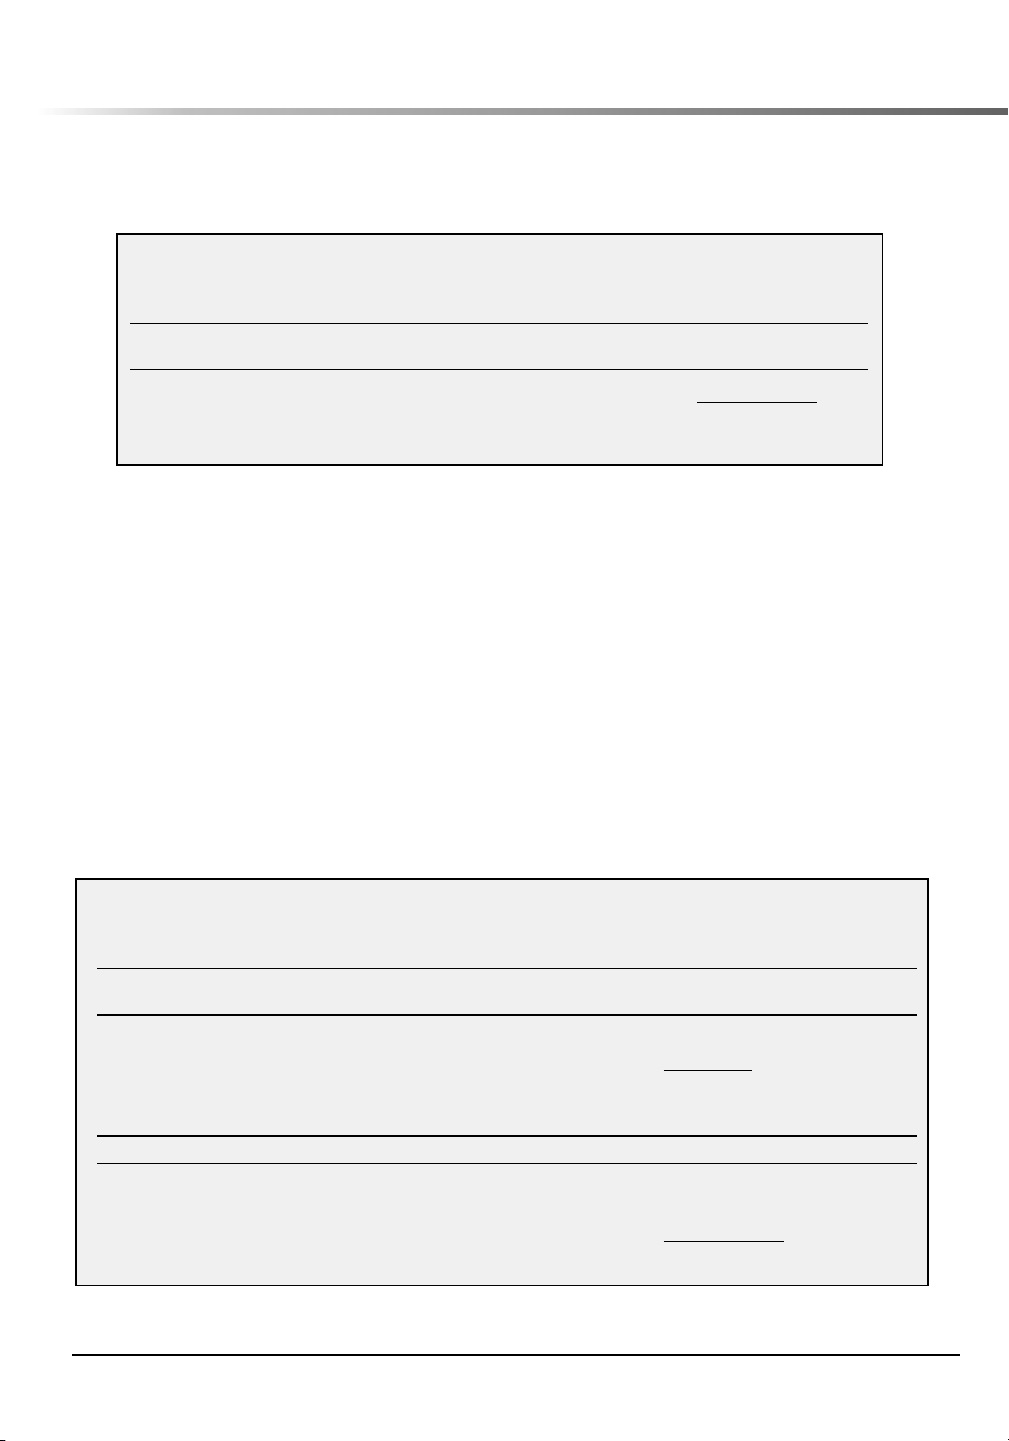
Additional Supplies
There are a few additional items that you will need.
Seeds
AeroGarden with Deck removed
Watering Can
Planning Your Garden – Seed Selection
Sample Gardens
There are thousands of seed choices available to grow in your Garden Starter Tray. To simplify the plan-
ning process, we’ve provided some plant lists for theme gardens that you can start in your Tray. Feel free to
modify the lists any way you like, or plant a garden of your own design.
Spring Summer Butterfly Children’s Kitchen Herb Cutting
Vegetables Vegetables Garden Garden Garden Garden
Lettuces Beans Alyssum Beans Basil Zinnias
Spinach Tomatoes Cosmos Pumpkins Oregano Black-Eyed Susans
Scallions Bell Peppers Nasturtiums Watermelons Thyme Dianthus
Beets Chilies Petunias Cucumbers Cilantro Snapdragons
Radishes Cantaloupe Verbenas Crazy Carrots* Mint Phlox
Swiss Chard Cucumbers Candytufts Marigolds Sage Rudbeckias
Broccoli Eggplants Phlox Nasturtiums Parsley Calendulas
Brussels Sprouts Zucchinis Zinnias Savory Campanulas
Cabbages Dill Foxglove
Cauliflower Sorrel Coreopsis
* Carrot seedlings transplanted from a Garden Starter Tray into our outdoor test garden grew into some wild and twisted shapes.
Children (and adults) had fun harvesting, naming and eating them. If you’re up for some garden surprises, sow some carrot
seeds in your Garden Starter Tray. To see pictures of our one-of-a-kind Crazy Carrots, please see page 16 of this Guide.
3
Page 5

Your Seed Planting Schedule
Determining when to plant seeds in your Tray so that they are ready at the right time depends
on a few factors: the last frost date for your area, what you want to plant and how quickly each
seed type germinates and grows into a seedling ready to transplant.
Last Frost Date
The last frost date is, on average, the last day in the spring that you might have a frost that can
damage tender plants. It is a useful date to know when starting seeds indoors.
A great resource for specific information for your area is a local master gardener, someone at a
garden supply store or a local cooperative extension agent.
You can also check the internet for Last Frost Dates in your part of the world.
Rate of Growth
You will find that seeds started in the Garden
Starter Tray germinate and grow much faster than
you may have experienced with other seed starting systems. That said, not all plants germinate
and grow at the same rate.
toes and peppers need
seedlings are ready for transplanting. In comparison, beans and cucumbers grow much quicker
and need only 2 weeks of growth in the Garden
Starter Tray until they are ready to transplant. This
information is sometimes provided on the back
of seed packets, but as with much gardening,
the best guidance is from experience: your
or a trusted expert at a gardening store or local
cooperative extension service. Use this information with the last frost date to calculate the earliest
date to start seeds.
For example, toma-
about 6 weeks until the
own,
When to Transplant
Some plants can withstand frost, others require
frost free days and certain soil temperatures to
thrive. For example, beets, lettuce and some
flower seedlings can all be transplanted several
weeks before the last frost. Summer crops, such as
cucumbers, tomatoes, melons and beans, should
only be transplanted after the last frost date. Your
seed packet is the best source of “when to plant”
information. Keep in mind, you do not need to
seed the entire Tray at one time. Instead, you can
stagger when you seed your Tray. For example,
you can seed some Grow Sponges with spring
crops that can withstand a frost, transplant the
seedlings outside and then seed the remaining
Grow Sponges with summer vegetables or flowers that need warmer outdoor weather to thrive.
Putting It All Together: Creating a Staggered
Planting Schedule
Following are two examples of how to create a
staggered planting schedule. Use the blank Plant-
ing Schedule on page 19 of this Guide to calculate and keep track of your seed starting dates
for each plant type. In each example, a sample
Planting Schedule is provided. A month-to-month
calendar also comes in handy when setting up
your planting schedule.
Example 1: Planting schedule for summer
vegetables to transplant after the last frost
(e.g., non-frost tolerant plants).
Suppose you live in Lansing, Michigan, U.S.A.
and want to grow tomato, pepper and cucumber
seedlings, which are not frost tolerant. The last
frost date for this area is May 7 (date obtained
from internet). Tomato and pepper seeds need
about 6 weeks to grow before hardening off (see
“Hardening Off” on page 14 of this Guide).
Using a calendar to count backwards 6 weeks
from the last frost date (May 7),
starting date of March 26
pers. Cucumbers need only 2 weeks to grow, so
counting backwards 2 weeks from the last frost
date (May 7), gives you a seed starting date of
gives you a seed
for tomatoes and pep-
Continued on next page
4
Page 6
Your Seed Planting Schedule (Continued)
April 23 or 4 weeks after starting your tomato and
pepper seeds. All seedlings will be ready to harden
by May 7. An example of a completed Planting
Schedule (shown below) includes all this information.
Planting Schedule
Last Frost Date:
Weeks to Earliest Seed Ready to Transplant
Plants Grow Starting Date Harden Off Date Notes
Tomatoes 6 weeks March 26 May 7 May 17 For cucumbers Peppers 6 weeks March 26 May 7 May 17 Seed 4 weeks after
Cucumbers 2 weeks April 23 May 7 May 17 tomatoes & peppers.
Sample Planting Schedule for seeding non-frost tolerant plants. See page 19-20 for blank Planting Schedules.
Example 2: Planting schedule for both frost
tolerant and non-frost tolerant plants.
Continuing with the example from Lansing,
Michigan, U.S.A. (where the last frost date
7), suppose you want to also start seedlings for
frost tolerant plants such as lettuce, beets, chard
and scallions, as well as for non-frost tolerant
plants such as tomatoes, peppers and cucumbers.
Scallions, beets, and chard seeds need about 2
weeks to grow until the seedlings are ready for
hardening off. The lettuce seeds grow quicker and
can be planted a week after the scallions, beets
May 7
is May
and chard seeds. In addition, these plants can all
tolerate a frost and can
ground 6 weeks
before the last frost date.
You’ll need another 1½ weeks to harden off the
lettuce, scallions, beets and chard plants before
transplanting outside (more on this on page 14 of
this Guide). Using a calendar to count backwards
9½ weeks (2 weeks + 6 weeks + 1½ weeks)
gives you a seed starting date of February 28. An
example of a completed Planting Schedule (shown
below) includes all this information.
usually be planted in the
Planting Schedule
Last Frost Date:
Frost Tolerant Weeks to Earliest Seed Ready to Transplant
Plants Grow Starting Date Harden Off Date Notes
Scallions 2 weeks February 28 March 14 March 24
Beets 2 weeks February 28 March 14 March 24 For lettuce - Seed 1 week
Chard 2 weeks February 28 March 14 March 24 after scallions, beets & chard.
Lettuce 1 week March 7 March 14 March 24
Non-Frost Tolerant Plants
Tomatoes 6 weeks March 26 May 7 May 17 Start seedlings after trans-
planting spring crops outside.
Peppers 6 weeks March 26 May 7 May 17 For cucumbers - Seed 4 weeks
Cucumbers 2 weeks April 23 May 7 May 17 after tomatoes & peppers.
Sample Planting Schedule for seeding frost tolerant and non-frost tolerant plants. See pages 19-20 for blank Planting Schedules.
May 7
5
Page 7

Seeding Your Garden Starter Tray
1
2
3
4
5
6
34
35
36
37
38
39
40
41
42
43
44
45
46
47
48
49
50
51
52
53
54
55
56
57
58
59
60
61
62
63
64
65
66
7
8
9
10
11
12
13
14
15
16
17
18
19
20
21
22
23
24
25
26
27
28
29
30
31
32
33
lettuce
scallions
chard
chard
chard
chard
chard
chard
cucumber
cucumber
cucumber
cucumber
cucumber
cucumber
tomato
tomato
tomato
tomato
tomato
tomato
tomato
tomato
tomato
scallions
beets
beets
beets
beets
scallions
lettuce
scallions
cucumber
tomato
scallions
scallions
lettuce
scallions
scallions
scallions
lettuce
scallions
scallions
cucumber
tomato
scallions
scallions
lettuce
scallions
scallions
scallions
lettuce
lettuce
lettuce
lettuce
lettuce
lettuce
lettuce
scallions
scallions
cucumber
tomato
scallions
scallions
scallions
peppers
peppers
Once you have decided which seeds to plant and when to start them, the next step is to decide
where in the Tray to plant seeds, how many seeds to plant in each Grow Sponge and how deep
to plant
(page 23) to keep track of your
seeds. We recommend using a Blank Tray Layout (pages 21-22) and/or Seeding Log
choices and create a Seeding Plan.
outs and Seeding Logs available at www.aerogardensupport.com.)
Tray Layout
The Grow Sponges are all the same size and receive
the same amount of light, warmth and moisture.
Following are a few guidelines that will help you
decide where to plant each seed type. Use a blank
Tray Layout (pages 21-22 of this Guide, or online
at www.aerogardensupport.com) to work out and
record your Seeding Plan (sample shown below).
•
Use the outer Grow Sponges for seedlings with
large, spreading leaves (such as beans, cucumbers
and okra) to prevent them
from shading other seed-
lings in your Tray.
• For a staggered seeding of plants with the same
planting out date (e.g., all frost tolerant plants or
all non-frost tolerant plants) use the inner Grow
Sponges for the slow growing seeds (which get
seeded first) and the outer Grow Sponges for
the fast
growing seeds. This allows you to plant
the fast growing seeds without reaching over
and potentially damaging the seedlings that are
already growing.
• For a staggered planting of seeds with different
planting out dates (such as
scallion, chard, tomato,
example on bottom of page 5 of this Guide),
consider using every other Grow Sponge for
the planting of frost tolerant plants. Again, this
will ensure that leaves from the larger non-frost
tolerant seedlings get enough light.
(Additional blank Tray Lay-
the lettuce, beet,
pepper and cucumber
Seeding Plan
(AeroGarden 6 and all 7-Pod AeroGarden models)
Seeding Log
1 lettu ce
2 lettu ce
3 lettu ce
4 lettu ce
5 lettu ce
6 lettu ce
7 tomato
Sample Seeding Plan for frost tolerant and non-frost tolerant plants from Example 2 on page 5.
Blank Tray Layouts and Seeding Logs found on pages 21-24 of this Guide and also available at www.aerogardensupport.com.
Continued on next page
6
Page 8

Seeding Your Garden Starter Tray (Continued)
1 5
4 9 14
3 8
7
13
12 17
18
19
20
21
22
23
24
25
26
27 31
28 32
29 33 35
30 34 36
10 15
2 6 11 16
scallions
chard
chard
chard
chard
cucumber
cucumber
tomato
tomato
tomato
tomato
tomato
tomato
tomato
scallions
beets
beets
beets
scallions
scallions
scallions
lettuce
scallions
scallions
lettuce
scallions
tomato
scallions
lettuce
lettuce
scallions
scallions
scallions
peppers
lettuce
lettuce
Seeding Plan (Space•Saver 6 AeroGarden models)
Seeding Log
1 lettu ce
2 lettu ce
3 tomato
4 tomato
5 tomato
6 tomato
7 scallions
Sample Seeding Plan for frost tolerant and non-frost tolerant plants from Example 2 on page 5.
Blank Tray Layouts and Seeding Logs found on pages 21-24 of this Guide and also available at www.aerogardensupport.com.
Number of Seeds
As with an outdoor garden, it is important to plant extra seeds in each Grow Sponge to ensure
germination success. A good rule of thumb is to sow only a few extra seeds for large seeds and
fruiting plants. Increase amount of seeds as seed size gets smaller and for plants that grow in
bunches, such as chives. For small seeds, typically 6 seeds does the trick. The table below provides recommendations of how many seeds to plant in each Grow Sponge.
Recommended Number of Seeds per Grow Sponge and Dibble Size
Seed Size Small Medium Large
Example
Number of Seeds
per Grow Sponge
Recommended
Dibble Size
lettuce, scallions,
chives, basil
Universal Dibble
1
/4” wide and 3/8” deep
(already in each
Grow Sponge)
6 4 2
beets, chard, tomatoes,
peppers, eggplant
Universal Dibble
1
/4” wide and 3/8” deep
(already in each
Grow Sponge)
beans, cucumbers, melon
Enlarge Dibble
to just larger than the
size of the seed
(see facing page)
7
Page 9

Seed Depth
The planting depth of seeds in your Garden Starter Tray will not necessarily be the same as
recommended on seed packets from suppliers. Each Grow Sponge has a small, tapered hole
near the center called a Dibble. The Dibble is adequate for most small and
seeds. For larger seeds, the Dibble may need to be enlarged.
We recommend using a Tray
Layout or Seeding Log to keep track of which Dibbles need to be enlarged. Please refer to the
table on page 7 for some guidelines on planting depths.
Changing Dibble Size
Enlarging Dibble size requires only tweezers.
• Open tweezers to desired width of Dibble opening.
• Insert open tweezers into Dibble to desired depth, then
close tweezers.
medium sized
• Pull up on closed tweezers to remove part of Grow Sponge.
• Repeat above steps until Dibble is desired depth.
• Be sure to make all Dibble adjustments before seeding
the Tray.
Continued on next page
8
Page 10

Seeding Your Garden Starter Tray (Continued)
It is important to seed your Grow Sponges and get the Tray into your AeroGarden
day. Otherwise, the seeds will start germinating without the benefit of moisture, warmth and
light provided by your AeroGarden.
on the same
Place Seeds in Grow Sponge
To avoid confusion, work with only one seed type
at a time.
Empty contents of 1 seed packet onto a
1
piece of paper or clean work surface. For
larger seeds, you may be able to grab seeds
right from seed packet.
Count out the number of seeds needed
2
for one Grow Sponge. For example, take
4 seeds if you are planting beets. (Use the
table on page 7 of this Guide to help you
decide the number of seeds to plant in each
Grow Sponge.)
Drop seeds into the Dibble with your fingers
3
or tweezers.
Mark Seeding Plan to indicate which Grow
4
Sponges are planted.
Repeat steps until all Grow Sponges for that
5
seed type are planted.
Return unused seeds to packet.
6
HELPFUL HINTS:
To avoid losing track of where you are on the Seeding Plan:
• Plant all of one seed type at a time.
• Start planting seeds on one side of the Tray and work your way across (rather than jumping around).
• Remember to check off each Grow Sponge on the Seeding Plan as you get it planted. (This way if you
get distracted, you’ll know where you stopped!)
• If you accidentally put in an extra seed or two, don’t worry. There is still plenty of room for seeds to
germinate and plants to grow.
9
Page 11

1
2
3
4
5
6
34
35
36
37
38
39
40
41
42
43
44
45
46
47
48
49
50
51
52
53
54
55
56
57
58
59
60
61
62
63
64
65
66
7
8
9
10
11
12
13
14
15
16
17
18
19
20
21
22
23
24
25
26
27
28
29
30
31
32
33
lettuce
scallions
chard
chard
chard
chard
chard
chard
cucumber
cucumber
cucumber
cucumber
cucumber
cucumber
tomato
tomato
tomato
tomato
tomato
tomato
tomato
tomato
tomato
scallions
beets
beets
beets
beets
scallions
lettuce
scallions
cucumber
tomato
scallions
scallions
lettuce
scallions
scallions
scallions
lettuce
scallions
scallions
cucumber
tomato
scallions
scallions
lettuce
scallions
scallions
scallions
lettuce
lettuce
lettuce
lettuce
lettuce
lettuce
lettuce
scallions
scallions
cucumber
tomato
scallions
scallions
scallions
peppers
peppers
✓
✓
✓
✓
✓
✓
1 5
4 9 14
3 8
7
13
12 17
18
19
20
21
22
23
24
25
26
27 31
28 32
29 33 35
30 34 36
10 15
2 6 11 16
scallions
chard
chard
chard
chard
cucumber
cucumber
tomato
tomato
tomato
tomato
tomato
tomato
tomato
scallions
beets
beets
beets
scallions
scallions
scallions
lettuce
scallions
scallions
lettuce
scallions
tomato
scallions
lettuce
lettuce
scallions
scallions
scallions
peppers
lettuce
lettuce
✓
✓
✓
✓
AeroGarden 6 and all 7-Pod models Garden Starter Tray
Sample Seeding Plan with planted Grow Sponges marked. Blank Tray Layouts and Seeding Logs found on
pages 21-24 of this Guide and also available at www.aerogardensupport.com.
Space•Saver 6 model Garden Starter Tray
Sample Seeding Plan with planted Grow Sponges marked. Blank Tray Layouts and Seeding Logs found on
pages 21-24 of this Guide and also available at www.aerogardensupport.com.
10
Page 12

Setting Up Your AeroGarden
Place Tray in AeroGarden
Remove Grow Surface from Bowl and set aside.
1
Lower Lamp Hood to lowest position.
2
Place Bowl on Base.
3
Add water up to “Fill to Here” inside Bowl.
4
Plug in AeroGarden.
5
Press “Select” button to set AeroGarden to
6
“Tomatoes/Peppers” on 7-Pod models,
and “Vegetables” on AeroGarden 6 and
Space•Saver 6 models.
Press and HOLD “Reset” button for 6 seconds
7
(Space•Saver 6 models), and 9 seconds (AeroGarden 6
and all 7-Pod models).
When “Add Nutrient” light begins to blink, release
“Reset” button. Nutrient timer is reset.
NOTE: In some cases, you may see other lights blink as
well. This is nothing to worry about.
To place planted Tray into AeroGarden:
8
• Carefully lift Tray from work surface. Keep Tray
steady to avoid spilling seeds from Grow Sponges.
• Gently lower Tray into Bowl so the large semi-circle
cutout for “Fill to Here” mark is in front.
NOTE: To inhibit algae growth, cover any empty Grow
Sponge Openings. (There is no need to cover
unplanted Grow Sponges.) A bottlecap, a cut-out
piece of plastic from a container lid or aluminum
foil all work well.
• Use room-temperature water. Very hot or very cold water will hurt your plants.
• We recommend using municipal tap, bottled or purified water. Well or softened water
SHOULD NOT be used because the extra minerals in these sources may be harmful to
!
aeroponically grown plants.
AeroGarden Classic shown
11
Page 13

Tending Your Seedlings
Add Water
There should always be water in the Bowl of your AeroGarden. Using a spouted container, pour water into
front of Bowl where “Fill To Here” is indicated. Always add water when “Water Low” light illuminates.
• Use room-temperature water. Very hot or very cold water will hurt your plants.
• We recommend using municipal tap, bottled or purified water. Well or softened water
SHOULD NOT be used because the extra minerals in these sources may be harmful to
!
aeroponically grown plants.
Add Nutrients
For the first 2 weeks of growth, seedlings will derive all necessary nutrients from the Grow
Sponge. After 2 weeks, you will need to add nutrient tablets.
Every two weeks, “Add Nutrient” and “Water Level Low”
lights will blink. At that time:
Unplug AeroGarden.
1
Remove Bowl from Base and bring it to a sink.
2
Remove Tray from Bowl and place on a counter that
3
can get wet.
Empty contents of Bowl into sink
4
water only.)
Fill Bowl with room-temperature
5
Here” and set Bowl on counter.
Place Tray back on Bowl arranging roots over Cross
6
Beams (if present).
Carefully replace Bowl on Base and plug in Garden.
7
First Feeding–two weeks after seeding
8
Add 2 nutrient tablets from “Starting Nutrients” bag,
reseal bag and press “Reset” button.
All Other Feedings
Add 2 nutrient tablets from
reseal
bag and press “Reset” button.
and rinse Bowl. (Use
water up to “Fill to
“Growing Nutrients” bag,
Cross
Beams
Bowl
Continued on next page
12
Page 14

Tending Your Seedlings (Continued)
Thin Plants
We recommended earlier in this Guide that you plant multiple seeds in each Grow Sponge.
Often times this results in more than one plant growing in a Grow Sponge. Herbs, lettuces, and
plants that grow in bunches (such as chives) do not require thinning. However, with broadstemmed varieties, such as fruiting plants, it is best to thin plants as described below.
• When plants are about 2” (5cm) tall, check each
Grow Sponge for multiple plants. Using scissors,
gently snip the smallest plants at the base of stem,
leaving ONE healthy plant in each Grow Sponge.
• Thinning seedlings ensures that the remaining plant
in each Grow Sponge will have room to grow, get
enough nutrients.
Be sure to cut, not pull, the extra seedlings to
avoid damaging the roots of the strongest plant
!
in each Grow Sponge.
Planning Your Outdoor Garden
A good time to plan and prepare for your outdoor garden is while seedlings are growing.
Prepare Your Soil
For seedlings to thrive, they’ll need to be transplanted into soil that is amended with organic
matter so it has good drainage, can retain water,
is aerated and has an ample supply of nutrients.
Make sure soil is not too wet before you begin
working it or transplanting seedlings outdoors. To
check for moisture, pick up a small handful of soil
and squeeze it into a ball. If soil clumps together,
then soil is still too wet to work. Let it dry out
some more before working it. If the ball of soil
can be easily broken apart by pressing it between
your thumb and index finger, then soil is ready to
be worked.
Plant Size
Though seedlings are small – mature plants
can be quite large. Consider how much space
each mature plant requires and
make sure you
have room in your garden.
minimum space requirements between plants
and rows. (Raised beds, intensive and container
gardening methods allow for closer plant spacing.)
Garden Plans
It is helpful to know where you want to
plant in your outdoor garden
transplanting. Pre-planning makes transplanting go
quickly, which means less stress on your young
seedlings. Here are
when planning your outdoor garden:
• If possible, orient the long axis of your garden in
an east-west direction, to maximize the amount
of sun each plant receives.
•
Refer to seed packets for recommended
row spacing, as well as light, water, and fertilizer
requirements.
See seed packets for
place each
before you begin
a few basic rules to follow
plant and
13
Page 15

Moving Seedlings to Your Outdoor Garden
Once soil is prepared and seedlings are grown, it is time to harden off and transplant
seedlings to your outdoor garden. If you are new to gardening, please take a moment to
read this entire section and “Caring For Young Seedlings” before transitioning delicate
seedlings to the outdoors.
Hardening Off
Hardening off seedlings eases their transition from
the AeroGarden to the outdoors, where they will
be exposed to full sunlight, temperature variations
and wind. It entails slowly increasing the amount
of time seedlings spend outside while still in the
comfort of the AeroGarden. Allow about 1½
weeks for hardening off. (See Sample Hardening
Off Schedule, right.)
To harden off seedlings:
• Remove Bowl (with Tray and seedlings) from
Base and bring outside.
• Return Bowl to Base when you bring it indoors.
• Keep Bowl filled with water to “Fill to Here.”
• Remember to add nutrient tablets when “Add
Nutrients” light illuminates.
• Bring Bowl inside if weather turns bad or temperature is below 45°F (7.2°C). Add a day to the
hardening off schedule for any weather-related
missed days.
Sample Hardening Off Schedule
Day 1: P u t Bowl outside in a shady,
tected area (i.e., no wind),
hours between midmorning and
early afternoon
Day 2: As above, but outside for 4 hours
Day 3: As above, but outside for 6 hours
– start nudging the Bowl towards
sun to provide partial sun
Day 4: As above, but outside for 8 hours
and a little more sun
Day 5: As above for 4 hours and then
full sun for 4 hours
Day 6: Partial sun 2 hours full sun for 6
hours
Day 7: Full sun 8 hours
Day 8: Full sun 10 hours
Day 9: Full sun– outside 12 hours
Day 10: Outside all day and night
Day 11: Transplant
pro-
for 2
When to Plant
Although a clear warm day may be a nice time to
be in the garden, it is NOT what you want when
it is time to transplant your seedlings outdoors. A
perfect day for transplanting is one that is damp,
drizzly and cool. If such a day does not come your
way, then transplant seedlings near the end of the
day, when the sun is low and temperatures have
cooled. It is okay to keep your seedlings in the
Tray and AeroGarden for a little extra time if you
want to wait for the weather to cooperate or just
for convenience. Just be sure to add nutrients if
“Add Nutrients” light is on.
Water Garden
The day before you plant (preferably after the
hottest part of the day has passed), water your
outdoor garden or container. The moisture in
the soil will help ease the shock to your newly
transplanted seedlings. If you miss the night-before
watering, you can water early in the morning of
the day you plan to plant. Just allow plenty of time
for the water to drain before you begin transplanting. Transplanting in saturated soil is not a good
idea. You’ll end up compacting the soil.
Continued on next page
14
Page 16

Moving Seedlings to Your Outdoor Garden (Continued)
Transplant Seedlings
Supplies needed:
A filled watering can
A narrow trowel
Your garden plan indicating seedling locations
Your Tray of hardened-off seedlings
To transplant seedlings, take entire Bowl and Tray outside.
Follow these 4 basic steps for each seedling until entire Tray is
planted:
1) Dig hole;
2) Remove seedling from Tray;
3) Place seedling in hole and fill; and
4) Water seedling.
Remove Seedling from Tray
1
• Lift Tray from Bowl.
• With nger, gently push up on Grow Sponge bottom.
• Remove from Tray holding Grow Sponge – not plant.
• Return Tray to Bowl.
Dig Hole
2
• Insert trowel about 3” (7.6cm) into soil at marked
location.
• Pull trowel toward you to create an opening in soil
and leave trowel in soil…
Place Seedling in Hole and Fill
3
• With trowel still in soil, put Grow Sponge in hole so
its top is about ½” (1.2cm) below the surface.
• Hold Grow Sponge in place and pull out trowel.
• Fill with soil around, and to the top of Grow Sponge.
• Lightly press down soil to remove air pockets. At the
same time, make a shallow, bowl-shaped, depression
around base of seedling. This will help direct water
toward your plant.
Water Seedling
4
Water each seedling at its base by pouring 1 to 2 cups
(.23 to .47 liters) of water into depression immediately
after transplanting. (Do not pour water on top of delicate
seedling!).
Repeat these 4 steps until all seedlings from Tray are planted.
Once finished, go back and give each seedling another cup or
two of water.
15
Page 17

Caring for Young Seedlings
Your seedlings will do best if they have care and attention after transplanting.
Daily Watering
Your seedlings need water every day. It is best
to water when the sun is low, either in the early
morning or evening. Water
rather than dousing
with water from above (such as with a sprinkler). If
you do not want to water each plant individually,
then use a soaker hose or drip irrigation system.
Provide enough water so that soil is moist to a
depth
of 3” (7.6cm). As your plants grow, you can
start top watering rather than continue with the
time-consuming watering of individual plants.
the fragile stems and leaves
each plant at the base,
Frost
Despite the best planning, a damaging frost may
come your way. Keep an eye on the weather
for any reports of frosts (temperatures below
32°F/0°C) and be prepared to cover young plants if
necessary. Some easily found household items that
make good covers are yogurt containers, cardboard boxes, milk jugs, flower pots or baskets.
Just remember to put a rock (or other weight) on
top of these containers to stop them from blowing away. It is a good idea to place a small rock
over the hole in a flower pot, to provide the best
protection from a hard frost. Be sure to remove
covers when the weather warms up.
What to Expect
It takes about one to two weeks for your seedlings to adjust to the change in environment.
After that, your seedlings will start to grow again.
Follow the directions on your seed packets for
fertilizing and caring for your plants. Soon you’ll
have wonderful harvests.
HAPPY GARDENING!
Troubleshooting
My seeds are not germinating.
What can I do?
If seeds in your
nate, the first thing to check is the expiration date
on the seed packet. Viability of seeds decreases
significantly with age. Also verify that your seeds
were stored properly. Excessive humidity and/or
heat can ruin a seed.
A hard outer coat on a seed may also hinder germination. Refer to your seed packet for suggested
pre-planting treatments.
Finally, make sure you plant more than one seed in
a Grow Sponge. Even the best seeds do not germi-
nate 100% of the time. See page 7 regarding how
many seeds to plant in each Grow Sponge.
Garden Starter Tray
do not germi-
Why are my fully grown carrots such
strange shapes?
The change in conditions between the Grow
Sponge and garden soil triggers some bizarre
growth patterns in carrots. Enjoy the surprise of
these unique shapes. Kids love to harvest these
Crazy Carrots and eat them too!
Two examples of what your Crazy Carrots might look like.
Continued on next page
16
Page 18

Troubleshooting (Continued)
Quick Start Guides available at:
www.aerogardensupport.com
What do I do if one of my seedlings die?
Occasionally you might find that one of the seedlings in your Tray does not thrive. If a plant dies,
remove entire Grow Sponge from AeroGarden and
cover empty Grow Sponge Opening to inhibit algae
growth in Bowl. Choose a moisture-tolerant material such as aluminum foil or a plastic milk jug lid.
Can Grow Sponge(s) be reused?
If your seeds did not germinate, you should be able
to re-use your Grow Sponge(s).*
Gently remove Grow Sponge by pushing it up from
the bottom of Tray. Remove non-germinated seeds
and clean off any residue on Grow Sponge. Store in
a sealed plastic bag or re-seed immediately.
* If there is any indication of algae growth or mold on Grow
Sponge(s), they are not re-usable and should be discarded.
What if one of my Grow Bulbs burns out?
Purchase replacement bulbs from your retailer or at
www.aerogardensupport.com. Grow Bulbs should
be replaced after 6 months of use.
What if my Grow Bulbs aren’t working?
Make sure Grow Bulbs are firmly inserted into
the Lamp Hood. Also check that your Garden is
plugged into a working electrical outlet and the
Lamp Cord is plugged into the Lamp Hood.
Can I move my AeroGarden to another
location?
Go right ahead! Your AeroGarden has a built-in
backup system that lets you unplug it without losing any of the settings.
To move your AeroGarden, be sure to pick it up by
holding the Lamp Arm with one hand and sliding
your other hand under the bottom of the Base.
My seedlings don’t look healthy.
What can I do?
If you are concerned about the health of your seedlings, please go through the following:
• Keep lights as close to seedlings as possible with-
out leaves touching the Grow Bulbs.
• Replace Grow Bulbs after 6 months of use (see
your models Quick Start Guide for instructions).
• Follow thinning instructions (see page 13).
• Don’t use softened or well water.
How do I take care of my garden when I go
out of town?
Add water to raise level up to “Fill to Here.” A
newly planted Tray may not need care for 2 weeks
or more. If your seedlings are more than a couple
inches tall, and you will be gone for some time, you
may want to make arrangements to have someone
care for your Garden while you are away.
Do I need to turn the AeroGarden lights on
and off manually?
No. Your AeroGarden includes a built-in timer
that turns your lights on and off at specific intervals. These intervals are designed to maximize the
growth of your seedlings. The timing system started
when you plugged in your AeroGarden. Every day
it will automatically turn your lights on for 16 hours
beginning at that time.
Can I change the time of day lights go off?
Yes. To change the time your lights go off, follow
the “Personalize Your Light Timer” instructions
found in your model’s Quick Start Guide.
Does it matter what time of day lights go off?
No, for seedlings. It makes no difference to them
when your lights go on and off. Some people like
to have the lights turn off when they go to bed and
come on in the morning when they awake. Others
prefer to use the AeroGarden as a nightlight.
Can I temporarily turn off my lights?
Absolutely. Just push “Lights” button and then
immediately release to manually turn lights off (or
back on). This will not change any settings for your
AeroGarden and your lights will turn on (or off) at
the next regularly programmed time. Occasional
use of this feature will not harm or slow the growth
of seedlings.
What do I do with my AeroGarden after all
seedlings have been planted?
For step-by-step instructions regarding the care of
your AeroGarden after your seedlings have been
planted, refer to “Prepare for your Next Garden”
section in your model’s Quick Start Guide.
See next page for Garden Starter Tray sanitizing and
preparation instructions.
17
Page 19

Prepare for Your Next Garden Starter Tray
Clean AeroGarden:
For step-by-step cleaning instructions, please refer to
the “Prepare for your Next Garden” section in your
model’s Quick Start Guide.
Clean Tray before reusing:
• Rinse Seed Starter Tray in water to remove plant or
Grow Sponge debris. A small scrub brush or old
toothbrush is helpful for this task.
Sanitize Seed Starter Tray:
•
Fill a sink or 5 gallon bucket with water.
• Add ¼ cup (.06 liter) chlorine bleach per 5 gallons
(3.78 liters) of water.
• Dip Tray into solution for 2 minutes giving it an oc-
casional swish or scrub. (If entire Tray does not fit into
bucket/sink, turn it around to ensure that you sanitize
all parts of it.)
• Rinse Tray under cold running water for about 2
minutes.
Place Grow Sponges in Tray (Do this only
when you are ready to plant seeds)
You do not have to plant something in each Grow
Sponge Opening in your Tray. Just remember to store
any unused Grow Sponges in an airtight bag and to
cover all empty Grow Sponge Openings to inhibit algae
growth in Bowl.
• Remove pre-moistened Grow Sponge from bag.
• Place Grow Sponge into Tray so that the Dibble is on
top. (Grow Sponge is tapered, with the lower section
narrower than Dibbled top.)
• Cover any empty Grow Sponge Openings with a
moisture-tolerant material.
Your Garden Starter Tray is now ready for seeding.
Refill packs for Garden Starter Tray are available at
www.aerogardensupport.com or from your retailer.
Quick Start Guides available at:
www.aerogardensupport.com
NOTE: Don’t worry about Tray discoloration. As
long as Tray is sanitized, staining will not
affect the growth of your next planting.
18
Page 20

Planting Schedule
Please refer to “Your Seed Planting Schedule” on page 4 for Planting Schedule details.
Planting Schedule
Last Frost Date:
Weeks to Earliest Seed Ready to Transplant
Plants Grow Starting Date Harden Off Date Notes
19
Page 21

Planting Schedule
Last Frost Date:
Weeks to Earliest Seed Ready to Transplant
Plants Grow Starting Date Harden Off Date Notes
20
Page 22

Blank Tray Layouts (6- and 7-Pod AeroGarden models)
1
2
3
4
5
6
34
35
36
37
38
39
40
41
42
43
44
45
46
47
48
49
50
51
52
53
54
55
56
57
58
59
60
61
62
63
64
65
66
7
8
9
10
11
12
13
14
15
16
17
18
19
20
21
22
23
24
25
26
27
28
29
30
31
32
33
able at www.aerogardensupport.com.
Use a blank Tray Layout and/or Seeding Log to record your Seeding Plan. Refer to ”Seeding Your Garden Starter Tray”
on page 6 for Seeding Plan examples and instructions. Larger versions of blank Tray Layouts and Seeding Logs are avail-
21
Page 23

Blank Tray Layouts (Space•Saver 6 AeroGarden models)
1 5
4 9 14
3 8
7
13
12 17
18
19
20
21
22
23
24
25
26
27 31
28 32
29 33 35
30 34 36
10 15
2 6 11 16
Use a blank Tray Layout and/or Seeding Log to record your Seeding Plan. Refer to ”Seeding Your Garden Starter Tray”
on page 6 for Seeding Plan examples and instructions. Larger versions of blank Tray Layouts and Seeding Logs are avail-
able at www.aerogardensupport.com.
22
Page 24

Seeding Log
1
2
3
4
5
6
7
8
9
10
11
12
13
14
15
16
17
18
19
20
21
22
23
24
25
26
27
28
29
30
31
32
33
34
35
36
37
38
39
40
41
42
43
44
45
46
47
48
49
50
51
52
53
54
55
56
57
58
59
60
61
62
63
64
65
66
This Seeding Log can be used with either Garden Starter Tray.
Seeding Log
23
Page 25

Seeding Log
1
2
3
4
5
6
7
8
9
10
11
12
13
14
15
16
17
18
19
20
21
22
23
24
25
26
27
28
29
30
31
32
33
34
35
36
37
38
39
40
41
42
43
44
45
46
47
48
49
50
51
52
53
54
55
56
57
58
59
60
61
62
63
64
65
66
This Seeding Log can be used with either Garden Starter Tray.
Seeding Log
24
Page 26

AeroGrow International, Inc.
Quick Start Guides available at:
www.aerogardensupport.com
507140-0000 A D 9/5/08 © 2007-2008 AeroGrow International, Inc. U.S. Patent Pending
 Loading...