

Page 1
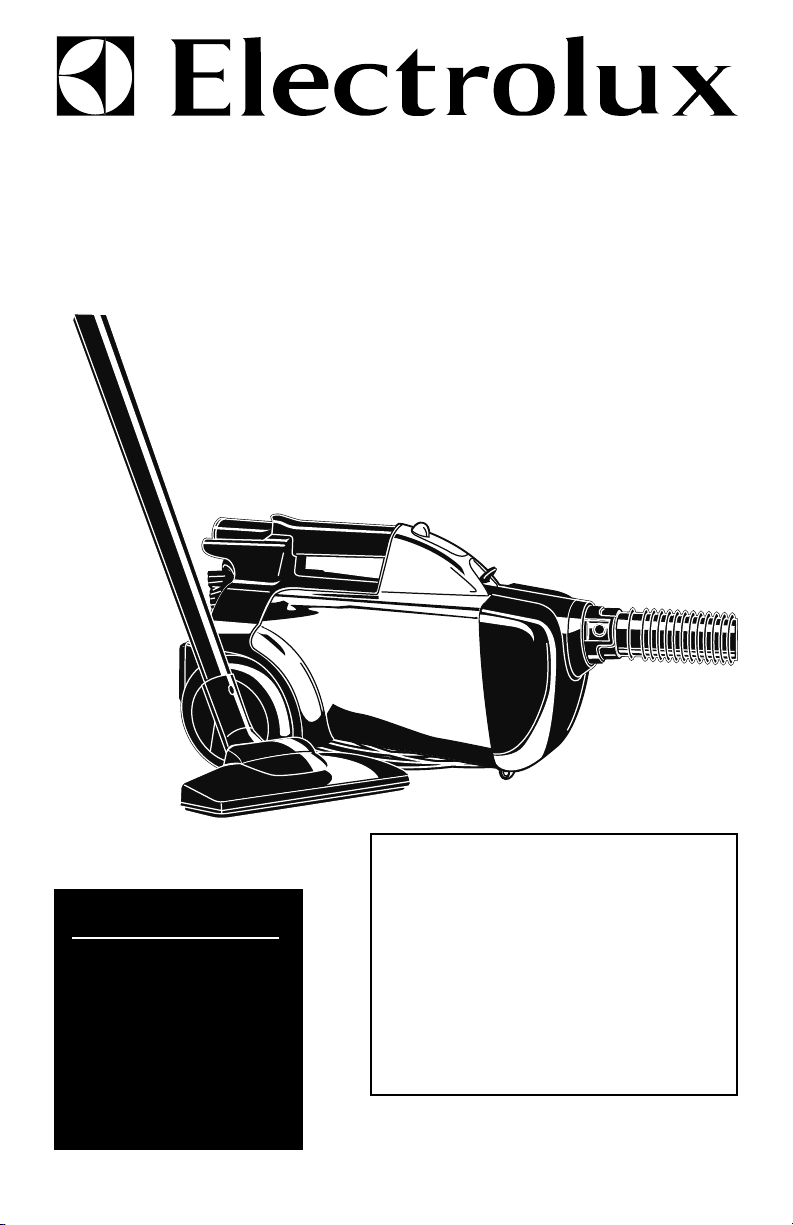
Mighty Mite
Household Type
®
Vacuum Cleaner
Owner’s Guide
Z3690 Series
IMPORTANT
For any advice and
to order filters and
accessories
on your cleaner,
please telephone
Customer Care
08706 055055
INDEX
Important Safeguards ................................. 2
Service Information ..................................... 4
Use ............................................................. 5
Accessories ................................................. 6
Maintaining ...............................................7-8
Dust Cup ..................................................7-8
Filters ........................................................8-9
HEPA Filter .................................................. 9
Problem Solving ........................................ 10
Guarantee ................................................. 11
www.electrolux.com
Page 2

When using an electric appliance, basic precautions should always be followed,
including the following:
IMPORTANT SAFEGUARDS
READ ALL INSTRUCTIONS BEFORE USING THIS VACUUM CLEANER.
WARNING
To reduce the risk of fire, electric shock, or injury:
• Do not use outdoors or on wet surfaces.
• Do not leave vacuum cleaner when plugged in. Turn off the switch and unplug
the electrical cord when not in use and before servicing.
• Do not allow to be used as a toy. Close attention is necessary when used by or near
children.
• Use only as described in this manual. Use only manufacturer’s recommended attachments.
• Do not use with damaged cord or plug. If vacuum cleaner is not working as it should,
has been dropped, damaged, left outdoors, or dropped into water, return it to a service center before using.
• Do not pull or carry by cord, use cord as a handle, close a door on cord, or pull cord
around sharp edges or corners. Do not run vacuum cleaner over cord. Keep cord
away from heated surfaces.
• Do not use extension cords or outlets with inadequate current carrying capacity.
• Turn off all controls before unplugging.
• Do not unplug by pulling on cord. To unplug, grasp the plug, not the cord.
• Do not handle plug or vacuum cleaner with wet hands or operate without shoes.
• Do not put any object into openings. Do not use with any opening blocked; keep free
of dust, lint, hair, and anything that may reduce airflow.
• This vacuum cleaner creates suction. Keep hair, loose clothing, fingers, and all parts
of body away from openings and moving parts.
• Do not pick up anything that is burning or smoking, such as cigarettes, matches, or
hot ashes.
• Do not use without dust bag or filter(s) in place.
• Use extra care when cleaning on stairs.
• Do not pick up flammable or combustible liquids such as gasoline, or use in areas
where they may be present.
• Store your cleaner indoors in a cool, dry area.
• Keep your work area well lighted.
• Unplug electrical appliances before vacuuming them.
SAVE THESE INSTRUCTIONS
2
Page 3
BEFORE YOU START
CHECK THE VOLTAGE
First check the voltage shown on the data plate (see rear view) to make sure that the
cleaner is of the correct voltage for your electricity supply. If it is not, do not use the
cleaner but refer back to your dealer.
CONNECTING TO YOUR ELECTRICITY SUPPLY
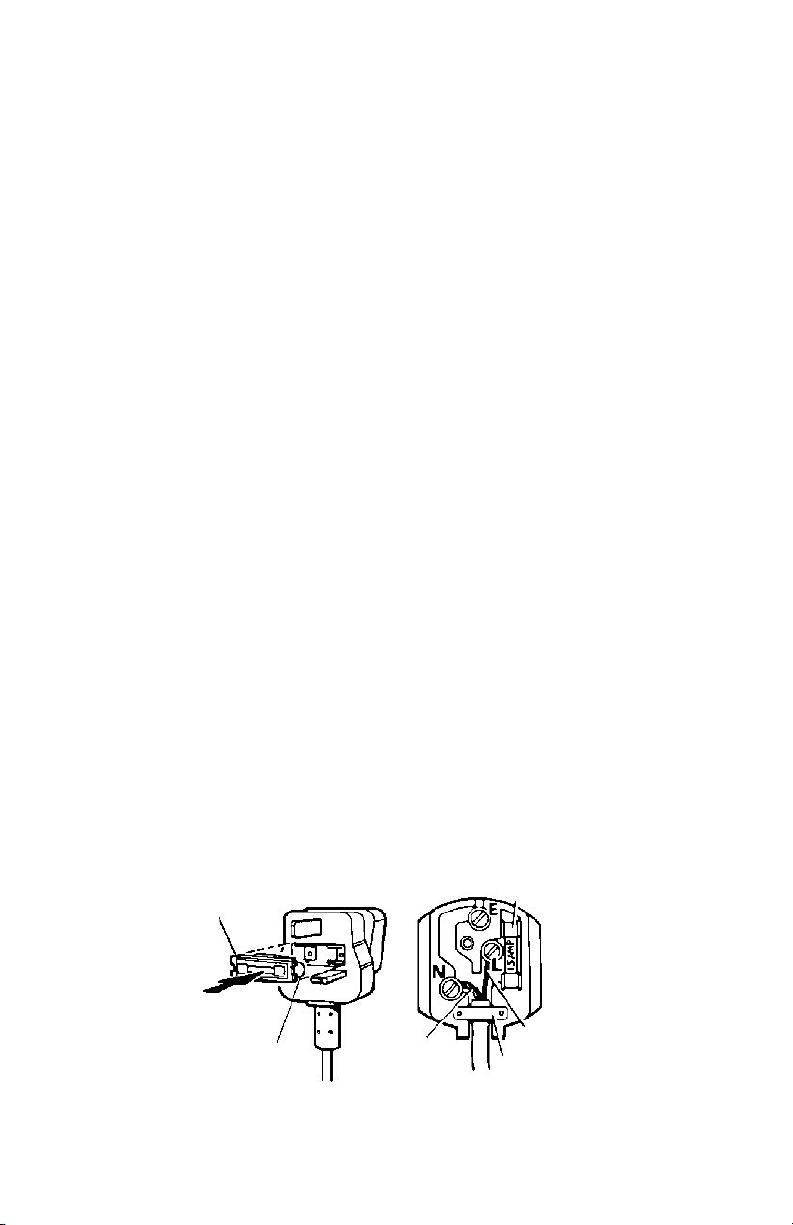
Permanently connected to the cleaner is a mains supply (2-core) cable fitted with a nonrewirable plug incorporating a 13A fuse.
In the event of the fuse requiring replacement the fuse cover should be removed using
a small screwdriver. The old fuse MUST be replaced by a 13A ASTA approved BS1362
fuse or a BSI approved fuse. The cover must be replaced before the plug is used again.
In the event of loss of the fuse cover, replacements can be obtained from your Electrolux
retailer and must be of the same colour as indicated by the coloured insert on the base
of the plug.
If difficulty is experienced in obtaining a replacement, contact an Electrolux Service Agent
or phone 08706 055055.
In no circumstances must the plug be used without a correct fuse cover fitted.
If the plug that is fitted to your appliance is not suitable for your socket outlet, it must be
cut off and the appropriate plug fitted.
Remove the fuse from the cut off plug.
The cut off plug should then be disposed of to prevent the hazard of shocks in case it
should be plugged into a 13 amp socket in another part of your home.
The wires in the mains cable of this appliance are coloured in accordance with the
following code: Blue: Neutral. Brown: Live.
As the colours of the wires in the mains cable of this appliance may not correspond with
the coloured markings identifying the terminals in your plug, proceed as follows:
The wire which is coloured blue must be connected to the terminal which is marked with
the letter N or coloured black.
The wire which is coloured brown must be connected to the terminal which is marked
with the letter L or coloured red.
If using a three-pin plug, do not make any connection to the terminal marked with the
letter E or by the earth symbol or coloured green or green-and-yellow. This cleaner is
double insulated and no earth connection is necessary.
It is in your interest to ensure that the plug is correctly attached to the mains cable. In
case of doubt, have it done by a qualified electrician, as Electrolux cannot regard the
repair of faults on the plug connection as a service that can be given free of charge
under the terms of the guarantee.
Fuse
cover
Fuse
Blue
13 Amp Fuse
Brown
Cord
Clamp
3
Page 4
SERVICE
Should you require service on your Electrolux cleaner, please telephone 08706 055055.
Important - in the event of the mains supply cable of this cleaner requiring replacement,
we recommend that this be carried out by a Electrolux Service Agent.
Rating Plate
The model, type, and serial numbers are
indicated on the rating plate located on the back
side of the cleaner. For prompt and complete
ser vice information, always refer to these
numbers when inquiring about service.
Model & Type No. _____________________
Serial No. ____________________________
MODEL TYPE SERIAL NO.
VOLTS WATTS HERTZ
ELECTROLUX
Automatic Motor Shut-Off
To protect from overheating, this vacuum cleaner is equipped with a thermostat which
automatically shuts off the motor if it overheats. Should this happen:
1. Turn off the switch and unplug the cleaner because the thermostat will allow the
cleaner to automatically start running again when the motor cools (approximately 30
minutes).
2. Check the hose, dust cup and filters regularly, as a clogged hose, full dust cup or
dirty filters could cause the motor to overheat.
3. Call an Electrolux Service Agent if the cleaner will not operate after cooling for ap-
proximately 30 minutes. Call Electrolux at 08706 055055.
4
Page 5

HOW TO USE
CAUTION: Moving parts. Make sure on/off switch is in off position before
plugging in.
A carpet should be cleaned regularly over heavily traveled areas, and once a week over
the entire carpeted area. Vacuum slowly, making several passes (forward and backward)
over the carpet, covering small areas at a time. The time required to clean the carpet will
depend on several factors–including type of carpet and amount of dirt.
Connect Hose
1
Store Tools
4
Rotate Swivel Hook to
2
release cord
Plug in
3
Swivel Hook
Crevice Tool
Combination Tool
(on some models)
HEPA Filter
5
Push ON/OFF Switch
(A thermostat automatically shuts the
motor off if it overheats, see Automatic
Motor Shut-Off)
ON/OFF Switch
5
Page 6

Cleaning Accessories
Attach wands and cleaning tools
Open the Slip
Ring to reduce
suction.
Slip the circular end of an accessory tool
onto the end of the hose handle and twist
slightly to secure. If additional reach is
needed, place a wand on the hose handle
first.
Crevice Tool *Upholstery Nozzle
(optional)
Combination
Floor Tool
*Dusting Brush
(optional)
*Bare Floor Brush (optional)
Crevice Tool: For crevices, corners, baseboards, between
cushions.
Upholstery Nozzle: For curtains, draperies, cushions,
fabrics.
Dusting Brush: For furniture, blinds, books, lamp shades,
shelves.
Combination Tool: One tool with bristles for dusting, and
nozzle for floors and upholstery.
Bare Floor Brush: For any type of hard surface floor.
*May be purchased separately.
6
Combination Tool
Page 7

HOW TO MAINTAIN
The instructions given in this booklet serve as a guide to routine maintenance. To avoid
unnecessary service calls, check the hose, dust cup and filters often. Empty the dust
cup if it is full, and clean or replace the filters when dirty.
How to Remove Dust Cup and Empty Dust Cup
NOTE: Turn off vacuum and unplug the electrical cord before changing dust bag
or cleaning filters. Never operate the vacuum cleaner without the dust
bag or filters.
1
Turn off and unplug cleaner.
2
Open lid by pushing down hood latch
and lifting up on lid.
4
Open dust cup by pressing down on
dust cup lid latch and raising dust cup
lid.
3
Lift dust cup out of canister by
handle.
Handle
5
Empty dust cup over trash
receptacle. To replace dust cup in
canister follow these instructions
in reverse.
Latch
7
Page 8

Disposable Filters
The filters play a very important roll in the efficiency of the vacuum cleaner. If the filters
become clogged, no air can pass through the cleaner and no cleaning can take place
regardless of how powerful the unit is. To keep the cleaner operating at maximum
efficiency, change or clean the filters as needed. Some fine particles can restrict airflow
very quickly and will decrease performance even before the filters appear to be dirty. For
that reason, when vacuuming carpet fresheners or cleaners, powder, plaster dust, or
similar fine substances, the filters may need to be changed more often.
Look for the symbol.
GENUINE
Electrolux Product
How to Check and Replace Disposable Dust Cup Filter
NOTE: Turn off vacuum and unplug the electrical cord before changing dust bag
or cleaning motor filter. Never operate the vacuum cleaner without the
dust bag or filter.
1
Follow the directions on the previous page on how to remove the dust cup from
the canister.
2
Open dust cup by pressing down on
dust cup lid latch and raising dust cup
lid.
Latch
3
Remove the filter from the dust cup
lid. Grasp filter and turn clockwise
pulling away from dust cup lid.
4
The filter can be cleaned by brushing over a trash receptacle or vacuuming with
another cleaner.
5
Reinstall filter by following the above directions in reverse.
8
Page 9

How to Clean or Replace Motor Filter
1
Turn off and unplug cleaner.
2
Open lid by pushing
down hood latch and
lifting up on lid.
5
Clean motor filter by rinsing under warm water and let air dry if heavily soiled.
6
Reinstall completely dry motor filter before use.
3
Lift dust cup out
of canister by
handle.
Handle
4
Locate motor filter
in bottom of canister
body and lift out.
How to Install HEPA Filter (on some models)
Check the HEPA filter each time the dust cup is emptied. Replace twice a year or after
every six dust cup empties.
Upper Filter Tabs
Rear Housing Tabs
Bottom Clips
How to Remove HEPA Filter
Grasp the bottom clips on the filter and
pull out and down to release the upper
filter tabs from the rear housing tabs on
the cleaner.
Bottom Clips
Insert upper filter corner tabs firmly under
rear housing tabs and pivot filter down until
bottom clips on filter click securely into
place on the cleaner.
9
Page 10

PROBLEM SOLVING
NOTE: Turn OFF the power switch and unplug the electrical cord before servicing.
PROBLEM CAUSE SOLUTION
3
Motor won’t start
Electric plug
3
Power switch not
turned “ON”
Push plug securely into
outlet.
Try another outlet.
Check circuit breaker.
Make sure power switch is
“ON.”
No suction at end of
hose
Reduced suction
Cleaner shuts off
General questions
3
Full dust cup
3
Hose
3
Canister lid not
latched
3
Full dust cup
3
Slip ring open
3
Hose
3
Internal safety
thermostat trips
3
Cord connection at
hose
3
Assembly or
related
attachments
Empty dust cup.
Remove any clogs from
hose that restrict airflow,
then try again.
Push canister lid until it
latches firmly.
Empty dust cup.
Rotate slip ring on wand
until hole is covered.
Remove any clogs from
hose that restrict airflow,
then try again.
Unplug cleaner and check
for obstructions in hose,
wands and attachments.
Check for full dust cup.
Clean/replace motor filter.
Check powerhead and hose
plugs for proper connection.
Call Electrolux at 08706
055055.
Know the Model number and
Serial number when you call.
10
Page 11

Guarantee
This guarantee is in addition to your statutory and other legal rights.
This product is for household use only.
Electrolux products are carefully designed, manufactured, tested and inspected and,
in consequence, we undertake to replace or repair any part found to be defective in
material or workmanship, within one year of delivery to the original purchaser, free
of charge. You may be required to take the product to your nearest service provider
if the product requires attention during the first year.
There are certain conditions which may invalidate this guarantee:
a. It is dependent upon the appliance being correctly installed and used in accordance
with the Company’s instructions under normal domestic conditions within the
United Kingdom or the Republic of Ireland.
b. Service at all times must be carried out by an Electrolux Service Representative
or authorised agent.
c. The guarantee may be invalidated by unauthorised repair or modification of the
appliance.
d. You may be charged by Electrolux if you call for an engineer to resolve a problem
that we believe is covered in the instruction booklet.
The Company does not accept liability for defects arising from neglect, misuse or
accident. This guarantee excludes such normal wearing parts as cloths and brushes
as the life of these depends upon the amount and nature of use.
Proof of the date of purchase will be required before service under guarantee is
provided. For further assistance call our customer care line on 08706 055055.
Important:
For future reference we suggest you record the following details here, and keep the
receipt with the handbook as proof of purchase.
Purchased from ____________________________________________________
Date purchased __________________Model no __________________________
LUTON, BEDFORDSHIRE, LU4 9RJ
Features of the Electrolux vacuum cleaner and accessories supplied with it are protected
in Great Britain and abroad by Patents or Registered Designs.
This appliance conforms with the requirements of the amended E.E.C. directive No.
89/336/EEC relating to electromagnetic compatibility (EMC) CE.
Electrolux, may introduce modifications to their product from time to time, and consequently
the details given in this booklet are subject to alteration without notice.
11
Page 12

©2001 White Consolidated Industries, Inc.
Part No. 71602 (5/01) Printed in U.S.A.
 Loading...