

Page 1
toolboxVac.book Seite 1 Montag, 27. Oktober 2003 4:07 16
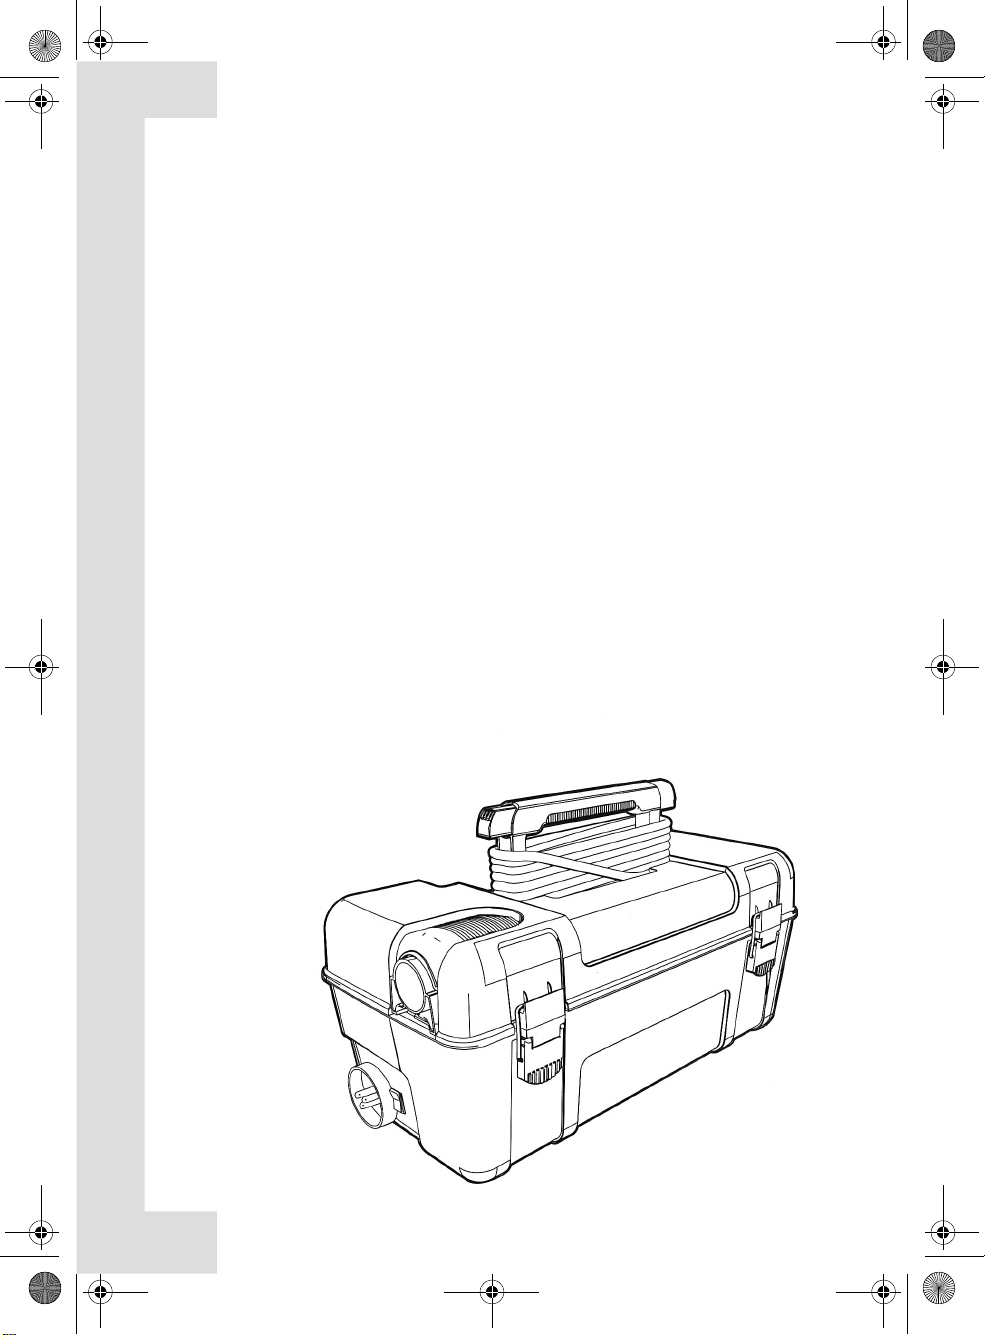
WORKWARE
CleanPack
Gebrauchsanweisung
Operating Instructions
Mode d'emploi
Gebruiksaanwijzing
Bruksanvisning
Brugsanvisning
Käyttöohje
Istruzioni per l'uso
Instrucciones para el uso
ПдзгЯет ЧсЮузт
Manual de instruções
Kullaným Talimatlarý
Instrukcja obs³ugi
Uputstva za korištenje
Instrucþiuni de utilizare
Návod na obsluhu
Navodila za uporabo
Návod k použití
Használati utasítás
Page 2
toolboxVac.book Seite 2 Montag, 27. Oktober 2003 4:07 16
Page 3
toolboxVac.book Seite 2 Montag, 27. Oktober 2003 4:07 16
D
C
GFE
2
HAB
1
2
Page 4

toolboxVac.book Seite 3 Montag, 27. Oktober 2003 4:07 16
5 64
7 8
3
3
Page 5

toolboxVac.book Seite 8 Montag, 27. Oktober 2003 4:07 16
g
Dear Customer,
g
Please read these user instructions
carefully. Above all please observe the
safety instructions. Please retain it for
future reference.
Pass the user instructions on to any
subsequent owner of the appliance.
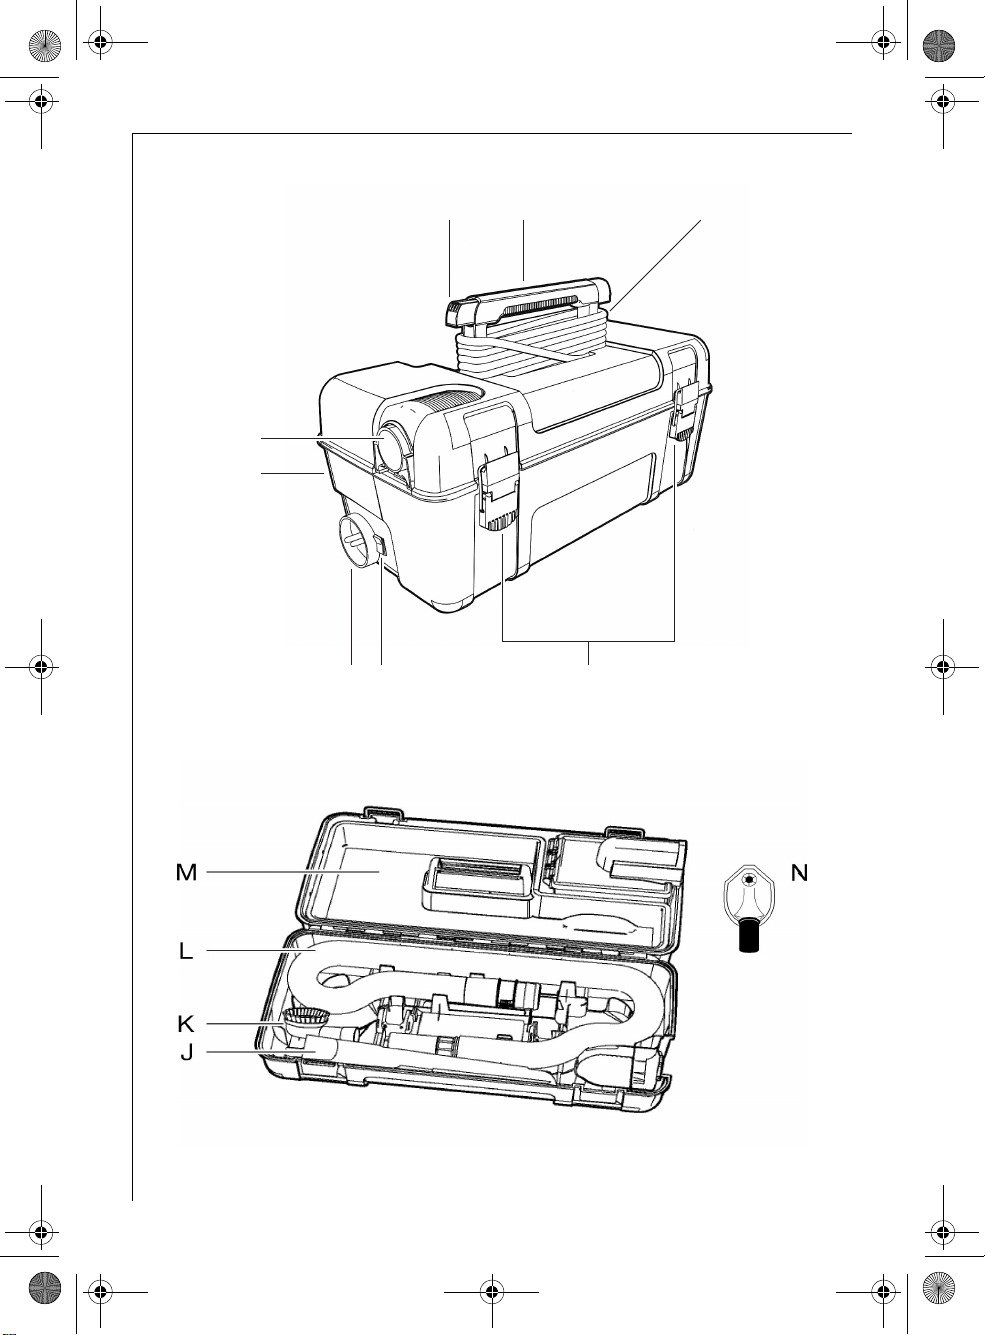
Equipment (Figure 1)
A On/Off switch
B Power socket
C Suction hose connection (blowing);
at the rear of the appliance)
D Suction hose connection (vacuuming)
E Rapid cord removal knob
F Carry handle
G Cord
H Latches
Accessories (Figure 2)
J Crevice nozzle
K Furniture brush
L Suction hose (2x)
M Tool basket
N Drill nozzle
Dust bag and filter (Figure 3)
O Motor filter
P Motor filter duct
Q Dust bag
R Cover
1 Safety instructions
• Only connect the appliance to AC 240
volts.
• The electric circuit for the power outlet
used must be fused with at least a 16 A
or 10 A delayed-action fuse.
• Never remove the plug from the power
point by pulling on the cord.
• Do not use the appliance if:
–the cord is damaged,
–the suction hoses are damaged,
–there is visible damage to the box.
8
• Do not immerse the box in water or fill
it with water.
• Do not place the box on wet surfaces.
• Do not expose the box to weather,
moistures or sources of heat.
• Do not store flammable or corrosive
fluids in box.
• Do not use the appliance to vacuum up
liquids.
• Do not use to pick up flammable or
combustible liquids such as gasoline, or
use in areas where they may be
present.
• Do not use the appliance to vacuum up
matches, hot ashes or cigarette butts.
• Do not use the appliance to vacuum up
shards, nails or similar materials. This
could result in damage to the dust bag
and motor. When emptying the bag
you could be injured by sharp or
pointed objects.
• Dust from toner used in laser printers
and photocopying machines may not
be vacuumed up using household
vacuum cleaners.
• The appliance may only be used within
the household to vacuum dry material.
People and animals must not be
vacuumed using the appliance.
Keep children well away from electrical
appliances.
•Only one additional appliance with a
maximum of 2000 watts may be
connected to the cord’s second cord
connection,.
• The manufacturer cannot accept any
liability for any damage caused as a
result of using the appliance contrary
to the manner intended, or using it
incorrectly.
• Repairs to electrical appliances may
only be carried out by authorised
electricians. Improper repairs can give
rise to significant hazards for the user.
• For this reason, in the event of a fault
please contact your specialist dealer or
our Customer Service directly.
Page 6

toolboxVac.book Seite 9 Montag, 27. Oktober 2003 4:07 16
g
Prior to using the appliance for
the first time
0 Check to ensure that all the accessories
are included (Figure 2/J-N).
0 Read the safety instructions.
Vacuuming
0 Insert the connection cable’s two way
adapter into the box’s power socket
(Figure 1/B).
0 Remove one of the suction hoses from
the box. Insert the hose’s larger
connecting piece into the vacuuming
connection at the box. (Figure 1/D).
0 Attach the desired nozzle to the
suction hose.
0 Insert the cord’s mains plug into the
power socket.
0 Switch on the appliance using the on/
off switch (Figure 1/A).
Blowing
You can use this function to blow
crumbs, sawdust or similar from hardto-reach corners or crevices.
0 Proceed as described in the
“Vacuuming” section, but use the
blowing connection located at the box
(Figure 1/C).
Using accessories
0 Set up the vacuum cleaner for
vacuuming as described in the
“Vacuuming” section.
0 Attach the drill nozzle to the suction
hose and switch the vacuum cleaner
on.
0 Place the drill nozzle on the wall such
that the nozzle’s drill hole opening is
located directly over the hole that is to
be drilled.
0 Switch on the appliance using the on/
off switch (Figure 1/A).
The vacuum pressure that is created
3
when vacuuming keeps the drill nozzle
in its position on the wall.
You can connect your drill machine
directly to the power socket on the
box’s cord. Please observe the safety
instructions when doing this.
Suction hose extension
Extending the suction hose increases
the range in which the suction hose
can be used.
This is useful for example in the case of
hard-to-reach crevices or if you want
to use the drill nozzle when drilling a
hole in the ceiling.
0 Attach the two suction hoses to the
connecting pieces. Insert the larger
connecting piece into the appliance
and then proceed as described in the
“Vacuuming” section.
Furniture brush
For vacuuming damageable surfaces
and uneven objects, for example, books
and shelves in the house, and
workpieces and appliances in the
workshop (Figure 4).
Crevice nozzle
For vacuuming crevices, corners and
narrow gaps (Figure 5).
Drill nozzle
The drill nozzle vacuums up dust
produced from drilling while the
drilling is taking place (Figure 6).
9
Page 7

toolboxVac.book Seite 10 Montag, 27. Oktober 2003 4:07 16
g
Rapid cord removal knob
Once you have wound the cord around
the box’s handle, you can conveniently
remove it using the rapid cord removal
knob. Press the button (Figure 1/E) and
remove the wound up cord from the
handle.
Emptying the dust bag
Empty the dust bag regularly each time
1
after using the appliance. Otherwise,
the vacuum cleaner can overheat
causing damage to the motor.
0 Switch off the vacuum cleaner and
remove the mains plug.
0 Open the box.
0 Open the cover in the left of the box
by lifting the hose inserts to the right
and up (Figure 3/R).
0 Remove the dust bag from the box
(Figure 3/Q). Hold the dust bag over a
rubbish bin and pull the dust bag clip
off sideways. (Figure 7).
0 Empty the entire contents of the dust
bag and shake out the bag.
0 Securely attach the clip to the
underside of the bag again.
0 Place the dust bag back into the
appliance and close the cover.
Ordering a new dustbag
Replacement bags can be obtained
from our customer service.
Part Number: 407 132 821/7
Cleaning and changing the
motor protection filter
You should clean the motor protection
filter by brushing off the dust once for
every 5 times you empty the dust bag.
The filter is also washable (handwash
or machine wash up to 30°).
1 Do not operate the appliance without
the motor protection filter installed as
this could cause damage to the motor.
Removing and replacing the
filter
0 Switch off the vacuum cleaner and
remove the mains plug.
0 Open the box.
0 Open the cover in the left of the box
by lifting the hose inserts to the right
and up (Figure 3/R).
0 Remove the dust bag.
0 Remove the old filter out of the two
guide rails.
0 Insert the new filter. Ensure that the
filter is inserted into the guide rails as
far as it can go (Figure 8).
Ordering a new filter
Motor protection filters can be
obtained from our customer service.
Part Number: 407 132 743/2
Storage
Store the box in a dry place inside the
house or apartment.
10
Page 8

toolboxVac.book Seite 11 Montag, 27. Oktober 2003 4:07 16
g
Cleaning and maintenance
Box
When necessary, wipe out the box
using a damp cloth. Do not use
abrasive substances or solvent.
Accessories
Clean the nozzles in lukewarm water
for rinsing. If necessary, use a damp
cloth to wipe over the hoses. Wait until
all parts are dry prior to placing them
back into the lid or box.
Do not fill the box with water for
1
rinsing or other liquids. Ensure that all
parts are dry prior to operating the
vacuum cleaner.
Do not clean any parts of the box in
the dishwasher.
What to do if…
• the appliance is not vacuuming with
full suction power:
Empty the dust bag. Check the filter
and change it if required. Examine the
nozzles and hoses for larger foreign
objects located inside and remove
these if required.
• the vacuum cleaning is not vacuuming
at all:
Has the cord been correctly inserted
into the socket at the box? Is the mains
plug inserted in the power socket? Is
the appliance switched on?
If the cord is damaged, or the box has a
1
split, crack or other visible sign of
damage, disconnect the mains plug
and contact customer service.
• the cleaner suddenly shuts off:
This vacuum cleaner has a special
thermostat that protects the cleaner in
case of motor overheating. If the
cleaner shuts off, push the on/off
switch and unplug the cleaner.
Check the cleaner for a possible source
of overheating such as a full dust bag,
a blocked hose or clogged filter.
If these conditions are found, fix them
and wait at least 30 minutes before
attempting to use the cleaner. After
the 30 minute period, plug the cleaner
back in and push the on/off switch on.
If the cleaner still does not run, then
call our customer service.
11
Page 9

toolboxVac.book Seite 36 Montag, 27. Oktober 2003 4:07 16
AEG Hausgeräte GmbH
Postfach 1036
D-90327 Nürnberg
http://www.aeg.hausgeraete.de
© Copyright by AEG
822 949 256 - 1003
Änderungen vorbehalten
Subject to change without notice
Sous réserve de modifications
Wijzigingen voorbehouden
Med reservation för ändringar
Med forbehold om endringer
Ret til ændringer uden varsel forbeholdes
Oikeus muutoksiin pidätetään
Con riserva di modifiche
Salvo modificaciones
Yрькейфбй уе бллбгЭт чщсЯт рспейдпрпЯзуз
Sujeito a alterações sem aviso prévio
Deðiþiklikler yapýlabilir
Wprowadzanie zmian zabronione
Zadržava se pravo na izmjene
Ne rezervãm dreptul de a efectua
modificãri
Zmeny vyhradené
Pridržujemo si pravico do sprememb
Zmìny vyhrazeny
A változtatások jogát fenntartjuk
 Loading...