

Page 1

SANTO
Gebrauchsanweisung
Operating instructions
Mode d’ emploi
SK 48800-7I
Kühlschrank
Refrigerator
Réfrigerateur
PERFECT IN FORM UND FUNCTION
N/AE/58. (08.)
200382182
Page 2

2
Bevor Sie Ihr Gerät anschließend in Betrieb nehmen, lesen Sie bitte zuerst die
Gebrauchsanleitung durch, die Sicherheitshinweise und wichtige Informationen
enthält.
Nur so können Sie das Gerät sicher und zuverlässig nutzen und werden viel
Freude daran haben.
Folgende Zeichen werden Ihnen helfen, sich in der Gebrauchsanleitung besser
zurecht zu finden.
Sicherheitsvorschriften
Die Warnungen mit diesem Symbol dienen Ihrer Sicherheit und der Ihres
Gerätes
Wichtige Hinweise und Informationen
Umwelthinweise
Das Symbol auf dem Produkt oder seiner Verpackung weist darauf hin, dass
dieses Produkt nicht als normaler Haushaltsabfall zu behandeln ist,
sondern an einem Sammelpunkt für das Recycling von elektrischen und
elektronischen Geräten abgegeben werden muss. Durch Ihren Beitrag zum
korrekten Entsorgen dieses Produkts schützen Sie die Umwelt und die
Gesundheit Ihrer Mitmenschen. Umwelt und Gesundheit werden durch
falsches Entsorgen gefährdet. Weitere Informationen über das Recycling
dieses Produkts erhalten Sie von Ihrem Rathaus, Ihrer Müllabfuhr oder
dem Geschäft, in dem Sie das Produkt gekauft haben.
Page 3

3
Sicherheitshinweise.......................................................................................................4
Entsorgung .....................................................................................................................6
Gebrauch ........................................................................................................................7
Vor Inbetriebnahme /Inbetriebnhame / Temperaturregelung /......................................7
Kühlabteilausstattung ................................................................................................8
Tipps..................................................................................................................................9
Wartung / Abtauen .....................................................................................................10
Reinigung.......................................................................................................................11
Stillstandszeiten...........................................................................................................11
Wechsel der Glühlampe.............................................................................................12
Wenn etwas nicht funktioniert................................................................................14
Kundendienst und Ersatzteile / Technische Angabe /
Umkehrbarkeit der Tür ................................................................................................15
Installation ..................................................................................................................15
Aufstellung / Elektrischer Anschluss......................................................................16
Einbau............................................................................................................................17
Inhalt4Sicherheitshinweise
Page 4

Bevor Sie Ihr neues Kältegerät in Betrieb nehmen, lesen Sie bitte diese
Gebrauchsanweisung aufmerksam durch. Diese sind Sicherheitshinweise.
Wir ersuchen Sie daher, die folgenden Punkte vor der Installation des
Gerätes und seiner Inbetriebnahme aufmerksam durchzulesen.
Es wird empfohlen, diese Gebrauchsanweisung gut aufzubewahren und bei
einem eventuellen Verkauf des Gerätes dem neuen Besitzer auszuhändigen.
Benutzung im Haushalt
Sollten Sie Ihr Gerät einmal weitergeben wollen, vergessen Sie bitte nicht, die
Gebrauchsanleitungen dazuzulegen.
Sie haben ein Gerät für den Haushalt erworben, und es sollte auch nur zur
Lagerung von Lebensmitteln gebraucht werden.
Wartungen und Reparaturen (einschließlich Verbesserung und Austausch
der Netzleitung) nur durch eine autorisierte Werkstatt durchführen
lassen. Für Reparaturen dürfen nur Original-Ersatzteile benutzt werden,
anderenfalls könnte Ihr Gerät beschädigt oder Sie selbst verletzt werden.
Das Gerät steht nicht unter Spannung, wenn Sie den Netzstecker aus der
Steckdose ziehen. Ziehen Sie deshalb vor Reparaturen, Reinigungen den
Netzstecker aus der Steckdose. Nicht am Anschlußkabel ziehen, um das Gerät
vom Netz zu trennen! Wenn die Steckdose schwer zu erreichen ist, schalten
Sie das Stromnetz ab (Sicherung herausnehmen).
Es ist verboten, das Netzkabel zu verlängern!
Bitte prüfen, dass das Netzkabel nicht von der Geräterückseite
eingeklemmt und beschädigt wird. Ein beschädigtes Netzkabel kann
überhitzen und einen Brand verursachen.
- Keine schweren Gegenstände bzw. das Gerät selbst auf das Netzkabel stellen.
Kurzschluss- und Brandgefahr!
Den Netzstecker nie am Kabel aus der Steckdose ziehen, besonders wenn
das Gerät aus der Nische gezogen wurde. Eine Beschädigung des
- Netzkabels kann Kurzschluss, Feuer und/oder Stromschlag verursachen.
Ein beschädigtes Netzkabel muß durch eine qualifizierte Fachkraft oder
vom Kundendienst ersetzt werden.
- Den Netzstecker niemals in eine lockere oder beschädigte Steckdose stecken.
Stromschlag- und Brandgefahr!
Ohne die Abdeckblende der Innenbeleuchtung darf das Gerät nicht in Betrieb
genommen werden!
Die Innenwände sind kratzempfindlich, deshalb sollten Sie beim Reinigen nie
Eiskratzer oder andere spitze Gegenstände benutzen.
Page 5

5
Achten Sie darauf, daß keine Flüssigkeiten mit dem Temperaturregler, bzw. der
Beleuchtungsarmatur in Berührung kommen.
Bewahren Sie keine heißen Töpfe in unmittelbarer Nähe der Kunststoffteile
des Gerätes auf.
Lagern Sie keine entflammbaren Gase und Flüssigkeiten im Gerät, es besteht
Explosionsgefahr.
Kontrollieren und reinigen Sie bitte regelmäßig den Tauwasserablauf - einen
Hinweis hierzu finden Sie auch im Inneren des Gerätes - sonst könnte im Falle
einer Verstopfung das angesammelte Wasser zu einer vorzeitigen
Funktionsstörung des Gerätes führen.
Für die Sicherheit Ihrer Kinder
Ihre Kinder sollten nicht mit den Klebebändern und Verpackungsmaterialien des
Gerätes spielen, da Lebensgefahr durch Ersticken besteht!
Das Gerät sollte ausschließlich von Erwachsenen bedient werden. Achten Sie
darauf, daß Ihre Kinder mit dem Gerät oder dessen Bedienungselementen nicht
spielen.
Sollte das Gerät am Ende seine Lebensdauer außer Betrieb gesetzt werden, so
ziehen Sie den Netzstecker aus der Steckdose, trennen Sie das Anschlußkabel
durch (möglichst nah am Gerät) und montieren Sie die Tür ab. Dadurch verhindern
Sie, daß sich spielende Kinder selbst einsperren oder einen Stromschlag erleiden.
Das Gerät darf von Kindern und Personen, deren physische, sensorische oder
geistige Fähigkeiten sowie Mangel an Erfahrung und Kenntnissen einen sicheren
Gebrauch des Gerätes ausschließen, nur unter Aufsicht oder nach entsprechender
Einweisung durch eine Person benutzt werden, die sicherstellt, dass sie sich den
Gefahren des Gebrauchs bewusst sind.
Umweltnormen
Das Gerät darf nicht mit dem Hausmüll oder Sperrmüll entsorgt werden.
Auskunft über Abholtermine oder Sammelplätze gibt die örtliche
Gemeindeverwaltung an.
Page 6
6
Entsorgung
Verpackungsmaterialien
Die mit dem Symbol gekennzeichneten
Materialien sind recyclingfähig.
>PE<=Polyäthylen
>PS<=Polystyrol
>PP<=Polypropylen
Sämtliche Verpackungsmaterialien sind recyclingfähig. In Deutschland
können Sie die Verpackung an den Händler zurückgeben, bei dem Sie das
Gerät gekauft haben.
Informationen für Sicherheits-vorschriften von
Isobutan
Warnung
Ihr Gerät enthält im Kältekreislauf Isobutan (R 600a); bei diesem Stoff besteht
Feuer- und Explosionsgefahr.
Belüftungsöffnungen der Geräteverkleidung oder des Aufbaus von
Einbaumöbeln nicht verschließen.
Zum Beschleunigen der Abtauung keine anderen mechanischen Einrichtungen oder
sonstige künstlichen Mittel als die vom Hersteller empfohlenen benutzen.
Kühlkreislauf nicht beschädigen.
Keine elektrischen Geräte innerhalb des Lebensmittellagerraumes betreiben,
die nicht vom Hersteller freigegeben sind.
Page 7
7
Gebrauch
Vor Inbetriebnahme
Man sollte mindestens 2 Std. warten, bevor das Gerät in Betrieb
genommen wird, damit das Kältemittel zurückströmen kann.
Bevor Sie das Gerät in Betrieb nehmen, beseitigen Sie den typischen
«Neugeruch» am besten durch Auswaschen der Innenteile mit lauwarmem
Wasser und einem neutralen Reinigungsmittel. Sorgfältig nachtrocknen.
Bitte keine Reinigungs- bzw. Scheuermittel verwenden, die das
Gerät beschädigen könnten.
Das Gerät sowie Teile der Innenausstattung sind fürden Transport geschützt.
Alle Klebebänder sowie Polsterteile aus dem Geräteinnenraum entfernen.
Inbetriebnahme
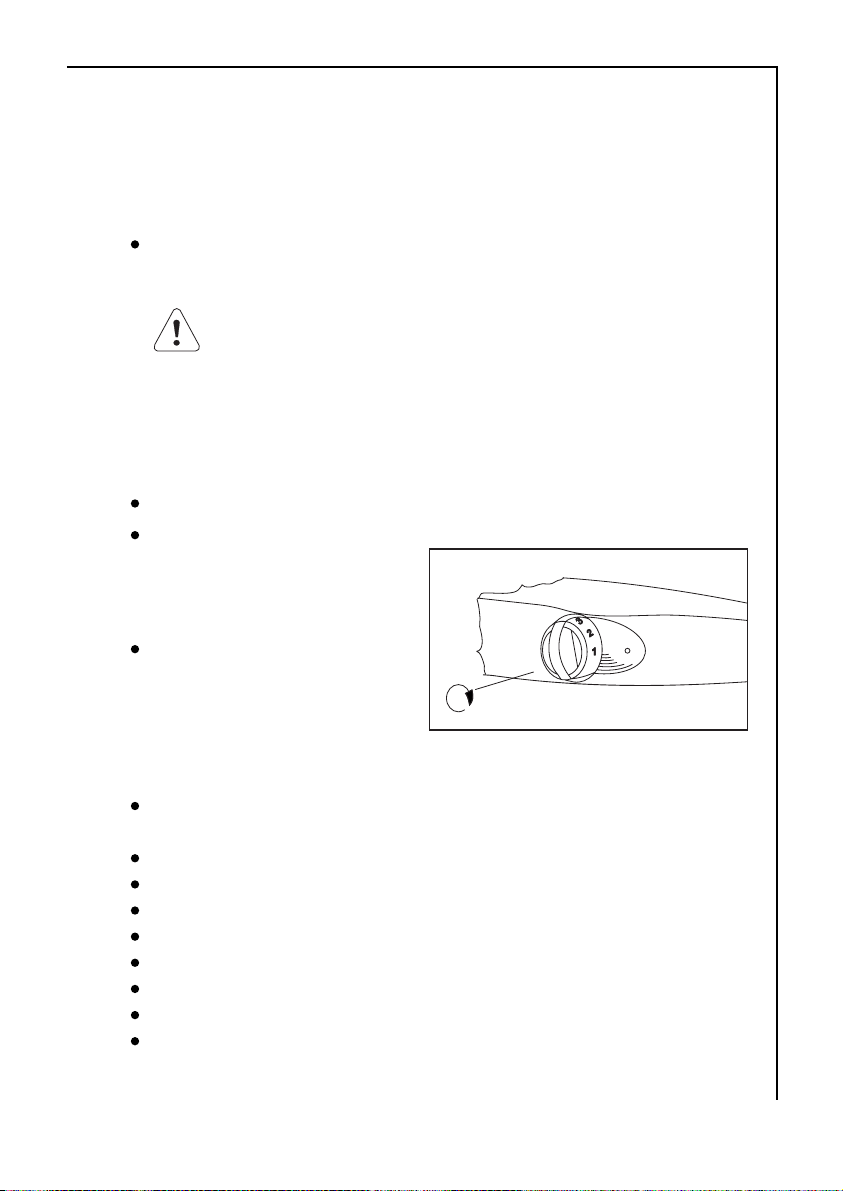
Der Drehknopf für die Temperaturwahl ist im Kühlraum rechts.
Den Stecker in die Steckdose
einsetzen. Kühlschranktür öffnen
und Thermostatknopf von der
Stellung «O» (STOP) aus im
Uhrzeigersinndrehen.
Das Gerät ist eingeschaltet. Den
Stillstand des Gerätes erhält man
durch Drehen des Thermostatknopfes
auf das Symbol «O» .
Temperaturregelung
Die richtige Einstellung erhält man, unter Berücksichtigung folgender, die
Innentemperatur beeinflussender Faktoren:
Raumtemperatur
Häufigkeit des Türöffnens
Menge der eingelagerten Lebensmittel,
Aufstellung des Gerätes
Die Temperatur wird automatisch geregelt.
Stellung “1”= wärmste Innentemperatur
Stellung “6”= kälteste Innentemperatur
Stellung “0”= Kühlung aus
Die mittlere Einstellung ist meistens die geeigneteste.
Page 8

8
Kühlabteilausstattung
Abstellregale
Zur Einlagerung von
Lebensmittel-Packungen
verschiedener Größe, sind die
Abstellfläche höhenverstellbar.
Dazu die Abstellfläche soweit
nach vorne ziehen, bis sie sich
nach oben oder unten
abschwenken und herausnehmen
läßt.
Das Einsetzen in eine andere Höhe
bitte in umgekehrter Reihenfolge
vornehmen.
Die Glasablage über der Gemüseschale und die Flascheablage müssen
immer in der Stellung verbleiben, um eine korrekte Luftzirkulation zu
gewährleisten.
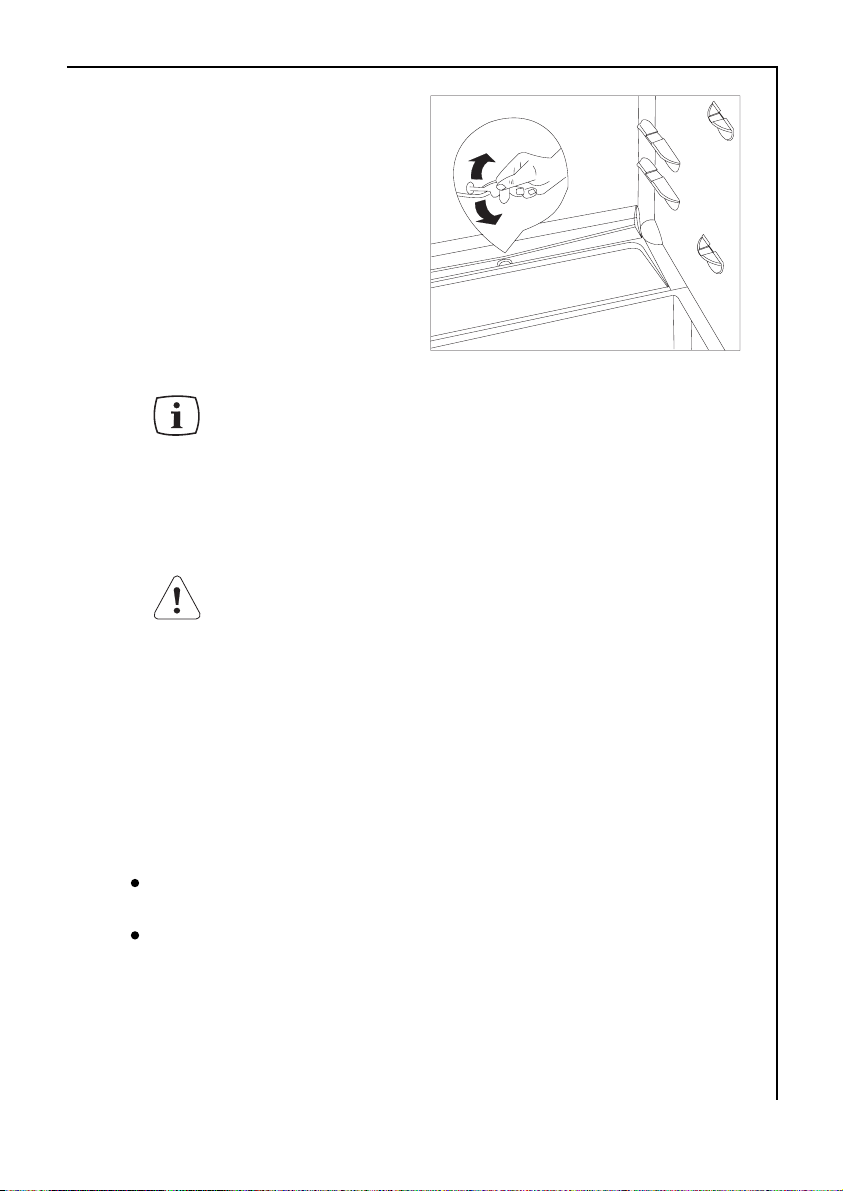
Türabsteller
Das mittlere Abstellregale der
Innentür ist höhenverstellbar.
Das Abstellregal stufenweise in
Pfeilrichtung drücken bis es frei
wird; dann in der gewünschten
Höhe wieder anbringen.
Zur besseren Reinigung kann die
untere Ablage genommen werden.
Page 9

9
Tipps
Energie-Einsparung
Das Gerät nicht in der Nähe von Herden, Heizkörpern oder anderen
Wärmequellen aufstellen. Bei hoher Umgebungstemperatur läuft der
Kompressor häufiger und länger. Bitte im Abschnitt “Aufstellung”
nachsehen.
Tür nur so lange wie nötig geöffnet lassen.
Höchste Kälteeinstellung bei hoher Raumtemperatur und erheblicher
Lebensmittelmenge kann fortdauernden Kühlschrank-Betrieb
verursachen, dabei kann sich eine Reif- oder Eisschicht an der
hinteren Innenwand bilden.
In diesem Falle den Thermostatknopf auf wärmere Temperaturen
stellen, damit das automatische Abtauen, mit folglich geringerem
Stromverbrauch, gewährleistet werden kann.
Keine warmen Speisen in das Gerät stellen. Warme Speisen erst
abkühlen lassen.
Den Verflüssiger, das Metallgitter an der Geräterückseite, mit einem
Staubsauger oder einer Bürste immer sauber halten.
Richtiges Kühlen
Keine warmen Speisen oder dampfenden Flüssigkeiten in den Kühlschrank
einstellen.
Geruchverbreitende Lebensmittel müssen abgedeckt oder eingewickelt
werden.
Die Lebensmittel müssen so eingelagert werden, dass die Kälte um sie frei
zirkulieren kann.
Nachstehend einige praktische Ratschläge:
Fleisch (alle Sorten) in Plastikfolie einpacken und auf die Glasplatte, die
sich über der Gemüseschale befindet, legen. In dieser Lage kann das
Fleisch längstens 1-2 Tage aufbewahrt werden.
Gekochte Nahrungsmittel, kalte Platten, usw. zugedeckt
aufbewahren. Sie können auf jede beliebige Ablage gelegt werden.
Obst und Gemüse: nach vorherigem Säubern und Waschen in den
Gemüseschalen) aufbewahren.
Butter und Käse: in speziellen Behältern aufbewahren oder in Alu- bzw.
Plastikfolie einpacken, um den Kontakt mit der Luft zu vermeiden.
Page 10
10
Milch in Flaschen: gut verschlossen in den Flaschenhalter der
Innentür stellen.
Wenn Bananen, Kartoffeln, Zwiebeln und Knoblauch nicht verpackt
sind, sollten sie nichtin den Kühlschrank gegeben werden.
Wartung
Vor jeder Reinigungsarbeit immer den Netzstecker aus der
Steckdose ziehen.
Dieses Gerät erhält im Kaltekreislauf Kohlenwasserstoff. Aus
diesem Grund darf die Wartung und das Nachfüllen
ausschließlich von autorisierten Fachpersonal durchgeführt werden.
Abtauen
Nach einer bestimmten Betriebszeit kann sich im Kühlraum des Gerätes
eine Reif- bzw. Eischicht bilden.
Diese Reif- und Eisschicht wirkt isolierend, die Kälteabgabe wird
dadurch erschwert, was zur erhöhten Temperatur der Kühlräume führen
kann und den Stromverbrauch ansteigen läßt.
Bei diesem Typ besitzt der Kühlbereich eine Abtauvollautomatik. Damit
entfällt ein Abtauen des Kühlbereiches.
Der Temperaturregler unterbricht immer wieder den Kompressor während dieser Zeit wird der Kühlprozeß unterbrochen - die
Innentemperatur steigt und somit erfolgt ein Abtauen.
Nach dem Abtauen aktiviert der Temperaturregler den Kühlprozeß.
Das Wasser sammelt sich im Sammelbehälter, läuft durch den
Tauwasserablauf über die Tauwasserabführung in die Auffangschale (auf
dem Kompressor) und verdunstet dort durch die Wärme des Kompressors.
Kontrollieren und reinigen Sie bitte den Tauwasserablauf
regelmäßig, sonst könnte im Falle einer Verstopfung das
angesammelte Wasser in die Isolierung gelangen und somit zu einer
vorzeitigen Funktionsstörungen des Gerätes führen.
Verwenden Sie beim Reinigen des Tauwasserablaufes das mitgelieferte und auch
in der Abb. dargestellte Reinigungsgerät. Bewahren Sie es am Tauwasserablauf auf.
Überzeugen Sie sich gelegentlich davon, daß der Tauwasserablauf nicht
verstopft ist.
Ein typisches Beispiel für die Verstopfung der Tauwasserabführung besteht
Page 11
11
darin, daß in Papier verpackte
Lebensmittel mit der Rückwand
des Kühlbereiches in Berührung
kommen und dort festfrieren.
Beim Herausnehmen des
Lebensmittels kann das Papier
in die Tauwasserabführung
gelangen und dadurch einen
Verstopfung verursachen.
Gehen Sie deshalb bitte beim
Einlegen von in Papier
verpackte Lebensmittel aus den eben ernannten Gründen vorsichtig vor.
Bei voller Auslastung (z.B. bei Hitze) läuft der Kühlschrank
ununterbrochen, während dieser Zeit ist die Abtauvollautomatik
unwirksam.
Nach dem Abtauen sind Reif- und Eisflecken auf der Rückseite des
Kühlschrankes nicht unüblich..
Reinigung
Bitte keine Reinigungs- bzw. Scheuermittel verwenden, die das Gerät
beschädigen könnten. Benutzen Sie nie Metallgegenstände um das
Gerät zu reinigen, da es beschädigt werden könnte.
Den Innenraum mit lauwarmem Wasser und einem neutralen
Reinigungsmittel reinigen.Gut nachwaschen und sorgfältig trocknen.
Um einen sicheren Betrieb des Gerätes zu gerwährleisten, einmal im
Jahr den Sockel-Grill abbauen und die Luftkanäle mit einem
Staubsauger reinigen. Dies begünstigt den guten Betrieb mit folglicher
Stromersparnis.
Stillstandszeiten
Den Stecker aus der Steckdose ziehen. Alle Lebensmittel
herausnehmen und Gerät reinigen.
Die Tür offen lassen, um im Inneren eine gute Luftzirkulation zu
gewährleisten und somit Geruchsbildung zu vermeiden.
Page 12

12
Wechsel der Glühlampe
Wenn die Glühlampe defekt ist,
können Sie diese leicht selbst
austauschen:
Ziehen Sie den Netzstecker.
Drehen Sie die Schraube der
Abdeckung heraus und ziehen
Sie die Abdeckung in Pfeilrichtung ab. Jetzt können Sie die defekte
Glühlampe ersetzen. (Typ: Mignon 322, 230 V, 15 W, Sockel E 14)
Setzen Sie die Abdeckung der Glühlampe zurück und schrauben Sie die
Schraube wieder ein. Stecken Sie zum Schluß den Netzstecker in die
Steckdose.
Eine defekte Innenbeleuchtung beeinträchtigt die Funktionsfähigkeit
des Gerätes nicht.
Page 13

13
Wenn etwas nicht funktioniert
Falls das Gerät Stärungen aufweisen sollte, bevor Sie den Kundendienst
verständigen, überprüfen Sie zuerst folgendes:
Störung
Im Gerät wird es nicht kalt
genug
Gerät kühlt zu stark.
Der Kompressor läuft
ständig
Wasser im Kühlschrank.
Geräusche
Abhilfe
Der Drehknopf auf kältere Temperatur drehen.
Die Lebensmittel müssen so eingelagert werden, dass die
Kälte um sie frei zirkulieren kann.
Tür richtig schließen.
Die Umgebungstemperatur ist zu warm.
Der Drehknopf auf wärmere Temperatur drehen.
Der Drehknopf auf niedrigere Zahlen drehen.
Die Umgebungstemperatur ist zu warm.
Achten Sie darauf, dass diese Öffnungen nicht durch
Sockelblenden oder Geschirr abgedeckt werden.
Innerhalb der letzen 24 Std. wurden größere Mengen
warmer Lebensmittel eingelagert.
Tür nur so lange wie nötig geöffnet lassen.
Die Ablauföffnung an der Rückwand im
Geräteinnenraum ist verstopft. Mit einem nicht
scharfkantigen Gegenstand reinigen.
Manchmal sind sie charakterstisch für Kältegeräte.
Wenn Kältemittel in dünne Rohre einströmt, können Sie
ein blubberndes oder plätscherndes Geräusch hören.
Immer wenn der Kompressor ein- oder ausschaltet, ist
ein Klicken zu hören.
Geräusche können durch das Instand setzen der
Möbelstruktur entstehen.
Page 14

14
Kundendienst und Ersatzteile
Sollten Sie nach o.e. Prüfungen zu keinem Resultat kommen, so wenden Sie
sich bitte an unseren nächsten Kundendienst. Um ein rasches Beheben des
Schadens zu ermöglichen, ist es beim Anruf an den Kundendienst notwendig
anzugeben:
Modellbezeichnung
Erzeugnis-Nummer (PNC)
Fertigungs-Nummer (S-No.)
Diese Angaben finden Sie auf dem Typschild links ander Innenseite des
Gerätes. Damit Sie die Daten schnell bei der Hand haben, empfehlen wir, sie
hier einzutragen.
Technische Angabe
Die technischen Angaben sind
auf dem Typschild genannt, das
auf der linken inneren Seite der
Anlage liegt.
Umkehrbarkeit der Tür
Das Gerät wird mit Öffnung der
Tür nach rechts geliefert.
Zum Öffnen der Tür zur
entgegengesetzten Seite, sind vor
der Installation folgende
Arbeitsgänge notwendig.
1.Den oberen Zapfen lösen und
das Distanzstück entfernen.
2.Die Tür entfernen.
3.Den unteren Bolzen mit einem
Schlüssel losschrauben und auf
der gegenüber liegenden Seite
einsetzen.
4.Die Tür wieder einsetzen und
den oberen Zapfen und das
Distanzstück auf der
entgegengesetzten Seite wieder
aktivieren.
Page 15

15
Installation
Vor der Installation sicherstellen, dass das Gerät nicht beschädigt ist.
Mögliche Transportschäden sind dem Händler unverzüglich mitzuteilen.
Während das Gerät in Betrieb ist, werden der Verflüssiger und der Kompressor,
die sich auf der Rückseite des Gerätes befinden, heiß. Aus Gründen der
Sicherheit muss eine Mindestbelüftung gesichert sein. Siehe
Aufstellungsanweisungen.
Wichtig: Beschädigte Versorgungs-kabel müssen durch ein Spezialkabel bzw.
einen Spezialsatz ersetzt werden, die beim Hersteller oder dem
Kundendienststellen erhältlich sind.
Aufstellung
Vor der Installation sicherstellen, dass das Gerät nicht beschädigt ist.
Mögliche Transportschäden sind dem Händler unverzüglich mitzuteilen.
Das Gerät darf nicht in unmittelbarer Nähe von Heizkörpern oder
sonstigen Wärmequelle aufgestellt werden.
Ein Standort mit direkter Sonneneinstrahlung sollte vermieden werden.
Eine ausreichende Luftzirkulation an der Geräterückseite muss gewährleistet
sein.
Für eine optimale Belüftung des Gerätes müssen die minimalen
Lüftungsquerschnitet (Abb.) eingehalten werden.
Achtung: Die Ventilations - Öffnungen müssen immer saubergehalten
werden.
Ferner ist auch am hinteren Einbauschrankteil ein Lüftungskamin mit
folgenden Massen notwendig:
Tiefe: 50 mm
Breite: 540 mm
Page 16
16
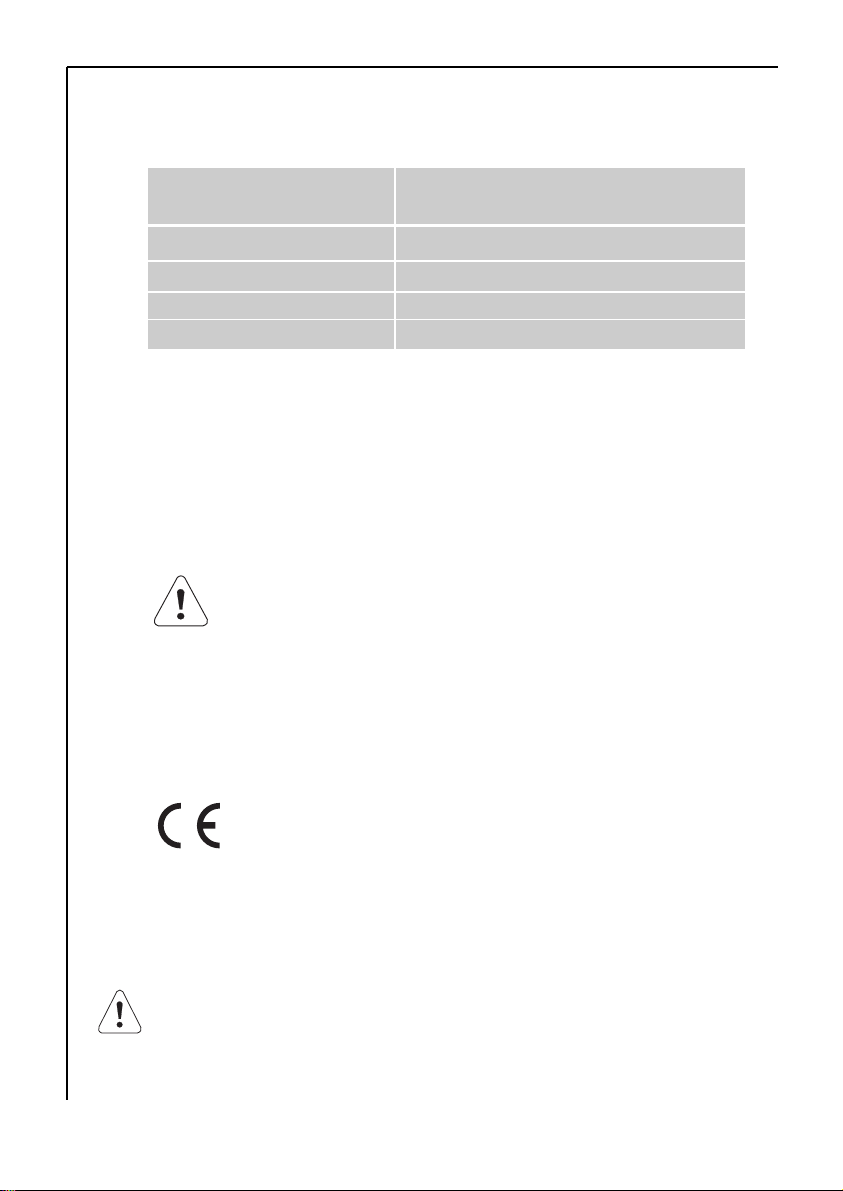
Die Klimaklasse finden Sie auf dem Typschild, das sich links im Innenraum des
Gerätes befindet. Nachstehende Tabelle zeigt, welche Umgebungstemperatur
welcher Klimaklasse zugeordnet ist:
Klimaklasse für Umgebungs-
temperatur von
SN +10 bis +32 °C
N +16 bis +32 °C
ST +18 bis +38 °C
T +18 bis +43 °C
Elektrischer Anschluss
Bevor Sie den Stecker in die Steckdose einstecken, überprüfen Sie bitte, dass
die auf dem Typschild des Gerätes angegebene Spannung sowie Frequenz mit
dem Anschlusswert des Hauses übereinstimmen.
Eine Abweichung von ±6% von der Nominalspannung ist zulässig.
Für die Anpassung des Gerätes an andere Spannungen muss ein
Spartransformator angemessener Leistung vorgeschaltet werden.
Wichtig
Das Gerät muss unbedingt vorschriftsmäßig geerdet werden.
Zu diesem Zweck ist der Stecker des Anschlusskabels mit dem dafür
vorgesehenen Kontakt versehen. Sollte die Netzleitung im Haus nicht mit
einer Erdleitung versehen sein, so muss das Gerät an eine getrennte
Erdleitung vorschriftsmäßig und unter Hinzuziehung eines Fachmanns
angeschlossen werden.
Die Erzeugerfirma lehnt jede Verantwortung ab, falls diese
Unfallverhütungsvorschrift nicht beachtet wird.
Dieses Gerät entspricht der folgende EWG Richtlinie:
- 73/23 EWG vom 19.2.73 (Niederspannung) und folgende Änderungen;
- 87/308 EWG vom 2.6.87 (Funkentstörung);
- 89/336 EWG vom 03/05/89 (Elektromagnetische Verträglichkeit) und
folgende Änderungen.
Wichtig
Es muss möglich sein, das Gerät vom Netz zu trennen; nach der Installation
muss die Steckdose daher zugänglich bleiben.
Page 17

17
Einbau
Maßzeichnungen
Höhe (1) 880 1225 mm
Tiefe (2) 550 550 mm
Breite (3) 560 560 mm
Ferner ist auch am hinteren Einbauschrankteil ein Lüftungskamin mit folgenden
Massen notwendig:
Tiefe 50 mm
Breite 540 mm
Page 18

18
1.Gerät in die Nische einschieben, bis
die Anschlagleiste (1) oben am Möbel
anliegt und die vordere Kante des
Scharniers mit der Türöffnungsseite
bündig an der Nischenseitenwand
ansteht (2).
2.Tür öffnen und Gerät gegenüber der
Bandseite an die Möbelseitenwand
rücken. Gerät mit den 4 beiliegenden
Schrauben (I) befestigen.
3.Fugenabdeckprofil am Gerät, wie in
Abbildung gezeigt ankleben.
Page 19

19
4.Brechen Sie aus der Plastikabdeckung
(E), die das Scharnier mit Stift bedeckt,
die in der Abbildung gekennzeichneten
Teile heraus. Dies wird durch die
vorgestanzten Ausbruchlinien
erleichtert. "Entfernen Sie das mit DX
gekennzeichnete Teil, wenn der Stift am
rechten Scharnier angebracht werden
soll, andernfalls das mit SX
gekennzeichnete Teil."
In die Befestigungs- und
Scharnierlöcher beiliegende
Abdeckkappen (C-D) eindrücken.
Belüttungsgitter (B) und
Scharnierabdeckungen (E) aufstecken.
5.Die Teile Ha, Hb, Hc, Hd abnehmen, wie
in der Abb. gezeigt wird.
Page 20

20
6.Die Schiene auf der Innenseite der
Möbeltür oben und unten auflegen
(siehe Abb.) und die Positionder äußeren
Bohrlöcher anzeichnen. Nachdem die
Lächer gebohrt wurden, die Schiene mit
den mitgelieferten Schrauben
befestigen.
7.Die Abdeckung (Hc) in die Scheine
(Ha) eindrücken, bis sie einrastet.
8.Gerätetür und Möbeltür auf ca. 90 °
öffnen. Den Winkel (Hb) in der Schiene
(Ha) einsetzen.Gerätetür und Mäbeltür
zusammenhalten und die Bohrlächer
anzeichnen (siehe Abb.).
Page 21

21
9.Die Winkeleisen entfernen und 8 mm
vom äusseren Rand der Tür mit dem
Nagel (K) kennzeichnen.
10. Den Winkel wieder auf der
Schiene anbringen und mit den
mitgelieferten Schrauben befestigen.
Für eine allfällig notwendige
Ausrichtung der Möbeltür, den
Spielraum der Langlächer nutzen. Nach
Beendigung der Arbeiten den
einwandfreien Verschluss der Gerätetür
überprüfen.
11. Die Abdeckung (Hd) in den
Winkel (Hb) eindrücken, bis sie einrastet.
Page 22

22
Instructions for the use of the instructions booklet
Notes which are important for your safety or for the proper functioning of
the appliance
Supplementary information regarding operation and practical applications
of the appliance.
Tips and notes concerning economical and environmentally sound use of
the appliance
The symbol on the product or on its packaging indicates that this product
may not be treated as household waste. Instead it shall be handed over to
the applicable collection point for the recycling of electrical and electronic
equipment. By ensuring this product is disposed of correctly, you will help
prevent potential negative consequences for the environment and human
health, which could otherwise be caused by inappropriate waste handling
of this product. For more detailed information about recycling of this
product, please contact your local city office, your household waste
disposal service or the shop where you purchased the product.
Page 23

Contents
Safety Instructions .........................................................................................................24
Diposal...............................................................................................................................25
Use and Control / Before Use ...................................................................................................27
Starting the appliance / Temperature control ...................................................................27
Iternal parts / Door shelves / ...................................................................................................28
Hints...................................................................................................................................29
Maintenance Defrosting................................................................................................30
Cleaning.............................................................................................................................31
How to change the bulb ................................................................................................31
Something not Working.................................................................................................21
Customer Service and Spare Parts..............................................................................32
Technical Specifications / Door reversibility.............................................................33
Installation / Positioning...............................................................................................34
Electrical connection......................................................................................................35
Building-in ......................................................................................................................36
23
Page 24

Safety Instructions
This information has been provided in the interests of your safety. Please
read it before installing or using the appliance. Please retain the
instruction book for future reference. If owner ship is transferred, please
leave the user manual for the new owner.
Domestic Use
Keep these instructions and they should remain at the appliance when moving
away or changing owner.
This appliance is designed for storing food, domestic use and being used
according to these instructions only.
Specialised companies that are qualified to do so by the manufacturer
must carry out service and repairs including repairing and changing the
power cord. Accessory parts supplied by them should be used only for
repairing. Otherwise the appliance can be damaged or can cause other
damage or injury.
The appliance is out of circuit only in that case if the plug is removed from
the socket. Before cleaning and maintenance always unplug it (do not get it
by the cable). If the socket is difficult to reach, switch off the appliance by
cutting off the current.
Power cord must not be lengthened.
Make sure that the power plug is not squashed or damaged by the back
of the fridge/freezer.
- A damaged power plug may overheat and cause a fire.
Do not place heavy articles or the fridge/freezer itself on the power cord.
- There is a risk of a short circuit and fire.
Do not remove the power cord by pulling on its lead, particularly when the
fridge/freezer is being pulled out of its niche.
- Damage to the cord may cause a short-circuit, fire and/or electric shock.
- If the power cord is damaged, it must be replaced by a certified service agent or
qualified service personnel.
If the power plug socket is loose, do not insert the power plug.
- There is a risk of electric shock or fire.
Without the lamp cover of interior lighting you must not operate the
appliance.
When cleaning, do not use sharp, pointed or hard devices, as they can cause
damage to the appliance.
24
Page 25

25
Be careful not to allow liquids to the temperature control and lighting box.
Do not put hot pot to the plastic parts.
Do not store flammable gas and liquid in the appliance, because they may
explode.
Check and clean the outlet of melting water coming during defrosting
regularly - a label inside the appliance warns you for this. If it is clogged the
melting water gathered can cause earlier failure.
Precautions for child safety
Do not allow children to play with the packaging of the appliance. Plastic foil
can cause suffocation.
Adults must handle the appliance. Do not allow children to play with it or its
controlling parts.
If you are discarding the appliance pull the plug out of the socket, cut the
connection cable (as close to the appliance as you can) and remove the door
to prevent playing children to suffer electric shock or to close themselves into
it.
This appliance is not intended for use by persons (including children) with
reduced physical sensory or mental capabilities, or lack of experience and
knowledge, unless they have been given supervision or instruction concerning
use of the appliance by a person responsible for their safety.
Environment Protection
This appliance does not contain gasses which could damage the ozone layer, in
either its refrigerant circuit or insulation materials. Theappliance shall not be
discarded together with the urban refuse and rubbish. Avoid damaging the
cooling unit. Information on your local disposal sites may be obtained from your
municipal authorities.
Remove the plug and ensure that any locks or catches are removed, to prevent
young children being trapped inside.
Disposal
Appliance Packaging Information
The materials marked with the symbol are recyclable.
>PE< for polyethylene, e.g. sheet wrapping material
>PS< for polystyrene, e.g. padding material (always CFC-free)
>POM< polyoxymethylene, e.g. plastic clips.
All materials are environmentally sound!
Page 26

26
Safety precautions for isobutane
Warning
The refrigerant of the appliance is isobutane (R600a) that is inflammable and
explosive to a greater extent.
Keep ventilation openings, in the appliance enclosure or in the built-in
structure, clear of obstruction.
Do not use mechanical devices or other means to accelerate the defrosting
process, other than those recommended by the manufacturer.
Do not damage the refrigerant circuit.
Do not use electrical appliances inside the food storage compartments of the
appliance, unless they are of the type recommended by the manufacturer.
Page 27

Use and Control
Before Use
Wait two hours before connecting the appliance to allow the oil to flow back
in the compressor.
Before using the appliance for the first time, wash the interior and all
internal accessories with lukewarm water and some neutral soap so as to
remove the typical smell of a brand-new product, then dry thoroughly.
Do not use detergents or abrasive powders, as these will damage the finish.
Remove safety elements used for transportation.
Starting the appliance
Insert the plug into the wall socket
and turn the thermostat knob
clockwise beyond position «O» (OFF).
The thermostat control situated
inside the fridge compartment
regulates the temperature of the
appliance.
Turn the thermostat control to the
required setting.
Temperature Control
The following effects are of significance in respect of the interior
temperature:
Ambient temperature
Quantity and temperature of the food stored;
Frequency with which the door is opened and how long it is left open
the location of the appliance.
The temperature inside the appliance is automatically adjusted.
Setting “1” = hightest temperature, warmest setting
Setting “6” = lowest temperature, coldest setting.
Setting “0” = Off
A medium setting is generally the most suitable.
27
Page 28

28
Internal Parts
Storage shelves
The shelves can be removed for
cleaning.
To permit storage of food packages
of various sizes, the shelves can be
placed at different heights.
To remove the internal shelf pull
forward until it can be tipped up or
down and removed.
Please do the same in reverse to
insert the shelf at a different height.
The glass shelf above the
vegetable drawers and the
bottle shelf should always remain in
position, to ensure correct air
circulation.
Door shelves
To permit storage of food packages
of various sizes, the central door
shelf can be adjusted in height.
Gradually pull the shelf in the
direction of the arrows until it comes
free, then reposition as required.
For more thorough cleaning, the top
and bottom door sheves can be
easily removed and refitted in
position.
Page 29

29
Hints
Saving Energy
Pay careful attention to where the cabinet is placed. See the section
Installation. When installed correctly the cabinet will consume less energy.
Try to avoid keeping the doors open for long periods or opening the doors too
frequently as warm air will enter the cabinet and cause the compressor to
switch on unnecessarily often.
If the ambient temperature is high, the thermostat knob is on the coldest
setting (higher numbers) and the appliance is fully loaded, the compressor may
run continuously, causing frost or ice to form on the evaporator. If this happens,
turn the knob to a warmer setting (lower numbers) to allow automatic
defrosting and so a saving in electricity consumption.
Do not place warm foods inside the appliance. Allow warm foods to cool first.
Keep the heat emitting condenser, the metall grille on the rear wall of your
appliance, always clean.
Hints for refrigeration
Do not store warm food or evaporating liquids in the refrigerator and do
cover or wrap up the food, particularly if it has a strong smell.
To help you use your refrigerator correctly, here are some useful hints:
Raw meat (beef, pork, lamb & poultry): wrap in polythene bags and place
on top of the salad compartment, this being the coldest spot in the
refrigerator.
Meat can only be stored safely in this way for one or two days at the most.
Cooked food, cold cuts, jelly, etc.: these should be well covered and can be
stored on any of the glass shelves.
Fruit & vegetables: these should be thoroughly cleaned and placed in the
bottom drawer/s.
Butter & cheese: these should be placed in special airtight containers or
wrapped in aluminium foil or polythene bags to keep out as much air as
possible.
Milk bottles: these should have a top and should be stored in the bottle rack
on the door.
Bananas, potatoes, onions and garlic, if not packed, must not be kept in the
refrigerator.
Page 30

30
Maintenance
Unplug the appliance before carrying out any maintenance operation.
Warning
This appliance contains hydrocarbons in its cooling unit maintenance and
recharging must therefore only be carried out by authorised technicians.
Defrosting
Bleeding part of the moisture of cooling chamber in form of frost and ice
goes with the operation of the refrigerator.
Thick frost and ice has an insulating effect, so it reduces cooling efficiency
as the temperature increases and it needs more energy.
At this type of appliance defrosting cooling compartment is automatic
without any external intervention.
The thermostatic control interrupts the operation of compressor at regular
intervals for more or less time - during this cooling is interrupted temperature of the cooling compartment increases and defrosting occurs.
After defrosting the thermostatic control restarts operation of the system.
Melting water flows through defrost water outlet into the evaporative tray
maintained on the top of compressor and evaporates due to warmth of it.
Check and clean the outlet
of melting water coming
during defrosting regularly. If it is
clogged the melting water
gathered can cause earlier failure
as it can go to the insulating of
the appliance.
Clean the melting water outlet with
the supplied pipe scraper that can be
seen in the figure. The pipe scraper
has to be stored in the outlet.
Occasionally check the defrost
water outlet not to be clogged up.
The most typical case of clogging up in the defrost water outlet when you
put food wrapped in some paper into the appliance and this paper contacts
back plate of cooling compartment and freezes to it. If you remove the food
right at this moment the paper will tear and it can cause clogging up in
Page 31

31
the outlet by getting into it. So you are asked to be careful - because of the
above - when placing foods wrapped in paper into the appliance.
In case of increased demand e.g. during heatwaves, the refrigerator
temporarily happens to operate constantly - during this the automatic
defrosting is ineffective.
Remaining small ice and frost stains on back plate of the cooling
compartment after defrosting period is not abnormal.
Cleaning
Never use metal objects for cleaning your appliance as it may get
damaged.
NEVER use detergents, abrasive powders, highly perfumed cleaning
products or wax polishes to clean the interior as these will damage the
surface and leave a strong odour.nie Metallgegenstände um das Gerät zu
reinigen, da es beschädigt werden könnte.
Clean the inside with warm water and bicarbonate of soda. Rinse and dry
thoroughly.
To guarantee a safe operation of the fridge, once a year remove the
ventilation grill at the base and clean the air channels with a vacuum cleaner.
When the appliance is not in use
Disconnect the appliance from the electricity supply.
Empty all foods and clean the appliance, leaving the doors ajar to prevent
unpleasant smells.
How to change the bulb
Should the light fail to work you can change it as below:
Break the circuit of the appliance.
Unscrew the plate screw fixing the
lamp cover, then take the lamp cover
off in the direction of arrow and the
bulb can be changed. (Type of the bulb:
Mignon 322, 230 V, 15 W, E 14 thread)
After changing bulb replace the lamp
cover, screw the plate screw and apply
voltage to the appliance.
The lack of light does not influence
operation of the refrigerator.
Page 32

32
Something not Working
Problems may be due to causes which can easily be solved before
calling the Technical Service. Please follow these instructions:
SYMPTOM
Door does not close
It is too warm inside the
refrigerator
It is too cold inside the
refrigerator.
The compressor works
continuously.
There is water inside/outside
the refrigerator.
Water comes out on the
floor.
Noises
SOLUTION
Level properly the appliances if it is not well levelled.
Weight surpasses the storage limit of the door shelf so
spread weight more evenly or take some products out.
The appliance is not properly installed. Please look in the
“Building-in” section.
Set a lower temperature.
Distribute the food products to allow cold air to
circulate around them.
Make sure that the door is completely closed and that
the insulating strip is complete and clean.
The temperature where the cabinet is placed is above
normal room temperature.
Turn the temperature regulator to a warmer setting
temporarily.
Turn the thermostat knob to a lower number.
The temperature where the cabinet is placed is above
normal room temperature.
Check that the ventilation is sufficient and that the
ventilation openings are unobstructed.
The cause could be the introduction of large quantities
of food and/or frequent opening/closing of the door.
Sometimes is normal. During automatic defrosting frost
thaws on the cooling plate.
Place the drain hose at the back of the cabinet above
the drain bowl.
Sometimes this is normal. Temperature control may
cause clicking sounds when the system is connected or
disconnected.
The injected cooling gas may produce a gurgling sound
while passing through the tubes.
The motor may cause a humming noise and/or slight
bumping.
The insulation material used has a tendency to slighly
increase noise levels, how ever it allows for much better
insulation and a lower energy consumption.
Page 33

33
Customer service and spare parts
If you cannot find the remedy for a malfunction in these operating instructions,
please contact your dealer or our customer service department and consult the
Guarantee card.
Selective ordering of replacement parts can save unnecessary travel and costs.
For this reason always provide the following appliance information:
Model Name
Model Number (PNC)
Serial Number (S-No.)
This information can be found on the rating plate inside the cabenit on the
left hand wall. We recommend that you enter this information here, so that
it is handy if needed.
Technical specifications
The technical data is indicated in the rating plate on the left side inside the
appliance.
Door reversibility
The equipment is supplied
with the door opening
toward the right.
Follow the instructions below
before installing it to have the door
open to the left.
1.Unscrew the top hinge screw and
remove the spacer.
2.Remove the door.
3.Unscrew with a key the lower pin
and replace it on the opposite side.
4.Reinsert the door and screw the
upper hinge and spacer onto the
opposite side.
Page 34

Installation
Take utmost care when handling your appliance so as not to
cause any damages to the cooling unit with consequent
possible fluid leakages.
During normal operation, the condenser and compressor at the back
of the appliance heat up considerably. Always ensure that there is
adequate ventilation as a failure to do this will result in component
failure and possible food loss. See installation instructions.
Important: if the supply cord is damaged, it must be replaced by a
special cord or assembly available from the manufacturer or its service
agent.
Positioning
Unpack the cabinet and check that it is in good condition and free of
any transport damage.
The appliance must not be located close to radiators or gas cookers.
Avoid prolonged exposure of the appliance to direct sunlight.
For safety reasons, minimum ventilation must be as shown in Fig.
Attention: keep ventilation openings clear of obstruction.
It is necessary that the niche is provided with a conduct of ventilation having the following dimensions:
Depth: 50 mm
Width: 540 mm
34
Page 35

35
The climate classification can be found on the rating plate, which is
located inside the cabinet on the left hand wall.
The following table shows which ambient temperature is correct for
each climate classification:
Climate for an ambient
classification temperature of
SN +10 to +32 °C
N +16 to +32 °C
ST +18 to +38 °C
T +18 to +43 °C
Electrical connection
Before plugging in, ensure that the voltage and frequency shown on
the serial number plate correspond to your domestic power supply.
Voltage can vary by ±6% of the rated voltage.
For operation with different voltages, a suitably sized autotransformer must be used.
Important
The appliance must be earthed.
The power supply cable plug is provided with a contact for this
purpose.
If the domestic power supply socket is not earthed. connect the
appliance to a separate earth in compliance with current regulations,
consulting a specialist technician.
The Manufacturer declines all responsibility if the above safety
precautions are not observed.
This appliance complies with the following E.E.C.
Directives:
- 87/308 EEC of 2/6/87 relative to radio interference suppression.
- 73/23 EEC of 19.2.73 (Low Voltage Directive) and subsequent
modifications.
- 89/336 EEC of 3.5.89 (Electromagnetic Compatibility Directive) and
subsequent modifications.
Page 36

Attention!
It must be possible to disconnect the appliance from the mains power supply;
the plug must therefore be easily accessible after installation.
Building-in
Dimensions of the recess
Height of housing (1)
880 1225 mm
Depth of housing (2)
550 550 mm
Width of housing (3)
560 560 mm
It is necessary that the niche is provided
with a conduct of ventilation having the
following dimensions:
Depth 50 mm
Width 540 mm
For appropriate venting, follow indications in the figure.
36
Page 37

37
1. Fit the appliance in the niche by making
sure that it stands against the interior
surface of the unit on the side where the
door hinges of the appliances are fitted.
Insert the appliance until the upper strip
butts up against the unit (1) and make
sure that the lower hinge is in line with the
surface of the unit (2).
2. Open the door and push the appliance
against the side of kitchen furniture opposite
to that of the appliance hinges. Fasten the
appliance with 4 screws (I) provided in the kit
included with the appliance.
3. Press in the joint covers between the
appliance and the kitchen furniture.
Page 38

38
4. From the plastic cover (E), which is used
to cover the hinge with the pivot pin, you
must take away the part as indicated in
the drawing.
This operation is made easer since there
is, in the internal part of the cover hinge
lid a groove that facilates the removal of
this coomponent.
"Remove the part marked with DX, if the
pivot pin is inserted in the right hinge, SX
in opposite case."
Apply covers (C-D) on joint cover lugs and
into hinge holes.Snap hinge covers (E)
into position.
5. Separate parts Ha, Hb, Hc, Hd as shown in
the figure.
Page 39

39
6. Place guide (Ha) on the inside part of the
furniture door, up and down as shown in
the figure and mark the position of
external holes. After having drilled holes,
fix the guide with the screws supplied.
7. Fix cover (Hc) on guide (Ha) until it clips
into place.
8. Open the appliance door and the
furniture door at 90°. Insert the small
square (Hb) into guide (Ha). Put together
the appliance door and the furniture door
and mark the holes as indicated in the
figure.
Page 40

9. Remove the squares and mark a distance
of 8 mm from the outer edge of the door
where the nail must be fitted (K).
10. Place the small square on the guide
again and fix it with the screws
supplied.
Should the alignment of the furniture
door be necessary, use the clearance of
slots.
At the end of this procedure, it is
necessary to check if the door of the
furniture closes properly.
11. Fix cover (Hd) on the small square (Hb)
until it clips into place.
40
Page 41

41
Les symboles suivants sont utilisés dans cette notice
d'utilisation
Informations importantes pour votre sécurité et pour éviter d'endommager
l'appareil
Informations générales et conseils
Informations écologiques
Le symbole sur le produit ou son emballage indique que ce produit ne
peut être traité comme déchet ménager.
Il doit être remis au point de collecte dédié à cet effet (collecte et
recyclage du matériel électrique et électronique). En procédant à la mise
au rebut de l'appareil, dans les régles de l’art, nous préservons
l'environnement et notre sécurité, s'assurant ainsi que le déchets seront
traités dans des conditions optimum. Pour obtenir plus de détails sur le
recyclage de ce produit, veuillez prendre contact avec les services de votre
commune ou le magasin où vous avez effectué l'achat.
Page 42

42
Sommaire
Avertissement importants.........................................................................................43
Élimination .....................................................................................................................45
Utilisation ............................................................................................................46
Avant la première mise en service / Mise en service / Réglage de la
température..........................................................................................................46
Eléments modulables .................................................................................................47
Conseils............................................................................................................................48
Entretien Dégivrage ..............................................................................................................49
Nettoyage ..................................................................................................................................50
Dépannage / Changement d`ampoule..................................................................51
En cas d'anomalie de fonctionnement................................................................52
Service après-vente et pièces de rechange / Caractéristiques techniques /
Réversibilité de la porte............................................................................................53
Installation / Emplacement...............................................................................54
Branchement électrique ...................................................................................55
Encastrement ......................................................................................................56
Page 43

43
Avertissement importants
Ces avertissements sont donnés pour votre sécurité et pour celle d'autrui.
Nous vous prions donc de bien vouloir les lire attentivement avant
d'installer et d'utiliser l'appareil. Il est très important que cette notice
d'utilisation soit gardée avec l'appareil pour toute future consultation. Si
cet appareil devait être vendu ou transféré à une autre personne, assurezvous que la notice d'utilisation l'accompagne.
Prescriptions générales de sécurité
Conservez ce mode d`emploi qui doit toujours suivre l`appareil.
L`appareil n`est conçu que pour conserver les aliments dans les conditions
domestique ordinaires suivant ce mode d`emploi.
Confiez toute réparation - y compris le changement et la réparation du câble
de raccordement électrique - à l`atelier agréé. Les pièces de rechange doivent
être livrées par la fabrique. Sinon, l`appareil peut s`endommager ou. de dégâts
matériaux ou de blessures humains peuvent arriver.
L`appareil n`est hors de tension que dans le cas où le câble d`alimentation est
retiré de la prise secteur. Retirez donc toujours la fiche du câble de la prise
(saisissant toujours la fiche et ne jamais tirant sur le câble) avant de procéder au
nettoyage ou à la réparation Dans le cas où la prise secteur est en un endroit
difficilement accessible, déconnectez le réseau électrique pour mettre l`appareil
hors de tension.
Ne rallongez jamais le câble d`alimentation!
Assurez-vous que la prise n'est pas écrasée ou endommagée par l'arrière de
l'appareil. Une prise de courant endommagée peut s'échauffer et causer un
incendie.
- Ne placez pas d'objets lourds ou l'appareil sur le câble d'alimentation (risque de
court circuit et incendie).
Ne débranchez pas l'appareil en tirant sur le câble, particulièrement lorsque
l'appareil est tiré de son emplacement.
- Si le câble d'alimentation est endommagé ou écrasé peut causer un court
circuit, un incendie et/ou une électrocution.
Important: En cas de dommage du câble d’alimentation, il ne doit être
remplacé que par un professionnel qualifié.
- Si la prise murale est mal fixée, ne branchez pas l'appareil (risque d'électrocution
ou incendie).
Il est interdit d`exploiter l`appareil quand il manque le globe de l`éclairage
intérieur!
N`utilisez pas des outils durs, pointus ou coupants pour nettoyer, dégeler l`appareil,
Page 44

44
ou pour faire sortir les aliments congelés, vous risquez de détériorer le système
réfrigérant.
Evitez la pénétration du liquide au régulateur de température ou à l`armature de
l`éclairage.
Ne touchez pas les parties en plastique de l`appareil par pot chaud.
N`entreposez pas de gaz ou liquide inflammable dans l`appareil, un danger de
l`explosion existe.
Surveillez et nettoyez systématiquement l`orifice d`écoulement de l`eau dégelée
durant l`opération de dégèlement. Une étiquette à l`intérieur de l`appareil attire
l`attention à cela. Au cas d`un engorgement l`eau de dégel accumulée peut
détériorer prématurément l`appareil.
Prescriptions de sécurité pour l`enfants
Ne laissez jamais les enfants jouer au matériel d`emballage. La feuille en plastique
peut causer asphyxie.
L`appareil doit être manipulé par adultes. Ne laissez pas les enfants jouer à
l`appareil ou à ses parties de réglage.
Si vous terminez d`utiliser l`appareil, retirez la fiche secteur de la prise, coupez le
câble de raccordement (le plus proche de l`appareil) et démontez la porte de
l`appareil. Ainsi il devient possible d`éviter que les enfants subissent de
l`électrocution ou un asphyxie dans l`appareil.
Cet appareil n'est pas destiné à être utilisé par des enfants ou des personnes dont
les capacités physiques, sensorielles ou mentales, ou le manque d'expérience et de
connaissance les empêchent d'utiliser l'appareil sans risque lorsqu'ils sont sans
surveillance ou en l'absence d'instruction d'une personne responsable qui puisse
leur assurer une utilisation de l'appareil sans danger.
Protection de l'environnement
Le circuit réfrigérant et l'isolation de cet appareil ne contiennent pas de gaz
réfrigérant nocif pour l'ozone.
L'appareil ne doit être ni jeté avec les ordures ménagères ni mis à la casse.
Si vous vous débarrassez de votre appareil, veillez à ne pas détériorer les
circuits frigorifiques. Pour obtenir plus de détails sur le recyclage de ce
produit, veuillez prendre contact avec les services de votre commune ou le
magasin où vous avez effectué l'achat.
Coupez le câble d'alimentation et la prise et mettez-les au rebut. Enlevez
la prise et neutralisez le dispositif de fermeture de la porte pour empêcher
que des enfants ne restent enfermés à l'intérieur de l'appareil et ne mettent
leur vie en danger.
Page 45

45
Élimination
Matériaux d'emballage
Les matériaux marqués du symbole sont recyclables.
>PE< = polyéthylène, p.ex. feuilles d'emballage
>PS< = polystyrène, p.ex. matériel de rembourrage (sans CFC)
>POM< polyoxyméthylène, p.ex. clips plastique. Tous les matériaux sont
écologiques !
Prescriptions de sécuritépour isobutane
Mise en garde
L`isobutane (R 600a) constitue l`agent réfrigérant de l`appareil, qui est plus
intensément inflammable et explosif.
Maintenir dégagées les ouvertures de ventilation dans l`enceinte de
l`appareil ou dans la structure d`encastrement. Ne pas utiliser de
dispositifs mécaniques ou autres moyens pour accélérer le processus de
dégivrage autres que ceux recommandés par le fabricant.
Ne pas endommager le circuit de réfrigération.
Ne pas utiliser d`appareils électriques à l`intérieur du compartiment destiné
à la conservation des denrées, à moins qu`ils ne soient du type recommandé
par le fabricant.
Respectez les prescriptions du mode du mode d`emploi au point de
vue de la protection de la vie et des biens.
Page 46

46
Utilisation
Avant la première mise en service
Attendez deux heures avant de brancher votre appareil et de procéder au
réglage du thermostat.
Votre appareil étant installé, prenez la précaution de nettoyer l'intérieur et les
accessoires avec de l'eau tiède et un savon inodore (produit utilisé pour la
vaisselle). Rincez et séchez soigneusement.
N'utilisez jamais de produits abrasifs ou caustiques, ni d'éponges avec grattoir
pour procéder au nettoyage intérieur de votre appareil.
Enlevez les éléments de protection utilisés pendant le transport.
Mise en service
Branchez l'appareil et tournez le
thermostat dans le sens des aiguilles
d'une montre. Placez-le sur une
position différente de "0" (arrêt).
Le thermostat se trouve dans le
compartiment réfrigérateur.
Tournez le thermostat sur une
position médiane afin d'effectuer le réglage de la température.
Réglage de la température
La température à l'intérieur de l'appareil est fonction de plusieurs facteurs,
tels que:
la température ambiante
la quantité de denrées stockées
la fréquence d'ouverture de la porte
l'emplacement de l'appareil. La température est réglée automatiquement.
La position “1” correspond à la température la moins froide.
La position “6” correspond à la température la plus froide.
Position “ ” correspond à la position "arrêt" de l'appareil.
Page 47

47
Nous vous conseillons lors de la mise en service d'effectuer un premier réglage
sur une position médiane en tenant compte des différentes remarques citées cidessus.
Eléments modulables
Clayettes
Les clayettes sont amovibles pour
permettre un nettoyage plus facile.
Les glissières se trouvant sur les
parois de la cuve permettent de
positionner les clayettes à
différentes hauteurs.
Pour sortir la clayette, tirez-la vers
l'avant jusqu'à ce qu'elle puisse
basculer vers le haut ou vers le bas,
afin de la dégager de la glissière.
Pour glisser la clayette à une autre
hauteur, procédez dans l'ordre
inverse.
Le balconnet inférieur de
contre porte et la clayette
située au-dessus du bac à légumes
ne doivent pas être retirées (sauf
pendant le nettoyage).
Ils garantissent également une
bonne circulation de l'air à
l'intérieur du compartiment.
Balconnets de la contre-porte
Il est possible de modifier la position en hauteur du balconnet central sur la
contre-porte selon vos besoins et le volume des denrées à stocker.
Pour retirer le balconnet, tirez-le progressivement dans le sens des flèches,
puis repositionnez-le selon vos besoins.
Pour faciliter le nettoyage, les balconnets supérieur et inférieur de la contreporte peuvent être aisément retirés.
Page 48

48
Conseils
Économie d'énergie /
Stockage optimal
Placez votre appareil loin d'un source de chaleur et veillez à ce que l'air
circule librement tout autour de l'appareil. Voir le chapitre “Installation”. Si
l'appareil est installé correctement il consommera moins d'énergie.
Evitez d'ouvrir trop souvent la porte de l'appareil et ne la laissez ouverte que
le temps nécessaire.
Si l'évaporateur du compartiment réfrigérateur (paroi du fond de l'appareil)
se couvre anormalement de givre (appareil trop chargé, température
ambiante élevée, thermostat sur une position élevée, ouvertures fréquentes
de la porte), il est possible que le compresseur fonctionne en régime continu.
Dans ce cas, ramenez progressivement le thermostat sur une position
inférieure, jusqu'à obtenir de nouveau des périodes d'arrêt du compresseur.
Ne stockez pas d'aliments chauds dans l'appareil. Attendez que le complet
refroidissement des préparations avant de les stocker.
Nettoyez régulièrement le condenseur (grille en métal située à l'arrière de l'appareil).
Conseils pour la réfrigération
Attendez le complet refroidissement des préparations avant de les stocker (ex
: soupe). N'entreposez que des aliments frais, nettoyés et enfermés dans des
emballages ou récipients appropriés de qualité alimentaire.
Pour vous aider à utiliser correctement votre réfrigérateur, voici quelques conseils
utiles:
Viande crue (boeuf, porc, agneau et volaille): enveloppez-la dans des
sachets en plastique et placez-la sur la clayette en verre au-dessus du bac à
légumes, qui correspond à la zone la plus froide. La période de conservation
est de 1 à 2 jours au maximum.
Aliments cuits, plats froids, gelée, etc.: placez-les, bien couverts, sur une
clayette.
Fruits et légumes:bac(s) à légumes (une fois nettoyés).
Beurre et fromage: placez-les dans des récipients étanches spéciaux ou
enveloppez-les soigneusement dans des feuilles d'aluminium ou de
polyéthylène.
Bouteille de lait: placez-les dans le balconnet porte bouteilles.
Bananes, pommes de terre, oignons et ail ne se conservent pas au réfrigérateur,
s'ils ne sont pas correctement emballés.
Page 49

49
Entretien
Débranchez l'appareil avant de procéder à son nettoyage et son
entretien.
Attention
Le système frigorifique de cet appareil contient des hydrocarbures: les
interventions (entretien, recharge,...) doivent être effectuées
exclusivement par des personnes qualifiées ayant reçues une formation
spécifique.
Décongélation
L`humidité à l`intérieur de l`appareil se glace et se précipite sous forme des
couches de glace ou de blanc gel.
La couche épaisse de glace ou de blanc gel a un effet isolant et diminue la
puissance réfrigérante qui se traduit dans augmentation de la température
interne de l`espace réfrigérant et l`accroissement de la consommation en
énergie.
La décongélation de l`espace de
refroidissement se fait
automatiquement sans aucune
intervention.
Le régulateur de température arrête
régulièrement le fonction du
compresseur - le refroidissement est
stoppé - la température augmente
et la décongélation s`accomplit.
Ensuit le régulateur de température
remet en marche le système.
A travers le tube de déversement
l`eau de dégel s`écoule dans le plat
d`évaporation installé sur le
compresseur et s`évaporise.
Attirons l`attention à ce qu`il faut régulièrement contrôler et
nettoyer l`orifice de l`écoulement de l`eau de fonte car en cas d`une
obturation de cette orifice l`eau accumulée pénétrant dans
l`isolation de l`appareil causera la détérioration prématurée de l`appareil.
Nettoyez l`orifice de sortie de l`eau du dégèlement à l`aide du nettoyeur de
tube joint à l`appareil et présenté sur la figure. Stockez le nettoyeur de tube
dans l`orifice de sortie.
Vérifiez périodiquement le libre écoulement de l`eau de dégel.
Le cas le plus caractéristique de l`engorgement du tube de déversement est
Page 50

le suivant: vous mettez dedans l`aliment enveloppé en papier, le papier gèle
contre le paroi du compartiment de réfrigération et quand vous retirez
l`aliment quelques morceaux de papier restent gelés contre le paroi. Au cours
du dégel ces morceaux arrivent au tube et l`embouchonnent.
Rangez donc avec soin les aliments enveloppés en papier.
Une charge accentuée p.e. une canicule peut provisoirement forcer
l`appareil à un fonctionnement continu pendent duquel le dégel
automatique n`est pas efficace.
Des traces de glace ou de blanc gel dans le paroi de fond de l`espace
réfrigérant ne signifient pas un fonctionnement anormal.
Nettoyage
N'utilisez jamais d'objets métalliques pour nettoyer l'appareil :
vous risquez de l'endommager. N'utilisez JAMAIS de produits
abrasifs ou caustiques ni d'éponges avec grattoir pour nettoyer
l'intérieur de façon à ne pas l'abîmer et laisser de fortes odeurs.
Nettoyez périodiquement l'intérieur de votre appareil avec de l'eau tiède et
du bicarbonate de soude. Rincez et séchez soigneusement.
De temps en temps, dépoussiérez le condenseur (paroi arrière de l'appareil) et
les conduits de ventilation.
En cas d'absence prolongé ou de non-utilisation
Débranchez l'appareil.
Videz, dégivrez et nettoyez l'appareil. Maintenez les portes entrouvertes
pendant toute la durée de non-utilisation.
50
Page 51

51
Dépannage
Changement d`ampoule
Vous pouvez changer l`ampoule
brûlée comme suite:
Débranchez l`appareil.
Otez le couvercle de l`ampoule en le
faisant éclater au sens de la flèche
supérieure ensuite le retirant au sens
de la flèche inférieure. Changez
l`ampoule. (Le modèle de l`ampoule:
Mignon 322, 230 V, 15 W, douille E 14)
Après le changement d`ampoule remettez le couvercle et mettez sous tension
l`appareil.
La manque de l`éclairage n`influence pas le fonctionnement de l`appareil.
Page 52

52
En cas d'anomalie de fonctionnement
Si vous constatez une anomalie de fonctionnement, consultez le tableau cidessous avant d'appeler le service après vente. Observez les recommandations
suivantes:
PROBLÈME
La porte ne ferme pas
L'appareil ne fait pas
suffisamment de froid.
L'appareil fait trop de froid.
Le compresseur fonctionne
en continu.
Il y a gouttelettes d'eau sur
l'évaporateur du
compartiment réfrigérateur.
Il y a de l'eau autour de
l'appareil.
Bruits
REMÈDE
Mettez de niveau l'appareil. La porte est surchargée,
veillez à mieux répartir le poids sur les balconnets ou à
enlever des produits. L'appareil n'est pas bien installé.
Voir le chapitre “Encastrement”.
Placez le thermostat sur une position plus élevée.
Vérifiez que les aliments ne sont pas en contact avec
l'évaporateur afin que l'air puisse circuler librement.
Vérifiez que la fermeture correcte de la porte et le bon
état et propreté du joint. La température ambiante du
local où est situé l'appareil est trop élevée.
Placez le thermostat sur une position moins élevée.
Placez le thermostat sur une position moins élevée. La
température ambiante du local où est situé l'appareil est
trop élevée. Vérifiez que les conduits d'aération ne sont
pas obstruées et que la ventilation nécessaire est
suffisante. Trop de produits frais ont été introduits dans
l'appareil et/ou la porte est restée ouverte plus
longtemps que nécessaire.
Ce phénomène est normal. Pendant la phase de
dégivrage automatique, l'eau dégivrée ruisselle sur
l'évaporateur.
Placez le flexible d'évacuation situé à l'arrière de
l'appareil dans le bac collecteur.
Ces phénomène ne sont pas anormaux. Le régulateur de
température peut occassionner des claquements lorsque le
système s'éteint. Il n'est pas anormal d'entendre le bruit de
circulation du fluide frigorigène selon son état liquide, gazeux
ou vaporeux. Dès que le compresseur se met en
fonctionnement, vous pouvez l'entendre bourdonner ou
claquer légèrement. Le matériel isolant utilisé a tendance à
amplifier les bruits mais il offre un isolement parfait et une
basse consommation d'énergie.
Page 53

53
Service après-vente et pièces de rechange
Une fois que toutes ces vérifications ont été effectuées, si l'anomalie de
fonctionnement persiste, adressez-vous à votre magasin vendeur ou à défaut
votre Service après-vente.
Une commande sélective de pièces de rechange peut vous éviter des
déplacements inutiles. Pour que l'intervention soit plus rapide, indiquez-lui:
le modèle
le numéro de code produit (PNC)
le numéro de série (S-No.)
Ces informations figurent sur la plaque signalétique située sur le côté gauche
à l'intérieur de l'appareil. Nous vous conseillons de noter ces informations ici,
afin de les avoir rapidement à portée de main.
Caractéristiques techniques
Les caractéristiques techniques figurent sur la plaque signalétique située sur
le côté gauche à l'intérieur de l'appareil.
Réversibilité de la porte
L'appareil est livré avec
l'ouverture de la porte à
droite.
Conformez-vous aux instructions
ci-dessous avant de l'installer pour
que la porte s'ouvre à gauche.
1.Débranchez l'appareil. Dévissez la
charnière supérieure et enlevez
l'entretoise.
2.Retirez la porte.
3.Dévissez le pivot inférieur avec une
clé et repositionnez-le sur le côté
opposé.
4.Remettez la porte en place et
revissez la charnière supérieure et l'entretoise sur le côté opposé.
Page 54

54
Installation
Lors du transport et de
l'installation de l'appareil,
veillez à n'endommager aucune
partie du circuit réfrigérant.
Pendant le fonctionnement normal,
le condenseur et le compresseur à
l'arrière de l'appareil s'échauffent
sensiblement. Pour des raisons de
sécurité et le bon fonctionnement
de l'appareil, la ventilation doit être
prévue. Voir les instructions
d'installation.
Important: Si le câble
d'alimentation est endommagé, il doit être remplacé par un câble
d'alimentation certifié. Cette opération ne peut être effectuée que par une
personne habilitée, par votre vendeur, ou par le fabricant.
Emplacement
À la réception de l'appareil, déballez-le et vérifiez qu'il n'est pas endommagé.
Placez de préférence votre appareil loin d'une source de chaleur (chauffage,
cuisson ou rayons solaires trop intenses).
Évitez les expositions prolongées de l'appareil aux rayons solaires.
Pour des raisons de sécurité, un minimum de ventilation doit être prévu
comme indiqué
Important: Veillez à ce que les orifices de ventilation ne soient pas
obstrués.
Il est nécessaire que la niche
d'encastrement soit dotée d'un
conduit de ventilation ayant les
dimensions suivantes:
Profondeur 50 mm
Largeur: 540 mm
Page 55

Pour le bon fonctionnement de l'appareil, il est impératif de respecter les
températures ambiantes du local où doit être placé l'appareil suivant la classe
climatique (indiquée sur la plaque signalétique, qui se trouve à l'intérieur de
l'appareil sur le côté gauche). Au delà de ces températures ces performances
peuvent s'en trouver diminuées.
Les différentes classes climatiques existantes et les températures ambiantes
correspondantes en fonction du modèle de l'appareil sont les suivantes:
Classe pour une température
climatique ambiante de
SN +10 à +32 °C
N +16 à +32 °C
ST +18 à +38 °C
T +18 à +43 °C
Branchement électrique
Contrôlez, que le compteur électrique peut supporter l'intensité absorbée par
votre appareil (indications portées sur la plaque signalétique) compte tenu
des autres appareils branchés.
Tolérance admise : ±6 % de la tension nominale. Pour l'adaptation de
l'appareil à des tensions différentes, l'adjonction d'un autotransformateur
d'une puissance adéquate est indispensable.
Important
Utilisez un socle de prise de courant comportant une borne de mise
à la terre, qui doit être obligatoirement raccordée conformément à la
norme NFC 15100 et aux prescriptions des fournisseurs d'énergie
électrique.
Vérifiez que la prise de terre est conforme aux règlements en vigueur. Si la prise de
courant murale n'est pas mise à la terre, branchez l'appareil sur une prise de terre
conformément aux normes en vigueur, en faisant appel à lun électricien. L'appareil ne
doit pas être raccordé à l'aide d'un prolongateur ou d'une prise multiple.
55
Page 56

56
Notre responsabilité ne saurait être engagée en cas d'incidents ou
d'incendie provoqués par une mise à la terre inexistante ou défectueuse.
L'installation doit être réalisée conformément aux règles de l'art, aux
prescriptions de la norme NFC 15100 et aux prescriptions des fournisseurs
d'énergie électrique.
Cet appareil est conforme aux directives communautaires
suivantes:
87/308 CEE du 2.6.87 concernant la suppression des interférences radio-
électriques.
73/23 CEE du 19.2.73 (Basse tension) et modifications successives.
89/336 CEE du 3.5.89 (Compatibilité électromagnétique) et
modifications successives.
Important!
L'appareil doit pouvoir être débranché à tout moment du secteur ; il est donc
nécessaire que la prise murale reste accessible une fois que l'installation est
terminée.
Encastrement
Dimensions de la niche
Hauteur (1)
880 1225 mm
Profondeur (2)
550 550 mm
Largeur (3)
560 560 mm
A Il est nécessaire que la niche
Page 57

57
d'encastrement soit dotée d'un
conduit de ventilation ayant les
dimensions suivantes:
Profondeur 50 mm
Largeur 540 mm
Pour une ventilation appropriée, suivez les indications de la figure.
1.Contrôlez, lors de l'installation de
l'appareil dans la niche, que le côté
où se trouvent les charnières de la
porte de l'appareil soit appuyé
contre la surface interne du meuble.
Introduisez l'appareil jusqu'à ce que
le joint supérieur bute contre
l'élément (1) et contrôlez que la
charnière inférieure soit alignée à la
surface de l'élément (2).
2.Ouvrez la porte et poussez
l'appareil dans la direction opposée
aux charnières de l'appareil contre le
côté du meuble de cuisine. Fixez
l'appareil avec les 4 vis (I) incluses
dans le kit fourni avec l'appareil.
3.Enfoncez les couvre-joints entre
Page 58

58
l'appareil et le meuble de cuisine.
4.Sur le cache plastique (E), qui sert à recouvrir la charnière et le pivot, retirez
la pièce indiquée, comme illustré.
Cette opération est facilitée par la
présence d'une rainure, à l'intérieur
du cache charnière, qui facilite le
retrait de cette pièce.
"Retirez la pièce marquée d'un DX,
si le pivot est inséré dans la charnière
droite, ou la pièce marquée d'un SX si
le pivot est inséré dans la charnière
gauche."
Appliquez les caches (C-D) sur les
ailettes des buté es et dans les trous
des charnières.
Appliquez la grille d'aération (B) et
le couvrecharnières (E).
5.Séparez les pièces Ha, Hb, Hc, Hd
comme indiqué dans la figure.
Page 59

59
6.Placez la glissière (Ha) à l'intérieur
de la porte du meuble en haut et en
bas comme indiqué dans la figure et
marquez la position des orifices
externes. Après avoir percé les trous,
fixez la glissière avec les vis fournies.
7.Enfoncez le cache (Hc) sur la
glissière (Ha) jusqu'à ce qu'il
s'enclenche.
8.Ouvrez la porte de l'appareil et la
porte du meuble à 90°. Insérez le
petit carré (Hb) dans la glissière (Ha). Réunissez la porte de l'appareil et la
Page 60

60
porte du meuble et marquez les
trous comme indiqué sur la figure.
9.Enlevez les carrés et marquez une
distance de 8 mm du bord extérieur
de la porte où doit être planté le
clou (K).
10.Placez de nouveau le petit carré
sur la glissière et fixez-le avec les vis
fournies.
S'il est nécessaire d'aligner la porte
du meuble, utilisez l'espace des
rainures.
À la fin de cette procédure, vérifiez
si la porte du meuble ferme
correctement.
11. Fixez le cache (Hd) sur le
petit carré Hb) jusqu'à ce qu'il
s'enclenche en place.
Page 61

61
Page 62

62
N/AE/58. (08.)
Page 63

63
Page 64

AEG Hausgeräte GmbH
Postfach 1036
D-90327 Nürnberg
Sie können Ersatzteile, Zubehör und Pflegemittel on-line bestellen bei
http://www.aeg-electrolux.de
© Copyright by AEG
Technische Änderungen vorbehalten
200382182 -00- 3608
2008. 09. 04.
 Loading...