

Page 1
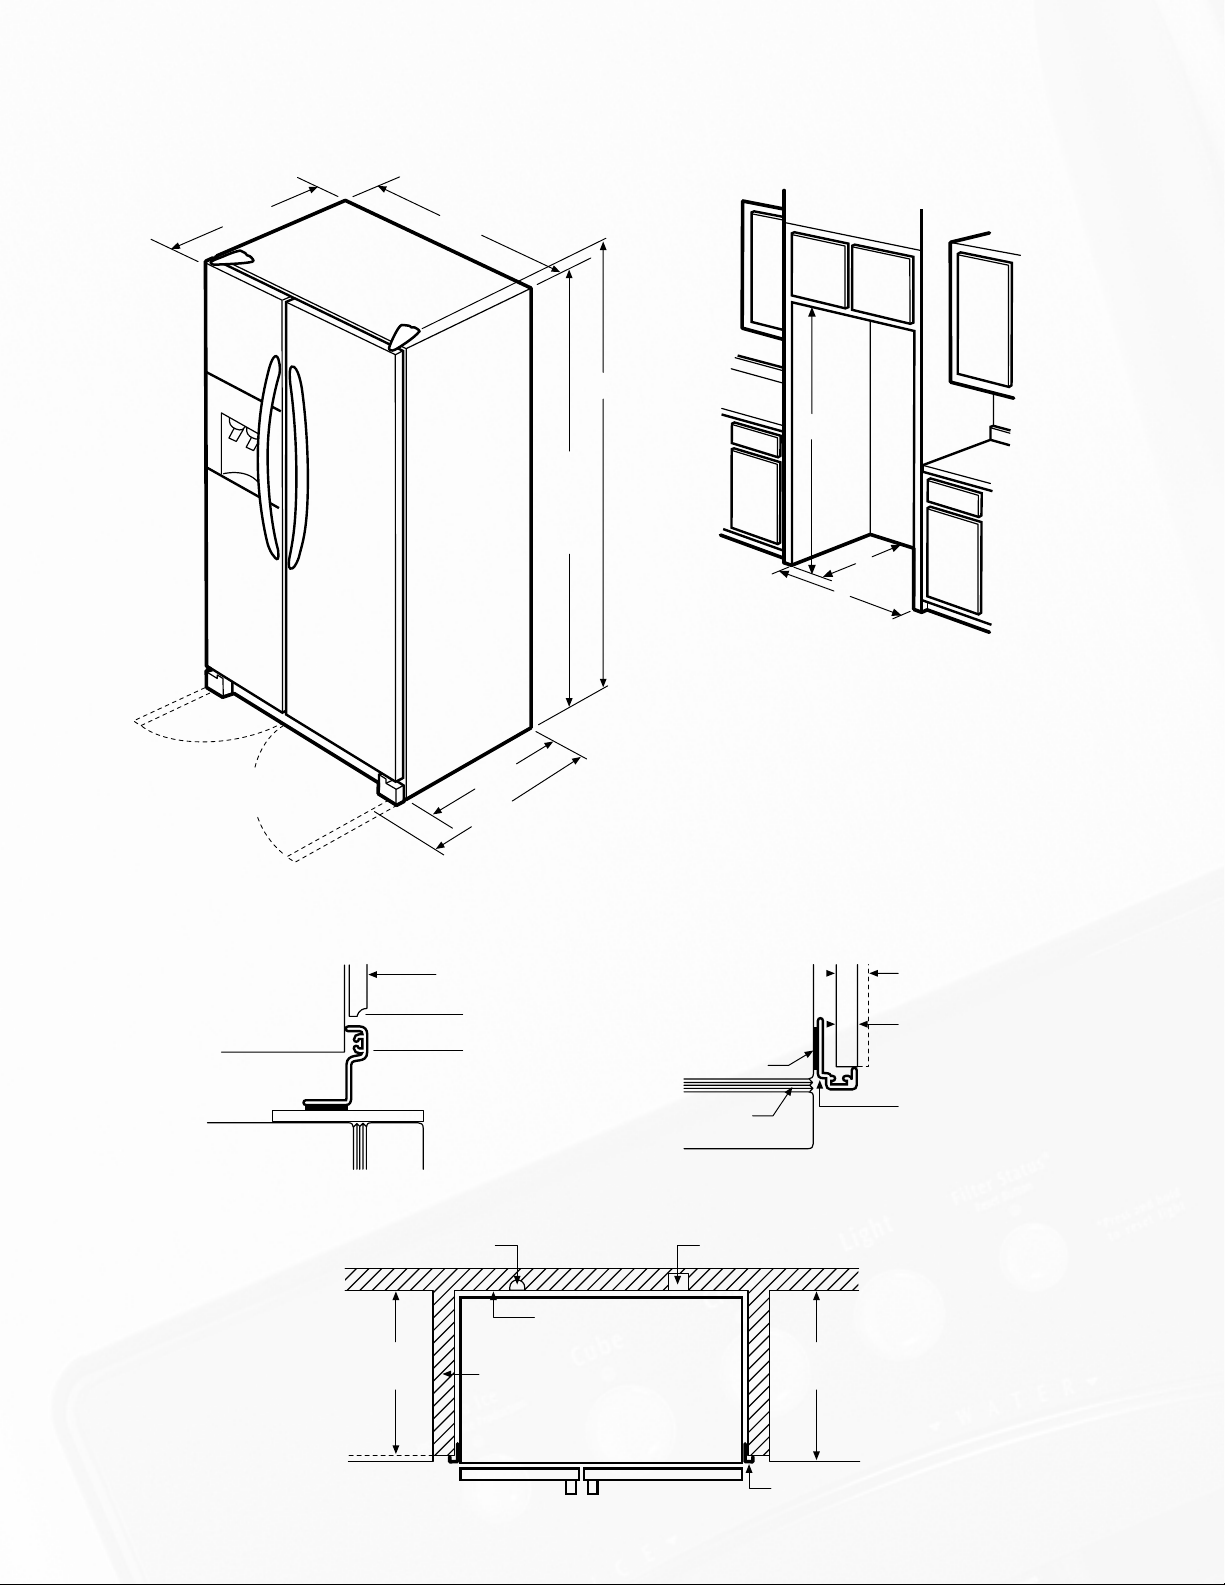
COUNTER-DEPTH REFRIGERATOR INSTALLATION
The dimension and cutout information is for planning purposes only.
Consult installation instructions packed with individual products for complete details.
267/8"
Allow at least 451/4" with
doors in 90° open position
5
35
/8"
5
/8"
23
293/8" to handle
extension
3
/16"
68
with
3
/8"
rollers
69
5
/16"
A
C
B
Rough-In Dimensions
1
/4"
With Collar
Trim Kit
1
(A) 70
/4"
1
(B) 36
/8"
1
(C) 24
/2"
Standard
(A) 70
(B) 36"
(C) 24"
COLLAR TRIM KIT INSTALLATION
Top Trim Piece
Overhead
Cabinet Door
1" min. Clearance
Refrigerator
Case
Recessed Water Line
7
/8" Airspace
5
24"
Cabinet
(
1
24
/2" Side Panel, 1/2" min. width
(with collar trim)
24" Side Panel, 1/2" min. width
(without collar trim)
Side Trim Piece
Magnetic Tape
Door Gasket
/8" gap + 1/4" wall plates)
Refrigerator
Case
Recessed Electrical Outlet
25"
Countertop
Side Trim Piece
3
/4" Cabinet
Side Panel
1
/2" Cabinet
Side Panel
Side trim must be
installed flush with
the gasket contact
surface on the
refrigerator case.
Page 2
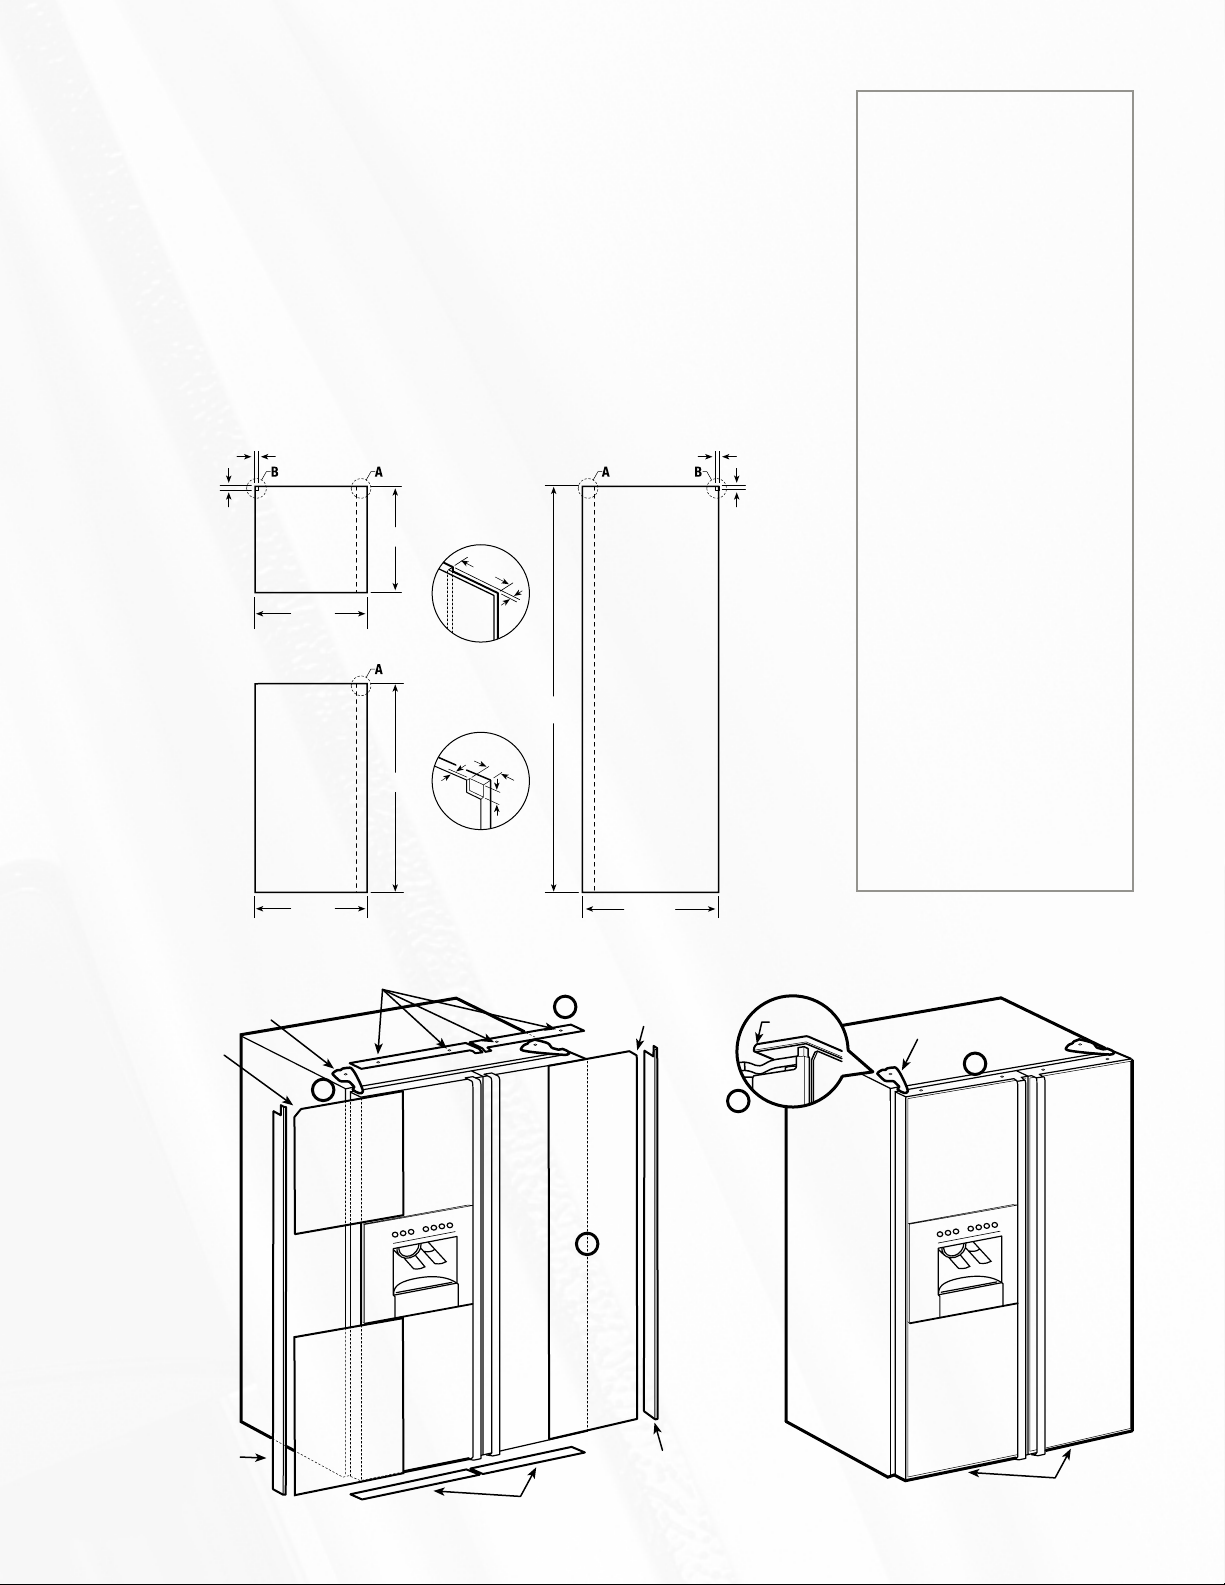
DOOR PANEL KIT INSTALLATION
Consult installation instructions packed with individual products for complete details.
The following instructions outline the procedure to install Decorator Door Panel Kits or custom
panels on your Frigidaire® Counter-Depth Refrigerator Trim Kit models.
Decorator Door Panel Kits Available:
White (PK23CDW), Black (PK23CDB) or Stainless Steel (PK23CDS).
For Custom Door Panels:
Order your own custom door panels to match cabinetry or other décor. Panels up to 1/4"
thick will fit door frames with no special preparation. Local shop-built or custom cabinet supplier
may fabricate custom 1/4" panels. Refer to drawings below for exact panel dimensions and
specifications. Edges must be routed to 1/4".
Note: When installing custom panels less than1/4", inser t spacer panel behind door panel for
proper fit (spacer panel supplied with Decorator Door Panel Kit). Combined thickness of panels
must total1/4".
Custom Door Panel Dimensions
1
/4"
5
/16"
Upper
Freezer Door
Panel
1813/16"
(Door panels
illustrated showing
front view.)
Fresh
Food Door
Panel
5
/16"
1
/4"
15/8"
1
/4"
15
Lower
Freezer Door
Panel
34
3
/16"
3
A
Note: Route
out (A) for full
length of panel
on back side.
B
/32"
Note: Route
out (B) on front
side of panel.
1
/8"
6515/16"
5
/16"
1
/4"
INSTALLATION
INSTRUCTIONS
Read each step thoroughly before
proceeding.
Tools: #2 Philips Screwdriver
Procedure:
Step 1 – Loosen top trim on
freezer and fresh food doors.
Step 2 – Remove side trim.
Swing bottom of side trim
outward away from door to break
magnetic attachment. Lower side
trim to pull free of top trim.
Step 3 – Insert panels.
Remove protective film from
panels before insertion.
Upper Freezer Panel and Fresh
Food Panel – Cutout notch in
panel is positioned to upper
outside of door. Lift top trim up
1/4" and carefully push upper
freezer panel in until it slides into
slot behind door handle.
Lower Freezer Panel – Carefully
push panel in until it slides into
slot behind door handle.
Step 4 – Install side trim.
Slip upper front corner of side
trim under top trim and swing
into position. Make sure trim seats
behind panel and in front of
Ice & Water dispenser. Magnetic
attraction will hold trim in place.
Step 5 – Tighten screws on
top trim.
Top Trim Screws
Hinge Cover Screw
Cutout
Side Trim
1
/4"
15
2
Freezer Door
Freezer Door
Upper
Panel
Lower
Panel
Bottom Trim
7
/8"
19
Door Panel Installation
1
Cutout
Fresh
Food Door
Panel
3
Side Trim
2
4
Top Trim
Hinge Cover Screw
5
Bottom Trim
 Loading...