

Page 1

EUT1105AW1
................................................ .............................................
EN FREEZER USER MANUAL 2
DE GEFRIERGERÄT BENUTZERINFORMATION 17
ES CONGELADOR MANUAL DE
INSTRUCCIONES
34
Page 2
www.electrolux.com
2
CONTENTS
1. SAFETY INSTRUCTIONS . . . . . . . . . . . . . . . . . . . . . . . . . . . . . . . . . . . . . . . . . . . . . . . . . . 3
2. PRODUCT DESCRIPTION . . . . . . . . . . . . . . . . . . . . . . . . . . . . . . . . . . . . . . . . . . . . . . . . . 5
3. CONTROL PANEL . . . . . . . . . . . . . . . . . . . . . . . . . . . . . . . . . . . . . . . . . . . . . . . . . . . . . . . 6
4. FIRST USE . . . . . . . . . . . . . . . . . . . . . . . . . . . . . . . . . . . . . . . . . . . . . . . . . . . . . . . . . . . . . 7
5. DAILY USE . . . . . . . . . . . . . . . . . . . . . . . . . . . . . . . . . . . . . . . . . . . . . . . . . . . . . . . . . . . . . 7
6. HELPFUL HINTS AND TIPS . . . . . . . . . . . . . . . . . . . . . . . . . . . . . . . . . . . . . . . . . . . . . . . . 7
7. CARE AND CLEANING . . . . . . . . . . . . . . . . . . . . . . . . . . . . . . . . . . . . . . . . . . . . . . . . . . . . 8
8.
WHAT TO DO IF… . . . . . . . . . . . . . . . . . . . . . . . . . . . . . . . . . . . . . . . . . . . . . . . . . . . . . . 10
9. INSTALLATION . . . . . . . . . . . . . . . . . . . . . . . . . . . . . . . . . . . . . . . . . . . . . . . . . . . . . . . . . 11
10.
NOISE . . . . . . . . . . . . . . . . . . . . . . . . . . . . . . . . . . . . . . . . . . . . . . . . . . . . . . . . . . . . . . . . 14
11. TECHNICAL DATA . . . . . . . . . . . . . . . . . . . . . . . . . . . . . . . . . . . . . . . . . . . . . . . . . . . . . . 15
WE’RE THINKING OF YOU
Thank you for purchasing an Electrolux appliance. You’ve chosen a product that brings with it
decades of professional experience and innovation. Ingenious and stylish, it has been designed
with you in mind. So whenever you use it, you can be safe in the knowledge that you’ll get great
results every time.
Welcome to Electrolux.
Visit our website for:
Get usage advice, brochures, trouble shooter, service information:
www.electrolux.com
Register your product for better service:
www.electrolux.com/productregistration
Buy Accessories, Consumables and Original spare parts for your appliance:
www.electrolux.com/shop
CUSTOMER CARE AND SERVICE
We recommend the use of original spare parts.
When contacting Service, ensure that you have the following data available.
The information can be found on the rating plate. Model, PNC, Serial Number.
Warning / Caution-Safety information
General information and tips
Environmental information
Subject to change without notice.
Page 3

ENGLISH 3
1.
SAFETY INSTRUCTIONS
In the interest of your safety and to ensure
the correct use, before installing and first
using the appliance, read this user manual
carefully, including its hints and warnings.
To avoid unnecessary mistakes and accidents, it is important to ensure that all
people using the appliance are thoroughly
familiar with its operation and safety features. Save these instructions and make
sure that they remain with the appliance if
it is moved or sold, so that everyone using
it through its life will be properly informed
on appliance use and safety.
For the safety of life and property keep
the precautions of these user's instructions as the manufacturer is not responsible for damages caused by omission.
1.1 Children and vulnerable
people safety
• This appliance is not intended for use
by persons (including children) with reduced physical, sensory or mental capabilities, or lack of experience and
knowledge, unless they have been given supervision or instruction concerning
use of the appliance by a person responsible for their safety.
Children should be supervised to ensure that they do not play with the appliance.
• Keep all packaging well away from children. There is risk of suffocation.
• If you are discarding the appliance pull
the plug out of the socket, cut the connection cable (as close to the appliance
as you can) and remove the door to
prevent playing children to suffer electric shock or to close themselves into it.
• If this appliance featuring magnetic
door seals is to replace an older appliance having a spring lock (latch) on the
door or lid, be sure to make that spring
lock unusable before you discard the
old appliance. This will prevent it from
becoming a death trap for a child.
1.2 General safety
WARNING!
Keep ventilation openings, in the appliance enclosure or in the built-in structure,
clear of obstruction.
• The appliance is intended for keeping
foodstuff and/or beverages in a normal
household and similar applications such
as:
– staff kitchen areas in shops, offices
and other working environments;
– farm houses and by clients in hotels,
motels and other residential type environments;
– bed and breakfast type environ-
ments;
– catering and similar non-retail appli-
cations.
• Do not use a mechanical device or any
artificial means to speed up the thawing
process.
• Do not use other electrical appliances
(such as ice cream makers) inside of refrigerating appliances, unless they are
approved for this purpose by the manufacturer.
• Do not damage the refrigerant circuit.
• The refrigerant isobutane (R600a) is
contained within the refrigerant circuit of
the appliance, a natural gas with a high
level of environmental compatibility,
which is nevertheless flammable.
During transportation and installation of
the appliance, be certain that none of
the components of the refrigerant circuit become damaged.
If the refrigerant circuit should become
damaged:
– avoid open flames and sources of ig-
nition
– thoroughly ventilate the room in
which the appliance is situated
• It is dangerous to alter the specifications or modify this product in any way.
Any damage to the cord may cause a
short-circuit, fire and/or electric shock.
WARNING!
Any electrical component (power
cord, plug, compressor) must be
replaced by a certified service
agent or qualified service personnel to avoid hazard.
Page 4
www.electrolux.com
4
• This appliance is heavy. Care should be
• Do not remove nor touch items from
• Avoid prolonged exposure of the appli-
• Bulb lamps (if foreseen) used in this ap-
1.3 Daily Use
• Do not put hot pot on the plastic parts
• Do not store flammable gas and liquid
• Do not place food products directly
• Frozen food must not be re-frozen once
• Store pre-packed frozen food in ac-
1.
Power cord must not be lengthened.
2.
Make sure that the power plug is
not squashed or damaged by the
back of the appliance. A squashed
or damaged power plug may overheat and cause a fire.
3.
Make sure that you can come to
the mains plug of the appliance.
4.
Do not pull the mains cable.
5.
If the power plug socket is loose,
do not insert the power plug. There
is a risk of electric shock or fire.
6.
You must not operate the appliance without the lamp cover (if
foreseen) of interior lighting.
taken when moving it.
the freezer compartment if your hands
are damp/wet, as this could cause skin
abrasions or frost/freezer burns.
ance to direct sunlight.
pliance are special purpose lamps selected for household appliances use
only. They are not suitable for household room illumination.
WARNING!
Do not place frozen food on the
worktop since cold and vapour
may produce water condensate
within its inner side. The resulting
drip liquid may cause malfunctions. Therefore, do not place nor
leave frozen items of any kind on
the worktop.
in the appliance.
in the appliance, because they may explode.
against the air outlet on the rear wall. (If
the appliance is Frost Free)
it has been thawed out.
cordance with the frozen food manufacturer's instructions.
• Appliance's manufacturers storage recommendations should be strictly adhered to. Refer to relevant instructions.
• Do not place carbonated or fizzy drinks
in the freezer compartment as it creates
pressure on the container, which may
cause it to explode, resulting in damage
to the appliance.
• Ice lollies can cause frost burns if consumed straight from the appliance.
1.4 Care and cleaning
• Before maintenance, switch off the appliance and disconnect the mains plug
from the mains socket.
• Do not clean the appliance with metal
objects.
• Do not use sharp objects to remove
frost from the appliance. Use a plastic
scraper.
• Never use a hair drier or other heating
appliances to speed up defrosting. Excessive heat may damage the plastic
interior, and humidity could enter the
electric system making it live.
1.5 Installation
For electrical connection carefully
follow the instructions given in
specific paragraphs.
• Unpack the appliance and check if
there are damages on it. Do not connect the appliance if it is damaged. Report possible damages immediately to
the place you bought it. In that case retain packing.
• It is advisable to wait at least four hours
before connecting the appliance to allow the oil to flow back in the compressor.
• Adequate air circulation should be
around the appliance, lacking this leads
to overheating. To achieve sufficient
ventilation follow the instructions relevant to installation.
• Wherever possible the back of the
product should be against a wall to
avoid touching or catching warm parts
(compressor, condenser) to prevent
possible burn.
• The appliance must not be located
close to radiators or cookers.
Page 5

• Make sure that the mains plug is accessible after the installation of the appliance.
• Connect to potable water supply only (If
a water connection is foreseen).
1.6 Service
• Any electrical work required to do the
servicing of the appliance should be
carried out by a qualified electrician or
competent person.
• This product must be serviced by an
authorized Service Centre, and only
genuine spare parts must be used.
1.7 Environment Protection
This appliance does not contain
gasses which could damage the
2. PRODUCT DESCRIPTION
ozone layer, in either its refrigerant
circuit or insulation materials. The
appliance shall not be discarded
together with the urban refuse and
rubbish. The insulation foam contains flammable gases: the appliance shall be disposed according
to the applicable regulations to
obtain from your local authorities.
Avoid damaging the cooling unit,
especially at the rear near the heat
exchanger. The materials used on
this appliance marked by the sym-
are recyclable.
bol
1
ENGLISH 5
Control panel
1
Freezer drawer
2
Storage drawer
3
2
3
6
5
Storage drawer
4
Defrost water drain
5
Rating plate
6
4
Page 6

www.electrolux.com
6
3. CONTROL PANEL
1
Green Indicator Light
1
Red Indicator Light
2
Temperature Regulator
3
Half Loaded position
4
Full Loaded position
5
3.1 Switching on
1.
Allow the appliance to stand for 4
hours after installation.
2.
Insert the plug into the wall socket.
3.
Turn the Temperature Regulator
clockwise to the Full Loaded position.
4.
The Green Indicator Light will light up
and remain lit until the appliance is
switched off at the mains.
5.
Leave to run for 4 hours to allow the
correct temperature to be reached
before placing food inside.
Yellow Indicator Light lights in the
switched-on state of the Freezer
Switch.
6.
The Red Indicator Light will also illuminate until the correct temperature is
reached.
A few hours after starting up the Red
Indicator Light will go out to show
that the correct temperature has been
reached for the setting chosen and
will stay out to indicate that everything
is in order. It will come on if the freezer temperature rises unduly for instance, after opening the freezer door
or placing food inside the cabinet, but
the light should go out again when
2 3 4 5
0
the temperature returns to the correct
storage level.
7.
When the appliance has reached the
set temperature (the Red Indicator
Light has gone out) adjust the Temperature Regulator according to the
quantity of the stored foods.
3.2 Switching off
1.
To turn off the appliance, turn the
Temperature Regulator to the "O" position.
2.
To disconnect the appliance from the
power disconnect the mains plug
from the wall socket.
3.3 Temperature regulation
The temperature within the appliance is
controlled by the Temperature Regulator
situated on the control panel.
To operate the appliance, proceed as follows:
• turn the Temperature Regulator toward
lower settings to obtain the minimum
coldness.
• turn the Temperature Regulator toward
higher settings to obtain the maximum
coldness.
In case of freezing less food volumes, the Half Loaded setting is
the most suitable.
In case of freezing much food volumes, the Full Loaded setting is
the most suitable.
Page 7

4. FIRST USE
ENGLISH 7
4.1 Cleaning the interior
Before using the appliance for the first
time, wash the interior and all internal accessories with lukewarm water and some
neutral soap so as to remove the typical
5. DAILY USE
5.1 Freezing fresh food
The freezer (top) compartment is suitable
for freezing fresh food and storing frozen
and deep-frozen food for a long time.
To freeze fresh food place it in the freezing (top) compartment and leave it there
for 24 hours
Move frozen food from the top (freezer)
compartment into the other two compartments (storing compartments). For maximum freezing performance remove the
top drawer (if the drawer is foreseen) and
then place the foods to be frozen directly
on the evaporator. In case of freezing
smaller food volumes you do not need to
remove the drawer.
The maximum amount of food that can be
frozen in 24 hours is specified on the rat-
ing plate, a label located on the inside of
the appliance.
The freezing process lasts 24 hours: during this period do not add other food to
be frozen.
smell of a brand-new product, then dry
thoroughly.
Do not use detergents or abrasive
powders, as these will damage
the finish.
compartment let the appliance run at least
8 hours on the higher settings.
In the event of accidental defrosting, for example due to a power
failure, if the power has been off
for longer than the value shown in
the technical characteristics chart
under "rising time", the defrosted
food must be consumed quickly
or cooked immediately and then
re-frozen (after cooling).
5.3 Thawing
Deep-frozen or frozen food, prior to being
used, can be thawed at room temperature.
Small pieces may even be cooked still frozen, directly from the freezer: in this case,
cooking will take longer.
5.2 Storage of frozen food
When first starting-up or after a period out
of use, before putting the products in the
6. HELPFUL HINTS AND TIPS
6.1 Normal Operating Sounds
• You may hear a faint gurgling and a
bubbling sound when the refrigerant is
pumped through the coils or tubing.
This is correct.
• When the compressor is on, the refrigerant is being pumped around and you
will hear a whirring sound and a pulsat-
ing noise from the compressor. This is
correct.
• The thermic dilatation might cause a
sudden cracking noise. It is natural, not
dangerous physical phenomenon. This
is correct.
• When the compressor switches on or
switches off, you will hear a faint "click"
Page 8
www.electrolux.com
8
6.2 Hints for freezing
To help you make the most of the freezing
process, here are some important hints:
• the maximum quantity of food which
• the freezing process takes 24 hours.
• only freeze top quality, fresh and thor-
• prepare food in small portions to enable
• wrap up the food in aluminium foil or
• do not allow fresh, unfrozen food to
• lean foods store better and longer than
of the temperature regulator. This is
correct.
can be frozen in 24 hrs. is shown on
the rating plate;
No further food to be frozen should be
added during this period;
oughly cleaned, foodstuffs;
it to be rapidly and completely frozen
and to make it possible subsequently to
thaw only the quantity required;
polythene and make sure that the
packages are airtight;
touch food which is already frozen, thus
avoiding a rise in temperature of the latter;
fatty ones; salt reduces the storage life
of food;
• water ices, if consumed immediately after removal from the freezer compartment, can possibly cause the skin to be
freeze burnt;
• it is advisable to show the freezing in
date on each individual pack to enable
you to keep tab of the storage time.
6.3 Hints for storage of frozen
food
To obtain the best performance from this
appliance, you should:
• make sure that the commercially frozen
foodstuffs were adequately stored by
the retailer;
• be sure that frozen foodstuffs are transferred from the foodstore to the freezer
in the shortest possible time;
• not open the door frequently or leave it
open longer than absolutely necessary;
• once defrosted, food deteriorates rapidly and cannot be refrozen;
• do not exceed the storage period indicated by the food manufacturer.
7. CARE AND CLEANING
CAUTION!
Unplug the appliance before carrying out any maintenance operation.
This appliance contains hydrocarbons in its cooling unit; maintenance and recharging must therefore only be carried out by authorized technicians.
7.1 Periodic cleaning
The equipment has to be cleaned regularly:
• clean the inside and accessories with
lukewarm water and some neutral
soap.
• regularly check the door seals and wipe
clean to ensure they are clean and free
from debris.
• rinse and dry thoroughly.
Do not pull, move or damage any
pipes and/or cables inside the
cabinet.
Never use detergents, abrasive
powders, highly perfumed cleaning products or wax polishes to
clean the interior as this will damage the surface and leave a
strong odour.
Clean the condenser (black grill) and the
compressor at the back of the appliance
with a brush. This operation will improve
the performance of the appliance and
save electricity consumption.
Take care of not to damage the
cooling system.
Page 9
7.2 Defrosting the freezer
A certain amount of frost will always form
on the freezer shelves and around the top
compartment.
Defrost the freezer when the frost layer
reaches a thickness of about 3-5 mm.
About 12 hours prior to defrosting, set the Temperature Regulator toward higher settings , in order to build up sufficient chill reserve for the interruption in operation.
To remove the frost, follow the instructions below:
1.
Switch off the appliance and disconnect the mains plug from the mains
socket.
2.
Remove any stored food, wrap it in
several layers of newspaper and put it
in a cool place.
CAUTION!
Do not touch frozen goods with
wet hands. Hands can freeze to
the goods.
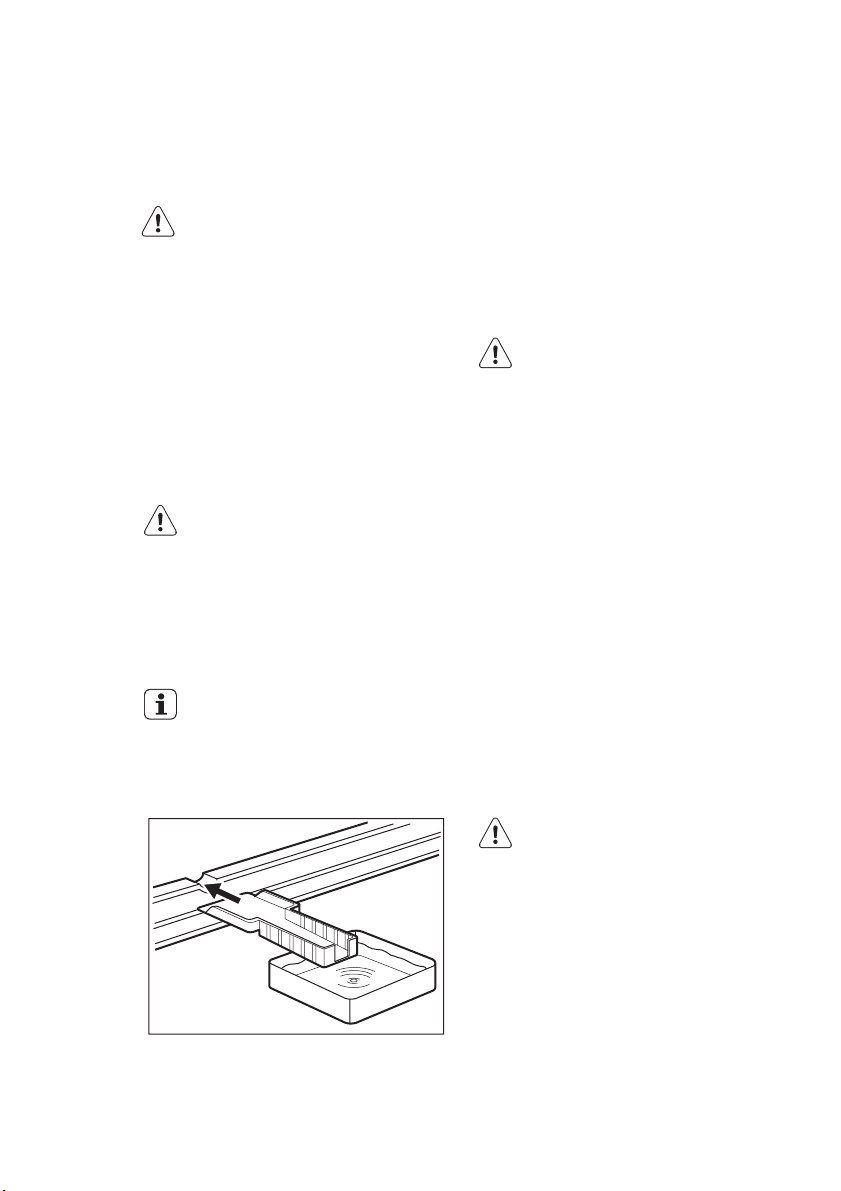
3.
Leave the door open and insert the
plastic scraper in the appropriate
seating at the bottom centre, placing
a basin underneath to collect the defrost water.
In order to speed up the defrosting process, place a pot of warm
water in the freezer compartment.
In addition, remove pieces of ice
that break away before defrosting
is complete.
ENGLISH 9
4.
When defrosting is completed, dry
the interior thoroughly and keep the
scraper for future use.
5.
Switch on the appliance.
6.
Turn the Temperature Regulator to
the Full Loaded position and leave to
run for at least 8 hours.
7.
After the Red Indicator Light has gone
out, reload the previously removed
food into the compartments.
8.
Adjust the Temperature Regulator according to the quantity of the stored
foods.
WARNING!
Never use sharp metal tools to
scrape off frost from the evaporator as you could damage it.
Do not use a mechanical device
or any artificial means to speed up
the thawing process other than
those recommended by the manufacturer.
A temperature rise of the frozen
food packs, during defrosting,
may shorten their safe storage life.
7.3 Periods of non-operation
When the appliance is not in use for long
periods, take the following precautions:
1.
disconnect the appliance from electricity supply
2.
remove all food
3.
defrost and clean the appliance and
all accessories
4.
leave the door/doors open to prevent
unpleasant smells.
If the cabinet will be kept on, ask
somebody to check it once in a
while to prevent the food inside
from spoiling in case of a power
failure.
Page 10

www.electrolux.com
10
8. WHAT TO DO IF…
WARNING!
Before troubleshooting, disconnect the mains plug from the
mains socket.
Only a qualified electrician or competent person must do the troubleshooting that is not in this manual.
There are some sounds during
normal use (compressor, refrigerant circulation).
The appliance operates discontinuously, so the stopping of compressor does not mean being no
current. That is why you must not
touch the electrical parts of the
appliance before breaking the circuit.
Problem Possible cause Solution
The appliance is
noisy
The appliance is not supported properly
Check if the appliance
stands stable (all the four
feet should be on the floor)
The compressor operates continually
Doors are not shut proper-
The thermostatic control is
set incorrectly
ly or do not close tightly
Set a warmer temperature
Check if the doors close
well and the gaskets are
undamaged and clean
The door has been
opened too frequently
Large quantities of food to
be frozen were put in at
the same time
Food placed in the appli-
ance was too warm
The room temperature is
too high.
There is too much
frost and ice
Products are not wrapped
properly
Doors are not shut proper-
ly or do not close tightly
Do not leave the door open
longer than necessary
Wait some hours and then
check the temperature
again
Allow food to cool to room
temperature before storing
Decrease the room temperature.
Wrap the products better
Check if the doors close
well and the gaskets are
undamaged and clean
The Temperature regulator
Set a warmer temperature
may be set incorrectly
It is too warm in the
freezer
The door does not close
Large quantities of food to
Temperature regulator
may be set incorrectly
tightly or it is not shut
properly
be frozen were put in at
the same time
Set a lower temperature
Check if the door closes
well and the gasket is undamaged and clean
Insert smaller quantities of
food to be frozen at any
one time.
Page 11
Problem Possible cause Solution
Food placed in the appli-
ance was too warm
Products to be frozen are
placed too closely to each
other
It is too cold inside
the freezer
The appliance does
not work at all. Nei-
Temperature regulator
may be set incorrectly
Plug is not connected to
the mains socket properly
Allow food to cool to room
temperature before storing.
Place the products in a way
so that cold air could circulate among them
Set a warmer temperature
Connect the mains plug
properly
ther cooling nor
lighting works
Power does not reach the
appliance
Try connecting another
electrical device to the
power outlet
The appliance is not
Switch on the appliance
switched on
There is no voltage in the
Call an electrician
mains socket (try to connect another appliance into it)
The appliance does
not cool at all
There is no voltage in the
Plug is not connected to
the mains socket properly
Connect the mains plug
properly
Call an electrician
mains socket (try to connect another appliance into it)
The appliance is not
Switch on the appliance
switched on
3.
8.1 Closing the door
1.
Clean the door gaskets.
2.
If necessary, adjust the door. Refer to
"Installation".
If necessary, replace the defective
door gaskets. Contact the Service
Center.
ENGLISH 11
9. INSTALLATION
WARNING!
Read the "Safety Information"
carefully for your safety and correct operation of the appliance
before installing the appliance.
9.1 Positioning
This appliance should be installed in a dry,
well ventilated indoor where the ambient
temperature corresponds to the climate
class indicated on the rating plate of the
appliance:
Page 12

www.electrolux.com
12
Climate
class
SN +10°C to + 32°C
N +16°C to + 32°C
ST +16°C to + 38°C
T +16°C to + 43°C
9.2 Levelling
9.3 Location
Ambient temperature
100 mm
15 mm 15 mm
Some functional problems might occur for
some types of models when operating
outside of that range. The correct operation can only be guaranteed within the
specified temperature range. If you have
any doubts regarding where to install the
appliance, please turn to the vendor, to
our customer service or to the nearest
Service Centre
When placing the appliance ensure that it
stands level. This can be achieved by two
adjustable feet at the bottom in front.
The appliance should be installed well away
from sources of heat such as radiators, boilers, direct sunlight etc. Ensure that air can
circulate freely around the back of the cabinet.To ensure best performance, if the appliance is positioned below an overhanging
wall unit, the minimum distance between
the top of the cabinet and the wall unit must
be at least 100 mm . Ideally, however, the
appliance should not be positioned below
overhanging wall units. Accurate levelling is
ensured by one or more adjustable feet at
the base of the cabinet. If the cabinet is
placed in a corner and the side with the
hinges facing the wall, the distance between
the wall and the cabinet must be at least 10
mm to allow the door to open enough so
that the shelves can be removed.
WARNING!
It must be possible to disconnect
the appliance from the mains power
supply; the plug must therefore be
easily accessible after installation.
Page 13

9.4 Door reversibility
ENGLISH 13
To carry out the following operations, we suggest that this be
made with another person that will
keep a firm hold on the doors of
the appliance during the operations.
To change the opening direction of the
door, do these steps:
• Remove the plug from the power socket.
• Tilt back the appliance carefully so that
the compressor cannot touch the floor.
• Unscrew the left foot.
• Remove the lower door hinge by unscrewing the 2 retaining screws.
• Remove the hinge pin from the bottom
of the door.
• Slot the hinge pin into the hole in the
hinge plate.
• Take the door off.
• Refit the upper hinge pin into the opposite location.
• Fit the door in place on the hinge pin.
• Slot the hinge pin into the hole in the
hinge plate and relocate the hinge assembly to the opposite location and refit using the retaining screws.
• Refit the bottom hinge plate assembly
on the opposite side, taking care that
the edge of the door is parallel with the
side of the cabinet.
• Remove and install the handle (if foreseen)on the opposite side.
• Reposition, level the appliance, wait for
at least four hours and then connect it
to the power socket.
Do a final check to make sure that:
• All screws are tightened.
1
2
• The door opens and closes correctly.
Page 14

www.electrolux.com
14
If the ambient temperature is cold (i.e. in
Winter), the gasket may not fit perfectly to
the cabinet. In that case, wait for the natural fitting of the gasket.
In case you do not want to carry out the
above mentioned operations, contact the
nearest After Sales Service Force. The After Sales Service specialist will carry out
the reversibility of the doors at your cost.
9.5 Electrical connection
Before plugging in, ensure that the voltage and frequency shown on the rating
plate correspond to your domestic power
supply.
The appliance must be earthed. The power supply cable plug is provided with a
contact for this purpose. If the domestic
10. NOISE
There are some sounds during normal
running (compressor, refrigerant circulation).
power supply socket is not earthed, connect the appliance to a separate earth in
compliance with current regulations, consulting a qualified electrician.
The manufacturer declines all responsibility if the above safety precautions are not
observed.
This appliance complies with the E.E.C.
Directives.
SSSRR
R!
HISSS!
CLICK!
BRRR!
OK
SSSRRR!
SSSRRR!
BLUBB!
CLICK!
CRACK!
CLICK!
Page 15

ENGLISH 15
HISSS!
BLUBB!
11. TECHNICAL DATA
HISSS!
BLUBB!
BRRR!
BRRR!
CRACK!CRACK!
Dimension
Height 850 mm
Width 550 mm
Depth 612 mm
Rising Time 22 h
Voltage 230-240 V
Frequency 50 Hz
The technical information are situated in
the rating plate on the internal left side of
the appliance and in the energy label.
Page 16

www.electrolux.com
16
12. ENVIRONMENT CONCERNS
Recycle the materials with the symbol
. Put the packaging in applicable
containers to recycle it.
Help protect the environment and human
health and to recycle waste of electrical
and electronic appliances. Do not dispose
appliances marked with the symbol
with the household waste. Return the
product to your local recycling facility or
contact your municipal office.
Page 17

DEUTSCH 17
INHALT
1. SICHERHEITSHINWEISE . . . . . . . . . . . . . . . . . . . . . . . . . . . . . . . . . . . . . . . . . . . . . . . . . 18
2. GERÄTEBESCHREIBUNG . . . . . . . . . . . . . . . . . . . . . . . . . . . . . . . . . . . . . . . . . . . . . . . . 21
3. BEDIENFELD . . . . . . . . . . . . . . . . . . . . . . . . . . . . . . . . . . . . . . . . . . . . . . . . . . . . . . . . . . 21
4. ERSTE INBETRIEBNAHME . . . . . . . . . . . . . . . . . . . . . . . . . . . . . . . . . . . . . . . . . . . . . . . . 22
5. TÄGLICHER GEBRAUCH . . . . . . . . . . . . . . . . . . . . . . . . . . . . . . . . . . . . . . . . . . . . . . . . . 22
6. PRAKTISCHE TIPPS UND HINWEISE . . . . . . . . . . . . . . . . . . . . . . . . . . . . . . . . . . . . . . . . 23
7. REINIGUNG UND PFLEGE . . . . . . . . . . . . . . . . . . . . . . . . . . . . . . . . . . . . . . . . . . . . . . . . 24
8.
WAS TUN, WENN … . . . . . . . . . . . . . . . . . . . . . . . . . . . . . . . . . . . . . . . . . . . . . . . . . . . . 26
9. MONTAGE . . . . . . . . . . . . . . . . . . . . . . . . . . . . . . . . . . . . . . . . . . . . . . . . . . . . . . . . . . . . 28
10.
GERÄUSCH . . . . . . . . . . . . . . . . . . . . . . . . . . . . . . . . . . . . . . . . . . . . . . . . . . . . . . . . . . . 31
11. TECHNISCHE DATEN . . . . . . . . . . . . . . . . . . . . . . . . . . . . . . . . . . . . . . . . . . . . . . . . . . . . 32
WIR DENKEN AN SIE
Vielen Dank, dass Sie sich für ein Electrolux Gerät entschieden haben. Sie haben ein Produkt
gewählt, hinter dem eine jahrzehntelange professionelle Erfahrung und Innovation steht. Bei der
Entwicklung dieses großartigen und eleganten Geräts haben wir an Sie gedacht. So haben Sie
bei jedem Gebrauch die Gewissheit, dass Sie stets großartige Ergebnisse erzielen werden.
Willkommen bei Electrolux.
Besuchen Sie uns auf unserer Website, um:
Anwendungshinweise, Prospekte, Fehlerbehebungs- und Service-Informationen zu
erhalten:
www.electrolux.com
Ihr erworbenes Produkt zu registrieren, um den besten Service dafür zu gewährleisten:
www.electrolux.com/productregistration
Zubehör, Verbrauchsmaterial und Original-Ersatzteile für Ihr Gerät zu erwerben:
www.electrolux.com/shop
KUNDENDIENST UND -BETREUUNG
Bitte verwenden Sie ausschließlich Original-Ersatzteile für Ihre Produkte.
Halten Sie folgende Angaben bereit, wenn Sie sich an den Kundendienst wenden
(diese Informationen finden Sie auf dem Typenschild): Modell, Produktnummer (PNC),
Seriennummer.
Warnungs-/ Sicherheitshinweise.
Allgemeine Hinweise und Ratschläge
Hinweise zum Umweltschutz
Änderungen vorbehalten.
Page 18

www.electrolux.com
18
1.
SICHERHEITSHINWEISE
Lesen Sie zu Ihrer Sicherheit und für eine
optimale Nutzung des Geräts vor der
Montage und dem ersten Gebrauch das
vorliegende Benutzerhandbuch einschließlich der Ratschläge und Warnungen aufmerksam durch. Es ist wichtig,
dass zur Vermeidung von Fehlern und Unfällen alle Personen, die das Gerät benutzen, mit der Bedienung und den Sicherheitsvorschriften vertraut sind. Heben Sie
die Gebrauchsanleitung gut auf und übergeben Sie sie bei einem Weiterverkauf
des Geräts dem neuen Besitzer, so dass
jeder während der gesamten Lebensdauer des Geräts über Gebrauch und Sicherheit informiert ist.
Halten Sie sich zu Ihrer Sicherheit und
zum Schutz Ihres Eigentums strikt an die
Vorsichtsmaßnahmen der vorliegenden
Gebrauchsanweisung, da der Hersteller
bei Missachtung derselben von jeder Haftung freigestellt ist.
1.1 Sicherheit von Kindern und
hilfsbedürftigen Personen
• Das Gerät darf von Personen (einschließlich Kindern), deren physische,
sensorische Fähigkeiten und deren
Mangel an Erfahrung und Kenntnissen
einen sicheren Gebrauch des Gerätes
ausschließen nur unter Aufsicht oder
nach ausreichender Einweisung durch
eine verantwortungsbewusste Person
benutzt werden, die sicherstellt, dass
sie sich der Gefahren des Gebrauchs
bewusst sind.
Kinder müssen beaufsichtigt werden,
damit sie nicht am Gerät herumspielen
können.
• Halten Sie das Verpackungsmaterial
unbedingt von Kindern fern. Erstickungsgefahr!
• Ziehen Sie vor der Entsorgung des Gerätes den Netzstecker, schneiden Sie
das Netzkabel (so nah wie möglich am
Gerät) ab und entfernen Sie die Tür, so
dass spielende Kinder vor elektrischem
Schlag geschützt sind und sich nicht in
dem Gerät einschließen können.
• Wenn dieses Gerät mit magnetischer
Türdichtung ein älteres Modell mit
Schnappverschluss (Türlasche) an der
Tür oder auf dem Deckel ersetzt, machen Sie den Schnappverschluss vor
dem Entsorgen des Altgerätes unbrauchbar. So verhindern Sie, dass das
Gerät nicht zu einer Todesfalle für Kinder wird.
1.2 Allgemeine
Sicherheitshinweise
WARNUNG!
Achten Sie darauf, dass die Belüftungsöffnungen im Gehäuse um das Gerät oder in
der Einbaunische nicht blockiert sind.
• Das Gerät ist für die Aufbewahrung von
Lebensmitteln und/oder Getränken in
einem normalen Haushalt und ähnliche
Zwecke vorgesehen, wie z. B.:
– Personalküchenbereiche in Geschäf-
ten, Büros und anderen Arbeitsumfeldern
– Bauernhöfe und für Gäste in Hotels,
Motels und anderen wohnungsähnlichen Räumlichkeiten
– Pensionen und vergleichbaren Unter-
bringungsmöglichkeiten
– Catering und einzelhandelsfremde
Anwendungen
• Benutzen Sie keine mechanischen oder
sonstigen Hilfsmittel, um den Abtauprozess zu beschleunigen.
• Verwenden Sie keine anderen Elektrogeräte (wie Speiseeisbereiter) in Kühlgeräten, wenn solche Geräte nicht ausdrücklich vom Hersteller für diesen
Zweck zugelassen sind.
• Beschädigen Sie nicht den Kältekreislauf.
• Das Kältemittel Isobutan (R600a) im
Kältekreislauf des Gerätes ist ein natürliches und sehr umweltfreundliches Gas,
das jedoch leicht entflammbar ist.
Achten Sie beim Transport und bei der
Montage des Gerätes darauf, nicht die
Komponenten des Kältekreislaufs zu
beschädigen.
Bei einer eventuellen Beschädigung des
Kältekreislaufs:
Page 19

– Offene Flammen und Zündfunken
vermeiden
– Den Raum, in dem das Gerät instal-
liert ist, gut lüften
• Technische und anderweitige Änderungen am Gerät sind gefährlich. Ein defektes Netzkabel kann Kurzschlüsse
und einen Brand verursachen und/oder
zu Stromschlägen führen.
WARNUNG!
Elektrische Bauteile (Netzkabel,
Stecker, Kompressor) dürfen zur
Vermeidung von Gefahren nur
vom Kundendienst oder einer
Fachkraft ausgewechselt werden.
1.
Das Netzkabel darf nicht verlängert
werden.
2.
Vergewissern Sie sich, dass der
Netzstecker nicht von der Geräterückseite eingeklemmt oder beschädigt wird. Ein eingeklemmter
oder beschädigter Netzstecker
überhitzt und kann einen Brand
verursachen.
3.
Vergewissern Sie sich, dass der
Netzstecker des Gerätes frei zugänglich ist.
4.
Ziehen Sie nicht am Netzkabel.
5.
Stecken Sie den Netzstecker niemals in eine lockere Steckdose. Es
besteht Brand- und Stromschlaggefahr.
6.
Betreiben Sie das Gerät nicht ohne
Lampenabdeckung (falls vorhanden) für die Innenbeleuchtung.
• Dieses Gerät ist schwer. Seien Sie vorsichtig beim Transport.
• Entnehmen oder berühren Sie nie mit
nassen/feuchten Händen Tiefkühlgut,
da dies zu Hautverletzungen oder Kälteverbrennungen führen kann.
• Setzen Sie das Gerät nicht über eine
längere Zeit direkter Sonneneinstrahlung aus.
• Die Leuchtmittel (falls vorhanden) in diesem Gerät sind Speziallampen, die nur
für Haushaltsgeräte geeignet sind! Sie
eignen sich nicht zur Raumbeleuchtung.
DEUTSCH 19
WARNUNG!
Legen Sie keine tiefgefrorenen Lebensmittel auf die Arbeitsplatte,
da die Verdunstungskälte zur
Wasserkondensation in ihrem Inneren führen kann. Die tropfende
Flüssigkeit könnte Störungen verursachen. Stellen Sie daher keine
gefrorenen Lebensmittel auf die
Arbeitsplatte oder lassen sie darauf liegen.
1.3 Täglicher Gebrauch
• Stellen Sie keine heißen Töpfe auf die
Kunststoffteile des Gerätes.
• Lagern Sie keine feuergefährlichen Gase oder Flüssigkeiten in dem Gerät. Explosionsgefahr.
• Legen Sie Lebensmittel nicht direkt vor
den Luftauslass in der Rückwand.
(Wenn es ein No-Frost-Gerät ist)
• Ein aufgetautes Produkt darf nicht wieder eingefroren werden.
• Abgepackte Tiefkühlkost immer entsprechend den Herstellerangaben aufbewahren.
• Die Lagerempfehlungen des Geräteherstellers sollten strikt eingehalten werden. Halten Sie sich an die betreffenden
Anweisungen.
• Keine kohlensäurehaltigen Getränke
oder Sprudel in den Tiefkühlschrank
stellen, da der Druckanstieg in den Behältern zur Explosion führen und das
Gerät beschädigen kann.
• Eis am Stiel kann Kälteverbrennungen
verursachen, wenn es direkt nach der
Entnahme aus dem Gefrierschrank gegessen wird.
1.4 Reinigung und Pflege
• Schalten Sie vor Wartungsarbeiten immer das Gerät ab und ziehen Sie den
Netzstecker aus der Steckdose.
• Reinigen Sie das Gerät nicht mit Metallgegenständen.
• Verwenden Sie keine scharfen Gegenstände zum Entfernen von Reif und Eis
im Gerät. Verwenden Sie einen Kunststoffschaber.
• Verwenden Sie niemals einen Haartrockner oder andere Heizgeräte, um
das Abtauen zu beschleunigen. Starke
Page 20

www.electrolux.com
20
1.5 Montage
• Kontrollieren Sie nach dem Auspacken
• Lassen Sie das Gerät mindestens vier
• Ausreichenden Freiraum zur Luftzirkula-
• Das Gerät sollte zur Vermeidung von
• Das Gerät darf nicht in der Nähe von
• Vergewissern Sie sich, dass der Netz-
Hitze kann die Plastikteile im Innenraum
beschädigen und Feuchtigkeit kann in
das elektrische System eindringen, so
dass die Teile unter Spannung stehen.
Halten Sie sich für den elektrischen Anschluss strikt an die Anweisungen der betreffenden Abschnitte.
das Gerät auf eventuelle Beschädigungen. Nehmen Sie das Gerät nicht in Betrieb, wenn es beschädigt ist. Melden
Sie die Schäden umgehend dem Händler, bei dem Sie es erworben haben.
Bewahren Sie in diesem Fall die Verpackung auf.
Stunden stehen, bevor Sie es elektrisch
anschließen, damit das Öl in den Kompressor zurückfließen kann.
tion um das Gerät lassen; anderenfalls
besteht Überhitzungsgefahr. Halten Sie
sich für die Belüftung an die Installationsanweisungen.
Verbrennungen durch Berührung von
heißen Bauteilen (Kompressor, Kondensator) möglichst mit der Rückseite gegen eine Wand aufgestellt werden.
Heizkörpern oder Kochern installiert
werden.
stecker des Gerätes nach der Installation frei zugänglich ist.
• Wenn ein Wasseranschluss vorgesehen
ist, verbinden Sie das Gerät nur mit
dem Trinkwasseranschluss.
1.6 Kundendienst
• Sollte die Wartung des Gerätes elektrische Arbeiten verlangen, so dürfen diese nur von einem qualifizierten Elektriker
oder einem Elektro-Fachmann durchgeführt werden.
• Wenden Sie sich für Reparaturen und
Wartung nur an Fachkräfte der autorisierten Kundendienststellen und verlangen Sie stets Original-Ersatzteile.
1.7 Umweltschutz
Das Gerät enthält im Kältekreis
oder in dem Isoliermaterial keine
ozonschädigenden Gase. Das
Gerät darf nicht wie normaler
Hausmüll entsorgt werden. Die
Isolierung enthält entzündliche
Gase: das Gerät muss gemäß den
geltenden Vorschriften entsorgt
werden; sie erhalten diese bei Ihrer Gemeindeverwaltung. Nicht
das Kälteaggregat beschädigen,
insbesondere nicht in der Nähe
des Wärmetauschers. Die Materialien, die bei der Herstellung dieses Geräts verwendet wurden und
mit dem Symbol
können recycelt werden.
markiert sind,
Page 21

2. GERÄTEBESCHREIBUNG
DEUTSCH 21
1
2
3
Bedienfeld
1
Gefrierschublade
2
Schublade
3
3. BEDIENFELD
Grüne Kontrolllampe
1
Rote Kontrolllampe
2
Temperaturregler
3
Position „Halbe Beladung“
4
Position „Volle Beladung“
5
3.1 Einschalten des Geräts
1.
Lassen Sie das Gerät nach dem Aufstellen 4 Stunden stehen.
2.
Stecken Sie den Stecker in die Netzsteckdose.
3.
Drehen Sie den Temperaturregler im
Uhrzeigersinn auf „Volle Beladung“.
6
5
Schublade
4
Tauwasserablauf
5
Typenschild
6
1
2 3 4 5
4.
Die grüne Kontrolllampe leuchtet und
4
0
bleibt eingeschaltet, bis das Gerät
vom Netz getrennt wird.
5.
Lassen Sie das Gerät 4 Stunden eingeschaltet, bis die richtige Temperatur erreicht ist, bevor Sie Lebensmittel
einlagern.
Die gelbe Kontrolllampe leuchtet, solange die Gefriertaste eingeschaltet
ist.
6.
Die rote Kontrolllampe leuchtet ebenfalls, bis die richtige Temperatur erreicht ist.
Die rote Kontrolllampe erlischt einige
Stunden später, um anzuzeigen, dass
Page 22

www.electrolux.com
22
die eingestellte Temperatur erreicht
ist. Sie bleibt ausgeschaltet, um darauf hinzuweisen, dass alles in Ordnung ist. Sie leuchtet wieder, wenn
die Temperatur zu stark ansteigt, z.
B. nachdem die Tür geöffnet wurde
oder Lebensmittel eingelagert wurden. Sie erlischt, wenn die Temperatur den eingestellten Wert wieder erreicht hat.
7.
Stellen Sie den Temperaturregler gemäß der eingelagerten Menge Lebensmittel ein, sobald die eingestellte
Temperatur erreicht wurde (die rote
Kontrolllampe ist ausgeschaltet).
3.2 Ausschalten
1.
Drehen Sie den Temperaturregler
zum Ausschalten des Geräts in die
Position „O“.
2.
Ziehen Sie den Netzstecker aus der
Steckdose, um das Gerät von der
Stromversorgung zu trennen.
4. ERSTE INBETRIEBNAHME
3.3 Temperaturregelung
Die Temperatur im Gefrierraum wird durch
den Temperaturregler, der sich auf dem
Bedienfeld befindet, geregelt.
Bedienen Sie das Gerät wie folgt:
• Drehen Sie den Temperaturregler auf
eine niedrigere Einstellung, um die minimal mögliche Kühlung zu erreichen.
• Drehen Sie den Temperaturregler auf
eine höhere Einstellung, um die maximal mögliche Kühlung zu erreichen.
Wenn kleinere Mengen Lebensmittel eingefroren werden, ist die
Einstellung „Halbe Beladung“ am
besten geeignet.
Wenn größere Mengen Lebensmittel eingefroren werden, ist die
Einstellung „Volle Beladung“ am
besten geeignet.
4.1 Reinigung des Innenraums
Bevor Sie das Gerät in Betrieb nehmen,
beseitigen Sie den typischen „Neugeruch“
am besten durch Reinigen der Innenteile
mit lauwarmem Wasser und einer neutralen Seife. Sorgfältig nachtrocknen.
5. TÄGLICHER GEBRAUCH
5.1 Einfrieren frischer
Lebensmittel
Das (obere) Tiefkühlfach eignet sich zum
Einfrieren von frischen Lebensmitteln und
zum Lagern von gefrorenen und tiefgefrorenen Lebensmitteln über einen längeren
Zeitraum.
Zum Einfrieren frischer Lebensmittel, lagern Sie diese 24 Stunden im (oberen)
Tiefkühlfach.
Nehmen Sie die gefrorenen Lebensmittel
aus dem oberen (Tiefkühl-) Fach und legen Sie sie in die beiden anderen Fächer
(Lagerungsfächer). Um die maximale Ge-
Verwenden Sie keine aggressiven
Reinigungsmittel oder Scheuerpulver, die die Oberfläche beschädigen.
frierleistung zu erreichen, nehmen Sie die
obere Schublade (falls vorhanden) heraus
und legen Sie das Gefriergut direkt auf
den Verdampfer. Beim Gefrieren kleinerer
Mengen ist eine Herausnahme der
Schublade nicht notwendig.
Die maximale Menge an Lebensmitteln,
die innerhalb von 24 Stunden eingefroren
werden kann, ist auf dem im Inneren des
Geräts befindlichen Typenschild angegeben.
Der Gefriervorgang dauert 24 Stunden:
Legen Sie während dieses Zeitraums keine weiteren einzufrierenden Lebensmittel
in das Gerät.
Page 23

DEUTSCH 23
5.2 Lagerung gefrorener
Lebensmittel
Lassen Sie das Gerät vor der ersten Inbetriebnahme oder nach einer Zeit, in der
das Gerät nicht benutzt wurde, mindestens 8 Stunden lang mit höherer Einstellung laufen, bevor Sie Lebensmittel in das
Gefrierfach legen.
Kam es zum Beispiel durch einen
Stromausfall, der länger dauerte
als der in der Tabelle mit den
technischen Daten angegebene
Wert (siehe „Lagerzeit bei Störung“) zu einem ungewollten Abtauen, dann müssen die aufgetauten Lebensmittel sehr rasch verbraucht oder sofort gekocht und
nach dem Abkühlen erneut eingefroren werden.
5.3 Auftauen
Tiefgefrorene oder gefrorene Lebensmittel
können vor der Verwendung bei Raumtemperatur aufgetaut werden.
Kleinere Gefriergutteile können sogar direkt aus dem Gefriergerät entnommen
und anschließend sofort gekocht werden:
in diesem Fall dauert der Garvorgang allerdings etwas länger.
6. PRAKTISCHE TIPPS UND HINWEISE
6.1 Normale Betriebsgeräusche
• Unter Umständen ist ein leichtes Gurgeln und Blubbern zu hören, wenn das
Kältemittel durch die Leitungen gepumpt wird. Das ist normal.
• Bei eingeschaltetem Kompressor wird
das Kältemittel umgewälzt und Sie hören ein Surren und ein pulsierendes Geräusch vom Kompressor. Das ist normal.
• Die thermische Ausdehnung kann ein
plötzliches Krachen verursachen. Das
ist eine natürliche und nicht gefährliche
physikalische Erscheinung. Das ist normal.
• Beim Ein- oder Ausschalten des Kompressors ist ein leises "Klicken" des
Temperaturreglers zu hören. Das ist
normal.
6.2 Hinweise zum Einfrieren
Im Folgenden finden Sie einige wertvolle
Tipps für einen optimalen Gefriervorgang:
• die maximale Menge an Lebensmitteln,
die innerhalb von 24 Stunden eingefroren werden kann. ist auf dem Typschild
angegeben;
• der Gefriervorgang dauert 24 Stunden.
Legen Sie während dieses Zeitraums
keine weiteren einzufrierenden Lebensmittel in das Gefrierfach;
• frieren Sie ausschließlich frische und
gründlich gewaschene Lebensmittel
von sehr guter Qualität ein;
• teilen Sie die Lebensmittel in kleinere
Portionen ein, damit diese schnell und
vollständig gefrieren und Sie später nur
die Menge auftauen müssen, die Sie
gerade benötigen;
• die einzufrierenden Lebensmittelportionen sollten stets luftdicht in Aluminiumfolie oder in lebensmittelechte Gefrierbeutel verpackt werden, um so wenig
Luft wie möglich in der Verpackung zu
haben;
• achten Sie beim Hineinlegen von frischen, noch ungefrorenen Lebensmitteln darauf, dass diese keinen Kontakt
mit Gefriergut bekommen, da dieses
sonst antauen kann;
• weniger fetthaltige Lebensmittel lassen
sich besser lagern als fetthaltigere; Salz
verkürzt die Lagerzeit von Lebensmitteln im Gefrierfach;
• werden Gefrierwürfel direkt nach der
Entnahme aus dem Gefrierfach verwen-
Page 24

www.electrolux.com
24
det, können Sie zu Frostbrand auf der
Haut führen;
• es empfiehlt sich, das Einfrierdatum auf
jeder einzelnen Packung zu notieren,
um einen genauen Überblick über die
Lagerzeit zu haben.
6.3 Hinweise zur Lagerung
gefrorener Produkte
So erzielen Sie die besten Ergebnisse mit
Ihrem Gerät:
• Vergewissern Sie sich, dass die gefrorenen Lebensmittel vom Händler angemessen gelagert wurden.
7. REINIGUNG UND PFLEGE
• Achten Sie unbedingt darauf, die eingekauften gefrorenen Lebensmittel in der
kürzest möglichen Zeit in das Gefriergerät zu bringen.
• Öffnen Sie die Tür nicht zu häufig, und
lassen Sie die Tür nicht länger offen als
notwendig.
• Aufgetaute Lebensmittel verderben sehr
schnell und eignen sich nicht für ein erneutes Einfrieren.
• Das Haltbarkeitsdatum auf der Tiefkühlkostverpackung darf nicht überschritten
werden.
VORSICHT!
Ziehen Sie bitte vor jeder Reinigungsarbeit immer den Netzstecker aus der Steckdose.
Der Kältekreis des Gerätes enthält
Kohlenwasserstoffe; Wartungsarbeiten und Nachfüllen von Kältemittel dürfen daher nur durch vom
Hersteller autorisiertes Fachpersonal ausgeführt werden.
7.1 Regelmäßige Reinigung
Der gesamte Kühlschrank muss regelmäßig gereinigt werden:
• Reinigen Sie die Innenseiten und die
Zubehörteile mit lauwarmem Wasser
und etwas Neutralseife.
• Prüfen und säubern Sie die Türdichtungen in regelmäßigen Abständen und
kontrollieren Sie, dass diese sauber und
frei von Verunreinigungen sind.
• Spülen und trocknen Sie diese sorgfältig ab.
Ziehen Sie nicht an Leitungen
und/oder Kabeln im Innern des
Kühlschranks und achten Sie darauf, diese nicht zu verschieben
oder zu beschädigen.
Benutzen Sie zur Reinigung des
Innenraums keinesfalls Putzmittel,
Scheuerpulver, stark parfümierte
Reinigungsmittel oder Wachspolituren, da diese die Oberfläche des
Innenraums beschädigen und einen starken Eigengeruch hinterlassen können.
Reinigen Sie den Kondensator (schwarzes
Gitter) und den Kompressor auf der Geräterückseite mit einer Bürste. Dadurch verbessert sich die Leistung des Geräts und
es verbraucht weniger Strom.
Bitte achten Sie darauf, das Kühlsystem nicht zu beschädigen.
7.2 Abtauen des Gefriergeräts
Auf den Ablagen des Gefriergeräts und im
Innern des oberen Fachs bildet sich stets
etwas Reif.
Tauen Sie das Gefriergerät ab, wenn die
Reifschicht eine Stärke von etwa 3 bis 5
mm erreicht hat.
Page 25

Stellen Sie den Temperaturregler
12 Stunden vor dem Abtauen auf
eine höhere Stufe, damit eine ausreichende Kälte als Reserve für die
Unterbrechung des Betriebes entstehen kann.
Entfernen Sie den Reif wie nachstehend
erläutert:
1.
Schalten Sie das Gerät ab und ziehen
Sie den Netzstecker aus der Steckdose.
2.
Nehmen Sie das gesamte Gefriergut
heraus, verpacken Sie es in mehrere
Schichten Zeitungspapier und lagern
Sie es an einem kühlen Ort.
VORSICHT!
Fassen Sie gefrorene Lebensmittel
nicht mit nassen Händen an. Ihre
Hände könnten an den Lebensmitteln festfrieren.
3.
Lassen Sie die Tür des Geräts offen
stehen und setzen Sie den Kunststoffschaber in die entsprechende
Aufnahme unten in der Mitte; stellen
Sie eine Schale zum Auffangen des
Tauwassers darunter.
Stellen Sie eine Schale mit warmem Wasser in das Gefrierfach,
um den Abtauprozess zu beschleunigen. Entfernen Sie bereits
während des Abtauprozesses vorsichtig Eisstücke, die sich lösen
lassen.
4.
Ist das Geräteinnere vollständig abgetaut, trocken Sie die nassen Oberflächen gründlich ab und bewahren Sie
den Kunststoffschaber für eine spätere Verwendung auf.
DEUTSCH 25
5.
Schalten Sie das Gerät ein.
6.
Drehen Sie den Temperaturregler auf
„Volle Beladung“ und lassen Sie das
Gerät mindestens 8 Stunden in Betrieb.
7.
Legen Sie das entnommene Gefriergut in die Fächer, nachdem die rote
Kontrolllampe erloschen ist.
8.
Stellen Sie den Temperaturregler gemäß der eingelagerten Menge Lebensmittel ein.
WARNUNG!
Entfernen Sie Reif und Eis vom
Verdampfer niemals mit scharfen
metallischen Gegenständen, da
dieser dadurch beschädigt werden könnte.
Versuchen Sie nicht, den Abtauvorgang durch andere als vom
Hersteller empfohlene mechanische oder sonstige Hilfsmittel zu
beschleunigen.
Ein Temperaturanstieg des Gefrierguts während des Abtauens
des Geräts kann die Lagerzeit dieser Lebensmittel verkürzen.
7.3 Stillstandzeiten
Bei längerem Stillstand des Geräts müssen Sie folgendermaßen vorgehen:
1.
Trennen Sie das Gerät von der Netzversorgung.
2.
Entnehmen Sie alle Lebensmittel.
3.
Tauen Sie das Gerät ab; reinigen Sie
den Innenraum und das gesamte Zubehör.
4.
Lassen Sie die Türen offen, um das
Entstehen unangenehmer Gerüche zu
vermeiden.
Möchten Sie bei einer längeren
Abwesenheit das Gerät weiter laufen lassen, bitten Sie jemanden,
gelegentlich die Temperatur zu
prüfen, damit das Gefriergut bei
einem möglichen Stromausfall
nicht im Innern des Geräts verdirbt.
Page 26

www.electrolux.com
26
8. WAS TUN, WENN …
WARNUNG!
Ziehen Sie vor der Fehlersuche
immer den Netzstecker aus der
Steckdose.
Die Fehlersuche, die in der vorliegenden Gebrauchsanweisung
nicht beschrieben ist, darf nur von
einem qualifizierten Elektriker oder
einer kompetenten Person durchgeführt werden.
Während das Gerät in Betrieb ist,
entstehen bestimmte Geräusche
(Kompressor und Kühlkreislauf).
Das Gerät arbeitet nicht ständig.
Wenn der Kompressor aufhört,
bedeutet das nicht, dass keine
Stromversorgung mehr anliegt.
Aus diesem Grund dürfen Sie erst
dann elektrische Teile des Geräts
berühren, nachdem das Gerät
vom Netz getrennt wurde.
Störung Mögliche Ursache Abhilfe
Das Gerät ist zu
laut.
Unebenheiten im Boden
sind durch Unterlegen
nicht ausgeglichen worden.
Kontrollieren Sie, ob eventuelle Unebenheiten der
Standfläche korrekt ausgeglichen wurden, so dass alle vier Füße fest auf dem
Boden stehen.
Der Kompressor arbeitet ständig.
Die Türen schließen nicht
Der Temperaturregler ist
falsch eingestellt.
richtig oder sind nicht fest
geschlossen.
Stellen Sie eine höhere
Temperatur ein.
Prüfen Sie, ob die Türen gut
schließen und die Dichtungen unbeschädigt und sauber sind.
Die Tür wurde zu häufig
geöffnet.
Lassen Sie die Tür nicht
länger als unbedingt erforderlich offen.
Es wurden zu große Men-
gen an Lebensmitteln
gleichzeitig zum Einfrieren
Warten Sie einige Stunden
und prüfen Sie dann die
Temperatur erneut.
eingelegt.
In das Gerät eingelegte
Lebensmittel waren noch
zu warm.
Die Raumtemperatur ist zu
hoch.
Zu starke Reif- und
Eisbildung.
Das Gefriergut ist nicht
korrekt verpackt.
Die Türen schließen nicht
richtig oder sind nicht fest
geschlossen.
Lassen Sie Lebensmittel auf
Raumtemperatur abkühlen,
bevor Sie diese einlagern.
Senken Sie die Raumtemperatur.
Verpacken Sie die Lebensmittel besser.
Prüfen Sie, ob die Türen gut
schließen und die Dichtungen unbeschädigt und sauber sind.
Der Temperaturregler kann
falsch eingestellt sein.
Stellen Sie eine höhere
Temperatur ein.
Page 27

Störung Mögliche Ursache Abhilfe
Es ist zu warm im
Gefrierfach
Die Tür schließt nicht rich-
Der Temperaturregler kann
falsch eingestellt sein.
tig oder ist nicht fest geschlossen.
Stellen Sie eine niedrigere
Temperatur ein.
Prüfen Sie, ob die Tür gut
schließt und die Dichtung
unbeschädigt und sauber
ist.
Es wurden zu große Men-
gen an Lebensmitteln
gleichzeitig zum Einfrieren
Legen Sie kleinere Mengen
an Lebensmitteln in den
Gefrierschrank.
eingelegt.
In das Gerät eingelegte
Lebensmittel waren noch
zu warm.
Die einzufrierenden Pack-
ungen liegen zu dicht aneinander.
Es ist zu kalt im Gefriergerät.
Das Gerät funktioniert überhaupt
Der Temperaturregler kann
falsch eingestellt sein.
Der Stecker ist nicht richtig
in die Steckdose gesteckt.
nicht. Weder die
Lassen Sie Lebensmittel auf
Raumtemperatur abkühlen,
bevor Sie diese einlagern.
Legen Sie die Lebensmittel
so hinein, dass die Luft frei
um sie zirkulieren kann.
Stellen Sie eine höhere
Temperatur ein.
Stecken Sie den Netzstecker korrekt in die Steckdose.
Kühlung noch die
Beleuchtung funktionieren.
Das Gerät bekommt kei-
nen Strom.
Versuchen Sie, ein anderes
elektrisches Gerät an die
Steckdose anzuschließen.
Das Gerät ist nicht einge-
Schalten Sie das Gerät ein.
schaltet.
Es liegt keine Spannung
Rufen Sie einen Elektriker.
an der Netzsteckdose an
(versuchen Sie bitte, ob
ein anderes Gerät dort
funktioniert).
Das Gerät kühlt
nicht
Der Stecker ist nicht richtig
in die Steckdose gesteckt.
Stecken Sie den Netzste-
cker korrekt in die Steckdo-
se.
Es liegt keine Spannung
Rufen Sie einen Elektriker.
an der Netzsteckdose an
(versuchen Sie bitte, ob
ein anderes Gerät dort
funktioniert).
Das Gerät ist nicht einge-
Schalten Sie das Gerät ein.
schaltet.
DEUTSCH 27
Page 28

www.electrolux.com
28
8.1 Schließen der Tür
1.
Reinigen Sie die Türdichtungen.
2.
Stellen Sie die Tür nach Bedarf ein.
Siehe hierzu „Montage“.
9. MONTAGE
3.
Ersetzen Sie die defekten Türdichtungen, falls erforderlich. Wenden Sie
sich hierzu an den Kundendienst.
WARNUNG!
Lesen Sie bitte die "Sicherheitshinweise" sorgfältig vor der Aufstellung des Geräts durch, um
Gefahren für Sie selbst zu vermeiden und einen korrekten Betrieb
des Geräts zu gewährleisten.
9.1 Aufstellung
Installieren Sie dieses Gerät in einem trockenen, gut belüfteten Raum, an dem die
Umgebungstemperatur mit der Klimaklas-
9.2 Ausrichten
se übereinstimmt, die auf dem Typenschild des Geräts angegeben ist:
Klima-
Umgebungstemperatur
klasse
SN +10 °C bis +32 °C
N +16 °C bis +32 °C
ST +16 °C bis +38 °C
T +16 °C bis +43 °C
Bei der Aufstellung des Geräts ist dieses
waagerecht auszurichten. Dies lässt sich
mit zwei Schraubfüßen am vorderen Sockel des Gerätes erreichen.
Page 29

9.3 Standort
100 mm
15 mm 15 mm
DEUTSCH 29
Das Gerät sollte in ausreichendem Abstand
von Wärmequellen wie Heizungen, Boilern,
direkter Sonneneinstrahlung, usw. aufgestellt werden. Vergewissern Sie sich, dass
Luft an der Rückseite des Gehäuses frei zirkulieren kann. Wenn das Gerät unter einem
Hängeschrank installiert wird, muss der Abstand zwischen der Geräteoberseite und
dem Hängeschrank mindestens 100 mm
betragen, um die bestmögliche Leistung zu
garantieren. Allerdings sollte die Aufstellung
des Geräts unter einem Hängeschrank nach
Möglichkeit vermieden werden. Die ordnungsgemäße waagrechte Ausrichtung des
Gerätes kann mithilfe eines oder mehrerer
verstellbarer Füße am Sockel des Gehäuses
erfolgen. Wird das Gerät in einer Ecke aufgestellt, und zeigt die Scharnierseite dabei
zur Wand, so muss der Abstand zwischen
Wand und Gerät mindestens 10 mm betragen, damit die Tür zum Herausnehmen der
Ablagen geöffnet werden kann.
WARNUNG!
Es muss möglich sein, das Gerät
von der Hauptstromversorgung zu
trennen; daher sollte der Netzstecker nach der Installation leicht zugänglich sein.
Page 30

www.electrolux.com
30
9.4 Wechsel des Türanschlags
Die nachfolgend beschriebenen
Tätigkeiten sollten von mindestens
zwei Personen durchgeführt werden, um ein Herunterfallen der Türen zu vermeiden.
Zum Wechseln des Türanschlags muss
wie folgt vorgegangen werden:
• Ziehen Sie den Netzstecker aus der
Steckdose.
• Neigen Sie das Gerät vorsichtig nach
hinten, so dass der Kompressor den
Boden nicht berührt.
• Schrauben Sie den linken Standfuß ab.
• Entfernen Sie das untere Türscharnier,
indem Sie die zwei Befestigungsschrauben lösen.
• Entfernen Sie den Scharnierbolzen unten an der Tür.
• Schieben Sie den Scharnierbolzen in
das Loch in der Scharnierplatte.
• Nehmen Sie die Tür ab.
• Bringen Sie den oberen Scharnierbolzen an der gegenüberliegenden Seite
an.
• Hängen Sie die Tür auf dem Scharnierbolzen ein.
• Schieben Sie den Scharnierbolzen in
das Loch in der Scharnierplatte und
montieren Sie die Scharniereinheit auf
der gegenüberliegenden Seite mit den
beiden Befestigungsschrauben.
• Bringen Sie die untere Scharnierplatteneinheit auf der gegenüberliegenden Seite an und achten Sie darauf, dass die
Tür parallel zur Schrankseite ist.
• Entfernen Sie den Griff (je nach Ausstattung) und bringen Sie ihn an der gegenüberliegenden Seite an.
• Rücken Sie das Gerät wieder an die
richtige Stelle und richten Sie es waagerecht aus. Warten Sie mindestens
vier Stunden, bevor Sie es wieder an
1
2
die Stromversorgung anschließen.
Führen Sie eine Endkontrolle durch, um
sicherzustellen, dass:
• Alle Schrauben fest angezogen sind.
• Die Tür korrekt öffnet und schließt.
Page 31

DEUTSCH 31
Bei niedrigen Umgebungstemperaturen (z.
B. im Winter) kann es vorkommen, dass
die Türdichtung nicht richtig am Gerät anliegt. Warten Sie in diesem Fall ab, bis
sich die Dichtung allmählich anpasst.
Wenden Sie sich an den Kundendienst,
um bei den oben beschriebenen Tätigkeiten Unterstützung zu bekommen. Ein
Kundendiensttechniker wird die Türen
dann auf Ihre Kosten umbauen.
9.5 Elektrischer Anschluss
Kontrollieren Sie vor der ersten Benutzung
des Gerätes, ob die Netzspannung und frequenz Ihres Hausanschlusses mit den
auf dem Typenschild angegebenen Anschlusswerten übereinstimmen.
Das Gerät muss geerdet sein. Zu diesem
Zweck ist der Netzstecker mit einem
Schutzkontakt ausgestattet. Falls die
10. GERÄUSCH
Während das Gerät in Betrieb ist, entstehen bestimmte Geräusche (Kompressor
und Kühlkreislauf).
Steckdose Ihres Hausanschlusses nicht
geerdet sein sollte, lassen Sie das Gerät
gemäß den geltenden Vorschriften von einem qualifizierten Elektriker erden.
Der Hersteller übernimmt keinerlei Haftung
bei Missachtung der vorstehenden Sicherheitshinweise.
Das Gerät entspricht den EWG-Richtlinien.
OK
SSSRRR!
SSSRRR!
SSSRR
HISSS!
BLUBB!
CLICK!
R!
CLICK!
BRRR!
CRACK!
CLICK!
Page 32

www.electrolux.com
32
HISSS!
BLUBB!
BLUBB!
11. TECHNISCHE DATEN
HISSS!
BRRR!
BRRR!
CRACK!CRACK!
Abmessungen
Höhe 850 mm
Breite 550 mm
Tiefe 612 mm
Lagerzeit bei Störung 22 Std.
Spannung 230-240 V
Frequenz 50 Hz
Die technischen Daten befinden sich auf
dem Typenschild innen links im Gerät sowie auf der Energieplakette.
Page 33

12. UMWELTTIPPS
DEUTSCH 33
Recyceln Sie Materialien mit dem Symbol
. Entsorgen Sie die Verpackung in den
entsprechenden Recyclingbehältern.
Recyceln Sie zum Umwelt- und
Gesundheitsschutz elektrische und
elektronische Geräte. Entsorgen Sie
Geräte mit diesem Symbol
dem Hausmüll. Bringen Sie das Gerät zu
Ihrer örtlichen Sammelstelle oder wenden
Sie sich an Ihr Gemeindeamt.
nicht mit
Page 34

www.electrolux.com
34
ÍNDICE DE MATERIAS
1. INSTRUCCIONES DE SEGURIDAD . . . . . . . . . . . . . . . . . . . . . . . . . . . . . . . . . . . . . . . . . . 35
2. DESCRIPCIÓN DEL PRODUCTO . . . . . . . . . . . . . . . . . . . . . . . . . . . . . . . . . . . . . . . . . . . 37
3. PANEL DE MANDOS . . . . . . . . . . . . . . . . . . . . . . . . . . . . . . . . . . . . . . . . . . . . . . . . . . . . 38
4. PRIMER USO . . . . . . . . . . . . . . . . . . . . . . . . . . . . . . . . . . . . . . . . . . . . . . . . . . . . . . . . . . 39
5. USO DIARIO . . . . . . . . . . . . . . . . . . . . . . . . . . . . . . . . . . . . . . . . . . . . . . . . . . . . . . . . . . . 39
6. CONSEJOS ÚTILES . . . . . . . . . . . . . . . . . . . . . . . . . . . . . . . . . . . . . . . . . . . . . . . . . . . . . 40
7. MANTENIMIENTO Y LIMPIEZA . . . . . . . . . . . . . . . . . . . . . . . . . . . . . . . . . . . . . . . . . . . . . 40
8.
QUÉ HACER SI… . . . . . . . . . . . . . . . . . . . . . . . . . . . . . . . . . . . . . . . . . . . . . . . . . . . . . . . 42
9. INSTALACIÓN . . . . . . . . . . . . . . . . . . . . . . . . . . . . . . . . . . . . . . . . . . . . . . . . . . . . . . . . . 44
10.
RUIDO . . . . . . . . . . . . . . . . . . . . . . . . . . . . . . . . . . . . . . . . . . . . . . . . . . . . . . . . . . . . . . . 47
11. DATOS TÉCNICOS . . . . . . . . . . . . . . . . . . . . . . . . . . . . . . . . . . . . . . . . . . . . . . . . . . . . . . 48
PENSAMOS EN USTED
Gracias por adquirir un producto Electrolux. Ha escogido un producto que contiene décadas de
experiencia e innovación profesionales. Ingenioso y elegante, se ha diseñado pensando en usted.
Así que, siempre que lo utilice puede tener la seguridad de que conseguirá excelentes resultados.
Bienvenido a Electrolux.
Visite nuestro sitio web para:
Obtener consejos, folletos, soluciones a problemas e información de servicio:
www.electrolux.com
Registrar su producto para recibir un mejor servicio:
www.electrolux.com/productregistration
Adquirir accesorios, artículos de consumo y recambios originales para su aparato:
www.electrolux.com/shop
ATENCIÓN Y SERVICIO AL CLIENTE
Le recomendamos que utilice recambios originales.
Al contactar con el Servicio, cerciórese de tener la siguiente información a mano.
La información se puede encontrar en la placa de características. Modelo, PNC, Número de
serie.
Advertencia - Precaución-Información sobre seguridad.
Datos y recomendaciones generales
Información medioambiental
Salvo modificaciones.
Page 35

ESPAÑOL 35
1.
INSTRUCCIONES DE SEGURIDAD
Por su seguridad y para garantizar el funcionamiento correcto del aparato, antes
de instalarlo y utilizarlo por primera vez lea
atentamente este manual del usuario, incluidos los consejos y advertencias. Para
evitar errores y accidentes, es importante
que todas las personas que utilicen el
aparato estén perfectamente al tanto de
su funcionamiento y de las características
de seguridad. Conserve estas instrucciones y no olvide mantenerlas junto al aparato en caso de su desplazamiento o venta para que quienes lo utilicen a lo largo
de su vida útil dispongan siempre de la información adecuada sobre el uso y la seguridad.
Por la seguridad de personas y bienes, siga las normas de seguridad indicadas en
estas instrucciones, ya que el fabricante
no se hace responsable de daños provocados por omisiones.
1.1 Seguridad de niños y
personas vulnerables
• Este electrodoméstico no está diseñado para que lo usen personas (incluidos
niños) con discapacidad física, sensorial o mental, o con experiencia y conocimiento insuficientes, a menos que
una persona responsable de su seguridad les supervise o instruya en el uso
del electrodoméstico.
No permita que los niños jueguen con
el electrodoméstico.
• Mantenga los materiales de embalaje
alejados de los niños. Existe riesgo de
asfixia.
• Si va a desechar el aparato, extraiga el
enchufe de la toma, corte el cable de
conexión (tan cerca del aparato como
pueda) y retire la puerta para impedir
que los niños al jugar puedan sufrir
descargas eléctricas o quedar atrapados en su interior.
• Si este aparato, que cuenta con juntas
de puerta magnéticas, sustituirá a un
aparato más antiguo con cierre de
muelle (pestillo) en la puerta, cerciórese
de inutilizar el cierre de muelle antes de
desechar el aparato antiguo. Evitará así
que se convierta en una trampa mortal
para niños.
1.2 Instrucciones generales de
seguridad
Mantenga libres de obstrucciones las
aberturas de ventilación del alojamiento
del aparato o de la estructura empotrada
• El aparato está diseñado para conservar los alimentos y bebidas de una vivienda normal, como se explica en este
folleto de instrucciones.
– áreas de cocina para el personal en
– granjas y por clientes en hoteles, mo-
– entornos de tipo hostales o pensio-
– servicios de catering y actividades si-
• No utilice dispositivos mecánicos ni
medios artificiales para acelerar el proceso de descongelación.
• No utilice otros aparatos eléctricos (como máquinas para hacer helados) dentro de los aparatos de refrigeración, a
menos que el fabricante haya autorizado su utilización para estos fines.
• No dañe el circuito del refrigerante.
• El circuito del refrigerante del aparato
contiene isobutano (R600a). Se trata de
un gas natural con un alto nivel de
compatibilidad medioambiental, aunque
es inflamable.
Durante el transporte y la instalación del
aparato, cerciórese de no provocar daños en el circuito de refrigeración.
Si el circuito de refrigeración se daña:
– mantenga el aparato alejado de las
– ventile bien la habitación en la que se
• Es peligroso alterar las especificaciones
o modificar este producto en modo alguno. Cualquier daño en el cable de alimentación puede provocar un cortocir-
ADVERTENCIA
tiendas, oficinas y otros entornos de
trabajo;
teles y otros entornos de tipo residencial;
nes;
milares al por mayor.
llamas y de cualquier fuente de encendido
encuentra el aparato
Page 36

www.electrolux.com
36
• Este aparato es pesado. Debe tener
• No retire ni toque elementos del com-
• Evite la exposición prolongada del apa-
• Las bombillas que se utilizan en este
cuito, un incendio o una descarga eléctrica.
ADVERTENCIA
Los componentes eléctricos (cable de alimentación, enchufe,
compresor) debe sustituirlos un
técnico autorizado o personal de
reparaciones profesional a fin de
evitar riesgos.
1.
El cable de alimentación no se debe prolongar.
2.
Compruebe que la parte posterior
del aparato no aplaste ni dañe el
enchufe. Un enchufe aplastado o
dañado puede recalentarse y provocar un incendio.
3.
Cerciórese de que tiene acceso al
enchufe del aparato.
4.
No tire del cable de alimentación.
5.
Si la toma de red está floja, no introduzca el enchufe. Existe riesgo
de descarga eléctrica o incendio.
6.
No utilice el aparato sin la tapa de
la bombilla (si está provisto de ella)
de iluminación interior.
precauciones durante su desplazamiento.
partimento congelador con las manos
húmedas o mojadas, ya que podría sufrir abrasión de la piel o quemaduras
por congelación.
rato a la luz solar directa.
aparato (si está provisto de ellas) son
especiales, y se han seleccionado exclusivamente para uso en aparatos domésticos. No pueden utilizarse para la
iluminación de la vivienda.
ADVERTENCIA
No coloque alimentos congelados
en la encimera, ya que el frío y el
vapor pueden producir condensación de agua en el lado interior. El
goteo resultante puede provocar
fallos de funcionamiento. Por lo
tanto, no coloque ni deje productos congelados de ningún tipo sobre la encimera.
1.3 Uso diario
• No coloque recipientes calientes sobre
las piezas plásticas del aparato.
• No almacene gas ni líquido inflamable
en el aparato, ya que podrían estallar.
• No coloque alimentos directamente
contra la salida de aire de la pared posterior. (Si el aparato es No Frost, es decir, no acumula escarcha.)
• Los alimentos que se descongelen no
deben volver a congelarse.
• Guarde los alimentos congelados, que
se adquieren ya envasados, siguiendo
las instrucciones del fabricante.
• Se deben seguir estrictamente las recomendaciones del fabricante del aparato
sobre el almacenamiento. Consulte las
instrucciones correspondientes.
• No coloque bebidas carbonatadas o
con gas en el congelador, ya que se
genera presión en el recipiente, que podría estallar y dañar el aparato.
• Si se consumen polos helados retirados directamente del aparato, se pueden sufrir quemaduras causadas por el
hielo.
1.4 Cuidado y limpieza
• Desenchufe el aparato antes de realizar
cualquier tarea de reparación o mantenimiento.
• No limpie el aparato con objetos metálicos.
• No utilice objetos afilados para eliminar
el hielo del aparato. Utilice un raspador
plástico.
• No utilice secadores de pelo ni otros
aparatos de calefacción para acelerar la
descongelación. El exceso de calor
puede dañar el interior de plástico; la
humedad podría penetrar en el sistema
eléctrico y provocar un cortocircuito.
1.5 Instalación
Para realizar la conexión eléctrica,
siga atentamente las instrucciones
de los párrafos correspondientes.
• Desembale el aparato y compruebe
que no tiene daños. No conecte el aparato si está dañado. Informe de los posibles daños de inmediato a la tienda
Page 37

donde lo adquirió. En ese caso, conserve el material de embalaje.
• Es recomendable esperar al menos dos
horas antes de conectar el aparato, para permitir que el aceite regrese al compresor.
• El aparato debe contar con circulación
de aire adecuada alrededor, ya que de
lo contrario se produce recalentamiento. Para conseguir una ventilación suficiente, siga las instrucciones correspondientes a la instalación.
• Siempre que sea posible, la parte posterior del producto debe estar contra
una pared, para evitar que se toquen
las partes calientes (compresor, condensador) y se produzcan quemaduras.
• El aparato no debe colocarse cerca de
radiadores ni de hornillas de cocina.
• Asegúrese de que es posible acceder
al enchufe después de instalar el electrodoméstico.
• Realice la conexión sólo a un suministro
de agua potable (si está prevista una
conexión de agua).
1.6 Servicio técnico
• Un electricista homologado deberá realizar las tareas que se requieran para
ESPAÑOL 37
ejecutar el servicio o mantenimiento de
este electrodoméstico.
• Las reparaciones de este aparato debe
realizarlas un centro de servicio técnico
autorizado y sólo se deben utilizar recambios originales.
1.7 Protección del medio
ambiente
Este aparato no contiene gases
perjudiciales para la capa de ozono, ni en el circuito de refrigerante
ni en los materiales aislantes. El
aparato no se debe desechar junto con los residuos urbanos. La
espuma aislante contiene gases
inflamables: el aparato se debe
desechar de acuerdo con la normativa vigente, que puede solicitar a las autoridades locales. No
dañe la unidad de refrigeración,
en especial la parte trasera, cerca
del intercambiador de calor. Los
materiales de este aparato marca-
dos con el símbolo
clables.
son reci-
2. DESCRIPCIÓN DEL PRODUCTO
6
5
Panel de control
1
Cajón congelador
2
Compartimento de almacenaje
3
1
2
3
4
Compartimento de almacenaje
4
Drenaje del agua de descongelación
5
Placa de características
6
Page 38

www.electrolux.com
38
3. PANEL DE MANDOS
1
Indicador luminoso verde
1
Indicador luminoso rojo
2
Regulador de temperatura
3
Posición de media carga
4
Posición de carga completa
5
3.1 Encendido
1.
Deje reposar el aparato durante 4 horas después de la instalación.
2.
Introduzca el enchufe en la toma de
pared.
3.
Gire el regulador de temperatura a la
derecha hasta la posición de carga
completa.
4.
El indicador verde se enciende y permanece encendido hasta que se desconecta el aparato de la red eléctrica.
5.
Deje que funcione durante 4 horas
para que alcance la temperatura adecuada antes de colocar alimentos en
su interior.
El indicador amarillo se enciende en
el estado encendido del interruptor
del congelador.
6.
El indicador rojo también se enciende
hasta que se alcanza la temperatura
correcta.
Transcurridas unas horas desde la
puesta en marcha, el indicador luminoso rojo se apaga para indicar que
se ha alcanzado la temperatura correcta para el ajuste seleccionado y
permanecerá así para indicar que todo es correcto. Se encenderá si la
temperatura del congelador aumenta
excesivamente, por ejemplo, después
de abrir la puerta del congelador o de
2 3 4 5
0
colocar alimentos en el interior, pero
debería apagarse de nuevo cuando la
temperatura vuelva al nivel correcto.
7.
Cuando el aparato alcance la temperatura ajustada (el indicador rojo se
apaga), ajuste el regulador de temperatura en función de la cantidad de
alimentos guardados.
3.2 Apagado
1.
Para apagar el aparato, gire el regulador de temperatura hasta la posición
"O".
2.
Para desconectar el aparato de la alimentación, desenchúfelo de la toma.
3.3 Regulación de la
temperatura
La temperatura del aparato se controla
por medio del regulador de temperatura
situado en el panel de control.
Para utilizar el aparato, proceda como se
indica:
• Gire el regulador de temperatura hacia
ajustes más bajos para obtener el frío
mínimo.
• Gire el regulador de temperatura hacia
ajustes más altos para obtener el frío
máximo.
En caso de congelar menos cantidad de alimentos, el ajuste de
media carga es el más adecuado.
En caso de congelar gran cantidad de alimentos, el ajuste de
carga completa es el más adecuado.
Page 39

4. PRIMER USO
ESPAÑOL 39
4.1 Limpieza de las partes
internas
Antes del empleo limpiar todas las partes
internas con agua tibia y jabón neutro, a
fin de eliminar el característico olor de
nuevo y secarlas luego cuidadosamente.
5. USO DIARIO
5.1 Congelación de alimentos
frescos
El compartimento de congelación (superior) es adecuado para congelar alimentos
frescos y conservar a largo plazo los alimentos congelados y ultracongelados.
Para congelar alimentos frescos, colóquelos en el compartimento congelador (superior) y déjelos durante 24 horas.
Cambie los alimentos congelados del
compartimento superior (congelación) a
los otros dos compartimentos (de conservación). Para obtener una congelación
máxima, extraiga el cajón superior (si el
aparato va equipado con él) y a continuación coloque los alimentos que va a congelar directamente sobre el evaporador.
Para congelar pequeños volúmenes no es
necesario extraer el cajón.
La cantidad máxima de alimentos que
puede congelarse en 24 horas se indica
en la placa de características, una etiqueta situada en el interior del aparato.
El proceso de congelación dura 24 horas:
durante ese tiempo no deben añadirse
otros alimentos para congelar.
No utilice detergentes ni polvos
abrasivos, ya que podrían dañar el
acabado
déjelo en marcha al menos durante 8 horas con un ajuste alto antes de colocar los
productos en el compartimento.
En caso de producirse una descongelación accidental, por ejemplo, por un corte del suministro
eléctrico, y si la interrupción ha sido más prolongada que el valor
indicado en el campo "tiempo de
elevación" de la tabla de características técnicas, será necesario
consumir cuanto antes los alimentos descongelados o cocinarlos
de inmediato y congelarlos de
nuevo (después de que se hayan
enfriado).
5.3 Descongelación
Antes de utilizar los alimentos ultracongelados y congelados puede descongelarlos
a temperatura ambiente.
Las piezas pequeñas se pueden cocinar
directamente sin necesidad de descongelarlas: en tal caso deberá prolongarse el
tiempo de cocción.
5.2 Conservación de alimentos
congelados
Al poner en marcha el aparato por primera vez o después de un periodo sin uso,
Page 40

www.electrolux.com
40
6. CONSEJOS ÚTILES
6.1 Sonidos de funcionamiento
normal
• Es posible que oiga un gorgoteo o burbujeo cuando el refrigerante circula a
través del circuito de refrigeración o tuberías. Esto es correcto.
• Cuando el compresor está en marcha,
el refrigerante es bombeado a través de
todo el circuito y el compresor emite un
zumbido o un sonido intermitente. Esto
es correcto.
• La dilatación térmica puede provocar
un repentino crujido. Es un fenómeno
físico natural que no representa riesgo
alguno. Esto es correcto.
• Cuando el compresor se activa o desactiva, el regulador de temperatura
emite un chasquido débil. Esto es correcto.
6.2 Consejos sobre la
congelación
Estos consejos son importantes para poder aprovechar al máximo el proceso de
congelación:
• la cantidad máxima de alimentos que
puede congelarse en 24 horas se
muestra en la placa de datos técnicos;
• el proceso de congelación requiere 24
horas. Durante ese periodo no deben
añadirse otros alimentos para congelación;
• congele sólo productos alimenticios de
máxima calidad, frescos y perfectamente limpios;
• prepare los alimentos en porciones pequeñas para que se congelen de manera rápida y total, así como para poder descongelar posteriormente sólo
las cantidades necesarias;
• envuelva los alimentos en papel de aluminio o polietileno y compruebe que los
envoltorios quedan herméticamente cerrados;
• no permita que alimentos frescos y sin
congelar entren en contacto con alimentos ya congelados, para evitar el
aumento de temperatura de los segundos;
• los alimentos magros se congelan mejor que los grasos; la sal reduce el tiempo de almacenamiento de los alimentos;
• el hielo, si se consume inmediatamente
después de retirarlo del compartimento
congelador, puede provocar quemaduras por congelación en la piel;
• es recomendable etiquetar cada paquete con la fecha de congelación para
controlar el tiempo que permanecen almacenados.
6.3 Consejos para el
almacenamiento de alimentos
congelados
Para obtener el máximo rendimiento de
este aparato, deberá:
• comprobar que el comerciante ha mantenido los productos congelados correctamente almacenados;
• procurar que los alimentos congelados
pasen de la tienda al congelador en el
menor tiempo posible;
• evitar la apertura frecuente de la puerta
o dejarla abierta más del tiempo estrictamente necesario;
• los alimentos descongelados se deterioran con rapidez y no pueden congelarse de nuevo;
• no supere el tiempo de almacenamiento indicado por el fabricante de los alimentos.
7. MANTENIMIENTO Y LIMPIEZA
PRECAUCIÓN
Antes de realizar tareas de mantenimiento, desenchufe el aparato.
Este equipo contiene hidrocarburos en la unidad de refrigeración;
por tanto, el mantenimiento y la
Page 41

recarga deben estar a cargo exclusivamente de técnicos autorizados.
7.1 Limpieza periódica
El equipo debe limpiarse de manera habitual:
• Limpie el interior y los accesorios con
agua templada y un jabón neutro.
• Revise y limpie periódicamente las juntas de la puerta para mantenerlas limpias y sin restos.
• Aclare y seque a fondo.
No mueva, dañe ni tire de los conductos o cables del interior del armario.
No utilice detergentes, polvos
abrasivos, productos de limpieza
perfumados ni cera para limpiar el
interior, ya que dañarán la superficie y dejarán un fuerte olor.
Limpie el condensador (rejilla negra) y el
compresor de la parte posterior del aparato con un cepillo. Esa operación mejorará el rendimiento del aparato y reducirá
el consumo eléctrico.
Tenga cuidado para no dañar el
sistema de refrigeración.
ESPAÑOL 41
periódico y colóquelos en un sitio
fresco.
PRECAUCIÓN
No toque los alimentos congelados con las manos mojadas. Podrían congelarse al contacto con
los alimentos.
3.
Deje la puerta abierta e introduzca el
raspador plástico en el centro de la
base, después de colocar un recipiente debajo para recoger el agua
de la descongelación.
Para acelerar el proceso de descongelación, coloque un recipiente con agua tibia en el compartimento congelador. Además, retire
los trozos de hielo que se desprendan antes de que finalice la
descongelación.
7.2 Descongelación del
congelador
Siempre se forma un poco de escarcha
en los estantes del congelador y en torno
al compartimento superior.
Descongele el congelador sólo cuando la
capa de escarcha alcance un grosor de
unos 3 a 5 mm.
Unas 12 horas antes de realizar la
descongelación, coloque el regulador de temperatura en los niveles más elevados, con el fin de
acumular frío suficiente para la interrupción del funcionamiento.
Para eliminar la escarcha, siga estos pasos:
1.
Apague el aparato y desenchúfelo de
la toma de corriente.
2.
Retire los alimentos congelados, envuélvalos en varias hojas de papel de
4.
Finalmente, seque bien el interior y
conserve el raspador para su uso futuro.
5.
Encienda el aparato.
6.
Gire el regulador de temperatura hasta la posición de carga completa y
déjelo durante un mínimo de 8 horas.
7.
Una vez apagado el indicador luminoso rojo, vuelva a introducir en los
compartimentos los alimentos que retiró previamente.
8.
Ajuste el regulador de temperatura en
función de la cantidad de alimentos
guardados.
Page 42

www.electrolux.com
42
ADVERTENCIA
No utilice herramientas metálicas
afiladas para raspar la escarcha
del evaporador, ya que podría dañarlo.
No utilice dispositivos mecánicos
ni medios artificiales para acelerar
el proceso de descongelación, excepto los recomendados por el
fabricante.
El aumento de la temperatura de
los paquetes de alimentos congelados durante la descongelación
puede acortar su tiempo de almacenamiento.
7.3 Periodos sin funcionamiento
Si no va a utilizar el aparato durante un
tiempo prolongado, tome las siguientes
precauciones:
8. QUÉ HACER SI…
1.
desconecte el aparato de la red eléctrica
2.
extraiga todos los alimentos
3.
descongele y limpie el aparato y todos sus accesorios
4.
deje las puertas entreabiertas para
evitar la formación de olores desagradables.
Si lo va a mantener en marcha,
solicite a alguien que lo inspeccione de vez en cuando para evitar
que los alimentos se echen a perder en caso de un corte de energía.
ADVERTENCIA
Antes de solucionar problemas,
desenchufe el aparato.
Las reparaciones que no se expliquen en el presente manual deben dejarse en manos de un electricista o profesional cualificado y
homologado.
Se oyen sonidos durante el funcionamiento normal (compresor,
circulación de refrigerante).
El aparato no funciona continuamente, por lo que la parada del
compresor no significa que haya
un fallo de corriente. No toque las
partes eléctricas del aparato
mientras esté enchufado.
Problema Causa probable Solución
El aparato hace rui-
do.
El aparato no está bien
apoyado en el suelo.
Compruebe que los soportes del aparato descansan
sobre una superficie estable
(las cuatro patas deben estar bien apoyadas en el
suelo).
El compresor funciona continuamente.
Las puertas no están bien
El control del termostato
se ha ajustado incorrectamente.
cerradas o no cierran correctamente.
Seleccione una temperatura más alta.
Asegúrese de que las tapas
cierran correctamente y de
que las juntas estén sin daños y limpias.
Page 43

Problema Causa probable Solución
La puerta se ha abierto
con excesiva frecuencia.
No mantenga la puerta
abierta más tiempo del necesario.
Se han introducido gran-
des cantidades de alimentos para congelar al mis-
Espere varias horas y vuelva a comprobar la temperatura.
mo tiempo.
Los alimentos introducidos
en el aparato estaban demasiado calientes.
Deje que los alimentos se
enfríen a temperatura ambiente antes de almacenarlos.
La temperatura ambiente
es demasiado alta.
Hay demasiada escarcha.
Los productos no están
bien envueltos.
Las puertas no están bien
cerradas o no cierran correctamente.
Reduzca la temperatura
ambiente.
Envuelva mejor los productos.
Asegúrese de que las tapas
cierran correctamente y de
que las juntas estén sin daños y limpias.
Es posible que el ajuste
del mando de temperatura
Seleccione una temperatura más alta.
sea incorrecto.
La temperatura del
congelador es demasiado alta.
La puerta no se cierra co-
Es posible que el ajuste
del mando de temperatura
sea incorrecto.
rrectamente o no está bien
cerrada.
Seleccione una temperatura más fría.
Asegúrese de que la puerta
cierra correctamente y de
que la junta esté sin daños
y limpia.
Se han introducido gran-
des cantidades de alimentos para congelar al mis-
Reduzca la cantidad de alimentos que desea congelar
al mismo tiempo.
mo tiempo.
Los alimentos introducidos
en el aparato estaban demasiado calientes.
Deje que los alimentos se
enfríen a temperatura ambiente antes de almacenarlos.
Los productos para con-
gelar estaban demasiado
cerca unos de otros.
La temperatura interior del congelador
es demasiado baja.
Es posible que el ajuste
del mando de temperatura
sea incorrecto.
Coloque los productos de
forma que el aire pueda circular libremente entre ellos.
Seleccione una temperatura más alta.
ESPAÑOL 43
Page 44

www.electrolux.com
44
Problema Causa probable Solución
El aparato no fun-
ciona. No enfría ni
se encienden las luces.
El aparato no recibe co-
El aparato no está encen-
No hay tensión en la toma
El aparato no enfría.
No hay tensión en la toma
El aparato no está encen-
8.1 Cierre de la puerta
1.
2.
El enchufe no está bien
colocado en la toma de
corriente.
rriente eléctrica.
dido.
de corriente (pruebe a conectar otro aparato para
ver si funciona).
El enchufe no está bien
colocado en la toma de
corriente.
de corriente (pruebe a conectar otro aparato para
ver si funciona).
dido.
Limpie las juntas de la puerta.
Si es necesario, ajuste la puerta. Con-
sulte "Instalación".
Enchufe el aparato correctamente a la toma de corriente.
Conecte otro aparato a la
misma toma de corriente
para comprobar que funciona.
Encienda el aparato.
Llame a un electricista homologado.
Enchufe el aparato correctamente a la toma de corriente.
Llame a un electricista homologado.
Encienda el aparato.
3.
Si es necesario, cambie las juntas defectuosas. Póngase en contacto con
el servicio técnico.
9. INSTALACIÓN
ADVERTENCIA
Lea atentamente la "Información
sobre seguridad" para garantizar
su propia seguridad y el correcto
funcionamiento del electrodoméstico antes de instalar el electrodoméstico.
9.1 Colocación
Instale el aparato en un lugar interior seco
y bien ventilado en el que la temperatura
ambiente se corresponda con la clase climática indicada en la placa de características del aparato:
Clase
Temperatura ambiente
climática
SN +10°C a + 32°C
N +16°C a + 32°C
ST +16°C a + 38°C
T +16°C a + 43°C
Se puede producir algún problema de
funcionamiento en algunos modelos
cuando se usan fuera de ese rango. Sólo
se puede garantizar el correcto funcionamiento dentro del rango de temperatura
especificado. Si tiene cualquier duda res-
Page 45

pecto al lugar de instalación del aparato,
consulte al vendedor, a nuestro servicio
9.2 Nivelado
9.3 Ubicación
100 mm
15 mm 15 mm
ESPAÑOL 45
de atención al cliente o al servicio técnico
más cercano.
Al colocar el aparato compruebe que
queda nivelado. Esto se puede conseguir
utilizando las dos patas ajustables de la
parte inferior delantera.
Instale el aparato alejado de fuentes de calor, como radiadores, calderas, luz solar directa, etc. Asegúrese también de que el aire
puede circular sin obstáculos por la parte
trasera del armario. Para garantizar un rendimiento óptimo, si el aparato se coloca debajo de un mueble de cocina instalado en la
pared, deje una distancia mínima de 100
mm entre la parte superior del aparato y el
mueble de pared. No obstante, lo ideal sería
que el aparato no se colocara debajo de
ningún mueble instalado en la pared. La base del aparato está provista de una o varias
patas ajustables para garantizar un nivelado
correcto del mismo. Si el aparato se sitúa
en una esquina con el lateral de las bisagras
frente a la pared, deje una distancia mínima
de 10 mm entre la pared y el aparato de
modo que la puerta se pueda abrir lo suficiente para retirar los estantes sin dificultad.
ADVERTENCIA
Puede que en algún momento sea
necesario desenchufar el aparato de
la toma de corriente; por lo tanto, el
enchufe debe ser fácilmente accesible tras la instalación del aparato.
Page 46

www.electrolux.com
46
9.4 Cambio del sentido de apertura de la puerta
Los procedimientos que se indican a continuación requieren la
ayuda de otra persona que sujete
bien las puertas del aparato durante todo el proceso.
Para cambiar el sentido de apertura de la
puerta, siga estos pasos:
• Desconecte el enchufe de la red.
• Incline el aparato hacia atrás con cuidado, de modo que el compresor no toque el suelo.
• Desatornille la pata izquierda.
• Retire la bisagra de la puerta inferior
desatornillando los 2 tornillos de sujeción.
• Retire el pasador de la bisagra de la
parte inferior del aparato.
• Introduzca el pasador de la bisagra en
el orificio de la placa de bisagras.
• Extraiga la puerta.
• Vuelva a colocar el pasador de la bisagra superior en la ubicación opuesta.
• Ajuste la puerta en su sitio sobre el pasador de la bisagra.
• Introduzca el pasador de la bisagra en
el orificio de la placa y vuelva a colocar
las bisagras en la ubicación opuesta;
utilice los tornillos de sujeción.
• Vuelva a colocar el conjunto de la placa
de bisagras inferior en el lado opuesto,
prestando especial atención para que
el borde de la puerta quede paralelo al
lado del armario.
• Retire e instale el asa (en su caso) en el
lado opuesto.
• Coloque el aparato en su lugar, nivélelo
y espere al menos cuatro horas antes
de enchufarlo a la corriente.
Finalmente, compruebe que:
• Todos los tornillos están apretados.
1
2
• La puerta abre y cierra correctamente.
Page 47

ESPAÑOL 47
Es posible que la junta no encaje a la perfección en el mueble si la temperatura
ambiente es baja (es decir, en invierno).
En tal caso, espere hasta que la junta se
fije al mueble de forma natural.
Si prefiere no realizar los procedimientos
anteriores, póngase en contacto con el
centro de servicio técnico más próximo.
El personal del centro de servicio técnico
cambiará el sentido de apertura de las
puertas con gastos a su cargo.
9.5 Conexión eléctrica
Antes de conectar el aparato, compruebe
que el voltaje y la frecuencia que aparecen en la placa de datos técnicos se corresponden con el suministro de la vivienda.
El aparato debe tener conexión a tierra. El
enchufe del cable de alimentación se suministra con un contacto para tal fin. Si la
10. RUIDO
Durante el funcionamiento normal del
aparato suelen producirse ciertos ruidos
(compresor, circulación del refrigerante).
toma de red de la vivienda carece de conexión a tierra, conecte el aparato a una
toma de tierra conforme con la normativa,
después de consultar a un electricista
profesional.
El fabricante rechaza toda responsabilidad si no se toman las precauciones antes indicadas.
Este aparato es conforme con las directivas de la CEE.
OK
SSSRRR!
SSSRRR!
SSSRR
HISSS!
BLUBB!
CLICK!
R!
CLICK!
BRRR!
CRACK!
CLICK!
Page 48

www.electrolux.com
48
HISSS!
BLUBB!
11. DATOS TÉCNICOS
HISSS!
BLUBB!
BRRR!
BRRR!
CRACK!CRACK!
Medidas
Alto 850 mm
Ancho 550 mm
Fondo 612 mm
Tiempo de estabilización 22 h
Tensión 230-240 V
Frecuencia 50 Hz
La información técnica se encuentra en la
placa de características, situada en el la-
do interior izquierdo del aparato, y en la
etiqueta de consumo energético.
12. ASPECTOS MEDIOAMBIENTALES
contenedores adecuados para su
Recicle los materiales con el símbolo
Coloque el material de embalaje en los
.
reciclaje.
Page 49

Ayude a proteger el medio ambiente y la
salud pública, así como a reciclar
residuos de aparatos eléctricos y
electrónicos. No deseche los aparatos
marcados con el símbolo
junto con los
ESPAÑOL 49
residuos domésticos. Lleve el producto a
su centro de reciclaje local o póngase en
contacto con su oficina municipal.
Page 50

www.electrolux.com
50
Page 51

ESPAÑOL 51
Page 52

www.electrolux.com/shop
212000328-A-192013
 Loading...