

Page 1

fridge - freezer
/
æ Y ° E I O K A T A æ Y K T H ™
/
Sogutucu - Dondurucu
INSTRUCTION BOOK
O¢H°IE™ XPH™H™
KULLANIM KILAVUZU
2223 196-81
ERN 2921
GB
EL
TR
ELECTROLUX HOME PRODUCTS OPERATIONS EUROPE
Page 2

2
WARNINGS
It is most important that this instruction book should be retained with the appliance for future
reference. Should the appliance be sold or transferred to another owner, or should you move house
and leave the appliance, always ensure that the book is supplied with the appliance in order that the
new owner can be acquainted with the functioning of the appliance and the relevant warnings.
If this appliance featuring magnetic door seals is to replace an older appliance having a spring lock
(latch) on the door or lid, be sure to make that spring lock unusable before you discard the old
appliance. This will prevent it from becoming a death-trap for a child.
These warnings are provided in the interest of safety. You must read them carefully before installing or
using the appliance.
General Safety
• This appliance is designed to be operated by
adults. Children should not be allowed to tamper
with the controls or play with the product.
• It is dangerous to alter the specifications or
modify this product in any way.
• Before any cleaning or maintenance work is carried
out, be sure to switch off and unplug the appliance.
• This appliance is heavy. Care should be taken
when moving it
• Ice lollies can cause frost burns if consumed
straight from the appliance.
• Take utmost care when handling your
appliance so as not to cause any damages to
the cooling unit with consequent possible
fluid leakages.
• The appliance must not be located close to
radiators or gas cookers.
• Avoid prolonged exposure of the appliance to
direct sunlight.
• There must be adequate ventilation round the
back of the appliance and any damage to the
refrigerant circuit must be avoided.
• For freezers only (except built-in models): an
ideal location is the cellar or basement.
• Do not use other electrical appliances (such
as ice cream makers) inside of refrigerating
appliances.
Service/Repair
• Any electrical work required to install this
appliance should be carried out by a qualified
electrician or competent person
• This product should be serviced by an authorized
Service Centre, and only genuine spare parts
should be used.
• Under no circumstances should you attempt to
repair the appliance yourself. Repairs carried out
by inexperienced persons may cause injury or
more serious malfunctioning. Refer to your local
Service Centre, and always insist on genuine
spare parts.
• This appliance contains hydrocarbons in its
cooling unit; maintenance and recharging must
therefore only be carried out by authorized
technicians.
Use
• The domestic refrigerators and freezers are
designed to be used specifically for the storage
of edible foodstuffs only.
• Best performance is obtained with ambient
temperature between +18°C and +43°C (class T);
+18°C and +38°C (class ST); +16°C and +32°C
(class N); +10°C and +32°C (class SN).The
class of your appliance is shown on its rating
plate.
Warning: when the ambient temperature is not
included within the range indicated for the class
of this appliance, the following instructions must
be observed: when the ambient temperature
drops below the minimum level, the storage
temperature in the freezer compartment cannot
be guaranteed; therefore it is advisable to use the
food stored as soon as possible.
• Frozen food must not be re-frozen once it has
been thawed out.
• Manufacturers’ storage recommendations should
be strictly adhered to. Refer to relevant
instructions.
• The inner lining of the appliance consists of
channels through which the refrigerant passes. If
these should be punctured this would damage the
appliance beyond repair and cause food loss. DO
NOT USE SHARP INSTRUMENTS to scrape off
frost or ice. Frost may be removed by using a
plastic scraper. Under no circumstances should
solid ice be forced off the liner. Solid ice should be
allowed to thaw when defrosting the appliance.
Page 3
3
CONTENTS
Warnings 2
Use 4
Cleaning the interior 4
The control panel 4
Starting 4
Quick-freezing 4
Warning light 4
Freezing fresh food 4
Storage of frozen food 5
Thawing 5
Ice-cube production 5
Temperature regulation 5
Fresh food refrigeration 5
Movable shelves 6
Positioning the door shelves 6
Hints 7
Hints for refrigeration 7
Hints for freezing 7
Hints for storage of frozen food 7
Maintenance 8
Periodic cleaning 8
Periods of no operation 8
Interior light 8
Defrosting 8
Customer service and spare parts 9
Installation 10
Location 10
Electrical connection 10
Instructions for totally built-in appliances 11
• Do not place carbonated or fizzy drinks in the
freezer as it creates pressure on the container,
which may cause it to explode, resulting in
damage to the appliance. Do not use a
mechanical device or any artificial means to
speed up the thawing process other than those
recommended by the manufacturer. Never use
metal objects for cleaning your appliance as it
may get damaged.
Installation
• During normal operation, the condenser and
compressor at the back of the appliance heat up
considerably. For safety reasons, minimum
ventilation must be as shown in the instructions.
Attention: keep ventilation openings clear of
obstruction.
• Care must be taken to ensure that the appliance
does not stand on the electrical supply cable.
Important: if the supply cord is damaged, it must
be replaced by a special cord or assembly available from the manufacturer or its service agent.
• If the appliance is transported horizontally, it is
possible that the oil contained in the compressor
flows in the refrigerant circuit. It is advisable to
wait at least two hours before connecting the
appliance to allow the oil to flow back in the
compressor.
• There are working parts in this product which
heat up. Always ensure that there is adequate
ventilation as a failure to do this will result in
component failure and possible food loss. See
installation instructions.
• Parts which heat up should not be exposed.
Wherever possible the back of the product should
be against a wall.
Environment Protection
This appliance does not contain gasses which
could damage the ozone layer, in either its
refrigerant circuit or insulation materials. The
appliance shall not be discarded together with
the urban refuse and rubbish. Avoid damaging
the cooling unit, especially at the rear near the
heat exchanger. Information on your local
disposal sites may be obtained from municipal
authorities. The materials used on this appliance
marked by the symbol are recyclable.
20.07.2002 - 1548
Page 4
4
Cleaning the interior
Before using the appliance for the first time, wash
the interior and all internal accessories with lukewarm water and some neutral soap so as to remove
the typical smell of a brand-new product, then dry
thoroughly.
Do not use detergents or abrasive
powders, as these will damage the finish.
USE
This freezer has been marked with the symbol, which means that it is suited to the freezing of fresh
foods, the conservation of frozen foods and the production of ice-cubes.
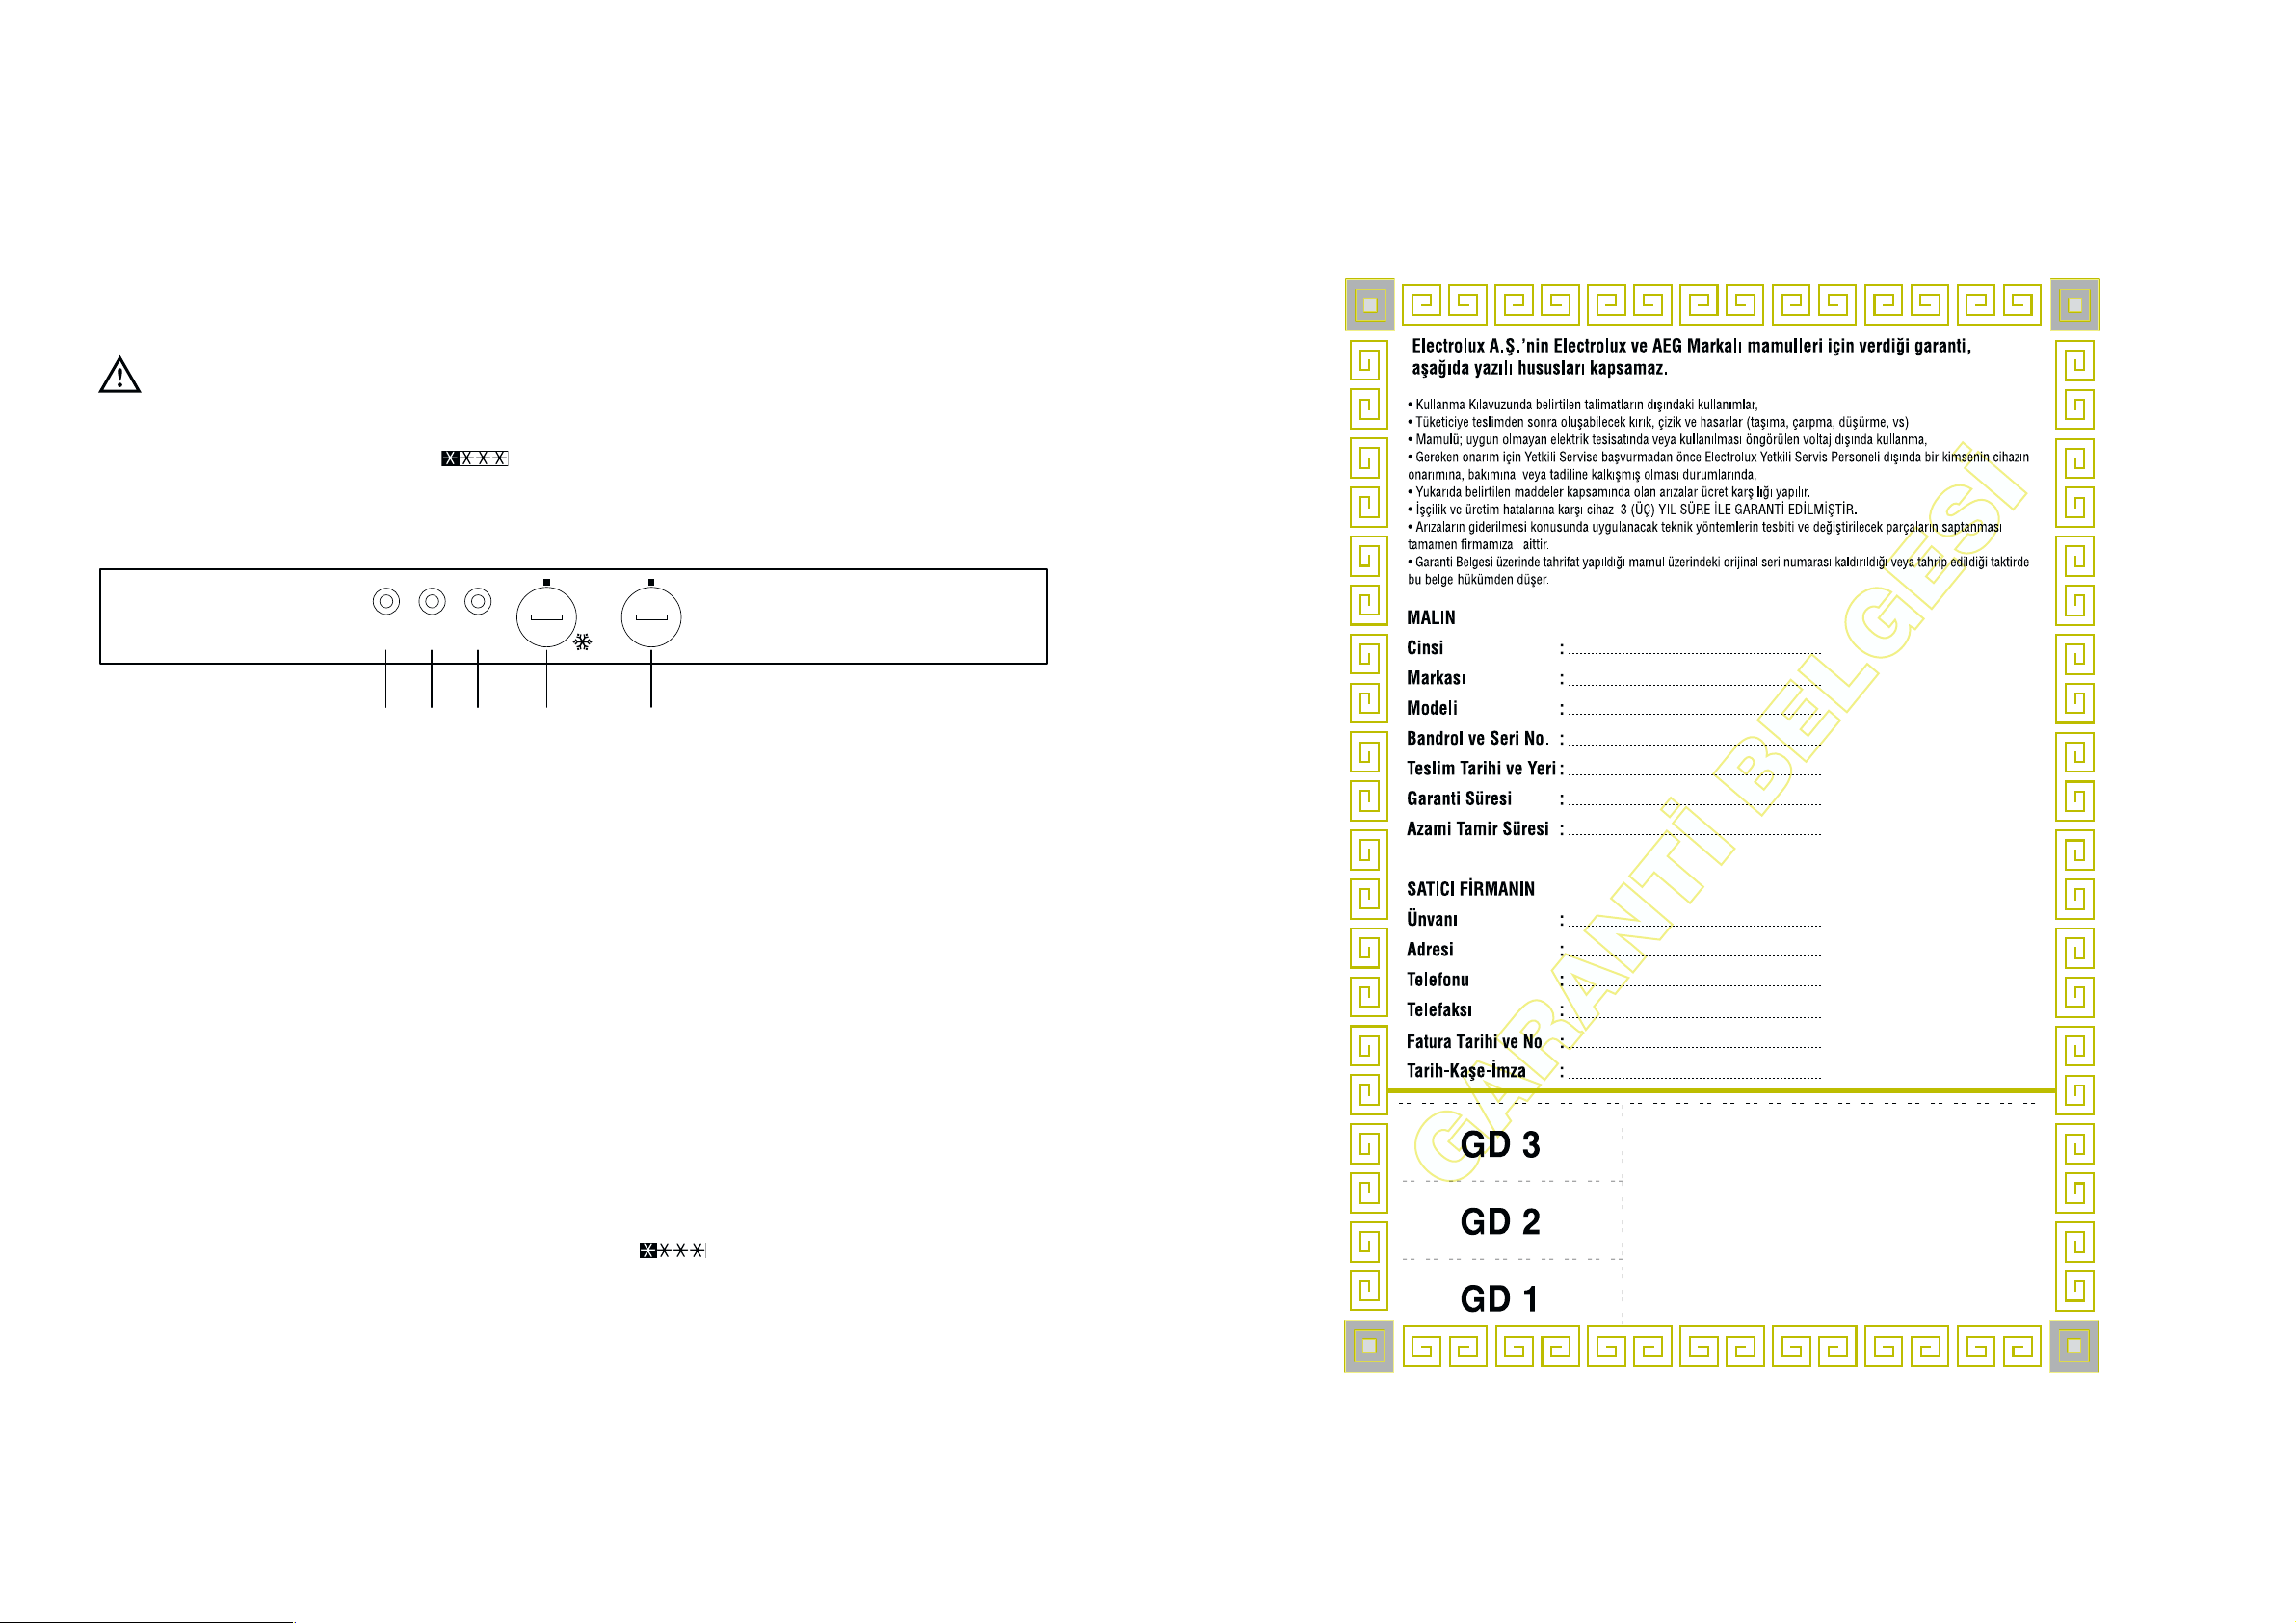
The control panel
A. Pilot light
B. SUPER operating control light
C. Warning light
D. Normal/Super (quick-freezing) switch
E. Thermostat knob
Starting
Insert the power supply plug into the nearest wall
socket (the function indicator light (A) will light up
indicating that the freezer is receiving electrical
input). Turn the thermostat knob (E) to the right to a
medium setting (the temperature alarm light (C) will
light up). For the satisfactory conservation of frozen
foods, the freezer’s internal temperature must be
lower than -18°C. Wait until the temperature alarm
light (C) turns off when the optimum temperature
has been reached. Thermostat settings may be
modified according to the surrounding room
temperature, the location of the freezer and the
frequency of door openings, etc. To turn off the
freezer, turn the thermostat knob to the «O» position.
The refrigerator compartment will remain operating.
Quick-freezing
For quick-freezing, turn the N/S knob (D) to the «S»
symbol. The quick-freezlng indlcator light (B) will
then light up.
Warning light
Warning light (C) lights up when the temperature
inside the freezer compartment has increased to a
value which jeopardizes the long-term storage of
food in the compartment. When the appliance is
switched on for the first time or when food is placed
in the compartment for freezing, it is normal for this
light to remain on until the temperature has reached
the level required for correct storage.
Freezing fresh food
The 4-star freezer is suitable for long term
storage of commercially frozen food and for freezing
fresh food.
To fast freeze food, if the appliance has been out of
operation, allow it to run on the fast freeze setting for
at least three hours before loading the food.
If, however, the appliance is already in operation, set
it to run on the fast freeze setting for at least 24
hours before loading the food.
Place the food to be frozen in the upper
compartment of the freezer as this is the coldest part.
ANKASTRE SOGUTUCU
ELECTROLUX
ERN 2921
3 YIL
30 ISGUNU
O
6
1
5
2
4
3
EDCB
SUPER
ON
A
ALARM
N
S
Page 5

5
Fresh food refrigeration
To obtain the best performance:
• do not store warm food or evaporating liquids in
the refrigerator;
• do cover or wrap the food, particularly if it has a
strong flavour.
• Position food so that air can circulate freely round it.
Important
Do not put carbonated liquids (fizzy drinks, etc.) in
the freezing compartment as they may burst.
Water ices, if consumed immediately after removal
from the freezing compartment, can possibly cause
the skin to be freeze burnt.
Remember that, once thawed, frozen food deteriorates rapidly.
Storage of frozen food
Frozen food storage
When the freezer is being turned on for the first time,
or after a prolonged period of disuse, turn the N/S
knob to the Quick-freezing position and then wait at
least two hours before introducing the food to be
conserved. You may then return the knob to the «N»
position. This two-hour waiting period may be
avoided if the freezer has already been in operation.
To obtain the best performance from this appliance,
you should:
if large quantities of food are to be stored, remove all
drawers and baskets from appliance (except for the
last one at the bottom) and place food on cooling
shelves.
Pay careful attention not to exceed load limit stated
on the side of the upper section (where applicable).
Thawing
Deep-frozen or frozen food, prior to being used, can
be thawed in the refrigerator compartment or at
room temperature, depending on the time available
for this operation. Small pieces may even be cooked
still frozen, directly from the freezer: in this case,
cooking will take longer.
Ice-cube production
This appliance is equipped with one or more trays
for the production of ice-cubes. Fill these trays with
water, then put them in the freezer compartment. Do
not use metallic instruments to remove the trays
from the freezer.
Temperature regulation
To start the appliance, turn the thermostat knob,
located inside the compartment, to the required
position. This thermostat has six operating positions
and an «O» (Stop) position. The higher the number
selected, the lower the temperature in the
refrigerator. When first starting up the appliance, an
initial setting of 3 or 4 is recommended. The
temperature inside the compartment depends on a
number of factors, such as the ambient temperature,
the amount of food stored in the appliance, the
frequency with which the door is opened, the
location of the appliance in the room, etc. These
factors must be taken into account when setting the
thermostat. To stop the appliance, turn the
thermostat knob to the «O» position. The freezer
compartment will continue to operate.
Important
If the ambient temperature is high, the thermostat
knob is on the coldest setting (higher numbers) and
the appliance is fully loaded, the compressor may
run continuously, causing frost or ice to form on the
evaporator. If this happens, turn the knob to a
warmer setting (lower numbers) to allow automatic
defrosting and so a saving in electricity
consumption.
40
Cihaz mutfak tezgahına yandan sabitlen-miflse, (E)
sabitleme yuvasındaki vidaları gevfletip flekilde
gösterildi¤i gibi destekleri çıkarınız ve tekrar sıkınız.
Köflebentleri çıkarınız ve çivi (K) ile kapının dıfl
kenarından 8 mm. mesafeyi iflaretleyiniz.
Ufak kareleri kılavuz üzerindeki yerlerine tekrar
takarak tornavida ile sabitleyiniz.
Mobilya kapının teraziye alınması ge-rekti¤inde
yuvadaki açıklıkları kullanın.
‹fllemin sonunda mobilyanın kapa¤ının tam olarak
kapanıp kapanmadı¤ının kontrol edilmesi gereklidir.
(Hd) ka¤a¤ını (Hb) kılavuzu üzerine oturun-caya dek
yerlefltiriniz.
Kapıların açılıfl yönlerini de¤ifltirdikten sonra
bütün vidaların iyice sıkıldıkların-dan ve
manyetik contanın dolaba tam olarak
oturdu¤undan emin olunuz. E¤er ortam sıcaklı¤ı
düflük ise (ör. Kıflın) conta dolaba tam olarak
oturmayabilir. Bu du-rumda contanın do¤al olarak
oturmasını bekleyebilir veya fön makinasıyla bu
ifllemi hızlandırabilirsiniz.
8mm
K
Ha
PR168
Hb
PR167/1
D735
Hb
Hd
E
E
Page 6
6
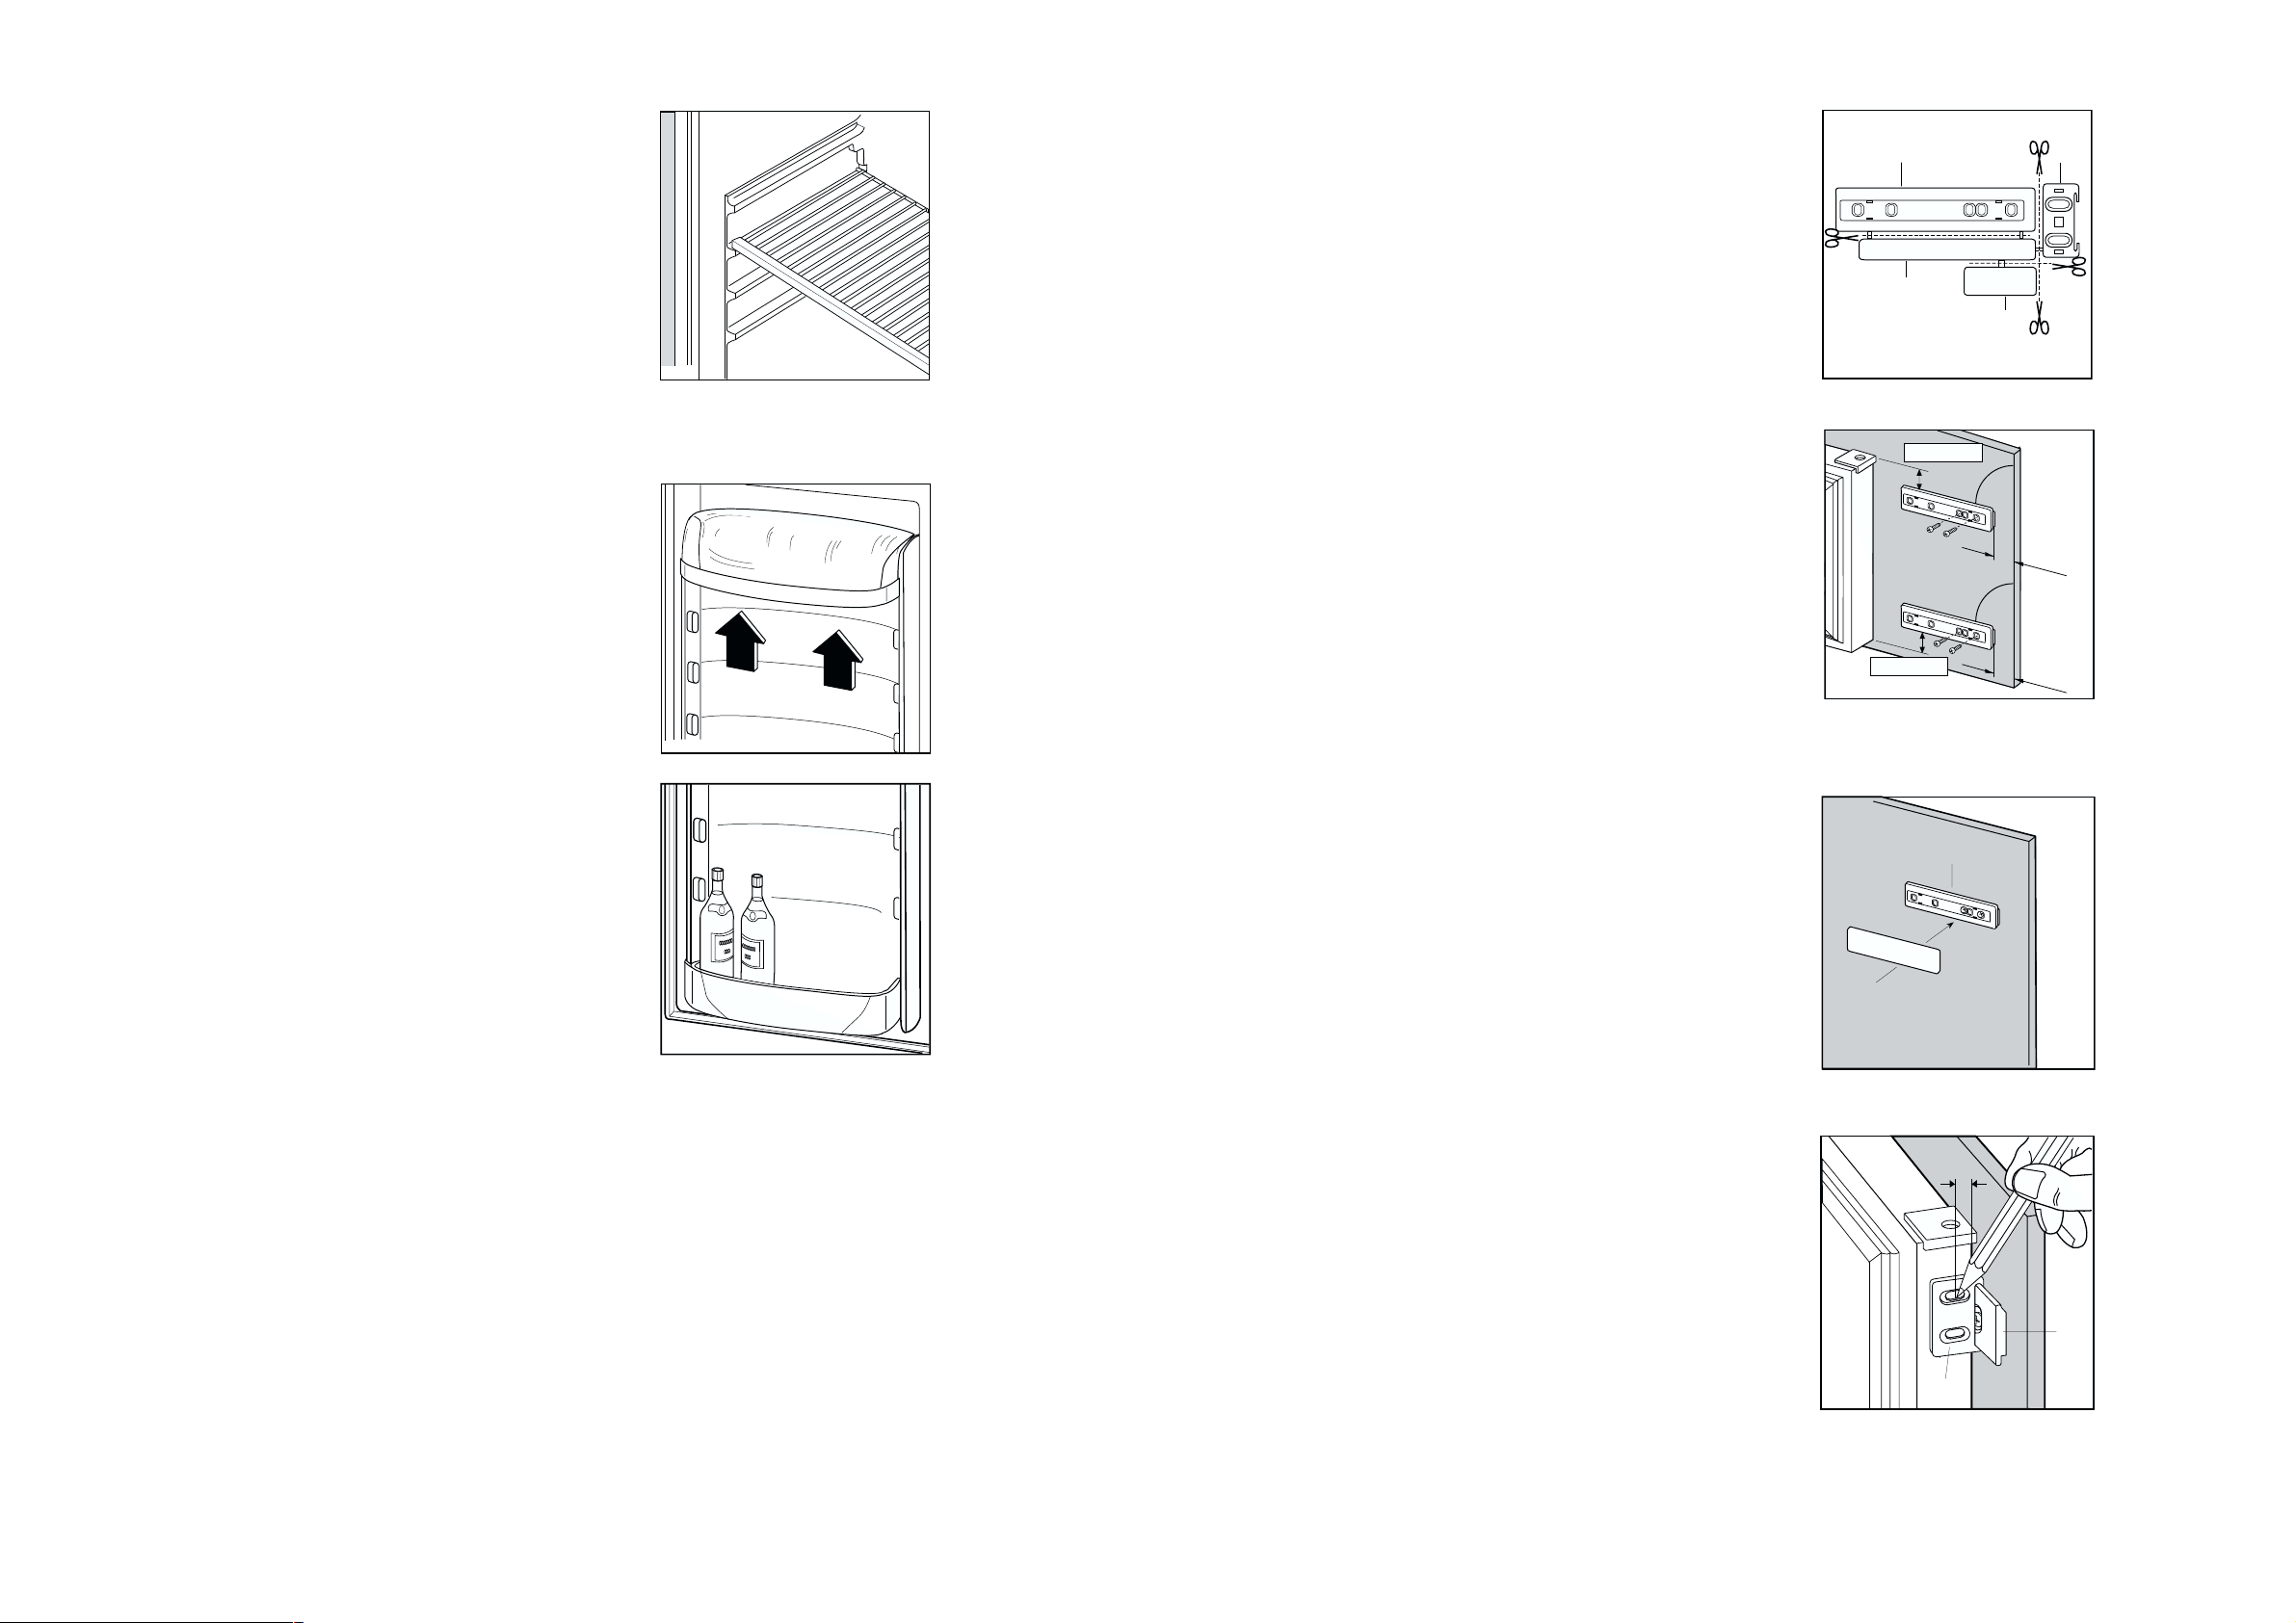
Movable shelves
The walls of the refrigerator are equipped with a
series of runners so that the shelves can be
positioned as desired.
Positioning the door shelves
To permit storage of food packages of various sizes,
the door shelves can be adjusted in height.
To make these adjustments proceed as follows:
Gradually pull the shelf in the direction of the arrows
until it comes off, then reposition as required.
39
fiekilde gösterilen Ha, Hb, Hc, Hd yedek parçaları
Verilen (Ha) flablonunu mobilya kapının iç tarafına,
flekilde gösterildi¤i gibi altına ve üst kısmına yerlefltirerek, dıfl deliklerin yerlerini iflaretleyiniz. Delikleri
deldikten sonra tornavida ila kılavuzu sabitleyiniz.
(Hc) Kapa¤ını (Ha) kılavuzu üzerine klips yerine oturuncaya dek takınız.
Cihazın kapısını ve mobilya kapıyı 90° açınız. Ufak
(Hb) kare parçayı (Ha) kılavuzuna yerlefltiriniz.
Cihazın kapısı ile mobilya kapıyı üst üste getirerek
flekildeki delikleri markalayınız.
2
1
m
m
2
1
m
m
ÒÇÔPP
90˚
90˚
ÒÇÔPP
PR33
Hc
Ha
PR266
Ha
Hb
Hc
Hd
PR167
Ha
Hb
8mm
D040
Page 7

7
HINTS
Hints for refrigeration
Useful hints:
Meat (all types): wrap in polythene bags and place
on the glass shelf above the vegetable drawer.
For safety, store in this way only one or two days
at the most.
Cooked foods, cold dishes, etc..: these should be
covered and may be placed on any shelf.
Fruit and vegetables: these should be thoroughly
cleaned and placed in the special drawer(s)
provided.
Butter and cheese: these should be placed in
special airtight containers or wrapped in aluminium
foil or polythene bags to exclude as much air as
possible.
Milk bottles: these should have a cap and should
be stored in the bottle rack on the door.
Bananas, potatoes, onions and garlic, if not
packed, must not be kept in the refrigerator.
Hints for freezing
To help you make the most of the freezing process,
here are some important hints:
• the maximum quantity of food which can be
frozen in 24 hrs. is shown on the rating plate;
• the freezing process takes 24 hours. No further
food to be frozen should be added during this
period;
• only freeze top quality, fresh and thoroughly
cleaned, foodstuffs;
• prepare food in small portions to enable it to be
rapidly and completely frozen and to make it
possible subsequently to thaw only the quantity
required;
• wrap up the food in aluminium foil or polythene
and make sure that the packages are airtight;
• do not allow fresh, unfrozen food to touch food
which is already frozen, thus avoiding a rise in
temperature of the latter;
• lean foods store better and longer than fatty
ones; salt reduces the storage life of food;
• water ices, if consumed immediately after
removal from the freezer compartment, can
possibly cause the skin to be freeze burnt;
• it is advisable to show the freezing-in date on
each individual pack to enable you to keep tab of
the storage time;
• The symbols on the drawers show different types
of frozen goods.
The numbers indicate storage times in months for
the appropriate types of frozen goods. Whether
the upper or lower value of the indicated storage
time is valid depends on the quality of the foods
and pre-treating before freezing.
• do not put carbonated liquids (fizzy drinks,
etc.) in the freezer compartment as they may
burst.
Hints for storage of frozen food
To obtain the best performance from this appliance,
you should:
• make sure that the commercially frozen
foodstuffs were adequately stored by the retailer;
• be sure that frozen foodstuffs are transferred
from the foodstore to the freezer in the shortest
possible time;
• not open the door frequently or leave it open
longer than absolutely necessary.
• Once defrosted, food deteriorates rapidly and
cannot be refrozen.
• Do not exceed the storage period indicated by
the food manufacturer.
38
Açık kalan deliklere ve mentefle yuvalarına
kapaklarını (C-D) takınız.
Havalandır-ma ızgarasını (B) ve mentefle
muhafazasını (E) yerlerine takınız.
Mutfak kaplamasıyla cihaz arasına ara kapama
conta-sını yerlefltiriniz.
Cihazı, kapı açma tarafına karflılık gelen iç yan
yüzeye yaslayarak, üst kaçak önleyici conta tam
yerine oturana (1) ve alt mentefle mobilyanın yan
yüzeyi ile aynı hizaya gelene kadar boflluk içine
yerlefltiriniz (2).
Dolabı, verilen dört civatayla sabitleyiniz.
(I = Kısa) (P = Uzun)
1
D023
2
I
D724
C
D
E
P
B
Page 8

8
MAINTENANCE
Unplug the appliance before carrying out
any maintenance operation.
Warning
This appliance contains hydrocarbons in its cooling
unit; maintenance and recharging must therefore
only be carried out by authorized technicians.
Periodic cleaning
Clean the inside with warm water and bicarbonate of
soda.
Rinse and dry thoroughly.
Clean the condenser (black grill) and the
compressor at the back of the appliance with a
brush or a vacuum cleaner.This operation will
improve the performance of the appliance and save
electricity consumption.
Periods of non-operation
When the appliance is not in use for long periods,
take the following precautions:
remove the plug from the wall socket;
remove all food;
defrost and clean the interior and all accessories;
leave the door ajar to allow air to circulate to prevent
unpleasant smells.
Interior light
The light bulb inside the refrigerator compartment
can be reached as follows:
• unscrew the light cover securing screw.
• unhook the moving part as shown in the figure.
If the light does not come on when the door
is open, check that it is screwed into place
properly. If it still does not light up, change
the bulb.The rating is shown on the light
bulb cover.
Defrosting
Frost is automatically eliminated from the evaporator
of the refrigerator compartment every time the motor
compressor stops, during normal use.
The defrost water drains out through a trough into a
special container at the back of the appliance, over
the motor compressor, where it evaporates.
The freezer compartment, however, will become progressively covered with frost. This should be
removed with the special plastic scraper provided,
whenever the thickness of the frost exceeds 4 mm.
During this operation it is not necessary to switch off
the power supply or to remove the foodstuffs.
However, when the ice becomes very thick on the inner liner, complete defrosting should be carried out
and it is advisable to carry out this operation when
the appliance is empty.
37
Ev tipi cihazlarla ilgili tavsiyeler
Cihazın yerlefltirilece¤i yerin ölçüleri
Yükseklik (1) 1780 mm
Derinlik (2) 550 mm
Genifllik (3) 560 mm
Güvenlik açısından asgari havalandırma mesafeleri
flekilde gösterildi¤i gibi olmalıdır.
Dikkat: Havalandırma gözleri açık ve önünde bir
engel olmamasına dikkat edin.
50 mm
min.
200 cm
2
200 cm
2
min.
D567
Ev tipi cihazlarla ilgili tavsiyeler
Kapı açılıfl yönünün de¤ifltirilmesi
B
C
A
Cihaz, kapısı sa¤a veya sola açılır flekilde
su-nulmaktadır. Kapının açılma yönünü
de¤ifltirmek için, cihazı monte etmeden önce
afla¤ıdaki talimatlar do¤rultusunda harekete
ediniz.
1. Üst vidayı gevfletip pulu çıkarın.
2. Üst kapa¤ı çıkarın
3. Vidayı (B) ve pulu (C) çıkarıp di¤er taraftaki orta
mentefleye takın. Mentefle kapa¤ını (A) takın.
4. Üst vidayı, ve pulu ters tarafa takarak üst kapıyı
tekrar monte edin.
5. Alt vidayı söküp pulu çıkarın ve di¤er taraf takın.
PR01
540
50
3
2
1
Ayrıca duvarda afla¤ıdaki ölçülerde bir havalandırma
açıklı¤ı olması da tavsiye edilir:
Derinlik 50 mm
Genifllik 540 mm
D411
D037
Page 9

9
CUSTOMER SERVICE AND SPARE PARTS
If the appliance is not functioning properly, check that:
• the plug is firmly in the wall socket and the mains
power switch is on;
• there is an electricity supply (find out by plugging
in another appliance);
• the thermostat knob is in the correct position.
• If there are water drops on the bottom of the
cabinet, check that the defrost water drain
opening is not obstructed (see “Defrosting”
section).
• If your appliance is still not working properly after
making the above checks, contact the nearest
service centre.
To obtain fast service, it is essential that when you
apply for it you specify the model and serial number
of your appliance which can be found on the
guarantee certificate or on the rating plate located
inside the appliance, on the bottom left-hand side.
To carry out complete defrosting of the freezer compartment proceed as follows:
1. remove any stored food, wrap it in several layers
of newspaper and put it in a cool place;
2. pull out the plug from the wall socket or turn the
thermostat knob to the a«
O» setting.
3. leave the door open;
4. introduce the plastic scraper in the appropriate
seating at the bottom centre, as shown in Fig ,
place underneath a basin to collect the defrost
water;
5. when defrosting is completed, dry the interior
thoroughly;
6. keep the scraper for future use;
7. replace the plug in the socket and, after letting
the appliance run for at least half an hour,
replace the previously removed food into the
compartment.
Important
A temperature rise of the frozen food packs, during
defrosting, may shorten their safe storage life. Never
use sharp metal tools to scrape off frost from the
evaporator as you could damage it.
Do not use a mechanical device or any artificial
means to speed up the thawing process other than
those recommended by the manufacturer.
D068
36
Elektriksel Ba¤lantı
Cihazın fiflini prize takmadan önce etiketin-deki
gerilim ve frekans de¤erlerinin flebeke-nize uygun
oldu¤undan emin olun. Voltajdaki müsaade edilebilir
dalgalanma etiket de¤eri-nin ±¤6’dır.
Farklı voltajlarda çalıfltırılması durumunda uygun bir
transformatörün kullanılması gereklidir.
Cihaz topraklanmalıdır.
Bu amaçla cihazın güç kablosu topraklı olarak
sunulmufltur.
flebeke priziniz topraklı de¤il ise cihazı yetkili bir
elektrikçiye danıflarak, yürürlükteki yönet-meliklere
uygun özelliklere sahip ayrı bir topraklı hatlı prize
takınız.
Üretici yukarıdaki önlemlere uyulmaması
durumunda ortaya çıkabilecek olumsuzluklardan dolayı sorumluluk kabul etmez.
Cihaz afla¤ıdaki E.E.C. Direktiflerine uygundur;
- 2/6/87 tarihli 87/308 EEC radyo parazit
yönetmeli¤i
- 19.2.73 tarihli 73/23 EEC (Alçak Gerilim Direktifi)
ve sonraki de¤ifliklikleri
- 3.5.89 tarihli 89/336 EEC (Elektroman-yetik
Uygunluk Direktifi) ve sonraki de¤ifliklikleri.
MONTAJ
Manyetik kapı contalı olan bu cihaz, yay
kilitli eski bir cihaz ile de¤ifltirilecekse,
de¤ifltirece¤iniz cihazın yaylı kilidini
kullanılamaz hale getiriniz. Bu sayede
çocuklar için muhtemel bir ölüm kapanını
önlemifl olursunuz.
Yerlefltirme
Cihaz kalorifer pete¤i, kazan, do¤rudan günefl ıflı¤ı
gibi ısı yayan kaynaklardan uza¤a yerlefltirilmelidir.
Gerekti¤inde cihazın fiflini prizden çeke-bilmek
için priz kolay ulaflılabilir bir yerde olmalıdır.
Cihazınızın kullanım ömrü 10 yıldır. Kullanım
ömrü, üretici ve/veya ithalatçı firmanın
cihazınızla ilgili yedek parça temini ve bakım
süresini ifade eder.
ELECTROLUX Afi
Tarlabaflı Cd.No 35 Taksim / ‹STANBUL
TEL : 0 212 293 10 20
FAX : 0 212 251 9144
ÜCRETS‹Z TÜKET‹C‹ DANIfiMA HATTI 0 800 211
60 32
Page 10

10
Electrical connection
Before plugging in, ensure that the voltage and
frequency shown on the serial number plate
correspond to your domestic power supply. Voltage
can vary by ±6% of the rated voltage.
For operation with different voltages, a suitably sized
auto-transformer must be used.
The appliance must be earthed.
The power supply cable plug is provided with a
contact for this purpose.
If the domestic power supply socket is not earthed,
connect the appliance to a separate earth in
compliance with current regulations, consulting a
specialist technician.
The Manufacturer declines all responsibility if
the above safety precautions are not observed.
This appliance complies with the following
E.E.C. Directives:
- 87/308 EEC of 2/6/87 relative to radio interference
suppression.
- 73/23 EEC of 19.2.73 (Low Voltage Directive) and
subsequent modifications;
- 89/336 EEC of 3.5.89 (Electromagnetic
Compatibility Directive) and subsequent
modifications.
INSTALLATION
If this appliance featuring magnetic door
seals is to replace an older appliance having
a spring lock (latch) on the door or lid, be
sure to make that spring lock unusable
before you discard the old appliance. This
will prevent it from becoming a death-trap
for a child.
Location
The appliance should be installed well away from
sources of heat such as radiators, boilers, direct
sunlight etc.
It must be possible to disconnect the appliance from
the mains power supply; the plug must therefore be
easily accessible after installation
35
SERV‹S VE YEDEK PARÇA
Cihaz ifllevini düzgün biçimde yerine getir-miyorsa
afla¤ıdakileri kontrol edin:
• Cihazın fiflinin prize tam olarak oturdu-¤undan ve
sigortanın açık oldu¤undan emin olun;
• Elektrik geldi¤inden emin olun (baflka bir cihaz
takıp çalıfltırarak deneyin);
• Termostat dü¤mesinin do¤ru konumda
oldu¤undan emin olun.
• Dolabın alt yüzeyinde su damlaları var ise defrost
suyu giderinin tıkanıp tıkan-madı¤ını kontrol edin
(bkz. "Defrost" bölümü).
• Yukarıdaki kontrolleri yapmanıza ra¤men
cihazınız hala düzgün bir flekilde çalıflmıyorsa en
yakın servis merkezini arayınız.
Hızlı hizmet alabilmek için garanti belgesi üzerinde
veya sol alt kısmında bulunan etiketinde yer alan,
cihazın model ve seri numarasını bildiriniz.
Dondurucu bölmenin buzunun tam olarak
çözülmesi için afla¤ıdaki hususları uygulayın:
1. Muhafaza edilen besinleri çıkarın, bir kaç kat
gazete ka¤ıdıyla sararak serin bir yere alın.
2. Fifli prizden çekin veya termostat dü¤mesini
defrost konumuna getirin.
3. Kapa¤ını açık bırakın;
4. Tabanın ortasında bulunan plastik kazıyıcıyı
kullanarak buzları kazıyınız, eriyen suyu
toplamak için uygun bir tepsi kullanınız.
5. Buz çözme ifllemi tamamlandı¤ında bölmeyi iyice
kurutun.
6. Kazıyıcıyı daha sonra tekrar kullanmak üzere
saklayın.
7. Fifli prize takın ve cihazı, içerisinden çıkardı¤ınız
gıdaları yerlefltirmeden önce yarım saat kadar
bofl olarak çalıfltırın.
Önemli
Defrost sırasında saklanan gıdaların ısılarını
yükselmesi sa¤lıklı muhafaza sürelerini kısaltacaktır.
Evaporatör yüzeyindeki buzları kazımak için asla
keskin uçlu metaller kullanmayınız; zira evaporatöre
zarar vere-bilirsiniz. Buz eritme prosesini
hızlandırmak için üreticinin önerdi¤inden baflka, asla
mekanik cihazlar veya baflka yapay aletler
kullanmayınız.
D068
Page 11

11
Instructions for totally built-in
appliances
Dimensions of the recess
Height (1) 1780 mm
Depth (2) 550 mm
Width (3) 560 mm
For safety reasons, minimum ventilation must be as
shown in Fig.
Attention: keep ventilation openings clear of
obstruction.
50 mm
min.
200 cm
2
200 cm
2
min.
D567
Instructions for totally built-in appliances
Door reversibility
B
C
A
The appliance is supplied with the right
or left door opening. To change the opening
direction of the door proceed as in the
following instructions before installing it.
1. Unscrew the upper pin and remove the spacer
2. Remove the upper door
3. Unscrew the pins (B) and the spacers (C) and
refit them on the middle hinge of the opposite
side. Snap the hinge cover (A).
4. Refit the upper door, the upper pin and the
spacer on the opposite side
5. Unscrew the lower pin and remove the spacer
and refit them on the opposite side
PR01
540
50
3
2
1
Furthermore, it is necessary that the niche is provid
with a conduct of ventilation having the following
dimensions:
depth 50 mm
width 540 mm
34
BAKIM
Cihaz üzerinde herhangi bir ba-kım
yapmadan önce fiflini priz-den çıkarınız.
Uyarı
Bu cihazın so¤utucu ünitesinde hidrokarbon
bulundu¤undan bakım ve onarımı yetkili servis
yapılmalıdır.
Periyodik Temizlik
Dolabın içerisini ılık tuzlu su ile siliniz.
Durulayıp tam olarak kurutunuz.
Dolabın arkasındaki kondanseri (siyah ızga-ralar) ve
kompresörü bir fırça veya elektrikli süpürge ile
temizleyin. Bu sayede cihazın verimi artacak ve
elektrikten tasarruf edecek-siniz.
Kullanılmayaca¤ı Zamanlar
Cihaz uzunca bir süre kullanılmayacaksa afla¤ıdaki
önlemleri alınız:
Fifli prizden çıkarınız,
Bütün yiyecekleri çıkarınız
Defrost ifllemi uygulayıp tüm iç yüzeyi ve
aksesuarları temizleyiniz.
Hofl olmayan kokuların çıkması için dolabın kapısını
açık bırakarak havalan-dırınız.
‹ç Aydınlatma
Dolap içerisindeki aydınlatma lambasına flu flekilde
ulaflabilirsiniz:
• Lamba muhafaza vidasını sökünüz,
• flekilde gösterildi¤i flekilde hareketli parçayı
yerinden çıkarınız
Dolabın kapısı açıldı¤ında lamba
yanmıyor-sa lambanın yerine tam oturup
oturmadı¤ını kontrol ediniz; hala
yanmıyorsa lambayı de¤ifltiriniz. Lambayla
ilgili de¤erler lamba kapa¤ında verilmifltir.
Defrost ifllemi (Buzları eritme)
Buz çözme ifllemi, normal çalıflma esnasın-da
kompresörün her duruflunda otomatik olarak
devreye girer.
Defrost sonucu eriyen buzların suyu cihazın arka
kısmında, kompresörün üzerinde bulunan ve düflen
suyun buharlafltı¤ı özel bir hazneye akar.
Dondurucu bölüm de zamanla buz tabakası ile
kaplanacaktır. Bu buzları, kalınlıkları 4 mm’yi
afltı¤ında verilen plastik kazıyıcı ile kazıyabilirsiniz.
Bu ifllem esnasında cihazın kapatılması veya
gıdaların çıkarılması gerekmemektedir. Ancak iç
yüzeydeki buz tabakası aflırı kalınlafltı¤ında tam bir
defrost ifllemi uygulanmalıdır. Bu ifllemin cihazın bofl
oldu¤u sırada yapılması tavsiye edilir.
D037
D411
Page 12

12
Fit the appliance in the niche by making sure that it
stands against the interior surface of the unit on the
side where the door hinges of the appliances are
fitted. Insert the appliance until the upper strip butts
up against the unit (1) and make sure that the lower
hinge is in line with the surface of the unit (2).
Fasten the appliance with 4 screws provided in the
kit included with the appliance.
(I = short) (P = long)
Apply the sealing strip pushing it between the
refrigerator and the adjacent cabinet.
Apply covers (C-D) on joint cover lugs and into hinge
holes.
Snap vent grille (B) and hinge cover (E) into
position.
Separate parts Ha, Hb, Hc, Hd as shown in the
figure.
33
TAVS‹YELER
So¤utmayla ilgili tavsiyeler
Faydalı Tavsiyeler:
Et (Her çeflidi): Polietilen pofletlere sarıp sebze
çekmecesinin üzerindeki cam rafa yerlefltiriniz.
Emniyet açısından burada en fazla bir veya iki gün
saklayınız.
Piflmifl yenmekler, so¤uk tabaklar, vs.: Üzerleri
kaplandıktan sonra herhangi bir rafa
yerlefltirilebilirler.
Meyve ve sebzeler: ‹yice temizlendikten sonra özel
çekmecelerine konulmalıdırlar.
Tereya¤ı ve Peynir: Özel hava almaz kaplara
konulmalı veya alüminyum folyoya veya polietilen
pofletlere sarılarak olabildi-¤ince hava almalarına
mani olunmalıdır.
Süt flifleleri: A¤ızları kapalı olmalı ve kapak
üzerindeki rafta muhafaza edilmeli-dirler.
Paket içerisinde olmadıkça muz, pata-tes, so¤an
ve sarımsak buzdolabında saklanmamalıdır.
Dondurmayla ilgili tavsiyeler
ço¤u dondurma iflleminde sizlere yardımcı olacak
tavsiyeler:
• 24 saatte dondurulabilecek en fazla besin miktarı
cihazın etiketinde belirtil-mifltir.;
• Dondurma ifllemi 24 saat sürmektedir. Bu süre
içerisinde dondurmak üzere baflka besinler ilave
edilmemelidir.
• Yalnızca en kaliteli, taze ve tam olarak
temizlenmifl besinleri dondurunuz
• Besinleri hızlı bir flekilde dondurmak ve
gerekti¤inde azar azar çözebilmek için
olabildi¤ince ufak porsiyonlar haline getirin;
• Besinleri alüminyum folyo veya polieti-len pofletle
hava almayacak flekilde sarın
• Taze, henüz donmamıfl besinlerin dondurucudaki di¤er dondurulmufl gıdalara temas
ederek ısılarını yükseltmelerini önlemek için
dikkatle yerlefltirin.
• Yayvan olan besinler toplu olanlara nazaran daha
kolay ve daha uzun süre saklanırlar; tuz
besinlerin saklanma ömürlerini kısaltır;
• Dondurucudan çıkar çıkmaz buza te-mas edilirse
ciltte buz yanı¤ına sebep olabilir;
• Dondurulmufl gıdaların üzerine dondu-rulma
tarihlerinin kaydedilmesi, sonra-sında
kontrolünüzü kolaylafltıracaktır;
• Çekmecelerdeki semboller farklı türdeki
dondurulmufl gıdaları ifade ederler.
Sayılar ilgili dondurulmufl gıdanın saklanabilece¤i maksimum ayı ifade eder. Belir-tilen
saklama sürelerinin asgarisinin veya azamisinin
geçerlili¤i saklanan besinlerin kalitesine ve
dondurma iflleminden önceki ön hazırlık
ifllemlerine ba¤lıdır.
• Kola gibi gazlı içecekleri dondurucu-ya
koymayınız, patlayabilirler.
Dondurulmufl gıdaların saklanmasıyla ilgili tavsiyeler
Cihazdan azami ölçüde faydalanabilmeniz için:
• Almıfl oldu¤unuz hazır dondurulmufl gıdaların
satın aldı¤ınız yerde uygun muhafaza
edildi¤inden emin olunuz.
• Aldı¤ınız dondurulmufl gıdayı marketten dolaba
en kısa sürede ulafltırmaya özen gösteriniz.
• Kapıyı sık sık açmayın ve lüzumundan uzun süre
açık bırakmayın.
• Bir kez gıdanın buzu çözüldü¤ünde, hızla
bozulma bafllar ve tekrar dondu-rulamaz.
• Gıda üreticisinin belirtti¤i muhafaza süresini
aflmayın.
1
D023
2
I
D724
D
C
E
Ha
Hc
P
B
Hb
Hd
PR266
Page 13

13
Place guide (Ha) on the inside part of the furniture
door, up and down as shown in the figure and mark
the position of external holes. After having drilled
holes, fix the guide with the screws supplied.
2
1
m
m
2
1
m
m
ca. 50 mm
90
90
ca. 50 mm
Fix cover (Hc) on guide (Ha) until it clips into place
PR33
Hc
Ha
PR167
Ha
Hb
8mm
Open the appliance door and the furniture door at
90°. Insert the small square (Hb) into guide (Ha).
Put together the appliance door and the furniture
door and mark the holes as indicated in the figure.
Ha
8mm
K
Remove the brackets and mark a distance of 8 mm
from the outer edge of the door where the nail must
be fitted (K).
PR168
Hb
Place the small square on the guide again and fix it
with the screws supplied.
Should the lining up of the furniture door be
necessary, use the clearance of slots.
At the end of operations, it is necessary to check if
the door of the furniture closes properly.
32
Hareketli raflar
Buzdolabının duvarları rafları istedi¤iniz flekilde
yerlefl-tirebilmenize imkan verecek raf kızaklarıyla
dona-tılmıfltır.
Kapak raflarının yerlefltirilmesi
De¤iflik ebatlardaki gıda ambalajlarının muhafaza
edilebilmesi için kapıdaki rafların yükseklikleri de
ayarlanabilir.
Bu ayarları yapmak için:
Rafı ok istikametinde çıkıncaya kadar yavafl yavafl
çekiniz, sonra istedi¤iniz yere takınız.
D040
Page 14

14
If the appliance is fixed to the side of the kitchen
unit, simply slacken the screws in the fixing brackets
(E), move the brackets as shown in the figure and
re-tighten the screws.
After having reversed the opening direction of
the doors check that all the screws are properly
tightened and that the magnetic seal adheres to
the cabinet. If the ambient temperature is cold
(i.e. in Winter), the gasket may not fit perfectly to
the cabinet. In that case, wait for the natural
fitting of the gasket or accelerate this process by
heating up the part involved with a normal
hairdrier.
Fix cover (Hd) on guide (Hb) until it clips into place.
31
Taze gıdaların so¤uk saklan-ması
En iyi sonuca ulaflmak için:
• Buzdolabına sıcak yiyecekleri veya buharlaflabilir
sıvıları muhafaza etme-yiniz.
• Yiyecekleri, özellikle de keskin kokusu var ise,
üzerini örtün veya kaplayın.
• Besinleri etrafında hava kolayca dolafla-bilecek
flekilde yerlefltirin.
Önemli
Kola gibi gazlı içecekleri dondurucuya koy-mayınız,
patlayabilirler.
Dondurucudan çıkar çıkmaz buza temas edilirse
ciltte buz yanı¤ına sebep olabilir
Dondurulmufl gıdaların bir kez buzları çözüldü¤ünde
hızla bozulduklarını unut-mayınız.
Dondurulmufl gıdaların saklanması
Dondurucu ilk kez çalıfltırıldı¤ında veya uzun süreli
bir çalıflmama süresi ardından ilk açıldı¤ında N/S
dü¤mesini Hızlı dondur-ma konumuna getirerek
besinleri koyma-dan önce en az iki saat kadar
çalıfltırın. Sonra dü¤meyi «N» konumuna getirebilirsiniz. ‹ki saatlik bu süre e¤er dondurucu halihazırda
çalıflmaktaysa uygulanmaya-bilir.
Cihazdan azami performansı almak için:
E¤er çok miktarda gıda muhafaza edile-cekse cihaz
içerisindeki tüm sepet ve çek-meceleri (tabandaki
sonuncu hariç) çıkarı-nız ve besinleri so¤utucu raflar
üzerine yerlefltiriniz.
Üst kısımda belirtilen (varsa) azami yükle-me
sınırlarına riayet ediniz.
Buz çözme
Derin dondurulmufl veya dondurulmufl gıdalar
kullanılmadan önce buzdolabında veya oda
sıcaklı¤ında, süresine göre, buzları çözülünceye
kadar bekletilmelidir. Ufak parçalılar donmufl halde
iken de piflirilebilir ancak bu dudumda piflmeleri
daha uzun sürecektir.
Küp - Buz Yapma
Cihazda bir veya daha fazla sayıda küp – buz
yapmak için kap bulunmaktadır. Bu kapları su ile
doldurup dondurucu bölüme yerlefltirin. Bu kapları
yerinden çıkarmak için metal aletler kullanmayın.
Sıcaklık Ayarı
Cihazı çalıfltırmak için, dolabın içerisindeki termostat
ayar dü¤mesini istenilen konu-ma getirin. Bu
termostatda 6 çalıflma ko-numu bir de «0» (Stop)
konumu bulun-maktadır. Seçti¤iniz sayı büyüdükçe
dolap içerisindeki sıcaklık o derece düflecektir.
Cihazı ilk kez çalıfltıracakken ilk ayar de¤erinin 3
veya 4 olması önerilir.. Dolap içerisindeki sıcaklık,
çevrenin sıcaklı¤ı, dolaba yerlefltirilen besin
miktarına, kapı-sının açılıp kapanma sıklı¤ına, oda
içinde yerlefltirildi¤i yere, vb. gibi bir kaç tane
faktöre ba¤lıdır. Termostat ayarı yapılırken bu
faktörler göz önünde bulundurulmalıdır. Cihazı
durdurmak için termostadın dü¤me-sini «0»
konumuna getirmek yeterlidir. Dondurucu bölmesi
ise çalıflmaya devam edecektir.
Önemli
E¤er dıfl ortam sıcaklı¤ı yüksek ve dolap tam olarak
doldurulmuflsa termostat dü¤-mesi en so¤uk
konuma (en büyük de¤ere) alınaca¤ından so¤utucu
kompresör sürekli çalıflmak durumunda kalabilecek
bu da evaporatörde buzlanmaya neden olabilecektir. Böyle bir durumda termostadı daha düflük bir
de¤ere getirerek hem otomatik defrost hem de
elektrik tasarrufu sa¤lamıfl olursunuz.
PR167/1
D735
Hb
Hd
E
E
Page 15

15
¶POEI¢O¶OIH™EI™
E›Ó·È Ôχ ÛËÌ·ÓÙÈÎfi Ó· ̤ÓÂÈ ¿ÓÙ· ÎÔÓÙ¿ ÛÙË Û˘Û΢‹ ÙÔ ÂÁ¯ÂÈÚ›‰ÈÔ ·˘Ùfi Ì ÙȘ Ô‰ËÁ›Â˜ ¯Ú‹Û˘ ÁÈ· Ó· ÙÔ
Û˘Ì‚Ô˘Ï‡ÛÙÂ. ™Â ÂÚ›ÙˆÛË Ô˘ Ë Û˘Û΢‹ ˆÏËı› ‹ ÌÂÙ·ÊÂÚı› Û ¿ÏÏÔ È‰ÈÔÎÙ‹ÙË, ‹ ¿Ó ÌÂÙ·ÎÔÌ›ÛÂÙÂ Î·È ÙËÓ
·К‹ЫВЩВ, ‚В‚·ИˆıВ›ЩВ fiЩИ ЩФ ВБ¯ВИЪ›‰ИФ ı· МВ›УВИ ЫЩЛ Ы˘ЫОВ˘‹, ¤ЩЫИ ТЫЩВ Ф О·ИУФ‡ЪИФ˜ И‰ИФОЩ‹ЩЛ˜ У· МФЪ¤ЫВИ У·
ВНФИОВИˆıВ› МВ ЩЛ ПВИЩФ˘ЪБ›· ЩЛ˜ Ы˘ЫОВ˘‹˜ О·И ЩИ˜ Ы¯ВЩИО¤˜ ЪФВИ‰ФФИ‹ЫВИ˜.
E¿У ·˘Щ‹ Л Ы˘ЫОВ˘‹ Ф˘ ¤¯ВИ М·БУЛЩИО‹ fiЪЩ· ЪfiОВИЩ·И У· ·УЩИО·Щ·ЫЩ‹ЫВИ МИ· ·П·И¿ Ы˘ЫОВ˘‹ Л ФФ›· ¤¯ВИ
ОПВИ‰·ЪИ¿, ‚В‚·ИˆıВ›ЩВ fiЩИ ·¯ЪЛЫЩВ‡Ы·ЩВ ·˘Щ‹У ЩЛУ ОПВИ‰·ЪИ¿ ЪИУ ВЩ¿НВЩВ ЫЩ· ЫОФ˘›‰И· ЩЛУ ·П·И¿ Ы·˜ Ы˘ЫОВ˘‹.
ŒЩЫИ ı· ·ФК‡БВЩВ У· ЩЛУ О¿УВЩВ ·Б›‰· ОИУ‰‡УФ˘ БИ· О¿ФИФ ·И‰›.
OИ ЪФВИ‰ФФИ‹ЫВИ˜ ·˘Щ¤˜ ·Ъ¤¯ФУЩ·И ·fi ВУ‰И·К¤ЪФУ БИ· ЩЛУ ·ЫК¿ПВИ¿ Ы·˜. ¶Ъ¤ВИ У· ЩИ˜ ‰И·‚¿ЫВЩВ ЪФЫВОЩИО¿
ЪИУ ВБО·Щ·ЫЩ‹ЫВЩВ ‹ ı¤ЫВЩВ ЫВ ПВИЩФ˘ЪБ›· ЩЛ Ы˘ЫОВ˘‹.
AÛÊ¿ÏÂÈ·
с H Ы˘ЫОВ˘‹ ·˘Щ‹ Ы¯В‰И¿ЫЩЛОВ БИ· У· ЩЛ ¯ВИЪ›˙ФУЩ·И
ÂÓ‹ÏÈΘ. ¢ÂÓ Ú¤ÂÈ Ó· ÂÈÙÚ¤ÂÙ ÛÙ· ·È‰È¿ Ó·
ÂÈÚ¿˙Ô˘Ó ÙÔ˘˜ ‰È·ÎfiÙ˜ ‹ Ó· ·›˙Ô˘Ó Ì ÙË
Û˘Û΢‹.
ñ E›Ó·È ÂÈΛӉ˘ÓÔ Ó· ·ÏÏ¿˙ÂÙ ÙȘ ÚԉȷÁڷʤ˜ ‹ Ó·
ÙÚÔÔÔț٠ÙË Û˘Û΢‹ Ì ÔÔÈÔ‰‹ÔÙ ÙÚfiÔ.
ñ ¶ÚÈÓ ·fi ÙÔÓ Î·ı·ÚÈÛÌfi ‹ ÙËÓ Û˘ÓÙ‹ÚËÛË,
‚‚·Èˆı›Ù fiÙÈ ¤¯ÂÙ ÎÏ›ÛÂÈ Î·È ‚Á¿ÏÂÈ ·fi ÙËÓ
Ú›˙· ÙËÓ Û˘Û΢‹.
ñ H Û˘Û΢‹ ·˘Ù‹ Â›Ó·È ‚·ÚÈ¿. ¶ÚÔÛÔ¯‹ ηٿ ÙË
ÌÂÙ·ÊÔÚ¿.
ñ T· ·ÁˆÙ¿ ÛÂ Í˘Ï¿ÎÈ ÌÔÚÔ‡Ó Ó· ÚÔηϤÛÔ˘Ó
η„›Ì·Ù· ÏfiÁˆ ¿ÁÔ˘ ·Ó ηٷӷψıÔ‡Ó Î·Ù¢ı›·Ó
·fi ÙË Û˘Û΢‹.
ñ
¶ЪФЫ¤НЩВ И‰И·›ЩВЪ· fiЩ·У МВЩ·ОИУВ›ЩВ ЩЛ Ы˘ЫОВ˘‹
Ы·˜, БИ· У· МЛУ ЪФО·П¤ЫВЩВ ˙ЛМ›В˜ ЫЩЛУ „˘ОЩИО‹
МФУ¿‰· О·И, О·Щ¿ Ы˘У¤ВИ·, ‰И·ЪЪФ¤˜ ЩФ˘ „˘ОЩИОФ‡
˘БЪФ‡.
ñ
MЛУ ЩФФıВЩВ›ЩВ ЩЛ Ы˘ЫОВ˘‹ ОФУЩ¿ ЫВ О·ПФЪИК¤Ъ ‹
КФ‡ЪУФ˘˜ ОФ˘˙›У·˜.
ñ
MËÓ ·Ê‹ÓÂÙ ÙË Û˘Û΢‹ ÂÎÙÂıÂÈ̤ÓË ÁÈ· Ôχ
¯ÚfiÓÔ ÛÙȘ ·ÎÙ›Ó˜ ÙÔ˘ ‹ÏÈÔ˘.
ñ
¶›Ыˆ ·fi ЩЛУ П¿ЩЛ ЩЛ˜ Ы˘ЫОВ˘‹˜ Ъ¤ВИ У·
˘¿Ъ¯ВИ В·ЪО‹˜ ¯ТЪФ˜ ·ВЪИЫМФ‡. ¶ЪФЫ¤НЩВ МЛУ
ЪФО·П¤ЫВЩВ ФФИ·‰‹ФЩВ ˙ЛМ›· ЫЩФ О‡ОПˆМ·
„‡НЛ˜.
ñ
°И· ЩФ˘˜ О·Щ·„‡ОЩВ˜ (ВОЩfi˜ ·fi Щ· ВУЩФИ¯И˙fiМВУ·
МФУЩ¤П·): Л И‰·УИО‹ ı¤ЫЛ ЩФФı¤ЩЛЫ‹˜ ЩФ˘˜ В›У·И ЩФ
˘fiБВИФ ‹ ЩФ ОВП¿ЪИ.
ñ
MЛ ¯ЪЛЫИМФФИВ›ЩВ ¿ППВ˜ ЛПВОЩЪИО¤˜ МИОЪФЫ˘ЫОВ˘¤˜
(.¯., ·БˆЩФМЛ¯·У¤˜) М¤Ы· ЫЩИ˜ „˘ОЩИО¤˜
Ы˘ЫОВ˘¤˜.
Service/EȉÈfiÚıˆÛË
с OФИ·‰‹ФЩВ ЛПВОЩЪИО‹ ВЪБ·Ы›· ··ИЩВ›Щ·И БИ· ЩЛУ
ВБО·Щ¿ЫЩ·ЫЛ ЩЛ˜ Ы˘ЫОВ˘‹˜ ı· Ъ¤ВИ У· ВОЩВПВ›Щ·И
·fi ЛПВОЩЪФПfiБФ ‹ О¿ФИФУ ¿ППФ ·ЪМfi‰ИФ.
ñ H Û˘Û΢‹ ı· Ú¤ÂÈ Ó· ÂÈÛ΢¿˙ÂÙ·È ·fi ¤Ó·
ВНФ˘ЫИФ‰ФЩЛМ¤УФ K¤УЩЪФ ™¤Ъ‚И˜ О·И У·
¯ЪЛЫИМФФИФ‡УЩ·И МfiУФ ·˘ıВУЩИО¿ ·УЩ·ПП·ОЩИО¿.
ñ ™Â η̛· ÂÚ›ÙˆÛË ‰ÂÓ ı· Ú¤ÂÈ Ó·
ЪФЫ·ı‹ЫВЩВ У· ВИЫОВ˘¿ЫВЩВ МfiУФИ Ы·˜ ЩЛ
Ы˘ЫОВ˘‹. OИ ВИЫОВ˘¤˜ Ф˘ Б›УФУЩ·И ·fi МЛ ¤МВИЪ·
¿ЩФМ· В›У·И ‰˘У·ЩfiУ У· ЪФО·П¤ЫФ˘У ЫˆМ·ЩИО¤˜
‚П¿‚В˜ ‹ ИФ ЫФ‚·Ъ‹ ‰˘ЫПВИЩФ˘ЪБ›· ЩЛ˜ Ы˘ЫОВ˘‹˜.
ZЛЩ‹ЫЩВ ЩЛ ‚Ф‹ıВИ· ЩФ˘ ОФУЩИУfiЩВЪФ˘ K¤УЩЪФ˘
™¤Ъ‚И˜ О·И ВИМ¤УВЩВ ¿УЩ· ЫВ ·˘ıВУЩИО¿
·ÓÙ·ÏÏ·ÎÙÈο.
ñ H „˘ÎÙÈ΋ ÌÔÓ¿‰· Ù˘ Û˘Û΢‹˜ ÂÚȤ¯ÂÈ
˘‰ЪФБФУ¿УıЪ·ОВ˜. ™˘УВТ˜, Л ·У·П‹ЪˆЫ‹ ЩФ˘˜
О·И Л Ы˘УЩ‹ЪЛЫЛ Ъ¤ВИ У· Ъ·БМ·ЩФФИВ›Щ·И ·fi
ВНФ˘ЫИФ‰ФЩЛМ¤УФ˘˜ ЩВ¯УИОФ‡˜.
XÚ‹ÛË
ñ T· „˘Á›· Î·È ÔÈ Î·Ù·„‡ÎÙ˜ ÔÈÎȷ΋˜ ¯Ú‹Û˘
Ы¯В‰И¿˙ФУЩ·И БИ· У· ¯ЪЛЫИМФФИФ‡УЩ·И ·ФОПВИЫЩИО¿
БИ· ЩЛУ Ы˘УЩ‹ЪЛЫЛ К·БТЫИМˆУ О·И МfiУФ.
ñ H ηχÙÂÚË ·fi‰ÔÛË ÂÈÙ˘Á¯¿ÓÙ·È Ì ۯÂÙÈ΋
ВНˆЩВЪИО‹ ıВЪМФОЪ·Ы›· МВЩ·Н‡ +18ФC О·И +43ФC
(ОПИМ·ЩФПФБИО‹ Щ¿НЛ T), +18ФC О·И +38ФC
(ОПИМ·ЩФПФБИО‹ Щ¿НЛ ST), +16ФC О·И +32ФC
(ОПИМ·ЩФПФБИО‹ Щ¿НЛ N), +10ФC О·И +32ФC
(ОПИМ·ЩФПФБИО‹ Щ¿НЛ SN). H ОПИМ·ЩФПФБИО‹ ОП¿ЫЛ
К·›УВЩ·И ЫЩЛУ П·О¤Щ· О·Щ¿Щ·НЛ˜.
¶PO™OXH: ŸЩ·У Л Ы¯ВЩИО‹ ВНˆЩВЪИО‹ ıВЪМФОЪ·Ы›·
‰ВУ ВЪИП·М‚¿УВЩ·И М¤Ы· ЫЩЛУ ОП›М·О· Ф˘
‰ЛПТУВЩ·И БИ· ЩЛУ ОПИМ·ЩФПФБИО‹ Щ¿НЛ ЩЛ˜
Ы˘ЫОВ˘‹˜, ЪФЫ¤НЩВ ЩИ˜ ·Ъ·О¿Щˆ Ф‰ЛБ›В˜: ŸЩ·У Л
ВНˆЩВЪИО‹ ıВЪМФОЪ·Ы›· ¤ЫВИ О¿Щˆ ·fi ЩФ ВП¿¯ИЫЩФ
›‰Ф, Л ıВЪМФОЪ·Ы›· ·Фı‹ОВ˘ЫЛ˜ ЫЩФУ
О·Щ·„‡ОЩЛ ‰ВУ МФЪВ› У· ВББ˘ЛıВ›. ™˘УВТ˜
Ы˘У›ЫЩ·Щ·И У· ¯ЪЛЫИМФФИ‹ЫВЩВ Щ· ·ФıЛОВ˘М¤У·
ЩЪfiКИМ· ИФ Ы‡УЩФМ· МФЪВ›ЩВ.
ñ OÈ Î·Ù„˘Á̤Ó˜ ÙÚÔʤ˜ ‰ÂÓ ı· Ú¤ÂÈ Ó·
О·Щ·„‡¯ФУЩ·И Н·У¿ ·fi ЩЛ ЫЩИБМ‹ Ф˘ НВ·БТУФ˘У.
ñ £· Ú¤ÂÈ Ó· ·ÎÔÏÔ˘ı›Ù ÈÛÙ¿ ÙȘ Û˘ÛÙ¿ÛÂȘ ÁÈ·
ÙËÓ Û˘ÓÙ‹ÚËÛË ÙˆÓ ÙÚÔÊ›ÌˆÓ Ô˘ ‰›ÓÔ˘Ó ÔÈ
ηٷÛ΢·ÛÙ¤˜. AÓ·ÙÚ¤ÍÙ ÛÙȘ ·ÓÙ›ÛÙÔȯ˜ Ô‰ËÁ›Â˜.
с H ВЫˆЩВЪИО‹ ‰И¿Щ·НЛ ЩЛ˜ Ы˘ЫОВ˘‹˜ ·ФЩВПВ›Щ·И ·fi
ηӿÏÈ· ̤۷ ·fi Ù· ÔÔ›· ÂÚÓ¿ ÙÔ „˘ÎÙÈÎfi ˘ÁÚfi.
AÓ ·˘Ù¿ ÙÚ˘ËıÔ‡Ó ı· ηٷÛÙÚ·Ê› Ë Û˘Û΢‹
·Ó·ÓfiÚıˆÙ· Î·È Ù· ÙÚfiÊÈÌ· ı· ¯·Ï¿ÛÔ˘Ó. MHN
XPH™IMO¶OIEITE AIXMHPA ANTIKEIMENA ÁÈ· Ó·
·ФН¤ЫВЩВ ЩФУ ¿БФ. MФЪВ›ЩВ У· ·К·ИЪ¤ЫВЩВ ЩФУ
¿БФ ¯ЪЛЫИМФФИТУЩ·˜ ЩФУ Н‡ЫЩЛ Ф˘ Ы·˜
·Ъ¤¯ВЩ·И. ™В О·М›· ВЪ›ЩˆЫЛ ‰ВУ ı· Ъ¤ВИ Ф
ЫЩВЪВfi˜ ¿БФ˜ У· ·К·ИЪВ›Щ·И ‚›·И· ·fi ЩЛУ
ВЫˆЩВЪИО‹ В¤У‰˘ЫЛ. O ЫЩВЪВfi˜ ¿БФ˜ ı· Ъ¤ВИ У·
·К‹УВЩ·И У· ПВИТЫВИ fiЩ·У О¿УВЩВ ·fi„˘НЛ ЩЛ˜
Ы˘ЫОВ˘‹˜.
ñ MËÓ ‚¿˙ÂÙ ·ÂÚÈÔ‡¯· ÔÙ¿ ‹ ÔÙ¿ Ô˘ ÂÚȤ¯Ô˘Ó
·УıЪ·ОИОfi ЫЩФУ О·Щ·„‡ОЩЛ БИ·Щ› ‰ЛМИФ˘ЪБВ›Щ·И
›ВЫЛ ЫЩФ ‰Ф¯В›Ф Ф˘ МФЪВ› У· ВОЪ·БВ›
ЪФО·ПТУЩ·˜ ˙ЛМИ¿ ЫЩЛУ Ы˘ЫОВ˘‹. MЛ
¯ЪЛЫИМФФИВ›ЩВ ЩВ¯УЛЩ¿ ‹ МЛ¯·УИО¿ М¤Ы·, ВОЩfi˜ ·fi
·˘Щ¿ Ф˘ ЪФЩВ›УВИ Ф О·Щ·ЫОВ˘·ЫЩ‹˜, БИ· У·
ВИЩ·¯‡УВЩВ ЩЛУ О·Щ¿„˘НЛ. MЛ ¯ЪЛЫИМФФИВ›ЩВ
МВЩ·ППИО¿ ·УЩИОВ›МВУ· БИ· ЩФУ О·ı·ЪИЫМfi ЩЛ˜
Ы˘ЫОВ˘‹˜ Ы·˜ БИ·Щ› ı· МФЪФ‡Ы·ЩВ У· ЪФО·П¤ЫВЩВ
˙ЛМ›В˜.
T˘ˆÌ¤ÓÔ Û ·Ó·Î˘Îψ̤ÓÔ ¯·ÚÙ›
30
‹çinin temizlenmesi
Cihazı ilk kez kullanmadan önce içi ve iç
aksesuarlarını nötr sabunlu ılık su ile silerek yeni
cihazlarda var olan kokuyu gidermeye çalıflınız.
Sonra kurulayınız.
Deterjan veya aflındırıcı tozlar
kullanmayınız, boyaya zarar verebilirler.
KULLANIM
Cihaz üzerinde, taze gıdaları dondurabildi¤ini, dondurulmufl gıdaları saklayabildi¤ini ve buz üretebildi¤ini
gösteren sembol bulunmaktadır.
KONTROL PANEL‹
A. çalıflma Lambası
B. SUPER çalıflma Lambası
C. ‹kaz lambası
D. Normal /Süper (floklama) Dü¤mesi
E. Termostat dü¤mesi
Çalıfltırma
Elektrik fiflini en yakın prize takınız (Göster ge
lambası (A) yanarak cihaza elektrik geldi¤ini
gösterir). Termostat dü¤mesini (E) sa¤a do¤ru
çevirerek ortalama bir ayara getiriniz (sıcaklık ikaz
lambası (C) yana-caktır).Dondurulmufl gıdaların
uygun bir flekilde saklanması için dondurucunun iç
sıcaklı¤ının -18°C’den daha düflük olması gerekir.
Gerekli sıcaklı¤a ulaflıp sıcaklık ikaz lambası (C)
sönene dek bekleyiniz. Termostat ayar de¤erleri,
oda sıcaklı¤ı, buzdolabının yeri, ve kapısının açılıpkapanma sıklı¤ına vs. göre de¤ifltirilebilir.
Dondurucuyu kapatmak için termostat dü¤mesini
«O» konumuna getirin. So¤utucu bölüm çalıflmaya
devam edecektir.
Hızlı Dondurma
Hızlı dondurma için N/S dü¤mesini (D) «S»
sembolüne do¤ru çevirin. Hızlı dondurma gösterge
lambası (B) yanacaktır.
‹kaz lambası
Dondurucu bölümün sıcaklı¤ı, saklanan
dondurulmufl gıdaların uzun süre sa¤lıklı bir flekilde
muhafazasını tehlikeye soka-cak düzeye geldi¤inde
ikaz lambası (A) yanacaktır. Cihaz ilk kez
çalıfltırıldı¤ında veya bölmeye dondurulmak üzere
besin konuldu¤unda sıcaklık, dondurulmufl gıda-nın
muhafazası için gerekli düzeye gelene dek bu ikaz
lambasının yanması normaldir.
Taze gıdanın dondurulması
Dört yıldızlı dondurucu hazır dondurulmufl
gıdaların ve taze besinlerin dondurulması için
uygundur.
Besinleri hızlı bir flekilde dondurmak için, cihaz uzun
bir süre çalıflmamıfl ise, besini yerlefltirmeden önce
hızlı dondurma konumunda 3 saat kadar çalıfltırın.
E¤er cihaz çalıflıyorsa besinleri koymadan önce en
az 24 saat hızlı dondurma konumunda çalıfltırın.
Dondurulacak besini dondurucunun üst bölmesine
yerlefltirin, zira burası dondu-rucunun en so¤uk
yeridir.
ON
A
SUPER
ALARM
N
S
O
6
1
5
2
4
3
EDCB
Page 16

16
¶¶EEPPIIEXOMENA
¶ÚÔÂȉÔÔÈ‹ÛÂȘ
. . . . . . . . . . . . . . . . . . . . . . . . . . . . . . . . . . . . . . . . . . . . . . . . . . . . . . . . . . . . . . . . . . . . . . . . . . . . . .15
XÚ‹ÛË -
K·ı·ЪИЫМfi˜ ЩФ˘ ВЫˆЩВЪИОФ‡ - ¶INAKA™ E§E°XOY - §ВИЩФ˘ЪБ›· - P‡ıМИЫЛ ЩЛ˜ ıВЪМФОЪ·Ы›·˜ - . . . . . . . .
T·¯Â›· ηٿ„˘ÍË - §˘¯Ó›· ÚÔÂȉÔÔ›ËÛ˘ (C) . . . . . . . . . . . . . . . . . . . . . . . . . . . . . . . . . . . . . . . . . . . . . . . . . . . . . . . . . .17
XÚ‹ÛË -
K·Ù¿„˘ÍË ÊÚ¤ÛÎˆÓ ÙÚÔÊ›ÌˆÓ - AÔı‹Î¢ÛË Î·Ù„˘ÁÌ¤ÓˆÓ ÙÚÔÊ›ÌˆÓ - Afi„˘ÍË - . . . . . . . . . . . . . . . . . .
°И· У· О¿УВЩВ ·Б¿ОИ· - §ВИЩФ˘ЪБ›· - P‡ıМИЫЛ ıВЪМФОЪ·Ы›·˜ - ™˘УЩ‹ЪЛЫЛ КЪ¤ЫОˆУ ЩЪФК›МˆУ . . . . . . . . . . . . . . . . .18
XÚ‹ÛË -
MВЩ·ОИУФ‡МВУ· Ъ¿КИ· - TФФıВЩТУЩ·˜ Щ· Ъ¿КИ· ЫЩИ˜ fiЪЩВ˜ . . . . . . . . . . . . . . . . . . . . . . . . . . . . . . . . . . . .19
Yԉ›ÍÂȘ -
Yԉ›ÍÂȘ ÁÈ· ÙËÓ ·Ôı‹Î¢ÛË ÙÚÔÊ›ÌˆÓ ÛÙË Û˘ÓÙ‹ÚËÛË - . . . . . . . . . . . . . . . . . . . . . . . . . . . . . . . . .
Yԉ›ÍÂȘ ÁÈ· ÙËÓ ·Ôı‹Î¢ÛË ÙÚÔÊ›ÌˆÓ ÛÙËÓ Î·Ù¿„˘ÍË - . . . . . . . . . . . . . . . . . . . . . . . . . . . . . . . . . . . . . . . . . . . .
Yԉ›ÍÂȘ ÁÈ· ÙËÓ ·Ôı‹Î¢ÛË Î·Ù„˘ÁÌ¤ÓˆÓ ÙÚÔÊ›ÌˆÓ . . . . . . . . . . . . . . . . . . . . . . . . . . . . . . . . . . . . . . . . . . . . . .20
™˘ÓÙ‹ÚËÛË
- ¶ВЪИФ‰ИОfi˜ О·ı·ЪИЫМfi˜ - EЫˆЩВЪИОfi˜ КˆЩИЫМfi˜ - Afi„˘НЛ . . . . . . . . . . . . . . . . . . . . . . . . . . . . . . . . .21
E͢ËÚ¤ÙËÛË ÂÏ·ÙÒÓ Î·È ·ÓÙ·ÏÏ·ÎÙÈο . . . . . . . . . . . . . . . . . . . . . . . . . . . . . . . . . . . . . . . . . . . . . . . . . . . . . . . . . . . .22
TВ¯УИО¿ ¯·Ъ·ОЩЛЪИЫЩИО¿ - EБО·Щ¿ЫЩ·ЫЛ - TФФı¤ЩЛЫЛ - HПВОЩЪИО‹ Ы‡У‰ВЫЛ . . . . . . . . . . . . . . . . . . . . . . . . . . . . . . .23
O‰ЛБ›В˜ БИ· ФПИОfi ВУЩФИ¯ИЫМfi ЩЛ˜ Ы˘ЫОВ˘‹˜ - AПП·Б‹ ПВ˘Ъ¿˜ ·УФ›БМ·ЩФ˜ ЩЛ˜ fiЪЩ·˜ . . . . . . . . . . . . . . . . . . . . . .24
EÁηٿÛÙ·ÛË
с K·Щ¿ ЩЛУ ‰И¿ЪОВИ· ЩЛ˜ О·УФУИО‹˜ ПВИЩФ˘ЪБ›·˜ ЩЛ˜
Ы˘ОВ˘‹˜, Ф Ы˘М˘ОУˆЩ‹˜ О·И Ф Ы˘МИВЫЩ‹˜ ЫЩФ ›Ыˆ
М¤ЪФ˜ ıВЪМ·›УФУЩ·И ·ЪОВЩ¿. °И· ПfiБФ˘˜ ·ЫК·ПВ›·˜,
Ф ВП¿¯ИЫЩФ˜ ¯ТЪФ˜ ·ВЪИЫМФ‡ ı· Ъ¤ВИ У· В›У·И
fiˆ˜ ЪФЩВ›УВЩ·И ЫЩИ˜ ·Ъ·О¿Щˆ Ф‰ЛБ›В˜.
¶ЪФЫФ¯‹: MЪФЫЩ¿ ЫЩ· ·УФ›БМ·Щ· ·ВЪИЫМФ‡ ‰ВУ
Ъ¤ВИ У· ˘¿Ъ¯ВИ О·У¤У· ВМfi‰ИФ.
ñ £· Ú¤ÂÈ Ó· ÚÔÛ¤ÍÂÙÂ Ë Û˘Û΢‹ Ó· ÌËÓ ·Ù¿
¿Уˆ ЫЩФ О·ПТ‰ИФ ЩЛ˜ ЛПВОЩЪИО‹˜ ·ЪФ¯‹˜.
™ЛМ·УЩИОfi
: E¿У ЩФ О·ПТ‰ИФ ·ЪФ¯‹˜ В›У·И
О·ЩВЫЩЪ·ММ¤УФ, ı· Ъ¤ВИ У· ·УЩИО·Щ·ЫЩ·ıВ› МВ
ВИ‰ИОfi О·ПТ‰ИФ Ф˘ ‰И·Щ›ıВЩ·И ·fi ЩФУ
О·Щ·ЫОВ˘·ЫЩ‹ ‹ ЩФ Ы¤Ъ‚И˜.
ñ AÓ Ë Û˘Û΢‹ ÌÂÙ·ÊÂÚı› ÔÚÈ˙ÔÓÙ›ˆ˜ Â›Ó·È Èı·Ófi ÙÔ
П¿‰И Ф˘ ВЪИ¤¯ВЩ·И ЫЩФУ Ы˘МИВЫЩ‹ У· ¯˘ıВ› ЫЩФ
О‡ОПˆМ· „‡НЛ˜. £· Ы·˜ Ы˘М‚Ф˘ПВ‡·МВ У·
ВЪИМ¤УВЩВ ЩФ˘П¿¯ИЫЩФУ ‰‡Ф ТЪВ˜ ЪИУ Ы˘У‰¤ЫВЩВ
ЩЛ Ы˘ЫОВ˘‹ ТЫЩВ ЩФ П¿‰И У· Н·У·МВ› ЫЩФУ
Ы˘МИВЫЩ‹.
ñ Y¿Ú¯Ô˘Ó ÙÌ‹Ì·Ù· Ù˘ Û˘Û΢‹˜ ·˘Ù‹˜ Ô˘ ηٿ ÙË
ПВИЩФ˘ЪБ›· ıВЪМ·›УФУЩ·И. N· ‚В‚·ИТУВЫЩВ ¿УЩ· fiЩИ
Ф ВН·ВЪИЫМfi˜ В›У·И В·ЪО‹˜, БИ·Щ› ЫЩЛУ ·УЩ›ıВЩЛ
ВЪ›ЩˆЫЛ Щ· ВН·ЪЩ‹М·Щ· ·˘Щ¿ МФЪВ› У· МЛ
ПВИЩФ˘ЪБ‹ЫФ˘У ЫˆЫЩ¿ О·И Щ· ЩЪfiКИМ· У· ¯·П¿ЫФ˘У.
BП¤В Ф‰ЛБ›В˜ ВБО·Щ¿ЫЩ·ЫЛ˜.
ñ T· ÙÌ‹Ì·Ù· ÂΛӷ Ô˘ ıÂÚÌ·›ÓÔÓÙ·È ‰ÂÓ ı· Ú¤ÂÈ
Ó· ÂÎÙ›ıÂÓÙ·È. ŸÔ˘ ·˘Ùfi Â›Ó·È ‰˘Ó·ÙfiÓ, ÙÔ ›Ûˆ
̤ÚÔ˜ Ù˘ Û˘Û΢‹˜ ı· Ú¤ÂÈ Ó· ÙÔÔıÂÙ›ٷÈ
ÌÚÔÛÙ¿ ·fi ÙÔ›¯Ô.
¶ЪФЫЩ·Ы›· ЩФ˘
ВЪИ‚¿ППФУЩФ˜
H Ы˘ЫОВ˘‹ ·˘Щ‹ ‰ВУ ВЪИ¤¯ВИ ·¤ЪИ· Ф˘ ı· МФЪФ‡Ы·У
У· ‚П¿„Ф˘У ЩФ ЫЩЪТМ· ЩФ˘ fi˙ФУЩФ˜, В›ЩВ ЫЩФ О‡ОПˆМ·
„‡НЛ˜ В›ЩВ ЫЩ· МФУˆЩИО¿ ˘ПИО¿. H Ы˘ЫОВ˘‹ ‰ВУ Ъ¤ВИ
У· ВЩ·¯ЩВ› М·˙› МВ Щ· ·ЫЩИО¿ ·fi‚ПЛЩ· О·И ЫОФ˘›‰И·.
AФК‡БВЩВ У· О·Щ·ЫЩЪ¤„ВЩВ ЩЛ МФУ¿‰· „‡НЛ˜,
И‰И·›ЩВЪ· ЫЩФ fiИЫıВУ М¤ЪФ˜ ОФУЩ¿ ЫЩФУ ВУ·ПП¿ОЩЛ
ıВЪМfiЩЛЩ·˜. ¶ПЛЪФКФЪ›В˜ БИ· Щ· ЫЛМВ›· ВУ·fiıВЫЛ˜
·Ô‚Ï‹ÙˆÓ ÌÔÚ›Ù ӷ ¿ÚÂÙ ·fi ÙȘ ÙÔÈΤ˜ ·Ú¯¤˜.
ŸÏ· Ù· ÚÔ˚fiÓÙ· Ù· ÔÔ›· ‰È·ı¤ÙÔ˘Ó ÙÔ Û‹Ì· ›ӷÈ
·У·О˘ОПТЫИМ·.
29
Montaj
• Normal çalıflma esnasında dolabın arka-sında
bulunan kompresör ve kondanse-rin hissedilir
derecede ısınması normal-dir. Güvenlik
açısından talimatlarda belir-tilen asgari
havalandırmanın yapılabil-mesi gerekmektedir.
Dikkat: Havalandırma kanalı açık ve önünde
engel olmamasına dikkat edin.
• Cihazın elektrik kablosuna basmama-sına dikkat
edilmelidir.
Önemli: Elektrik kablosu hasar görmüfl ise
servisten veya bayiden alınacak özel bir kablo ile
de¤ifltirilmesi gereklidir.
• E¤er cihaz yatay olarak taflınmıflsa
kompresördeki ya¤ın so¤utma devresine akması
mümkündür. Bu nedenle cihazı yerlefltirdikten
sonra çalıfltırmadan önce ya¤ın tekrar
kompresörde birikmesi için iki saat kadar
beklemeniz tavsiye edilir.
• Cihaz içerisinde, çalıfltı¤ında ısınan par-çalar
bulunmaktadır. Daima yeterli hava-landırmanın
sa¤landı¤ından emin olun; aksi takdirde bu
çalıflan aksamda hasa-ra dolayısıyla besinlerinizi
kaybetmenize neden olabilir. Bakınız montaj
talimatları.
• Isınan parçalar dıflarıda kalmamalıdır. Mümkünse
cihazın arkası duvara yaslanmalıdır.
Çevrenin Korunması
Bu cihazın ne so¤utucu devresinde ne de yalıtım
malzemesinde Ozon tabakasına zararlı gazlar
bulunma-maktadır. Cihaz sıradan atıklarla birlikte atılmamalıdır. So¤utucu ünitenin hasar
görmemesine dikkat ediniz, özellikle de ısı
eflanjörünün arka kısmının. Yerel makamlardan
bu tür cihazların imhasının / dönüflümünün
yapıldı¤ı yerlerin bilgilerine ulaflabilir-siniz. Bu
cihazda kullanılan sem-bollü malzemeler geri
dönüflümlüdür.
‹Ç‹NDEK‹LER
Uyarı 28
Kullanım 30
‹çinin temizlenmesi 30
Kontrol paneli 30
Çalıfltırma 30
fioklama 30
‹kaz Lambası 30
Taze gıdanın dondurulması 30
Dondurulmufl gıdanın saklanması 31
Buz çözme 31
Küp – Buz Yapma 31
Sıcaklık Ayarı 31
Taze gıdanın so¤uk muhafazası 31
Hareketli raflar 32
Kapak raflarının yerlefltirilmesi 32
Tavsiyeler 33
So¤utmayla ilgili tavsiyeler 33
Dondurmayla ilgili tavsiyeler 33
Dondurulmufl gıdaların saklanmasıyla ilgili
tavsiyeler 33
Bakım 34
Periyodik Temizlik 34
Kullanılmayaca¤ı Zamanlar 34
‹ç Aydınlatma 34
Defrost ifllemi 34
Müflteri Hizmetleri ve Yedek Parça 35
Montaj 36
Yeri 36
Elektriksel ba¤lantılar 36
Ev içi cihazlar ile ilgili Talimatlar 37
TEKN‹K ÖZELL‹KLER
ÇALIfiMA GER‹L‹M‹ 220-240 V/50 Hz
YÜKSEKL‹K (mm) 1780
GEN‹fiL‹K (mm) 560
DER‹NL‹K (mm) 550
‹KL‹M SINIFI SN-N-ST-T
YILDIZ SINIFI ****
TOPLAM KAPAS‹TE (NET) 280
DOND.BÖL.KAPAS‹TES‹ (NET) 70 lt
SO⁄T.BÖL.KAPAS‹TES‹ (NET) 210 lt
SO⁄UTUCU AKIfiKAN R600a
ENERJ‹ SARF‹YATI (kWh/24h)
(TS EN 153'e göre + 25 °C)
1.15
ENERJ‹ SARF‹YATI (kWh/24h)
(TS EN 8561'e göre + 32 °C)
1.70
YÜKTEK‹ SICAKLIK ARTIfi SÜRES‹
(TS EN 153'e göre + 25 °C derecede)
20
YÜKTEK‹ SICAKLIK ARTIfi SÜRES‹
(TS EN 8561'e göre + 32 °C)
14
Page 17

17
XPH™H
K·ı·ЪИЫМfi˜ ЩФ˘ ВЫˆЩВЪИОФ‡
¶ЪИУ ¯ЪЛЫИМФФИ‹ЫВЩВ ЩЛУ Ы˘ЫОВ˘‹ БИ· ЪТЩЛ КФЪ¿,
П‡УВЩВ ЩФ ВЫˆЩВЪИОfi ЩЛ˜ О·И fiП· Щ· ВН·ЪЩ‹М·Щ· Ф˘
В›У·И М¤Ы· МВ ¯ПИ·Ъfi УВЪfi О·И М·П·Оfi Ы·Ф‡УИ БИ· У·
·К·ИЪ¤ЫВЩВ ЩЛУ Щ˘ИО‹ М˘Ъˆ‰И¿ ЩФ˘ О·ИУФ‡ЪБИФ˘
ЪФ˚fiУЩФ˜ О·И МВЩ¿ ЫЩВБУТЫЩВ fiПЛ ЩЛУ Ы˘ЫОВ˘‹.
¶ЪФЫФ¯‹: MЛУ ¯ЪЛЫИМФФИВ›ЩВ ·ФЪЪ˘·УЩИО¿ ‹
ПВИ·УЩИО¤˜ ЫОfiУВ˜, О·ıТ˜ ·˘Щ¤˜ ı· МФЪФ‡Ы·У
У· О·Щ·ЫЩЪ¤„Ф˘У ЩЛУ ВИК¿УВИ·.
¶¶INAKA™ E§E°XOY
1
2
3
4
5
6
O
N
S
A
EDCB
ON
SUPER
ALARM
A. §˘¯У›· ПВИЩФ˘ЪБ›·˜
B. §˘¯У›· Щ·¯В›·˜ „‡НЛ˜
C. §˘¯У›· ЪФВИ‰ФФ›ЛЫЛ˜
D. ¶П‹ОЩЪФ NФЪМ¿П / T·¯В›·˜ „‡НЛ˜
E. £ВЪМФЫЩ¿ЩЛ˜
§ÂÈÙÔ˘ÚÁ›·
EИЫ¿БВЩВ ЩЛУ Ъ›˙· ЫЩЛУ ·ЪФ¯‹ ЪВ‡М·ЩФ˜. °˘Ъ›ЫЩВ ЩФУ
‰И·ОfiЩЛ ЩФ˘ ıВЪМФЫЩ¿ЩЛ (E), Ы‡МКˆУ· МВ ЩЛУ КФЪ¿
ЩФ˘ ЪФПФБИФ‡ ¤Ъ· ·fi ЩЛ ı¤ЫЛ “” (‰И·ОФ‹
ПВИЩФ˘ЪБ›·˜). H П˘¯У›· Ф‰ЛБfi˜ (A) ı· ·У¿„ВИ
˘Ф‰ВИОУ‡ФУЩ·˜ fiЩИ Л Ы˘ЫОВ˘‹ ПВИЩФ˘ЪБВ›. H П˘¯У›·
ЪФВИ‰ФФ›ЛЫЛ˜ (C) ı· ·У¿„ВИ, ˘Ф‰ВИОУ‡ФУЩ·˜ fiЩИ Л
ıВЪМФОЪ·Ы›· ВУЩfi˜ ЩЛ˜ Ы˘ЫОВ˘‹˜ В›У·И ˘„ЛП‹.
°И· У· ‰И·Оfi„ВЩВ ЩЛ ПВИЩФ˘ЪБ›·, ·П¿ Б˘Ъ›ЫЩВ ЩФУ
‰И·ОfiЩЛ ЩФ˘ ıВЪМФЫЩ¿ЩЛ ЫЩЛУ ı¤ЫЛ “”.
P‡ıМИЫЛ ЩЛ˜ ıВЪМФОЪ·Ы›·˜
H ıВЪМФОЪ·Ы›· Ъ˘ıМ›˙ВЩ·И ·˘ЩfiМ·Щ· О·И МФЪВ› У·
·У¤‚ВИ БИ· У· ВЩ‡¯ВИ МИ· ˘„ЛПfiЩВЪЛ ıВЪМФОЪ·Ы›· (ИФ
˙ВЫЩ‹) Б˘ЪУТУЩ·˜ ЩФУ ‰И·ОfiЩЛ ЩФ˘ ıВЪМФЫЩ¿ЩЛ ЪФ˜
ЩИ˜ ¯·МЛПfiЩВЪВ˜ ı¤ЫВИ˜ ‹ У· МВИˆıВ› (ИФ ОЪ‡Ф)
Б˘ЪУТУЩ·˜ ЩФУ ‰И·ОfiЩЛ ЫЩИ˜ ˘„ЛПfiЩВЪВ˜ ı¤ЫВИ˜. H
·ОЪИ‚‹˜ Ъ‡ıМИЫЛ Ъ¤ВИ У· ВИПВБВ› ¤¯ФУЩ·˜ ˘’ fi„ИУ
fiЩИ Л ıВЪМФОЪ·Ы›· ЫЩФ ВЫˆЩВЪИОfi ЩФ˘ „˘БВ›Ф˘
ВН·ЪЩ¿Щ·И ·fi:
с TЛУ ıВЪМФОЪ·Ы›· ЩФ˘ ‰ˆМ·Щ›Ф˘,
с ¶fiЫФ Ы˘¯У¿ ·УФ›БВЩВ ЩЛУ fiЪЩ·,
с Afi ЩЛУ ФЫfiЩЛЩ· ЩФ˘ К·БЛЩФ‡ Ф˘ ·ФıЛОВ‡ВЩ·И,
с TЛУ ı¤ЫЛ ЩЛ˜ Ы˘ЫОВ˘‹˜.
M›· МВЫ·›· Ъ‡ıМИЫЛ В›У·И Ы˘У‹ıˆ˜ Л ИФ О·Щ¿ППЛПЛ.
T·¯Â›· ηٿ„˘ÍË
°И· ЩЛУ Щ·¯В›· О·Щ¿„˘НЛ ЩˆУ ЩЪФК›МˆУ, ВЪИЫЩЪ¤„ЩВ ЩФ
ОФ˘М› N-S (D) ЪФ˜ ЩФ Ы‡М‚ФПФ "S". £· ·У¿„ВИ Л
ВУ‰ВИОЩИО‹ П˘¯У›· Щ·¯В›·˜ О·Щ¿„˘НЛ˜ (B).
§˘¯Ó›· ÚÔÂȉÔÔ›ËÛ˘ (C)
H П˘¯У›· Ы˘У·БВЪМФ‡ ıВЪМФОЪ·Ы›·˜ ·У¿‚ВИ ·˘ЩfiМ·Щ·
О¿ıВ КФЪ¿ Ф˘ Л ıВЪМФОЪ·Ы›· ВУЩfi˜ ЩФ˘ О·Щ·„‡ОЩЛ
·УВ‚·›УВИ ¿Уˆ ·fi М›· Ы˘БОВОЪИМ¤УЛ ЩИМ‹ Л ФФ›· ı¤ЩВИ
ЫВ О›У‰˘УФ М›· ИО·УФФИЛЩИО¿ М·ОЪfi¯ЪФУЛ Ы˘УЩ‹ЪЛЫЛ
ЩˆУ ЩЪФК›МˆУ.
E›У·И ·fiП˘Щ· К˘ЫИФПФБИОfi У· ·Ъ·МВ›УВИ БИ· П›БФ
·У·ММ¤УЛ Л П˘¯У›· Ы˘У·БВЪМФ‡ ЩЛ˜ ıВЪМФОЪ·Ы›·˜,
·М¤Ыˆ˜ МВЩ¿ Ф˘ ı· ЩВıВ› ЫВ ПВИЩФ˘ЪБ›· Ф О·Щ·„‡ОЩЛ˜.
£· ·Ъ·МВ›УВИ ·У·ММ¤УЛ М¤¯ЪИ У· ВИЩВ˘¯ıВ› Л ‚¤ПЩИЫЩЛ
ıВЪМФОЪ·Ы›· БИ· ЩЛУ Ы˘УЩ‹ЪЛЫЛ ЩˆУ О·ЩВ„˘БМ¤УˆУ
ЩЪФК›МˆУ.
28
UYARILAR
Bu kılavuzun ileride baflvuru kaynaflı olarak saklanması çok önemlidir. Cihaz baflka birine satılır,
devredilir veya evden ayrıldı¤ınızda cihazı bırakırsanız bu kılavuzun cihazla birlikte oldu¤undan emin
olunuz. Böylece yeni sahibinin cihazın çalıfltırılması ve uyarılarla ilgili bilgi alabilece¤i bir kaynak
bulunabilsin.
Bu uyarılar güvenlik amacıyla verilmifltir.Cihazı çalıfltırmadan önce dikkatlice okuyunuz.
Genel Güvenlik
• Cihaz yetiflkinlerin kullanımı için tasar-lanmıfltır.
çocukların cihazla oynama-larına, ayarlarını
kurcalamalarına izin verilmemelidir.
• Cihazın özelliklerini de¤ifltirmek, buna teflebbüs
etmek tehlikelidir.
• Temizlik veya bakım iflleminden önce cihazı kapalı
ve fiflinin prizden çekili oldu¤undan emin olun.
• Cihaz a¤ırdır.Taflırken dikkat ediniz
• Do¤rudan cihazdan alınan buza temas edilirse
bu buz yanı¤ına sebep olabilir.
• Cihazı kaldırırken ve taflırken so¤utucu
üniteye zarar verebilecek ve so¤utucu gazın
kaçmasına neden olabilecek hususlara dikkat
ediniz.
• Cihaz kalorifer pete¤i veya ocak civa-rına
yerlefltirilmemelidir.
• Uzun süreli günefl ıflı¤ına maruz
bırakılmamalıdır.
• Cihazın arkasında havalandırma için yeterli
boflluk olmalı ve so¤utucu devre-ye zarar
verecek riskler ortadan kaldırılmalıdır.
• Dondurucular için (ev tipi modeller ha-riç) en
ideal yer kiler veya bodrumdur.
• Buzdolapları içerisinde elektrikli cihaz-lar
kullanmayınız.
Servis / Bakım
• Cihazın montajında elektrik iflleri için yetkili bir
elektrikçi gereklidir.
• Cihazın bakım ve onarımı yetkili servis tarafından
yapılmalı ve sadece orijinal yedek parça
kullanılmalıdır.
• Hiçbir flekilde cihazı kendi baflınıza tamir etmeye
çalıflmayınız. Tecrübesiz kiflilerce yapılacak
onarımlar yaralan- malara hatta ciddi arızalara
neden olabilir. En yakın Yetkili Servisle
görüflünüz.
Cihazın so¤utucu ünitesinde hidrokarbon
bulundu¤undan bakım ve servis yetkili
teknisyenlerce yapılmalıdır.
Kullanımı
• Ev tipi so¤utucu ve dondurucular sadece
yenilebilir gıdaların saklan-ması için dizayn
edilmifltir.
• En iyi çalıflma de¤erleri flu çevre ko-flullarında
elde edilmifltir: +18°C ve +43°C (T Sınıfı); +18°C
ve +38 °C (ST Sınıfı); +16°C ve +32°C (N Sınıfı);
+10°C ve +32°C (Sn Sınıfı)
Cihazın sınıfı cihaz etiketi üzerinde belirtilmifltir.
Uyarı: Cihaz, sınıfına uygun olmayan çevre
sıcaklıkları dıflında çalıfltırılacaksa afla¤ı-daki
hususlar dikkate alınmalıdır.çevre sıcaklı¤ı
cihazın sınıfının alt sıcaklık de¤e-rinden daha
afla¤ıya düflerse dondurucu bölmedeki saklama
sıcaklı¤ı garanti edilemez bu nedenle de
muhafza edilen besinin en kısa sürede
tüketilmesi önerilir.
• Bir kez çözüldükten sonra dondurul-mufl gıdalar
tekrar dondurulmamalıdır.
• ‹malatçının saklama ile ilgili tavsiyele-rine sıkı
sıkıya uyulmalıdır. ‹lgili talimatlara bakınız.
• Dolabın iç yüzeyinde so¤utucunun dolafl-tı¤ı
kanallar bulunmaktadır. Bu kanalların delinmesi
tamiri mümkün olmayan hasara ve gıda kaybına
neden olacaktır. Donmufl besinleri veya buzu
kazımak için ASLA KESK‹N ALETLER
KULLANMAYINIZ. Bu-zu kazımak için plastik
kazıyıcı kullanıla-bilir. Kesinlikle yüzeydeki buz
zorla alın-maya çalıflılmamalıdır. Buzun cihaz defrostta iken çözünmesine izin verilmelidir.
• Kola gibi gazlı içecekleri dondurucuya
koymayınız zira dondurucu içecek kabın-da
basınca bu basınçta kabın patlayarak cihaza
zarar vermesine neden olabilir. Buz eritme
ifllemini hızlandırmak için üreticinin önerdi¤inden
baflka asla meka-nik cihazlar veya baflka aletler
kullanma-yınız. Dolabı temizlemek için asla metal
nesneler kullanmayınız hasar verebilirler.
 Loading...