How it Works
Log In / Sign Up
Buy Points
How it Works
FAQ
Contact Us
Questions and Suggestions
Users
AEG
Loading...
S
Startprotect SN16
Startprotect SN35
STE 500
STE 800 XE
STEAM5507
STEAM6007
STEP 100
2
STEP 100X
2
STEP1200BX
4
STEP 1200 X
STEP 1200 XE
2
STEP 420
STEP 450
STEP 500
STEP 600 X
STEP 70
2
STEP 700
STEP 80
2
STEP 900 X
STEP 90 X
2
Stichsäge STEP 100 X
STM1100
4
STM1100P
STM1150
5
STM1250
STM1255
STM 20
STM 30
STM3200
2
STM3300
STM3400
2
STM3430
STM 40
STM5400
STM5600
STM6200
STM6400
STM6600
STM7500S
2
STM9500
STO422
STO460
4
STO462
STO464
STO466
STO480
2
STP 70
STPE-400
STR10
STSE-400
Style 10
3
STYLE 12
2
Style 15
4
SU65040-1E
2
SU65040E
SU66040-4E
SU66040-5E
SU86000-1I
4
SU86000-4I
2
SU86000 5 i
2
SU86000I
5
SU86040
SU86040-1I
5
SU86040-2I
4
SU86040I
9
SU96000-5i
2
SU96040-4I
4
SU96040-5I
3
SU96040-6I
SU 96043-6I
SUP11
SUPCHARCE1
2
SUPER114
SUPER1273-4G
SUPER CLEAN-Accessories
6
supercyclone
Super series
SV 2514
SV2528
4
SV 3528
4
SV 4528
4
SV5028
SW 1000
2
SW 1500
3
SW 2000
SW 600
2
SW91820-4L
SW91820-4R
SW98820-4IL
SW98820-4IR
SW98820-5L
SW98820-5R
SWB61501DG
3
SWB63001DG
6
SWB66001DG
7
SWD81800G0
2
SWD81800G1
6
SWD81800L0
3
SWD81800L1
7
SWK101
3
Loading...
Loading...
Nothing found
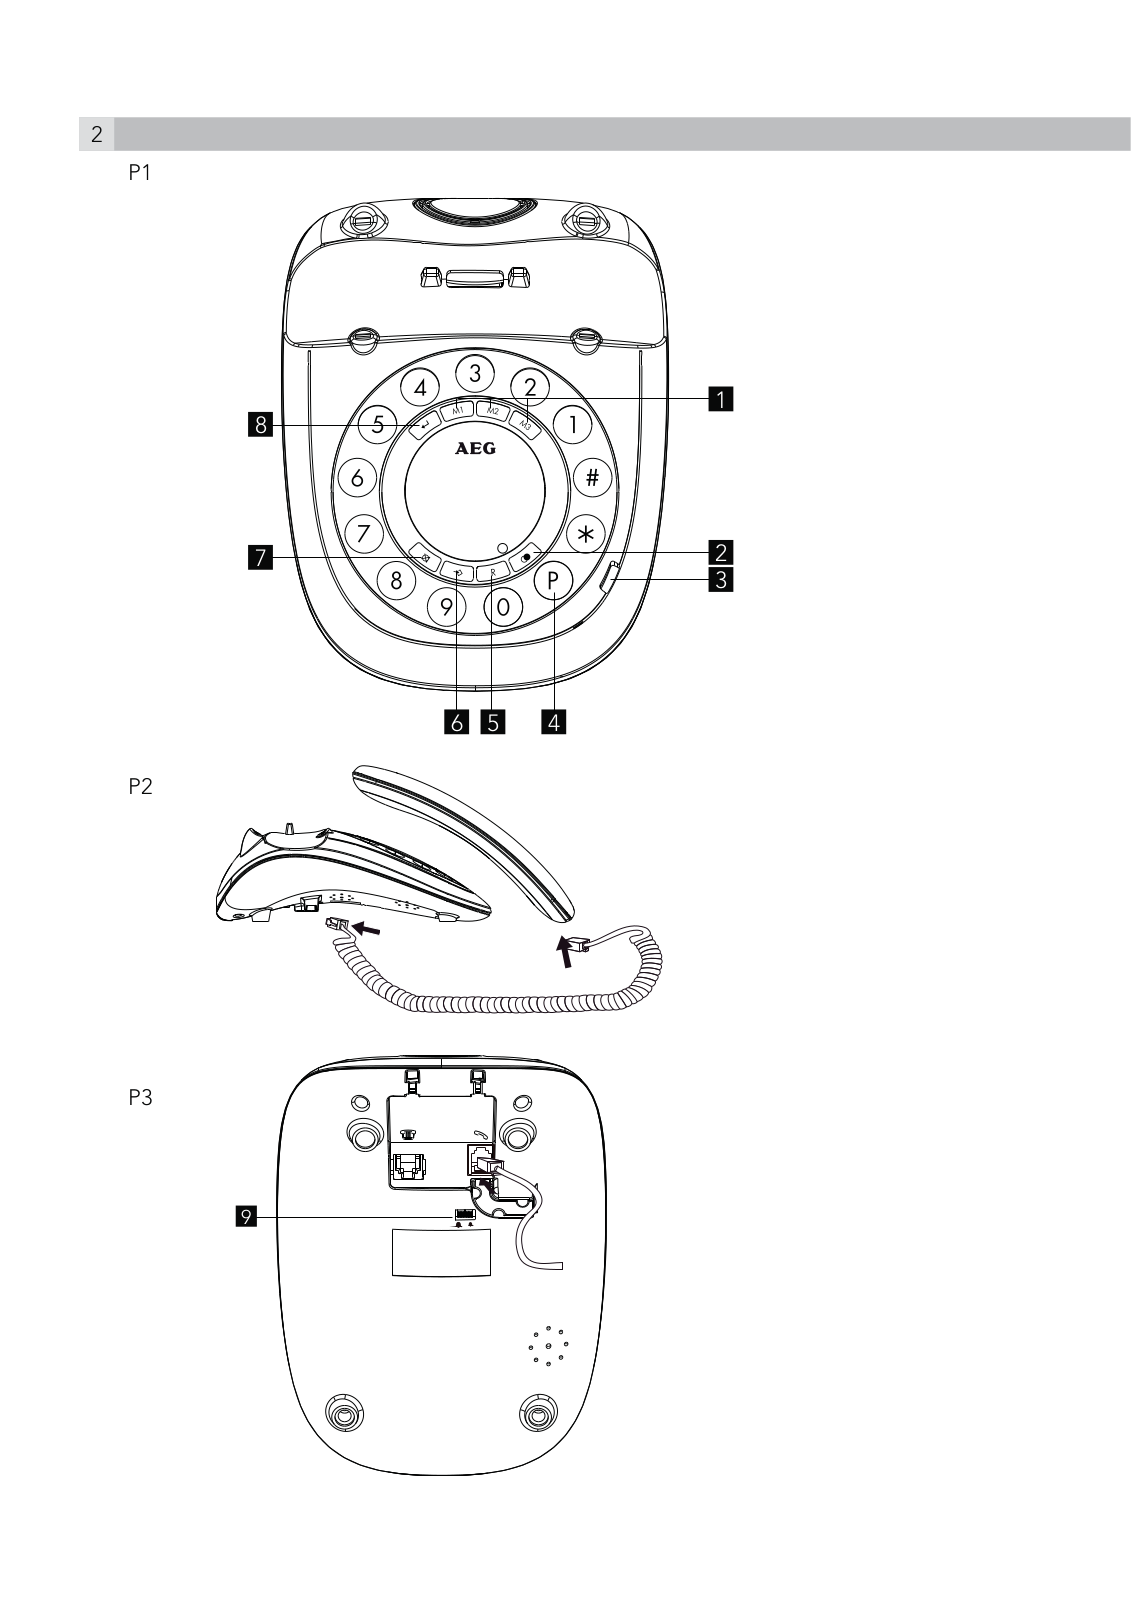
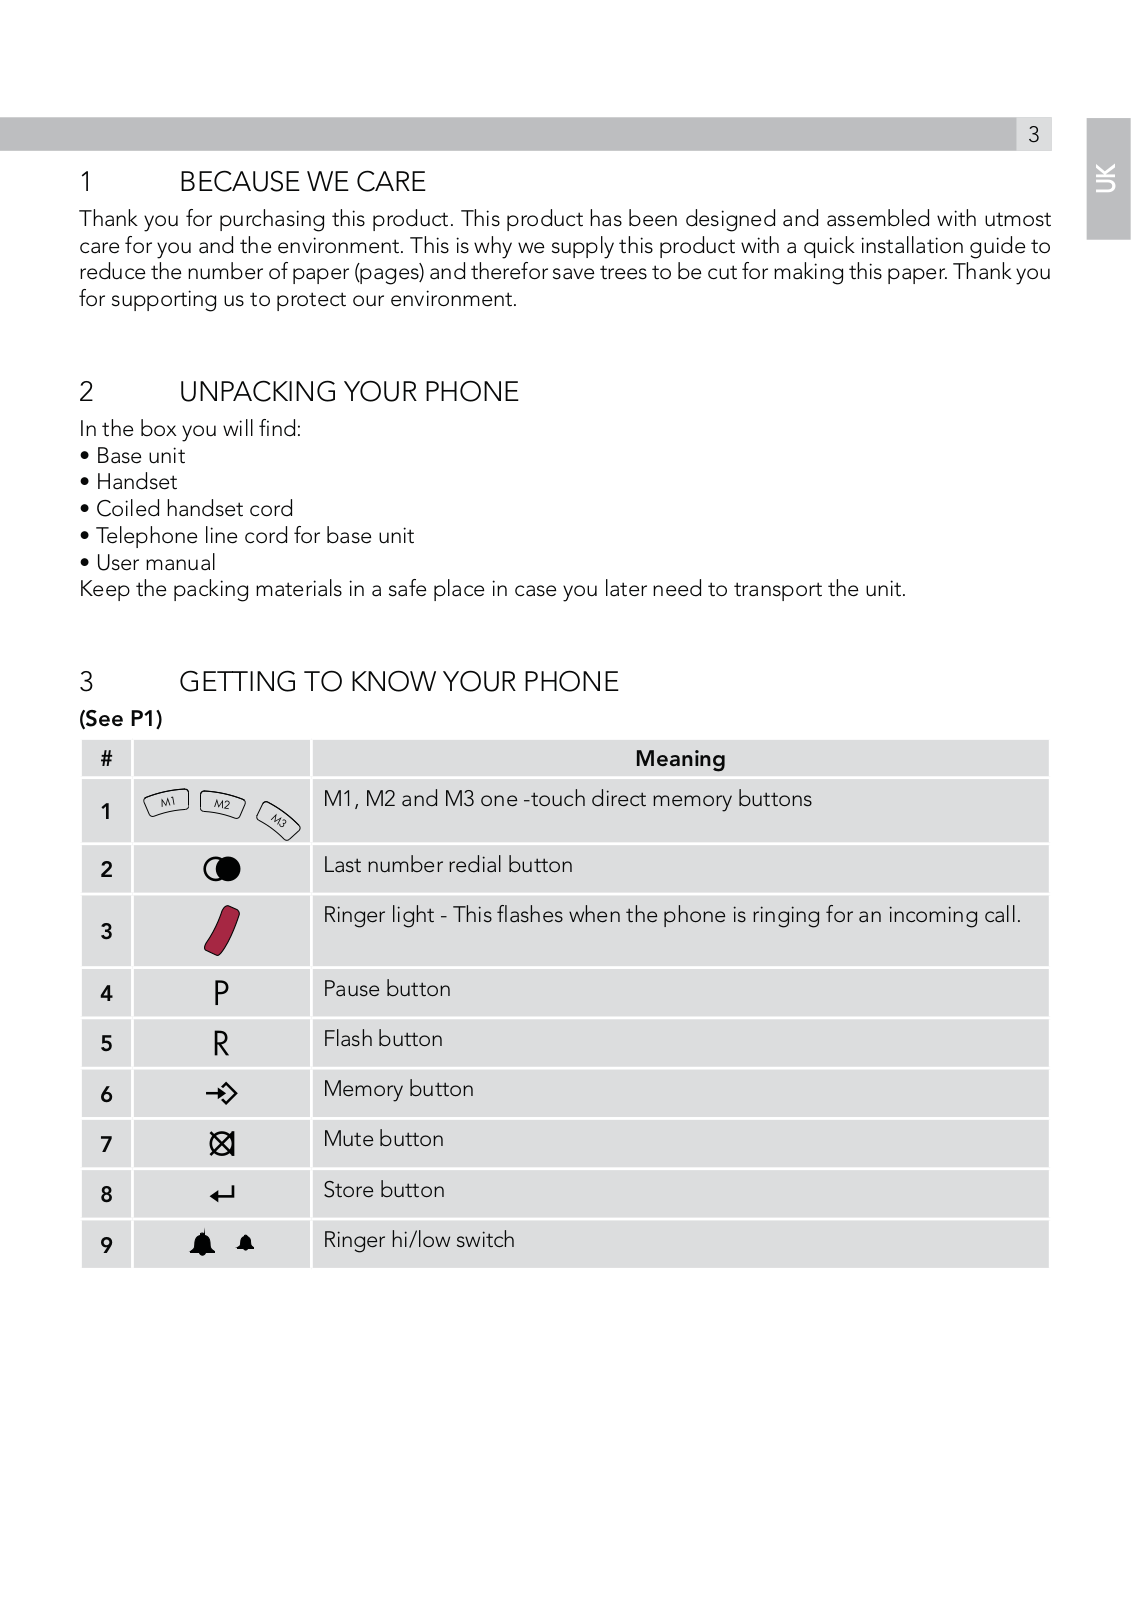
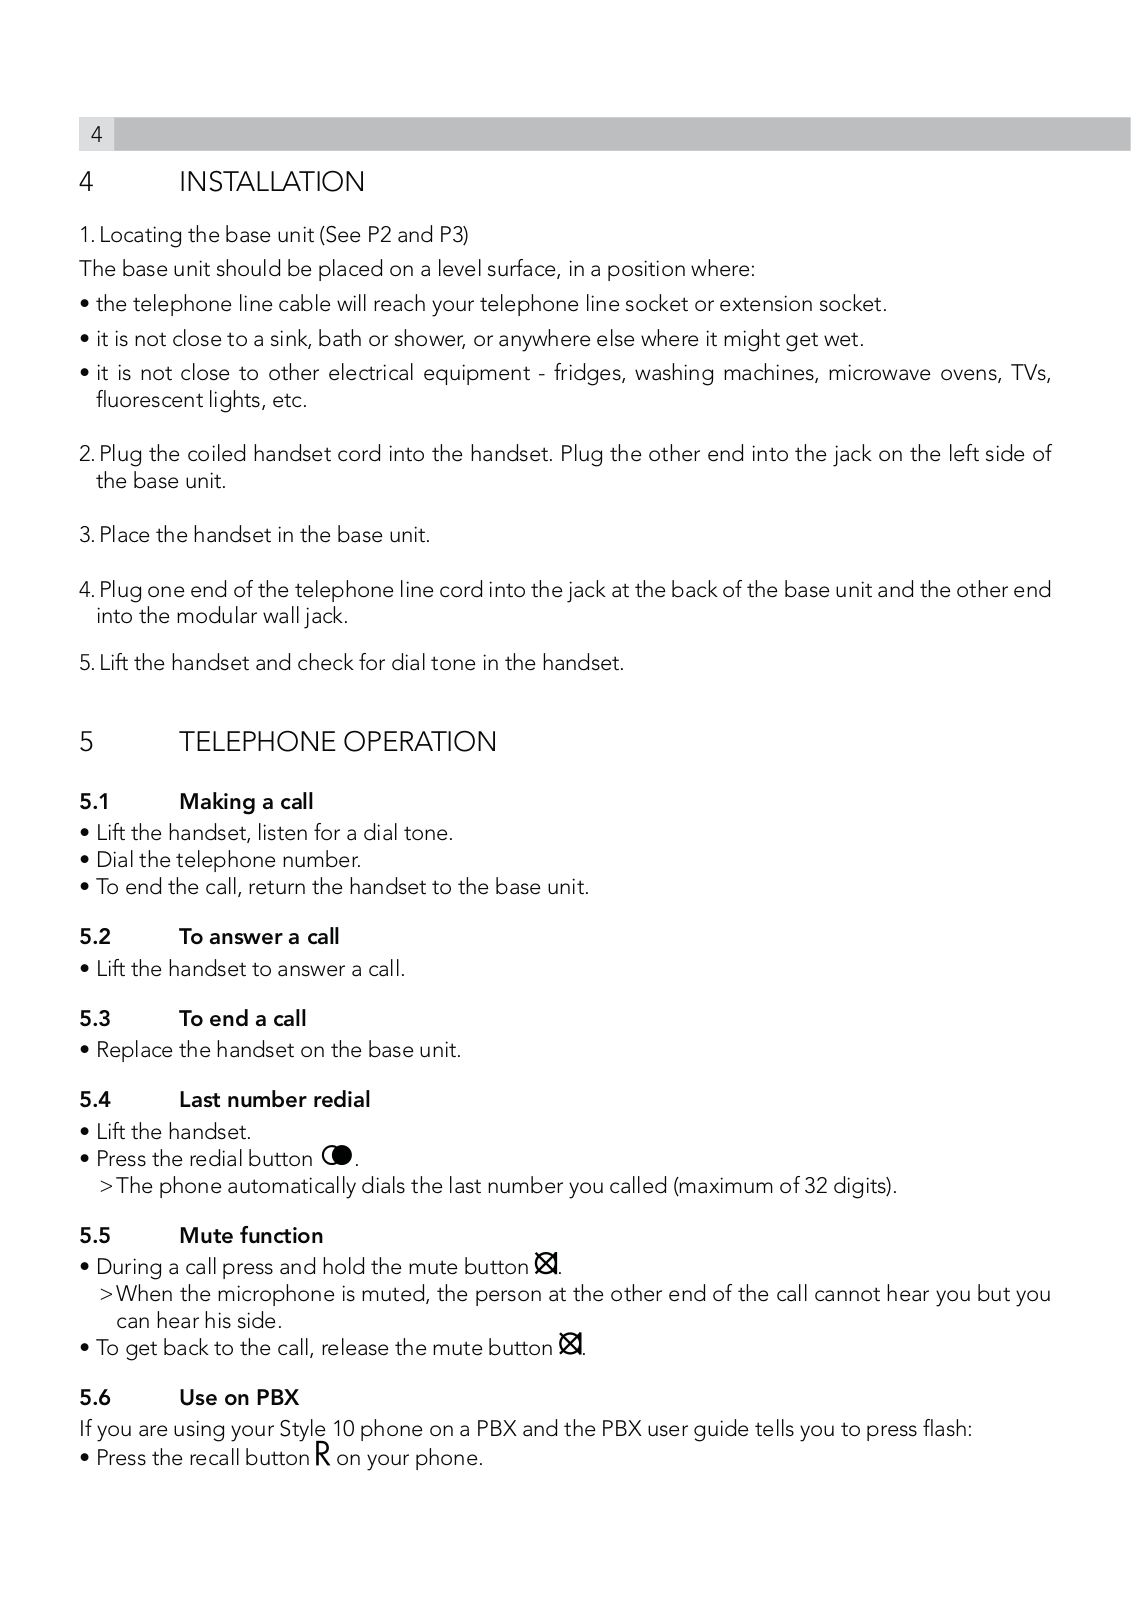
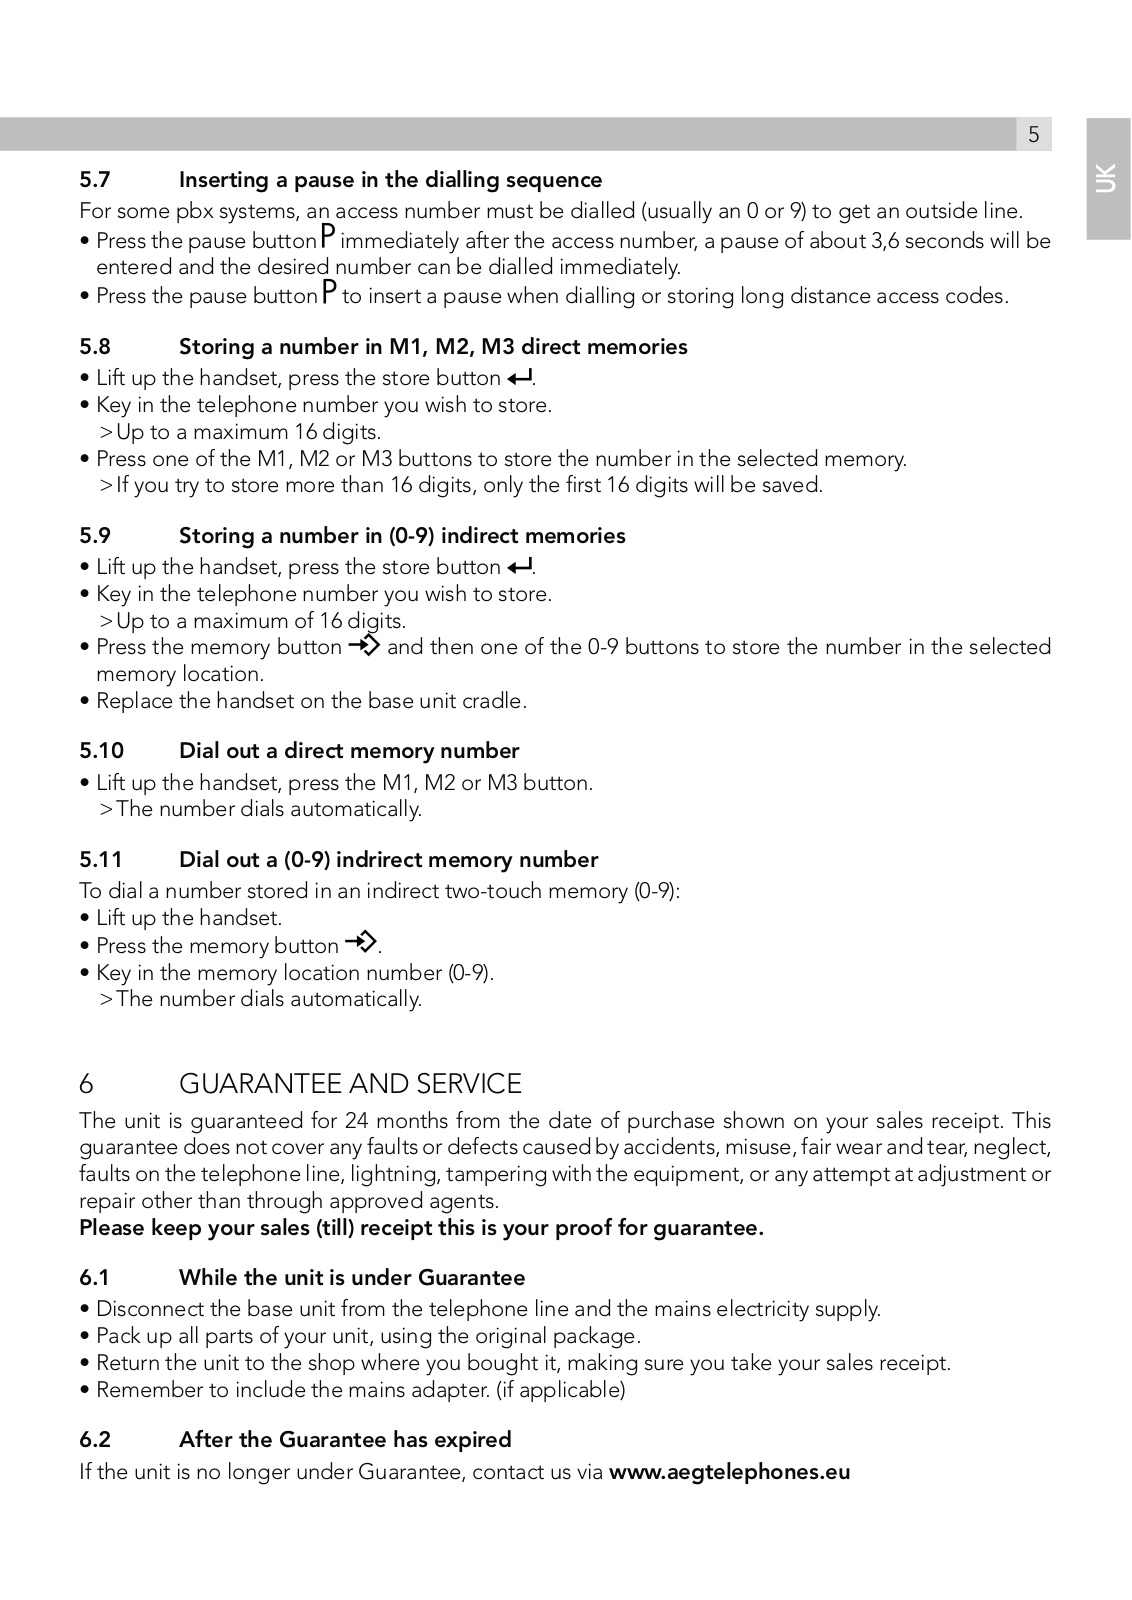
Style 10
product sheet
2 pgs
384.19 Kb
0
User guide [hu]
2 pgs
143.82 Kb
0
User guide [ml]
48 pgs
595.57 Kb
0
Table of contents
Loading...
AEG Style 10 User guide [ml]
...
AEG User guide [ml]
Download
Specifications and Main Features
Frequently Asked Questions
User Manual
Download
Loading...
+
hidden pages
Unhide
You need points to download manuals.
1 point = 1 manual.
You can buy points or you can get point for every manual you upload.
Buy points
Upload your manuals
 Loading...