

Page 1
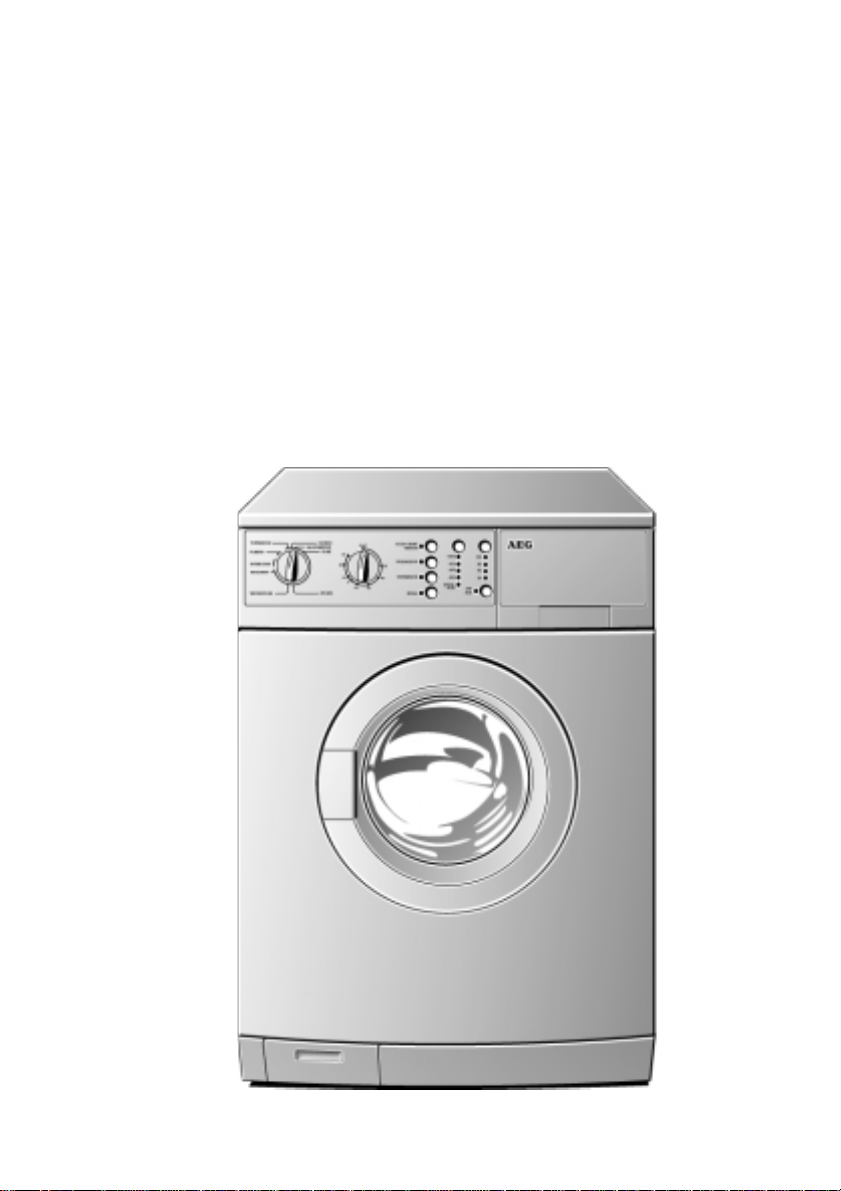
ÖKO-LAVAMAT 62600
The environmentally friendly washing machine
Operating instructions
Page 2

Dear customer,
Pri
Please read these operating instructions through carefully.
Please make sure you read the safety instructions on the first pages of
these operating instructions! Keep the operating instructions for future
reference. Pass them on to any future owners.
With the warning triangle and/or by means of key words (Warning!,
1
Caution!, Attention!), information is emphasized which is important
for your safety or the correct functioning of the appliance. It is essential that this information is observed.
0 This symbol guides you step by step when operating the appliance.
Next to this symbol you receive additional information and practical
3
tips on using the appliance.
Tips and information about the economical and environmentally
2
friendly use of the machine are marked with the clover.
These operating instructions contain information about how to inde-
pendently solve any problems which may arise. See "Troubleshooting".
If this information is not sufficient, please contact your local Customer
Service Centre. Addresses and phone numbers can be found in the separate “Guarantee Conditions/Service Departments“ (supplied with the
appliance).
In connection with this please refer to the "Service" section.
nted on environmentally friendly paper.
Whoever thinks ecologically also acts ecologically ....
2
Page 3

Contents
Safety instructions . . . . . . . . . . . . . . . . . . . . . . . . . . . . . . . . . . . . . . . . . . . . . 5
Disposal . . . . . . . . . . . . . . . . . . . . . . . . . . . . . . . . . . . . . . . . . . . . . . . . . . . . . . 7
Environmental tips . . . . . . . . . . . . . . . . . . . . . . . . . . . . . . . . . . . . . . . . . . . . . 7
The most important features of your
appliance . . . . . . . . . . . . . . . . . . . . . . . . . . . . . . . . . . . . . . . . . . . . . . . . . . . . . 8
Structure of the appliance . . . . . . . . . . . . . . . . . . . . . . . . . . . . . . . . . . . . . . 9
Front view . . . . . . . . . . . . . . . . . . . . . . . . . . . . . . . . . . . . . . . . . . . . . . . . . . . . . 9
Control panel . . . . . . . . . . . . . . . . . . . . . . . . . . . . . . . . . . . . . . . . . . . . . . . . . . 10
Program selector . . . . . . . . . . . . . . . . . . . . . . . . . . . . . . . . . . . . . . . . . . . . 10
Program selector as program progress display . . . . . . . . . . . . . . . . . . . . 11
Temperature selector . . . . . . . . . . . . . . . . . . . . . . . . . . . . . . . . . . . . . . . . . 11
Type of washing buttons . . . . . . . . . . . . . . . . . . . . . . . . . . . . . . . . . . . . . . 12
Final spin speed/(Rinse Hold) button . . . . . . . . . . . . . . . . . . . . . . . . . . . . 12
Delay Timer button . . . . . . . . . . . . . . . . . . . . . . . . . . . . . . . . . . . . . . . . . . 12
(On/Off) button . . . . . . . . . . . . . . . . . . . . . . . . . . . . . . . . . . . . . . . . . . . . . 12
Compartment for washing powder and fabric softener . . . . . . . . . . . . . . . 13
Consumption values and time required for selected programs . . . . . . . . . 14
Before using your machine for the first time . . . . . . . . . . . . . . . . . . . . . 14
Preparing the washing cycle . . . . . . . . . . . . . . . . . . . . . . . . . . . . . . . . . . . . 15
Sorting out and preparing washing . . . . . . . . . . . . . . . . . . . . . . . . . . . . . . . . 15
Washing Types and Care Symbols . . . . . . . . . . . . . . . . . . . . . . . . . . . . . . . . . 16
Washing powders and conditioners . . . . . . . . . . . . . . . . . . . . . . . . . . . . . . . . 16
Which washing powder and conditioner? . . . . . . . . . . . . . . . . . . . . . . . . 16
How much washing powder and fabric softener? . . . . . . . . . . . . . . . . . 17
Using a water softener . . . . . . . . . . . . . . . . . . . . . . . . . . . . . . . . . . . . . . . . . . 17
Run wash cycle . . . . . . . . . . . . . . . . . . . . . . . . . . . . . . . . . . . . . . . . . . . . . . . . 18
Brief instructions . . . . . . . . . . . . . . . . . . . . . . . . . . . . . . . . . . . . . . . . . . . . . . . 18
Filling in the washing . . . . . . . . . . . . . . . . . . . . . . . . . . . . . . . . . . . . . . . . . . . 19
Adding washing powder/fabric softener . . . . . . . . . . . . . . . . . . . . . . . . . . . 20
Setting the washing program . . . . . . . . . . . . . . . . . . . . . . . . . . . . . . . . . . . . . 21
Start the washing program, set delay timer and the final spin speed. . . . 22
During the washing program . . . . . . . . . . . . . . . . . . . . . . . . . . . . . . . . . . . . . 23
Washing cycle finished/Removing the washing . . . . . . . . . . . . . . . . . . . . . . 23
3
Page 4

Contents
Program tables . . . . . . . . . . . . . . . . . . . . . . . . . . . . . . . . . . . . . . . . . . . . . . . . 24
Washing . . . . . . . . . . . . . . . . . . . . . . . . . . . . . . . . . . . . . . . . . . . . . . . . . . . . . . 24
Separate Soaking . . . . . . . . . . . . . . . . . . . . . . . . . . . . . . . . . . . . . . . . . . . . . . . 26
Separate Conditioning/Starching/Treatment . . . . . . . . . . . . . . . . . . . . . . . 26
Separate Rinsing . . . . . . . . . . . . . . . . . . . . . . . . . . . . . . . . . . . . . . . . . . . . . . . 27
Separate Spinning . . . . . . . . . . . . . . . . . . . . . . . . . . . . . . . . . . . . . . . . . . . . . 27
Cleaning and caring . . . . . . . . . . . . . . . . . . . . . . . . . . . . . . . . . . . . . . . . . . . 28
In daily use . . . . . . . . . . . . . . . . . . . . . . . . . . . . . . . . . . . . . . . . . . . . . . . . . . . . 28
Control panel . . . . . . . . . . . . . . . . . . . . . . . . . . . . . . . . . . . . . . . . . . . . . . . . . . 28
Detergent compartment . . . . . . . . . . . . . . . . . . . . . . . . . . . . . . . . . . . . . . . . . 28
Washing machine drum . . . . . . . . . . . . . . . . . . . . . . . . . . . . . . . . . . . . . . . . . 29
Door . . . . . . . . . . . . . . . . . . . . . . . . . . . . . . . . . . . . . . . . . . . . . . . . . . . . . . . . . 29
Precautionary measures in the event of a risk of frost . . . . . . . . . . . . . . . . 29
Troubleshooting . . . . . . . . . . . . . . . . . . . . . . . . . . . . . . . . . . . . . . . . . . . . . . . 30
Remedy . . . . . . . . . . . . . . . . . . . . . . . . . . . . . . . . . . . . . . . . . . . . . . . . . . . . . . . 30
If the washing results are not satisfactory . . . . . . . . . . . . . . . . . . . . . . . . . . 33
Executing an emergency emptying . . . . . . . . . . . . . . . . . . . . . . . . . . . . . . . . 34
Cleaning the suds pump . . . . . . . . . . . . . . . . . . . . . . . . . . . . . . . . . . . . . . . . . 35
Additional Rinse/Water Cooling . . . . . . . . . . . . . . . . . . . . . . . . . . . . . . . . . . . 36
Technical data . . . . . . . . . . . . . . . . . . . . . . . . . . . . . . . . . . . . . . . . . . . . . . . . 37
Power supply . . . . . . . . . . . . . . . . . . . . . . . . . . . . . . . . . . . . . . . . . . . . . . . . . . 37
Information for the electrician . . . . . . . . . . . . . . . . . . . . . . . . . . . . . . . . . . . 37
Index . . . . . . . . . . . . . . . . . . . . . . . . . . . . . . . . . . . . . . . . . . . . . . . . . . . . . . . . . 38
Service . . . . . . . . . . . . . . . . . . . . . . . . . . . . . . . . . . . . . . . . . . . . . . . . . . . . . . . 39
4
Page 5

1 Safety instructions
The safety standards of AEG electric appliances are in keeping with the
recognised rules of technology and the law governing the safety of
appliances. Nevertheless as a manufacturer we are committed to familiarise you with the following safety instructions:
General safety
• Repairs to the washing machine may only be carried out by qualified
personnel. As a result of incorrect repairs considerable dangers for the
user may result. Please contact our customer service department or
an authorised AEG dealer in the event of repairs being necessary.
• Never start the washing machine if the mains flex is damaged or the
control panel, work top or base area are so damaged that the inside
of the washing machine is accessible.
• Switch off the washing machine before carrying out any cleaning,
care and maintenance work! You can make totally sure by pulling the
mains plug out of the socket or - if permanently connected – by
switching off the fuse switch in the fuse box or by unscrewing the
plug fuse right out.
• Multiway plugs, joints and extension cables must not be used. There is
risk of overheating!
• Never use the flex to pull the plug out of the socket but pull the
actual plug.
• Do not spray the washing machine with a water jet – danger of an
electric shock!
• During washing programs at a high temperature, the glass of the
door heats up. Do not touch!
• Allow the suds to cool down before cleaning the pump or carrying
out emergency emptying.
• Small animals can nibble at power cables and water hoses. Electric
shock hazard and danger of damages from water!
Installation, connection and initial operation
• Please follow the separate Installation and connection instructions.
• Run the first washing cycle without washing ( /Cottons 95,
with half the amount of washing powder) to remove residues on the
drum and suds container caused during production.
• If the machine is delivered during the winter at freezing temperatures: store the washing machine for 24 hours at room temperature
before starting it.
5
Page 6

Safety instructions
Safety of children
• Often children are not aware of the dangers involved in handling
electrical equipment. Therefore please ensure they are adequately
supervised whilst the appliance is on and do not allow children to
play with the washing machine – there is a risk that the children may
lock themselves in the appliance.
• Packaging (e.g. plastic films, polystyrene) could be danger ous for children – danger of suffocation! Keep packaging away from children.
• Please make sure that children or small animals do not climb into the
drum of the washing machine.
• When disposing of the washing machine pull out the plug, cut off the
flex, dispose of the plug and remaining flex and destroy the door
lock. This hinders children from locking themselves in and endangering their lives.
Intended use
• Only use the washing machine to wash normal domestic washing. If
the washing machine is used for any other purpose or is incorrectly
used, the manufacturer adopts no liability for any damages which
may result.
• Conversions or changes to washing machines are not permitted due
to safety reasons.
• Only use washing powder which is suitable for washing machines.
Please follow the instructions of the washing powder manufacturers.
• The washing may not contain any flammable solvents.
Please observe this above all when washing prewashed laundry.
• Do not use your washing machine for dry cleaning.
• Dyes and bleaching agents may only be used if specifically permitted
by the manufacturer of these products. We cannot be held liable for
any damages.
• Please only use water from the mains. Only use rain or industrial
water if it meets the requirements of DIN1986 and DIN1988.
6
Page 7

2 Disposal
Dispose of the packaging!
Dispose of the packaging material of your washing machine correctly.
All packaging materials are environmentally friendly and can be disposed of without any danger or burnt in the refuse incinerator.
The plastic parts can be reused:
• The external plastic cover and the bags inside are made of polyethylene (marking >PE<).
• The padding is made of CFC free expanded polystyrene
(marking >PS<).
The boxes are made from recycled paper and should be returned to the
old paper collection.
Dispose of your old washing machine!
When you eventually stop using your washing machine please bring it
to the nearest recycling centre or to your dealer who will take it back
for a small fee.
2 Environmental tips
• For normally soiled washing you do not need a prewash. In this way
you can save washing powder, water and time (and not pollute the
environment!).
• The washing machine works particularly economically if you exploit
the maximum loads.
• For small quantities of washing use half to two thirds of the recommended washing powder quantity.
• By suitable pretreatment stains and a certain amount of dirt can be
removed. Then you can wash at a low temperature.
• Wash slightly soiled to normally soiled cottons with the energy saving
program.
• Often you do not need a fabric softener . Just t ry it! If you use a washing machine your washing will become soft and fluffy without softener.
• For medium to high water hardness (from hardness range II, see
"Washing powder and conditioners") you should use a water softener.
The washing powder can then always be measured as for hardness
area I (= soft).
7
Page 8
The most important features of your
appliance
• Setting the program using the program selector, temperature selector
and type of washing buttons.
• Stain program for effectively treating stained washing.
• Energy saving program for slightly soiled to normally soiled linen.
• Maximum spin speed 1200 revolutions per minute, speed for the
final spin is automatically adapted depending on the washing program:
(Cottons/Linen) 1200 revolutions per minute
(Easy Cares) 1000 revolutions per minute
(Delicates) 1000 revolutions per minute
(Woollens) 1000 revolutions per minute
• Speed for the final spin can be changed to 1000, 700, or 400 revolutions per minute.
• (Rinse hold) can be added: the washing remains in the final
rinse water, it is not spun.
• Delay timer: program start can be delayed by 2, 4, 8 or 12 hours
(e.g. to times with a more economical power rate).
• Automatic load adaptation with fuzzy logic: sensor controlled wash-
ing process, water quantity dependent on foam and load. This ensures
the best washing and rinsing results with the lowest automatically
adapted water consumption.
• 4-chamber compartment for washing powder and fabric softener:
temporally delayed addition of softener, washing powder and stain
removing agent enables environmentally friendly washing and
improves the effectiveness of the detergents.
• ÖKO gate: ensures that the washing powder is fully exploited by auto-
matically closing the suds container during the wash cycle.
• Scoop ribs in the washing machine drum: ensure washing is wet fast
and equally.
• Anti-unbalance control system: for stability and smooth running.
• Extra water switch: suds cooling only or suds cooling with extra rinse
can be set.
• All-round water protection.
8
Page 9

Structure of the appliance
Front view
Control panel
Compartment for washing powder
and fabric softener
with handle flap
Type plate
(behind door)
Door with
handle
Flap in front of
suds pump
Height adjustable
screw feet
9
Page 10
Structure of the appliance
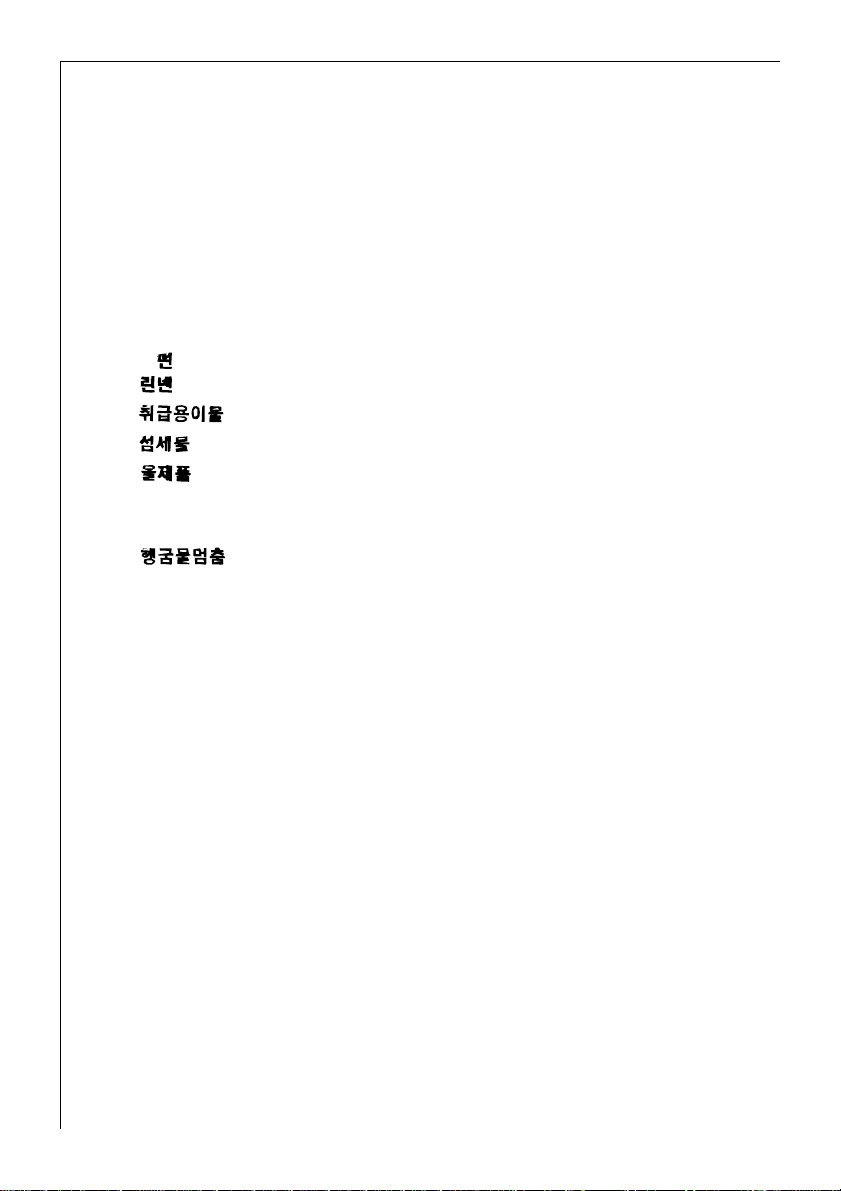
Control panel
Final spin speed/
Rinse hold button
Program selector
Temperature selector
Program selector
The program selector determines
the type of the washing cycle. The
different setting positions have the
following effect:
(PREWASH)
Cold prewash before the main
wash which follows automatically
(not selectable for the Woollens
setting).
Type of washing
buttons
Delay Timer
button
On/Off button
10
(STAIN)
To treat heavily soiled washing or stained washing with stain remover
(extended main wash with time optimised stain remover rinse, not
selectable for Woollens setting).
(MAIN WASH)
Main wash for normally soiled washing (washing rinsing/fabric softening, spinning).
(QUICK WASH)
Shortened main wash cycle for slightly soiled washing
Page 11
Structure of the appliance
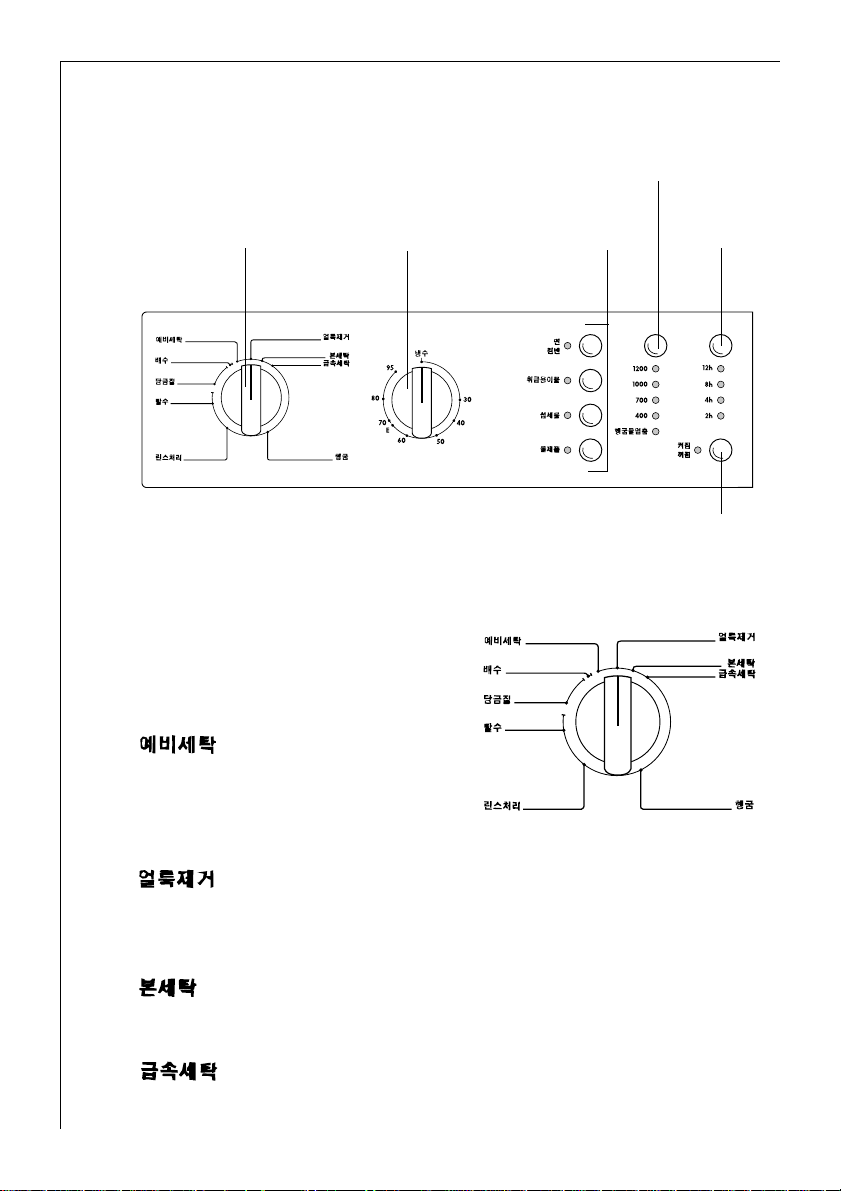
(RINSE)
Separate rinse, e.g. for rinsing fabrics washed by hand (spin according
to the type of washing).
(CONDITIONER)
Separate fabric softening, separate starching, separate impregnating
(one rinse runs, liquid conditioner from the compartment À is
added).
(SPIN)
Spin after a (Rinse hold), or separate spinning of handwashed fabrics.
(SOAKING)
Separate soaking (maximum 40°C), the washing stays in the suds at the
end (not selectable for Woollens setting).
After soaking the main washing cycle required must be set, the pro-
3
gram does not continue automatically.
(PUMP OUT)
Pumping out the water after a /Rinse hold (without spin).
Program selector as program progress display
The program selector serves as a program progress display by turning
clockwise to the end of the program. For the programs Stain, Main
wash and Quick wash, the program selector moves to a position directly
behind Quick wash immediately after the program starts. Then it displays the program progress as usual.
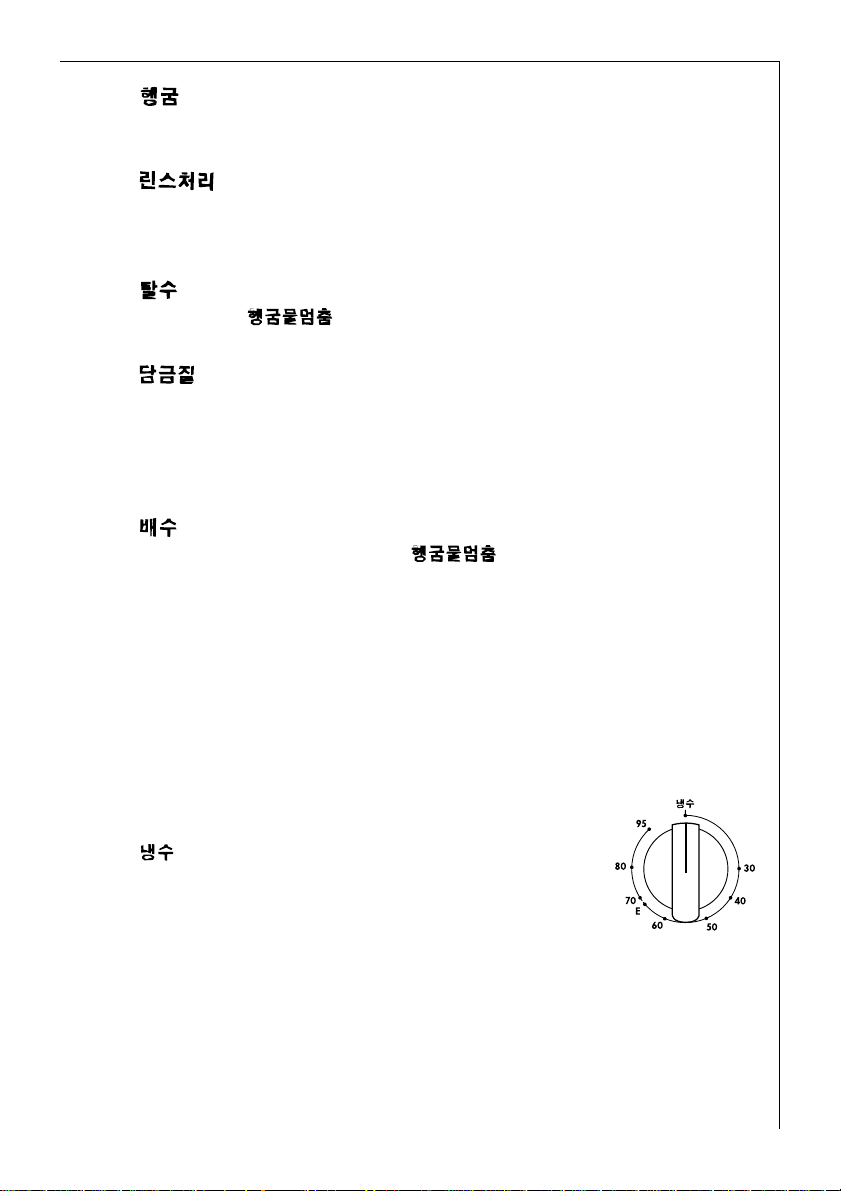
Temperature selector
The following temperatures can be set on the
temperature selector:
(Cold), 30, 40, 50, 60, E, 70, 80, 95
Position E (energy saving pr ogram) is suitable
2
for slightly to normally soiled linen;
reduced temperature to approx. 67°C.
11
Page 12
Structure of the appliance
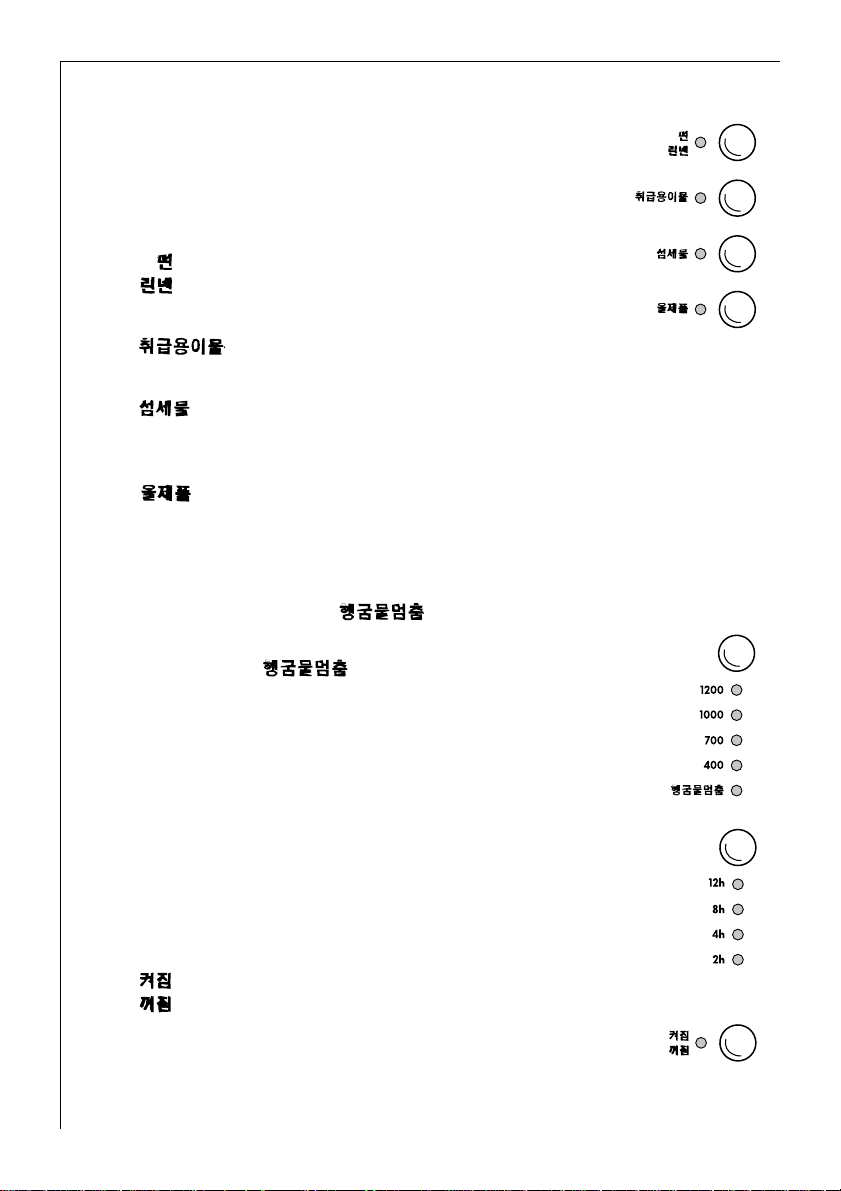
Type of washing buttons
With the type of washing buttons the progress of
the programs (e.g. max. possible temperature, water
level, drum movement, number of rinses, spin
speed) is influenced in accordance with the type of
washing to be treated.
(COTTONS/LINEN)
For cottons and linen.
(EASY CARES)
For easy cares (temperature automatically limited to maximum 60°C.)
(DELICATES)
For delicates (higher water level and reduced drum movement, temperature automatically limited to maximum 40°C).
(WOOLLENS)
For machine washable woollens and particularly sensitive fabrics
(higher water level and considerably reduced drum movement, temperature automatically limited to maximum 40°C).
Final spin speed/ (Rinse Hold) button
With this key you can change the maximum speed for the
final spin. For (Rinse hold) the washing stays in
the final rinse water and is not spun.
12
Delay Timer button
With this button you can delay the start of a washing
program by 2, 4, 8 or 12 hours.
(ON/OFF) button
This button switches the washing machine on and
starts the program selected or switches the washing
machine off.
Page 13

Structure of the appliance
Compartment for washing powder and fabric softener
Suction cap
(must be tightly
stuck on)
k Compartment for prewash detergent/soaking agent or water
softener.
They are added right at the beginning of the washing program.
l Compartment for non-liquid i.e. powder main detergents and
possibly softeners.
They are added right at the beginning of the main washing program.
m Compartment for stain remover.
This is added during the Stain program in the main wash at the
optimal time.
w Compartment for liquid conditioners (fabric softener, starch).
They are added to the final rinse water.
13
Page 14

Consumption values and time required for selected
programs
The values in the following table were determined under standard conditions. They provide a useful guide for household use.
Program
Selector
(MAIN
WASH)
1)Note: program setting for testing in accordance with EN 60 456
Temperature
Selector
95
1)
60
40
40
30
30
Type of Washing
Button
(COTTONS/LINEN)
(COTTONS/LINEN)
(COTTONS/LINEN)
(EASY CARES)
(DELICATES)
(WOOLLENS)
Load
in kg
Water
in Litres
5 58 1.70 134
5 58 1.05 120
5 58 0.63 120
2.5 50 0.43 93
2.5 52 0.43 83
2 51 0.32 58
Energy
in kWh
Time in
minutes
Before using your machine for the first time
0 Slightly pull the detergent compartment out of the control panel.
0 Pour about 1 litre of water through the detergent compartment into the
washing machine.
Only once this has been done does the suds container close and the
ÖKO gate can function correctly.
0 Run through a wash cycle without washing ( /COTTONS 95,
with half the amount of washing powder).
This removes residues on the drum and suds container caused during
production.
14
Page 15

Preparing the washing cycle
Sorting out and preparing washing
• Sort out washing according to the type and care symbol (see "Types
of washing and care symbols").
• Empty the pockets.
• Remove any metal parts (paper clips, safety pins etc.).
• To prevent washing from getting damaged and forming bundles:
close zips, button up duvet covers and pillow cases, tie up loose straps
such as from aprons.
• Turn clothes made from double layer fabric inside out (e.g. anoraks,
sleeping bags).
• For knitted coloured fabrics as well as woollens and fabrics with
appliqué: turn inside out.
• Put small and delicate pieces (baby socks, tights) in a washing net, a
pillow case with zip or in larger socks.
• Handle curtains with special care. Remove metal strips or plastic fins
or tie them in a net or a bag.
We accept no liability for damages.
• Keep coloureds and whites separately in different washing cycles,
otherwise whites will turn grey.
• New coloured fabric often contains excess dyes. Wash this laundry
separately for the first time.
• Mix small and large pieces of washing! This improves the effective-
ness of the wash and the washing is distributed better when spinning.
• Shake out washing before putting it into the machine.
• Unfold the washing before putting it into the drum.
• Observe tips for proper care such as "wash separately" and "wash sep-
arately several times"!.
15
Page 16

Preparing the washing cycle
Washing Types and Care Symbols
Care symbols assist in the selection of the correct washing program.
Washing should be sorted according to type and care symbol. The temperatures indicated in the care symbols are maximum temperatures.
Cottons ç
Cotton and linen fabrics with this care symbol are resistant to the
mechanical action of the washing machine and high temperatures.
The (COTTONS/LINEN) program is suitable for this type of
washing.
Linen èë
Cotton and linen fabrics with this care symbol are resistant to the
mechanical action of the washing machine.
The (COTTONS/LINEN) program is suitable for this type of
washing.
Easy-care washing êíî
Fabrics such as treated cottons, cotton mixtures and synthetics with
this care symbol need careful handling. The (EASY-CARES)
program is suitable for this type of washing.
Delicates ì
Fabrics such as those with layered fibres, micr o-fibr es, as well as synthetics and net curtains with this care symbol need particularly careful handling. The (DELICATES) program is suitable for this type of
washing.
Woollens and particularly delicate washing 9 ì
Fabrics such as woollens, wool mixtures and silk with this care symbol
are particularly delicate in respect of the mechanical action of the
washing machine. The (WOOLLENS) program is suitable for this
type of fabrics.
Important! Fabrics with the
care symbols must not be washed in the washing machine!
ï (hand washing) or ñ (do not wash!)
Washing powders and conditioners
Which washing powder and conditioner?
Only use washing powders and fabric softeners suitable for washing
machine use. As a general rule follow the instructions of the producers.
16
Page 17

Preparing the washing cycle
How much washing powder and fabric softener?
The amount to be used depends on
• the load:
If the washing powder producer does not make any specifications for
small loads, use a third less for half loads, and for very small loads only
use half of the amount of washing powder recommended for a full
load.
• the degree of soiling of the washing:
For only slightly soiled washing use less washing powder. Follow the
instructions of the washing powder producer and load.
• on the degree of hardness of the tap water:
The harder the water, the higher the dosage! You will find the quantities to use according to water hardness on the washing powder packaging.
Liquid detergent
Add liquid detergent using the dosing device provided by the detergent
industry. Please follow the instructions on the package.
Using a water softener
For a medium to high degree of water hardness (from water hardness
area II) water softener should be used. Follow the manufacturers
instructions! Then always dose detergent for hardness area I (= soft).
You can find information about the local degree of water hardness
from your water utility.
As the water softener has to be added before the main detergent (pre-
2
softening of the water), 80% of the water softener otherwise needed is
sufficient.
Specifications of water hardness
Hardness Band
I – soft 0 – 7 to 1.3
II – medium-hard 7 – 14 1.3 – 2.5
III – hard 14 – 21 2.5 – 3.8
IV – very hard greater than 21 greater than 3.8
Water hardness in °dH
(German hardness scale)
Water hardness in mmol/l
(millimol per litre)
17
Page 18

Run wash cycle
Brief instructions
A washing cycle consists of the following steps:
0 Open the door, put in the washing.
0 Shut the door.
0 Add detergent/conditioner.
0 Set the correct washing program:
– Set the program on the program selector;
– Set the temperature on the temperature selector;
– Select type of washing with the type of washing buttons.
0 Press (ON/OFF) button.
Washing program starts automatically after six seconds. During these
six seconds:
0 Set any delay timer if required.
0 If applicable change final spin speed/select a (Rinse hold).
You can change this setting and the temperature during the entire
washing cycle.
After the washing program has finished:
Attention! If the washing cycle ends with a (Rinse hold),
run (PUMP OUT) or (SPIN) before opening the door.
0 Open the door, remove the washing.
0 Press the (ON/OFF)button!
18
Page 19

Run wash cycle
Filling in the washing
0 Sort the washing according to the type and prepare it correctly.
For information about the correct prepara-
3
tion of the washing see "Types of washing
and care symbols".
0 Open the door: pull at the handle of the
door.
0 Fill in the washing.
See the "Program tables" for the maximum
3
load.
0 Firmly shut the door.
Attention! When shutting the door be careful not to catch any pieces
of washing! The fabric and machine could get damaged.
19
Page 20

Run wash cycle
Adding washing powder/fabric softener
0 Open the compartment: reach into the recess
under the compartment, pull the compartment
out as far as it will go.
0 Fill in washing powder/fabric softener.
For information about washing powder and
3
fabric softeners see section "Washing powder
and conditioners".
k Prewash agent/soaking agent
(PRE WASH)/ (SOAKING),
or water softener
l Main detergent in powder form
(If you use water softener and need compartment k for the
prewash/soaking agent, add the water softener to the main
detergent compartment l.)
m Stain remover (only with additional program /STAIN))
w Liquid conditioners (fabric softener, starch).
Caution! Fill up the compartment to the MAX mark at the most.
If necessary dilute thick detergents to the MAX mark, dissolve
powdery starch.
0 Push the compartment right in.
20
Page 21

Setting the washing program
See "Program tables" for suitable program and correct temperature for
3
the respective type of washing.
Set washing program
Attention! Only turn the program
selector clockwise!
0 Set the program selector to the
washing program selected.
Set temperature
0 Set the temperature selector to the required
temperature.
Run wash cycle
0 Select type of washing.
– The display lamp of the type of washing
selected lights up.
– To deselect press another button.
21
Page 22

Run wash cycle
Start the washing program, set delay timer
and the final spin speed.
0 Check if the tap is open.
0 Switch on the washing machine: press the (ON/OFF) button.
– The washing program starts automatically after six seconds.
– During these six seconds you can set any delay timer if required to
delay the start of the washing program.
– As soon as the door is locked the On/Off display lamp lights up
(max. 15 seconds after the start).
For the programs (STAIN), (MAIN WASH) and
3
the program selector moves to a position directly behind
(QUICK WASH). Then it displays the program progress as usual.
If applicable set the delay timer (delay of the start of the
program): press the delay timer button so often until the
time delay desired is displayed.
– The remaining time until the start of the progr amm is dis-
played (in steps of 12, 8, 4, 2 hours).
– While the delay timer expires you can open the door to
add washing.
– Changing or cancelling the delay timer: press the delay
timer button so often until the display lamp of the
desired time delay lights up. If no display lamp lights up,
the delay timer is cancelled, the program will start immediately.
0 If applicable change the spin speed for the final spin or
select Rinse hold:
Press the final spin speed/ (Rinse hold) button
so often until the display of the spin speed required lights
up (or of Rinse Hold).
With (Rinse hold) the washing stays in the final
rinse water, it is not spun.
(QUICK WASH) immediately after the program has started
22
Page 23

Run wash cycle
During the washing program
You can at any time
– change the setting of the final spin speed,
– select (Rinse Hold),
– change the setting of the temperature.
Other settings cannot be changed.
To stop the washing program prematurely:
0 Press the (ON/OFF) button.
0 Turn the program selector clockwise to (PUMP OUT).
0 Press the (ON/OFF) button again. The water is pumped out.
Washing cycle finished/Removing the washing
The washing program is completed when the (ON/OFF) button
display lamp goes out.
After a Rinse Hold the water must first be pumped out or the washing
spun:
0 Either press the final spin speed/ (Rinse Hold) button so
often until the display of the spin speed required lights up,
or
turn the program selector clockwise to (SPIN)
(washing is spun in accordance with the program which has just run),
or
turn the program selector clockwise to (PUMP OUT).
(water is pumped out).
0 Open the door.
0 Remove the washing.
0 Switch off the washing machine by pressing the (ON/OFF) button.
0 Close the tap.
0 Pull the detergent compartment out a little so that it can dry . Only lean
the door to so that the washing machine can get some air.
23
Page 24

Program tables
Washing
In the following not all possibilities, but only the ones used most often
and which are most useful are listed..
Washing Type,
Care Symbol
Cottons
ç
Energy Saving
Program
Cottons ç
Max. Load
(weight dry)
5kg
5kg
Program
1)
Selector
(MAIN WASH)
(PRE WASH)
(STAIN)
(QUICK WASH)
(MAIN WASH)
(PRE WASH)
(MAIN WASH)
Temperature
Selector
70 to 9 5
E
Washing Type
Buttons
(COTTONS/
LINEN)
(COTTONS/
LINEN)
24
Linen
èë
5kg
(PRE WASH)
(STAIN)
(QUICK WASH)
30 to 60
(COTTONS/
LINEN)
Page 25

Program tables
Washing Type,
Care Symbol
Easy-Cares
êíî
Delicates
ì
Max. Load
(weight dry)
2.5kg
2.5kg
(or 15-20m
Net Curtains)
1)
(MAIN WASH)
(PRE WASH)
(QUICK WASH)
(MAIN WASH)
(PRE WASH)
2
Program
Selector
(STAIN)
(STAIN)
Temperature
Selector
30 to 60
Washing Type
Buttons
(EASY-CARES)
(COLD)
to 40 (DELICATES)
(QUICK WASH)
Woollens
9 ì
1)A 10-litre bucket contains about 2.5kg of dry washing (cotton).
2)Only wash woollen garments with the woolmark in the machine if they are also
2)
marked with "does not produce fluff", "non-fluffing" or "washing machine-safe".
2kg
(MAIN WASH)
(QUICK WASH)
(COLD)
to 40 (WOOLLENS)
25
Page 26

Program tables
Separate Soaking
Type of
Washing
Cottons/Linen 5kg
Easy-Cares 2.5kg
Delicates 2.5kg
Max. Load
(weight dry)
Program
Selector
SOAKING
Temperature
Selector
(COLD)
to 40
Separate Conditioning/Starching/Treatment
Type of Washing
Cottons/Linen 5kg
Easy-Cares 2.5kg
Delicates 2.5kg
Max. Load
(weight dry)
Program
Selector
(CONDITIONER)
Washing Type
Buttons
(COTTONS/LINEN)
(EASY-CARES)
(DELICATES)
Washing T y pe
Buttons
(COTTONS/LINEN)
(EASY-CARES)
(DELICATES)
26
Woollens 2kg
(WOOLLENS)
Page 27

Separate Rinsing
Type of Washing
Cottons/Linen 5kg
Easy-Cares 2.5kg
Delicates 2.5kg
Woollens 2kg
Separate Spinning
Type of Washing
Cottons/Linen 5kg
Max. Load
(weight dry)
Max. Load
(weight dry)
Program
Selector
(RINSE)
Program
Selector
Washing T y pe
Buttons
(COTTONS/LINEN)
(EASY-CARES)
(DELICATES)
(WOOLLENS)
Washing T y pe
Buttons
(COTTONS/LINEN)
Easy-Cares 2.5kg
Delicates 2.5kg
Woollens 2kg
(EASY-CARES)
(SPIN)
(DELICATES)
(WOOLLENS)
27
Page 28

Cleaning and caring
Cleaning and caring
In daily use
0 After the program has finished pull out the detergent compartment a
little so that it can dry out.
0 Only lean the door to after washing so that the washing machine is
aerated from the inside and can dry out.
0 Close the tap.
Control panel
Attention! Do not use household furniture polish or aggressive deter-
gents to clean the panel and operating parts
0 Wipe over the operating panel with a damp cloth. Only use warm
water.
Detergent compartment
Now and again the detergent compartment should be cleaned.
0 Pull out the detergent compartment as far as it will go.
0 Remove the detergent compartment by pulling heftily.
0 Remove the suction cap.
0 Clean the suction cap under running
water.
28
Page 29

0 Clean the separate compartments with
warm water from the back. A bottle
brush is a useful help here.
0 Push on the suction cap until the stop,
so that it is sitting tightly.
0 Clean the entire detergent compart-
ment inside area with a brush.
0 Insert the detergent compartment into the guides and push it in.
Washing machine drum
The washing machine drum is made from rust-free stainless steel. Rusty
foreign bodies in the washing can cause rust deposits on the drum.
Attention! Do not clean the stainless steel drum with descaling agents
containing acids, scouring agents containing chlorine or iron or steel
wool. Our customer service department has suitable agents available.
0 Remove rust deposits on the drum with a stainless steel cleansing
agent.
Door
0 Regularly check if there are deposits or foreign bodies in the rubber
sleeve behind the door and remove them if applicable.
Precautionary measures in the event of a risk of frost
Damages caused by frost are not covered by the warranty! If the wash-
3
ing machine is in a room with a risk of freezing, in the event of a risk of
freezing, an emergency emptying has to be done (see "Executing an
emergency emptying"). Additionally:
0 Unscrew the inlet hose from the tap and place it on the floor.
29
Page 30

Troubleshooting
Troubleshooting
The whistling noise when spinning which is some-
3
what different compared with older washing
machines is due to the modern drive system.
Remedy
In the event of a problem, try to eliminate it with the help of the information provided here. If you call out the customer service to eliminate
one of the problems listed here or to solve an operating error, a charge
is levied even during the warranty time.
Malfunction Possible cau se Remedy
Washing machine does
not work.
No water runs in.
The mains plug is not connected.
The fuse of the household
electrical system is faulty.
The door is not correctly
closed.
The tap is closed.
The sieve in the clamp of the
inlet hose is blocked.
Plug in the mains plug.
Replace or switch on the
fuse.
Close the door; you must
hear a click as it locks.
Press (ON/OFF) button;
Open tap;
Reselect program;
Press (ON/OFF) button
again.
Unscrew the hose from the
tap, remove the sieve and
clean it under flowing water.
30
Page 31

Troubleshooting
Malfunction Possible cau se Remedy
Washing machine
vibrates during operation or is unsteady.
The suds in the main
wash cycle create too
much foam.
Water is leaking out
from under the washing machine.
The height-adjustable screw
feet are not correctly set.
There is only very little washing in the machine (e.g. only
a bath robe).
Water could not be completely pumped out before
the spin because
there is a kink in the outlet
hose or the suds pump is
blocked.
Probably too much washing
powder was used.
The clamp on the inlet hose
is not tight.
The inlet hose has a leak.
The lid of the suds pump is
not correctly closed.
Adjust the feet according to
the installation and connection instruction.
This does not hinder the
machine from functioning
correctly.
Check that the outlet hose is
correctly laid and if applicable eliminate the kink or
clean the suds pump and if
necessary remove any foreign bodies from the pump
housing.
Only use as much as the
washing powder manufacturer recommends.
Tighten the inlet hose.
Check the inlet hose and if
necessary replace it.
Close the lid correctly.
Fabric softener is not
added, w compartment for fabric softener is filled with
water.
Washing has not been
spun, there is water left
in the drum.
Washing is caught in the
door.
Suction cap in the compartment for fabric softener is
not correctly fitted or is
blocked.
Rinse hold is selected. Deselect Rinse hold.
The soaking program has
been completed.
Abort the program, remove
the washing caught in the
door, start a new program.
Clean the detergent compartment, fit the suction cap
on firmly.
Pump out the water and set
the main wash cycle
required.
31
Page 32

Troubleshooting
Malfunction Possible cau se Remedy
Drain hose is kinked. Eliminate the kink.
Washing has not been
spun well, there is
water left in the drum.
The door cannot be
opened.
The rinse water is
cloudy.
Remnants of detergent
are building up in the
detergent drawer.
Maximum pumping height
(drain height 1m from the
position of the machine) is
exceeded.
Suds pump is blocked.
If a siphon is connected: the
siphon is blocked.
Program is not yet finished,
(ON/OFF) display lamp
lights up.
Probably caused by a washing powder with a high silicate content.
Tap is not fully open. Open tap fully.
The sieve in the threaded fit-
ting on the water inlet hose
at the tap is blocked.
Sieve on threaded fitting for
the water inlet hose on the
machine is blocked.
Please contact the customer
service, it has a retro-kit
available for pump heights
above 1m.
Switch off the machine and
pull the plug out of the
socket, clean the suds pump.
Clean the siphon.
Wait until the (ON/OFF)
lamp goes out.
This does not negatively
affect the rinse results. If
necessary use liquid detergent.
Clean sieve.
Clean sieve.
32
Program selector skips
(PRE WASH).
Program selector stops
at
Stain remover is not
washed in.
(SOAKING).
(PRE WASH)
combined with
(WOOLLENS).
(SOAKING)
combined with
(WOOLLENS).
(STAIN)
combined with
(WOOLLENS).
(PRE WASH) can-
not be combined with
(WOOLLENS).
(SOAKING) cannot
be combined with
(WOOLLENS).
(STAIN) cannot
be combined with
(WOOLLENS).
Page 33

If the washing results are not satisfactory
If the washing turns greyish and limescale deposits are present in
the drum
• Insufficient washing powder has been added.
• Incorrect washing powder was used.
• Special stains were not pretreated.
• Program or temperature was not set correctly.
• When using modular washing powders the individual components
were not used in the correct ratio.
If there are still grey stains on the washing
• Washing soiled with ointments, grease or oils was washed with insuf-
ficient washing powder.
• The temperature selected for the wash was too low.
• A frequent cause is that fabric softener especially a concentrated one
has come into contact with the washing. Wash out these types of
stains as fast as possible and use the fabric softener carefully.
If after the final rinse foam is still visible
• Modern washing powders can still cause foam in the final rinse cycle.
The washing is nevertheless sufficiently rinsed.
Troubleshooting
If there are white residues on the washing
• These are insoluble contents of modern washing powders. They are
not the result of an insufficient rinse. Shake out the washing or brush
it off. Perhaps you should turn the washing inside out in future
before washing it. Review your choice of powder, possibly use liquid
detergents in future.
33
Page 34

Troubleshooting
Executing an emergency emptying
1 Warning! Switch off the washing machine and pull the mains plug
before an emergency emptying!
If the washing machine no longer pumps out the washing suds an
emergency emptying must be carried out.
Caution! The washing suds, which flow out of the emergency emptying
hose can be hot. Risk of scalding! First allow the suds to cool down
before an emergency emptying!
0 Put down a flat container to catch the suds draining out.
0 Pull down the flap in the left corner of
the base strip and remove it.
0 Release the emergency emptying hose
from its holder.
0 Pull the emergency emptying hose out a
little.
0 Place the container underneath to
catch the water.
0 Release the plugs of the emergency emp-
tying hose by turning them anti-clockwise and pull them out.
The suds drain out. Depending on the
amount of suds, it may be necessary to
empty the container to catch the water
several times. To do this, temporarily
close the emergency emptying hose again
with the plugs.
34
Page 35

When the suds have drained out completely:
0 Push the plug firmly back into the emergency emptying hose.
0 Push the emergency emptying hose back in a little and let it catch onto
the holder.
0 Replace the flap in the base plate and close it.
When the washing machine is completely empty, the ÖKO gate can no
3
longer function correctly. Therefore before the next wash fill in approx
1l water (pour it in through the washing powder compartment).
Cleaning the suds pump
1 Warning! Switch off the washing machine and pull the mains plug
before cleaning the suds pump!
0 First execute an emergency emptying (see previous section "Executing
an emergency emptying").
0 Place a floor cloth on the floor in front of the lid of the suds pump. Left
over water could flow out.
0 Unscrew the lid of the suds pump by
twisting it anti-clockwise and pull it off.
0 Remove any foreign bodies which may be
in the pump housing.
0 Check whether the impeller of the pump
can be turned. (It is normal for the pump
to jerk when running.) If the impeller
cannot be turned at all please contact
your customer service department.
0 Replace the lid (insert the ridges on the
lid into the guiding slots) and screw on
tightly in a clockwise direction.
0 Close the emergency emptying hose, push
it in and fasten it.
0 Close the flap.
35
Page 36

Additional Rinse/Water Cooling
The washing machine is set up for extremely low water consumption.
• However, for people who suffer from an allergy to detergents, it can
be useful to rinse with more water (additional rinse).
• It may be necessary to cool the water before it is pumped out in order
to prevent damage to plastic waste pipes (water cooling).
You can activate these functions using the More Water Switch.
The program duration and water consumption are increased by water
3
cooling and/or the additional rinse.
Position "1": Water Cooling
The water is cooled prior to pumping out at the end of the main wash
(by adding cold water). This setting is only effective for
(COTTONS/LINEN) at a temperature of over 40 °C.
Position "2": Water Cooling and Additional Rinse
The water is cooled as in position 1, and an additional rinse is also performed during the (COTTONS/LINEN), (EASYCARES) and (DELICATES) programs.
As supplied the More Water Switch is set to position 0.
3
Making the Adjustment:
0 1. Pull out the detergent drawer until the More
Water Switch is accessible in the frame on the left.
2. Set the More Water Switch to
"1" (water cooling) or
"2" (water cooling and additional rinse).
36
Page 37

Technical data
Height x width x depth 85x60x60cm
Depth with the door opened 95cm
Height adjustability approx. +10/-5mm
Empty weight approx. 85kg
Full load (depending on the program) max. 5kg
Area of application household
Drum speed when washing max. 53rpm
Drum speed when spinning see type plate
Water pressure 1-10bar
(=10–100N/cm
This appliance complies with the following EC directives:
;
• 73/23/EEC of 19/2/1973 ’Low voltage directive’
• 89/336/EEC of 3/5/1989 ’EMC directive’ including the
Modification directive 92/31/EEC
Power supply
2
= 0.1–1,0MPa)
Technical data
-1
Please refer to the type plate for specifications about the power supply .
The nominal voltage stated on the type plate and type of current must
be identical with the nominal voltage and type of current at the point
of installation. Also refer to the type plate for the fuse required.
Information for the electrician
When connecting the appliance without a plug, care must be taken
that this is done correctly . Please follow the relevant information in the
"Installation and connection instructions" section.
For appliances with variable voltage settings, the switch-over diagram
can be found on the cover of the connection box at the back of the
appliance.
37
Page 38

Index
A
Abort the program . . . . . . . . . . . . . . . . . . . 23
C
Conditioners
liquid . . . . . . . . . . . . . . . . . . . . . . . . .13
Conditioning . . . . . . . . . . . . . . . . . . . . .11
Cotton Mixtures . . . . . . . . . . . . . . . . . . . . . 16
Cottons . . . . . . . . . . . . . . .12
Curtains . . . . . . . . . . . . . . . . . . . . . . . . . . . . 15
Customer service . . . . . . . . . . . . . . . . . .29
, 16, 24, 26, 27
, 20
, 26
, 39
D
Delay Timer . . . . . . . . . . . . . . . 8 , 10, 12, 22
Delicates . . . . . . . . . . . . . .12
, 16, 25, 26, 27
E
Easy-Cares . . . . . . . . . . . .12, 16, 25, 26, 27
Energy saving program . . . . . . . . . . 8
Executing an emergency emptying . . .34
, 11, 24
, 35
F
Fabric softener . . . . . . . . . . . . . .7, 9, 13, 20
L
Linen . . . . . . . . . . . . . . . . .12, 16, 24, 26, 27
Liquid detergent . . . . . . . . . . . . . . . . . . . . . 17
M
Main detergent . . . . . . . . . . . . . . . . . . .13, 20
Main Wash . . . . . . . . . . . . . . . . . . .10
, 24, 25
N
Net Curtains . . . . . . . . . . . . . . . . . . . . . .16, 25
O
ÖKO gate . . . . . . . . . . . . . . . . . . . . . 8, 14, 35
P
Pre Wash . . . . . . . . . . . . . . . . 10, 20, 24, 25
Prewash agent . . . . . . . . . . . . . . . . . . . .13
Program progress . . . . . . . . . . . . . . . . . . . . 11
Pump Out . . . . . . . . . . . . . . . . . . . . . . . .11
, 20
, 23
Q
Quick Wash . . . . . . . . . . . . . . . . . . 10, 24, 25
R
Rinse . . . . . . . . . . . . . . . . . . . . . . . . . . . . . . . 11
Rinse hold . . . . . . . . . . . . . . . . 8
, 10, 12, 22
S
Silk . . . . . . . . . . . . . . . . . . . . . . . . . . . . . . . . .16
Soaking . . . . . . . . . . . . . . . . . . . . . . . . . 11
Soaking agent . . . . . . . . . . . . . . . . . . . . 13
Spin . . . . . . . . . . . 8
Stain . . . . . . . . . . . . . . . . . 7
remover . . . . . . . . . . . . . . . . . . . . . . . 13
Starching . . . . . . . . . . . . . . . . . . . . . . . . . . . .26
Suds pump . . . . . . . . . . . . . . . . . . . . . . . 9
, 10, 11, 12, 22, 23, 27
, 10, 20, 24, 25
, 26
, 20
, 20
, 35
T
Type plate . . . . . . . . . . . . . . . . . . . . . . . . 9, 39
W
Warranty . . . . . . . . . . . . . . . . . . . . . . . . . . . .29
Washing
coloured . . . . . . . . . . . . . . . . . . . . . . . . . .15
delicate . . . . . . . . . . . . . . . . . . . . . . .15
double layers . . . . . . . . . . . . . . . . . . . . . .15
easy-care . . . . . . . . . . . . . . . . . . . . . . . . . .16
normally soiled . . . . . . . . . . . . . . . . . . . . . .7
slightly soiled . . . . . . . . . . . . . . . . . . . 7
soaking . . . . . . . . . . . . . . . . . . . . . . . . . . .20
starching . . . . . . . . . . . . . . . . . . . . . . . . . .20
Washing powders . . . . . . . . . . . . . . .9
Water
hardness . . . . . . . . . . . . . . . . . . . . . . . 7
pumping out . . . . . . . . . . . . . . . . . . . 11
softener . . . . . . . . . . . . . . . . . 7
Woollens . . . . . . . . . . . . . 12
, 16, 25, 26, 27
, 16
, 17
, 13, 20
, 17
, 23
, 13, 17, 20
38
Page 39

Service
.
In the chapter "Troubleshooting" some disturbances have been summarised, which you can solve yourself. If you do not find any helpful information there, please contact your local Customer Service Centre.
Addresses and phone numbers can be found in the separate “Guarantee
Conditions/Service Departments“ (supplied with the appliance).
Be well prepared before you phone. This facilitates the diagnosis and
the decision as to whether a customer service visit is necessary. With
our checklist you can gather important information before making
your call:
Make a note of the PNC number and the Serial number (S-No.). They
are both on the type plate behind the door of your washing machine.
PNC ........................................
S-No. ......................................
If possible establish:
• How is the disturbance evident?
• Under what circumstances does the disturbance
occur?
When do you incur costs even during the warranty period?
– if you could have solved the disturbance yourself with the help of the
Troubleshooting table (see section "Troubleshooting "),
– if the customer service engineer has to make several journeys because
he did not receive all the necessary important information before his
visit and now e.g. has to fetch spares. Y ou can avoid these extra trips
by preparing your telephone call properly in the way described above
39
Page 40

AEG Hausgeräte GmbH
Postfach 1036
D-90327 Nürnberg
http://www.aeg.hausgeraete.de
© Copyright by AEG
H 243 273 194 - 01- 0999
 Loading...