

Page 1

user manual
notice d'utilisation
benutzerinformation
istruzioni per l’uso
Dishwasher
Lave-vaisselle
Geschirrspüler
Lavastoviglie
GA60LI220
Page 2

2 electrolux
Electrolux. Thinking of you.
Share more of our thinking at www.electrolux.com
CONTENTS
Safety information 2
Product description 5
Control panel 5
Use of the appliance 7
Setting the water softener 7
Use of dishwasher salt 8
Use of detergent and rinse aid 9
Multitab function 10
SAFETY INFORMATION
Before the installation and use, read this
manual carefully:
• For your safety and the safety of your
property.
• To help the environment.
• For the correct operation of the appliance.
Always keep these instructions with the appliance also if you move or give it to a different person.
The manufacturer is not responsible if an incorrect installation and use causes damage.
Children and vulnerable persons safety
• Do not let persons, children included,
with reduced physical sensory, reduced
mental functions or lack of experience
and knowledge to use the appliance.
They must have supervision or instruction
for the operation of the appliance by a
person who is responsible for their safety.
• Children must get supervision to make
sure that they do not play with the appliance.
• Keep all packaging away from children.
There is the risk of suffocation or injury.
• Keep all detergents in a safe area. Do not
let the children touch the detergents.
• Keep children and pets away from the
appliance when the door is open.
General safety
• Do not change the specifications of this
appliance. There is the risk of injury and
damage to the appliance.
Loading cutlery and dishes 10
Select and start a washing programme
11
Washing programmes 12
Care and cleaning 13
What to do if… 14
Technical data 16
Environment concerns 17
Subject to change without notice
• Obey the safety instructions from the de-
tergent manufacturer to prevent burns to
eyes, mouth and throat.
• Do not drink the water from the appli-
ance. Particles of detergent can stay in
your appliance.
• Do not keep the appliance door open
without supervision. This to prevent injury
and to fall on an open door.
• Do not sit or stand on the open door.
Use
• The appliance is only for domestic use.
Do not use the appliance for other uses
to prevent injury to persons and damage
to property.
• Only use the appliance to clean accesso-
ries that are applicable for dishwashers.
• Do not put flammable products or items
that are wet with flammable products in,
near or on the appliance. Risk of explosion or fire.
• Put the knives and all items with sharp
points in the cutlery basket with their
points down. If not, put in a horizontal
position in the upper basket or in the
knife basket. (Not all models have the
knife basket).
• Use only specified products for dish-
washers (detergent, salt, rinse aid).
• Types of salt that are not specified for
dishwashers can cause damage to the
water softener.
• Fill the appliance with salt before you
start a washing programme. Remaining
salt in the appliance can cause corrosion
Page 3

electrolux 3
or make a hole in the bottom of the appliance.
• Do not fill the rinse aid dispenser with
other products than the rinse aid, (dishwasher cleaning agent, liquid detergent).
This can cause damage to the appliance.
• Make sure that the spray arms can move
freely before you start a washing programme.
• The appliance can release hot steam if
you open the door while a washing programme operates. There is a risk of skin
burns.
•Do not remove the dishes from the appliance until the washing programme is
completed.
Care and cleaning
• Before you clean the appliance, deactivate it and disconnect the mains plug
from the mains socket.
• Do not use flammable products or products that can cause corrosion.
• Do not use the appliance without the filters. Make sure that the installation of the
filters is correct. An incorrect installation
causes unsatisfactory washing results
and damage to the appliance.
• Do not use spray water or steam to clean
the appliance. Risk of electrical shock
and damage to the appliance.
Installation
• Make sure that the appliance is not damaged. Do not install or connect a damaged appliance, contact the supplier.
• Remove all packaging before you install
and use the appliance.
• Only a qualified person must do the electrical connection, the plumbing and the
installation of the appliance. This to prevent the risks of structural damage or injury.
• Make sure that the mains plug is disconnected from the mains socket during installation.
• Do not drill into the sides of the appliance
to prevent damage to hydraulic components and electrical components.
• Important!Obey the instructions in the
template supplied with the appliance:
– To install the appliance.
– To assemble the door panel.
– To connect to the water supply and
drain.
• Make sure that the appliance is installed
below and adjacent to safe structures.
Frost precautions
• Do not install the appliance where the
temperature is less than 0 °C.
• The manufacturer is not responsible for
frost damage.
Water connection
• Use new hoses to connect the appliance
to the water supply. Do not use used hoses.
• Do not connect the appliance to new
pipes or pipes not used for a long time.
Let the water flow for some minutes, then
connect the inlet hose.
• Make sure not to squash or cause damage to the water hoses when you install
the appliance.
• Make sure that the water couplings are
tight to prevent a water leakage.
• The first time you use the appliance,
make sure that the hoses do not have
water leaks.
• The water inlet hose has a safety valve
and a double sheath with an inner mains
cable. There is pressure in the water inlet
hose only when the water flows. If there
is a leak in the water inlet hose, the safety
valve interrupts the flow of water.
– Be careful when you connect the water
inlet hose:
– Do not put the water inlet hose or
the safety valve in water.
– If the water inlet hose or the safety
valve are damaged, immediately disconnect the mains plug from the
mains socket.
– Contact the service centre to replace
the water inlet hose with safety
valve.
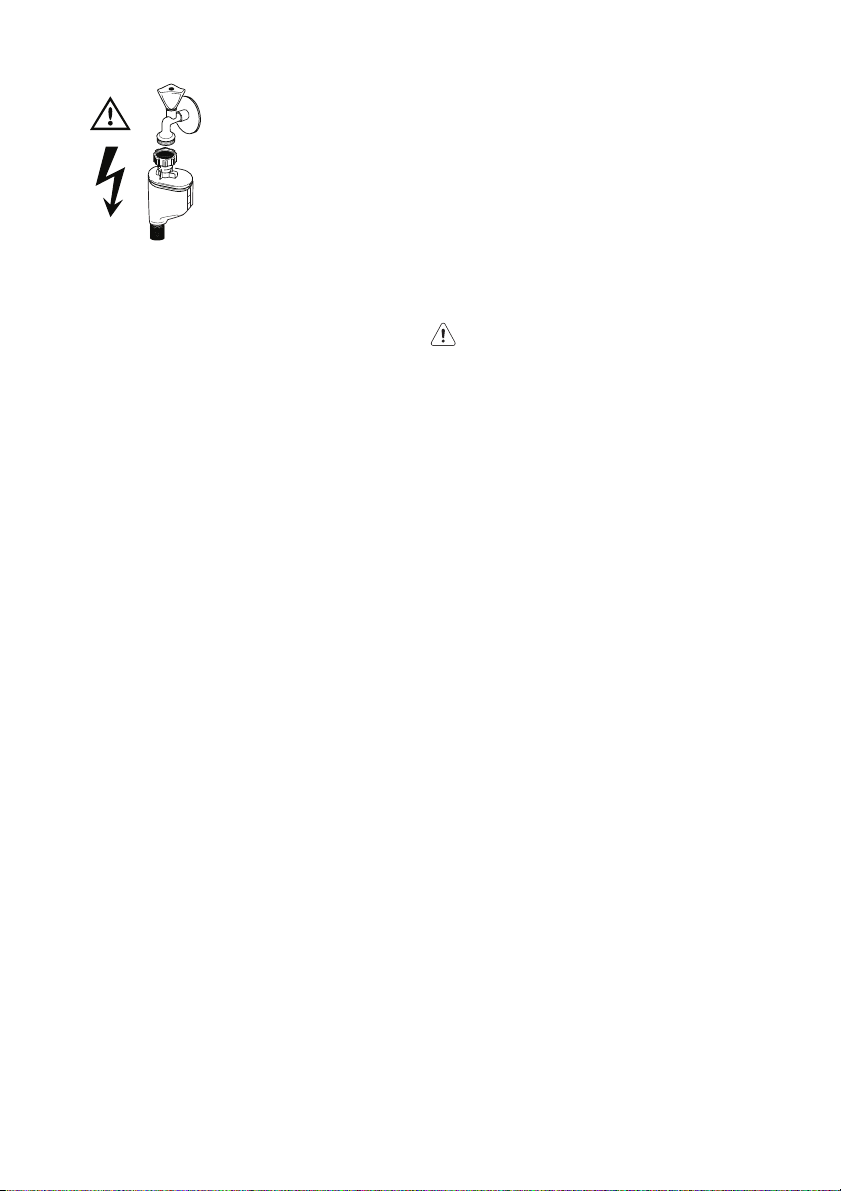
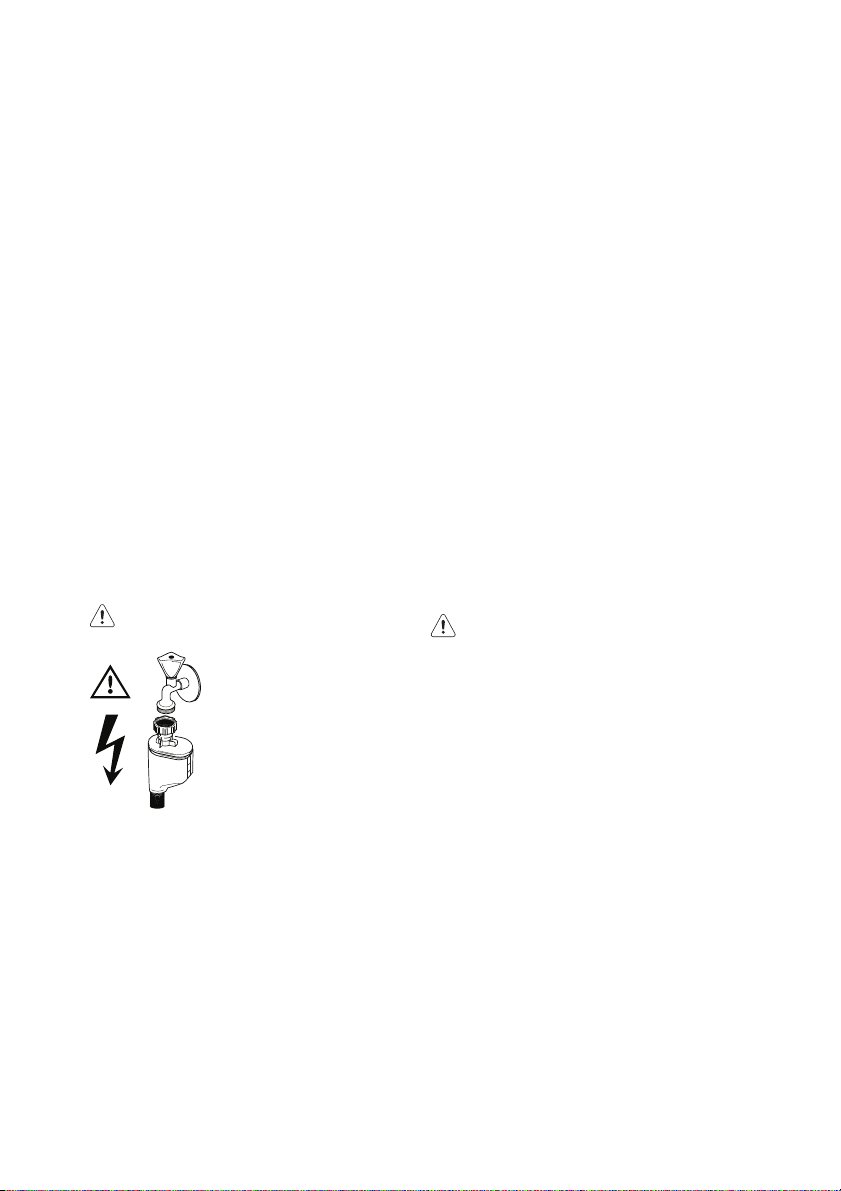
Warning! Dangerous voltage.
Page 4
4 electrolux
Electrical connection
• The appliance must be earthed.
• Make sure that the electrical information
on the rating plate agrees with the power
supply.
• Always use a correctly installed shockproof socket.
• Do not use multiple plugs and extension
cables. There is a risk of fire.
• Do not replace or change the mains cable. Contact the service centre.
• Make sure not to squash or cause damage to the mains plug and cable behind
the appliance.
• Make sure that there is access to the
mains plug after the installation.
• Do not pull the mains cable to disconnect
the appliance. Always pull the mains
plug.
Service centre
• Only a qualified person can repair or work
on the appliance. Contact the service
centre.
• Use only original spare parts.
To discard the appliance
• To prevent the risk of injury or damage:
– Disconnect the mains plug from the
mains socket.
– Cut off the mains cable and discard it.
– Remove the door catch. This prevents
children or pets to be closed in the ap-
pliance. There is a risk of suffocation.
– Discard the appliance at the local
waste disposal centre.
Warning! The dishwasher
detergents are dangerous and can
cause corrosion !
• If an accident occurs with these detergents, contact immediately a
physician.
• If the detergent gets into the mouth,
contact immediately a physician.
• If the detergent gets into the eyes,
contact immediately a physician and
clean the eyes with water.
• Keep dishwasher detergents in a
safe area and out of children touch.
• Do not keep the appliance door
open when there is detergent in the
detergent dispenser.
• Fill the detergent dispenser only before you start a washing programme.
Page 5

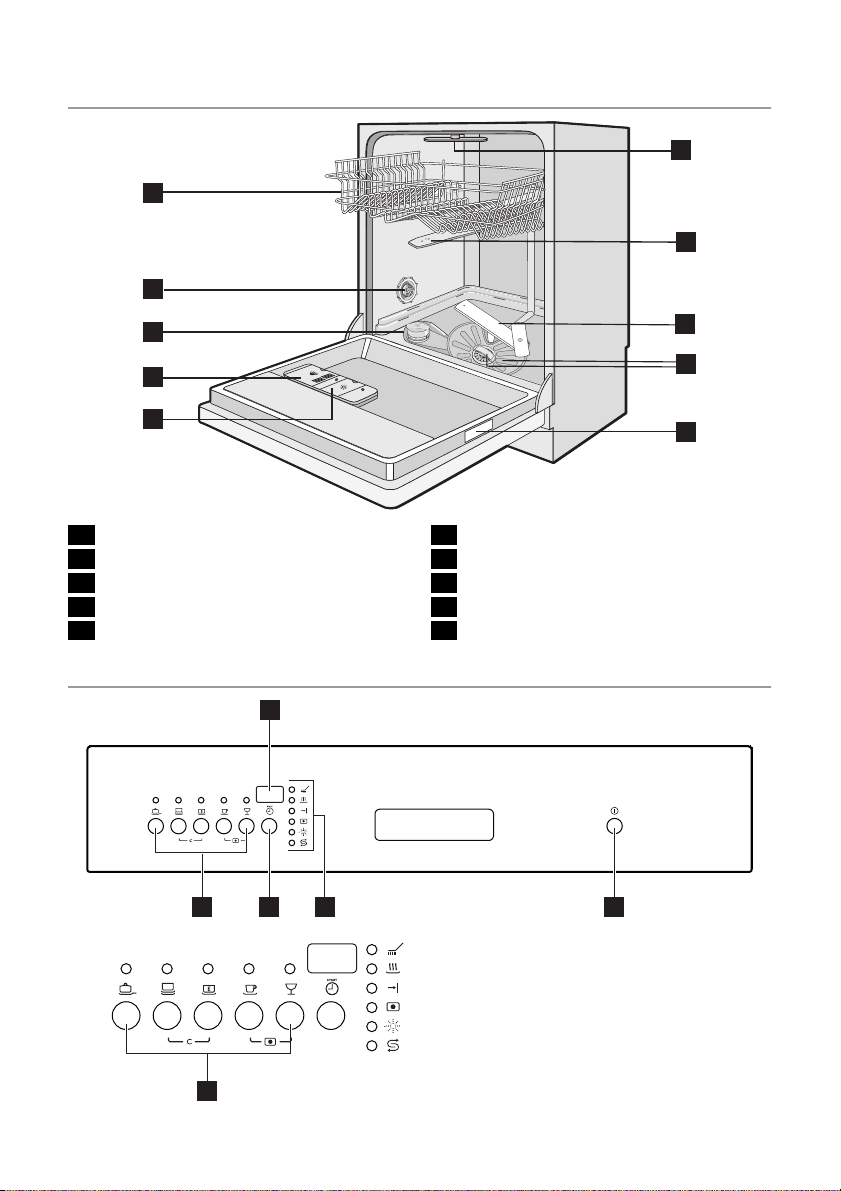
PRODUCT DESCRIPTION
1
2
electrolux 5
10
9
3
4
5
1 Upper basket
2 Water hardness dial
3 Salt container
4 Detergent dispenser
5 Rinse aid dispenser
CONTROL PANEL
8
7
6
6 Rating plate
7 Filters
8 Lower spray arm
9 Upper spray arm
10 Top spray arm
1
5
A
C
B
6
43
D
E
2
Page 6

6 electrolux
1 Display
2 On/off button
3 Indicators
4
Delay start button
5 Programme buttons
6 Function buttons
Indicators
Washing phase indicator. It comes on when the washing and rinsing phases operate.
Drying phase indicator. It comes on when the drying phase operates.
End indicator. It comes on when the washing programme is completed.
Multitab indicator. It comes on when you activate the function.
Rinse aid indicator. It comes on when it is necessary to fill the rinse aid dispenser.
1)
Salt indicator. It comes on when it is necessary to fill the salt container.
After you fill the container, the salt indicator can stay on for some hours. This
does not have an unwanted effect on the operation of the appliance.
1) When the salt container and/or the rinse aid dispenser are empty, the related indicators do not come on while a
washing programme operates.
Display
The display shows:
• The electronic adjustment of the level of
the water softener
• The activation and deactivation of the
rinse aid dispenser (only with the multitab
function on)
• The washing programme time
• The remaining time to the end of the
washing programme
• The end of a washing programme (the
display shows a zero)
• The delay start time
• The alarm codes.
On/off button
Press this button to activate or deactivate
the appliance.
After ten minutes from the end of the washing programme, the Auto Off function automatically deactivates the appliance. This
helps to decrease energy consumption.
Delay start button
Press this button again and again to delay
the start of the washing programme from 1
to 24 hours.
Programme buttons
Press one of these buttons to set a washing programme. The related indicator
comes on. Refer to 'Washing programmes'.
Function buttons
With these buttons you can:
• Adjust electronically the level of the water
softener. Refer to 'Setting the water softener'.
• Activate and deactivate the multitab function. Refer to 'Multitab function'.
• Activate and deactivate the rinse aid dispenser (only with the multitab function
on). Refer to 'What to do if...'.
• Cancel a washing programme in operation. Refer to 'Select and start a washing
programme'.
Setting mode
The appliance must be in setting mode
for these operations:
• To set and start a washing programme.
• To set and start a delay start.
• To adjust electronically the level of the
water softener.
• To activate or deactivate the multitab
1)
function.
Page 7

electrolux 7
• To deactivate or activate the rinse aid
dispenser (only with the multitab function
on).
Activate the appliance. The appliance
is in setting mode when:
• All the programme indicators come on.
Activate the appliance. The appliance
is not in setting mode when:
• Only one programme indicator comes
on.
USE OF THE APPLIANCE
1. Be sure that the set level of the water
softener agrees with the water hardness
in your area. If not, adjust the water
softener.
2. Fill the salt container with dishwasher
salt.
3. Fill the rinse aid dispenser with rinse aid.
4. Load cutlery and dishes into the appli-
ance.
5. Set the correct washing programme for
the type of load and soil.
SETTING THE WATER SOFTENER
The water softener removes minerals and
salts from the water supply. These minerals
and salts can cause damage to the appliance.
• The display shows the time of the washing programme or of the delay start.
– It is necessary to cancel the pro-
gramme or the delay start to go back
to the setting mode. Refer to 'Setting
and starting a washing programme'.
6. Fill the detergent dispenser with the cor-
rect quantity of detergent.
7. Start the washing programme.
If you use the combi detergent tablets
('3 in 1', '4 in 1', '5 in 1'), use the multitab function (refer to 'Multitab function').
Adjust the level of the water softener if this
does not agree with the water hardness in
your area.
Contact your local water authority to know
the water hardness in your area.
Page 8
8 electrolux
Water hardness
German degrees
(°dH)
51 - 70 91 - 125 9,1 - 12,5 64 - 88
43 - 50 76 - 90 7,6 - 9,0 53 - 63
37 - 42 65 - 75 6,5 - 7,5 46 - 52
29 - 36 51 - 64 5,1 - 6,4 36 - 45
23 - 28 40 - 50 4,0 - 5,0 28 - 35
19 - 22 33 - 39 3,3 - 3,9 23 - 27
15 - 18 26 - 32 2,6 - 3,2 18 - 22 1 4
11 - 14 19 - 25 1,9 - 2,5 13 - 17 1 3
4 - 10 7 - 18 0,7 - 1,8 5 - 12 1 2
< 4 < 7 < 0,7 < 5
1) Factory position.
2) Do not use salt at this level.
You must adjust the water softener
manually and electronically.
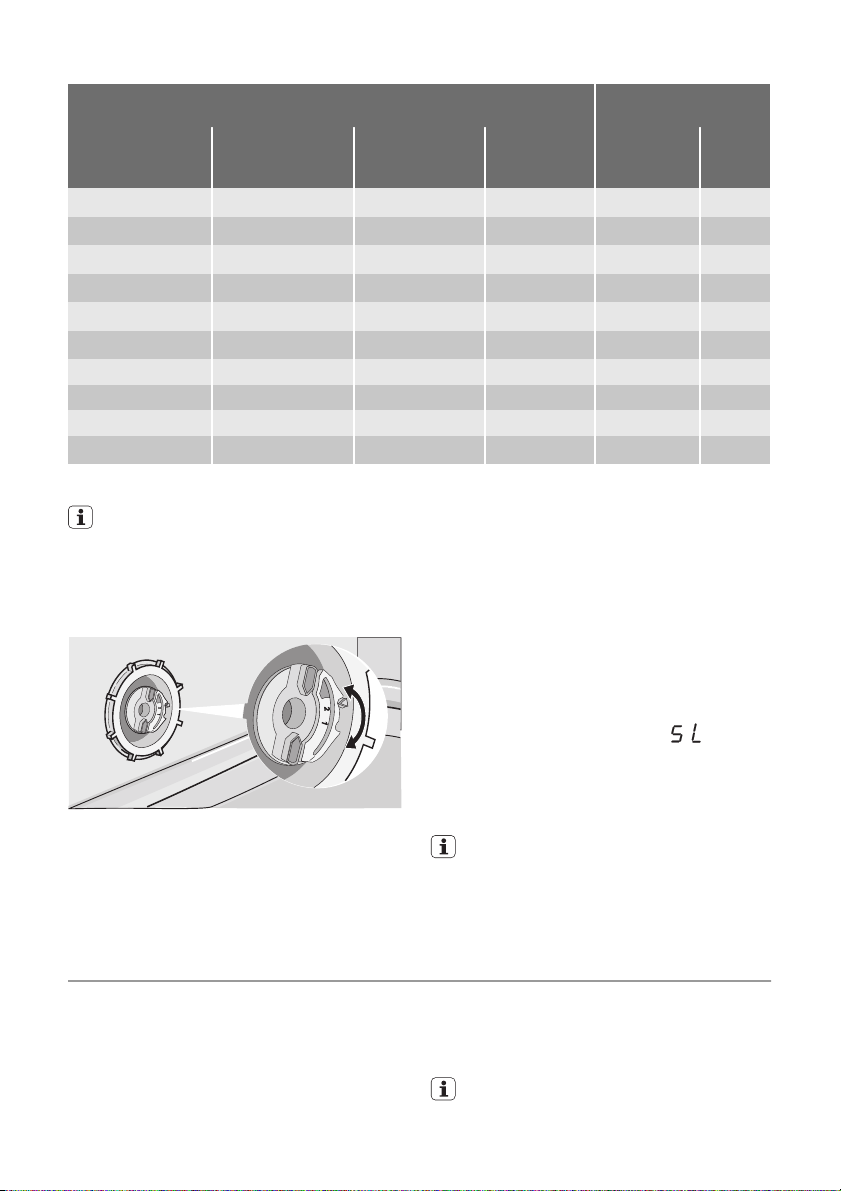
Manual adjustment
Turn the water hardness dial to the position
1 or 2 (refer to the table).
French degrees
(TH°)
mmol/l Clarke de-
grees
til the programme indicators above
function buttons (A), (B) and (C) flash.
3. Release function button (B) and function
button (C).
4. Press function button (A).
• The programme indicators above
Water hardness ad-
manually elec-
2
2
function button (B) and function button (C) go off.
• The programme indicator above function button (A) continues to flash.
• The display shows the setting of the
water softener (example:
5).
5. Press function button (A) again and
again to change the setting.
6. Deactivate the appliance to confirm.
Electronic adjustment
1. Activate the appliance. Make sure that
the appliance is in setting mode.
If the water softener is set electronically
to the level 1, the salt indicator stays
off.
2. Press and hold function button (B) and
function button (C) at the same time un-
justment
1)
1)
1)
2
1)
2
1)
2
1)
2
2)
1
troni-
cally
10
9
8
7
6
1)
5
2)
1
= level
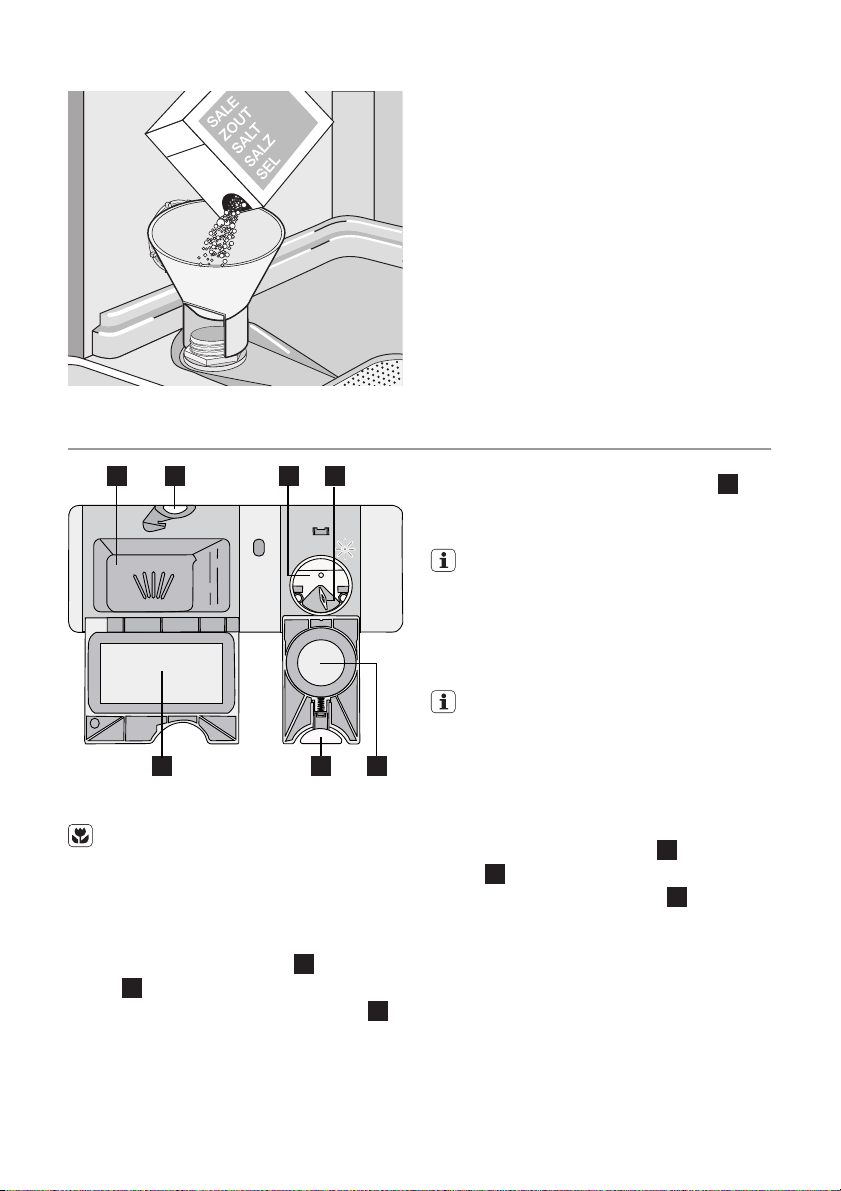
USE OF DISHWASHER SALT
How to fill the salt container:
1. Turn the cap counterclockwise and
open the salt container.
2. Fill the salt container with 1 litre of wa-
ter (only for the first time you fill with
salt).
3. Use the funnel to fill the salt container
with salt.
4. Remove the salt around the opening of
the salt container.
5. Turn the cap clockwise to close the salt
container.
It is correct that water comes out from
the salt container when you fill it with
salt.
Page 9
USE OF DETERGENT AND RINSE AID
20
30
M
A
X
1
2
3
4
+
-
1
2
7
3
4
6
Use of detergent
To help the environment, do not use
more than the correct quantity of detergent.
Obey the instructions on the detergent
packaging.
How to fill the detergent dispenser:
1.
Press the release button
7
lid
of the detergent dispenser.
2.
Put the detergent in the dispenser
2
to open the
3. If the washing programme has a prewash phase, put a small quantity of detergent on the inner part of the appliance door.
4. If you use the detergent tablets, put the
5. Close the detergent dispenser. Press
Use of rinse aid
5
Do these steps to fill the rinse aid dispenser:
1.
2.
3. Remove the spilled rinse aid with an
1
.
4. Close the rinse aid dispenser. Press the
Adjust the rinse aid dosage
Factory set: position 3.
electrolux 9
1
tablet in the detergent dispenser
.
the lid until it locks into position.
Use long washing programmes when
you use the detergent tablets. These
cannot fully dissolve with short washing
programmes and can decrease the
washing results.
Rinse aid makes it possible to dry the
dishes without streaks and stains.
The rinse aid dispenser automatically
adds rinse aid during the last rinsing
phase.
6
Press the release button
5
lid
of the rinse aid dispenser.
Fill the rinse aid dispenser
to open the
3
with rinse
aid. The mark 'max' shows the maximum level.
absorbent cloth to prevent too much
foam during the washing programme.
lid until it locks into position.
Page 10
10 electrolux
You can set the rinse aid dosage between
position 1 (lowest dosage) and position 4
(highest dosage).
MULTITAB FUNCTION
The multitab function is for combi detergent
tablets.
These tablets contain agents as detergent,
rinse aid and dishwasher salt. Some types
of tablets can contain other agents.
Be sure that these tablets are applicable for
the water hardness in your area (refer to the
instructions on the packaging of the products).
The multitab function deactivates the flow
of rinse aid and salt.
The multitab function deactivates the indicators of salt and rinse aid.
The programme duration can increase if
you use the multitab function.
Activate or deactivate the multitab
function before the start of a washing
programme. You cannot activate or deactivate the function when a washing
programme operates.
To activate the multitab function
1. Activate the appliance.
2. Make sure that the appliance is in setting mode.
3. Press and hold function buttons (D) and
(E) at the same time until the multitab indicator comes on.
4
Turn the rinse aid selector
decrease the dosage.
4. Release function buttons (D) and (E).
The function is activated.
• When you activate the multitab func-
tion, it stays on until you deactivate it.
To deactivate the multitab function and
use separately detergent, salt and rinse
aid
1. Activate the appliance.
2. Make sure that the appliance is in setting mode.
3. Press and hold at the same time, function buttons (D) and (E) until the multitab
indicator goes on.
4. Release function buttons (D) and (E).
The function is deactivated.
5. Fill the salt container and the rinse aid
dispenser.
6. Adjust the water hardness to the highest
level.
7. Start a washing programme without
dishes.
8. When the washing programme is completed, adjust the water softener to the
water hardness in your area.
9. Adjust the quantity of rinse aid.
to increase or
LOADING CUTLERY AND DISHES
Refer to the leaflet 'Examples of ProClean loads'.
Hints and tips
• Do not put in the appliance items that
can absorb water (sponges, household
cloths).
• Remove the remaining food from the
items.
• Make soft the remaining burned food on
the items.
• Put hollow items (cups, glasses and
pans) with the opening down.
• Make sure that water does not collect in
containers or in bowls.
• Make sure that cutlery and dishes do not
bond together.
• Make sure that the glasses do not touch
other glasses.
• Put small items in the cutlery basket.
• Mix the spoons with other cutlery to prevent them to bond together.
• When you put the items in the baskets,
make sure that the water can touch all
surfaces.
• Put light items in the upper basket. Make
sure that the items do not move.
• Water droplets can collect on plastic
items and non-stick pans.
Beer glass holders
The beer glass holders prevent beer
glasses to move while a washing programme operates.
Page 11
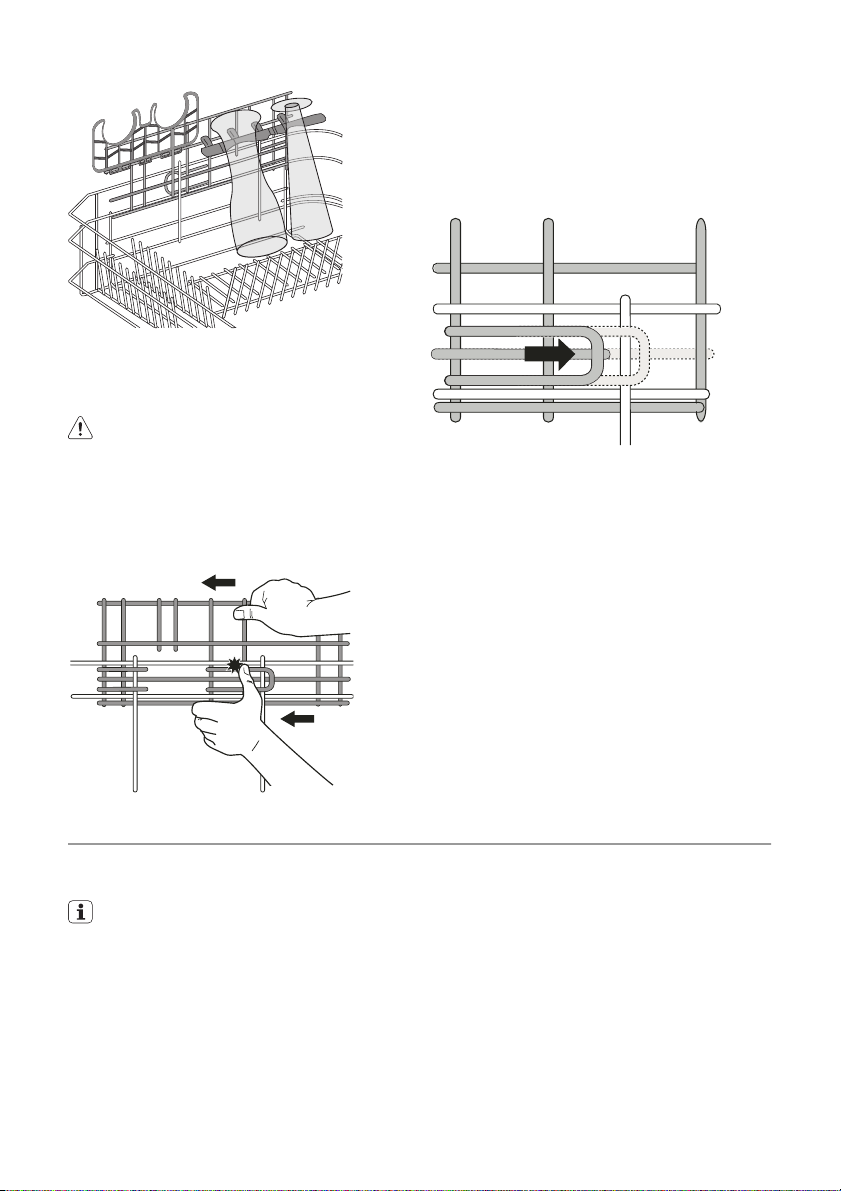
If you do not use the holders, fold them up
or remove them. You can also remove the
support.
Warning! Be careful when you
disengage or engage the support.
To remove the holders and the support,
do these steps:
1. Disengage the holders from the support
and remove them.
electrolux 11
2. Push the support to the rear part of the
basket to disengage it.
To engage the holders and the support,
do these steps:
1. Push the support to the front part of the
basket to engage it.
2. Engage the holders on the support.
SELECT AND START A WASHING PROGRAMME
Starting the washing programme
without delay start
You can set the washing programme
with the appliance door open or
closed.
If the door is open, you can change the
setting, the appliance starts to operate
only after you close the door.
If the door is closed, the appliance
starts to operate after 3 seconds from
the setting of the washing programme.
1. Activate the appliance. Make sure that
the appliance is in setting mode.
2. Set the washing programme.
• The related programme indicator
comes on.
• All the other programme indicators go
off.
• The programme time flashes in the
display.
3. Close the appliance door, the washing
programme starts automatically.
• The programme time flashes no more
in the display.
Page 12

12 electrolux
Starting the washing programme with
delay start
You can set the delay start with the appliance door open or closed.
If the door is open, you can change the
setting because the appliance starts to
operate only after you close the door.
If the door is closed, the appliance
starts to operate after 3 seconds from
the setting of the delay start.
1. Activate the appliance. Make sure that
the appliance is in setting mode.
2. Set the washing programme.
3. Press the delay start button again and
again until the display shows the time of
the delay start.
• The delay time flashes in the display.
4. Close the appliance door, the countdown starts automatically.
• The delay time flashes no more in the
display.
When the countdown is completed, the
washing programme starts automatically.
The opening of the appliance door
stops the countdown. When you close
the door, the countdown continues
from the point of interruption.
Cancelling the delay start
The countdown is not operating
1. Press the delay start button again and
again until the display shows the time of
the washing programme.
2. Close the appliance door, the washing
programme starts automatically.
The countdown is operating
1. Press the delay start button again and
again until the display shows the time of
the washing programme.
• The programme time flashes in the
display. After some seconds, the time
stops to flash and the washing programme starts automatically.
Interruption of a washing programme
• Open the appliance door.
– The washing programme stops.
• Close the appliance door.
– The washing programme continues
from the point of interruption.
Cancelling the washing programme
If the washing programme has not started,
you can change the selection.
To change the selection while the washing
programme operates, it is necessary to
cancel the programme.
• Press and hold function button (B) and
function button (C) at the same time until
all the programme indicators come on.
Make sure that there is detergent in the
detergent dispenser before you start a
new washing programme.
End of the washing programme
When the washing programme is completed, the display shows a zero and the end
indicator is on.
1. Deactivate the appliance.
2. Open the appliance door.
For better drying results, keep the appliance door ajar for some minutes.
Remove the items from the baskets
• Let the dishes become cold before you
remove them from the appliance. Hot
dishes can be easily damaged.
• First remove the items from the lower
basket, then from the upper basket.
• There can be water on the sides and on
the door of the appliance. Stainless steel
becomes cool more quickly than the
dishes.
WASHING PROGRAMMES
Programme Type of soil Type of load Programme description
Heavy soil Crockery, cutlery,
pots and pans
Prewash
Wash 70 °C
Rinses
Dry
Page 13
electrolux 13
Programme Type of soil Type of load Programme description
Normal soil Crockery and cutlery Prewash
1)
2)
1) This is the standard programme for test institutes. With this programme you have the most efficient use of water
and energy consumption for crockery and cutlery with normal soil. Refer to the supplied leaflet for test information.
2) With this programme you can wash a load with fresh soil. It gives good washing results in a short time.
Normal soil Crockery and cutlery Prewash
Fresh soil Crockery and cutlery Wash 65 °C
Normal or light
soil
Delicate crockery and
glassware
Wash 65 °C
Rinses
Dry
Wash 50 °C
Rinses
Dry
Rinse
Wash 45 °C
Rinses
Dry
Consumption values
Programme
1)
Energy (kWh) Water (litre)
1,5 - 1,7 15 - 16
1,4 - 1,6 16 - 17
1,0 - 1,1 10 - 11
0,9 9
0,8 - 0,9 12 - 13
1) The display shows the programme time.
The water pressure and temperature,
the variations of the mains supply and
CARE AND CLEANING
To remove and clean the filters
Dirty filters decrease the washing results.
Although the maintenance is very low with
these filters, make a check at intervals and
if necessary, clean them.
1. Turn the filter (A) counterclockwise and
remove it out from filter (B).
the quantity of dishes can change the
consumption values.
B
A
2. Filter (A) has two parts. To disassemble
the filter, pull them apart.
Page 14

14 electrolux
3. Fully clean the parts with water.
4. Put the two parts of the filter (A) together and push. Make sure that they assemble correctly in each other.
5. Remove the filter (B).
6. Fully clean the filter (B) with water.
7. Put the filter (B) to its initial position.
Make sure that it assembles correctly in
the two guides (C).
8. Put the filter (A) into position in filter (B).
Turn the filter (A) clockwise until it locks.
To clean the spray arms
Do not remove the spray arms.
If the holes in the spray arms become clogged, remove remaining parts of soil with a
thin pointed object.
To clean the external surfaces
Clean the external surfaces of the appliance
and control panel with a moist soft cloth.
Only use neutral detergents.
Do not use abrasive products, abrasive
cleaning pads or solvents (acetone).
C
WHAT TO DO IF…
The start of the appliance does not occur or
it stops during operation.
First try to find a solution to the problem (refer to the table). If not, contact the service
centre.
With some malfunctions, the display
shows an alarm code:
•
- The appliance does not fill with wa-
ter
Malfunction Possible cause Possible solution
The appliance does not fill with
water.
The water tap is blocked or
there is limescale on it.
•
- The appliance does not drain the
water
•
- The anti-flood device is on.
Warning! Deactivate the appliance
before you do the checks.
Clean the water tap.
Page 15

electrolux 15
Malfunction Possible cause Possible solution
The water pressure is too low. Contact your local water au-
The water tap is closed. Open the water tap.
The filter in the water inlet hose
The connection of the water in-
The water inlet hose is dam-
The appliance does not drain
the water.
The connection of the water
The water drain hose is dam-
The anti-flood device is on. Close the water tap and con-
The start of the washing programme does not occur.
The mains plug is not connec-
The fuse in the fuse box is
The delay start is set. • Cancel the delay start.
After the check, activate the appliance. The
programme continues from the point of interruption.
If the malfunction occurs again, contact the
service centre.
If the display shows other alarm codes,
contact the service centre.
The necessary information for the service
is blocked.
let hose is not correct.
aged.
There is a blockage in the sink
spigot.
drain hose is not correct.
aged.
The appliance door is open. Close the appliance door.
ted in the mains socket.
damaged.
Record this information:
–Model
(MOD.) ....................................................
....
– Product number
(PNC) ..........................................
– Serial number
(S.N.) ..............................................
thority.
Clean the filter.
Make sure that the connection
is correct.
Make sure that the water inlet
hose has no damages.
Clean the sink spigot.
Make sure that the connection
is correct.
Make sure that the water drain
hose has no damages.
tact the service centre.
Connect the mains plug.
Replace the fuse.
• When the countdown is
completed, the washing programme starts automatically.
centre is on the rating plate.
The washing results and drying results are not satisfactory
Problem Possible cause Possible solution
The dishes are not clean. The washing programme was
not applicable for the type of
load and soil.
You did not put the items cor-
rectly in the baskets, water did
not touch all surfaces.
The spray arms could not turn
freely. Incorrect position of the
items in the baskets.
Make sure that the washing
programme is applicable for the
type of load and soil.
Put the items correctly in the
baskets.
Make sure that an incorrect position of the items do not cause
the blockage of the spray arms.
Page 16

16 electrolux
Problem Possible cause Possible solution
The filters are dirty or not as-
The quantity of detergent was
Limescale particles on the
dishes.
Incorrect level of the water soft-
The salt container cap is not
There are streaks, whitish
stains, or a bluish layer on
glasses and dishes.
Dry water drop stains on
glasses and dishes.
The detergent can be the
The dishes are wet. The washing programme was
The dishes are wet and matt. The rinse aid dispenser is emp-
The multitab function is on (this
Activating the rinse aid dispenser
1. Activate the appliance. Make sure that
the appliance is in setting mode.
2. Press and hold function button (B) and
sembled and installed correctly.
not sufficient or missing.
The salt container is empty. Fill the salt container with dish-
ener adjustment.
closed correctly.
The rinse aid quantity is too
high.
The rinse aid quantity is too
low.
cause.
without a drying phase or with
a decreased drying phase.
ty.
function automatically deactivates the rinse aid dispenser).
• The programme indicator above function button (B) continues to flash.
• The display shows the setting of the
rinse aid dispenser.
function button (C) at the same time until the programme indicators above
function buttons (A), (B), and (C) start to
flash.
3. Release function button (B) and function
button (C).
4. Press function button (B).
• The programme indicators above
function button (A) and function but-
5. Press function button (B) to change the
setting.
6. Deactivate the appliance to confirm.
ton (C) go off.
Make sure that the filters are
clean and correctly assembled
and installed.
Make sure that the quantity of
detergent is sufficient.
washer salt.
Adjust the water softener with
the correct level.
Make sure that the salt contain-
er cap is closed correctly.
Decrease the rinse aid quantity.
Increase the rinse aid quantity.
Use a different brand of detergent.
For better drying results, keep
the door ajar for some minutes.
Fill the rinse aid dispenser with
rinse aid.
Activate the rinse aid dispenser.
The rinse aid dispenser is deactivated.
The rinse aid dispenser is activated.
TECHNICAL DATA
Dimensions Width 596 mm
Height 818 - 898 mm
Depth 575 mm
Water supply pressure Minimum 0.5 bar (0.05 MPa)
Maximum 8 bar (0.8 MPa)
Page 17

electrolux 17
Water supply
Capacity Place settings 12
1) Connect the water inlet hose to a water tap with a 3/4'' thread.
1)
The rating plate on the inner edge of
the appliance door shows the electrical
connection data.
Cold water or hot water maximum 60 °C
photovoltaic panels and aeolian), use a
hot water supply to decrease energy
consumption.
If the hot water comes from alternative
sources of energy, (e.g. solar panels,
ENVIRONMENT CONCERNS
The symbol on the product or on its
packaging indicates that this product may
not be treated as household waste. Instead
it should be taken to the appropriate
collection point for the recycling of electrical
and electronic equipment. By ensuring this
product is disposed of correctly, you will
help prevent potential negative
consequences for the environment and
human health, which could otherwise be
caused by inappropriate waste handling of
this product. For more detailed information
about recycling of this product, please
contact your local council, your household
waste disposal service or the shop where
you purchased the product.
Recycle the materials with the symbol
Put the packaging in applicable containers
to recycle it.
.
Page 18

18 electrolux
Electrolux. Thinking of you.
Partagez notre imagination sur www.electrolux.com
SOMMAIRE
Consignes de sécurité 18
Description de l'appareil 21
Bandeau de commande 21
Utilisation de l'appareil 23
Réglage de l'adoucisseur d'eau 23
Utilisation du sel régénérant 24
Utilisation du produit de lavage et du liquide
de rinçage 25
Fonction "Tout en 1" 26
Rangement des couverts et de la vaisselle
26
CONSIGNES DE SÉCURITÉ
Lire attentivement cette notice d'utilisation
avant l'installation et l'utilisation de l'appareil :
• Pour votre sécurité et la sécurité de votre
appareil.
• Pour protéger l'environnement.
• Pour le bon fonctionnement de l’appareil.
Conservez cette notice d'utilisation avec
l'appareil. Si vous déménagez ou si l'appareil est cédé à une autre personne, assurezvous que la notice d'utilisation l'accompagne.
Le fabricant n'est pas responsable des
dommages liés à une mauvaise installation
ou utilisation.
Sécurité des enfants et des personnes
vulnérables
• Cet appareil n'est pas destiné aux enfants et aux personnes dont les capacités physiques, sensorielles ou mentales,
ou le manque d'expérience et de connaissance les empêchent d'utiliser l'appareil sans risque lorsqu'ils sont sans
surveillance, ou en l'absence d'instruction d'une personne responsable qui
puisse leur assurer une utilisation de l'appareil sans danger.
• Surveillez les enfants en veillant à ce
qu'ils ne jouent pas avec cet appareil.
• Ne laissez jamais les emballages à la portée des enfants. Risque d'asphyxie ou de
blessure corporelle.
Sélection et départ d'un programme de
lavage 28
Programmes de lavage 29
Entretien et nettoyage 30
En cas d'anomalie de fonctionnement 30
Caractéristiques techniques 33
En matière de protection de
l'environnement 33
Sous réserve de modifications
• Conservez tous les produits de lavage
dans un endroit sûr. Ne laissez pas les
enfants toucher les produits de lavage.
• Tenez les enfants et les animaux éloignés
de l’appareil lorsque la porte est ouverte.
Consignes générales de sécurité
• Ne modifiez jamais les caractéristiques
de cet appareil. Vous risqueriez de vous
blesser et d'endommager l'appareil.
• Les produits de lavage pour lave-vaisselle
peuvent occasionner des brûlures chimiques au niveau des yeux, de la bouche et
de la gorge. Respectez les instructions
de sécurité du fabricant des produits.
• L'eau de votre lave-vaisselle n'est pas
potable. Des résidus de produits de lavage peuvent subsister dans votre lavevaisselle.
• Ne laissez pas la porte de l'appareil ouverte sans supervision. Vous éviterez ainsi les blessures et les chutes sur une porte ouverte.
• Ne montez pas ou ne vous asseyez pas
sur la porte ouverte de votre appareil.
Utilisation de l'appareil
• Cet appareil est destiné à un usage domestique normal. Ne l'utilisez jamais à
d'autres fins, pour éviter les dommages
corporels et les dégâts matériels.
• Ce lave-vaisselle est conçu pour laver la
vaisselle et les ustensiles pouvant être lavés en machine.
Page 19

electrolux 19
• Ne placez pas de produits inflammables
ou d'éléments imbibés de produits inflammables à l'intérieur, à proximité ou
sur l'appareil. Risque d'explosion ou d'incendie.
• Les couteaux et autres ustensiles pointus
ou tranchants doivent être placés dans le
panier à couverts avec la pointe vers le
bas, ou placez-les en position horizontale
dans le panier supérieur ou dans le panier à couteaux (tous les modèles ne sont
pas équipés d'un panier à couteaux).
• N'utilisez que des produits (sel, produit
de lavage, liquide de rinçage) spécifiques
pour lave-vaisselle.
• Tout autre type de sel non spécialement
étudié pour être utilisé dans un lave-vaisselle, en particulier le sel de cuisine, peut
endommager l'adoucisseur d'eau.
• Approvisionnez en sel juste avant de démarrer un programme de lavage. Les
restes de sel dans l'appareil peuvent provoquer de la corrosion ou perforer la cuve de l'appareil.
• Ne remplissez jamais le distributeur de liquide de rinçage avec d'autres produits
(agent de nettoyage pour lave-vaisselle,
produit de lavage liquide). Vous risqueriez
d'endommager l'appareil.
• Assurez-vous que les bras d'aspersion
tournent librement avant de lancer le programme de lavage.
• De la vapeur chaude peut s'échapper de
l'appareil si vous ouvrez la porte pendant
le déroulement d'un programme de lavage. Risque de brûlures cutanées.
• N'enlevez pas la vaisselle de l'appareil
avant la fin du programme de lavage.
Entretien et nettoyage
• Avant de nettoyer l'appareil, arrêtez-le et
débranchez-le du secteur.
• N'utilisez pas de produits inflammables
ou corrosifs.
• N’utilisez pas l'appareil sans les filtres.
Contrôlez que les filtres sont correctement installés. Si les filtres ne sont pas
correctement installés, les performances
de lavage pourraient être compromises
et l'appareil endommagé.
• Ne projetez pas d'eau ou de vapeur sur
l'appareil pour son nettoyage. Cela cré-
erait un risque de choc électrique et
pourrait endommager l'appareil.
Installation
• Vérifiez que l'appareil n'a subi aucun
dommage au cours du transport. Ne
branchez jamais un appareil endommagé. Si l'appareil est endommagé, contactez votre magasin vendeur.
• Retirez tous les emballages avant la première utilisation.
• Seul un professionnel qualifié doit effectuer l'installation, le raccordement électrique et hydraulique, la mise en service et
la maintenance de l'appareil. Vous éviterez ainsi des risques mobiliers, immobiliers et corporels.
• Pendant l'installation et avant toute intervention sur le lave-vaisselle, il est nécessaire de débrancher l'appareil.
• Les parois de votre lave-vaisselle ne doivent jamais être percées pour éviter d'endommager les composants hydrauliques
et électriques.
• Important !Respectez les consignes
données sur le gabarit fourni avec l'appareil :
– Pour installer l'appareil.
– Pour monter la porte du meuble.
– Pour raccorder les tuyaux d'arrivée
d'eau et de vidange.
• Vérifiez que l'appareil est installé sous et
à proximité de structures sûres.
Précautions contre le gel
• N'installez pas l'appareil dans un endroit
où la température ambiante est inférieure
à 0 °C.
• Le fabricant ne pourra être tenu responsable en cas de dommages dus au gel.
Tuyau d’arrivée d’eau
• Utilisez des tuyaux neufs pour raccorder
l'appareil à l'arrivée d'eau. N’utilisez pas
de tuyaux usagés.
• Ne raccordez pas l’appareil à des conduites neuves ou qui n’ont pas été utilisées depuis longtemps. Laissez couler
l’eau pendant quelques minutes avant de
brancher le tuyau d’arrivée d’eau.
• Veillez à ne pas écraser ou endommager
les tuyaux d'eau lorsque vous installez
l'appareil.
Page 20
20 electrolux
• Assurez-vous que tous les raccords de
tuyaux d’eau sont bien serrés afin d’éviter
les fuites.
• Lorsque vous utilisez l'appareil pour la
première fois, vérifiez que les tuyaux ne
fuient pas.
• Le tuyau d'arrivée d'eau comporte une
soupape de sécurité et une gaine double
comportant un câble électrique interne.
Le tuyau d'arrivée d'eau est sous pression uniquement quand l'eau circule. Si le
tuyau fuit, la soupape de sécurité coupe
automatiquement l'eau.
– Faites attention au moment de raccor-
der le tuyau d'arrivée d'eau :
– N'immergez pas le tuyau d'arrivée
d'eau ou la soupape de sécurité
dans l'eau.
– Si le tuyau d'arrivée d'eau ou la sou-
pape de sécurité est endommagé,
débranchez immédiatement la prise
secteur.
– Contactez le service après-vente de
votre magasin vendeur pour remplacer le tuyau d'arrivée d'eau avec
soupape de sécurité.
Avertissement Tension dangereuse
Raccordement électrique
• L'appareil doit être relié à la terre.
• Vérifiez que les données électriques figurant sur la plaque signalétique correspondent à celles de votre réseau.
•Utilisez toujours une prise correctement
installée, protégée contre les chocs.
• L'appareil ne doit pas être raccordé à
l'aide d'un prolongateur ou d'une prise
multiple. Risque d'incendie.
• Ne remplacez et ne modifiez jamais le câble d'alimentation. Contactez votre service après-vente.
• Attention à ne pas écraser ou endommager la prise et le câble d'alimentation situés à l'arrière de l'appareil.
• Assurez-vous que la prise principale est
accessible une fois l'appareil installé.
• Ne tirez jamais sur le câble d'alimentation
électrique pour débrancher l'appareil. Détachez, pour ce faire, la fiche de la prise
secteur.
Service après-vente
• Toute intervention ou réparation sur votre
appareil doit uniquement être effectuée
par une personne qualifiée. Contactez
votre service après-vente.
• Utilisez exclusivement des pièces d'origine.
Pour mettre l'appareil au rebut
• Pour éviter tout risque corporel ou matériel :
– Débranchez l'appareil.
– Coupez le câble d'alimentation au ras
de l'appareil et mettez-le au rebut.
– Retirez le loquet de la porte. Ceci évite
d'enfermer un enfant ou un animal
dans l'appareil par accident. Risque
d'asphyxie.
– Mettez l'appareil au rebut dans un cen-
tre local agréé.
Avertissement Les produits de
lavage pour lave-vaisselle sont
dangereux et peuvent être
corrosifs !
• En cas d'accident impliquant ces
produits, contactez immédiatement
un médecin.
• En cas d'ingestion du produit, contactez immédiatement un médecin.
• En cas de projection de produit de
lavage dans les yeux, contactez immédiatement un médecin et rincez
abondamment à l'eau.
• Conservez les produits de lavage
pour lave-vaisselle dans un endroit
sûr et hors de portée des enfants.
• Ne laissez pas la porte de l'appareil
ouverte quand celui-ci contient du
produit de lavage.
• Remplissez le distributeur de produit
de lavage juste avant de démarrer un
programme de lavage.
Page 21
DESCRIPTION DE L'APPAREIL
1
2
electrolux 21
10
9
3
4
5
1 Panier supérieur
2 Sélecteur de dureté de l'eau
3 Réservoir de sel régénérant
4 Distributeur de produit de lavage
5 Distributeur de liquide de rinçage
BANDEAU DE COMMANDE
1
8
7
6
6 Plaque de calibrage
7 Filtres
8 Bras d'aspersion inférieur
9 Bras d'aspersion intermédiaire
10 Bras d'aspersion supérieur
5
A
C
B
6
43
D
E
2
Page 22

22 electrolux
1 Écran
2 Touche Marche/Arrêt
3 Voyants
4
Touche Départ différé
5 Touches de programme
6 Touches de fonction
Voyants
Voyant de déroulement du lavage. Il s'allume quand les phases de lavage et de
rinçage sont en cours.
Voyant de déroulement du séchage. Il s'allume lorsque la phase de séchage est
en cours.
Voyant Fin. Il s'allume lorsqu'un programme de lavage est terminé.
Voyant Tout en un. Il s'allume lorsque la fonction est activée.
Voyant du liquide de rinçage. Il s'allume lorsque le distributeur de liquide de rinçage doit être rempli de liquide de rinçage.
Voyant du réservoir de sel. Il s'allume lorsque le réservoir de sel régénérant doit
être rempli.
Le voyant de réapprovisionnement en sel régénérant peut rester allumé plusieurs
heures après le remplissage du réservoir de sel. Cela n'affecte pas le fonctionnement de l'appareil.
1) Lorsque le réservoir de sel régénérant et/ou le distributeur de liquide de rinçage sont vides, leurs voyants ne
s'allument pas pendant qu'un programme est en cours.
1)
Écran
L'écran indique :
• Le réglage électronique du niveau
d'adoucisseur d'eau
• L'activation et la désactivation du distri-
buteur de liquide de rinçage (uniquement
si la fonction « Tout en 1 » est activée)
• La durée du programme de lavage
• Le temps restant avant la fin du program-
me de lavage
• La fin d'un programme de lavage (affi-
chage d'un zéro)
• L'heure du départ différé
• Les codes d'alarme.
Touche Marche/Arrêt
Appuyez sur cette touche pour activer ou
désactiver l’appareil.
La fonction Auto Off met à l'arrêt automatiquement l'appareil au bout de 10 minutes
dès la fin du programme de lavage. Cela
permet de diminuer la consommation
d'énergie.
Touche Départ différé
1)
Touches de programme
Pour sélectionner un programme de lavage,
appuyez sur l'une de ces touches. Le voyant correspondant s'allume. Reportez-vous
au chapitre « Programmes de lavage ».
Touches de fonction
Grâce à ces touches vous pouvez :
• Régler électroniquement le niveau de
l'adoucisseur d'eau. Reportez-vous au
chapitre « Réglage de l'adoucisseur
d'eau ».
• Activer/désactiver la fonction « Tout en
1 ». Reportez-vous au chapitre « Fonction Tout en 1 ».
• Activer et désactiver le distributeur de liquide de rinçage (seulement si la fonction
« Tout en 1 » est activée). Reportez-vous
au chapitre « En cas d'anomalie de fonctionnement ».
• Annuler un programme de lavage en
cours. Reportez-vous au chapitre « Sélection et départ d'un programme de lavage ».
Appuyez sur cette touche à plusieurs reprises pour retarder le départ du programme
de lavage de 1 à 24 heures.
Page 23

electrolux 23
Mode Programmation
L'appareil doit être en mode
Programmation pour effectuer les
opérations suivantes :
• Régler et lancer un programme de lavage.
• Régler et lancer un départ différé.
• Régler électroniquement le niveau de
l'adoucisseur d'eau.
• Activer ou désactiver la fonction « Tout
en 1 ».
• Activer ou désactiver le distributeur de liquide de rinçage (seulement si la fonction
« Tout en 1 » est activée).
Activez l'appareil. L'appareil se trouve
en mode Programmation lorsque :
• Tous les voyants du programme s'allument.
UTILISATION DE L'APPAREIL
1. Vérifiez si le réglage de dureté de
l'adoucisseur d'eau correspond à la dureté de l'eau de votre région. Sinon,
ajustez le niveau de l'adoucisseur d'eau.
2. Remplissez le réservoir de sel régéné-
rant avec du sel spécial pour lave-vaisselle.
3. Remplissez le distributeur de liquide de
rinçage.
4. Rangez les couverts et la vaisselle dans
le lave-vaisselle.
5. Sélectionnez le programme de lavage
en fonction de la charge et du degré de
salissure.
Activez l'appareil. L'appareil n'est pas
en mode Programmation lorsque :
• Un seul voyant de programme s'allume.
• L'écran indique la durée d'un programme
de lavage ou d'un départ différé.
– Pour revenir au mode Programmation,
annulez le programme ou le départ différé. Reportez-vous au chapitre « Sélection et départ d'un programme de
lavage ».
6. Remplissez le réservoir avec la quantité
nécessaire de produit de lavage.
7. Démarrez le programme de lavage.
Si vous utilisez des pastilles de détergent multifonctions (« 3 en 1 », « 4 en
1 » « 5 en 1 », etc.), utilisez la fonction
« Tout en 1 » (reportez-vous au chapitre Fonction « Tout en 1 »).
RÉGLAGE DE L'ADOUCISSEUR D'EAU
Le lave-vaisselle est équipé d'un adoucisseur d'eau conçu pour éliminer les minéraux et les sels de l'eau d'alimentation. Ces
minéraux et sels peuvent endommager
l'appareil.
Dureté eau
Degrés allemands (dH°)
51 - 70 91 - 125 9,1 - 12,5 64 - 88
43 - 50 76 - 90 7,6 - 9,0 53 - 63
37 - 42 65 - 75 6,5 - 7,5 46 - 52
Degrés français
(°TH)
Réglez le niveau de l'adoucisseur d'eau s'il
ne correspond pas à la dureté de l'eau de
votre région.
Contactez votre compagnie des eaux pour
connaître la dureté de l'eau de votre région.
mmol/l Degrés
Clarke
Réglage de la dureté
de l'eau
manuel élec-
1)
2
1)
2
1)
2
troni-
que
10
9
8
Page 24

24 electrolux
Dureté eau
Degrés allemands (dH°)
29 - 36 51 - 64 5,1 - 6,4 36 - 45
23 - 28 40 - 50 4,0 - 5,0 28 - 35
19 - 22 33 - 39 3,3 - 3,9 23 - 27
15 - 18 26 - 32 2,6 - 3,2 18 - 22 1 4
11 - 14 19 - 25 1,9 - 2,5 13 - 17 1 3
4 - 10 7 - 18 0,7 - 1,8 5 - 12 1 2
< 4 < 7 < 0,7 < 5
1) Réglage d'usine
2) Ne pas utiliser de sel à ce niveau.
L’adoucisseur d’eau doit être réglé manuellement et électroniquement.
Réglage manuel
Tournez le sélecteur de dureté de l'eau sur
1 ou 2 (reportez-vous au tableau).
Degrés français
(°TH)
mmol/l Degrés
Clarke
programme au-dessus des touches de
fonction (A), (B) et (C) se mettent à clignoter.
3. Relâchez les touches de fonctions (B) et
(C).
4. Appuyez sur la touche de fonction (A).
Réglage de la dureté
manuel élec-
2
2
2
1
• Les voyants de programme au-dessus des touches de fonction (B) et (C)
s’éteignent.
• Le voyant de programme au-dessus
de la touche de fonction (A) continue
à clignoter.
• L'écran affiche le réglage de l'adoucisseur d'eau (par exemple :
veau 5).
5. Appuyez plusieurs fois sur la touche de
Réglage électronique
1. Activez l'appareil. Assurez-vous que
l'appareil est au mode réglage.
2. Appuyez simultanément sur les touches
de fonction (B) et (C) et maintenez-les
appuyées jusqu'à ce que les voyants de
fonction (A) pour modifier le réglage.
6. Désactivez l'appareil pour confirmer.
Si l'adoucisseur d'eau est réglé électro-
niquement au niveau 1, le voyant de
réapprovisionnement de sel restera
éteint.
de l'eau
1)
1)
1)
2)
troni-
que
7
6
1)
5
2)
1
= ni-
UTILISATION DU SEL RÉGÉNÉRANT
Pour remplir le réservoir de sel :
1. Dévissez le bouchon du réservoir à sel
régénérant en le tournant dans le sens
inverse des aiguilles d'une montre.
2. Versez 1 litre d'eau à l'intérieur du réservoir (uniquement lorsque vous remplissez le réservoir pour la première
fois).
3. Versez le sel à l'aide de l'entonnoir jusqu'à ce que le réservoir soit rempli.
4. Éliminez toute trace de sel autour de
5. Remettez le bouchon en place et ser-
l'ouverture du réservoir de sel régénérant.
rez-le en le tournant dans le sens des
aiguilles d'une montre pour fermer le
réservoir de sel régénérant.
Il est normal que de l'eau s'écoule du
réservoir lorsque vous le remplissez de
sel.
Page 25

UTILISATION DU PRODUIT DE LAVAGE ET DU LIQUIDE DE
20
30
M
A
X
1
2
3
4
+
-
RINÇAGE
1
2
7
3
4
6
Utilisation du produit de lavage
Afin de préserver l'environnement,
n'utilisez que la quantité nécessaire de
produit de lavage.
Respectez les recommandations fournies par le fabricant du produit de lavage qui figurent sur l'emballage du produit.
Pour remplir le réservoir de produit de lavage :
1. Appuyez sur la touche de déverrouilla-
2
afin d'ouvrir le couvercle 7 du
ge
réservoir du produit de lavage.
2. Introduisez le produit de lavage dans le
réservoir
1
.
3. Si le programme de lavage comporte
une phase de prélavage, versez une
petite quantité de produit de lavage à
l'intérieur de la porte de l'appareil.
4. Si vous utilisez des pastilles de détergent, placez-les dans le distributeur
.
5. Fermez le réservoir du produit de lavage. Appuyez sur le couvercle jusqu'à
ce qu'il soit verrouillé.
Utilisez des programmes de lavage
longs quand vous utilisez des pastilles
5
de détergent. En effet, elles ne se dissolvent pas entièrement pendant les
programmes courts et peuvent donner
de mauvais résultats.
Utilisation du liquide de rinçage
Le liquide de rinçage assure un rinçage
optimal et un séchage sans taches ni
striures.
Le distributeur de liquide de rinçage libère automatiquement le liquide de rinçage durant la dernière phase de rinçage.
Pour remplir le distributeur de liquide de rinçage, procédez comme suit :
electrolux 25
1
Page 26

26 electrolux
1. Appuyez sur la touche de déverrouilla-
6
afin d'ouvrir le couvercle 5 du
ge
distributeur de liquide de rinçage.
2. Remplissez le distributeur de liquide de
3
rinçage
père 'max.' indique le niveau maximum.
3. Essuyez tout débordement de liquide
de rinçage à l'aide de papier absorbant, afin d'éviter une formation excessive de mousse lors du lavage.
4. Vérifiez que le couvercle est fermé
après chaque remplissage. Appuyez
sur le couvercle jusqu'à ce qu'il soit
verrouillé.
de liquide de rinçage. Le re-
FONCTION "TOUT EN 1"
La fonction « Tout en 1 » utilise les pastilles
de détergent multifonctions.
Ces pastilles combinent les fonctions de
produit de lavage, de liquide de rinçage et
de sel régénérant. Certains types de pastilles contiennent d'autres agents.
Assurez-vous que ces pastilles conviennent
à la dureté de l'eau de votre localité (reportez-vous aux instructions accompagnant
l'emballage des produits).
La fonction « Tout en 1 » désactive le débit
de liquide de rinçage et de sel.
La fonction « Tout en 1 » désactive les voyants du sel régénérant et du liquide de rinçage.
La durée du programme peut augmenter si
vous utilisez la fonction « Tout en 1 ».
Activez ou désactivez la fonction « Tout
en 1 » avant de lancer un programme
de lavage. Vous ne pouvez pas activer
ou désactiver cette fonction quand un
programme de lavage est en cours.
Pour activer la fonction « Tout en 1»
1. Mettez en fonctionnement l'appareil.
2. Contrôlez que l'appareil est en mode
Programmation.
3. Appuyez simultanément sur les touches
de fonction (D) et (E) jusqu'à ce que le
voyant de la fonction « Tout en 1 » s'allume.
Réglez le dosage du liquide de rinçage
Réglage d'usine : position 3.
Vous pouvez régler le dosage du liquide de
rinçage entre 1 (minimum) et 4 (maximum).
Tournez le sélecteur de liquide de rinçage
4
afin d'augmenter ou diminuer le dosage.
4. Relâchez les touches de fonction (D) et
(E). La fonction est activée.
• La fonction « Tout en 1 » une fois acti-
vée le reste jusqu'à ce que vous la
désactiviez.
Pour désactiver la fonction « Tout en
1 » et utiliser le produit de lavage, le sel
régénérant et le liquide de rinçage
séparément :
1. Mettez en fonctionnement l'appareil.
2. Contrôlez que l'appareil est en mode
Programmation.
3. Appuyez simultanément sur les touches
de fonction (D) et (E) jusqu'à ce que le
voyant de la fonction « Tout en 1 » s'allume.
4. Relâchez les touches de fonction (D) et
(E). La fonction est désactivée.
5. Remplissez de nouveau le réservoir de
sel et le distributeur de liquide de rinçage.
6. Réglez le degré de dureté de l'eau sur
sa position maximale.
7. Lancez un programme de lavage sans
charger l'appareil.
8. Sitôt le programme de lavage terminé,
réglez l'adoucisseur d'eau en fonction
de la dureté de l'eau de votre région.
9. Réglez la quantité de liquide de rinçage.
RANGEMENT DES COUVERTS ET DE LA VAISSELLE
Reportez-vous à la brochure « Exemples de charges ProClean ».
Page 27

electrolux 27
Conseils et astuces
• Les éponges, les chiffons de nettoyage
et tout autre objet absorbant l'eau ne
doivent pas être lavés au lave-vaisselle.
• Enlevez tous les restes d'aliments.
• Laissez tremper les casseroles au fond
desquelles adhèrent des restes d'aliments brûlés ou attachés.
• Chargez les articles creux, tels que tasses, verres, casseroles, etc. en les retournant,
• de manière à ce que l'eau ne s'accumule
pas dans le creux ou dans un fond bombé.
• La vaisselle et les couverts ne doivent
pas être insérés les uns dans les autres
ou se chevaucher.
• Pour éviter que les verres ne se brisent,
évitez qu'ils se touchent.
• Placez les petites pièces dans le panier à
couverts.
• Intercalez les cuillères aux autres couverts, afin d'éviter qu'elles ne s'emboîtent.
• Lorsque vous placez des articles dans les
paniers, veillez à ce que l'eau puisse accéder à toutes les surfaces.
• Placez les objets légers dans le panier
supérieur. Disposez-les de façon à ce
qu'ils ne puissent pas se retourner.
• La vaisselle en plastique et les poêles en
matériau antiadhésif tendent à retenir les
gouttes d'eau.
Supports pour verres à bière
Les éléments de maintien des verres à bière
empêchent les verres à bière de se retourner pendant qu'un programme de lavage
se déroule.
Si vous n'utilisez pas le support pour verres
à bière, rabattez-le vers le haut. Vous pouvez également le retirer.
Avertissement Faites attention en
retirant ou en installant le support.
Pour retirer les supports, suivez les
instructions ci-dessous :
1. Désengagez les éléments qui maintiennent en place les verres à bière
2. Poussez le support vers l'arrière du panier pour le retirer.
Pour réinsérer les supports, suivez les
instructions ci-dessous :
1. Poussez le support vers l'avant du panier pour l'installer.
2. Engagez les éléments de maintien des
verres sur le support.
Page 28

28 electrolux
SÉLECTION ET DÉPART D'UN PROGRAMME DE LAVAGE
Lancement du programme de lavage
sans départ différé
Vous pouvez régler le programme de
lavage que la porte de l'appareil soit
ouverte ou fermée.
Si la porte est ouverte, vous pouvez
modifier le réglage car l'appareil ne
commence à fonctionner qu'une fois la
porte fermée.
Si la porte est fermée, l'appareil commence à fonctionner 3 secondes après
le choix du programme de lavage.
1. Activez l'appareil. Assurez-vous que
l'appareil est en mode Réglage.
2. Réglez le programme de lavage.
• Le voyant correspondant s'allume.
• Tous les voyants de programme
s'éteignent.
• La durée du programme clignote sur
l'écran.
3. Fermez la porte de l'appareil, le programme de lavage démarre automatiquement.
• La durée du programme clignote sur
l'écran.
Lancement du programme de lavage
avec départ différé
Vous pouvez régler le départ différé
que la porte de l'appareil soit ouverte
ou fermée.
Si la porte est ouverte, vous pouvez
modifier votre réglage car l'appareil ne
commence à fonctionner qu'une fois la
porte fermée.
Si la porte est fermée, l'appareil commence à fonctionner 3 secondes après
le choix du départ différé.
1. Activez l'appareil. Assurez-vous que
l'appareil est en mode Réglage.
2. Réglez le programme de lavage.
3. Appuyez plusieurs fois sur la touche de
départ différé jusqu'à ce que l'écran indique l'heure du départ différé.
• La durée du départ différé clignote
sur l'écran.
4. Fermez la porte de l'appareil, le décompte démarre automatiquement.
• La durée du départ différé ne clignote
plus sur l'écran.
Lorsque le décompte est terminé, le programme de lavage démarre automatiquement.
L'ouverture de la porte de l'appareil
stoppe le décompte. Lorsque vous refermez la porte, le décompte reprend là
où il a été interrompu.
Annulation du départ différé
Le décompte ne démarre pas
1. Appuyez plusieurs fois sur la touche de
départ différé jusqu'à ce que l'écran affiche la durée du programme de lavage.
2. Fermez la porte de l'appareil, le programme de lavage démarre automatiquement.
Le décompte ne démarre pas
1. Appuyez plusieurs fois sur la touche de
départ différé jusqu'à ce que l'écran affiche la durée du programme de lavage.
• La durée du programme clignote sur
l'écran. Après quelques secondes, la
durée arrête de clignoter et le programme de lavage démarre automatiquement.
Interruption d'un programme de lavage
• Ouvrez la porte de l'appareil.
– Le programme de lavage s'arrête.
• Fermez la porte de l'appareil.
– Le programme de lavage reprend là où
il a été interrompu.
Annulation du programme de lavage
Si le programme de lavage n'a pas commencé, vous pouvez modifier la sélection.
Pour modifier la sélection au cours du programme de lavage, il faut annuler le programme.
• Appuyez simultanément sur les touches
de fonction (B) et (C) et maintenez-les appuyées jusqu'à ce que tous les voyants
de programme s'allument.
Assurez-vous qu'il y a du produit de lavage dans le distributeur de produit de
lavage avant de démarrer un nouveau
programme de lavage.
Page 29

electrolux 29
Fin du programme de lavage
Lorsque le programme de lavage est terminé, l'écran affiche zéro et le voyant de fin
s'est allumé.
1. Éteignez l'appareil.
2. Ouvrez la porte de l'appareil.
Pour de meilleurs résultats de séchage,
entrouvrez la porte de l'appareil pendant quelques minutes.
Retirez les articles des paniers
• Attendez que la vaisselle refroidisse avant
de la retirer du lave-vaisselle. La vaisselle
encore chaude est sensible aux chocs.
• Déchargez d'abord le panier inférieur,
puis le panier supérieur.
• Les côtés et la porte de l'appareil peuvent être mouillés. L’acier inox refroidit
plus rapidement que la vaisselle.
PROGRAMMES DE LAVAGE
Programme Niveau de sa-
1)
2)
1) Programme de test des organismes de contrôle. Ce programme vous permet d'utiliser le plus efficacement votre
consommation d'eau et d'énergie pour les plats et couverts avec un niveau normal de salissure. Reportez-vous à
la brochure fournie pour connaître les résultats des tests.
2) Ce programme vous permet de laver une charge de vaisselle légèrement sale. Les résultats du lavage sont
satisfaisants en très peu de temps.
lissure
Très sale Vaisselle, couverts,
Normalement
sale
Normalement
sale
Salissures récentes
Normalement ou
légèrement sale
Valeurs de consommation
Programme
1)
Type de charge Description de programmes
plats et casseroles
Vaisselle et couverts Prélavage
Vaisselle et couverts Prélavage
Vaisselle et couverts Lavage 65 °C
Vaisselle délicate et
verres
Énergie (kWh) Eau (litres)
1,5 - 1,7 15 - 16
Prélavage
Lavage 70 °C
Rinçages
Séchage
Lavage 65 °C
Rinçages
Séchage
Lavage 50 °C
Rinçages
Séchage
Rinçage
Lavage 45 °C
Rinçages
Séchage
1) L'écran indique la durée du programme.
Ces valeurs de consommation peuvent
changer en fonction de la pression et
de la température de l'eau, des varia-
1,4 - 1,6 16 - 17
1,0 - 1,1 10 - 11
0,9 9
0,8 - 0,9 12 - 13
tions d'alimentation électrique et de la
quantité de vaisselle.
Page 30

30 electrolux
ENTRETIEN ET NETTOYAGE
Pour retirer et nettoyer les filtres
Avec des filtres sales, les résultats du lavage sont moins satisfaisants.
Bien que ces filtres ne nécessitent pas
beaucoup d'entretien, nous vous recommandons de les vérifier à intervalles réguliers et, si besoin, de les nettoyer.
1. Pour retirer le filtre (A), tournez-le dans
le sens inverse des aiguilles d'une montre et retirez-le du filtre (B).
B
4. Rassemblez les 2 pièces du filtre (A) et
poussez. Vérifiez qu'elles s'emboîtent
correctement.
5. Retirez le filtre (B).
6. Nettoyez soigneusement le filtre (B) avec
de l’eau.
7. Replacez le filtre (B) dans sa position initiale. Vérifiez qu'il est correctement placé dans les deux guides (C).
C
A
2. Le filtre (A) est constitué de 2 parties.
Pour démonter le filtre, séparez-les.
3. Nettoyez soigneusement les filtres avec
de l’eau.
8. Mettez le filtre (A) en place dans le filtre
(B). Bloquez le filtre (A) en tournant la
poignée dans le sens des aiguilles d'une
montre jusqu'à la butée.
Pour nettoyer les bras d'aspersion
Ne retirez pas les bras d’aspersion.
Si des résidus ont bouché les orifices des
bras d'aspersion, éliminez ceux-ci à l'aide
d'un objet pointu.
Nettoyage des surfaces externes
Nettoyez les surfaces externes de l'appareil, de même que le bandeau de commandes, à l'aide d'un chiffon doux humide.
Utilisez uniquement un peu d'eau savonneuse.
N'utilisez en aucun cas des substances
abrasives, des tampons à récurer ou des
solvants (acétone).
EN CAS D'ANOMALIE DE FONCTIONNEMENT
L'appareil ne démarre pas ou se met à l'arrêt en cours de programme.
Dans un premier temps, essayez de trouver
une solution au problème (reportez-vous au
tableau). Si vous n'y parvenez pas, contactez votre service après-vente.
Pour certaines anomalies, l'écran affiche un code d’alarme :
•
- L'appareil n'est pas approvisionné
en eau.
•
- L'appareil ne vidange pas
Page 31

electrolux 31
•
- Le système de sécurité anti-débor-
dement s'est déclenché.
Avertissement Mettez à l'arrêt
l'appareil avant d'effectuer les
contrôles.
Anomalie de fonctionne-
ment
L'appareil n'est pas approvisionné en eau.
La pression d'eau est trop bas-
Le robinet d'arrivée d’eau est
Le filtre situé dans le tuyau
Le tuyau d'arrivée d'eau n'a
Le tuyau d'arrivée d'eau est en-
L'appareil ne se vidange pas. Le robinet de l'évier est bou-
Le tuyau de vidange n'a pas
Le tuyau de vidange est en-
Le système de sécurité anti-débordement s'est déclenché.
Le programme de lavage ne
démarre pas.
La fiche du câble d’alimentation
Le fusible de la boîte à fusibles
La fonction Départ différé est
Après avoir effectué ces contrôles, mettez
l'appareil en fonctionnement. Le programme reprend là où il a été interrompu.
Si l'anomalie persiste, contactez le service
après-vente.
Si d'autres codes d'alarme s'affichent, contactez le service après-vente.
Les informations nécessaires au service
Cause possible Solution possible
Le robinet d'arrivée d'eau est
obstrué ou entartré.
se.
fermé.
d'arrivée d'eau est bouché.
pas été installé correctement.
dommagé.
ché.
été raccordé correctement.
dommagé.
Fermez le robinet d'eau et con-
La porte de l'appareil est ouverte.
n'est pas branchée à la prise
de courant.
a disjoncté.
sélectionnée.
Inscrivez les éléments suivants :
–Modèle
(MOD.) ....................................................
....
– Référence produit
(PNC) ..........................................
–Numéro de série
(S.N.) ..............................................
après-vente figurent sur la plaque signalétique.
Nettoyez le robinet d'arrivée
d'eau.
Contactez votre compagnie locale de distribution des eaux.
Ouvrez le robinet d'arrivée
d'eau.
Nettoyez le filtre.
Vérifiez que le tuyau est bien
raccordé.
Assurez-vous que le tuyau
d'arrivée d'eau n'est pas endommagé.
Nettoyez le robinet de l'évier.
Vérifiez que le tuyau est bien
raccordé.
Assurez-vous que le tuyau de
vidange n'est pas endommagé.
tactez votre service après-vente.
Fermez la porte de l'appareil.
Branchez le câble d'alimentation.
Remplacez le fusible.
• Annulez le départ différé.
• Lorsque le décompte est terminé, le programme de lavage démarre automatiquement.
Page 32

32 electrolux
Les résultats de lavage et de séchage ne sont pas satisfaisants
Problème Cause possible Solution possible
La vaisselle n’est pas propre. Vous n'avez pas sélectionné le
Vous n'avez pas placé les arti-
Les bras d’aspersion ne pou-
Les filtres sont encrassés ou
Vous avez utilisé trop peu de
Traces de tartre sur la vaisselle. Le réservoir de sel régénérant
Réglage incorrect du niveau de
Le bouchon du réservoir de sel
Les verres et la vaisselle présentent des rayures, des taches blanches ou un film bleuâtre.
Traces de gouttes d'eau séchée sur les verres et la vaisselle
Il se peut que le produit de la-
La vaisselle est mouillée. Le programme de lavage choisi
La vaisselle est mouillée et terne.
La fonction « Tout en 1 » est
Activation du distributeur de liquide de
rinçage
1. Activez l'appareil. Assurez-vous que
l'appareil est au mode réglage.
programme approprié pour ce
type de vaisselle et de salissure.
cles dans les paniers de façon
à ce que l'eau puisse accéder
à toutes les surfaces.
vaient pas tourner librement. La
vaisselle est mal positionnée
dans les paniers.
mal montés et installés.
produit de lavage ou avez oublié d'approvisionner le distributeur de produit de lavage.
est vide.
l'adoucisseur d'eau.
régénérant n'a pas été vissé
correctement.
La quantité de liquide de rinçage est trop élevée.
La quantité de liquide de rinçage est trop basse.
vage soit en cause.
n'avait pas de phase de séchage ou avait une phase de séchage courte.
Le distributeur de liquide de
rinçage est vide.
activée (cette fonction désactive automatiquement le distributeur de liquide de rinçage).
2. Appuyez simultanément sur les touches
de fonction (B) et (C) et maintenez-les
appuyées jusqu'à ce que les voyants de
programme au-dessus des touches de
Vérifiez que ce programme de
lavage est approprié pour ce type de vaisselle et de salissure.
Placez les articles correctement
dans les paniers.
Vérifiez qu'une disposition incorrecte de la vaisselle ne bloque pas les bras d'aspersion.
Assurez-vous que les filtres
sont propres et correctement
montés et installés.
Vérifiez que la quantité de produit de lavage est suffisante.
Remplissez le réservoir de sel
régénérant avec du sel spécial
pour lave-vaisselle.
Ajustez l'adoucisseur d'eau au
niveau correct.
Assurez-vous que le bouchon
du réservoir de sel est correctement fermé.
Réduisez la quantité du liquide
de rinçage.
Augmentez la quantité du liquide de rinçage.
Utilisez une autre marque de
produit de lavage.
Pour de meilleurs résultats de
séchage, entrouvrez la porte
pendant quelques minutes.
Remplissez le distributeur de liquide de rinçage.
Activez le distributeur de liquide
de rinçage.
Page 33

electrolux 33
fonction (A), (B) et (C) se mettent à clignoter.
3. Relâchez les touches de fonctions (B) et
(C).
4. Appuyez sur la touche de fonction (B).
• Les voyants de programme au-des-
sus des touches de fonction (A) et (C)
s’éteignent.
• Le voyant de programme au-dessus
5. Appuyez sur la touche de fonction (B)
pour modifier le réglage.
6. Désactivez l'appareil pour confirmer.
Le distributeur de liquide de rinçage est
désactivé.
Le distributeur de liquide de rinçage est
activé.
de la touche de fonction (B) continue
à clignoter.
• L'écran affiche le réglage choisi pour
le distributeur de liquide de rinçage.
CARACTÉRISTIQUES TECHNIQUES
Dimensions Largeur 596 mm
Hauteur 818 - 898 mm
Profondeur 575 mm
Pression de l'arrivée d'eau Minimum 0,5 bar (0,05 MPa)
Maximum 8 bar (0,8 MPa)
Arrivée d'eau
Capacité Couverts 12
1) Raccordez le tuyau d'arrivée d'eau à un robinet fileté (3/4 po).
1)
La plaque signalétique située sur le
bord intérieur de la porte de l'appareil
donne des informations sur le branchement électrique.
Si l'eau chaude est produite à partir de
sources énergétiques alternatives plus
Eau froide ou eau chaude maximum 60 °C
respectueuses de l'environnement (par
ex. panneaux solaires ou photovoltaïques et énergie éolienne), utilisez un
raccordement à l'eau chaude pour réduire la consommation énergétique.
EN MATIÈRE DE PROTECTION DE L'ENVIRONNEMENT
Le symbole sur le produit ou son
emballage indique que ce produit ne peut
être traité comme déchet ménager. Il doit
plutôt être remis au point de ramassage
concerné, se chargeant du recyclage du
matériel électrique et électronique. En vous
assurant que ce produit est éliminé
correctement, vous favorisez la prévention
des conséquences négatives pour
l’environnement et la santé humaine qui,
sinon, seraient le résultat d’un traitement
inapproprié des déchets de ce produit.
Pour obtenir plus de détails sur le recyclage
de ce produit, veuillez prendre contact avec
le bureau municipal de votre région, votre
service d’élimination des déchets ménagers
ou le magasin où vous avez acheté le
produit.
Où aller avec les appareils usagés?
Partout où des appareils neufs sont
vendus, mais aussi dans un centre de
collecte ou une entreprise de
récupération officiels SENS.
La liste des centres de collecte officiels
SENS est disponible sous
www.sens.ch.
Recyclez les matériaux portant le symbole
. Déposez les emballages dans les bacs
de recyclage prévus à cet effet.
Page 34

34 electrolux
Electrolux. Thinking of you.
Mehr zu unserem Denken finden Sie unter
www.electrolux.com
INHALT
Sicherheitshinweise 34
Gerätebeschreibung 37
Bedienfeld 38
Gebrauch des Gerätes 39
Einstellen des Wasserenthärters 39
Gebrauch von Salz für Geschirrspüler 40
Verwendung von Reinigungsmittel und
Klarspüler 41
Funktion "Multitab" 42
SICHERHEITSHINWEISE
Lesen Sie vor der Montage und Anwendung sorgfältig dieses Handbuch:
• Für Ihre Sicherheit und die Sicherheit Ihres Eigentums.
• Zum Schutz der Umwelt.
• Zur korrekten Bedienung des Geräts.
Bewahren Sie diese Bedienungsanleitung in
der Nähe des Geräts auf, auch wenn Sie
dieses an einem anderen Ort aufstellen
oder es an eine andere Person weitergeben.
Der Hersteller ist nicht dafür verantwortlich,
wenn eine inkorrekte Montage und Verwendung Schäden verursacht.
Sicherheit von Kindern und
schutzbedürftigen Personen
• Lassen Sie keine Personen (einschließlich
Kinder) mit eingeschränkten physischen,
sensorischen oder geistigen Fähigkeiten,
mangelnder Erfahrung oder mangelndem
Wissen dieses Gerät benutzen. Solche
Personen müssen von einer Person beaufsichtigt oder bei der Bedienung des
Geräts angeleitet werden, die für ihre Sicherheit verantwortlich ist.
• Kinder müssen beaufsichtigt werden, so
dass sie nicht mit dem Gerät spielen können.
• Halten Sie das Verpackungsmaterial von
Kindern fern. Andernfalls besteht Erstickungs- und Verletzungsgefahr.
• Bewahren Sie alle Reinigungsmittel an einem sicheren Ort auf. Reinigungsmittel
Laden von Besteck und Geschirr 42
Auswählen und Starten eines
Spülprogramms 43
Spülprogramme 45
Reinigung und Pflege 45
Was tun, wenn … 46
Technische Daten 49
Umwelttipps 49
Änderungen vorbehalten
dürfen nicht in die Hände von Kindern
gelangen.
• Halten Sie Kinder und Haustiere vom geöffneten Gerät fern.
Allgemeine Sicherheitshinweise
• Nehmen Sie keine technischen Änderungen am Gerät vor. Hierdurch besteht Verletzungsgefahr und das Gerät kann beschädigt werden.
• Beachten Sie die Sicherheitsanweisungen des Reinigungsmittelherstellers, um
Verätzungen an Augen, Mund oder im
Hals zu vermeiden.
• Trinken Sie kein Wasser aus dem Gerät.
Es können Reinigungsmittelrückstände
im Gerät zurückbleiben.
• Lassen Sie die Gerätetür nicht ohne Beaufsichtigung offen stehen. Damit werden
Verletzungen und die von der geöffneten
Tür ausgehende Stolpergefahr vermieden.
• Setzen oder stellen Sie sich nie auf die
offene Tür.
Verwendung
• Dieses Gerät ist nur zur Verwendung im
Haushalt bestimmt. Verwenden Sie dieses Gerät nicht zu anderen Zwecken, um
Verletzungen und Sachschäden zu vermeiden.
• Spülen Sie in diesem Gerät ausschließlich
spülmaschinengeeignete Gegenstände.
• Laden Sie keine entflammbaren Produkte
oder Gegenstände, die mit entflammba-
Page 35

electrolux 35
ren Produkten benetzt sind, in das Gerät
und stellen Sie solche nicht in die Nähe
oder auf das Gerät. Es besteht Explosions- und Brandgefahr.
• Ordnen Sie Messer und andere spitze
Gegenstände mit der Spitze nach unten
in den Besteckkorb ein. Wenn dies nicht
möglich ist, legen Sie sie horizontal in den
Oberkorb oder in den Messerkorb. (Nicht
alle Modelle sind mit einem Messerkorb
ausgestattet.)
• Verwenden Sie für Geschirrspüler ausschließlich dafür vorgesehene Produkte
(Reinigungsmittel, Salz, Klarspülmittel).
• Die Verwendung von Salzarten, die nicht
für Geschirrspüler vorgesehen sind, kann
zur Beschädigung des Wasserenthärters
führen.
• Nach den Einfüllen des Spezialsalzes ein
Spülprogramm laufen lassen. Salzrückstände im Gerät können Korrosion oder
ein Loch im Boden des Gerätes verursachen.
• Füllen Sie nie andere Produkte als Klarspülmittel (Reinigungsmittel für Geschirrspüler, Flüssigreiniger) in den Klarspülmittel-Dosierer. Dadurch kann das Gerät beschädigt werden.
• Vergewissern Sie sich, dass die Sprüharme sich ungehindert bewegen können,
bevor Sie ein Spülprogramm starten.
• Es kann heißer Dampf aus dem Gerät
austreten, wenn Sie die Tür während des
Ablaufs eines Spülprogramms öffnen.
Dabei besteht die Gefahr von Hautverbrennungen.
• Nehmen Sie kein Geschirr aus dem Gerät, bevor das Spülprogramm beendet
ist.
Reinigung und Pflege
• Schalten Sie das Gerät vor Reinigungsarbeiten immer ab, und ziehen Sie den
Netzstecker aus der Steckdose.
• Verwenden Sie keine entflammbaren Produkte oder Produkte, die Korrosion verursachen.
• Benutzen Sie den Geschirrspüler nie ohne Filter. Vergewissern Sie sich, dass die
Filter ordnungsgemäß eingesetzt sind.
Falsch eingesetzte Filter führen zu nicht
zufriedenstellenden Spülergebnissen und
einer Beschädigung des Geräts.
• Reinigen Sie das Gerät nicht mit einem
Wasser- oder Dampfstrahl. Andernfalls
besteht Stromschlaggefahr und das Gerät könnte beschädigt werden.
Montage
• Achten Sie darauf, dass das Gerät nicht
beschädigt ist. Ein beschädigtes Gerät
darf nicht montiert oder an das Stromnetz angeschlossen werden. Wenden Sie
sich in diesem Fall an Ihren Händler.
• Entfernen Sie das gesamte Verpackungsmaterial, bevor Sie das Gerät montieren
und verwenden.
• Der elektrische Anschluss, die Klempnerarbeiten und die Montage des Geräts
dürfen nur von einer qualifizierten Fachkraft ausgeführt werden. Auf diese Weise
werden Gebäudeschäden oder Verletzungen vermieden.
• Achten Sie darauf, dass der Netzstecker
während der Installation nicht an einer
Netzsteckdose angeschlossen ist.
• Bohren Sie keine Löcher ins Gehäuse
des Geräts. Dabei könnten hydraulische
oder elektrische Bauteile beschädigt werden.
• Wichtig!Befolgen Sie die Anweisungen
der mit dem Gerät mitgelieferten Montageanleitung bei:
– Montage des Geräts.
– Montage der Türverkleidung.
– Anschluss des Wasserzulaufs und -ab-
laufs.
• Stellen Sie sicher, dass das Gerät unter
und an angrenzenden sicheren Konstruktionen montiert ist.
Frostschutzmaßnahmen
• Stellen Sie das Gerät nicht an einem Ort
auf, an dem die Temperatur unter 0 °C
absinken kann.
• Der Hersteller haftet nicht für Frostschäden.
Wasseranschluss
• Verwenden Sie neue Schläuche und keine gebrauchten Schläuche für den Anschluss an die Wasserversorgung.
• Schließen Sie das Gerät nicht an neue
oder lange nicht mehr benutzte Schläuche an, sondern lassen Sie zunächst das
Wasser ein paar Minuten durch den
Page 36

36 electrolux
Schlauch fließen und schließen Sie erst
dann den Zulaufschlauch an.
• Achten Sie darauf, die Wasserschläuche
bei der Geräteinstallation nicht zu quetschen oder zu beschädigen.
• Vergewissern Sie sich, dass alle Wasseranschlüsse vollkommen dicht sind, damit
kein Wasser austreten kann.
• Prüfen Sie bei der ersten Verwendung
des Gerätes, dass die Schläuche keine
Wasserlecks aufweisen.
• Der Wasserzulaufschlauch verfügt über
ein Sicherheitsventil und eine doppelte
Ummantelung mit einem innenliegenden
Netzkabel. Der Wasserzulaufschlauch
steht nur während des Wasserzulaufs unter Druck. Wenn der Wasserzulaufschlauch eine undichte Stelle aufweist,
unterbricht das Sicherheitsventil den
Wasserzulauf.
– Gehen Sie beim Anschluss des Was-
serzulaufschlauchs vorsichtig vor:
– Tauchen Sie den Wasserzulauf-
schlauch oder das Sicherheitsventil
nicht in Wasser.
– Ziehen Sie sofort den Netzstecker
aus der Steckdose, wenn der Wasserzulaufschlauch oder das Sicherheitsventil beschädigt ist.
– Wenden Sie sich für den Austausch
des Wasserzulaufschlauchs mit Sicherheitsventil an den Kundendienst.
Warnung! Gefährliche Spannung.
• Verwenden Sie keine Mehrfachsteckdosen oder Verlängerungskabel. Es besteht
Brandgefahr.
• Ersetzen oder wechseln Sie nicht selbst
das Netzkabel. Wenden Sie sich hierzu
an den Kundendienst.
• Achten Sie darauf, den Netzstecker und
das Netzkabel hinter dem Gerät nicht zu
quetschen oder zu beschädigen.
• Stellen Sie sicher, dass der Netzstecker
nach der Montage noch zugänglich ist.
• Ziehen Sie nicht am Netzkabel, wenn Sie
das Gerät vom Stromnetz trennen möchten, sondern ziehen Sie dazu immer direkt am Netzstecker.
Kundendienst
• Nur qualifizierte Fachkräfte dürfen an
dem Gerät Reparaturarbeiten durchführen. Wenden Sie sich hierzu an den Kundendienst.
• Es dürfen nur Originalersatzteile verwendet werden.
Entsorgung des Geräts
• Um das Risiko von Verletzungen oder
Sachschäden zu vermeiden:
– Ziehen Sie den Netzstecker aus der
Netzsteckdose.
– Schneiden Sie das Netzkabel ab und
entsorgen Sie es.
– Entfernen Sie den Türschnappver-
schluss, damit Kinder oder Haustiere
nicht in dem Gerät eingeschlossen
werden können. Andernfalls besteht
Erstickungsgefahr.
– Entsorgen Sie das Gerät bei Ihrer örtli-
chen Abfallentsorgungsstelle.
Elektrischer Anschluss
• Das Gerät muss geerdet sein.
• Stellen Sie sicher, dass die elektrischen
Daten auf dem Typenschild den Daten
Ihrer Stromversorgung entsprechen.
• Schließen Sie das Gerät nur an eine
sachgemäß installierte Schutzkontaktsteckdose an.
Page 37

electrolux 37
Warnung! Die GeschirrspülerReinigungsmittel sind gefährlich
und können Korrosion
verursachen!
• Bei Unfällen mit diesen Reinigungsmitteln konsultieren Sie umgehend
einen Arzt.
• Sollte Reinigungsmittel in den Mund
gelangen, konsultieren Sie umgehend einen Arzt.
• Sollte das Reinigungsmittel in die Augen gelangen, konsultieren Sie um-
GERÄTEBESCHREIBUNG
1
2
3
4
gehend einen Arzt und spülen Sie die
Augen mit Wasser aus.
• Bewahren Sie die Reinigungsmittel
an einem sicheren Ort außerhalb der
Reichweite von Kindern auf.
• Lassen Sie die Gerätetür nicht offen
stehen, solange sich Reinigungsmittel im Reinigungsmittelbehälter befindet.
• Füllen Sie das Gerät erst mit Reinigungsmittel, kurz bevor Sie ein Spülprogramm starten.
10
9
8
7
5
1 Oberkorb
2 Wasserhärtestufen-Wähler
3 Salzbehälter
4 Reinigungsmittelbehälter
5 Klarspülmittel-Dosierer
6
6 Typenschild
7 Filter
8 Unterer Sprüharm
9 Mittlerer Sprüharm
10 Oberer Sprüharm
Page 38

38 electrolux
BEDIENFELD
1
5
A
C
B
6
43
D
E
2
1 Display
2 Ein-Aus-Taste
3 Anzeigen
4
Zeitvorwahl-Taste
5 Programmwahltasten
6 Funktionstasten
Anzeigen
Hauptspülgang-Anzeige. Leuchtet während der Spül- und Klarspülphase auf.
Trocknungsphasen-Anzeige. Leuchtet während der Trocknungsphase auf.
Programmende-Anzeige. Leuchtet nach dem Ende des Spülprogramms auf.
Multitab-Anzeige. Leuchtet auf, wenn die Funktion aktiv ist.
Klarspülmittel-Anzeige. Leuchtet auf, wenn der Klarspülmittel-Dosierer nachgefüllt
werden muss.
Salz-Anzeige. Leuchtet auf, wenn der Salzbehälter aufgefüllt werden muss.
Die Salz-Anzeige kann nach dem Nachfüllen von Salz noch einige Stunden leuchten. Dies hat jedoch keine unerwünschte Auswirkung auf den Gerätebetrieb.
1) Die entsprechenden Anzeigen leuchten nie während eines laufenden Spülprogramms auf, auch wenn die Salzund Klarspülmittelbehälter leer sind.
Display
Im Display erscheint:
• Die elektronische Einstellung der Wasser-
enthärtungsstufe
• Die Aktivierung/Deaktivierung des Klar-
spülmittel-Dosierers (nur bei aktiver Funktion Multitab)
1)
1)
• Die Spülprogrammdauer
• Die Restlaufzeit bis zum Ende des Spülprogramms
• Das Ende eines Spülprogramms (im Display erscheint eine Null)
• Die Zeitvorwahl
• Die Alarmcodes.
Page 39

electrolux 39
Ein-/Aus-Taste
Drücken Sie diese Taste, um das Gerät einund auszuschalten.
Zehn Minuten nach Ende des Spülprogramms schaltet die Funktion Auto Off das
Gerät automatisch aus. Diese Funktion hilft
bei der Senkung des Energieverbrauchs.
Taste Zeitvorwahl
Drücken Sie wiederholt diese Taste, um
den Start des Spülprogramms um 1 bis 24
Stunden zu verzögern.
Programmwahltasten
Drücken Sie eine dieser Tasten, um ein
Spülprogramm einzustellen. Die entsprechende Kontrolllampe leuchtet auf. Siehe
hierzu den Abschnitt „Spülprogramme“.
Funktionstasten
Mit diesen Tasten können Sie:
• Elektronisch die Wasserenthärterstufe
einstellen. Beachten Sie den Abschnitt
„Einstellen des Wasserenthärters“.
• Die Funktion Multitab aktivieren/deaktivieren. Siehe Abschnitt „Funktion Multitab“.
• Den Klarspülmittel-Dosierer aktivieren
oder deaktivieren (nur bei eingeschalteter
Funktion Multitab). Schlagen Sie dazu bitte unter „Was tun, wenn...“ nach.
• Ein laufendes Spülprogramm abbrechen.
Siehe Abschnitt „Auswählen und Starten
eines Spülprogramms“.
Einstellmodus
Das Gerät muss sich für folgende
Funktionen im Einstellmodus befinden:
• Zum Einstellen und Starten eines Spülprogramms
• Zum Einstellen und Starten einer Zeitvorwahl
• Zur elektronischen Einstellung der Wasserenthärterstufe
• Zur Aktivierung/Deaktivierung der Funktion Multitab.
• Zur Aktivierung oder Deaktivierung des
Klarspülmittel-Dosierers (nur bei eingeschalteter Funktion Multitab).
Schalten Sie das Gerät ein. Das Gerät
ist im Einstellmodus, wenn:
• Alle Programmanzeigen leuchten.
Schalten Sie das Gerät ein. Das Gerät
ist nicht im Einstellmodus, wenn:
• Nur eine Programm-Anzeige leuchtet.
• Das Display die Dauer des Spülprogramms oder die Zeitvorwahl anzeigt.
– Um in den Einstellmodus zurückzukeh-
ren, müssen Sie das Programm oder
die Zeitvorwahl abbrechen. Siehe Abschnitt „Auswählen und Starten eines
Spülprogramms“.
GEBRAUCH DES GERÄTES
1. Prüfen Sie, ob die Einstellung des Wasserenthärters der Wasserhärte in Ihrem
Gebiet entspricht und stellen Sie ihn bei
Bedarf entsprechend ein.
2. Füllen Sie den Salzbehälter mit Geschirrspülsalz.
3. Füllen Sie den Klarspülmittel-Dosierer
mit Klarspülmittel auf.
4. Ordnen Sie Geschirr und Besteck in den
Geschirrspüler ein.
5. Stellen Sie je nach Spülgut und Verschmutzungsgrad das passende Spülprogramm ein.
6. Füllen Sie den Reinigungsmittelbehälter
mit der passenden Menge an Reinigungsmittel.
7. Starten Sie das Spülprogramm.
Wenn Sie Kombi-Reinigungstabletten
(„3 in 1“, „4 in 1“, „5 in 1“ etc.) benutzen, verwenden Sie die Funktion Multitab (siehe den Abschnitt „Funktion Multitab“).
EINSTELLEN DES WASSERENTHÄRTERS
Der Wasserenthärter hält die im Wasser
enthaltenen Minerale und Salze zurück. Die-
se Minerale und Salze können das Gerät
beschädigen.
Page 40

40 electrolux
Stellen Sie den Wasserenthärter ein, wenn
die Einstellung nicht der Wasserhärte in Ihrem Gebiet entspricht.
Wasserhärte
Deutscher Was-
serhärtegrad
(dH°)
51 - 70 91 - 125 9,1 - 12,5 64 - 88
43 - 50 76 - 90 7,6 - 9,0 53 - 63
37 - 42 65 - 75 6,5 - 7,5 46 - 52
29 - 36 51 - 64 5,1 - 6,4 36 - 45
23 - 28 40 - 50 4,0 - 5,0 28 - 35
19 - 22 33 - 39 3,3 - 3,9 23 - 27
15 - 18 26 - 32 2,6 - 3,2 18 - 22 1 4
11 - 14 19 - 25 1,9 - 2,5 13 - 17 1 3
4 - 10 7 - 18 0,7 - 1,8 5 - 12 1 2
< 4 < 7 < 0,7 < 5
1) Werkseinstellung
2) Verwenden Sie kein Salz bei diesen Werten.
Französischer
Wasserhärte-
grad (°TH)
Sie müssen den Wasserenthärter manuell und elektronisch einstellen.
Manuelle Einstellung
Drehen Sie den Wasserhärtestufen-Wähler
auf die Stufe 1 oder 2 (siehe Tabelle).
Wenden Sie sich an Ihr örtliches Wasserversorgungsunternehmen, um die Wasserhärte in Ihrem Gebiet zu erfahren.
Wasserhärteeinstel-
mmol/l Clarke-Wer-temanuell elekt-
2
2
2
2
2
2
1
grammanzeigen über den Funktionstasten (A), (B) und (C) zu blinken beginnen.
3. Lassen Sie die Funktionstasten (B) und
(C) dann los.
4. Drücken Sie die Funktionstaste (A).
• Die Programmanzeigen über den
Funktionstasten (B) und (C) erlöschen.
• Die Programmanzeige über der Funk-
tionstaste (A) blinkt weiter.
• Das Display zeigt die Einstellung des
Wasserenthärters an (Beispiel:
Stufe 5 an).
5. Drücken Sie wiederholt die Funktionstaste (A), um die Einstellung zu ändern.
6. Schalten Sie das Gerät zur Bestätigung
aus.
Elektronische Einstellung
1. Schalten Sie das Gerät ein. Stellen Sie
sicher, dass sich das Gerät im Einstellmodus befindet.
Wenn der Wasserenthärter elektronisch
auf Stufe 1 eingestellt ist, leuchtet die
Salzkontrolllampe bei leerem Salzbehälter nicht auf.
2. Halten Sie gleichzeitig die Funktionstasten (B) und (C) gedrückt, bis die Pro-
lung
ro-
nisch
1)
1)
1)
1)
1)
1)
2)
10
9
8
7
6
1)
5
2)
1
=
GEBRAUCH VON SALZ FÜR GESCHIRRSPÜLER
So füllen Sie den Salzbehälter:
1. Drehen Sie den Deckel gegen den Uhr-
zeigersinn und öffnen Sie den Salzbehälter.
2. Füllen Sie den Salzbehälter mit 1 Liter
Wasser (nur wenn Sie zum ersten Mal
Salz einfüllen).
Page 41

20
30
M
A
X
1
2
3
4
+
-
electrolux 41
3. Verwenden Sie den Trichter, um den
Salzbehälter zu füllen.
4. Entfernen Sie das Salz, das sich um die
Öffnung des Salzbehälters herum angesammelt hat.
5. Drehen Sie den Deckel im Uhrzeigersinn, um den Salzbehälter zu schließen.
Es ist normal, dass beim Befüllen mit
Salz Wasser aus dem Salzbehälter
überläuft.
VERWENDUNG VON REINIGUNGSMITTEL UND KLARSPÜLER
1
2
7
3
4
6
Gebrauch von Reinigungsmitteln
Um die Umwelt zu schützen, verwenden Sie nicht mehr als die korrekte Reinigermenge.
Beachten Sie die Empfehlungen des
Reinigungsmittelsherstellers auf der
Reinigerverpackung.
So füllen Sie den Reinigungsmittelbehälter:
1. Drücken Sie zum Öffnen des Deckels
2
die Freigabetaste 7 des Reini-
gungsmittelbehälters.
2. Füllen Sie das Reinigungsmittel in den
1
Behälter.
.
3. Wenn das Spülprogramm einen Vorspülgang hat, schütten Sie eine kleine
Menge Reinigungsmittel auf die Innenseite der Gerätetür.
4. Wenn Sie Geschirrspüler-Tabs verwenden, legen Sie diese in den Reinigungs-
mittelbehälter.
1
.
5. Schließen Sie den Reinigungsmittelbehälter, indem Sie auf den Deckel drücken, bis er einrastet.
Wählen Sie lange Spülprogramme,
wenn Sie Geschirrspüler-Tabs verwenden. Diese können sich bei kurzen
Spülprogrammen nicht vollständig auf-
5
lösen und die Reinigung beeinträchtigen.
Verwendung von Klarspülmittel
Klarspülmittel ermöglichen das Trocknen des Geschirrs ohne Streifen und
Flecken.
Der Klarspülmittel-Dosierer fügt während des letzten Spülgangs automatisch Klarspülmittel hinzu.
Gehen Sie wie folgt vor, um den Klarspülmittel-Dosierer aufzufüllen:
1. Drücken Sie zum Öffnen des Deckels
6
die Freigabetaste 5 des Klarspül-
mittel-Dosierers.
2. Füllen Sie den Klarspülmittel-Dosierer
3
mit Klarspülmittel. Die Markierung
„max“ zeigt den maximalen Pegel an.
Page 42

42 electrolux
3. Wischen Sie verschüttetes Klarspülmittel mit einem saugfähigen Tuch auf, um
zu große Schaumbildung während des
Spülprogramms zu vermeiden.
4. Schließen Sie den Klarspülmittel-Dosierer, indem Sie auf den Deckel drücken,
bis er einrastet.
Einstellung der Klarspülmitteldosierung
Werkseitige Einstellung: Stufe 3.
FUNKTION "MULTITAB"
Die Funktion Multitab ermöglicht die Verwendung von Kombi-Reinigungstabletten.
Diese Tabletten enthalten das Reinigungsmittel, Klarspülmittel und Geschirrspülsalz.
Einige Tabletten-Sorten können auch andere Zusätze enthalten.
Vergewissern Sie sich, dass diese Tabletten
für die Wasserhärte in Ihrer Region geeignet
sind (siehe hierzu die Anweisungen auf der
Produktverpackung).
Die Funktion Multitab sperrt automatisch
die Zufuhr von Klarspülmittel und Salz.
Die Funktion Multitab deaktiviert die Kontrolllampen für Salz und Klarspülmittel.
Die Programmdauer kann sich erhöhen,
wenn Sie die Funktion Multitab verwenden.
Schalten Sie die Funktion Multitab vor
dem Beginn eines Spülprogramms ein
oder aus. Sie können die Funktion Multitab nicht ein- oder ausschalten, wenn
ein Spülprogramm angelaufen ist.
Schalten Sie die Funktion Multitab wie
folgt ein:
1. Schalten Sie das Gerät ein.
2. Stellen Sie sicher, dass sich das Gerät
im Einstellmodus befindet.
3. Halten Sie gleichzeitig die Funktionstas-
ten (D) und (E) gedrückt, bis die Multitab-Kontrolllampe aufleuchtet.
Sie können den Klarspülmittel-Dosierer auf
die Stufen 1 (niedrigste Dosierung) bis 4
(höchste Dosierung) einstellen.
4
Drehen Sie den Klarspülmittelwähler
Erhöhung oder Verringerung der Dosierung.
4. Lassen Sie die Funktionstasten (D) und
(E) dann los. Die Funktion ist aktiviert.
• Wenn Sie die Funktion Multitab akti-
vieren, bleibt sie so lange aktiv, bis
Sie sie wieder deaktivieren.
Zur Deaktivierung der Funktion
Multitab und für die separate
Verwendung von Reinigungsmittel, Salz
und Klarspülmittel
1. Schalten Sie das Gerät ein.
2. Stellen Sie sicher, dass sich das Gerät
im Einstellmodus befindet.
3. Halten Sie gleichzeitig die Funktionstasten (D) und (E) gedrückt, bis die Multitab-Kontrolllampe erlischt.
4. Lassen Sie die Funktionstasten (D) und
(E) dann los. Die Funktion ist deaktiviert.
5. Füllen Sie den Salzbehälter und den
Klarspülmittel-Dosierer auf.
6. Stellen Sie den Wasserenthärter auf die
höchste Stufe ein.
7. Starten Sie ein Spülprogramm ohne Geschirr.
8. Nach Ablauf des Spülprogramms, stellen Sie den Wasserenthärter auf die
Wasserhärte in Ihrer Region ein.
9. Stellen Sie die Menge des Klarspülmittels ein.
zur
LADEN VON BESTECK UND GESCHIRR
Siehe Broschüre „Beispiele für ProClean-Beladungen“.
Hinweise und Tipps
• Spülen Sie in diesem Gerät keine Gegenstände, die Wasser aufnehmen können
(Schwämme, Geschirrtücher usw.).
• Entfernen Sie Speisereste vom Geschirr.
• Weichen Sie eingebrannte Essensreste
ein.
• Ordnen Sie hohle Gefäße (z. B. Tassen,
Gläser, Pfannen) mit der Öffnung nach
unten ein.
• Achten Sie darauf, dass sich kein Wasser
in Behältern oder Schüsseln sammeln
kann.
Page 43

electrolux 43
• Stellen Sie sicher, dass das Geschirr und
das Besteck nicht aneinander haften.
• Achten Sie darauf, dass die Gläser einander nicht berühren.
• Ordnen Sie kleine Gegenstände in den
Besteckkorb ein.
• Mischen Sie Löffel mit anderem Besteck,
so können sie nicht zusammenkleben.
• Achten Sie beim Einordnen des Spülguts
darauf, dass das Wasser die Oberflächen
aller Geschirrteile erreicht.
• Ordnen Sie leichte Gegenstände in den
Oberkorb ein. Achten Sie darauf, dass
diese nicht verrutschen können.
• Auf Kunststoffgegenständen und Geschirr mit Antihaftbeschichtung sammeln
sich oftmals Wassertropfen.
Bierglashalter
Die Bierglashalter verhindern ein Verschieben der Gläser während des laufenden
Spülprogramms.
So entfernen Sie die Halter und den
Träger:
1. Lösen Sie die Halter vom Träger und
entfernen Sie sie.
2. Drücken Sie den Träger in den hinteren
Teil des Korbs, um ihn zu lösen.
So rasten Sie die Halter und den Träger
ein:
1. Drücken Sie den Träger in den vorderen
Teil des Korbs, um ihn einzurasten.
Wenn Sie die Bierglashalter nicht benutzen,
klappen Sie sie nach oben oder entnehmen
Sie sie. Sie können auch den Träger entfernen.
Warnung! Seien Sie beim
Herausnehmen und beim Einsetzen
des Trägers vorsichtig.
2. Setzen Sie die Halter auf den Träger.
AUSWÄHLEN UND STARTEN EINES SPÜLPROGRAMMS
Starten des Spülprogramms ohne
Zeitvorwahl
Sie können das Spülprogramm bei geöffneter oder geschlossener Tür einstellen.
Wenn die Tür geöffnet ist, können Sie
die Einstellung ändern, da das Gerät
erst startet, nachdem Sie die Tür geschlossen haben.
Ist die Tür geschlossen, startet das Gerät 3 Sekunden nach der Einstellung
des Spülprogramms.
Page 44

44 electrolux
1. Schalten Sie das Gerät ein. Stellen Sie
sicher, dass sich das Gerät im Einstellmodus befindet.
2. Wählen Sie ein Spülprogramm.
• Die entsprechende Programmanzeige
leuchtet auf.
• Alle anderen Programmanzeigen erlö-
schen.
• Die Programmdauer blinkt im Display.
3. Schließen Sie die Tür des Geräts und
das Spülprogramm startet automatisch.
• Die Programmdauer blinkt nicht mehr
im Display.
Starten des Spülprogramms mit
Zeitvorwahl
Sie können die Zeitvorwahl bei geöffneter oder geschlossener Tür einstellen.
Wenn die Tür geöffnet ist, können Sie
die Einstellung ändern, da das Gerät
erst startet, nachdem Sie die Tür geschlossen haben.
Ist die Tür geschlossen, startet das Gerät 3 Sekunden nach der Einstellung
der Zeitvorwahl.
1. Schalten Sie das Gerät ein. Stellen Sie
sicher, dass sich das Gerät im Einstellmodus befindet.
2. Wählen Sie ein Spülprogramm.
3. Drücken Sie wiederholt die ZeitvorwahlTaste, bis das Display die gewünschte
Zeitvorwahl anzeigt.
• Die Zeitvorwahl blinkt im Display.
4. Schließen Sie die Tür des Gerätes und
der Countdown startet automatisch.
• Die Zeitvorwahl blinkt nicht mehr im
Display.
Nach Ablauf der Zeitvorwahl startet das
Spülprogramm automatisch.
Das Öffnen der Tür unterbricht den Ablauf der Zeitvorwahl. Wenn Sie die Tür
wieder schließen, läuft die Zeitvorwahl
ab dem Zeitpunkt der Unterbrechung
weiter.
Abbrechen der Zeitvorwahl
Der Ablauf der Zeitvorwahl ist nicht
aktiviert.
1. Drücken Sie wiederholt die Zeitvorwahl-
Taste, bis das Display die Spülprogrammdauer anzeigt.
2. Schließen Sie die Tür des Geräts und
das Spülprogramm startet automatisch.
Der Ablauf der Zeitvorwahl ist aktiviert.
1. Drücken Sie wiederholt die ZeitvorwahlTaste, bis das Display die Spülprogrammdauer anzeigt.
• Die Programmdauer blinkt im Display.
Nach einigen Sekunden hört die Programmdauer auf zu blinken und das
Spülprogramm startet automatisch.
Unterbrechung eines Spülprogramms
• Öffnen Sie die Tür des Gerätes.
– Das Spülprogramm stoppt.
• Schließen Sie die Gerätetür.
– Das Spülprogramm wird an der Stelle
fortgesetzt, an der es unterbrochen
wurde.
Abbrechen des Spülprogramms
Wenn das Spülprogramm noch nicht gestartet ist, können Sie die Auswahl ändern.
Um die Auswahl bei laufendem Spülprogramm zu ändern, müssen Sie das Programm zuerst abbrechen.
• Halten Sie die Funktionstasten (B) und (C)
gleichzeitig gedrückt, bis alle Programmanzeigen leuchten.
Bevor Sie ein neues Spülprogramm
wählen, kontrollieren Sie, ob der Reinigungsmittelbehälter gefüllt ist.
Ende des Spülprogramms
Wenn das Spülprogramm beendet ist, zeigt
das Display eine Null an und die Anzeige für
das Programmende leuchtet auf.
1. Schalten Sie das Gerät aus.
2. Öffnen Sie die Tür des Geräts.
Öffnen Sie für bessere Trocknungsergebnisse für einige Minuten die Tür einen Spaltbreit.
Entnehmen des Spülguts
• Lassen Sie das Geschirr abkühlen, bevor
Sie es aus dem Geschirrspüler entnehmen. Heißes Geschirr ist stoßempfindlich.
• Entladen Sie zuerst den Unter- und dann
den Oberkorb.
• An den Innenseiten und an der Gerätetür
kann sich Wasser niederschlagen, da
sich Edelstahl schneller abkühlt als das
Geschirr.
Page 45

electrolux 45
SPÜLPROGRAMME
Programm Verschmut-
1)
2)
1) Dies ist das Standardprogramm für Prüfinstitute. Dieses Programm gewährleistet den wirtschaftlichsten Wasserund Energieverbrauch für normal verschmutztes Geschirr und Besteck. Informationen zu den Testdaten finden Sie
in der mitgelieferten Broschüre.
2) Mit diesem Programm können Sie vor Kurzem benutztes Geschirr spülen. Sie erhalten ein gutes Spülergebnis in
einer kurzen Zeit.
zungsgrad
Stark verschmutzt
Normal verschmutzt
Normal verschmutzt
Vor Kurzem benutztes Geschirr
Normal oder
leicht verschmutzt
Verbrauchswerte
Programm
1)
1,5 - 1,7 15 - 16
Spülgut Programmbeschreibung
Geschirr, Besteck,
Töpfe und Pfannen
Geschirr und Besteck Vorspülen
Geschirr und Besteck Vorspülen
Geschirr und Besteck Hauptspülgang 65 °C
Empfindliches Geschirr und Gläser
Energie (kWh) Wasser (Liter)
Vorspülen
Hauptspülgang 70 °C
Klarspülgänge
Trocknen
Hauptspülgang 65 °C
Klarspülgänge
Trocknen
Hauptspülgang 50 °C
Klarspülgänge
Trocknen
Klarspülgang
Hauptspülgang 45 °C
Klarspülgänge
Trocknen
1,4 - 1,6 16 - 17
1,0 - 1,1 10 - 11
0,9 9
0,8 - 0,9 12 - 13
1) Das Display zeigt die Programmdauer an.
Druck und Temperatur des Wassers,
die Schwankungen in der Stromversor-
REINIGUNG UND PFLEGE
Entfernen und Reinigen der Filter
Verschmutzte Filter beeinträchtigen das
Spülergebnis.
Obwohl die Filter wartungsarm sind, müssen sie in regelmäßigen Abständen überprüft und, falls nötig, gereinigt werden.
1. Drehen Sie den Filter (A) gegen den Uhr-
zeigersinn und ziehen Sie ihn aus dem
Filter (B).
gung und die Geschirrmenge können
diese Werte verändern.
Page 46

46 electrolux
B
5. Nehmen Sie den Filter (B) heraus.
6. Reinigen Sie den Filter (B) unter fließendem Wasser.
7. Setzen Sie den Filter (B) wieder in der
ursprünglichen Position ein. Vergewissern Sie sich, dass er korrekt in den beiden Führungen (C) sitzt.
A
2. Filter (A) besteht aus zwei Teilen. Ziehen
Sie diese auseinander, um sie zu zerlegen.
3. Reinigen Sie die einzelnen Teile unter
fließendem Wasser.
4. Setzen Sie die beiden Teile des Filters
(A) ineinander und drücken Sie diese zusammen. Vergewissern Sie sich, dass
sie korrekt ineinander sitzen.
WAS TUN, WENN …
Das Gerät startet nicht oder stoppt während des Betriebs.
Versuchen Sie zuerst eine Lösung für das
Problem zu finden (beachten Sie die Tabelle). Ist dies nicht möglich, wenden Sie sich
an den Kundendienst.
Bei manchen Fehlfunktionen zeigt das
Display einen Alarmcode an:
•
- Es läuft kein Wasser in den Ge-
schirrspüler.
C
8. Setzen Sie den Filter (A) in den Filter (B)
ein. Drehen Sie den Filter (A) im Uhrzeigersinn, bis er einrastet.
Reinigen der Sprüharme
Bauen Sie die Sprüharme nicht aus.
Falls die Löcher in den Sprüharmen verstopft sind, reinigen Sie sie mit einem Cocktailspieß.
Reinigen der Außenseiten
Reinigen Sie die Außenseiten und das Bedienfeld des Gerätes mit einem weichen,
feuchten Tuch.
Verwenden Sie ausschließlich Neutralreiniger.
Benutzen Sie keine Scheuermittel, Metallschwämmchen oder Lösungsmittel (Azeton
usw.).
•
- Das Gerät pumpt nicht ab.
•
- Die Aquasafe-Einrichtung ist aus-
gelöst.
Warnung! Schalten Sie das Gerät aus,
bevor Sie die Überprüfungen
vornehmen.
Page 47

electrolux 47
Störung Mögliche Ursachen Mögliche Abhilfe
Es läuft kein Wasser in das Gerät.
Der Wasserdruck ist zu niedrig. Wenden Sie sich an Ihren loka-
Der Wasserhahn ist geschlos-
Der Filter im Wasserzulauf-
Der Wasserzulaufschlauch ist
Der Wasserzulaufschlauch ist
Das Gerät pumpt das Wasser
nicht ab.
Der Wasserablaufschlauch ist
Der Ablaufschlauch ist beschä-
Die Aquasafe-Einrichtung ist
ausgelöst.
Das Spülprogramm startet
nicht.
Der Netzstecker steckt nicht
Die Sicherung im Sicherungs-
Die Zeitvorwahl ist eingestellt. • Brechen Sie die Zeitvorwahl
Schalten Sie das Gerät wieder ein, nachdem Sie es überprüft haben. Das Programm wird an der Stelle fortgesetzt, an
der es unterbrochen wurde.
Tritt die Störung erneut auf, wenden Sie
sich an den Kundendienst.
Wenn das Display andere Alarmcodes anzeigt, wenden Sie sich an den Kunden-
Der Wasserhahn ist blockiert
oder durch Kalkablagerungen
verstopft.
sen.
schlauch ist verstopft.
nicht richtig angeschlossen.
beschädigt.
Der Siphon ist verstopft. Reinigen Sie den Siphon.
nicht richtig angeschlossen.
digt.
Drehen Sie den Wasserhahn zu
Die Gerätetür ist offen. Schließen Sie die Gerätetür.
richtig in der Steckdose.
kasten ist durchgebrannt.
Reinigen Sie den Wasserhahn.
len Wasserversorger.
Drehen Sie den Wasserhahn
auf.
Reinigen Sie den Filter.
Vergewissern Sie sich, dass die
Schlauchverbindung in Ordnung ist.
Stellen Sie sicher, dass der
Wasserzulaufschlauch nicht
beschädigt ist.
Vergewissern Sie sich, dass die
Schlauchverbindung in Ordnung ist.
Stellen Sie sicher, dass der
Wasserablaufschlauch keine
Beschädigungen aufweist.
und wenden Sie sich an den
Kundendienst.
Stecken Sie den Netzstecker
richtig in die Steckdose.
Wechseln Sie die Sicherung
aus.
ab.
• Nach Ablauf der Zeitvorwahl
startet das Spülprogramm
automatisch.
Notieren Sie folgende Daten:
–Modell
(MOD.) ....................................................
....
–Produktnummer
(PNC) ........................................
– Seriennummer
(S.N.) ........................................
dienst.
Die vom Kundendienst benötigten Daten
finden Sie auf dem Typenschild.
Page 48

48 electrolux
Die Spül- und Trocknungsergebnisse sind nicht zufriedenstellend
Problem Mögliche Ursache Mögliche Abhilfe
Das Geschirr ist nicht sauber. Das ausgewählte Spülpro-
Sie haben Teile des Spülguts
Die Sprüharme konnten sich
Die Filter sind verschmutzt,
Die Reinigungsmittelmenge war
Kalkablagerungen auf dem Geschirr.
Inkorrekte Härtegradeinstellung
Die Verschlusskappe des Salz-
Schlieren, Streifen, weißliche
Flecken oder blauschimmernder Belag auf Gläsern und Geschirr.
Flecken von getrockneten Wassertropfen auf Gläsern und Geschirr.
Die Ursache kann auch beim
Das Geschirr ist nass. Im Spülprogramm war keine
Das Geschirr ist nass und
glanzlos.
Die Funktion Multitab ist einge-
Einschalten des KlarspülmittelDosierers
1. Schalten Sie das Gerät ein. Stellen Sie
sicher, dass sich das Gerät im Einstell-
gramm ist für das Spülgut und
den Verschmutzungsgrad nicht
geeignet.
nicht richtig in die Körbe gestellt, so dass das Wasser nicht
alle Oberflächen berührte.
nicht frei drehen. Inkorrekte Position der Teile in den Körben.
nicht richtig montiert oder nicht
korrekt eingesetzt.
nicht ausreichend oder es wurde kein Reinigungsmittel verwendet.
Der Salzbehälter ist leer. Füllen Sie den Salzbehälter mit
des Wasserenthärters.
behälters ist nicht richtig geschlossen.
Die Klarspülmitteldosierung ist
zu hoch.
Die Klarspülmitteldosierung ist
zu niedrig.
Reinigungsmittel liegen.
oder eine verkürzte Trocknungsphase vorgesehen.
Der Klarspülmittel-Dosierer ist
leer.
schaltet (diese Funktion deaktiviert automatisch den Klarspülmittel-Dosierer).
2. Halten Sie gleichzeitig die Funktionstasten (B) und (C) gedrückt, bis die Programmanzeigen über den Funktionstasten (A), (B) und (C) zu blinken beginnen.
Stellen Sie sicher, dass für das
Spülgut und den Verschmutzungsgrad das geeignete Spülprogramm ausgewählt wird.
Stellen Sie die Teile richtig in die
Körbe.
Stellen Sie sicher, dass die
Sprüharme nicht durch eine inkorrekte Position der Teile blockiert werden.
Kontrollieren Sie, ob die Filter
sauber, richtig montiert und
korrekt eingesetzt sind.
Stellen Sie sicher, dass die Reinigungsmittelmenge ausreichend ist.
Geschirrspülsalz.
Stellen Sie den Wasserenthär-
ter auf den korrekten Härtegrad
ein.
Stellen Sie sicher, dass der
Salzbehälter richtig geschlossen ist.
Klarspülmitteldosierung verringern.
Klarspülmitteldosierung erhöhen.
Verwenden Sie eine andere
Reinigungsmittelmarke.
Öffnen Sie für bessere Trocknungsergebnisse für einige Minuten die Tür einen Spaltbreit.
Füllen Sie den KlarspülmittelDosierer mit Klarspülmittel auf.
Aktivieren Sie den Klarspülmittel-Dosierer.
modus befindet.
Page 49

electrolux 49
3. Lassen Sie die Funktionstasten (B) und
(C) dann los.
4. Drücken Sie Funktionstaste (B).
• Die Programmanzeigen über den
Funktionstasten (A) und (C) erlöschen.
• Die Programmanzeige über der Funk-
tionstaste (B) blinkt weiterhin.
5. Drücken Sie zur Einstellungsänderung
die Funktionstaste (B).
6. Schalten Sie das Gerät zur Bestätigung
aus.
Der KlarspülmittelDosierer ist eingeschaltet.
• Das Display zeigt die Einstellung des
Klarspülmittel-Dosierers an.
Der KlarspülmittelDosierer ist ausgeschaltet.
TECHNISCHE DATEN
Abmessungen Breite 596 mm
Höhe 818 - 898 mm
Tiefe 575 mm
Wasserdruck Min. 0,5 bar (0,05 MPa)
Max. 8 bar (0,8 MPa)
Wasserversorgung
Fassungsvermögen Gedecke 12
1) Den Zulaufschlauch an einen Wasserhahn mit einem 3/4"-Außengewinde anschließen.
1)
Das Typenschild am inneren Rand der
Gerätetür zeigt die elektrischen Anschlussdaten.
Wenn Sie Heißwasser mithilfe umweltfreundlicher, alternativer Energiequellen
Kalt- oder Warmwasser maximal 60 °C
(z. B. Solar- oder Photovoltaikanlagen
oder Windkraft) aufbereiten, können Sie
durch den Anschluss des Geräts an die
Heißwasserversorgung Energie sparen.
UMWELTTIPPS
Das Symbol auf dem Produkt oder
seiner Verpackung weist darauf hin, dass
dieses Produkt nicht als normaler
Haushaltsabfall zu behandeln ist, sondern
an einem Sammelpunkt für das Recycling
von elektrischen und elektronischen
Geräten abgegeben werden muss. Durch
Ihren Beitrag zum korrekten Entsorgen
dieses Produkts schützen Sie die Umwelt
und die Gesundheit Ihrer Mitmenschen.
Umwelt und Gesundheit werden durch
falsches Entsorgen gefährdet. Weitere
Informationen über das Recycling dieses
Produkts erhalten Sie von Ihrem Rathaus,
Ihrer Müllabfuhr oder dem Geschäft, in dem
Sie das Produkt gekauft haben.
Wohin mit den Altgeräten?
Überall dort wo neue Geräte verkauft
werden oder Abgabe bei den offiziellen
SENS-Sammelstellen oder offiziellen
SENS-Recyclern.
Die Liste der offiziellen SENSSammelstellen findet sich unter
www.sens.ch.
Recyceln Sie die Materialien mit dem Sym-
. Entsorgen Sie die Verpackung in
bol
den entsprechenden Recyclingbehältern.
Page 50

50 electrolux
Electrolux. Thinking of you.
Per conoscere meglio il nostro modo di pensare, visitate il
sito www.electrolux.com
INDICE
Informazioni per la sicurezza 50
Descrizione del prodotto 53
Pannello dei comandi 53
Uso dell'apparecchiatura 55
Regolazione del decalcificatore dell’acqua
55
Uso del sale per lavastoviglie 56
Uso del detersivo e del brillantante 57
Uso di pastiglie combinate 58
INFORMAZIONI PER LA SICUREZZA
Leggere attentamente il presente libretto di
istruzioni prima dell'installazione e dell'uso:
• Per la propria sicurezza e per la sicurezza
dei propri oggetti.
• Per motivi ecologici.
• Per il buon funzionamento dell’apparec-
chiatura.
Conservare sempre queste istruzioni assieme all'apparecchio anche in caso di trasferimento o di vendita dell'apparecchio stesso.
Il costruttore non risponde di danni da
ascrivere a un'installazione e uso non corretti.
Sicurezza dei bambini e delle persone
fragili
• Non permettere alle persone, compresi i
bambini, con capacità fisiche, sensoriali o
mentali ridotte, o con mancanza di espe-
rienza e conoscenza di utilizzare l'appa-
recchiatura, a meno che tale utilizzo non
avvenga sotto la supervisione o la guida
di una persona responsabile della loro si-
curezza.
• Sorvegliare i bambini per assicurarsi che
non giochino con l'apparecchiatura.
• Tenere i materiali di imballaggio al di fuori
della portata dei bambini. Possibile ri-
schio di soffocamento o lesioni.
• Conservare i detersivi in un luogo sicuro.
Evitare che i bambini tocchino i detersivi.
• Tenere i bambini e gli animali domestici
lontano dall'apparecchiatura quando la
porta è aperta.
Sistemazione di posate e stoviglie 58
Selezione e avvio di un programma di
lavaggio 59
Programmi di lavaggio 61
Pulizia e cura 61
Cosa fare se… 62
Dati tecnici 65
Considerazioni ambientali 65
Con riserva di modifiche
Norme di sicurezza generali
• Non apportare modifiche alle specifiche
di questo prodotto. Vi è il rischio di ferirsi
o danneggiare l'apparecchio.
• Seguire le istruzioni di sicurezza del produttore di detersivo per evitare ustioni
chimiche a occhi, bocca e gola.
• Non bere l’acqua dell'apparecchio. Potrebbe contenere particelle di detersivo.
• Non tenere la porta dell'apparecchio
aperta senza supervisione. In questo modo si prevengono lesioni e la caduta su
una porta aperta.
• Non sedersi o salire sullo sportello aperto.
Uso dell’apparecchiatura
• Questo apparecchio è destinato solo all'uso domestico. Non utilizzare l'apparecchio per altri utilizzi per prevenire lesioni
alle persone e danni alle cose.
• Utilizzare l'apparecchio solo per lavare
accessori idonei alla lavastoviglie.
• Non appoggiare o tenere liquidi o materiali infiammabili, né oggetti facilmente incendiabili sull'apparecchio, al suo interno
o nelle immediate vicinanze. Si può verificare un'esplosione o un incendio.
• Mettere i coltelli e gli altri utensili appuntiti
nel cestello delle posate con la punta rivolta verso il basso, altrimenti sistemarli
orizzontalmente nel cestello superiore o
nell'apposito cestello (non tutti i modelli
hanno questo cestello).
Page 51

electrolux 51
• Usare solo prodotti specifici per lavastoviglie (detersivo, sale, brillantante).
• Altri tipi di sale possono danneggiare il
decalcificatore.
• Riempire l'apparecchio di sale prima di
avviare un programma di lavaggio. Il sale
residuo nell'apparecchio può causare
corrosione o creare un foro sul fondo dell'apparecchio.
• Non introdurre nel contenitore del brillantante altre sostanze (detergenti per lavastoviglie, detersivi liquidi). Ciò potrebbe
danneggiare l'apparecchio.
• Prima di avviare un programma di lavaggio, assicurarsi che i mulinelli possano
ruotare liberamente.
• L'apparecchio può rilasciare vapore caldo se si apre lo sportello durante un programma di lavaggio. Vi è rischio di scottature.
• Non rimuovere i piatti dall'apparecchio fino al completamento del programma di
lavaggio.
Pulizia e cura
• Prima di pulire l'apparecchio, spegnerlo
ed estrarre la spina dalla presa.
• Non usare prodotti infiammabili o che
possono causare corrosione.
• Non usare la lavastoviglie senza i filtri.
Controllare che i filtri siano stati installati
correttamente. Un'installazione non corretta dei filtri influisce negativamente sui
risultati del lavaggio e può danneggiare
l'apparecchiatura.
• Non usare acqua spray né vapore per
pulire l'apparecchio. Vi è il rischio di
scosse elettriche o di danni all'apparecchio.
Installazione
• Controllare che l'apparecchiatura non sia
danneggiata. Non installare né collegare
un'apparecchiatura danneggiata; se ciò
dovesse verificarsi, contattare.
• Rimuovere tutti gli imballaggi prima di installare e usare l'apparecchiatura.
• I collegamenti elettrici, i collegamenti
idraulici e l'installazione dell'apparecchiatura devono essere effettuati solo da personale qualificato. Questa misura ha lo
scopo di evitare rischi legati a danni strutturali o lesioni fisiche.
• Verificare che la spina sia staccata dalla
presa elettrica durante l’installazione.
• Non forare le pareti laterali dell'apparecchiatura per evitare di danneggiare i componenti idraulici ed elettrici.
• Importante!Attenersi alle istruzioni riportate nel modello fornito insieme all'apparecchiatura:
– per installare l'apparecchiatura;
– per montare il pannello dello sportello;
– per collegare l’apparecchiatura all’ali-
mentazione e allo scarico dell'acqua.
• Assicurarsi che l'apparecchio sia installato sotto e vicino a parti adeguatamente
ancorate a una struttura fissa.
Precauzioni antigelo
• Non collocare l’apparecchio in un luogo
in cui la temperatura possa scendere al
di sotto di 0°C.
• Il produttore non è responsabile di eventuali danni dovuti al gelo.
Collegamento dell’acqua
• Utilizzare tubi nuovi per il collegamento
dell'apparecchio all'alimentazione dell'acqua. Non utilizzare tubi usati.
• Non collegare l'apparecchio a tubazioni
nuove o rimaste inutilizzate per molto
tempo. Lasciar scorrere l’acqua per alcuni minuti prima di collegare il tubo di carico dell'acqua.
• Accertarsi di non schiacciare o danneggiare i tubi di carico e scarico dell'acqua
quando si installa l'apparecchio.
• Per evitare perdite, assicurarsi che gli accoppiamenti siano serrati a fondo.
• La prima volta che si usa la lavastoviglie,
accertarsi che non vi siano perdite nei tubi.
• Il tubo di carico dell'acqua dispone di una
valvola di sicurezza e una doppia guaina
con un cavo elettrico interno. Il tubo di
carico è soggetto a pressione solo quando l'acqua scorre. In caso di una perdita
nel tubo di carico dell'acqua, la valvola di
sicurezza interrompe il flusso dell'acqua.
– Prestare attenzione quando si collega il
tubo di carico dell'acqua:
– Non immergere nell'acqua il tubo di
carico o la valvola di sicurezza.
– Se il tubo di carico o la valvola di si-
curezza sono danneggiati, scollega-
Page 52

52 electrolux
re immediatamente la spina dalla
presa elettrica.
– Fare sostituire il tubo di carico del-
l'acqua con valvola di sicurezza solo
da personale specializzato.
Avvertenza! Pericolo di tensione.
Collegamento elettrico
• L'apparecchio deve disporre di una messa a terra.
• Verificare che i dati elettrici riportati sulla
targhetta del modello corrispondano a
quelli dell'impianto.
• Utilizzare sempre una presa di corrente
collegata a terra e correttamente installata.
• Non utilizzare prese multiple e prolunghe.
Vi è il rischio di incendio.
• Non sostituire o modificare mai il cavo
elettrico da soli. Contattare il centro assistenza.
• Evitare di schiacciare o danneggiare la
presa e il cavo dietro il dispositivo.
• Verificare che la spina di alimentazione rimanga accessibile dopo l'installazione.
• Non tirare il cavo di alimentazione per
scollegare l’apparecchio. Tirare solo la
spina.
Centro assistenza
• Le riparazioni o i lavori all'apparecchio
devono essere svolti esclusivamente da
una persona qualificata. Contattare il
centro assistenza.
• Devono essere utilizzati esclusivamente
ricambi originali.
Per smaltire l'apparecchio
• Per evitare il rischio di danni o lesioni:
– Scollegare la spina dalla presa di cor-
rente.
– Tagliare il cavo di rete e smaltirlo.
– Rimuovere il fermo della porta. Ciò evi-
ta che i bambini o gli animali domestici
restino chiusi nell'apparecchio. Vi è il ri-
schio di soffocamento.
– Scartare l'apparecchio presso il locale
centro di smaltimento dei rifiuti.
Avvertenza! I detersivi per
lavastoviglie sono pericolosi e
possono causare corrosione!
• Se durante l'utilizzo di questi detersivi dovesse verificarsi un incidente, richiedere l'immediato intervento di un
medico.
• Se il detersivo dovesse penetrare
nella bocca, richiedere l'immediato
intervento di un medico.
• In caso di contatto con gli occhi,
contattare immediatamente un medico e lavare gli occhi con acqua.
• Tenere tutti i detersivi per lavastoviglie in un luogo sicuro e fuori della
portata dei bambini.
• Non lasciare lo sportello dell'apparecchio aperto quando è presente
detersivo nell'apposito contenitore.
• Riempire il contenitore del detersivo
solo prima di avviare un programma
di lavaggio.
Page 53

DESCRIZIONE DEL PRODOTTO
1
2
electrolux 53
10
9
3
4
5
1 Cestello superiore
2 Selettore di durezza dell'acqua
3 Contenitore del sale
4 Contenitore del detersivo
5 Contenitore del brillantante
PANNELLO DEI COMANDI
1
8
7
6
6 Targhetta di identificazione
7 Filtri
8 Mulinello inferiore
9 Mulinello superiore
10 Mulinello più alto
5
A
C
B
6
43
D
E
2
Page 54

54 electrolux
1 Display
2 Tasto on/off
3 Spie
4
Tasto Partenza ritardata
5 Tasti Selezione programmi
6 Tasti funzione
Spie
Spie fase di lavaggio. Si accende quando si attiva la fase di lavaggio e risciacquo.
Spia della fase di asciugatura. Si accende quando è in corso la fase di asciugatura.
Spia termine programma. Si accende quando il programma di lavaggio è terminato.
Spia della funzione Multitab. Si accende quando si attiva la funzione.
Spia del brillantante. Si accende quando è necessario riempire il contenitore del
brillantante.
Spia del sale. La spia si accende quando è necessario riempire il contenitore del
sale.
Dopo avere riempito il contenitore, la spia del sale potrebbe restare accesa ancora per qualche ora. Ciò non compromette il corretto funzionamento dell'apparecchiatura.
1) Quando il contenitore del sale e/o del brillantante sono vuoti, la spia corrispondente non si accende durante
l'esecuzione di un programma.
Display
Il display mostra:
• La regolazione elettronica del decalcifica-
tore dell'acqua.
• L'attivazione e disattivazione del conteni-
tore del brillantante (solo con la funzione
Multitab attiva)
• Il tempo del programma di lavaggio
• Il tempo residuo al termine del program-
ma di lavaggio
• La fine del programma di lavaggio (nel di-
splay viene visualizzato uno zero)
• Il tempo dell'avvio ritardato
• I codici allarme.
Tasto on/off
Premere questo tasto per attivare e disattivare l'apparecchiatura.
Dopo dieci minuti dalla fine del programma,
la funzione Auto Off disattiva automaticamente l'apparecchiatura. Ciò contribuisce a
ridurre il consumo di energia.
1)
1)
Tasti Selezione programmi
Premere uno di questi tasti per selezionare
un programma di lavaggio. La spia corrispondente si accende. Consultare la tabella
"Programmi di lavaggio".
Tasti funzione
Questi tasti consentono di:
• Regolare elettronicamente il livello del decalcificatore dell'acqua. Fare riferimento
al capitolo "Impostazione del decalcificatore".
• Per attivare e disattivare la funzione Multitab. Vedere "Funzione Multitab".
• Attivare e disattivare il contenitore del brillantante (solo con la funzione Multitab attiva). Fare riferimento al capitolo "Cosa
fare se...".
• Annullare il programma di lavaggio in funzione. Fare riferimento al capitolo "Selezione e avvio di un programma di lavaggio".
Tasto Partenza ritardata (Delay)
Premere ripetutamente questo tasto per ritardare l'avvio del programma di lavaggio
da 1 a 24 ore.
Page 55

electrolux 55
Modalità impostazione
L’apparecchiatura deve essere in
modalità impostazione per eseguire le
seguenti operazioni:
• Selezionare e avviare un programma di
lavaggio.
• Selezionare e avviare un avvio ritardato.
• Regolare elettronicamente il livello del decalcificatore dell'acqua.
• Attivare o disattivare la funzione Multitab.
• Attivare o disattivare il contenitore del
brillantante (solo con la funzione Multitab
attiva).
Attivare il dispositivo.
L’apparecchiatura è in modalità
impostazione quando:
• Tutte le spie del programma si accendono.
USO DELL'APPARECCHIATURA
1. Accertarsi che il livello stabilito del de-
calcificatore dell'acqua sia conforme alla
durezza dell'acqua locale. In caso contrario, regolare il decalcificatore dell'acqua.
2. Riempire il contenitore del sale.
3. Riempire il contenitore del brillantante.
4. Caricare le stoviglie nella lavastoviglie.
5. Impostare il programma corretto per il ti-
po di carico ed il grado di sporco.
Attivare il dispositivo.
L’apparecchiatura non è in modalità
impostazione quando:
• Si accende solo una spia dei programmi.
• Il display mostra la durata del programma
di lavaggio o dell'avvio ritardato.
– È necessario annullare il programma o
l'avvio ritardato per tornare alla modalità di impostazione. Fare riferimento al
capitolo "Selezione e avvio di un programma di lavaggio".
6. Riempire il contenitore con un quantitati-
vo corretto di detersivo.
7. Avviare il programma di lavaggio.
Se si utilizzano pastiglie combinate ("3
in 1", "4 in 1", "5 in 1"), usare la funzione MULTITAB (fare riferimento al capitolo "Uso di pastiglie combinate").
REGOLAZIONE DEL DECALCIFICATORE DELL’ACQUA
Il decalcificatore dell'acqua rimuove i sali e i
minerali presenti nell'acqua della rete idrica.
Questi minerali e sali possono danneggiare
l'apparecchiatura.
Regolare il livello del decalcificatore dell'acqua se non dovesse corrispondere alla durezza dell'acqua locale.
Durezza dell'acqua
Gradi tedeschi
(°dH)
51 - 70 91 - 125 9,1 - 12,5 64 - 88
43 - 50 76 - 90 7,6 - 9,0 53 - 63
37 - 42 65 - 75 6,5 - 7,5 46 - 52
29 - 36 51 - 64 5,1 - 6,4 36 - 45
23 - 28 40 - 50 4,0 - 5,0 28 - 35
Gradi francesi
(°TH)
Contattare l'ente locale di erogazione idrica
per informarsi circa la durezza dell'acqua
nella propria area.
Regolazione della
durezza dell'acqua
mmol/l Gradi Clar-keManuale Elet-
tronica
1)
2
1)
2
1)
2
1)
2
1)
2
10
9
8
7
6
Page 56

56 electrolux
Durezza dell'acqua
Gradi tedeschi
(°dH)
19 - 22 33 - 39 3,3 - 3,9 23 - 27
15 - 18 26 - 32 2,6 - 3,2 18 - 22 1 4
11 - 14 19 - 25 1,9 - 2,5 13 - 17 1 3
4 - 10 7 - 18 0,7 - 1,8 5 - 12 1 2
< 4 < 7 < 0,7 < 5
1) Impostazione di fabbrica.
2) Non utilizzare il sale a questo livello.
Il decalcificatore dell’acqua deve essere regolato manualmente ed elettronicamente.
Impostazione manuale
Ruotare la manopola per la durezza dell'acqua sulla posizione 1 o 2 (fare riferimento
alla tabella).
Gradi francesi
(°TH)
mmol/l Gradi Clar-keManuale Elet-
2. Premere e tenere premuti contempora-
neamente i tasti funzione (B) e (C) fino a
quando gli indicatori di programma delle
funzioni sopra indicate, (A), (B) e (C)
lampeggiano.
3. Rilasciare i tasti funzione (B) e (C).
4. Premere il tasto funzione (A).
• Gli indicatori di programma sopra ai
Regolazione della
durezza dell'acqua
2
1
tasti funzione (B) e (C) si spengono.
• L'indicatore di programma sopra al
tasto funzione (A) continua a lampeggiare.
• Il display visualizza l'impostazione del
decalcificatore dell'acqua (ad es.:
= livello 5).
5. Premere ripetutamente il tasto funzione
(A) per modificare l'impostazione.
6. Disattivare l'apparecchiatura per confer-
Regolazione elettronica
1. Accendere l'apparecchiatura. Verificare
che l'apparecchiatura sia in modalità impostazione.
mare.
Se il decalcificatore dell'acqua viene
impostato elettronicamente sul livello 1,
la spia del sale rimane spenta.
tronica
1)
2)
1)
5
2)
1
USO DEL SALE PER LAVASTOVIGLIE
Come riempire il contenitore del sale:
1. Ruotare il tappo in senso antiorario e
aprire il contenitore del sale.
2. Versare 1 litro di acqua all'interno del
contenitore del sale (solo la prima volta
che lo si riempie di sale).
3. Riempire il contenitore con il sale ser-
vendosi dell'imbuto.
4. Togliere l'eventuale sale rimasto attorno
all'apertura del contenitore.
5. Ruotare il tappo in senso orario per
chiudere il contenitore del sale.
È normale che dell’acqua fuoriesca dal
contenitore quando si riempie con il sale.
Page 57

USO DEL DETERSIVO E DEL BRILLANTANTE
20
30
M
A
X
1
2
3
4
+
-
1
2
7
3
4
6
Uso del detersivo
Per contribuire alla protezione dell’ambiente, non usare una dose di detersivo
superiore alla quantità raccomandata.
Attenersi alle raccomandazioni del produttore riportate sulla confezione del
detersivo.
Come riempire il contenitore del detersivo:
1.
Premere il tasto di sgancio
re il coperchio
7
del contenitore del
2
per apri-
detersivo.
2.
Mettere il detersivo nel contenitore
3. Se il programma prevede una fase di
prelavaggio, mettere una piccola quantità di detersivo nella parte interna dello
sportello della lavastoviglie.
4. Se si utilizzano tavolette combinate, inserire la tavoletta nel contenitore
5. Chiudere il contenitore. Premere il coperchio fino a che non si blocca.
Con le pastiglie di detersivo, utilizzare
programmi di lavaggio lunghi. Le pastiglie non si sciolgono completamente
con i programmi di lavaggio brevi e
possono ridurre la qualità dei risultati di
lavaggio.
Uso del brillantante
5
Il brillantante permette di asciugare le
stoviglie senza strisce o macchie.
Il contenitore del brillantante aggiunge
automaticamente il brillantante durante
l'ultima fase di risciacquo.
Riempire il contenitore del brillantante procedendo nel modo seguente:
1.
Premere il tasto di sgancio
re il coperchio
brillantante.
2. Riempire il contenitore del brillantante
3
1
.
con il brillantante. Il simbolo "max"
indica il livello massimo.
electrolux 57
6
per apri-
5
del contenitore del
1
.
Page 58

58 electrolux
3. Togliere l'eventuale brillantante fuoriuscito con un panno assorbente per evitare la formazione di schiuma eccessiva
durante il lavaggio.
4. Chiudere il contenitore del brillantante.
Premere il coperchio fino a che non si
blocca.
Regolare il dosaggio del brillantante
Impostazione di fabbrica: posizione 3.
USO DI PASTIGLIE COMBINATE
La funzione Multitab è specifica per l'utilizzo
di detersivo in pastiglie.
Questi prodotti esercitano una funzione integrata e combinata di detersivo, brillantante e sale. Alcuni tipi di pastiglie possono
contenere altri agenti.
Accertarsi che le pastiglie siano adatte alla
durezza dell'acqua locale (fare riferimento
alle istruzioni sulla confezione dei prodotti).
La funzione Multitab disattiva l’erogazione
di brillantante e sale.
La funzione Multitab disattiva le spie del
brillantante e del sale.
La durata del programma può aumentare
se si usa la funzione Multitab a seguito dell'adattamento automatico dei tempi per garantire lo scioglimento della pastiglia.
Attivare o disattivare la funzione Multitab prima di avviare un programma di
lavaggio. Non è possibile attivare o disattivare la funzione quando un programma di lavaggio è in corso.
Per selezionare la funzione Multitab
1. Attivare l'apparecchiatura.
2. Verificare che l'apparecchiatura sia in
modalità impostazione.
3. Premere e tenere premuti contempora-
neamente i tasti funzione (D) e (E) fino a
quando la spia della funzione Multitab si
accende.
È possibile impostare il livello del brillantante
da 1 (dosaggio minore) a 4 (dosaggio maggiore).
4
Ruotare il selettore del brillantante
aumentare o diminuire il dosaggio.
4. Rilasciare i tasti funzione (D) e (E). La
funzione è attivata.
• Una volta attivata, la funzione Multitab
rimane attiva fino a quando non viene
disattivata.
Per disattivare la funzione Multitab ed
usare separatamente detersivo, sale e
brillantante.
1. Attivare l'apparecchiatura.
2. Verificare che l'apparecchiatura sia in
modalità impostazione.
3. Premere e tenere premuti contemporaneamente i tasti funzione (D) e (E) fino a
quando la spia della funzione Multitab si
accende.
4. Rilasciare i tasti funzione (D) e (E). La
funzione è disattivata.
5. Riempire il contenitore del sale e il contenitore del brillantante.
6. Impostare la durezza dell'acqua sul livello più alto.
7. Avviare un programma di lavaggio senza
piatti.
8. Una volta completato il programma di
lavaggio, regolare decalcificatore
dell’acqua in base alla durezza dell'acqua locale.
9. Regolare del dosaggio del brillantante.
per
SISTEMAZIONE DI POSATE E STOVIGLIE
Fare riferimento all'opuscolo "Esempi di
carichi ProClean".
Suggerimenti
• Non inserire nell'apparecchiatura oggetti
che possano assorbire acqua (spugne,
panni).
• Eliminare i residui di cibo dalle stoviglie.
• Ammorbidire le tracce di bruciato nelle
stoviglie.
• Disporre gli utensili cavi (tazze, bicchieri e
padelle) con l’apertura rivolta verso il basso
• Assicurarsi che l’acqua non si depositi
nei contenitori o nelle ciotole.
Page 59

electrolux 59
• Assicurarsi che le posate e i piatti non
aderiscano tra loro.
• Verificare che i bicchieri non si tocchino
l’un l’altro.
• Disporre gli oggetti piccoli nel cestello
portaposate.
• Collocare i cucchiai insieme ad altri tipi di
posate per evitare che aderiscano tra loro.
• Quando si inseriscono le stoviglie nei cestelli, assicurarsi che l'acqua raggiunga
tutte le superfici.
• Sistemare gli oggetti leggeri nel cestello
superiore in modo tale che non possano
muoversi.
• Le stoviglie in plastica e i tegami in materiale antiaderente tendono a trattenere le
gocce d'acqua.
Supporti per bicchieri da birra
I supporti per i bicchieri da birra ne impediscono il movimento mentre un programma
di lavaggio è in corso.
Per togliere tutti i supporti, procedere
nel modo seguente:
1. Sganciare i supporti dalla struttura di
base e rimuoverli.
2. Spingere il supporto verso la parte posteriore del cestello per sganciarlo.
Per agganciare tutti i supporti,
procedere nel modo seguente:
1. Spingere il supporto verso la parte anteriore del cestello per agganciarlo.
Se non utilizzati, possono essere ripiegati o
rimossi. È anche possibile togliere il supporto.
Avvertenza! Prestare attenzione
quando si sgancia o aggancia il
supporto.
2. Agganciare i supporti per i bicchieri sul
supporto di base.
SELEZIONE E AVVIO DI UN PROGRAMMA DI LAVAGGIO
Avvio del programma di lavaggio senza
partenza ritardata
La selezione del programma di lavaggio
è possibile anche se lo sportello è chiuso.
Se lo sportello è aperto, l'impostazione
è modificabile in quanto l'apparecchia-
tura inizia a funzionare soltanto dopo la
chiusura dello sportello.
Se lo sportello è chiuso, l'apparecchiatura inizia a funzionare 3 secondi dopo
l'impostazione del programma di lavaggio.
Page 60

60 electrolux
1. Attivare il dispositivo. Verificare che l'apparecchiatura sia in modalità impostazione.
2. Impostare il programma di lavaggio.
• La spia del programma corrisponden-
te si accende.
• Tutte le altre spie dei programmi si
spengono.
• Sul display lampeggia la durata del
programma.
3. Quando si chiude lo sportello della lavastoviglie, il programma di lavaggio si avvia automaticamente.
• Sul display la durata del programma
non lampeggia più.
Avvio del programma di lavaggio con la
partenza ritardata
Sarà possibile impostare l'avvio ritardato con lo sportello dell'apparecchiatura
aperto o chiuso.
Se lo sportello è aperto, l'impostazione
è modificabile in quanto l'apparecchiatura inizia a funzionare soltanto dopo la
chiusura dello sportello.
Nel caso in cui lo sportello sia chiuso,
l'apparecchiatura inizia a funzionare
dopo 3 secondi dall'impostazione dell'avvio ritardato.
1. Attivare il dispositivo. Verificare che l'apparecchiatura sia in modalità impostazione.
2. Impostare il programma di lavaggio.
3. Premere ripetutamente il tasto dell'avvio
ritardato fino a quando il display visualizza il tempo dell'avvio ritardato.
• Il tempo di ritardo lampeggia sul di-
splay.
4. Quando si chiude lo sportello della lavastoviglie, il programma si avvia automaticamente
• Sul display non lampeggia più l'orario
ritardato.
Al termine del conto alla rovescia il programma si avvia automaticamente.
L'apertura dello sportello interrompe il
conto alla rovescia. Quando si chiude
nuovamente lo sportello, il conto alla
rovescia riprende dal punto in cui era
stato interrotto.
Annullamento dell'avvio ritardato
Il conto alla rovescia non è attivo
1. Premere ripetutamente il tasto dell'avvio
ritardato fino a quando il display visualizza la fine del programma di lavaggio.
2. Quando si chiude lo sportello della lavastoviglie, il programma di lavaggio si avvia automaticamente.
Il conto alla rovescia è attivo
1. Premere ripetutamente il tasto dell'avvio
ritardato fino a quando il display visualizza la fine del programma di lavaggio.
• Sul display lampeggia la durata del
programma. Dopo alcuni secondi, il
tempo smette di lampeggiare e il programma di lavaggio si avvia in modo
automatico.
Interruzione del programma di lavaggio
• Aprire lo sportello della lavastoviglie.
– Il programma si interrompe.
• Chiudere lo sportello della lavastoviglie.
– Il programma riprende dal punto in cui
era stato interrotto.
Annullamento del programma di
lavaggio
Se il programma di lavaggio non è ancora
iniziato, è possibile modificare la selezione.
Per modificare la selezione mentre il programma di lavaggio è in corso, è necessario annullare il programma.
• Premere e tenere premuti contempora-
neamente i tasti funzione (B) e (C) fino a
quando tutte le spie dei programmi si accendono.
Verificare che vi sia del detersivo nell'apposito contenitore prima di avviare
un nuovo programma di lavaggio.
Fine del programma di lavaggio
Una volta terminato il programma di lavaggio, il display mostra uno zero e si accende
la spia di fine.
1. Spegnere l'apparecchiatura.
2. Aprire lo sportello dell'apparecchiatura.
Per ottenere risultati di asciugatura migliori, lasciare lo sportello dell'apparecchiatura socchiuso per alcuni minuti.
Rimuovere le stoviglie dai cestelli.
• Lasciare raffreddare i piatti prima di
estrarli dalla lavastoviglie. Le stoviglie cal-
Page 61

electrolux 61
de possono essere più facilmente danneggiabili.
• Vuotare prima il cestello inferiore e quindi
quello superiore.
• Sulle pareti laterali e sulla porta della lavastoviglie può formarsi della condensa
perché l'acciaio inox si raffredda più velocemente della ceramica.
PROGRAMMI DI LAVAGGIO
Programma Tipo di sporco Tipo di carico Descrizione programma
Sporco intenso Stoviglie miste, posa-
Grado di sporco
normale
1)
2)
1) Programma standard per gli istituti di prova. Questo programma offre un utilizzo più efficiente di acqua ed
elettricità per lavare stoviglie e posate con grado di sporco normale. Fare riferimento all'opuscolo in dotazione per
le informazioni sulle condizioni di prova.
2) Con questo programma è possibile lavare un carico con sporco fresco. Garantisce buoni risultati di lavaggio in
breve tempo.
Grado di sporco
normale
Sporco fresco Stoviglie e posate Lavaggio 65 °C
Sporco normale
o leggero
te e pentole
Stoviglie e posate Ammollo
Stoviglie e posate Ammollo
Stoviglie e bicchieri
delicati
Valori di consumo
Programma
1)
Energia elettrica (kWh) Acqua (in litri)
1,5 - 1,7 15 - 16
Ammollo
Lavaggio 70 °C
Risciacqui
Asciugatura
Lavaggio 65°C
Risciacqui
Asciugatura
Lavaggio 50 °C
Risciacqui
Asciugatura
Risciacquo
Lavaggio 45 °C
Risciacqui
Asciugatura
1,4 - 1,6 16 - 17
1,0 - 1,1 10 - 11
0,9 9
0,8 - 0,9 12 - 13
1) Il display indica la durata del programma.
I valori di consumo possono variare a
seconda della pressione e della temperatura dell’acqua, le variazioni dell’ali-
PULIZIA E CURA
Rimozione e pulizia dei filtri
I filtri sporchi riducono i risultati di lavaggio.
mentazione elettrica e la quantità di
stoviglie.
Nonostante richiedano poca manutenzione,
controllarli con regolarità e, se necessario,
pulirli.
Page 62

62 electrolux
1. Ruotare il filtro (A) in senso orario ed
estrarlo dal filtro (B).
B
A
2. Il filtro (A) è composto da due parti.
Staccarle per smontare il filtro.
3. Pulire accuratamente i componenti sot-
to l’acqua corrente.
4. Assemblare i due componenti del filtro
(A) e spingere. Accertarsi che siano
montati correttamente l'uno nell'altro.
5. Rimuovere il filtro (B).
6. Pulire accuratamente il filtro (B) sotto
l’acqua corrente.
7. Collocare il filtro (B) nella posizione iniziale. Verificare che sia montato correttamente sotto le due guide (C).
C
8. Mettere il filtro (A) in posizione nel filtro
(B). Ruotare il filtro (A) in senso orario fino a che non si blocca.
Pulire i mulinelli
Non rimuovere i mulinelli.
Se i fori dei mulinelli sono ostruiti da residui
di sporco, liberarli servendosi di un oggetto
a punta fine.
Pulire le superfici esterne
Pulire le superfici esterne dell’apparecchiatura e il pannello dei comandi con un panno
morbido inumidito.
Utilizzare solo detergenti neutri.
Non usare prodotti abrasivi, spugnette
abrasive o solventi (acetone).
COSA FARE SE…
L'apparecchio non si avvia o blocca durante il funzionamento.
Cercare dapprima di risolvere il problema
(fare riferimento alla tabella). Se ciò non è
possibile, contattare l’assistenza tecnica.
Il display visualizza un codice allarme
in alcuni casi:
•
- La lavastoviglie non carica acqua
Malfunzionamento Possibile causa Possibile soluzione
L'apparecchiatura non carica
acqua.
Il rubinetto dell'acqua è ostruito
o intasato dal calcare.
•
- L'apparecchiatura non scarica
•
- Il dispositivo antiallagamento è atti-
vo.
Avvertenza! Disattivare
l'apparecchiatura prima di eseguire i
controlli.
Pulire il rubinetto dell’acqua.
Page 63

electrolux 63
Malfunzionamento Possibile causa Possibile soluzione
La pressione dell'acqua è trop-
Il rubinetto dell’acqua è chiuso. Aprire il rubinetto dell’acqua.
Il filtro del tubo di carico dell'ac-
Il tubo di carico dell'acqua non
Il tubo di carico dell'acqua è
L'apparecchiatura non scarica
l'acqua.
Il tubo di scarico dell'acqua
Il tubo di scarico dell'acqua è
Il dispositivo antiallagamento è
attivo.
Il programma di lavaggio non si
avvia.
La spina non è inserita nella
Il salvavita dell'impianto dome-
È stato impostato l'avvio ritar-
Una volta effettuati questi controlli, attivare
l’apparecchiatura. Il programma riprende
dal punto in cui era stato interrotto.
In caso di ricomparsa dell'anomalia, contattare il centro di assistenza.
Se il display mostra altri codici di errore,
contattare il centro assistenza.
Le informazioni necessarie per il centro as-
po bassa.
qua è ostruito.
è collegato correttamente.
danneggiato.
Lo scarico del lavello è ostruito. Pulire lo scarico del lavello.
non è collegato correttamente.
danneggiato.
Chiudere il rubinetto dell’acqua
Lo sportello dell'apparecchiatura è aperto.
presa.
stico è danneggiato.
dato.
Prendere nota delle seguenti informazioni:
–Modello
(MOD.) ....................................................
....
– Numero di prodotto
(PNC) ..........................................
–Numero di serie
(S.N.) ..............................................
Contattare l’ente erogatore locale.
Pulire il filtro.
Controllare che il collegamento
sia corretto.
Verificare che il tubo di carico
dell'acqua non sia danneggiato.
Controllare che il collegamento
sia corretto.
Accertarsi che il tubo di scarico
dell'acqua non sia danneggiato.
e contattare il centro di assistenza.
Chiudere lo sportello dell'apparecchiatura.
Inserire la spina nella presa.
Sostituire il fusibile.
• Annullare l'avvio ritardato.
• Al termine del conto alla rovescia il programma si avvia
automaticamente.
sistenza si trovano sulla targhetta dei dati.
I risultati di lavaggio e di asciugatura non sono soddisfacenti.
Problema Possibile causa Possibile soluzione
Le stoviglie non sono pulite. Il programma di lavaggio non
era corretto per il tipo di carico
ed il grado di sporco.
Accertarsi che il programma di
lavaggio selezionato sia corretto per il tipo di carico ed il grado di sporco.
Page 64

64 electrolux
Problema Possibile causa Possibile soluzione
Le stoviglie non sono state si-
I mulinelli non ruotavano libera-
I filtri sono sporchi o non sono
È stata utilizzata una dose in-
Ci sono depositi di calcare sulle
stoviglie.
Regolazione errata del livello
Il tappo del contenitore del sale
Bicchieri e stoviglie presentano
striature, macchie biancastre o
una patina bluastra.
Tracce di gocce d'acqua che si
sono asciugate su bicchieri e
stoviglie.
La causa potrebbe essere il
Le stoviglie sono bagnate. Il programma di lavaggio non
Le stoviglie sono bagnate ed
opache.
La funzione Multitab è attiva
Attivazione del dosatore del
brillantante
1. Accendere l'apparecchiatura. Verificare
che l'apparecchiatura sia in modalità impostazione.
stemate correttamente nei cestelli, per cui l'acqua non ha
raggiunto tutte le superfici.
mente. Sistemazione non corretta delle stoviglie nei cestelli.
montati correttamente.
sufficiente di detersivo o addirittura mancava.
Il contenitore del sale è vuoto. Riempire il contenitore del sale.
del decalcificatore dell'acqua.
non è chiuso correttamente.
Il dosaggio del brillantante è
troppo alto.
Il dosaggio del brillantante è
troppo basso.
detersivo.
comprendeva la fase di asciugatura o aveva una fase di
asciugatura ridotta.
Il contenitore del brillantante è
vuoto.
(questa funzione disattiva automaticamente il contenitore del
brillantante).
• L'indicatore di programma sopra al
tasto funzione (B) continua a lampeggiare.
• Il display visualizza l'impostazione del
contenitore del brillantante.
2. Premere e tenere premuti contemporaneamente i tasti funzione (B) e (C) fino a
quando gli indicatori di programma dei
tasti delle funzioni sopra indicate, (A), (B)
e (C) iniziano a lampeggiare.
3. Rilasciare i tasti funzione (B) e (C).
4. Premere il tasto funzione (B).
• Gli indicatori di programma sopra ai
tasti funzione (A) e (C) si spengono.
5. Premere il tasto funzione (B) per modificare l'impostazione.
6. Disattivare l'apparecchiatura per confermare.
Sistemare le stoviglie correttamente nei cestelli.
Accertarsi che una sistemazione non corretta delle stoviglie
non blocchi i mulinelli.
Controllare che i filtri siano puliti
e montati correttamente.
Accertarsi che la quantità di detersivo sia sufficiente.
Regolare correttamente il decalcificatore dell'acqua.
Assicurarsi che il tappo del
contenitore del sale sia chiuso
correttamente.
Ridurre il dosaggio del brillantante.
Aumentare il dosaggio del brillantante.
Utilizzare un detersivo di marca
diversa.
Per ottenere risultati di asciugatura migliori, lasciare lo sportello
socchiuso per alcuni minuti.
Riempire il contenitore del brillantante.
Attivare l'erogatore del brillantante.
Il contenitore del brillantante è disattivato.
Il contenitore del brillantante è attivato.
Page 65

electrolux 65
DATI TECNICI
Dimensioni Larghezza 596 mm
Altezza 818 - 898 mm
Profondità 575 mm
Pressione di carico dell'acqua Minima 0,5 bar (0,05 MPa)
Massima 8 bar (0,8 MPa)
1)
Collegamento dell'acqua
Capacità Coperti 12
1) Collegare il tubo di carico dell'acqua a un rubinetto con filettatura 3/4".
La targhetta dei dati sul bordo interno
dello sportello dell'apparecchio reca le
informazioni sui collegamenti elettrici.
Se l'acqua calda proviene da una fonte
Acqua fredda o calda massimo 60 °C
solari, pannelli fotovoltaici ed impianti
eolici), usare un'alimentazione di acqua
calda per ridurre il consumo di elettricità.
di energia alternativa (ad es., pannelli
CONSIDERAZIONI AMBIENTALI
Il simbolo sul prodotto o sulla confezione
indica che il prodotto non deve essere
considerato come un normale rifiuto
domestico, ma deve essere portato nel
punto di raccolta appropriato per il
riciclaggio di apparecchiature elettriche ed
elettroniche. Provvedendo a smaltire questo
prodotto in modo appropriato, si
contribuisce a evitare potenziali
conseguenze negative, che potrebbero
derivare da uno smaltimento inadeguato del
prodotto. Per informazioni più dettagliate
sul riciclaggio di questo prodotto,
contattare l’ufficio comunale, il servizio
locale di smaltimento rifiuti o il negozio in
cui è stato acquistato il prodotto.
Dove portare gli apparecchi fuori
uso?
In qualsiasi negozio che vende
apparecchi nuovi oppure si
restituiscono ai centri di raccolta ufficiali
della SENS oppure ai riciclatori ufficiali
della SENS.
La lista dei centri di raccolta ufficiali
della SENS è visibile nel sito
www.sens.ch.
Riciclare i materiali con il simbolo
. Smaltire i materiali di imballaggio negli appositi
contenitori per il riciclaggio.
Page 66

66 electrolux
Page 67

electrolux 67
Page 68

www.electrolux.com/shop
117936381-C-132011
 Loading...