


FM2500DDA
User manual Down draught
extractor

2
1
Dear Customer
Thank you for choosing one of our highquality products.
With this appliance you will experience the perfect combination of functional
design and cutting edge technology.
Convince yourself that our appliances are engineered to deliver the best per
formance and control indeed we are setting the highest standards of excel
lence.
In addition to this you find environmental and energy saving aspects as an inte
gral part of our products.
To ensure optimal and regular performance of your appliance please read this
instruction manual carefully. It will enable you to navigate all processes perfect
ly and most efficiently.
To refer to this manual any time you need to, we recommend you to keep it in a
safe place. And please pass it to any future owner of the appliance.
We wish you much joy with your new appliance.
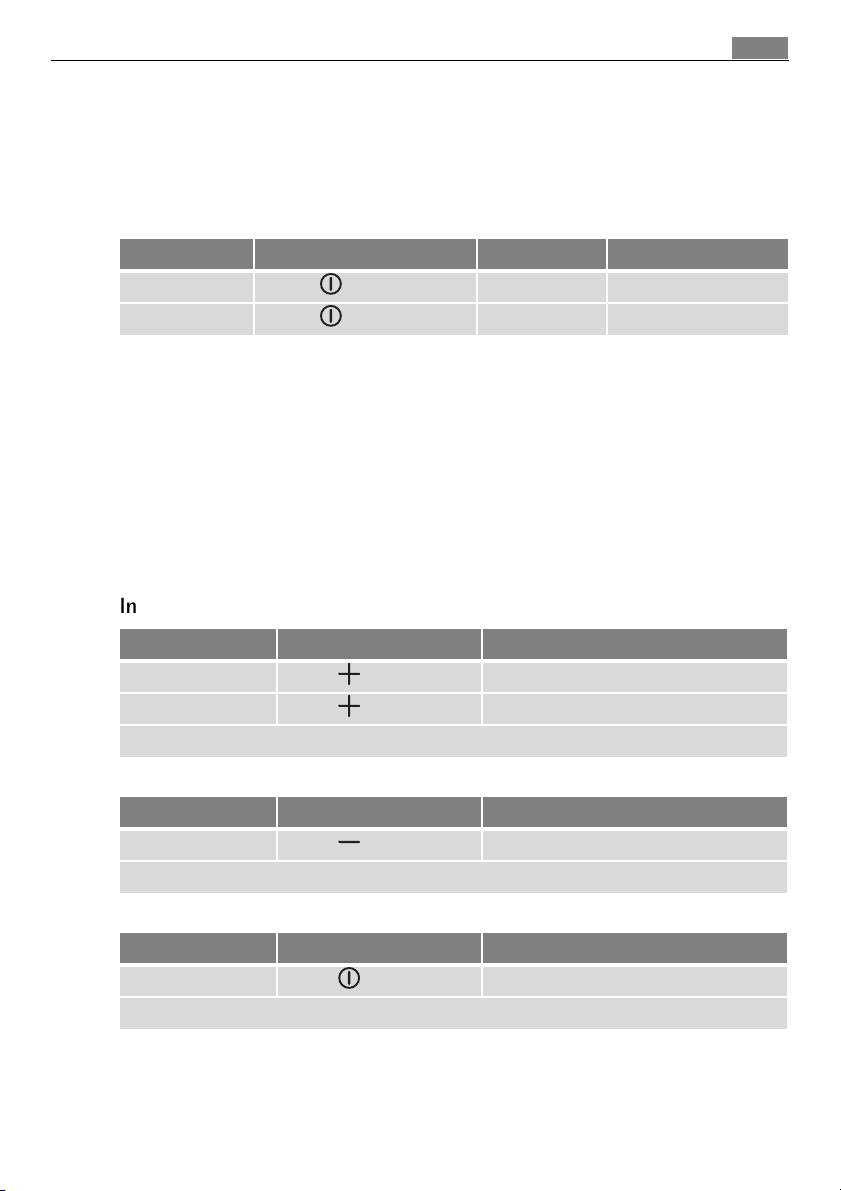
The following symbols are used in this user manual:
Important information concerning your personal safety and information on
3 General information and tips
how to avoid damaging the appliance.
2 Environmental information
Contents
Operating Instructions 4
Safety instructions 4
Description of the Appliance 6
Cooking surface layout 6
Control panel layout 7
Touch Control sensor fields 8
Displays 8
Operating the appliance 9
Switching the appliance on and off 9
Setting position of down draught extractor 9
Setting fan level 10
Switching intensive fan on and off 10
Using the timer 11
Safety cutout 11
Cleaning and Care 12
Filter 13
What to do if … 14
3Contents
Disposal 15
Installation Instructions 16
Assembly 19
Installing more than one Frontline hob 23
Rating Plate 27
Guarantee/Customer Service 28
Service and Spare Parts 31

Operating Instructions4
Operating Instructions
1 Safety instructions
3
Please comply with these instructions. If you do not, any damage resulting is not
covered by the warranty.
5 This appliance conforms with the following EU Directives:
– 73/23/EEC dated 19.02.1973 Low Voltage Directive
– 89/336/EEC dated 03.05.1989 EMC Directive inclusive of Amending Directive
92/31/EEC
– 93/68/EEC dated 22.07.1993 CE Marking Directive
Correct use
• The appliance must not be used as a work surface or as a storage surface.
• Additions or modifications to the appliance are not permitted.
Children’s safety
• Small children must be kept away from the appliance.
• Only let bigger children work on the appliance under supervision.
General safety
• The appliance may only be installed and connected by trained, registered
service engineers.
• Builtin appliances may only be used after they have built in to suitable built
in units and work surfaces that meet standards.
• In the event of faults with the appliance or damage to the glass ceramic
(cracks, scratches or splits), the appliance must be switched off and discon
nected from the electrical supply, to prevent the possibility of an electric
shock.
• Repairs to the appliance must only be carried out by trained registered service
engineers.
Safety during use
• Remove stickers and film from the glass ceramic.
• When the appliance is switched on, do not flambé directly next it.
• In the event of fire, switch off appliance.
• Smother fire using a cover, never use water to put out.
• Switch off the appliance after each use.

5Safety instructions
Safety when cleaning
• For cleaning, the appliance must be switched off.
• For safety reasons, the cleaning of the appliance with steam jet or highpres
sure cleaning equipment is not permitted.
How to avoid damage to the appliance
• The glass ceramic can be damaged by objects falling onto it.
Description of the Appliance6
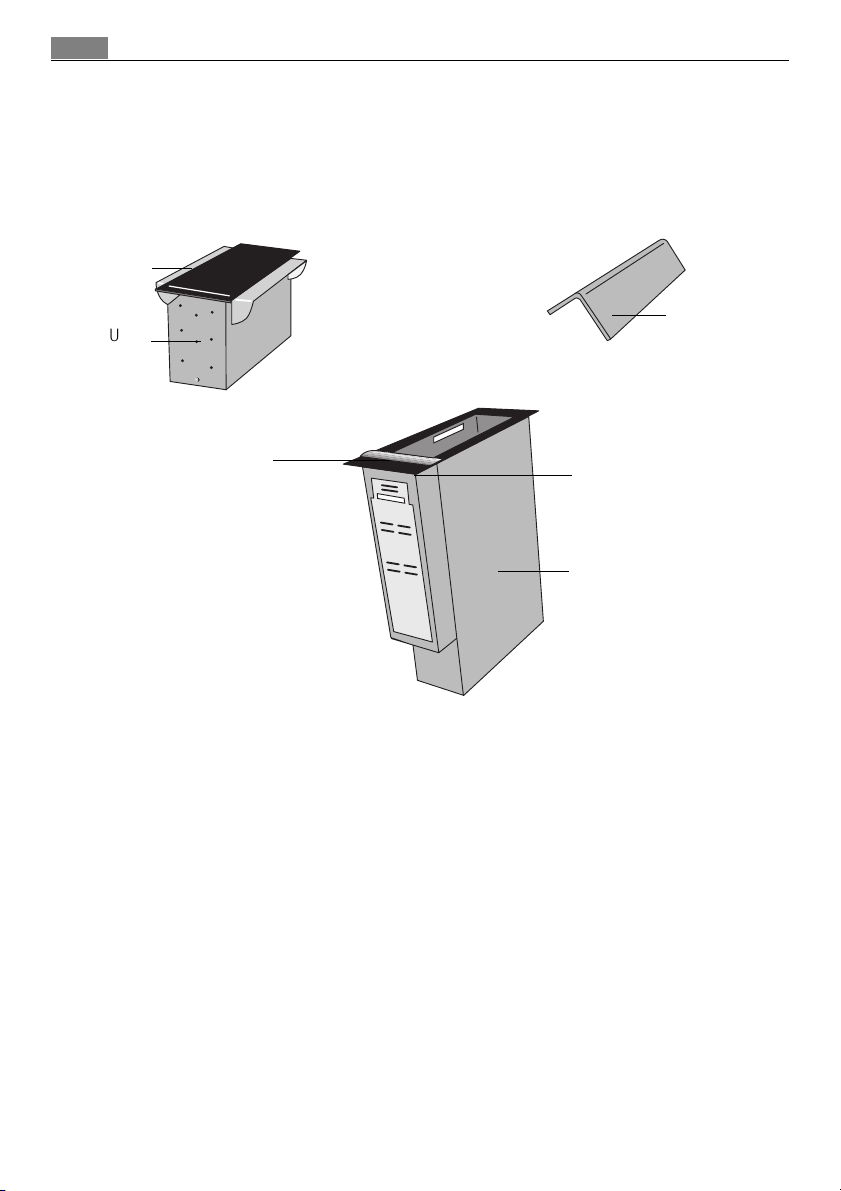
Description of the Appliance
Cooking surface layout
Fin
Upper
casing
Filter
Frontline strip
Control panel
Shaft of down draught
extractor
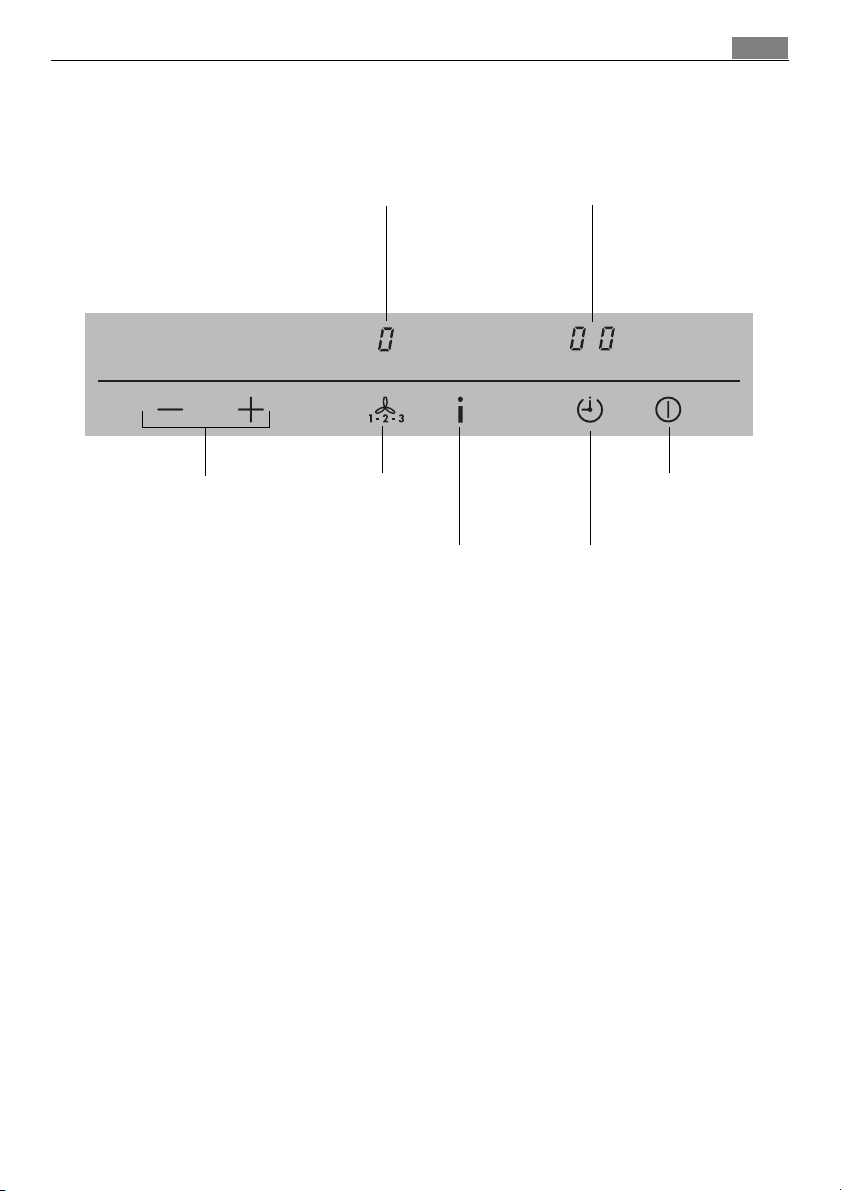
Control panel layout
7Description of the Appliance
Position selection
Fan level
display
Fan level selection
Intensive fan
Timer indicator
On/Off
Timer
Description of the Appliance8
Touch Control sensor fields
The appliance is operated using Touch Control sensor fields. Functions are con
trolled by touching sensor fields and confirmed by displays and acoustic signals.
Touch the sensor fields from above, without covering other sensor fields.
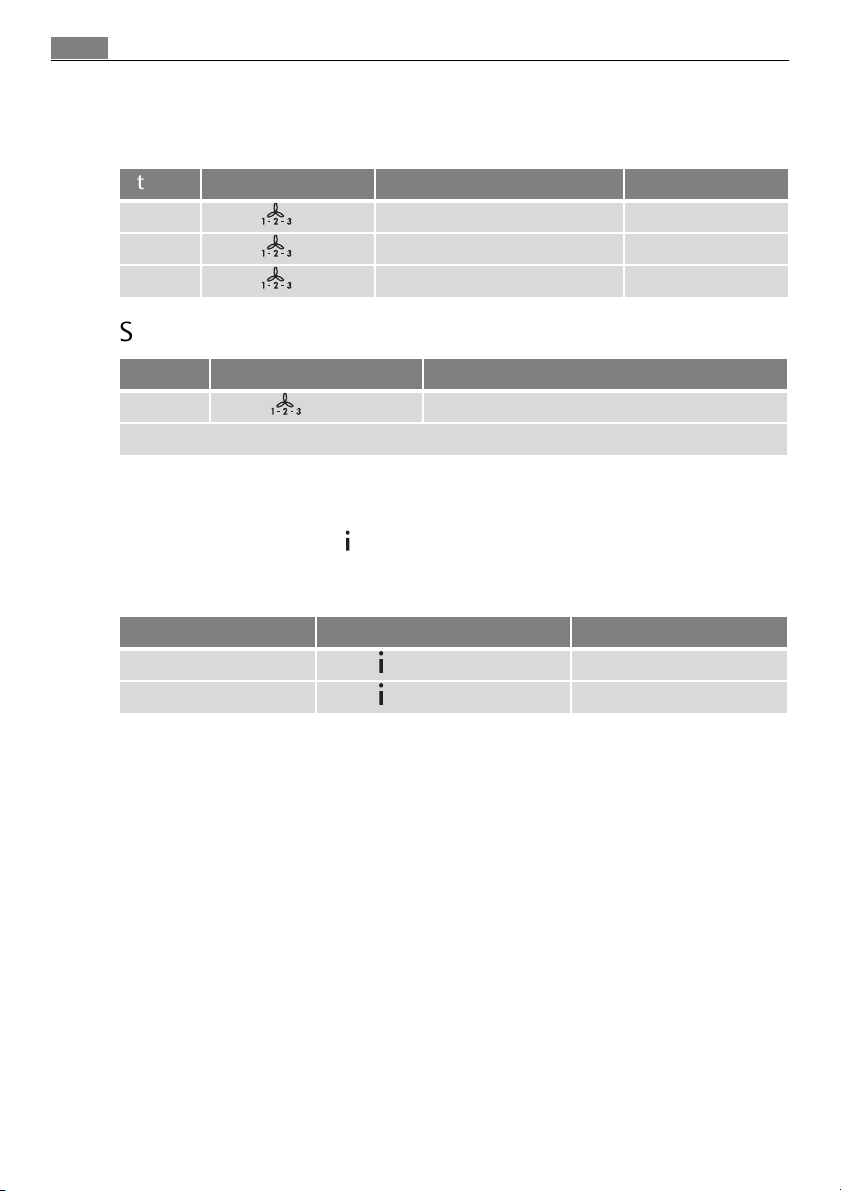
Sensor field Function
On / Off To switch the appliance on and off
Increase settings To increase position
Reduce settings To reduce position
Fan To set fan level
Intensive fan To switch intensive fan on/off
Timer Timer selection
Displays
Display Description
¾ no power setting set
¿ Á Fan levels Fan level is set
e Clean filter Filter must be cleaned
Safety cutout Safety cutout has been activated
9Operating the appliance
Operating the appliance
Switching the appliance on and off
Control panel Display Pilot light
To switch on Touch for 2 seconds ¾ lights up
To switch off Touch for 1 second none goes out
3 After switching on, within approx. 10 seconds a function must be set, otherwise
the appliance automatically switches itself off.
3 Let the down draught extractor run for a few minutes before and after prepar
ing a meal.
3 While the down draught extractor is working, windows in the room should be
closed. A window in a neighbouring room can be open.
Setting position of down draught extractor
Increasing extractor position
Step Control panel Position of extractor
1. Touch once Middle
2. Touch Top
Fan level 1 is switched on.
Reducing extractor position
Step Control panel Position of extractor
1. Touch Middle/bottom
The appliance switches off in the lowest position.
Retaining extractor position
Step Control panel Position of extractor
1. Touch Current position is retained
The appliance switches off.
3 If the appliance becomes blocked when changing the position, it switches off
automatically.
Operating the appliance10
Setting fan level
Step Control panel Fan level display Fan power
1. Touch once ¿ 150 m³/h
2. Touch once À 220 m³/h
3. Touch once Á 345 m³/h
Switching off fan level
Step Control panel Display
1. Touch ¾
The fan level is switched off.
Switching intensive fan on and off
The intensive fan function makes extra power available for 5 minutes. After
that the appliance switches off automatically or switches back to the previously
set fan level.
Control panel Fan power
To switch on Touch 480 m³/h
To switch off Touch previously set fan power

Using the timer
After the time set has elapsed, the suction switches off. The down draught ex
tractor remains in the top position.
Setting the time
Step Control panel Display
1. Touch once 60 seconds
2. Touch for longer ... 05...10...15... 20 (5 minute incre
The time is set.
The time counts down.
Switching timer function off
Step Control panel Display
1. Touch The remaining time counts up to 00.
The timer function is switched off.
11Operating the appliance
ments for easier setting)
Safety cutout
• If one or more sensor fields are covered for longer than approx. 10 seconds,
e.g. by a pan cloth lying on them, the appliance switches off automatically.
• If the appliance is not switched off after 6 hours or the fan level is not altered,
the appliance automatically switches itself off.
• Before the appliance is used again,
must be touched.

Cleaning and Care12
Cleaning and Care
1
Important: A blocked grease filter can ignite. Keep appliance clean.
1 Important: Sharp objects and abrasive cleaning materials will damage the ap
pliance. Clean with a damp cloth and washing up liquid.
1 Important: Residues from cleaning agents will damage the appliance. Remove
residues with a damp cloth and washing up liquid.
1 Important: Risk of fire! Cleaning must be performed according to the instruc
tions in these operating instructions.
Glass ceramic, shaft of down draught extractor
1. Wipe the appliance with a damp cloth and a little washing up liquid.
2. Dry the appliance using a clean cloth.
3 Scratches or dark stains on the glass ceramic cannot be removed but do not af
fect the functioning of the appliance.
Upper housing
1. Switch on down draught extractor and move to the top position.
2. Remove upper housing.
3. Wipe the appliance with a damp cloth and a little washing up liquid.
4. Dry the appliance using a clean cloth.

13Cleaning and Care
Filter
3 After 30 hours of operation the filter must be cleaned, 0 appears.
1 Important: Fingers can get caught. Only remove filter or upper casing when ap
pliance is dismantled.
1. Switch on down draught extractor and move to the top position.
2. Switch off fan level.
3. Remove upper casing and place on something soft.
4. Press in and remove the springs of the filter.
5. Take filter out.
6. Clean filter with hot water and washing up liquid or clean in the dishwasher.
3 If cleaned in the dishwasher, the filter can become discoloured, but this does not
affect the functioning of the filter.
7. Install filter, springs and upper casing in reverse order.
3 The filter must be completely dry before being installed.
8. Reset filter sensor by pressing and at the same time for 3 seconds.
9. 0 goes out.
3 If the filter is cleaned before the 30 hours of operation have elapsed, it can be
reset in the same way.
3 If the electricity supply is interrupted, the filter sensor automatically resets itself.
Removable Frontline strip
The aluminium Frontline strip fastens on by means of magnets. It is easy to re
move by hand and can be cleaned with detergent. Please do not use any scour
ing agents or sponges that scratch. Do not clean the strip in the dishwasher.

What to do if …14
What to do if …
Problem Possible cause Remedy
The appliance cannot be
switched on or is not operat
ing
Fuses keep blowing Too many electrical applianc
The fan is switched off, but the
down draught extractor is
raised
e is displayed Filter sensor has responded. Clean filter and reset filter
Down draught extractor has
switched off automatically
and cannot be switched on
again
More than 10 seconds have
passed since the appliance was
switched on
Several sensor fields were
touched at the same time
The sensor fields are partly
covered by a damp cloth or
with liquid
Electronics fault Disconnect appliance from the
es are connected
There was a power cut during
operation
Vertical adjustment of the
down draught extractor has
become jammed
Switch appliance on again
Only touch one sensor field
Remove the cloth or the liquid.
Switch appliance on again
electrical supply for a few
minutes. (Take the fuse out of
the house’s wiring system.)
If the appliance still does not
operate after switching on
again, call the Customer Care
Department
Switch off electrical applianc
es
Switch on down draught ex
tractor and touch
sensor (see section “Cleaning
and Care”)
Disconnect appliance from the
electrical supply for a few
minutes. (Take the fuse out of
the house’s wiring system.)
If the appliance still does not
operate after switching on
again, call the Customer Care
Department
If you are unable to remedy the problem by following the above sugges
tions, please contact your dealer or the Customer Care Department.
1 Warning! Repairs to the appliance are only to be carried out by qualified service
engineers. Considerable danger to the user may result from improper repairs.
3 If the appliance has been wrongly operated, the visit from the customer service
technician or dealer may not take place free of charge, even during the warranty
period.

Disposal
15Disposal
2
Packaging material
The packaging materials are environmentally friendly and can be recycled. The
plastic components are identified by markings, e.g. >PE<, >PS<, etc. Please dis
pose of the packaging materials in the appropriate container at the community
waste disposal facilities.
2 Old appliance
The symbol W on the product or on its packaging indicates that this product
may not be treated as household waste. Instead it shall be handed over to the
applicable collection point for the recycling of electrical and electronic equip
ment. By ensuring this product is disposed of correctly, you will help prevent po
tential negative consequences for the environment and human health, which
could otherwise be caused by inappropriate waste handling of this product. For
more detailed information about recycling of this product, please contact your
local city office, your household waste disposal service or the shop where you
purchased the product.

Installation Instructions16
Installation Instructions
Safety instructions
The laws, ordinances, directives and standards in force in the country of use are
to be followed (safety regulations, proper recycling in accordance with the regu
lations, etc.)
Installation may only be carried out by a qualified electrician.
The minimum distances to other appliances and units are to be observed.
Antishock protection must be provided by the installation, for example drawers
may only be installed with a protective floor directly underneath the appliance.
The cut surfaces of the worktop are to be protected against moisture using a
suitable sealant.
The sealant seals the appliance to the work top with no gap.
1 Important: If the down draught extractor is operated at the same time as a gas
appliance, there must be sufficient draught in the room.
1 Important: If the down draught extractor is operated at the same time as a fire
place, the pressure in the room must be below 4 Pa (4 x 10
5
bar).
1 Important: If the mains cable is defective, it must only be replaced by a qualified
electrician or our Customer Care Department in order to prevent hazards.
1 WARNING!
Risk of injury from electrical current.
• The electrical mains terminal is live.
• Make electrical mains terminal free of voltage.
• Observe connection schematic.
• Observe electrical safety rules.
• Ensure antishock protection through correct installation by a qualified elec
trician.
• The appliance must be connected to the electrical supply by a qualified elec
trician.
1 IMPORTANT!
Risk of injury from electrical current.
Loose and inappropriate plug and socket connections can make the terminal
overheat.
• Have the clamping joints correctly installed by a qualified electrician.
• Use strain relief clamp on cable.
A device must be provided in the electrical installation which allows the appli
ance to be disconnected from the mains at all poles with a contact opening
width of at least 3 mm.

17Installation Instructions
Suitable isolation devices include line protecting cutouts, fuses (screw type fus
es are to be removed from the holder), earth leakage trips and contactors.
Connect down draught extractor to an airtight vent hose or vent pipe with a
120 mm diameter and at least 1 m long.
1 Important: Do not connect down draught extractor to the voltage supply until
an adequate air outlet has been provided.
Do not connect vent hose or vent pipe to an air shaft, flue or similar which is al
ready in use.
If several Frontline appliances are installed, install down draught extractor be
tween the appliances.
Distance from flammable materials: at least 150 mm
1 Important: Official regulations must be followed when drawing off exhaust air.
1 Important: Do not conduct exhaust air to a chimney which is used by appliances
operated with gas or other combustible fuels.

Installation Instructions18
Installing next to a gas appliance
1 Important: The appliance must not be built in between two gas appliances.
1 Important: If a gas appliance is installed next to the down draught extractor, the
down draught extractor may only extract air on the opposite side. Therefore the
fin nearest the gas appliance must be removed and the supplied cover must be
fitted.
To remove the fin
1. Switch on down draught extractor and
move to the top position.
2. Switch off fan level.
3. Press in and remove the springs of the fil
ter.
4. Take filter out.
5. Remove upper casing and place on some
thing soft.
6. Remove the two screws which hold the fin.
7. Remove single screw that holds the lever
that closes the fin.
8. Remove the fin.
To fit cover
1. Lay cover on the glass ceramic.
2. Position cover on the upper housing.
3. Mark four holes on the upper casing. Use
cover as a template.
4. Remove cover and drill the four holes in
the upper casing.
5. Remove adhesive film.
6. Press cover in position on the upper casing.
7. Affix cover with the blind rivets supplied.
8. Install filter, springs and upper casing in re
verse order.

Assembly
19Assembly

Assembly20

21Assembly

Assembly22

Installing more than one Frontline hob
Additional parts: cross bar(s), heat resistant silicon, rubber block, shaving blade.
3 Only use special heatresistant silicon.
Cutout section
Distance from the wall: at least 50 mm
Depth:490 mm
Width: The widths of all appliances to be builtin are added together, minus 20
mm (see also “Overview of all appliance widths”)
Example:
23Installing more than one Frontline hob
Installing more than one appliance
1. Work out the size of the cutout section and saw it out.
2. Remove Frontline strip from the appliances by hand (magnetic fastening).
3. Lay the appliances one at a time on something soft (for example a blanket) with
the underside facing upwards.
4. Screw / clip fixing plates / retaining grips into the appropriate holes in the pro
tective boxes.

Installing more than one Frontline hob24
5. Place first appliance in the cutout. Lay connecting cross bar in the cutout and
push up halfway against the appliance.
6. Put silicon on the appliance corners that will touch one another. Put silicon on
the end of the cross bar.
7. Loosely screw in fixing plates / retaining grips from below on the worktop and
on the connecting cross bar.

25Installing more than one Frontline hob
8. Place Frontline strips on the appliances. Check that the Frontline strips are in line
with one another.
9. Tighten the fixing plate / retaining grip screws.
10. Inject a line of silicon into the gap between the appliances.
11. Dampen silicon line with a little soapy water.
12. Press rubber block hard against the glass ceramic and draw it slowly along the
gap.
13. Leave silicon until the next day to harden.
14. Carefully remove projecting silicon with a shaving blade.
15. Clean glass ceramic thoroughly.
16. Replace Frontline strips.

Installing more than one Frontline hob26
Overview of all appliance widths
180 mm
Worktopmounted cooker hood
360 mm
Glass ceramic cooking surface with 2 radiation cooking zones
Glass ceramic cooking surface with 2 induction cooking zones
Gas hob with 2 burners
Grill
Grill/Deep fat fryer
Wok
580 mm
Glass ceramic cooking surface with 4 radiation cooking zones
Gas hob with 4 burners
720 mm
Glass ceramic cooking surface with 4 radiation cooking zones
Glass ceramic cooking surface with 4 induction cooking zones
Gas hob with 4 burners

Rating Plate
AEG-ELECTROLUX
27
941 177 540
230 - 240 V0,31 kW
FDD 180
50 Hz
FM2500DD-A

Guarantee/Customer Service28
Guarantee/Customer Service
Great Britain
Standard guarantee conditions
We, AEG, undertake that if within 12 months of the date of the purchase this AEG appliance or any part there
of is proved to be defective by reason only of faulty workmanship or materials, we will, at our discretion repair
or replace the same FREE OF CHARGE for labour, materials or carriage on condition that:
• The appliance has been correctly installed and used only on the electricity or gas supply stated on the rating
plate.
• The appliance has been used for normal domestic purposes only, and in accordance with the manufacturer's
operating and maintenance instructions.
• The appliance has not been serviced, maintained, repaired, taken apart or tampered with by any person not
authorised by us.
• All service work under this guarantee must be undertaken by a Service Force Centre. Any appliance or de
fective part replaced shall become the Company's property.
• This guarantee is in addition to your statutory and other legal rights.
• Home visits are made between 8.30am and 5.30pm Monday to Friday. Visits may be available outside these
hours in which case a premium will be charged.
Exclusions
This guarantee does not cover:
• Damage or calls resulting from transportation, improper use or neglect, the replacement of any light bulbs
or removable parts of glass or plastic.
• Costs incurred for calls to put right an appliance which is improperly installed or calls to appliances outside
the United Kingdom.
• Appliances found to be in use within a commercial environment, plus those which are subject to rental
agreements.
• Products of AEG manufacture which are not marketed by AEG.
European Guarantee
This appliance is guaranteed by Electrolux in each of the countries listed at the back of this user manual, for
the period specified in the appliance guarantee or otherwise by law. If you move from one of these coun
tries to another of the countries listed below the appliance guarantee will move with you subject to the fol
lowing qualifications:
•
The appliance guarantee starts from the date you first purchased the appliance which will be evidenced
by production of a valid purchase document issued by the seller of the appliance.
•
The appliance guarantee is for the same period and to the same extent for labour and parts as exists in
your new country of residence for this particular model or range of appliances.
•
The appliance guarantee is personal to the original purchaser of the appliance and cannot be transferred
to another user.
•
The appliance is installed and used in accordance with instructions issued by Electrolux and is only used
within the home, i.e. is not used for commercial purposes.
•
The appliance is installed in accordance with all relevant regulations in force within your new country of
residence.
The provisions of this European Guarantee do not affect any of the rights granted to you by law.

www.electrolux.com
p t b
Albania +35 5 4 261 450 Rr. Pjeter Bogdani Nr. 7 Tirane
Belgique/België/
Belgien
Èeská republika +420 2 61 12 61 12 Budìjovická 3, Praha 4, 140 21
Danmark +45 70 11 74 00 Sjællandsgade 2, 7000 Fredericia
Deutschland +49 180 32 26 622 Muggenhofer Str. 135, 90429 Nürnberg
Eesti +37 2 66 50 030 Mustamäe tee 24, 10621 Tallinn
España +34 902 11 63 88
France www.electrolux.fr
Great Britain +44 8705 929 929
Hellas +30 23 10 56 19 70 4 Limnou Str., 54627 Thessaloniki
Hrvatska +385 1 63 23 338 Slavonska avenija 3, 10000 Zagreb
Ireland +353 1 40 90 753 Long Mile Road Dublin 12
Italia +39 (0) 434 558500 C.so Lino Zanussi, 26 33080 Porcia (PN)
Latvija +37 17 84 59 34 Kr. Barona iela 130/2, LV1012, Riga
Lietuva +370 5 2780609 Verkių 29, LT09108 Vilnius
Luxembourg +35 2 42 43 13 01 Rue de Bitbourg, 7, L1273 Hamm
Magyarország +36 1 252 1773
Nederland +31 17 24 68 300
Norge +47 81 5 30 222 Risløkkvn. 2 , 0508 Oslo
Österreich +43 18 66 400 Herziggasse 9, 1230 Wien
Polska +48 22 43 47 300 ul. Kolejowa 5/7, Warsaw
Portugal +35 12 14 40 39 39
Romania +40 21 451 20 30 Str. Garii Progresului 2, S4, 040671 RO
Schweiz/Suisse/
Svizzera
Slovenija +38 61 24 25 731
Slovensko +421 2 43 33 43 22
Suomi www.electrolux.fi
+32 2 363 04 44 Bergensesteenweg 719, 1502 Lembeek
Carretera M300, Km. 29,900
Alcalá de Henares Madrid
Addington Way, Luton, Bedfordshire
LU4 9QQ
H1142 Budapest XIV,
Erzsébet királyné útja 87
Vennootsweg 1, 2404 CG
Alphen aan den Rijn
Quinta da Fonte Edificio Gonçalves Zarco Q 35
2774 518 Paço de Arcos
+41 62 88 99 111 Industriestrasse 10, CH5506 Mägenwil
Electrolux Ljubljana d.o.o.
Gerbiceva 98, 1000 Ljubljana
Electrolux Slovakia s.r.o., Electrolux Domáce spot
rebièe SK, Seberíniho 1, 821 03 Bratislava
29Guarantee/Customer Service

Guarantee/Customer Service30
p t b
Sverige +46 (0)771 76 76 76
Türkiye +90 21 22 93 10 25
Россия +7 095 937 7837
Electrolux Service, S:t Göransgatan 143,
S105 45 Stockholm
Tarlabaþý caddesi no : 35 Taksim
Istanbul
129090 Москва, Олимпийский
проспект, 16, БЦ „Олимпик“

Service and Spare Parts
If the event of your appliance requiring service, or if you wish to purchase spare
parts, please contact Service Force by telephoning:
0870 5 929 929
Your telephone call will be automatically routed to the Service Force Centre cov
ering your post code area.
For the address of your local Service Force Centre and further information about
Service Force, please visit the website at
www. serviceforce.co.uk
Before calling out an engineer, please ensure you have read the details under the
heading „What to do if...“
When you contact the Service Force Centre you will need to give the following
details:
1. Your name, address and post code.
2. Your telephone number.
3. Clear and concise details of the fault.
4. The model and serial number of the appliance (found on the rating plate)
5. The purchase date.
Please note that a valid purchase receipt or
guarantee documentation is required for in
guarantee service calls.
Customer Care
For general enquiries concerning your AEG
Electrolux appliance, or for further informa
tion on AEGElectrolux products please
contact our Customer Care Department by
letter or telephone at the address below or
visit our website at www.aeg.co.uk.
Customer Care Department
Major Appliances
AEGElectrolux
Domestic Appliances
Addington Way
Luton
Bedfordshire, LU4 9QQ
Tel: 08705 350350 (*)
31Service and Spare Parts
For Customer Service in the Republic of
Ireland please contact us at the address be
low:
AEG/ Electrolux Group (Ire) Ltd
Long Mile Road/ Dublin 12
Republic of Ireland
Tel: +353 (0) 1 4090754
Email: service.eid@electrolux.ie
(*) Calls may be recorded for training purposes

www.electrolux.com
www.aeg-electrolux.co.uk
374 469 713-B-180107-02 Subject to change without no
tice
 Loading...