

Page 1

EHF6343FOK
................................................ .............................................
EN HOB USER MANUAL 2
KO 호브 사용자 설명서 14
Page 2
www.electrolux.com
2
CONTENTS
1. SAFETY INFORMATION . . . . . . . . . . . . . . . . . . . . . . . . . . . . . . . . . . . . . . . . . . . . . . . . . . . 3
2. PRODUCT DESCRIPTION . . . . . . . . . . . . . . . . . . . . . . . . . . . . . . . . . . . . . . . . . . . . . . . . . 5
3. DAILY USE . . . . . . . . . . . . . . . . . . . . . . . . . . . . . . . . . . . . . . . . . . . . . . . . . . . . . . . . . . . . . 6
4. HELPFUL HINTS AND TIPS . . . . . . . . . . . . . . . . . . . . . . . . . . . . . . . . . . . . . . . . . . . . . . . . 8
5. CARE AND CLEANING . . . . . . . . . . . . . . . . . . . . . . . . . . . . . . . . . . . . . . . . . . . . . . . . . . . . 9
6. TROUBLESHOOTING . . . . . . . . . . . . . . . . . . . . . . . . . . . . . . . . . . . . . . . . . . . . . . . . . . . . 10
7. INSTALLATION . . . . . . . . . . . . . . . . . . . . . . . . . . . . . . . . . . . . . . . . . . . . . . . . . . . . . . . . . 11
8.
TECHNICAL INFORMATION . . . . . . . . . . . . . . . . . . . . . . . . . . . . . . . . . . . . . . . . . . . . . . . 13
9. ENVIRONMENT CONCERNS . . . . . . . . . . . . . . . . . . . . . . . . . . . . . . . . . . . . . . . . . . . . . . 13
WE’RE THINKING OF YOU
Thank you for purchasing an Electrolux appliance. You’ve chosen a product that brings with it
decades of professional experience and innovation. Ingenious and stylish, it has been designed
with you in mind. So whenever you use it, you can be safe in the knowledge that you’ll get great
results every time.
Welcome to Electrolux.
Visit our website for:
Get usage advice, brochures, trouble shooter, service information:
www.electrolux.com
Register your product for better service:
www.electrolux.com/productregistration
Buy Accessories, Consumables and Original spare parts for your appliance:
www.electrolux.com/shop
CUSTOMER CARE AND SERVICE
We recommend the use of original spare parts.
When contacting Service, ensure that you have the following data available.
The information can be found on the rating plate. Model, PNC, Serial Number.
Warning / Caution-Safety information
General information and tips
Environmental information
Subject to change without notice.
Page 3
ENGLISH 3
1.
SAFETY INFORMATION
Before the installation and use of the appliance, carefully read the supplied instructions. The manufacturer is not responsible if an incorrect installation and
use causes injuries and damages. Always
keep the instructions with the appliance
for future reference.
1.1 Children and vulnerable
people safety
WARNING!
Risk of suffocation, injury or permanent disability.
• This appliance can be used by children
aged from 8 years and above and persons with reduced physical, sensory or
mental capabilities or lack of experience
and knowledge if they have been given
supervision or instruction for the operation of the appliance by a person who is
responsible for their safety.
• Do not let children play with the appliance.
• Keep all packaging away from children.
• Keep children and pets away from the
appliance when it operates or when it
cools down. Accessible parts are hot.
• If the appliance has a child safety device, we recommend that you activate
it.
• Cleaning and user maintenance shall
not be made by children without supervision.
1.2 Installation
WARNING!
Only a qualified person must install this appliance.
• Remove all the packaging.
• Do not install or use a damaged appliance.
• Obey the installation instruction supplied with the appliance.
• Keep the minimum distance from the
other appliances and units.
• Always be careful when you move the
appliance because it is heavy. Always
wear safety gloves.
• Seal the cut surfaces with a sealant to
prevent moisture to cause swelling.
• Protect the bottom of the appliance
from steam and moisture.
• Do not install the appliance adjacent to
a door or under a window. This prevents hot cookware to fall from the appliance when the door or the window is
opened.
• If the appliance is installed above drawers make sure that the space, between
the bottom of the appliance and the upper drawer, is sufficient for air circulation.
• The bottom of the appliance can get
hot. We recommend to install a noncombustile separation panel under the
appliance to prevent access to the bottom.
Electrical connection
WARNING!
Risk of fire and electrical shock.
• All electrical connections must be made
by a qualified electrician.
• Before every wiring make sure the main
terminal of the appliance is not live.
• Make sure the appliance is installed
correctly. Loose and incorrect plug and
socket can make the terminal become
too hot.
• Make sure that a shock protection is installed.
• Do not let the electricity bonds touch
the appliance or hot cookware, when
you connect the appliance to the near
sockets.
• Do not let the electricity bonds tangle.
• Use a strain relief clamp on cable.
• Use the correct mains cable.
• Make sure not to cause damage to the
mains plug and to the mains cable.
Contact the Service or an electrician to
change a damaged mains cable.
• The electrical installation must have an
isolation device which lets you disconnect the appliance from the mains at all
poles. The isolation device must have a
Page 4
www.electrolux.com
4
• Use only correct isolation devices: line
1.3 Use
• Use this appliance in a household envi-
• Do not change the specification of this
• Do not use an external timer or a sepa-
• Do not let the appliance stay unatten-
• Do not operate the appliance with wet
• Do not put cutlery or saucepan lids on
• Set the cooking zone to “off” after use.
• Do not use the appliance as a work
• If the surface of the appliance is
contact opening width of minimum 3
mm.
protecting cut-outs, fuses (screw type
fuses removed from the holder), earth
leakage trips and contractors.
WARNING!
Risk of injury, burns or electric
shock.
ronment.
appliance.
rate remote-control system to operate
the appliance.
ded during operation.
hands or when it has contact with water.
the cooking zones. They become hot.
surface or as a storage surface.
cracked, disconnect immediately the
appliance from the power supply. This
to prevent an electrical shock.
WARNING!
Risk of fire or explosion.
• Do not try to extinguish a fire with water. Disconnect the appliance and cover
the flame with a lid or a fire blanket.
WARNING!
Risk of damage to the appliance.
• Do not keep hot cookware on the control panel.
• Do not let cookware to boil dry.
• Be careful not to let objects or cookware fall on the appliance. The surface
can be damaged.
• Do not activate the cooking zones with
empty cookware or without cookware.
• Do not put aluminium foil on the appliance.
• Cookware made of cast iron, aluminium
or with a damaged bottom can cause
scratches on the glass ceramic. Always
lift these objects up when you have to
move them on the cooking surface.
1.4 Care and Cleaning
WARNING!
Risk of damage to the appliance.
• Clean regularly the appliance to prevent
the deterioration of the surface material.
• Do not use water spray and steam to
clean the appliance.
• Clean the appliance with a moist soft
cloth. Only use neutral detergents. Do
not use abrasive products, abrasive
cleaning pads, solvents or metal objects.
• Fats and oil when heated can release
flammable vapours. Keep flames or
heated objects away from fats and oils
when you cook with them.
• The vapours that very hot oil releases
can cause spontaneous combustion.
• Used oil, that can contain food remnants, can cause fire at a lower temperature than oil used for the first time.
• Do not put flammable products or items
that are wet with flammable products
in, near or on the appliance.
1.5 Disposal
WARNING!
Risk of injury or suffocation.
• Disconnect the appliance from the
mains supply.
• Cut off the mains cable and discard it.
Page 5

2. PRODUCT DESCRIPTION
2.1 General overview
1 2
ENGLISH 5
145 mm
120/175/210 mm
5
120/180 mm
145 mm
4
Cooking zone
1
Cooking zone
2
Cooking zone
3
Control panel
4
3
Cooking zone
5
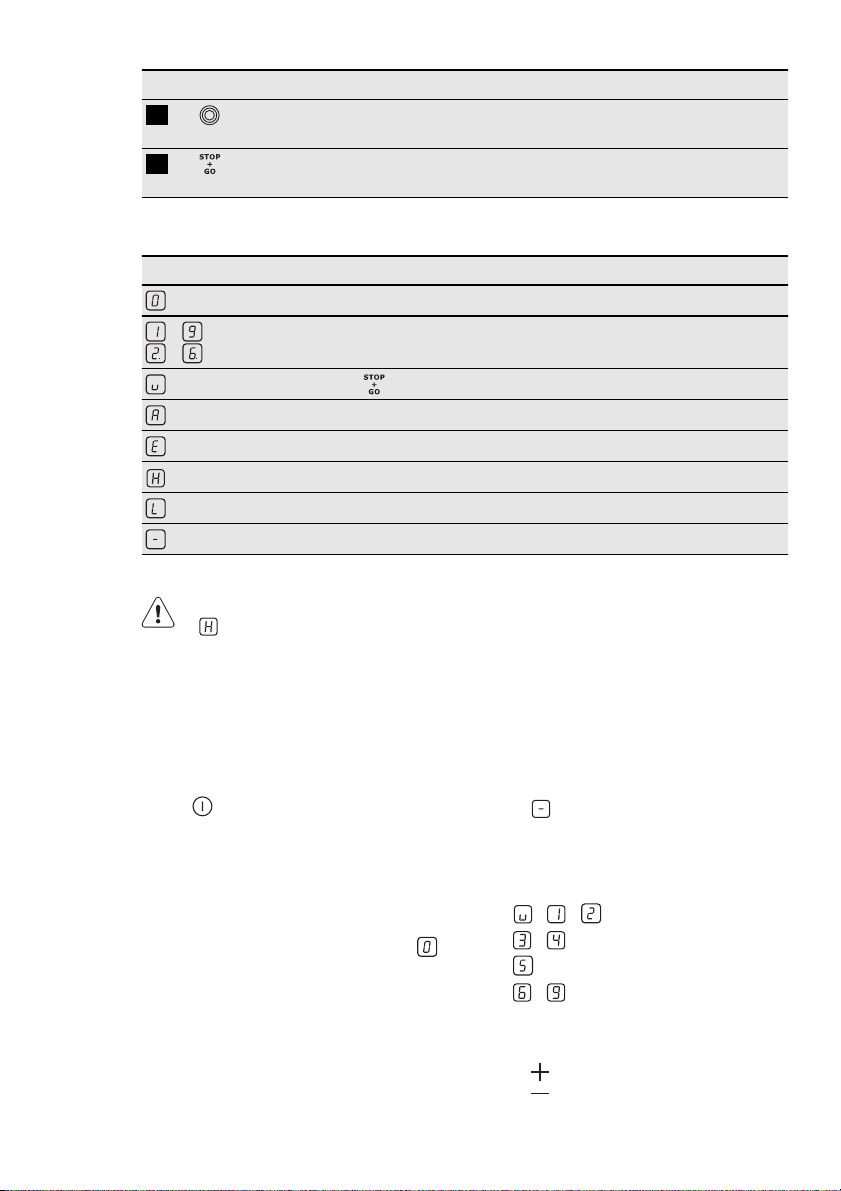
2.2 Control panel layout
1 2 3 4 5 6 7
891011
Use the sensor fields to operate the appliance. The displays, indicators and
sounds tell which functions operate.
sensor field function
1
2
A heat setting display To show the heat setting.
3
Timer indicators of cooking
4
zones
The timer display To show the time in minutes.
5
6
7
8
9
/
/
To activate and deactivate the appliance.
To lock/unlock the control panel.
To show for which zone you set the time.
To increase or decrease the heat setting.
To activate and deactivate the outer ring.
To increase or decrease the time.
To select a cooking zone.
Page 6
www.electrolux.com
6
sensor field function
10
11
2.3 Heat setting displays
2.4 Residual heat indicator
To activate and deactivate the outer
rings.
To activate and deactivate the STOP+GO
function.
Display Description
The cooking zone is deactivated.
-
The cooking zone operates.
-
The function operates.
The Automatic Heat Up function operates.
There is a malfunction.
A cooking zone stays hot (residual heat).
Lock / the Child Safety Device operates.
The Automatic Switch Off operates.
WARNING!
The risk of burns from residual
heat!
3. DAILY USE
3.1 Activation and deactivation
Touch for 1 second to activate or deactivate the appliance.
3.2 Automatic Switch Off
The function deactivates the
appliance automatically if:
•
All cooking zones are deactivated (
).
• You do not set the heat setting after
you activate the appliance.
• You spill something or put something
on the control panel for more than 10
seconds, (a pan, a cloth, etc.). An
acoustic signal sound some time and
the appliance deactivates. Remove the
object or clean the control panel.
• You do not deactivate a cooking zone
or change the heat setting. After some
comes on and the appliance
time
deactivates. See below.
• The relation between heat setting and
times of the Automatic Switch Off function:
•
, - — 6 hours
•
- — 5 hours
•
— 4 hours
•
- — 1.5 hours
3.3 The heat setting
Touch to increase the heat setting.
Touch
The display shows the heat setting. Touch
to decrease the heat setting.
Page 7
and at the same time to deactivate
00
the cooking zone.
3.4 Activation and deactivation
of the outer rings
You can adjust the surface you cook to
the dimension of the cookware.
To activate the outer ring touch the sen-
sor field
For more outer rings touch the same sensor field again. The subsequent indicator
comes on.
Do the procedure again to deactivate the
outer ring. The indicator goes out.
/ . The indicator comes on.
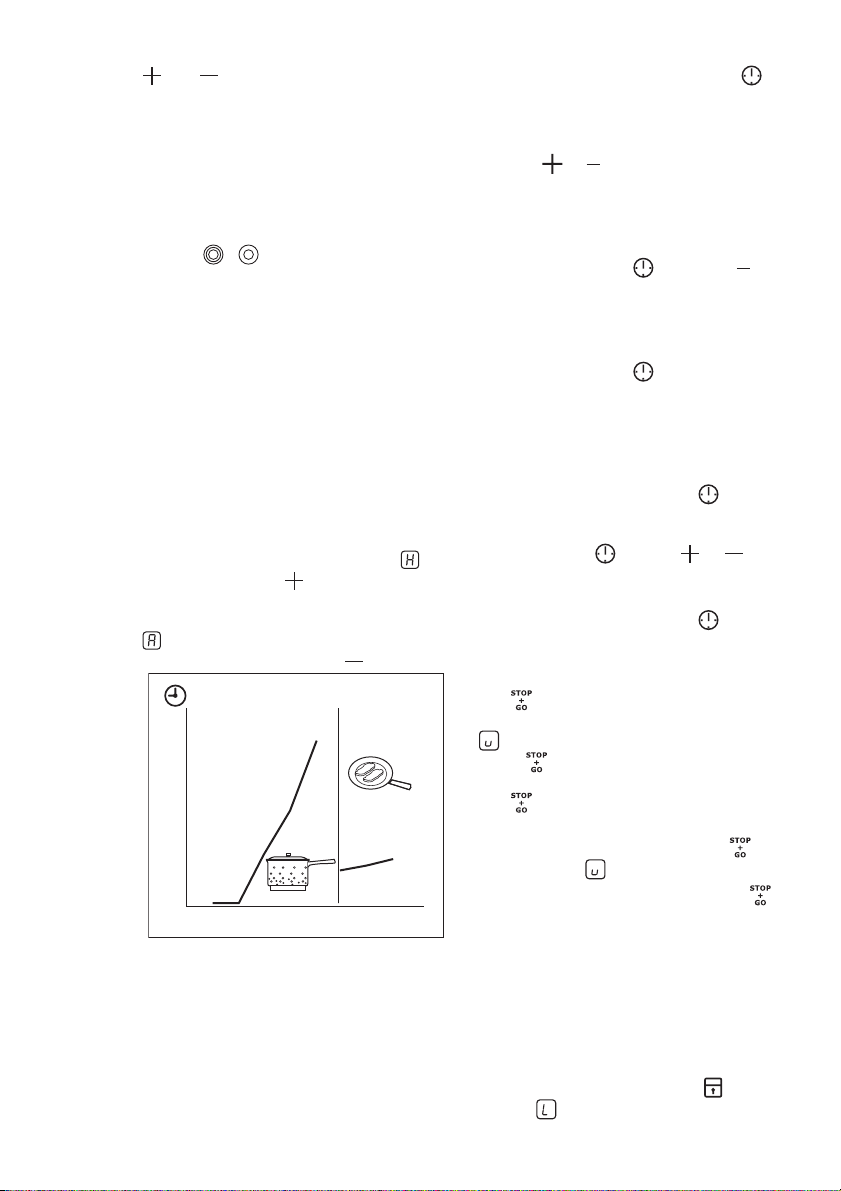
3.5 Automatic Heat Up
You can get a necessary heat setting in a
shorter time if you activate the Automatic
Heat Up function. This function sets the
highest heat setting for some time (see
the diagram), and then decreases to the
necessary heat setting.
To start the Automatic Heat Up function
the cooking zone must be cold (no
the display). Touch
zone again and again until the necessary
heat setting comes on. After 3 seconds
comes on in the display.
To stop the function, touch
of the cooking
in
.
ENGLISH 7
•
To set the cooking zone:touch
again and again until the indicator of a
necessary cooking zone comes on.
To activate or change the Timer:
•
touch
time (
dicator of the cooking zone starts to
flash slow, the time counts down.
• To deactivate the Timer: set the
cooking zone with
deactivate the Timer. The remaining
time counts back to
of the cooking zone goes out.
• To see the remaining time: set the
cooking zone with
the cooking zone starts to flash quickly.
The display shows the remaining time.
When the time comes to an end, the
sound operates and
cooking zone deactivates.
•
To stop the sound: touch
You can use the Timer as a minute
minder while the cooking zones do not
operate. Touch
set the time. When the time comes to an
end, the sound operates and
•
To stop the sound: touch
or of the timer to set the
- 99 minutes). When the in-
00
and touch to
. The indicator
00
. The indicator of
flashes. The
00
. Touch or to
flashes
3.7 STOP+GO
11
10
9
8
7
6
5
4
3
2
1
0
123456789
3.6 Timer
Use the Count Down Timer to set how
long the cooking zone operates for only
this one time.
Set the Timer after the selection of
the cooking zone.
You can set the heat setting before or after you set the timer.
The function sets all cooking zones
that operate to the lowest heat setting (
).
When
the heat setting.
The
function.
•
•
operates, you cannot change
function does not stop the timer
To activate this function touch
The symbol
To deactivate this function touch
The heat setting that you set before
comes on.
comes on.
.
3.8 Lock
When the cooking zones operate, you
can lock the control panel. It prevents an
accidental change of the heat setting.
Set the heat setting first.
To activate this function touch
symbol
The Timer stays on.
comes on for 4 seconds.
. The
.
Page 8
www.electrolux.com
8
To deactivate this function touch . The
heat setting that you set before comes
on.
When you deactivate the appliance, you
also deactivate this function.
3.9 The Child Safety Device
This function prevents an accidental operation of the appliance.
To activate The Child Safety Device
•
Activate the appliance with
set the heat settings.
•
Touch
•
Deactivate the appliance with .
To deactivate The Child Safety Device
•
Activate the appliance with
set the heat settings. Touch
seconds. The symbol
for 4 seconds. The symbol
comes on.
. Do not
. Do not
for 4
comes on.
4. HELPFUL HINTS AND TIPS
•
Deactivate the appliance with
To override The Child Safety Device
for only one cooking time
•
Activate the appliance with
symbol
•
Touch
setting in 10 seconds. You can operate the appliance.
• When you deactivate the appliance with
again.
comes on.
for 4 seconds. Set the heat
, The Child Safety Device operates
.
. The
4.1 Cookware
Information about the cookware
• The bottom of the cookware must be
as thick and flat as possible.
• Cookware made of enamelled steel and
with aluminium or copper bottoms can
cause the colour change on the glassceramic surface.
4.2 Energy saving
How to save energy
Heat
setting
1-2 Hollandaise sauce, melt: butter,
1-2 Solidify: fluffy omelettes, baked
Use to: Time Hints
Keep warm the food you cooked as re-
1
chocolate, gelatine
eggs
• If it is possible, always put the lids on
the cookware.
• Put cookware on a cooking zone before you start it.
• Stop the cooking zones before the end
of the cooking time to use residual
heat.
• The bottom of pans and cooking zones
must have the same dimension.
4.3 The Examples of cooking
applications
The data in the table is for guidance only.
quired
5-25
min
10-40
min
Put a lid on a cookware
Mix from time to time
Cook with a lid on
Page 9
ENGLISH 9
Heat
Use to: Time Hints
setting
2-3 Simmer rice and milkbased
dishes, heating up ready-cooked
meals
25-50
min
Add the minimum twice as
much liquid as rice, mix milk
dishes part procedure
through
3-4 Steam vegetables, fish, meat 20-45
min
4-5 Steam potatoes 20-60
min
4-5 Cook larger quantities of food,
stews and soups
6-7 Gentle fry: escalope, veal cordon
bleu, cutlets, rissoles, sausages,
liver, roux, eggs, pancakes,
60-150
min
as
necessary
Add some tablespoons of liquid
Use max. ¼ l water for 750 g
of potatoes
Up to 3 l liquid plus ingredients
Turn halfway through
doughnuts
7-8 Heavy fry, hash browns, loin
steaks, steaks
5-15
min
Turn halfway through
9 Boil large quantities of water, cook pasta, sear meat (goulash, pot roast),
deep-fry chips
Information on acrylamides
Important! According to the newest
scientific knowledge, if you brown food
(specially the one which contains starch),
acrylamides can pose a health risk. Thus,
we recommend that you cook at the
lowest temperatures and do not brown
food too much.
5. CARE AND CLEANING
Clean the appliance after each use.
Always use cookware with clean bottom.
Scratches or dark stains on the
glass-ceramic cause no effect on
how the appliance operates.
To remove the dirt:
1.
– Remove immediately: melted
plastic, plastic foil, and food with
sugar. If not, the dirt can cause
damage to the appliance. Use a
special scraper for the glass . Put
the scraper on the glass surface at
an acute angle and move the blade
on the surface .
Remove after the appliance is
–
sufficiently cool: limescale rings ,
water rings, fat stains, shiny metallic discolorations. Use a special
cleaning agent for glass ceramic or
stainless steel.
2.
Clean the appliance with a moist cloth
and some detergent.
3.
At the end rub the appliance dry
with a clean cloth.
Page 10

www.electrolux.com
10
6. TROUBLESHOOTING
Problem Possible cause Remedy
You cannot activate the
appliance or operate it.
You touched 2 or more
The Stop+Go function
There is water or fat
An acoustic signal
sounds and the appliance deactivates.
An acoustic signal
sounds when the appliance is deactivated.
The appliance deactivates.
The residual heat indicator does not come on.
The Automatic Heat Up
function does not operate.
The highest heat setting
You decreased the heat
You cannot activate the
outer ring.
The sensor fields become hot.
comes on.
comes on.
Activate the appliance
sensor fields at the same
time.
operates.
stains on the control panel.
You put something on
one or more sensor
fields.
You put something on
the sensor field
The cooking zone is not
hot because it operated
only for a short time.
The cooking zone is hot. Let the cooking zone be-
is set.
setting from
Activate the inner ring first.
The cookware is too
large or you put it too
near to the controls.
The Automatic Switch Off
operates.
The Child Safety Device
or the Lock function operates.
.
.
again and set the heat
setting in less than 10
seconds.
Touch only one sensor
field.
Refer to the chapter “Daily
use”.
Clean the control panel.
Remove the object from
the sensor fields.
Remove the object from
the sensor field.
If the cooking zone operated sufficiently long to be
hot, speak to the service
centre.
come sufficiently cool.
The highest heat setting
has the same power as
the Automatic Heat Up
function.
Start from and only increase the heat setting.
Put large cookware on the
rear cooking zones if necessary.
Deactivate the appliance
and activate it again.
Refer to the chapter “Daily
use”.
Page 11

Problem Possible cause Remedy
and a number come
on.
If you tried the above solutions and cannot repair the problem, speak to your
dealer or the customer service. Give the
data from the rating plate, three digit letter
code for the glass ceramic (it is in the corner of the glass surface) and an error
message that comes on.
7. INSTALLATION
There is an error in the
appliance.
Make sure, you operated the appliance
correctly. If not the servicing by a customer service technician or dealer will not be
free of charge, also during the warranty
period. The instructions about the customer service and conditions of guarantee
are in the guarantee booklet.
ENGLISH 11
Disconnect the appliance
from the electrical supply
for some time. Disconnect
the fuse from the electrical
system of the house. Connect it again. If
comes
on again, speak to the
service centre.
WARNING!
Refer to "Safety information"
chapter.
Before the installation
Before the installation of the appliance, record the information below from the rating
plate. The rating plate is on the bottom of
the appliance casing.
• Model ...........................
• PNC .............................
• Serial number ....................
7.1 Built-in appliances
• Only use the built-in appliances after
you assemble the appliance into correct
built-in units and work surfaces that
align to the standards.
7.2 Connection cable
• The appliance is supplied with the connection cable.
• Replace the damaged mains cable with
a special cable (type H05BB-F Tmax
90°C; or higher). Speak to your local
Service Centre.
Page 12

www.electrolux.com
12
7.3 Assembly
min.
50mm
min.
500mm
min.
50mm
R 5mm
600mm
=
490
+1
=
min.
20 mm
mm
560
+1
mm
min.
25 mm
min.
28 mm
If you use a protection box (an ad-
1)
ditional accessory
), the protective floor directly below the appliance is not necessary.
You can not use the protection
box if you install the appliance
above an oven.
1)
The protection box accessory may not be available in some countries. Please contact your
local supplier.
Page 13

8. TECHNICAL INFORMATION
Modell EHF6343FOK Prod.Nr. 949 596 004 00
Typ 58 HAD 53 AO 220-240 V 50-60 Hz
Made in Germany
Ser.Nr. .......... 6.4 kW
ELECTROLUX
Cooking zones power
Cooking zone Nominal Power (Max heat setting)
Right rear —120/180 mm 700/1700 W
Right front — 145 mm 1200 W
Left rear — 145 mm 1200 W
Left front — 120/175/210 mm 800/1600/2300 W
9. ENVIRONMENT CONCERNS
ENGLISH 13
[W]
Recycle the materials with the symbol
. Put the packaging in applicable
containers to recycle it.
Help protect the environment and human
health and to recycle waste of electrical
and electronic appliances. Do not dispose
appliances marked with the symbol
with the household waste. Return the
product to your local recycling facility or
contact your municipal office.
Page 14

www.electrolux.com
14
목차
1. 안전 정보 . . . . . . . . . . . . . . . . . . . . . . . . . . . . . . . . . . . . . . . . . . . . . . . . . . . . . . . . . . . . . . . . . . . . . . . . . . . . 15
2. 제품 설명 . . . . . . . . . . . . . . . . . . . . . . . . . . . . . . . . . . . . . . . . . . . . . . . . . . . . . . . . . . . . . . . . . . . . . . . . . . . . 17
3. 일상적 사용 . . . . . . . . . . . . . . . . . . . . . . . . . . . . . . . . . . . . . . . . . . . . . . . . . . . . . . . . . . . . . . . . . . . . . . . . . . 18
4. 알아두면 편리한 정보 . . . . . . . . . . . . . . . . . . . . . . . . . . . . . . . . . . . . . . . . . . . . . . . . . . . . . . . . . . . . . . . . . . 20
5. 관리 및 청소 . . . . . . . . . . . . . . . . . . . . . . . . . . . . . . . . . . . . . . . . . . . . . . . . . . . . . . . . . . . . . . . . . . . . . . . . . 21
6. 문제 해결 . . . . . . . . . . . . . . . . . . . . . . . . . . . . . . . . . . . . . . . . . . . . . . . . . . . . . . . . . . . . . . . . . . . . . . . . . . . . 21
7. 설치 . . . . . . . . . . . . . . . . . . . . . . . . . . . . . . . . . . . . . . . . . . . . . . . . . . . . . . . . . . . . . . . . . . . . . . . . . . . . . . . . 22
8. 기술 정보 . . . . . . . . . . . . . . . . . . . . . . . . . . . . . . . . . . . . . . . . . . . . . . . . . . . . . . . . . . . . . . . . . . . . . . . . . . . . 24
9. 환경 문제 . . . . . . . . . . . . . . . . . . . . . . . . . . . . . . . . . . . . . . . . . . . . . . . . . . . . . . . . . . . . . . . . . . . . . . . . . . . . 24
소비자를 먼저 생각하며
본 Electrolux 제품을 구입해 주셔서 감사합니다. 수십년의 전문 노하우와 혁신이 담겨 있는 제품을 선택하셨습니
다. 독창적이면서도 스타일이 멋진 본 제품은 소비자를 염두에 두고 디자인되었습니다. 따라서 제품을 사용할 때마
다 항상 훌륭한 결과를 기대하셔도 좋습니다.
Electrolux 에 오신 것을 환영합니다.
당사 웹사이트를 방문하여 다음 사항을 확인하십시오:
사용 지침, 브로셔, 문제해결 지침, 서비스 정보 받기:
www.electrolux.com
보다 나은 서비스를 위해 제품 등록:
www.electrolux.com/productregistration
전기제품에 맞는 부속품, 소모품 및 정품 예비부품 구입:
www.electrolux.com/shop
고객 관리 및 서비스
당사는 정품 예비부품의 사용을 권장합니다.
서비스 센터에 문의할 때는 반드시 다음과 같은 정보를 준비해야 합니다.
정보는 정격판에 있습니다. 모델, PNC, 일련 번호.
경고 / 주의-안전 정보
일반 정보 및 요령
?환경 정보
사전 통지 없이 변경될 수 있습니다.
Page 15

15
1.
안전 정보
제품을 설치하고 사용하기에 앞서 포함된 지침을
자세히 읽어보시기 바랍니다. 잘못된 설치나 사용
으로 부상이나 손상이 발생되는 경우 제조업체는
책임을 지지 않습니다. 필요할 때 참고하기 위해
지침은 항상 제품과 가까이 보관해 주십시오.
1.1 어린이 및 노약자 안전 수칙
경고
질식, 부상 또는 영구적 장애의 위험이
있습니다.
• 이 제품은 만 8 세 이상의 아동 및 신체적, 감각
적, 또는 정신적 능력이 부족하거나 경험과 지
식이 부족한 사람이 안전을 담당하는 개인에게
장비의 작동에 대한 감독 또는 지침을 받는 경
우 사용할 수 있습니다.
• 어린이가 제품을 가지고 장난을 하면 안 됩니
다.
• 모든 포장재는 어린이의 손에 닿지 않게 보관
해 주십시오.
• 제품이 작동되거나 열을 식힐 때 어린이나 애
완동물이 제품 가까이 오지 못하도록 주의합니
다. 표면의 부품은 뜨겁습니다.
• 제품에 어린이 안전 장치가 있는 경우 작동시
킬 것을 권장합니다.
• 어린이는 성인의 보호 없이 다리미를 세척하거
나 유지보수해서는 안됩니다.
1.2 설치
경고
자격을 갖춘 전문가만 이 제품을 설치해
야 합니다.
• 모든 포장재를 제거합니다.
• 손상된 제품을 설치 또는 사용하지 마십시오.
• 제품과 함께 제공된 설치 지침을 준수합니다.
• 다른 제품 및 장치와 최소 거리를 유지하십시
오.
• 제품이 무거우므로 제품 이동 시 항상 주의해
야 합니다. 반드시 안전 장갑을 착용하십시오.
• 팽창을 초래하는 습기를 방지하기 위해 절단
표면을 방수제로 밀폐하십시오.
• 제품 하단을 증기와 습기로부터 보호합니다.
• 제품을 문 옆이나 창 아래에 설치하지 마십시
오. 이렇게 하면 문이나 창이 열릴 때 뜨거운 조
리 용기가 제품에서 떨어지는 것을 예방할 수
있습니다.
• 제품을 칸 위에 설치하려면 공기가 순환할 수
있도록 제품 하단과 칸 위 사이의 공간이 충분
한지 확인하십시오.
• 제품 바닥이 뜨거워질 수 있습니다. 바닥에 닿
지 않도록 제품 아래 불연성 분리 패널을 설치
하는 것이 좋습니다.
전기 연결
경고
화재 및 감전 위험이 있습니다.
• 모든 전기 연결은 반드시 전문 기술자에게 의
뢰해야 합니다.
• 모든 배선 전에 제품의 전원 단자에 전류가 흐
르지 않는지 확인하십시오.
• 제품이 제대로 설치되었는지 확인하십시오. 플
러그와 소켓이 헐겁거나 적합하지 않으면 단자
가 과열될 위험이 있습니다.
• 충격 보호대를 설치해야 합니다.
• 제품을 주변 소켓에 연결할 경우 전기선이 제
품이나 뜨거운 조리 용기에 닿지 않도록 합니
다.
• 전기선이 꼬이지 않도록 합니다.
• 케이블에 스트레인 릴리프 클램프를 이용합니
다.
• 올바른 전원 케이블을 사용하십시오.
• 전원 플러그 및 전원 케이블이 손상되지 않게
하십시오. 서비스 센터나 전기 기술자에게 연
락하여 손상된 전원 케이블을 교체하십시오.
• 전기 설비에는 모든 극의 메인에서 제품을 분
리할 수 있는 절연 장치가 있어야 합니다. 절연
장치에는 최소 3 mm 의 접점 입구 너비가 있어
야 합니다.
• 올바른 절연 장치(라인 보호 차단기, 퓨즈(홀더
에서 분리된 나사형 퓨즈), 누전 차단기 및 접촉
기)만 사용해야 합니다.
1.3 사용 설명
경고
부상, 화상 또는 감전의 위험.
• 본 제품은 가정용 환경에서 사용하십시오.
• 본 전자 제품의 사양을 변경하지 마십시오.
• 제품을 작동하기 위해 외부 타이머나 별도의
원격 제어 시스템을 사용하지 마십시오.
• 제품이 작동 중인 경우는 자리를 비우지 마십
시오.
• 젖은 손 또는 물에 닿은 상태로 제품을 작동시
키지 마십시오.
Page 16

www.electrolux.com
16
• 쿠킹존 위에 칼붙이류(나이프, 포크, 숟가락
• 사용이 끝나면 쿠킹존의 스위치를 꺼야 합니
• 본 제품을 작업대로 사용하거나 물건을 올려
• 제품의 표면에 금이 간 경우 제품을 전원에서
• 기름과 지방이 가열되면 가연성 증기가 배출될
• 매우 뜨거운 기름이 배출하는 증기는 자연 발
• 폐유는 음식 찌꺼기가 포함될 수 있으며, 처음
• 제품 내부, 근처에 가연성 제품으로 젖은 품목
• 화재를 물로 끄지 마십시오. 제품을 분리하고
• 제어판 위에는 뜨거운 조리 용기를 올려 놓지
• 조리 용기를 가열하여 건조시키지 마십시오.
• 물건이나 조리 용기가 제품에 떨어지지 않도록
등)나 소스팬 뚜껑을 올려 놓지 마십시오. 올려
놓은 물체가 뜨거워집니다.
다.
두는 용도로 사용하지 마십시오.
즉시 분리하십시오. 감전을 방지하기 위해서입
니다.
경고
폭발이나 화재 위험이 있습니다.
수 있습니다. 기름과 지방을 사용하여 조리 시
화염 또는 가열된 물체로부터 멀리 하십시오.
화를 초래할 수 있습니다.
사용하는 기름보다 더 낮은 온도에서 화재를
초래할 수 있습니다.
및 가연성 물체를 놓지 마십시오.
뚜껑이나 화재용 담요로 불꽃을 덮으십시오.
경고
제품이 손상될 위험이 있습니다.
마십시오.
주의하십시오. 표면이 손상될 수 있습니다.
• 내용물이 없는 비어있는 냄비를 올려 놓거나
• 제품에 알루미늄 호일을 놓지 마십시오.
• 조리 용기가 주철 또는 알루미늄으로 되어 있
1.4 관리 및 청소
• 표면 재료의 악화를 방지하기 위해 제품을 정
• 제품을 세척하기 위해 물 분사나 증기를 사용
• 젖은 부드러운 천으로 제품을 닦습니다. 중성
1.5 폐기 처분
• 제품을 주전원으로부터 차단합니다.
• 전원 케이블을 잘라 내어 폐기하십시오.
아무 것도 올려 놓지 않은 채로 쿠킹존을 작동
하지 마십시오
거나 바닥이 손상되어 있으면 글라스 세라믹에
흠집을 낼 수 있습니다. 쿠킹판에서 이동해야
하는 경우 항상 물체를 들어 올려 이동시키십
시오.
경고
제품이 손상될 위험이 있습니다.
기적으로 청소합니다.
하지 마십시오.
세제만 사용하십시오. 마모성 제품, 마모성 세
척 패드나 용제 또는 금속성 물체를 사용하지
마십시오.
경고
부상이나 질식의 위험이 있습니다.
Page 17

2. 제품 설명
2.1 일반 개요
17
1 2
145 mm
120/175/210 mm
5
120/180 mm
145 mm
4
쿠킹존
1
쿠킹존
2
쿠킹존
3
제어판
4
3
5
쿠킹존
2.2 제어판 구성
1 2 3 4 5 6 7
891011
제품을 작동하려면 센서 필드를 사용하십시오. 표시창, 표시등 및 소리는 어떤 기능이 작동하는지
알려줍니다.
센서 필드 기능
1
2
온도 설정 표시창 온도 설정 상태를 표시.
3
쿠킹존의 타이머 표시등 시간을 설정하는 존(구역) 표시.
4
타이머 표시창 시간을 분 단위로 표시.
5
6
7
8
9
10
/
/
제품의 작동 및 작동 해제.
제어판 잠금/잠금 해제.
온도 설정 증가 또는 감소.
바깥 링의 작동 및 작동 해제.
시간을 늘리거나 줄임.
쿠킹존 선택.
바깥 링의 작동 및 작동 해제.
Page 18

www.electrolux.com
18
센서 필드 기능
2.3 온도 설정 표시창
2.4 잔열 표시등
11
표시창 설명
쿠킹존이 작동 해제됨.
-
쿠킹존 작동 중.
-
기능이 작동합니다.
자동 가열 기능 작동 중.
기능이 제대로 작동하지 않음.
쿠킹존에 열기(잔열)가 남아 있음.
잠금 장치/어린이 안전 장치 작동 중.
스위치 자동 꺼짐 작동 중.
경고
잔열로 인한 화상의 위험이 있습니
다!
STOP+GO 기능의 작동 및 작동 해제.
3. 일상적 사용
3.1 작동 또는 작동 해제
을 1 초간 눌러 제품을 작동 또는 작동 해제합
니다.
3.2 스위치 자동 꺼짐
다음과 같은 경우 제품은 자동으로 작동 해제됩니
다.
•
쿠킹존이 모두 작동 해제된 경우(
• 제품을 작동한 후 온도 설정을 하지 않은 경우.
• 제어판에 무언가를 흘리거나 10 초 이상 무언
가를 올려놓은 경우(팬, 행주 등). 신호음이 잠
시 들리고 제품이 작동 해제됩니다. 물체를 치
우거나 제어판을 청소하십시오.
• 쿠킹존을 작동 해제하지 않거나 온도 설정을
변경한 경우. 잠시 후
동 해제됩니다. 다음을 참조하십시오.
• 온도 설정과 스위치 자동 꺼짐 작동 시간의 관
계:
•
, - — 6 시간
).
가 켜지고 제품이 작
•
- — 5 시간
•
— 4 시간
•
- — 1.5 시간
3.3 온도 설정
를 터치해 온도 설정을 높이십시오. 를 터
치해 온도 설정을 낮추십시오. 표시창은 온도 설
정을 표시합니다. 쿠킹존을 작동 해제하려면
및 를 동시에 터치하십시오.
3.4 바깥 링의 작동 및 작동 해제
조리 용기의 크기에 따라 표면을 조절할 수 있습
니다.
바깥 링을 작동하려면 센서 필드
십시오. 표시등이 켜집니다. 바깥 링을 더 보려면
같은 센서 필드를 다시 터치하십시오. 이후 표시
등이 켜집니다.
바깥 링을 작동 해제하려면 이 절차를 다시 반복
하십시오. 표시등이 꺼집니다.
/ 를 누르
Page 19

3.5 자동 가열 기능
99
자동 가열 기능을 활성화하면 단시간 내에 필요한
온도 설정이 가능합니다. 이 기능은 일정 시간 동
안 온도 설정을 최고로 설정(도표 참조)한 후 원하
는 온도 설정으로 낮춥니다.
자동 가열 기능을 시작하려면 쿠킹존을 반드시 식
히십시오(표시창에
도 설정이 켜질 때까지 쿠킹존의
로 누르십시오. 3 초 후에
다.
기능을 정지하려면
11
10
9
8
7
6
5
4
3
2
1
0
123456789
가 없는 상태). 필요한 온
를 반복적으
이 표시창에 켜집니
을 누르십시오.
3.6 타이머
카운트다운 타이머를 사용해 쿠킹존을 얼마 동안
작동할 것인지 시간을 설정하십시오(1 회 설정에
만 해당).
쿠킹존을 선택한 후 타이머를 설정하십시오.
타이머를 설정하기 전후에 온도 설정이 가능합니
다.
• 쿠킹존을 설정하려면 원하는 쿠킹존 표시등이
켜질 때까지
•
타이머를 작동하거나 변경하려면 타이머의
또는 를 눌러 시간을 설정하십시오( 00 -
분). 쿠킹존의 표시등이 느리게 깜박이기
시작하면 시간이 카운트다운됩니다.
•
타이머를 작동 해제하려면
정하고
오. 카운트다운의 남은 시간은 다시
시됩니다. 쿠킹존의 표시등이 꺼집니다.
•
남은 시간을 보려면
시오. 쿠킹존의 표시등이 빠르게 깜박이기 시
작합니다. 표시창에 남은 시간이 표시됩니다.
시간이 종료되면 신호음이 울리고
니다. 쿠킹존이 작동 해제됩니다.
•
신호음을 멈추려면
쿠킹존을 사용하지 않을 때 타이머는 타이머 알람
으로 활용할 수 있습니다.
을 반복적으로 누르십시오.
로 쿠킹존을 설
를 눌러 타이머를 작동 해제하십시
로 표
00
로 쿠킹존을 설정하십
가 깜빡입
00
를 누르십시오.
을 누릅니다. 또
는
되면, 신호음이 울리고
•
3.7 STOP+GO
도로 설정합니다(
•
•
3.8 잠금
쿠킹존이 작동할 때, 조작판을 잠궈둘 수 있습니
다. 이렇게 하면 온도를 실수로 변경하는 것을 방
지할 수 있습니다.
먼저 온도 설정을 선택합니다
이 기능을 작동하려면
호가 4 초 간 켜집니다.
타이머가 계속 켜져 있습니다.
이 기능을 작동 해제하려면
전에 설정한 온도 설정이 켜집니다.
제품을 작동 해제하면 이 기능도 작동 해제됩니
다.
3.9 어린이 안전 장치
이 기능은 부주의로 인한 제품 작동을 방지합니
다.
어린이 안전 장치 작동
•
•
•
어린이 안전 장치의 작동 해제
•
•
1 회의 조리 시간에만 어린이 안전 장치를 끄고자
하는 경우
•
•
19
를 눌러 시간을 설정하십시오. 시간이 종료
가 깜빡입니다.
00
신호음을 멈추려면
기능은 작동하는 모든 쿠킹존을 가장 낮은 온
이 작동하면, 열 설정을 변경할 수 없습니다.
로 타이머 기능은 정지되지 않습니다.
이 기능을 작동하려면
가 켜집니다.
이 기능을 정지하려면
에 설정한 온도 설정이 켜집니다.
로 제품을 작동시킵니다. 온도 설정을 하지
마십시오.
를 4 초간 누릅니다 기호 가 켜집니다.
로 제품을 작동 해제합니다.
로 제품을 작동시킵니다. 온도 설정을 하지
마십시오.
켜집니다.
로 제품을 작동 해제합니다.
로 제품을 작동시킵니다. 기호 가 켜집
니다.
를 4 초간 누릅니다 10 초 이내에 온도를 설
정하십시오. 제품을 작동할 수 있습니다.
를 누르십시오.
).
를 누르십시오. 기호
를 누르십시오. 이전
를 누르십시오. 기
를 누르십시오. 이
를 4 초간 누릅니다 기호 가
Page 20

www.electrolux.com
20
•
로 제품을 작동 해제하면, 어린이 안전 장
치가 다시 작동합니다.
4. 알아두면 편리한 정보
4.1 조리 그릇
조리 용기에 대한 정보
• 조리 용기의 바닥은 두껍고 반드시 평평해야
합니다.
• 알루미늄이 포함된 에나멜 스틸로 만든 조리
용기나 바닥면이 구리로 된 조리 용기를 사용
하면 글라스 세라믹 표면이 변색될 수 있습니
다.
• 가능하면 조리 용기의 뚜껑을 덮습니다.
• 작동하기 전에 쿠킹존에 조리 용기를 놓으십시
오.
• 조리 시간이 끝나기 전에 쿠킹존을 정지시켜
남은 열기를 사용하십시오.
• 팬과 쿠킹존 바닥은 치수가 같아야 합니다.
4.3 요리 사례
표의 데이터는 안내용입니다.
4.2 에너지 절약 정보
에너지 절약 방법
온도설정용도: 시간 힌트
조리된 음식 보온 필요에따라조리 용기의 뚜껑을 덮으십시오.
1
1-2 홀란데이즈 소스, 녹임: 버터, 초콜릿,
젤라틴
1-2 굳힘: 오믈렛, 구운 계란 10-40분뚜껑 덮고 조리
2-3 쌀 및 우유 음식 끓이기, 미리 조리된
음식의 가열
3-4 찐 야채, 생선, 고기 20-45분액체를 몇 테이블스푼 첨가
5-25 분 경우에 따라 혼합
25-50분물은 최소 쌀의 두 배를 추가하고,
우유 음식은 중간에 섞으십시오.
4-5 감자 찌기 20-60분750 g 의 감자에 최대 ¼ L 의 물을
사용함
4-5 양이 많은 식품의 조리스튜, 스프 60-150분최대 3 L 의 액체와 재료
6-7 약간 튀기기: 에스칼로프, 송아지 고기,
필요에따라중간 쯤에 뒤집습니다.
커틀렛, 리졸레, 소시지, 리버, 루, 달걀,
팬케이크, 도너츠
7-8 세게 튀기기, 해쉬 브라운, 로인 스테이
5-15 분 중간 쯤에 뒤집습니다.
크, 스테이크
9 많은 양의 물 끓이기, 파스타 조리, 고기 굽기, 감자칩 튀김
아크릴아미드 관련 정보
중요 최신 과학 정보에 따르면 (특히 전분이 함유
된) 식품을 태우면 아크릴아미드가 발생하여 건강
에 위험이 될 수 있다고 합니다. 그러므로 가장 낮
은 온도로 요리하고 음식을 너무 태우지 말 것을
권장합니다.
Page 21

5. 관리 및 청소
21
사용 후 항상 기구를 청소하십시오.
항상 바닥이 깨끗한 조리 용기를 사용하십시오.
먼지 제거:
1.
– 즉시 제거: 녹는 플라스틱, 플라스틱 호일
6. 문제 해결
제품을 작동하거나 가동할 수
없습니다.
동시에 둘 이상의 센서 필드를
Stop+Go 기능이 작동합니다. "평상시 사용법"을 참조하십시
제어판에 물기나 지방 얼룩이
신호음이 들리고 제품이 작동
해제됩니다.
제품이 작동 해제되면 신호음
이 울립니다.
제품이 작동 해제됩니다.
잔열 표시등이 켜지지 않습니다.쿠킹존이 단시간 동안만 작동
자동 가열 기능이 작동하지 않
습니다.
최고 온도로 설정되어 있습니다.최고 온도 설정은 자동 가열 기
바깥 링을 작동할 수 없습니다. 안쪽 링을 먼저 작동하십시오.
십시오. 스크레이퍼가 유리 표면에 예각을
이루도록 놓고 칼날을 표면 위로 이동시키
글라스 세라믹의 스크래치나 진한 얼룩
은 제품의 작동에 영향을 미치지 않습니
다.
및 설탕 함유 식품. 제거하지 않으면 오염
물이 제품에 손상을 입힐 수 있습니다. 특
수 유리 스크레이퍼(긁기 도구)를 사용하
십시오.
– 제품이 충분히 식은 후 물때, 수봉, 지방
얼룩, 빛나는 금속의 변색 부분을 청소합
니다. 글라스 세라믹 또는 스테인리스 스
틸용 특수 클리너를 사용하십시오.
2.
세제를 약간 적신 천으로 제품을 청소합니
다.
3.
마지막으로 깨끗한 천으로 물기를 닦아냅니
다.
문제 예상 원인 해결 방법
제품을 다시 작동하고 온도 설
정을 10 초 내로 설정하십시오.
한 개의 센서 필드만 누르십시
터치했습니다.
오.
오.
제어판을 청소하십시오.
있습니다.
한 개 이상의 센서 필드에 무
언가를 올려 놓았습니다.
센서 필드 위에 물건을 올
려 놓았습니다.
센서 필드에서 물건을 치우십
시오.
센서 필드에서 물건을 치우십
시오.
쿠킹존이 충분히 오래 작동하
했으므로 뜨겁지 않습니다.
여도 뜨겁지 않은 경우, 서비스
센터에 문의하십시오.
쿠킹존이 뜨겁습니다. 쿠킹존이 충분히 식을 때까지
기다리십시오.
능과 동일한 출력이 전달됩니
다.
에서 온도 설정을 낮췄습
니다.
에서 시작하면 온도 설정 증
가만 가능합니다.
센서 필드가 뜨거워졌습니다. 조리 용기가 너무 크거나 제어
부에 너무 가까이 놓였습니다.
필요한 경우 뒤쪽 쿠킹존에 큰
조리 용기를 놓으십시오.
Page 22

www.electrolux.com
22
위의 방법을 시도했으나 문제를 해결할 수 없는
경우 판매업체나 고객 서비스 센터에 문의하십시
오. 명판의 데이터, 글라스 세라믹의 3 자리 문자
코드(유리 표면 모서리에 있음) 및 표시되는 오류
메시지를 알려주십시오.
7. 설치
문제 예상 원인 해결 방법
가 켜집니다.
가 켜집니다.
및 숫자가 표시됩니다
스위치 자동 꺼짐 작동 중. 제품을 작동 해제한 후 다시 작
동하십시오.
어린이 안전 장치 또는 잠금
기능 작동 중.
"평상시 사용법"을 참조하십시
오.
제품에 오류가 발생했습니다. 잠시 제품의 전기 공급을 차단
합니다. 집안의 전기 시스템에
서 퓨즈를 분리하십시오. 다시
연결하십시오.
가 다시 켜지
면 서비스 센터에 문의하십시
오.
제품을 올바르게 사용하십시오. 제품을 올바르게
사용하지 못한 경우, 보증 기간 중이더라도 고객
서비스 기술자 또는 판매업체의 서비스에 요금이
부과됩니다. 고객 서비스 및 보증 조건에 대한 지
침은 보증서에 있습니다.
경고
"안전 정보" 장을 참조하십시오.
설치 전
제품 설치 전, 정격판에서 아래 정보를 기록합니
다. 이 정격판은 제품 포장의 하단에 있습니다.
• 모델 ...........................
• PNC .............................
• 일련 번호 ....................
7.2 연결 케이블
• 이 제품에는 연결 케이블이 제공됩니다.
• 손상된 전원 케이블은 특수 케이블(H05BB-F
7.1 붙박이 제품
• 붙박이 제품은 올바른 붙박이 장치와 표준에
맞는 작업대 내에 조립한 후에만 사용하십시
오.
최대 온도 90°C 이상 유형)로 교체하십시오. 자
세한 내용은 가까운 서비스 센터로 문의해 주
십시오
Page 23

7.3 조립
min.
50mm
min.
500mm
min.
50mm
23
R 5mm
600mm
=
490
+1
=
min.
20 mm
mm
560
+1
mm
min.
25 mm
min.
28 mm
보호 상자(추가 부속품2))를 사용하는 경
우에는 제품 바로 아래 보호용 바닥은 필
요 없습니다.
제품을 오븐 위에 설치하면 보호 상자를
사용할 수 없습니다.
2)
보호 상자 부속품은 국가에 따라 제공되지 않을 수 있습니다. 가까운 공급업체에 문의하십시오.
Page 24

www.electrolux.com
24
8. 기술 정보
Modell EHF6343FOK Prod.Nr. 949 596 004 00
Typ 58 HAD 53 AO 220-240 V 50-60 Hz
Made in Germany
Ser.Nr. .......... 6.4 kW
ELECTROLUX
쿠킹존 출력
쿠킹존 정상 출력(최대 열 설정)[W]
우측 후면 — 120/180 mm 700/1700 W
우측 정면 — 145 mm 1200 W
좌측 후면 — 145 mm 1200 W
좌측 전면 — 120/175/210 mm 800/1600/2300 W
9. 환경 문제
가 표시된 재료는 재활용하십시오. 포장
기호
재는 해당 용기에 넣어 재활용하십시오.
전기 제품 및 전자 제품 폐기물을 재활용하여 환
경과 인류 건강을 보호하십시오. 가정용 폐기물
기호 가 표시된 제품을 폐기하지 마십시오. 가
까운 재활용 시설에 제품을 보내거나 가까운 시청
에 문의하십시오.
Page 25

25
Page 26

www.electrolux.com
26
Page 27

27
Page 28

www.electrolux.com/shop
892952297-B-172012
 Loading...