

Page 1

DECT
PHONE
ECLIPSE 10/15
USER GUIDE
UK
V1
Page 2
2
8
4
15
10
11
16
6
1
13 12
14
7
3
9
5
P1 P3 P4
P5
P2
Page 3

UK
1. BECAUSE WE CARE
Thank you for purchasing this product. This product has been designed and assembled with utmost care
for you and the environment. This is why we supply this product with a quick installation guide to reduce
the number of paper (pages) and therefor save trees to be cut for making this paper. A full and detailed
user guide with all the features descripted can be found on our website www.aegtelephones.eu. Please
download the full user guide in case you want to make use of all the advanced features of your product. To
save the environment we ask you not to print this full user guide. Thank you for supporting us to protect
our environment.
2. IMPORTANT SAFETY INSTRUCTIONS
Please follow these safety instructions when using your telephone equipment to reduce risk of fire, electric
shock and injury:
tRead and understand all the instructions.
tFollow all warnings and instructions marked on the product.
tUnplug this product from the wall outlet before cleaning. Do not use liquid cleaners or aerosol cleaners.
Use a damp cloth for cleaning.
tKeep this product away from hot, humid conditions or strong sunlight, and don’t let it get wet or use it
near water (for example, near a bath tub, kitchen sink, and swimming pool).
tDo not overload wall outlets and extension cords as this can result in the risk of fire or electric shock.
tUnplug this product from the wall outlet under the following conditions:
>When the power supply cord or plug is damaged.
>If the product fails to operate normally despite following the operating instructions.
>If the product has been dropped and the cabinet has been damaged.
>If the product exhibits a distinct change in performance.
tNEVER use your phone outdoors during a thunderstorm. Unplug the base from the telephone line and
the mains socket when there are storms in your area. Damage caused by lightning is not covered by the
guarantee.
tDo not use the telephone to report a gas leak in the vicinity of the leak.
tUse only the supplied NiMH (Nickel Metal Hydride) batteries that came with your phone or an authorized
replacement recommended by the manufacturer. There is a risk of explosion if you replace the battery
with an incorrect battery type. The use of other battery types or non-rechargeable batteries/primary
cells can be dangerous. They may cause interference and/or damage to the unit or surroundings. The
manufacturer will not be held liable for damage arising from such non-compliance.
tDo not use third party charging pods. Damage may be caused to the batteries.
tPlease ensure that the batteries are inserted in the correct polarity.
tDispose of batteries safely. Do not burn, immerse them in water, disassemble, or puncture the batteries.
3. INTENDED USE
This telephone is intended to be connected to a public analogue telephone network or to an analogue
extension of a compatible PBX system.
Page 4

4. PACKAGE CONTENT
The package contains the following items:
t1 Eclipse Handset
t1 Base Station
t1 Mains Power Adapter
t1 Telephone Line Cord
t2 AAA NiMH Rechargeable Batteries
t1 Back Cover for the Eclipse Handset
t1 Back Cover Unlock Tool
t1 User Guide
5. HANDSET & BASE CONNECTION
tWhen purchased, all handsets are already registered to the base unit and should link to it when they are
all powered up.
tTo use your cordless handset and base unit together, you must be able to establish a radio link between
them. The signal between the handset and the base unit is in accordance with the normal standards for a
DECT phone: Maximum range up to 300 metres outdoors or 50 metres indoors. Be aware that:
>Large metal objects, such as refrigerators, mirrors or filing cabinets, between the handset and the base
unit may block the radio signal.
>Solid structures, such as walls, may reduce the signal strength.
>Electrical equipment may cause interference and/or affect the range.
tDo not place the base unit close to another telephone, TV or audio equipment - it may cause interference.
tPutting the base unit as high as possible ensures the best signal.
tIf the sound in the earpiece becomes faint or distorted during a call, you may be going out of range of the
base unit. Move nearer to the base unit within 20 seconds; otherwise the line may be cut off.
Page 5

UK
6. INSTALLING YOUR PHONE
6.1 Connecting the Base Station (See P4)
tPlug the mains power cable (15) and telephone line cord (16) into the base station.
tPlug the power adapter into a 100 - 240Vac, 50 - 60Hz mains power socket and the telephone line cord
into a telephone line socket.
Warning: Always use the cables provided in the box. Use only the supplied adaptor. Using other power
adapter may damage the unit.
Note: Place the base unit within easy reach of the mains power socket. Never try to lengthen the mains
power cable. The base station needs mains power for normal operation and the cordless handsets will
not work without it.
6.2 Installing and Charging the Rechargeable Batteries
tInsert the 2 supplied batteries into the battery compartment, observing the correct polarity (see markings
inside battery compartment).
Warning: Use only the supplied NiMH rechargeable batteries.
tPlace the back cover over the back of the handset and press down until it clicks into place.
tPlace the handset on the base and charge for 15 hours before using the handset for the first time.
>The handset will give a double beep when it is properly placed on the base and the battery charging
indicator on the base lights up to indicate charging.
Note: The handset may become warm when the batteries are being charged or during prolonged periods
of use. This is normal and does not indicate a fault.
CAUTION
Risk of explosion if the battery is replaced by an incorrect type. Dispose of used batteries according to
the instructions.
6.3 Removing the back cover of the Eclipse Handset (See P5)
Insert the supplied key into the groove as indicated in the illustration and twist it clockwise to release the
back cover.
Page 6
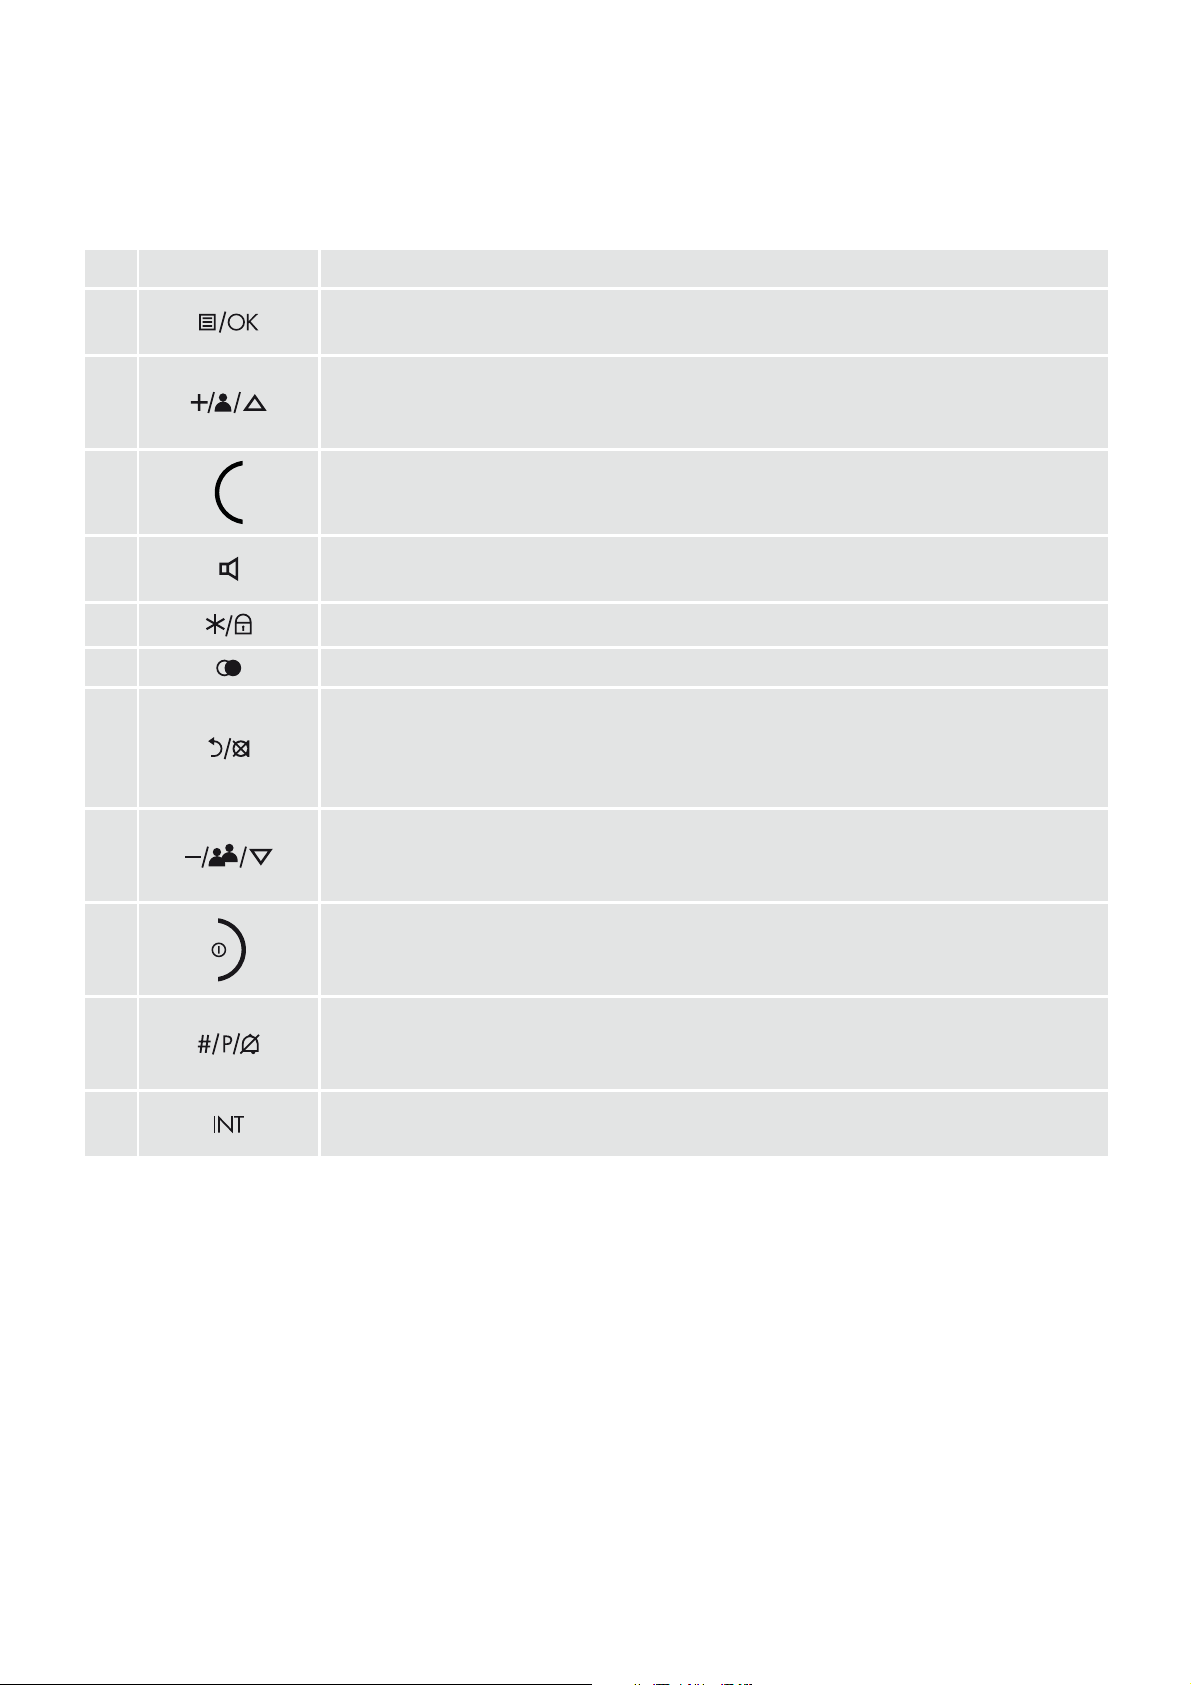
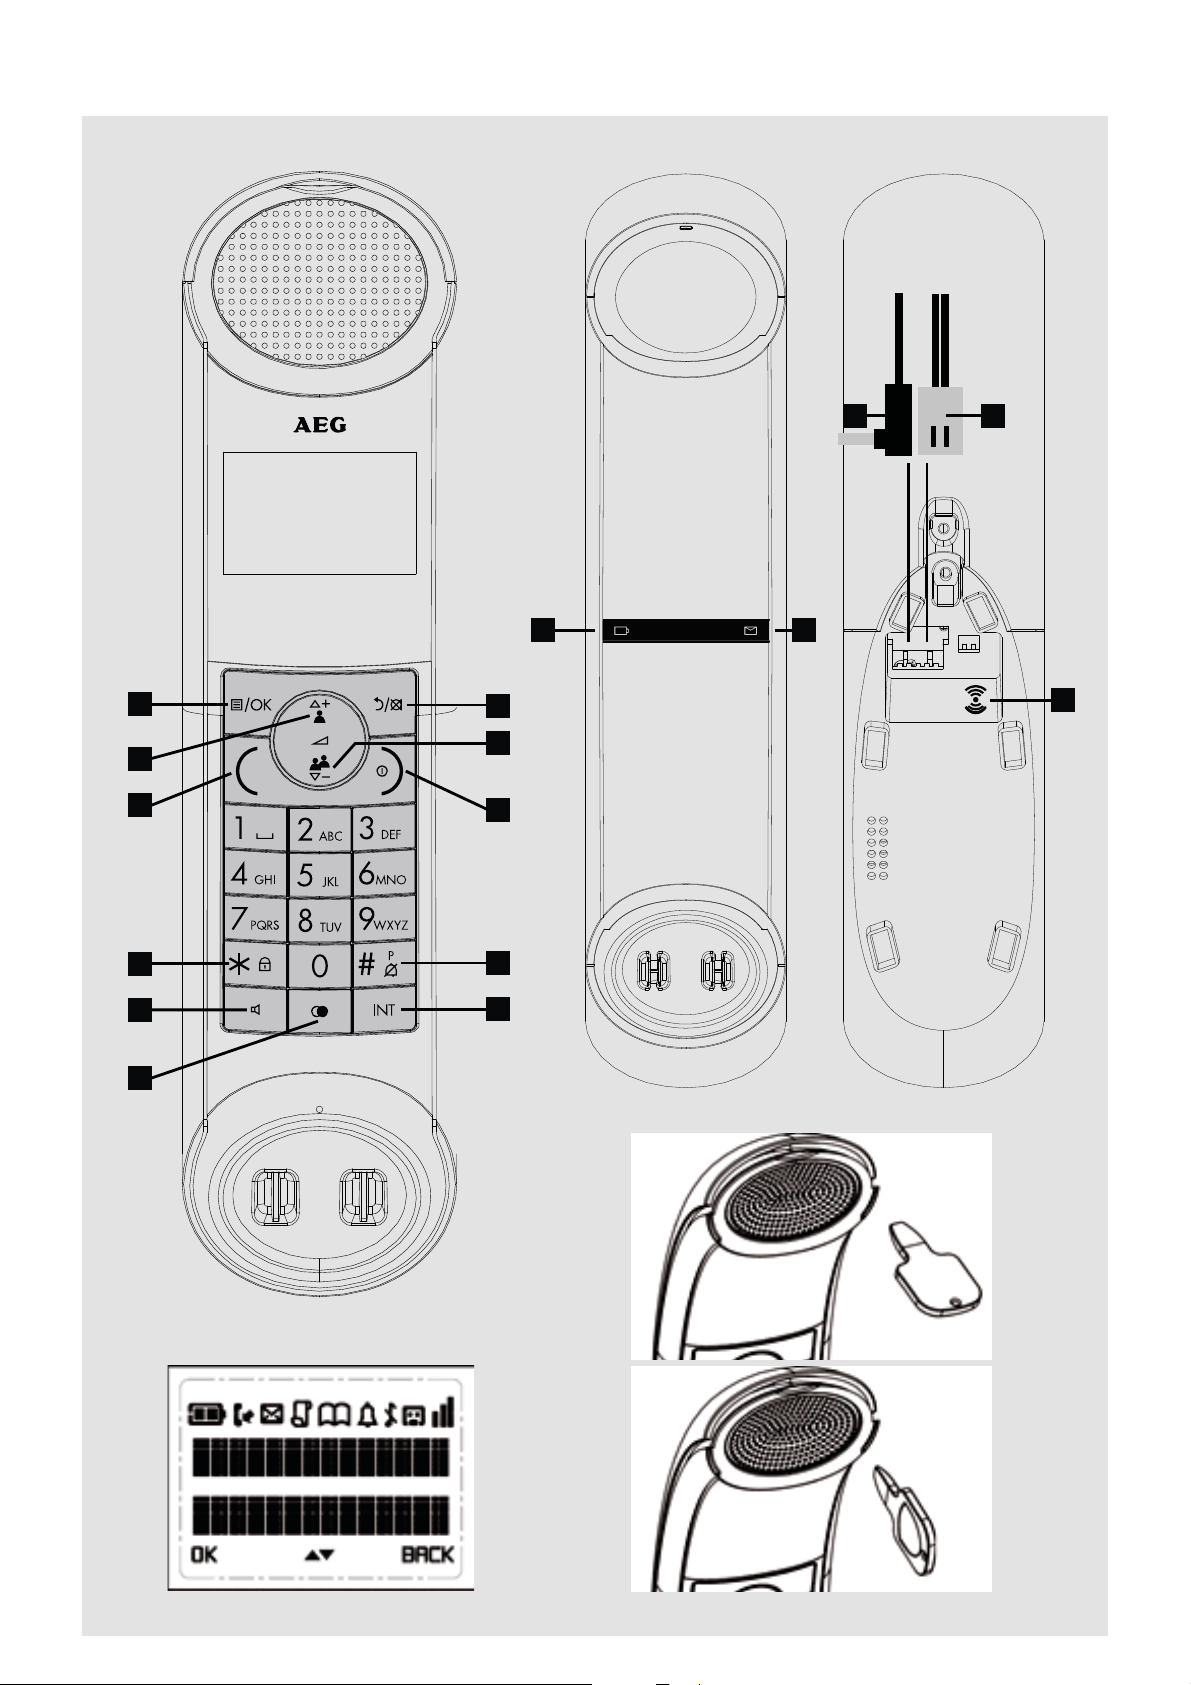
7. GETTING TO KNOW YOUR PHONE
7.1 Overview of the Handset and Base Station
# Icon Meaning
1
In standby mode, press to enter the Main Menu list.
Press to select an item, or to save an entry or setting.
2
In menu mode, press to scroll up.
During a call or message playback, press to increase the volume.
In standby mode, press to access the call log (CID).
3
In standby mode, press to make or answer a call.
During a call, press to send a Flash signal for network services.
4
In standby mode, press to make or answer a call in speakerphone mode.
During a call, press to switch between speakerphone and earpiece.
5
Press and hold to switch the key lock on or off
6
In standby mode, press to access the redial list.
7
Press to cancel an action.
During pre-dialling, press to delete the last digit entered.
During a call, press to mute the microphone and press again to resume
conversation.
8
In menu mode, press to scroll down.
During a call, or message playback, press to decrease the volume.
In standby mode, press to access the phonebook list.
9
During a call, press to hang up.
During programming, press to cancel and exit without making changes.
In standby mode, press and hold to power the handset on/off.
10
Press and hold to turn the handset ringer off.
Press and hold to add a dialling pause when dialling or entering numbers into
the phonebook.
11
In standby mode or during a call, press to initiate an intercom call or transfer
a call.
Page 7
UK
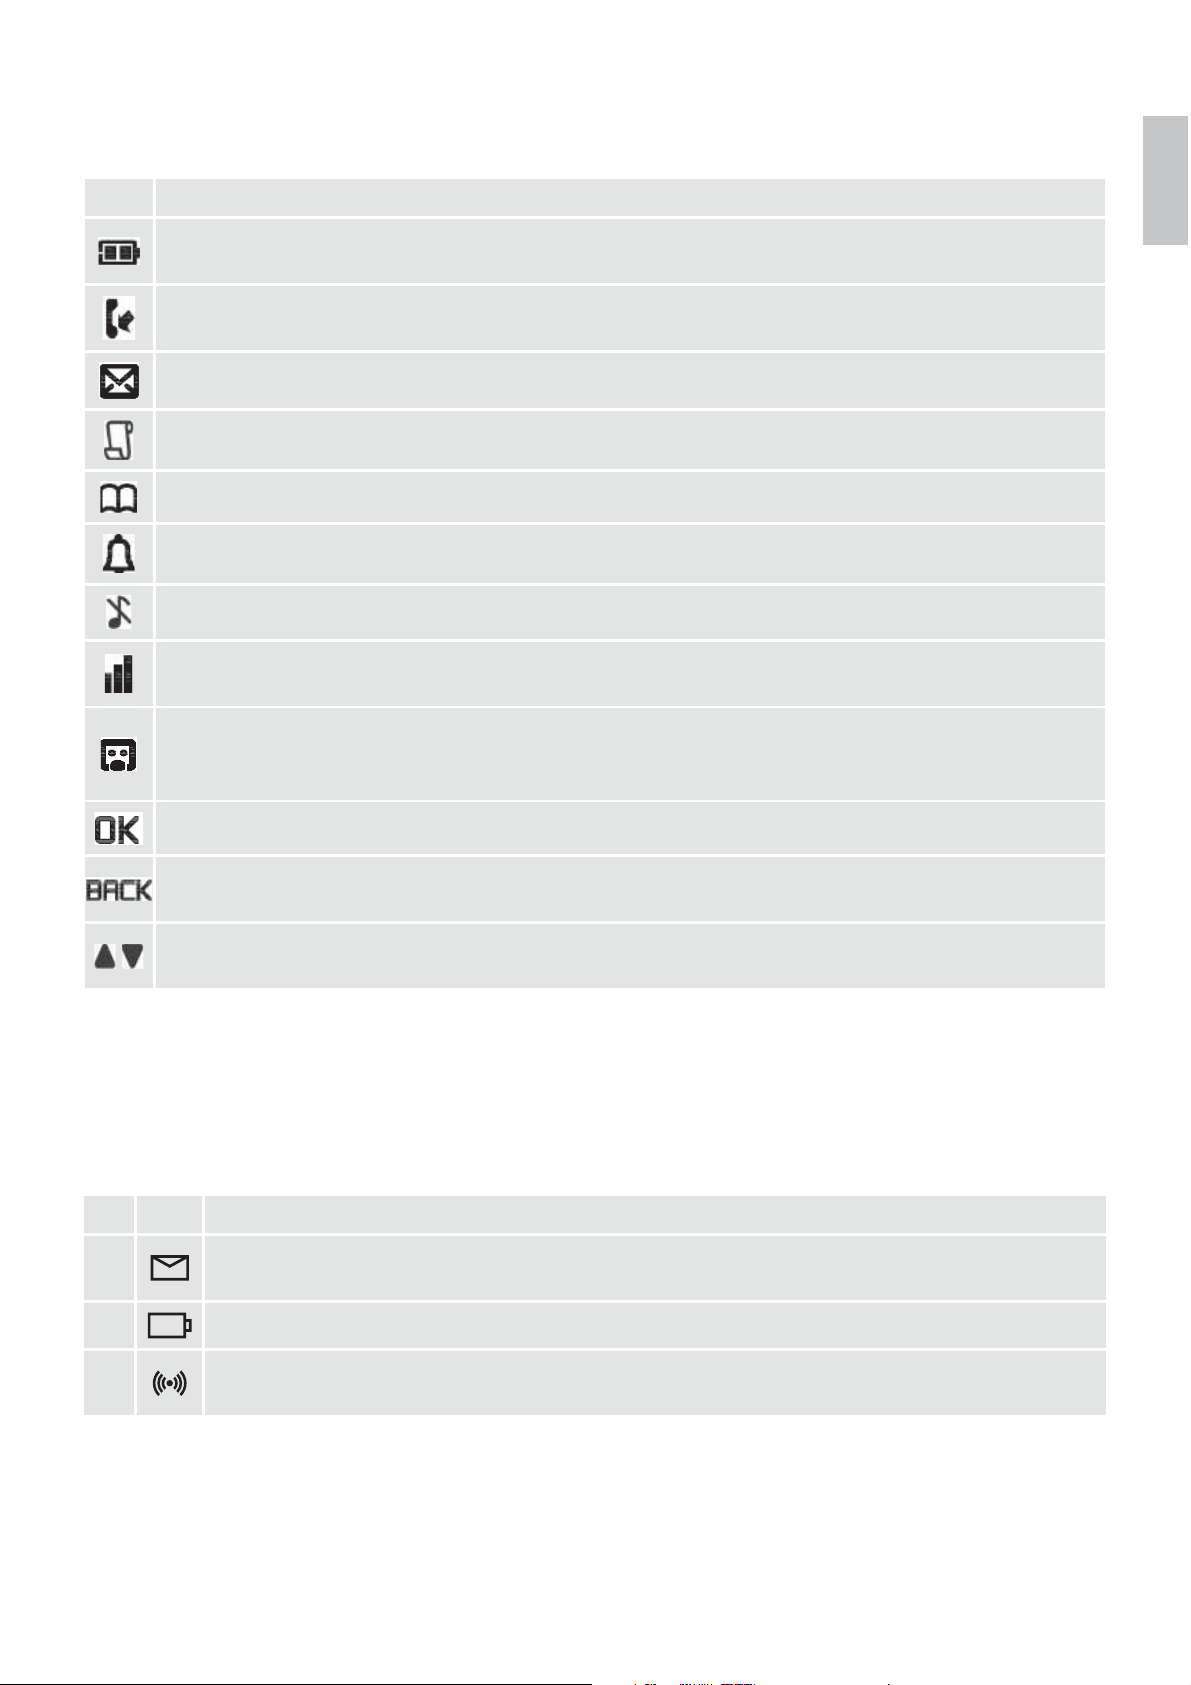
7.2 Display Icons and Symbols on the handset (See P2)
Icon Meaning
Displays when the battery is fully charged.
Internal segments cycle while charging.
Displays when the line is in use.
Flashes when there is an incoming call.
Flashes when you have a new voicemail message. (This is a network service)
Displays when you have new missed calls, or the call log is being viewed.*
Displays when the phonebook is accessed.
Displays when the alarm is set.
Displays when handset ringer is turned off.
Displays when the handset is registered and within range of the base station.
Blinks when the handset is out of range or is searching for a base.
Displays when the answering machine is on.
Flashes slowly when there are new answering machine message(s) or when the answering
machine memory is full.
Tur ns on w hen c onfi rm ati on of s elec ti on or pro gr amm in g i s ava il abl e.
Tur ns on d uri ng ph on ebo ok ed it ing mo de to de le te th e l as t d ig it.
Tur ns on d uri ng me nu mo de wh en you c an re tu rn t o t he pre vi ous st ate o r p re vi ou s step .
Tur ns on w hen t he sc re en di spl ay is o n.
*You must subscribe to Voicemail service or Caller ID from your network providers for this feature to work.
You m ay ne ed to pa y a s ub scr ip tion f ee.
7.3 Base Unit (See P3)
# Icon Meaning
12
Lights up in Green when the answering machine is on. Flashes if there are new messages.
Flashes rapidly if the answering machine memory is full.
13
Lights up in Red when a handset is on the base to indicate it is charging.
14
Press to find/page all registered handsets. Press the button again, or any key on the handset
to turn off the page signal. Press and hold to start registration process.
Page 8
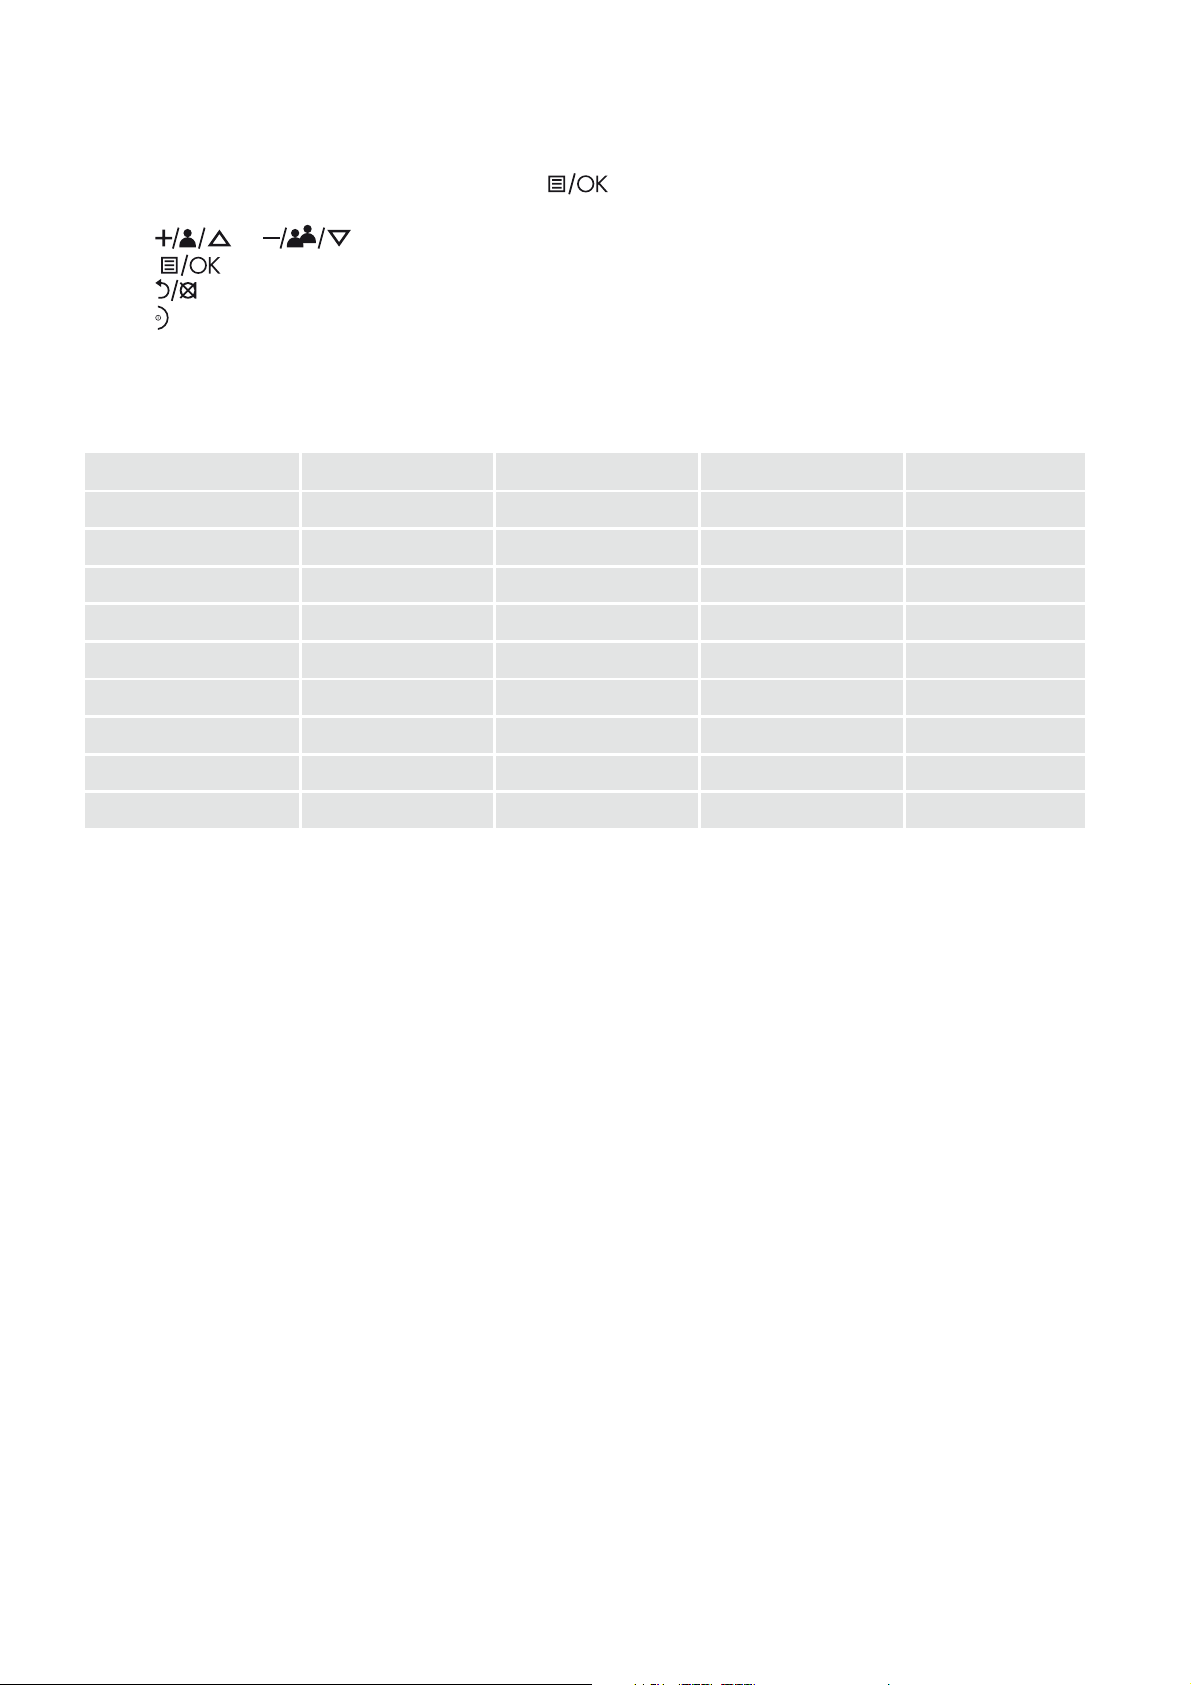
7.4 Menu Map and Menu
tFrom the home screen of the handset, press
to access “ANS. SYSTEM“, the first option in the
main menu list.
tPress
or to go to other options in the menu list.
tPress
to enter a sub-menu or function.
tPress
to go back to the previous level.
tPress
to cancel the current operation and return to the home screen.
Note: If you do not press any key on the handset for 15 seconds, the display will automatically return to
the home screen.
ANS. SYSTEM PHONEBOOK CLOCK&ALARM HANDSET OPTS SETTINGS
PLAY NEW ENTRY DATE & TIME HANDSET NAME CHANGE PIN
DELETE ALL VIEW ENTRIES SET FORMAT RINGER&TONES REGISTRATION
ANS. ON/OFF EDIT ENTRY TIME FORMAT RING VOLUME DEREGISTER
ANNOUNCEMENT DELETE DATE FORMAT RING TONE RESET
ANSWER MODE DELETE ALL ALARM KEY TONE RECALL TIME
ANS. SETTING DIRECT MEM. ALARM MELODY LANGUAGE
RING DELAY AUTO HANG-UP
REMOTE ACC.
LANGUAGE
Page 9
UK
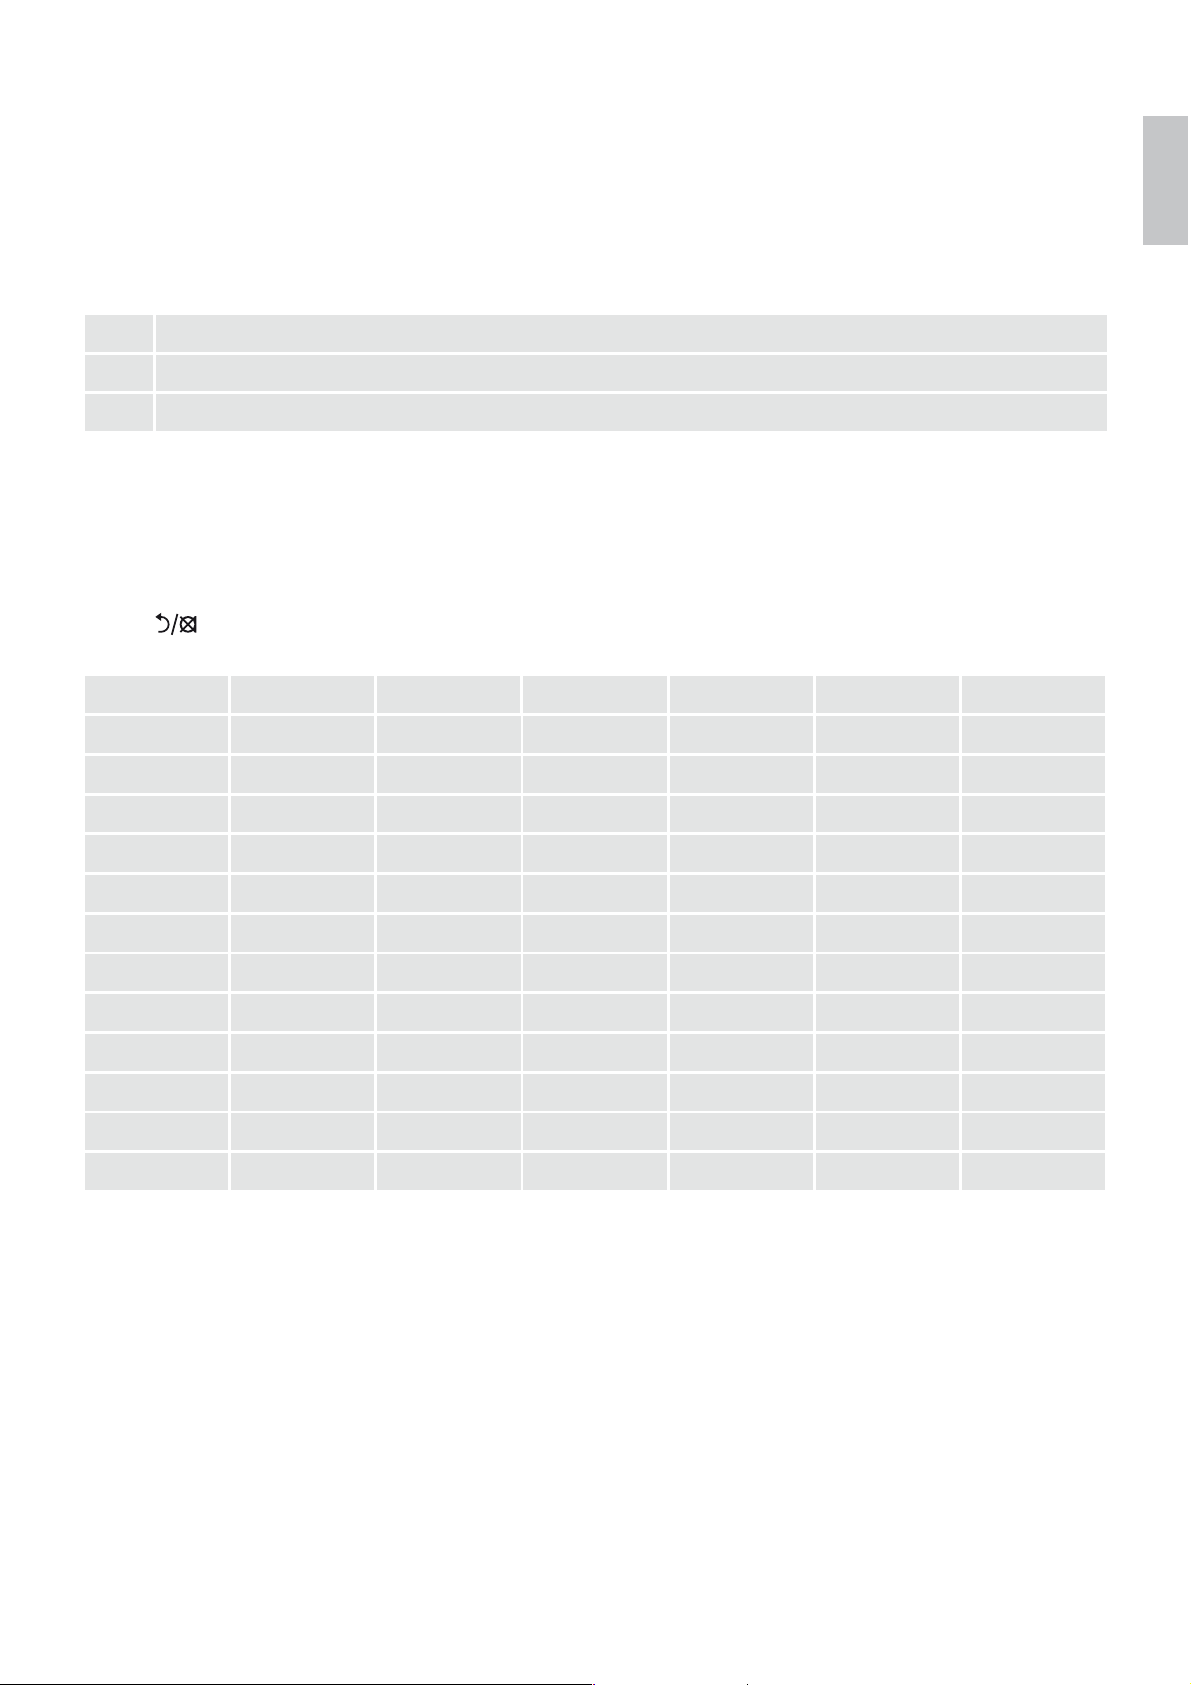
7.5 Text and Number Entry
You can select different characters by using repeated presses of the alphanumeric keypad. This will be
helpful when storing a name in the phonebook or renaming your handset. The characters are printed on
the keys.
For example, to enter the name Tom :
T Press 8 once
O Press 6 three times
M Press 6 once
In editing mode, a cursor is displayed to indicate the current text entry position.
It is positioned at the right of the last character entered.
Writing Tips:
tOnce a character is selected, the cursor will move to the next position after a short pause.
tPress
to delete the last letter or number.
Key 1st press 2nd press 3rd press 4th press 5th press 6th press
1 Space 1 _ < > *
2 ABC2
3 DE F 3
4 GHI 4
5 JKL5
6 MNO6
7 PQRS7
8 TUV8?
9 WX Y Z 9
0 0- / Space#+
* *
# #
Page 10
8. USING YOUR PHONE
8.1 Make a Call
8.1.1 Pre-dialling
tEnter the phone number (maximum 24 digits). If you make a mistake, press
to delete the last
entered number.
tPress
to dial the phone number.
8.1.2 Direct Dialling
tPress
on your Handset.
tDial the number.
8.1.3 Call from the Redial List
tPress
in standby mode.
>The last number dialled is displayed.
tPress
to select the desired entry in the redial list and then press to dial out the selected redial
number.
8.1.4 Call from the Call Log
tPress
in standby mode.
tPress
to select the desired entry in the call log and then press to dial out the selected call log
number.
Note: You need to subscribe to Caller Line Identification service to be able to see the caller’s number or
name in the call log.
8.1.5 Call from the Phonebook
tPress
in standby mode.
tPress
to select the desired entry in the phonebook and then press to dial out the selected
phonebook number.
8.2 Answer and End a Call
tWhen the phone rings, press
on your handset.
tTo en d a c o n v er s a t io n , pr e s s
on your handset.
Warning: When the handset is ringing, please do not hold it too close to your ear as the volume of the
ringing tone may damage your hearing.
Note: You can simply place the handset back on its base station to end the call, provided you have not
deactivated the Auto hang-up feature.
8.3 Handset Speakerphone
During a call, you can press
to alternate between hands-free speakerphone and handset earpiece.
Page 11

UK
8.4 Adjust Earpiece Volume
There are 5 levels of earpiece volume on your Handset.
tDuring a call, press
to select from “VOLUME 1” to “VOLUME 5”.
>The current setting is shown.
>When you end the call, the setting will remain at the last selected level.
8.5 Adjust Speaker Volume
There are 5 levels of speaker volume.
tDuring a handsfree call, press
to select from “VOLUME 1” to “VOLUME 5”.
>The current setting is shown.
>When you end the call, the setting will remain at the last selected level.
8.6 Mute/Unmute the Microphone
tWhen the microphone is muted, the handset displays “MUTE ON” and your caller cannot hear you.
tDuring a call, press
to turn on/off the microphone.
8.7 Paging
The paging feature enables you to locate a missing handset if the handset is in range and contains
charged batteries.
tPress the
key under the base unit.
>All the registered handsets that are in range will start to ring.
You c an st op th e p ag ing b y p re ss ing a ny ke y o n a h an dset o r t he
key under the base unit again.
8.8 Switching the Handset On/Off
Press and hold
on your Handset for more than 2 seconds to switch the handset on or off in standby
mode.
>When first turned on, the display shows “SEARCHING…” until the handset finds the base.
Note: You can switch the handset off to save battery life, if the handset is not on the base.
IMPORTANT:
When the handset is “OFF”, it cannot be used for making calls including emergency calls. It will not ring
when there is an incoming call.
To a n sw er a c a ll , y o u w i l l n e e d t o s w it c h i t b a c k o n a n d i t m a y ta ke s o me t i me f o r t h e h a n ds et t o r e establish a radio link with the base unit.
8.9 To Lock/Unlock the Keypad
You c an lo ck th e k ey pad t o a vo id m ak ing c all s or pr es sin g the k eys a cci de nta ll y.
tIn standby mode, press and hold
for 2 seconds to lock the keypad.
>The handset displays “KEYS LOCKED”.
tTo tu rn th e k ey p a d l o c k o f f , pr es s a nd h o ld
again.
Note: Incoming calls can still be answered even if the keypad is locked.
Page 12

8.10 Make an Internal Call (Multi - handset models only)
The system allows an intercom call between any two handsets registered to the same base. It also allows
you to transfer external calls from one handset to another and set up a 3-way conference with two handsets
and an external call.
8.11 Initiate an Intercom Call
tIn standby mode, press
.
>Intercom is established immediately if there are only 2 registered handsets.
>If there are more than 2 registered handsets, the handset numbers which are available for intercom
will be displayed.
tPress the handset number you wish to call or press * to call all handsets.
tPress
on a called handset to answer the internal call, where both internal callers can talk.
tTo en d t he i n te r c om c a ll , p re s s
on either handset.
Note:
tYo u can c ance l the i nte rc om c al l be fo re i t is an swe re d by pr essi ng
or on the originating handset.
tIf there is no answer from the called handset within one minute, the paging will be cancelled automatically.
tIf no other handset is registered to the base, 4 beeps will be heard and it will return to standby mode.
8.12 Answer an External Call during an Intercom Call
You will hear an alert tone when you receive an incoming external call during an intercom call and you can
choose from the following options:
tPress
to cancel the intercom call and let the handsets receive normal incoming ringing.
tPress
to answer the incoming call and end the intercom call.
tPress
to answer the incoming call and put the intercom call on hold.
tWhen the incoming external call is connected and the intercom call is on hold, press and hold
to start
a three-party conference call with both the incoming and the intercom parties.
tWhen the handset is connected to an external call, you can press
to enter into a three-party conference
call directly.
8.13 Initiate an Intercom during a Call
You can intercom with another system handset during a call, or invite another system handset to join in a
conference call with you and the external caller.
tDuring the call, press
to put the external call on hold.
>Intercom is established immediately if there are only 2 registered handsets.
>If there are more than 2 registered handsets, the handset numbers which are available for intercom
will be displayed.
tPress the handset number you wish to call or press
to call all handsets.
Note: If there is no answer from the called handset, or you wish to cancel the intercom call before it is
answered, press to return to the external call.
tPress
on the called handset to answer the internal call, where both internal callers can talk.
tWhen the intercom call is connected, you can choose from the following options on the originating
handset:
>Press and hold
for 2 seconds to connect both handsets to the call in conference mode.
>Press
on either handset to terminate the intercom on that handset, and leave the external call
connected to the other handset.
Page 13
UK
8.14 Transfer an External Call to another Handset
tDuring the call, press
to put the external call on hold.
>Intercom is established immediately if there are only 2 registered handsets.
>If there are more than 2 registered handsets, the handset numbers which are available for intercom
will be displayed.
tPress the handset number you wish to call or press
to call all handsets.
Note: If there is no answer from the called handset, or you wish to cancel the intercom call before it is
answered, press
to return to the external call.
tPress
on the called handset to answer the internal call, where both internal callers can talk.
tPress
on the originating handset to transfer the external call to the called handset.
>The external call is transferred.
9. DIRECT ACCESS MEMORY
In addition to the phonebook memory, there are 2 direct access memories (Keys 1 & 2) on the handset. A
long press on the keys in standby mode will automatically dial the stored phone number.
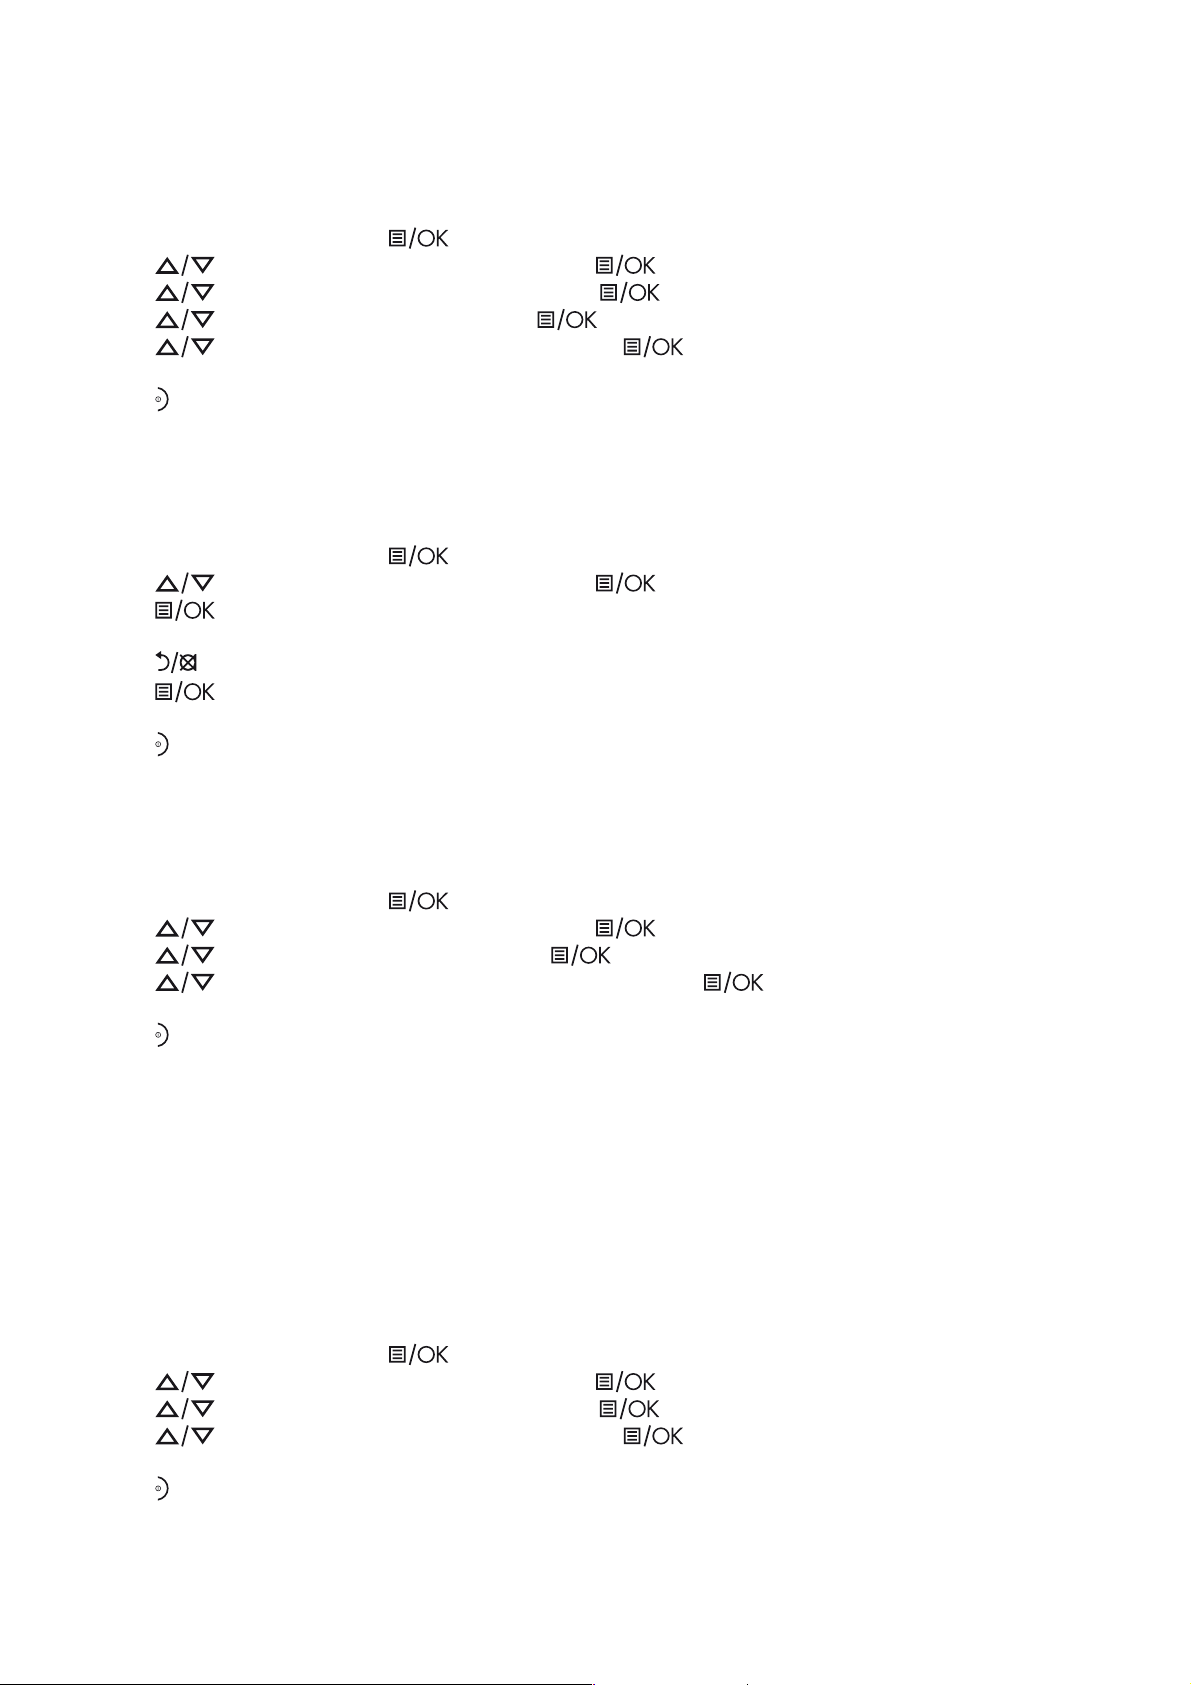
9.1 Add Direct Access Memory
tFrom the home screen, press
.
tPress
to “PHONEBOOK” and then press to select.
tPress
to “DIRECT MEM.” and then press to select.
tPress
to “KEY 1” or “KEY 2” and then press to select.
>The stored name is displayed, or “NO NUMBER” if it is empty.
tPress
to enter the “DIRECT MEM.” menu to add/edit the name or number.
tPress
again to select “EDIT NUMBER”.
>The display shows the currently stored name or just “ENTER NAME” if it is empty.
tEdit or enter the name of your contact and press
.
If you make a mistake, press
to delete the last character entered.
>The display shows the currently stored number or just “ENTER NUMBER” if it is empty.
tEdit or enter the number of your contact and press
.
If you make a mistake, press
to delete the last digit entered.
>A confirmation tone is played.
tPress
to return to standby mode.
9.2 Delete Direct Access Memory
tFrom the home screen, press
.
tPress
to “PHONEBOOK” and then press to select.
tPress
to “DIRECT MEM.” and then press to select.
tPress
to “KEY 1” or “KEY 2” and then press to select.
>“NO NUMBER” is displayed if it is empty. Otherwise, the stored name is displayed.
tPress
to enter the menu options.
tPress
to “DELETE” and then press to select.
>“CONFIRM?” is displayed.
tPress
again to confirm.
>A confirmation tone is played.
tPress
to return to standby mode.
Page 14
10. PHONEBOOK
The unit can store up to 200 phonebook entries. Each phonebook entry can have a maximum of 24 digits
for the phone number and 12 characters for the name.
10.1 Store a Contact in the Phonebook
tFrom the home screen, press
.
tPress
to “PHONEBOOK” and then press to select.
tPress
to select “NEW ENTRY”.
>The screen displays “ENTER NAME”.
tEnter the name of the contact (maximum 12 characters) using the keypad.
tIf you make a mistake, press
to delete the last character entered.
tPress
to confirm the name entry.
>The screen displays “ENTER NUMBER”.
tEnter the number of the contact (maximum 24 digits) using the keypad.
tIf you make a mistake, press
to delete the last digit entered.
tPress
to confirm.
>A confirmation tone is played.
tPress
to return to standby mode.
Note: You cannot store a new phonebook entry when the memory is full. In this case, you have to delete
existing entries to make space for new ones.
10.2 Access the Phonebook
tFrom the home screen, press
to open the phonebook list.
tAlternatively, from the home screen, you can press
, then to “PHONEBOOK”, then press
and to “VIEW ENTRIES”, then press to open the phonebook list.
>The phonebook entries are listed in alphabetical order.
tPress
to scroll through the list of entries.
tPress
P
to view the details of the selected entry.
tPress
to return to standby mode.
Note: Instead of pressing
to browse the phonebook entries, you can press the numeric key
corresponding to the first letter of the entry you wish to locate.
For example, pressing 2 will show the first entry starting with A. Pressing 2 again will show the first entry
starting with B, and so on..., and then press
to find the entry you want.
10.3 Modify a Phonebook Entry
tFrom the home screen, press
to open the phonebook list.
tPress
to select the entry you want to modify.
tPress
to open the phonebook menu options.
tPress
to “EDIT ENTRY” and then press to select.
>The current name is displayed.
tEdit the name using the keypad, using
to delete characters.
tPress
to confirm.
tEdit the number and then press
to confirm.
>A confirmation tone is played.
tPress
to return to standby mode.
Page 15

UK
10.4 Delete a Phonebook Entry
tFrom the home screen, press
to open the phonebook list.
tPress
to select the entry you want to delete.
tPress
to open the phonebook menu options.
tPress
to “DELETE” and then press to select.
>“CONFIRM?” is displayed.
tPress
again to confirm.
>A confirmation tone is played.
tPress
to return to standby mode.
10.5 Delete All Entries from the Phonebook List
tFrom the home screen, press
to open the phonebook list.
tPress
to open the phonebook menu options.
tPress
to “DELETE ALL” and then press to select.
>“CONFIRM?” is displayed.
tPress
again to confirm.
>A confirmation tone is played.
tPress
to return to standby mode.
11. CALLER DISPLAY (NETWORK DEPENDENT)
If you have subscribed to the Calling Line Identification (CLI) service with your network service provider,
the phone number of your caller will appear on the handset display when there is an incoming call and
then stored in your Call Log.
If the caller’s number is stored in your phonebook along with a name, the name will appear on the handset
display when the call is received and in the Call Log.
Note: If the call is from someone whose number is unavailable (e.g. an international call or from a private
exchange), the handset will display “UNAVAILABLE” when yo u re ce iv e t he ca ll and in th e Call Log aft er wa rd s.
If the call is from someone whose number is withheld, the handset will display “WITHHELD” when you
receive the call and in the Call Log afterwards.
If you have not subscribed to the Caller Line Identification service, the handset will display “UNKNOWN”
when you receive the call and it will not be saved in the Call Log.
Information about incoming calls varies by country and network operators.
11.1 Call Log
The Call Log stores the last 20 external calls whether or not you have answered the call.
Only the most recent call is saved if there are repeat calls from the same number.
When the Call Log is full, the next new call will replace the oldest entry.
11.1.1 Access the Call Log
tFrom the home screen, press
.
tPress
to browse through the call list.
>The calls are displayed in chronological order with the most recent call at the top of the list.
Page 16
11.1.2 Save a Call Log Entry into the Phonebook
tFrom the home screen, press .
tPress
to select an entry and then press .
tPress M again to select “SAVE NUMBER”.
tEnter the name of the contact (maximum 12 characters) and then press
to save.
tEdit the number (if necessary) and then press
to save the entry.
>A confirmation tone is played.
tPress
to return to standby mode.
11.1.3 Delete a Call Log Entry
tFrom the home screen, press
.
tPress
to select an entry and then press .
tPress
to “DELETE” and then press to select.
>“CONFIRM?” is displayed.
tPress
again to confirm.
>A confirmation tone is played.
tPress
to return to standby mode.
11.2 Delete All Entries in the Call Log
tFrom the home screen, press
.
tPress
.
tPress +/- to “DELETE ALL” and then press
to select.
>“CONFIRM?” is displayed.
tPress
again to confirm.
>A confirmation tone is played.
11.3 Redial List
The redial list stores the last 10 numbers dialled. A maximum of 24 digits can be displayed for each entry.
11.3.1 Access the Redial List
tFrom the home screen, press
.
tPress
on to browse the redial list.
>The last dialled number will appear first in the redial list.
>If the number has more than 14 digits press
P
to see other digits.
11.3.2 Save a Redial Number into the Phonebook
tFrom the home screen, press
.
tPress
to select an entry and press .
tPress
again to select “SAVE NUMBER”.
tEnter the name of the contact (maximum 12 characters) and then press
.
tEdit the number (if necessary) and then press
to save.
>A confirmation tone is played.
tPress
to return to standby mode.
Page 17
UK
11.3.3 Edit a Redial Number
)URPWKHKRPHVFUHHQSUHVV .
3UHVV
WRVHOHFWDQHQWU\DQGWKHQSUHVV .
3UHVV
WR“EDIT ENTRY”DQGWKHQSUHVV WRVHOHFW
(GLWWKHQXPEHUDQGSUHVV
WRFRQÀUP
>A confirmation tone is played.
3UHVV
WRUHWXUQWRVWDQGE\PRGH
11.3.4 Delete a Redial Number
tFrom the home screen, press
.
tPress
to select an entry and then press .
tPress
to “DELETE” and then press to select.
>“CONFIRM?” is displayed.
tPress
again to confirm.
>A confirmation tone is played.
tPress
to return to standby mode.
11.3.5 Delete All Entries from the Redial List
tFrom the home screen, press
.
tPress
.
tPress
to “DELETE ALL” and then press to select.
>“CONFIRM?” is displayed.
tPress
again to confirm.
>A confirmation tone played.
12. CLOCK AND ALARM SETTINGS
12.1 Date and Time Settings
If you have subscribed to the Calling Line Identification service, the time and date settings will be
automatically updated by the network when you receive an incoming call, but you may still need to set
the correct year.
You c an al so se t t he da te an d time m anu al ly.
tFrom the home screen, press
.
tPress
to “CLOCK&ALARM“ and the press to select.
tPress
again to select “DATE & TIME”.
>The last stored date is displayed, with the third digit of the year flashing.
tEnter the current date and press
to confirm.
>Enter 03 May 2012 as [1], [2], [0], [5], [0], [3].
>If you make a mistake, press
to delete the last digit entered.
tEnter the current time and press
to confirm. The default time format is 24 HOURS. (To change time
format, see Change the Date Format on page 51.)
>For 24-hour format, enter 1:30pm as [1], [3], [3], [0].
>For 12-hour format, enter the time and then press + to select am , or press- to select pm.
>If you make a mistake, press
to delete the last digit entered.
>A confirmation tone is played.
tPress
to return to standby mode.
Page 18
12.1.1 Change the Time Format
The time can be displayed either as 12-hour or 24-hour. The default setting is 24 HOURS.
tFrom the home screen, press
.
tPress
to “CLOCK&ALARM“ and then press to select.
tPress
to “SET FORMAT” and then press to select.
tPress
again to select TIME FORMAT.
>The current setting is displayed.
tPress
to select 12 HOURS or 24 HOURS and then press to confirm.
>A confirmation tone is played.
tPress
to return to standby mode.
12.1.2 Change the Date Format
The date can be displayed either as Month/Day or Day/Month. The default setting is DD/MM.
tFrom the home screen, press
.
tPress
to “CLOCK&ALARM“ and then press to select.
tPress
to “SET FORMAT” and then press to select.
tPress
to “DATE FORMAT” and then press to select.
>The current setting is displayed.
tPress
to select “DD/MM” or “MM/DD” and then press to confirm.
>A confirmation tone is played.
tPress
to return to standby mode.
12.2 Alarm Settings
An alarm can be set on a handset, to sound at a set time only once or repeated each day.
When an alarm is set, the alarm icon is shown on the handset display.
When the alarm time is reached, the handset will flash ”-ALARM-” on the display and sound an alarm for 1
minute, at the same volume setting as the handset ringer. If the ringer is off, it will ring at volume setting 1.
When the alarm rings, you can press any key on the handset to stop the ringing, even if the keylock is
activated.
tFrom the home screen, press
.
tPress
to “CLOCK&ALARM“ and then press to select.
tPress
to “ALARM” and then press to select.
tPress
to an alarm option.
>OFF: Turn alarm off
>ONCE: The alarm sounds once at the set time.
>DAILY: The alarm sounds daily at the set time.
tPress
to select the option.
tIf “ONCE” or “DAILY” is selected, enter the desired hour and minute.
tPress + to select am, or press- to select pm if the time is in 12-hour format.
tPress
to confirm the alarm setting.
>A confirmation tone is played.
tPress
to return to standby mode.
Page 19
UK
12.2.1 Set the Alarm Tone
You c an se lec t from 3 al ar m m el odi es .
tFrom the home screen, press
.
tPress
to “CLOCK&ALARM“ and then press to select.
tPress
to “ALARM MELODY” and then press to select.
tPress
to select the desired alarm tone (each tone will sound as it is selected) and then press
to confirm.
>A confirmation tone is played.
tPress
to return to standby mode.
13. SETTINGS
Your phone comes with a selection of settings that you can change to personalise your phone to the way
you like it to work.
13.1 Set the Ring Volume
You c an se t t he ha nd set r ing er vol um e f ro m Le ve l 1 t o Le ve l 4 o r t ur n t he ri ng er of f.
tFrom the home screen, press
.
tPress
to “HANDSET OPTS” and then press to select.
tPress
to “RINGER&TONES” and then press to select.
tPress
again to select “RING VOLUME”.
tPress
to select the desired setting (each volume level will play as it is selected) and then press
to confirm.
>A confirmation tone is played.
tPress
to return to standby mode.
Note: Press and hold
to switch the ringer on and off when the handset is in standby mode. The
ringer off icon displays on the screen when ringer off feature is activated.
13.2 Set the Ring Tone
You c an se lec t from 1 0 r in ger m elo di es f or bo th in te rna l and e xte rn al ca lls .
tFrom the home screen, press
.
tPress
to “HANDSET OPTS” and then press to select.
tPress
to “RINGER&TONES” and then press to select.
tPress
to “RING TONE” and then press to select.
tPress
to select the desired ringer melody from 1 to 10 (each melody will play as it is selected) and
then press
to confirm.
>A confirmation tone is played.
tPress
to return to standby mode.
Page 20
13.3 Set the Key Tone
The handset emits a tone with each key press. You can choose to turn this tone on or off. The default
setting is ”ON”.
tFrom the home screen, press
.
tPress
to “HANDSET OPTS” and then press to select.
tPress
to “RINGER&TONES” and then press to select.
tPress
to “KEY TONE” and then press to select.
tPress
to select “ON” or “OFF” and then press to confirm.
>A confirmation tone is played.
tPress
to return to standby mode.
13.4 Rename the Handset
You c an pe rso na lis e you r han ds et b y cha ng ing t he na me sh own o n t he ha nd set i n s ta ndby m ode .
tFrom the home screen, press
.
tPress
to “HANDSET OPTS” and then press .
tPress
to select “HANDSET NAME”.
tThe current handset name is displayed.
tPress
to delete the letters one by one and enter the new name (maximum 10 characters).
tPress
to confirm.
>A confirmation tone is played.
tPress
to return to standby mode.
13.5 Set the Display Language
You c an ch ang e the d isp la y l an guag e on yo ur ha nds et .
tFrom the home screen, press
.
tPress
to “HANDSET OPTS” and then press to select.
tPress
to “LANGUAGE” and then press to select.
tPress
to select your preferred language and then press to confirm.
>A confirmation tone is played.
tPress
to return to standby mode.
Note: Once the display language is set, the handset will switch to display in the selected language
immediately.
13.6 Set Auto Hang-up
This function enables you to end a call automatically by simply placing the handset back on the base unit
(main Eclipse handset) or charging pod (additional handsets). By default, the Auto Hang-up feature is ON,
but it can be turned off.
tFrom the home screen, press
.
tPress
to “HANDSET OPTS” and then press to select.
tPress
to „AUTO HANG-UP“ and then press to select.
tPress
to select “ON” or “OFF” and then press to confirm.
>A confirmation tone is played.
tPress
to return to standby mode.
Page 21
UK
13.7 Handset Registration
IMPORTANT: When you purchase your unit, all handsets are already registered to your base, so you do
not need to register them.
Handset registration is only necessary when you buy extra handsets or if a handset has become faulty.
You can register up to four handsets to one base station, with each handset’s number (1 to 4) shown on
its display.
Note: Each handset can only be registered to one base.
You need to enter the Master PIN before you can register or deregister handsets. The default Master PIN
is 0000.
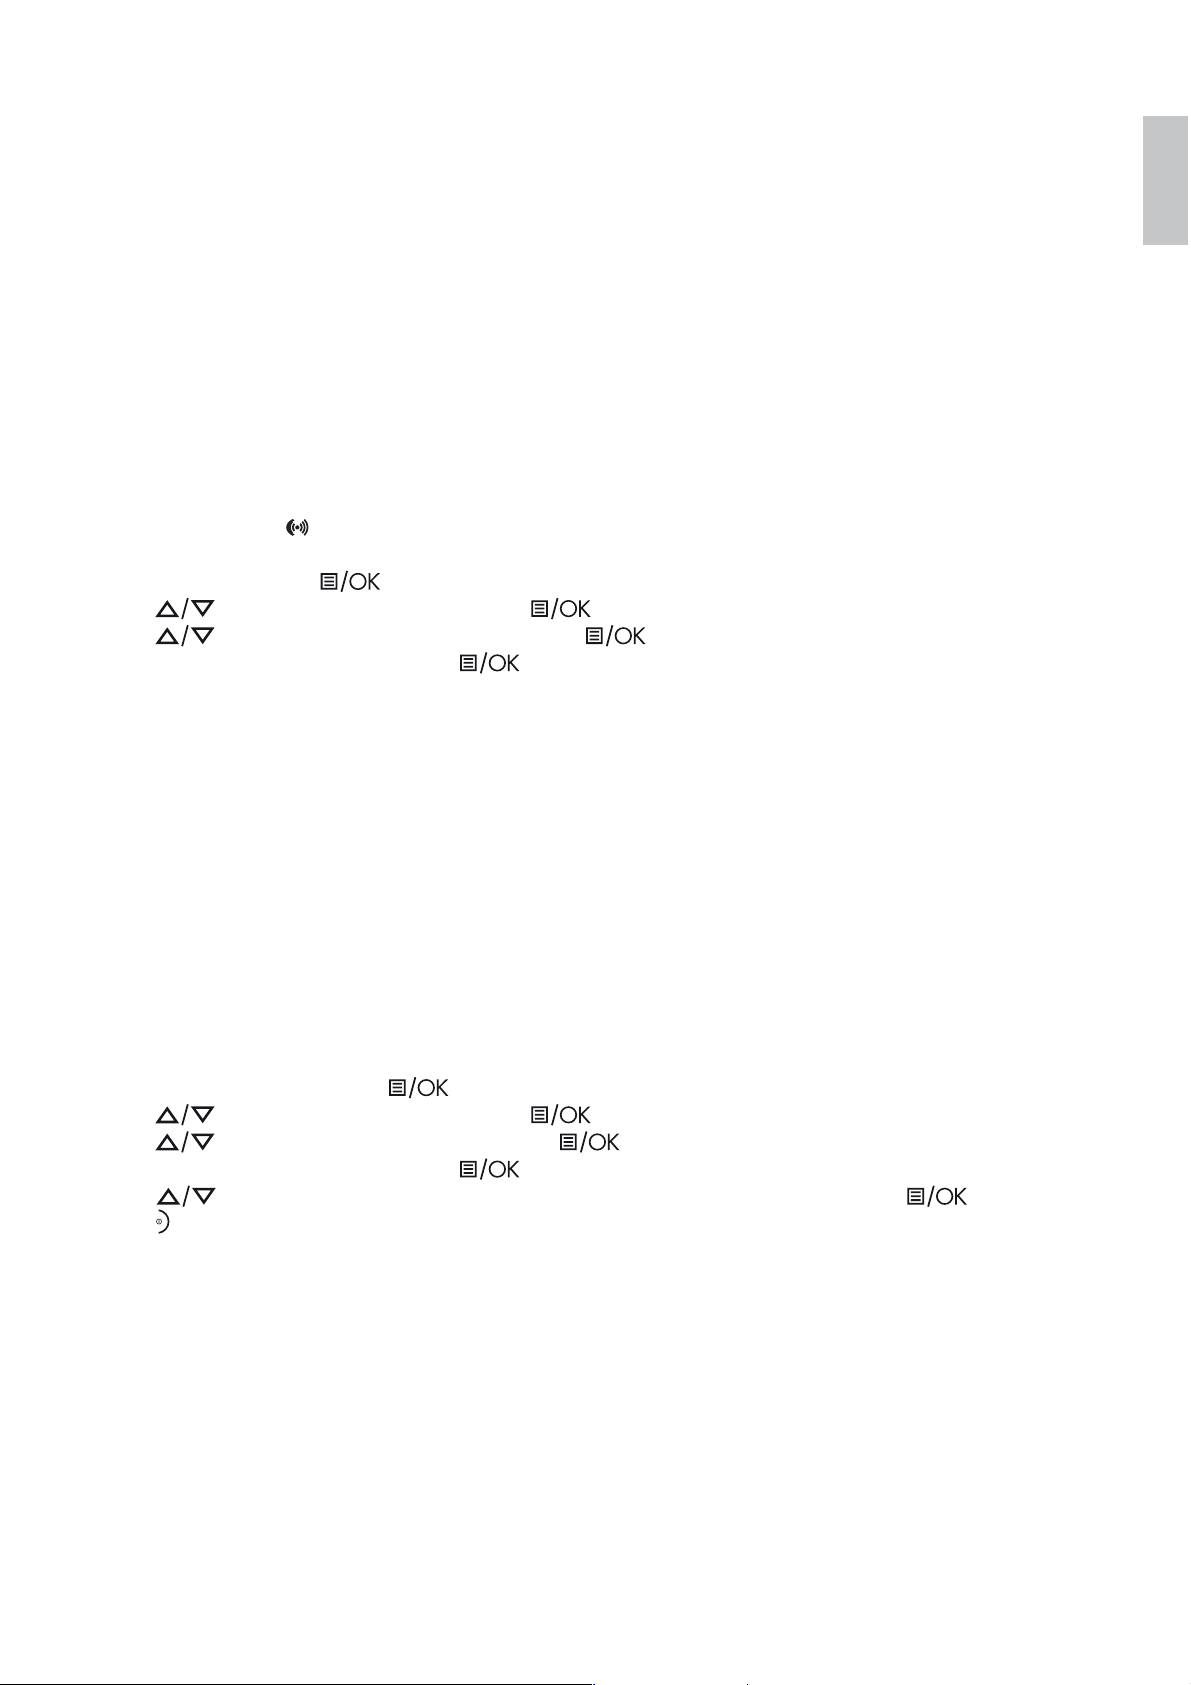
13.8 Register Additional Handsets
tPress and hold the
key under the base unit for approximately 5 seconds.
>The message indicator on the base will flash for up to 1 minute, while it is in registration mode.
tOn the handset, press
.
tPress
to “SETTINGS” and then press to select.
tPress
to “REGISTRATION” and then press to select.
tEnter the Master PIN and then press
to confirm.
Note: After entering the Master PIN,
>WAITING flashes on the screen.
>A confirmation tone is played to indicate successful registration, and the handset returns to standby
mode, with its handset number displayed.
>If no base is found with the entered PIN, error tones are played to indicate failed registration and
“PLS REG H/S” is displayed on the screen. You will need to repeat from step 1 above.
>During steps 2-5, if no key is pressed on the handset within 10 seconds, the registration procedure will
be aborted. If this happens, repeat from step 1 above.
13.9 Deregister your Handset
You can deregister the handset you are using, or any other handset registered to the same base. The
default Master PIN is 0000.
tFrom the home screen, press
.
tPress
to “SETTINGS” and then press to select.
tPress
to ”DEREGISTER” and then press to select.
tEnter the Master PIN and then press
to confirm.
tPress
to select the handset number you want to deregister and then press to confirm, or
press
to cancel the deregistration procedure.
Note: After confirming the handset you want to remove:
>A confirmation tone is played to indicate successful deregistration.
>“PLS REG H/S” is displayed on the home screen of the unregistered handset.
>If no handset key is pressed within 10 seconds, the procedure will abort and the handset returns to
standby mode.
Page 22
13.10 Change the Master PIN
The Master PIN is used for registration/deregistration of handsets and for accessing the answering machine
remotely. The default Master PIN number is 0000. The maximum length of the Master PIN is 8 digits.
Note: If you forget your PIN code, you can reset it to its default 0000 using a handset Reset.
tFrom the home screen, press
.
tPress
to “SETTINGS” and then press to select.
tPress
to select “CHANGE PIN”.
tEnter the current Master PIN and then press
to confirm.
>The PIN will be shown as asterisks (*) on the screen as you enter them.
tEnter the new PIN and then press
to confirm.
>A confirmation tone is played.
tPress
to return to the home screen.
13.11 Set the First Ring (for Additional Handsets Only)
If you have subscribed to Caller Line Identification service and do not wish to hear the phone ring before
the caller identification is displayed, you can set the “FIRST RING” to “OFF”.
tFrom the home screen of your additional handset, press
.
tPress
to “ADVANCED SET” and then press to select.
tPress
to “FIRST RING” and then press to select.
tPress
to select “ON” or “OFF” and then press to confirm.
>A confirmation tone is played.
tPress
to return to standby mode.
13.12 Change the Recall Time
You m ay ne ed t o p re ss
to send a Flash signal (also called Recall or Timed Break Recall) if you are
connected to a PBX or using certain network services. You should normally leave the Recall Time at its
default setting, Short (100ms). However, it can be changed to Medium (270ms) or Long (600ms) if your
telephone is connected to a PBX that requires a different recall time.
tFrom the home screen, press
.
tPress
to “SETTINGS” and then press to select.
tPress
to “RECALL TIME” and then press to select.
tPress
to select “SHORT”, “MEDIUM” or “LONG” and then press to confirm.
>A confirmation tone is played.
tPress
to return to standby mode.
13.13 Reset the Unit
You c an re se t y ou r p ho ne to it s def au lt se tti ng s w it h th is fe at ure.
Note: Upon reset, all your personal settings, call log and redial list entries will be deleted and the phone will
return to its default settings, including the Master PIN. However, your phonebook will remain unchanged
after reset and any recorded messages will remain unchanged, while all other settings will be reset.
tFrom the home screen, press
.
tPress
to “SETTINGS” and then press to select.
tPress
to select “RESET” and then press to select.
tPress
again to confirm.
>A confirmation tone is played and the unit is reset to its default settings.
Page 23
UK
14. ANSWERING MACHINE
Your phone includes a telephone answering machine that records unanswered calls when it is on.
The answering machine can store up to 59 messages within the maximum recording time of approximately
30 minutes and each message can be up to 3 minutes long.
When the answering machine is on, calls are answered after the set “RING DELAY”.
If you have selected “RECORD MSGS” then the caller can leave you a message after hearing your
announcement.
If you have selected “ANSWER ONLY” mode, the caller can only listen to your announcement but cannot
leave you a message. If the answering machine memory is full, the answering machine LED on the base
flashes rapidly, the answering machine icon on the handset flashes slowly and the “ANSWER ONLY”
announcement will be played to new callers. You will have to delete some messages before any new ones
can be recorded.
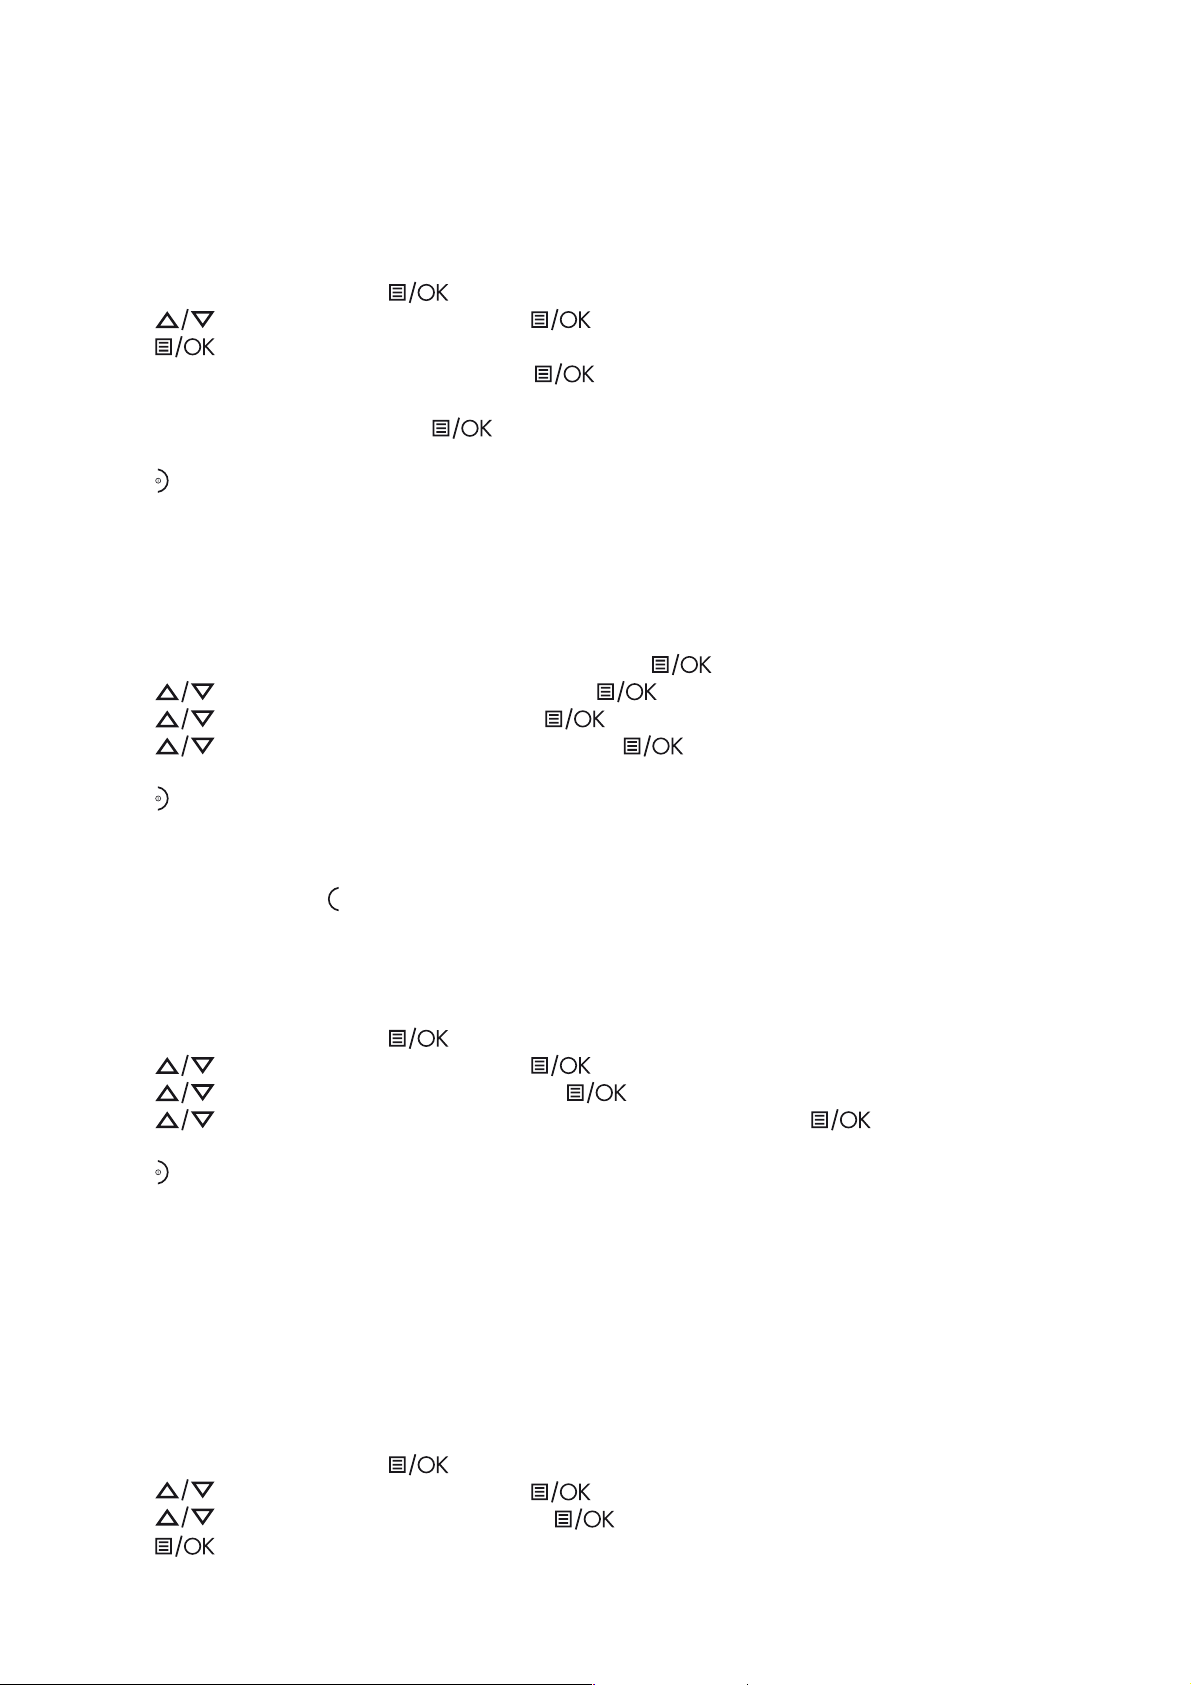
14.1 Turning the Answering Machine On/Off
tFrom the home screen, press
.
tPress
again to select “ANS. SYSTEM”.
tPress
to “ANS. ON/OFF” and then press to select.
tPress
to select “ON” or “OFF” and then press to confirm.
>A confirmation tone is played.
tPress
to return to standby mode.
Note: If the answering machine is “OFF” and the Master PIN is still set at its default 0000, the answering
machine will not answer any incoming calls.
However, if the Master PIN has been changed and Remote Access is activated, it will answer incoming calls
after 14 rings to allow remote access, and the “ANSWER ONLY” announcement will play.
14.2 Answer Mode
The phone comes with two pre-recorded announcements for the respective answer modes: “ANSWER
ONLY” and “RECORD MSGS”. By default, the answer mode is “RECORD MSGS” which allows a caller
to leave a message on the answering machine after hearing the announcement. This can be changed to
“ANSWER ONLY” mode, which does not allow callers to leave any messages on the answering machine
after hearing the announcement.
14.2.1 Set Answer Mode
tFrom the home screen, press
.
tPress
again to select “ANS. SYSTEM”.
tPress
to “ANSWER MODE” and then press to select.
tPress
to select “ANSWER ONLY” or “RECORD MSGS” and then press to confirm.
>A confirmation tone is played.
tPress
to return to standby mode.
Page 24

14.3 Answering Machine Settings
14.3.1 Set the Ring Delay
You can select the number of rings before the answering machine answers a call and starts playing the
announcement. You can set the delay from 2 to 7 rings or “TOLL SAVER“.
tFrom the home screen, press
.
tPress
again to select “ANS. SYSTEM“.
tPress
to “ANS. SETTING” and then press .
tPress
to select “RING DELAY”.
tPress
to select “2 RINGS“ – “7 RINGS“ or “TOLL SAVER” and then press to confirm.
>A confirmation tone is played.
tPress
to return to standby mode.
Note: If you select “TOLL SAVER” the answering machine will answer an incoming call on the fifth ring if
you have no new messages and on the third ring if you do.
When you call your answering machine to check messages, if it does not answer on the third ring, then you
can hang up immediately, knowing that you have no new messages. This feature can save you the cost of
a long-distance call when you check your messages remotely.
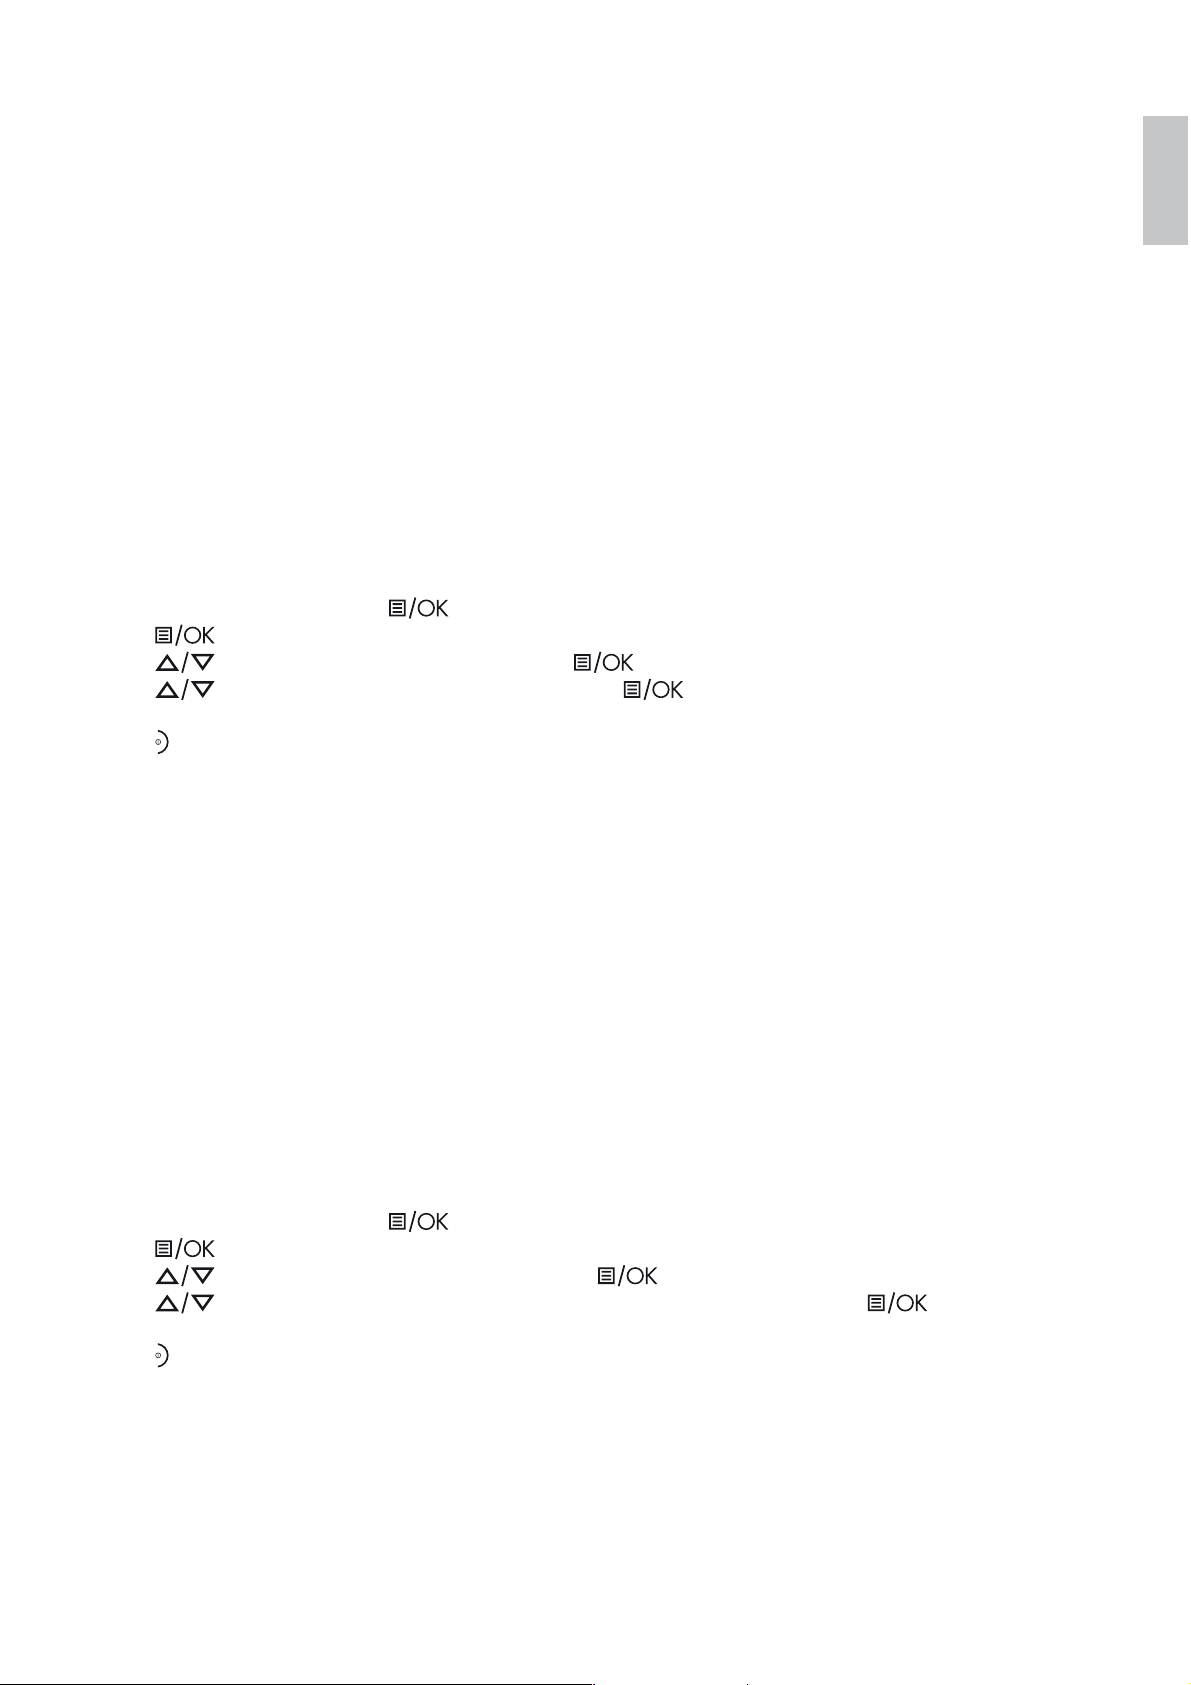
14.3.2 Activate/Deactivate Remote Access
tFrom the home screen, press
.
tPress
again to select “ANS. SYSTEM“.
tPress
to “ANS. SETTING” and then press to select.
tPress
to “REMOTE ACC.“ and then press to select.
tPress
to select “ACTIVATE“ or “DEACTIVATE“ and then press to confirm.
>A confirmation tone is played.
tPress
to return to standby mode.
Note: Once the remote control access is activated, you can check the messages on your answering
machine when you are away from home, by calling from another phone.
The Master PIN is used for accessing the answering machine remotely. If your answering machine is off,
you must change your Master PIN from its default 0000 before you can use the remote access feature to
turn on your answering machine.
14.3.3 Change the Voice Language
You may be able to select a different language for the answering machine’s pre- recorded announcements.
tFrom the home screen, press
.
tPress
again to select “ANS. SYSTEM“.
tPress
to “ANS. SETTING” and then press to select.
tPress
to “LANGUAGE” and then press to select.
tPress
to select your preferred language (if available) and then press to confirm.
>A confirmation tone is played.
tPress
to return to standby mode.
Page 25
UK
14.4 Message Playback
When there are new messages on the answering machine,
flashes on the handset screen.
tFrom the home screen, press
.
tPress
again to select “ANS. SYSTEM”.
tPress
again to select “PLAY”.
>Your messages will automatically playback through the handset’s speakerphone.
>The display will show the message number and the date and time of the call.
>Press
to listen to your messages privately through the earpiece of your handset.
tDuring playback, press
and then press to access the following options:
REPEAT Repeat the currently playing message
NEXT Play the next message
PREVIOUS Play the previous message
DELETE Delete the current message
Note: To return to the screen showing the message number and date/time, press
.
tPress
to return to standby mode.
14.5 Delete All Messages
Note: Only old messages can be deleted. New messages must be played before they can be deleted.
tFrom the home screen, press
.
tPress
again to select “ANS. SYSTEM”.
tPress
to select “DELETE ALL” and then press .
tPress
again to confirm.
>A confirmation tone is played.
tPress
to return to standby mode.
14.6 Announcement
When the answering system answers a call, the pre-recorded announcement is played to the caller unless
you have recorded your own announcement.
The phone comes with two pre-recorded announcements for the respective answer modes: “ANSWER
ONLY” and “RECORD MSGS”. By default, the answer mode is “RECORD MSGS”, which allows a caller
to leave a message on the answering machine after hearing the announcement. This can be changed to
“ANSWER ONLY” mode, which does not allow callers to leave any messages on the answering machine
after hearing the announcement.
Page 26

14.6.1 Record a Personal Announcement
You c an ch oos e to re pl ace t he de fau lt an no unc em ent w ith yo ur ow n p er son al an no unc em ent s.
Note: The maximum length of an announcement is 2 minutes.
tFrom the home screen, press
.
tPress
again to select “ANS. SYSTEM”.
tPress
to “ANNOUNCEMENT” and then press to select.
tPress
to select “ANSWER ONLY” or “RECORD MSGS” and then press to confirm.
tPress
to “RECORD ANNC” and then press .
>A confirmation tone is played.
tSpeak into the handset to start recording your new announcement and press
again to end the
recording.
>A confirmation tone is played.
tPress
to return to standby mode.
14.6.2 Listen to an announcement
tFrom the home screen, press
.
tPress
again to select “ANS. SYSTEM”.
tPress
to “ANNOUNCEMENT” and then press to select.
tPress
to select “ANSWER ONLY” or “RECORD MSGS”, and then press to confirm.
tPress
to select “PLAY“.
>The announcement plays through the phone’s speaker.
>Press
if you wish to listen to the announcement privately over the earpiece.
tPress
to return to standby mode.
14.6.3 Delete a Personal Announcement
If you want to return to using the default announcement, simply delete your personal announcement.
tFrom the home screen, press
.
tPress
again to select “ANS. SYSTEM”.
tPress
to “ANNOUNCEMENT” and then press to select.
tPress
to select “ANSWER ONLY” or “RECORD MSGS” and then press to confirm.
tPress
to “DELETE“ and press to confirm.
>The default pre-recorded announcement plays through the phone’s speaker.
>Press
if you wish to listen to the announcement privately over the earpiece.
tPress
to return to standby mode.
14.7 Remote Access
The phone lets you listen to the messages on your answering machine, or otherwise operate your
answering machine by calling in to your answering machine from another touch-tone phone.
You need to enter a remote access code (same as your Master PIN) to access your answering machine
remotely.
The remote access code is used to prevent unauthorised access of your answering machine.
Remote Access must be enabled if you want to use this feature.
Page 27

UK
14.7.1 Access the Answering Machine Remotely
tDial your phone number from any touch-tone phone.
tWhen your answering machine answers your call and starts playing your announcement, press the # key.
>The announcement will stop playing.
tEnter your Remote Access Code (same as your Master PIN code) within 8 seconds using the numeric
keypad on the touch-tone phone.
Note: that the answering machine will drop the call if you do not enter the Master PIN within 8 seconds.
tIf the code is accepted, you will hear a confirmation tone.
tThe answering machine will start to playback all the messages on your answering machine, beginning
with new messages, or if there are no recorded messages you will hear four beeps.
tUse the keypad on the touch-tone phone to carry out the following operations:
Keys
1 Repeat the previous message.
2 Playback messages / Repeat the current message.
3 Skip to the next message.
6 Delete the current message.
7 Turn on the answering machine in RECORD MSGS mode (main Eclipse handset) or
ANSW.&RECORD mode (additional handsets).
8 Stop message playback.
9 Tur n o ff t he an swe ri ng ma chi ne .
tWhen you have finished listening to your messages, simply hang up the phone to end.
Note:
If your answering machine is off but Remote Access is activated ,the answering machine will answer your
call after 14 rings, so that you can access it remotely, and the “ANSWER ONLY” announcement will play.
If you enter an incorrect Remote Access Code, you will hear a triple-beep error tone, and you will need
to enter the code again. If you enter the wrong Remote Code twice consecutively, the call will end
automatically.
Page 28

15. TROUBLESHOOTING
15.1 ALWAYS check that:
tYo u hav e foll ow ed al l t he st ep s l is ted i n t he us er gu id e to i nst al l a nd se t up yo ur te lep ho ne.
tAll connectors are securely inserted into their sockets.
tMains power for the base unit is switched on at the socket.
tThe handset’s batteries are correctly and securely installed and are sufficiently charged.
15.2 Everyday use
“I cannot make or answer calls”
tIf the handset’s display is blank, it may have been switched off. Press and hold
on the Handset to
switch it back on.
tCheck that the base unit’s mains power adapter is plugged in and power is switched on. The base unit
needs mains power for normal operation of the phone – not just for charging the handset batteries.
tMake sure that you are using the telephone line cable supplied with your phone. Other telephone line
cables might not work.
tMove the handset closer to the base unit.
tCheck the Battery Level symbol on the display. If it is low, put the handset back on the base unit or
charging pod to recharge the batteries.
t Switch off the power at the mains socket, wait for a short while and then switch it back on. This may solve
the problem.
“I cannot make calls”
tIf the handset display shows KEYS LOCKED, press and hold * to unlock it before you make a call.
tOnly one handset (or the base unit) can be connected to an external line at a time. If the handset display
shows, the base is already being used by either the answering machine or another handset.
“When I press on the keys, nothing happens”
tMake sure that the batteries are fitted in your handset. If the Battery Level symbol on the display shows
‘low’, put your handset back on the base unit or charging pod to charge.
“When I key in a number, it appears on the display, but I cannot make an external call”
tTry a different position for the base unit – somewhere higher if possible, or further away from other
electrical equipment.
“The phone does not ring”
tCheck that the base unit’s mains power adapter is plugged in and power is switched on.
tThe base unit needs mains power for normal operation of the phone – not just for charging the batteries.
tMake sure that you are using the telephone line cable that was supplied with your phone.
tMake sure that the ringer volume settings are not set to off. Increase the ringer volume settings.
“My call was cut off when I went out of range. Now I can’t use my handset.”
tMove the handset closer to the base unit before you try to make a call again.
“There is interference and noise on the line”
tMove the handset closer to the base unit, or to a different position.
tTr y mov in g th e bas e uni t awa y from o the r ele ct ric al eq ui pme nt , su ch as a te le vis io n o r a c om put er.
tYou’ll get the best reception if you place the base unit as high as possible. For example, in a two-floor
building, the first-floor landing is an ideal place.
Page 29

UK
“The Caller Display feature isn’t working”
tYo u nee d to s ub scr ib e t o the C all er Li ne Id en tifi ca tio n serv ic e f ro m yo ur ne tw ork se rvi ce pro vi der.
tThe caller may have withheld their number .Or they may be calling from a network that does not transmit
the caller’s number (e.g. if they are making international calls.)
“When I try to make a call, I hear busy tone”
tIf you’re using a multi-handset system, check whether another handset is already on a call.
“The volume in the earpiece is low when I’m on a call”
tMake sure you’re holding the earpiece correctly over your ear.
tAdjust the volume using
“I cannot store a phonebook entry”
tThe maximum number of 200 phonebook entries on your Handset You must delete existing entries to
make space for new ones.
15.3 Intercom and transfer
“I can’t transfer a call”
tMake sure that the other handset is in range of the base unit.
tMake sure that you have entered the correct number for the other handset.
15.4 Batteries
“The handset’s battery cells are running low within an hour or two”
tBefore you first use the handset, you must leave it to charge on the base unit or charging pod for at least
15 hours.
tYo u may n eed to rep la ce th e b at ter ie s.
tCheck the connection between the base unit and the mains power socket.
“I try to recharge the batteries but I still get a warning that they are low”
tYou need to replace the batteries. Dispose of used batteries safely – do not burn, immerse them in water,
disassemble, or puncture the batteries.
tDo not use non-rechargeable batteries in your handset – they may explode, causing damage.
15.5 Registration
“I am not able to register another handset”
tThe maximum number of 4 handsets has been reached. You will need to unregister a handset in order
to register a new one.
15.6 Answering Machine
“The Answering machine does not record messages”
tMake sure that the answering machine is switched on.
tMake sure that the Answer Mode is set to RECORD MSGS.
tThe memory may be full. If so, you will need to delete some messages.
“I cannot access my answering machine remotely”
tMake sure that Remote Access is activated.
tMake sure that you have entered the correct Remote Access PIN (same as your Master PIN).
Page 30

15.7 If the fault persists...
tDisconnect all other instruments connected to the same line and try to make a call.
tDisconnect the base unit from the telephone line and plug a different phone. Try making a call. If this
works, the line is OK.
tIf the call does not work and you are using a two-way socket adapter, remove it and plug a telephone
directly into the socket.
tIf the call now works, the adapter may be faulty.
tIf you cannot make a call, the fault may be on the exchange line. Contact the service provider.
Page 31

UK
16. CLEANING AND CARE
Do not clean any part of your unit with benzene, thinners or other solvent chemicals as this may cause
permanent damage which is not covered by the Guarantee.
When necessary, clean it with a damp cloth.
Keep your phone system away from hot, humid conditions or strong sunlight, and don‘t let it get wet.
17. GUARANTEE AND SERVICE
The unit is guaranteed for 24months from the date of purchase shown on your sales receipt. This guarantee
does not cover any faults or defects caused by accidents, misuse, fair wear and tear, neglect, faults on the
telephone line, lightning, tampering with the equipment, or any attempt at adjustment or repair other
than through approved agents.
Please keep your sales (till) receipt this is your proof of guarantee.
17.1 While the unit is under Guarantee
tDisconnect the base unit from the telephone line and the mains electricity supply.
tPack up all parts of your device, using the original package.
tReturn the unit to the shop where you bought it, making sure you take your sales receipt.
tRemember to include the mains adapter.
17.2 After the Guarantee has expired
If the unit is no longer under Guarantee, contact us via www.aegtelephones.eu
This product works with rechargeable batteries only. If you put nonrechargeable batteries in the handset
and place it on the base, the handset will be damaged and this in NOT covered under the warranty
conditions.
18. CE DECLARATION
This product is in compliance with the essential requirements and other relevant provisions of the R&TTE
directive 1999/5/EC.
The Declaration of conformity can be found on: www.aegtelephones.eu
Page 32

19. DISPOSAL OF THE DEVICE (ENVIRONMENT)
At the end of the product lifecycle, you should not throw this product into the normal household garbage
but bring the product to a collection point for the recycling of electrical and electronic equipments. The
symbol on the product, user guide and/or box indicate this. Some of the product materials can be re-used
if you bring them to a recycling point. By reusing some parts or raw materials from used products you
make an important contribution to the protection of the environment. Please contact your local authorities
in case you need more information on the collection points in your area.
Batteries must be removed before disposing of the device. Dispose of the batteries in an
environmental manner according to your country regulations.
20. TECHNICAL DETAILS
Standard Digital Enhanced Cordless Telecommunication (DECT)
Frequency range 1.88 to 1.9 GHz (bandwidth " 20 MHz)
Channel bandwidth 1.728 MHz
Operating range Up to 300m outdoors; Up to 50m indoors
Operating time Standby: 230 hours; Talking: 13 hours
Battery charge time: 15 hours
Temperature range Operating: 0°C to 40°C; Storage: -20°C to 60°C
Electrical power Base unit power adapter:
Te n P a o : S 0 0 3 IB 0 6 00 0 50 & S0 0 3 I V0 6 0 00 5 0
Input 100-240Vac 50-60Hz; Output 6VDC/500mA.
Charger unit power adapter:
Ten Pao: S003IB0600015 & S003IV0600015
Input 100-240Vac 50-60Hz; Output 6VDC/150mA.
Battery information:
2 X 1.2V AAA size, 650mAh NiMH (Rechargeable)
Page 33

UK
Page 34

© 2012 Binatone Electronics International Limited
All rights reserved
Subject to avaibility. Rights of modification reserved.
AEG is a registered trademark used under license from AB Electrolux (publ)
www.aegtelephones.eu
Page 35

FR
V1
DECT
PHONE
ECLIPSE 10/15
USER GUIDE
Page 36

2
8
4
15
10
11
16
6
1
13 12
14
7
3
9
5
P1 P3 P4
P5
P2
Page 37

FR
1. NOTRE ENGAGEMENT
Nous vous remercions d‘avoir acheté cet appareil. Nous l’avons conçu et assemblé avec le plus grand soin,
afin de garantir votre sécurité et de protéger l’environnement. C’est pourquoi il est livré avec un guide de
démarrage rapide comportant peu de pages, dans le but de sauvegarder les arbres qui seraient abattus
pour fabriquer le papier. Vous trouverez un mode d’emploi complet et détaillé contenant les descriptions
de toutes les fonctionnalités sur notre site Internet www.aegtelephones.eu. Veuillez télécharger ce mode
d’emploi si vous souhaitez utiliser toutes les fonctionnalités avancées de votre appareil. Pour protéger
l’environnement, nous vous demandons de ne pas imprimer ce mode d’emploi. Merci de nous aider à
protéger l‘environnement.
2. IMPORTANTES CONSIGNES DE SÉCURITÉ
Veuillez observer ces consignes de sécurité lorsque vous utilisez votre équipement téléphonique, afin de
réduire les risques d’incendie, d’électrocution et de blessures :
tLisez toutes les instructions et assurez-vous de les avoir comprises.
tObservez tous les avertissements et toutes les consignes figurant sur l’appareil.
tDébranchez cet appareil du secteur avant de le nettoyer. N’utilisez pas de détergents liquides ou en
aéorosol. Nettoyez l’appareil à l’aide d’un chiffon humide.
tN’exposez pas cet appareil à la chaleur, à l’humidité ou à la lumière directe du soleil, ne le laissez pas se
mouiller et ne l’utilisez pas à proximité de l’eau (par exemple près d’une baignoire, d’un évier ou d’une
piscine).
tNe surchargez pas les prises de courant murales et les rallonges: cela pourrait entraîner des risques
d’incendie ou de choc électrique.
tDébranchez cet appareil du secteur dans les cas suivants:
>Lorsque le câble ou la prise d’alimentation sont en mauvais état.
>Lorsque l’appareil ne fonctionne pas correctement bien que vous ayez suivi les consignes d’utilisation.
>Lorsque l’appareil est tombé et que le boîtier est endommagé.
>Lorsque les performances de l’appareil changent de manière importante.
tN’utilisez JAMAIS votre téléphone à l’extérieur pendant un orage. Débranchez la base de la ligne
téléphonique et du secteur en cas d’orage dans votre région. Les dégâts causés par la foudre ne sont
pas couverts par la garantie.
tN’utilisez pas le téléphone à proximité d’une fuite de gaz pour signaler cette fuite.
tUtilisez uniquement les piles NiMH (nickel-hydrure métallique) fournies avec votre téléphone, ou des
piles de rechange approuvées, recommandées par le fabricant. La mise en place de piles d’un type
incorrect dans l’appareil pourrait entraîner un risque d’explosion. L’utilisation d’autres types de piles
ou de piles non rechargeables ou jetables peut s’avérer dangereuse. Elles peuvent provoquer des
interférences ou des dommages à l’appareil ou au voisinage de celui-ci. Le fabricant ne pourra être tenu
responsable des dommages résultant d’une telle non-conformité.
tN’utilisez pas de chargeurs d’autres marques. Ceci pourrait endommager les piles.
tAssurez-vous d’insérer les piles en respectant les polarités.
Éliminez les piles de manière sûre. Ne brûlez pas, n’immergez pas, ne démontez pas ou ne percez pas
les piles.
3. USAGE PRÉVU
Ce téléphone est destiné à être raccordé à un réseau téléphonique analogique public ou à l’extension
analogique d‘un central téléphonique compatible.
Page 38

4. CONTENU DE L‘EMBALLAGE
Le carton d‘emballage contient les éléments suivants :
t1 combiné Eclipse
t1 station de base
t1 adaptateur secteur
t1 cordon pour la ligne téléphonique
t2 piles rechargeables NiMH AAA
t1 capot arrière pour le combiné Eclipse
t1 outil de déverrouillage du capot arrière
t1 guide de l‘utilisateur
5. CONNEXION DU COMBINÉ À LA BASE
tLors de l‘achat, tous les combinés sont déjà enregistrés sur l‘unité de base et doivent s‘y connecter
lorsqu‘ils sont tous mis sous tension.
tPour utiliser le combiné sans fil et l‘unité de base conjointement, vous devez pouvoir établir une
connexion radio entre eux. Le signal entre le combiné et l‘unité de base est conforme aux normes
habituelles d‘un téléphone DECT: portée maximale jusqu‘à 300mètres en extérieur et jusqu‘à 50mètres
en intérieur. Sachez que:
>Les objets métalliques de grande taille tels que les réfrigérateurs, les miroirs ou les bibliothèques se
trouvant entre le combiné et l‘unité de base peuvent faire obstacle au signal radio.
>Les structures solides telles que des murs peuvent réduire la puissance du signal.
>L‘équipement électrique peut provoquer des interférences et/ou avoir un effet sur la portée.
tNe placez pas l‘unité de base près d‘un autre téléphone, d‘un téléviseur ou d‘un appareil audio, car ils
pourraient provoquer des interférences.
tPlacez l‘unité de base le plus haut possible pour assurer un signal optimal.
tSi, au cours d‘un appel, le son devient plus faible ou est déformé dans l‘écouteur, il est possible que
vous trouviez à la limite de la portée de l‘unité de base. Rapprochez-vous de l‘unité de base dans les
20secondes, faute de quoi la ligne pourrait être coupée.
Page 39

FR
6. INSTALLATION DE VOTRE TÉLÉPHONE
6.1 Connexion de la base (Voir P4)
tBranchez le câble d’alimentation (15) et le cordon téléphonique (16) à la base.
tBranchez l’adaptateur secteur à une prise de courant 100 – 240 V ca, 50 – 60 Hz et le cordon téléphonique
à une prise téléphonique murale.
Avertissement: Utilisez uniquement les câbles fournis. Utilisez uniquement l’adaptateur secteur fourni.
L’ ut i l i sa t i o n d ’ a ut r e s a d a p ta t e u rs s e ct e u r p o u r ra i t e n d o mm a g e r l ’ a pp a r e il .
Remarque: Placez la base à proximité de la prise de courant. N’essayez jamais de rallonger le câble
d’alimentation. La base doit impérativement être branchée au secteur pour pouvoir fonctionner et les
combinés sans fil ne fonctionneront pas si elle ne l’est pas.
6.2 Mise en place et charge des piles rechargeables
tInsérez les 2 piles fournies dans leur logement en respectant les polarités (voir les signes à l’intérieur du
logement des piles).
Avertissement: Utilisez uniquement les piles rechargeables NiMh fournies.
tPlacez le capot arrière sur le dos du combiné et appuyez jusqu’à ce qu’il s’enclenche.
tPosez le combiné sur la base et laissez-le en charge pendant 15 heures avant la première utilisation.
>Vous entendez un double bip lorsque le combiné est correctement posé sur la base et le voyant de
charge de la base s’allume pour indiquer que la charge est en cours.
Remarque: Le combiné peut chauffer lorsque les piles se chargent ou pendant des périodes prolongées
d’utilisation. Ceci est normal et n’indique pas un défaut.
ATTE NT IO N
La mise en place de piles d’un type incorrect dans l’appareil pourrait entraîner un risque d’explosion.
Éliminez les piles usagées conformément aux instructions.
6.3 Retirer le capot arrière du combiné Eclipse (Voir P5)
Insérez la clé fournie dans la rainure comme montré sur l’illustration et tournez vers la droite pour libérer
le capot arrière.
Page 40

7. FAITES CONNAISSANCE AVEC VOTRE TÉLÉPHONE
7.1 Présentation du combiné et de la base
# Icône Explication
1
En mode veille, appuyez pour ouvrir le menu principal.
Appuyez pour sélectionner un élément ou pour enregistrer une entrée ou un
réglage.
2
Dans les menus, appuyez pour défiler vers le haut.
Pendant un appel ou pendant la lecture des messages, appuyez pour
augmenter le volume.
En mode veille, appuyez pour ouvrir le journal des appels.
3
En mode veille, appuyez pour appeler ou pour répondre à un appel.
Pendant un appel, appuyez pour envoyer un signal Flash pour accéder aux
services du réseau.
4
En mode veille, appuyez pour appeler ou pour répondre à un appel via le hautparleur.
Pendant un appel, appuyez pour basculer entre le haut-parleur et l’écouteur.
5
Appuyez longuement pour verrouiller ou déverrouiller le clavier.
6
En mode veille, appuyez pour ouvrir la liste des appels émis.
7
Appuyez pour annuler une opération.
En pré-numérotation, appuyez pour effacer le dernier chiffre entré.
Pendant un appel, appuyez pour couper le micro et appuyez de nouveau pour
reprendre la conversation.
8
Dans les menus, appuyez pour défiler vers le bas.
Pendant un appel ou pendant la lecture des messages, appuyez pour diminuer
le volume.
En mode veille, appuyez pour ouvrir le répertoire.
9
Pendant un appel, appuyez pour raccrocher.
Dans les réglages, appuyez pour annuler et sortir sans enregistrer les
modifications.
En mode veille, appuyez longuement pour allumer ou éteindre le combiné.
10
Appuyez longuement pour couper la sonnerie du combiné.
Appuyez longuement pour insérer une pause lorsque vous composez un
numéro ou lorsque vous entrez un numéro dans le répertoire.
11
En mode veille ou pendant un appel, appuyez pour appeler par l’interphone
ou transférer un appel.
Page 41

FR
7.2 Icônes et symboles de l’écran du combiné (Voir P2)
Icône Explication
S’affiche lorsque les piles sont complètement chargées.
Les barres à l’intérieur de l’icône s’animent pendant la charge.
S’affiche quand la ligne est utilisée.
Clignote pour un appel entrant.
S’affiche lorsque vous avez de nouveaux messages vocaux. (Ceci est un service du réseau)
S’affiche lorsque vous avez de nouveaux appels manqués ou que vous consultez le journal des
appels.*
S’affiche lorsque vous consultez le répertoire.
S’affiche lorsque l’alarme est activée.
S’affiche lorsque la sonnerie du combiné est coupée.
S’affiche lorsque le combiné est souscrit et à portée de la base.
Clignote lorsque le combiné est hors de portée ou cherche une base.
S’affiche lorsque le répondeur est activé.
Clignote lentement lorsque vous avez de nouveaux messages sur le répondeur ou quand la
mémoire de celui-ci est pleine.
S’affiche lorsqu'une sélection ou un réglage doit être confirmé.
S’affiche en mode de saisie pour effacer le dernier chiffre.
S’affiche dans les menus lorsque vous pouvez revenir à l’état précédent ou à l’étape précédente.
S’affiche lorsque l’écran du combiné est allumé.
* Pour pouvoir utiliser cette fonctionnalité, vous devez être abonné à la messagerie vocale ou au service
de présentation du numéro de votre réseau. Dans ce cas, vous devrez peut-être payer pour l’abonnement.
7.3 Base (Voir P3)
# Icône Explication
12
Seulement Eclipse 15
Vert quand le répondeu r est activ é. C ligno te lorsqu’i l y a de nouveaux mess ages.
Clignote rapidement lorsque la mémoire du répondeur est pleine.
13
Rouge pour indiquer qu’un combiné est sur la base et se charge.
14
Appuyez pour trouver ou appeler tous les combinés souscrits. Appuyez de nouveau (ou
appuyez sur n’importe quelle touche) pour désactiver le signal de recherche. Maintenez
enfoncé pour lancer la procédure de souscription.
Page 42

7.4 Présentation du menu
tDepuis l‘écran d‘accueil du combiné, appuyez sur
pour accéder à «REPONDEUR» (ANS.
SYSTEM), la première option de la liste du menu principal.
tAppuyez sur
ou pour accéder aux autres options de la liste du menu.
tAppuyez sur
pour accéder à un sous-menu ou à une fonction.
tAppuyez sur pour revenir au niveau précédent.
tAppuyez sur
pour annuler l‘opération en cours et revenir à l‘écran d‘accueil.
Remarque : si vous n‘appuyez sur aucune touche du combiné pendant 15 secondes, l‘écran revient
automatiquement à l‘écran d‘accueil.
REPONDEUR
(ANS. SYSTEM)
REPERTOIRE
(PHONEBOOK)
HORL.&REVEIL
(CLOCK&ALARM)
PERSONNALIS.
(HANDSET OPTS)
REGL AVANCES
(SETTINGS)
ECOUTER
(PLAY)
NOUV. ENTREE
(NEW ENTRY)
DATE/HEURE
(DATE & TIME)
NOM COMBINE
(HANDSET NAME)
CHANGER PIN
(CHANGE PIN)
SUPPRIM TOUT
(DELETE ALL)
LISTE
(VIEW ENTRIES)
CHOIX FORMAT
(SET FORMAT)
MELODIES
(RINGER&TONES)
SOUSCRIPTION
(REGISTRATION)
REP ACTIVE/
DESACTIVE (ON/OFF)
MODIFIER
(EDIT ENTRY)
FORMAT HEURE
(TIME FORMAT)
VOL SONNERIE
(RING VOLUME)
DESOUSCRIRE
(DEREGISTER)
ENR. ANNONCE
(ANNOUNCEMENT)
SUPPRIMER
(DELETE)
FORMAT DATE
(DATE FORMAT)
SONNERIES
(RING TONE)
REINITIALIS.
(RESET)
MODE REPOND.
(ANSWER MODE)
SUPPRIM TOUT
(DELETE ALL)
REVEIL (ALARM)
BIP TOUCHES
(KEY TONE)
DUREE RAPPEL
(RECALL TIME)
REGL. RÉPONDEUR
(ANS. SETTING)
MEM. DIRECTE
(DIRECT MEM.)
MELOD REVEIL
(ALARM MELODY)
LANGUE
(LANGUAGE)
NBR SONNERIE
(RING DELAY)
RACCROC AUTO
(AUTO HANG-UP)
ACCÈS A DIST
(REMOTE ACC.)
LANGUE
(LANGUAGE)
Page 43

FR
7.5 Saisie de texte et de numéros
Vous pouvez saisir différents caractères en appuyant plusieurs fois sur les touches du clavier. Ceci vous
sera utile pour entrer un nom dans le répertoire ou pour renommer votre combiné. Les caractères sont
imprimés sur les touches.
Par exemple, pour saisir le nom To m:
T Appuyez une fois sur 8
O Appuyez trois fois sur 6
M Appuyez une fois sur 6
En mode de saisie, un curseur indique la position à laquelle le texte sera saisi.
Il est placé à droite du dernier caractère entré.
Conseils pour la saisie:
tLorsqu’un caractère a été entré, le curseur se déplace sur la position suivante après une courte pause.
tAppuyez sur
pour effacer la dernière lettre ou le dernier chiffre entré.
Touche 1er appui 2e appui 3e appui 4e appui 5e appui 6e appui
1 Espace 1 _ < > *
2 A B C 2
3 D E F 3
4 G H I 4
5 J K L 5
6 M N O 6
7 P Q R S 7
8 T U V 8 ?
9 W X Y Z 9
0 0 - / Espace # +
* *
# #
Page 44

8. UTILISATION DE VOTRE TÉLÉPHONE
8.1 Appeler
8.1.1 Pré-numérotation
tEntrez le numéro (24 chiffres maximum). En cas d’erreur, appuyez sur
pour effacer le dernier chiffre
entré.
tAppuyez sur
pour appeler.
8.1.2 Numérotation directe
tAppuyez sur
sur votre combiné.
tComposez le numéro.
8.1.3 Appeler un numéro de la liste des appels émis
tAppuyez sur
en mode veille.
>Le dernier numéro appelé s’affiche.
tAppuyez sur
pour sélectionner un numéro dans la liste des appels émis, puis sur pour appeler
ce numéro.
8.1.4 Appeler un numéro du journal des appels
tAppuyez sur
en mode veille.
tAppuyez sur
pour sélectionner un numéro dans le journal des appels, puis sur pour appeler ce
numéro.
Remarque: Pour pouvoir voir le numéro ou le nom d’un correspondant dans le journal des appels, vous
devez être abonné au service de présentation du numéro.
8.1.5 Appeler un numéro du répertoire
tAppuyez sur en mode veille.
tAppuyez sur
pour sélectionner un contact dans le répertoire, puis sur pour appeler ce contact.
8.2 Répondre et mettre fin à un appel
tQuand le téléphone sonne, appuyez sur
sur votre combiné.
tPour mettre fin à la communication, appuyez sur
sur votre combiné.
Avertissement: Lorsque le combiné sonne, ne le tenez pas trop près de votre oreille, car le volume de la
sonnerie pourrait endommager votre ouïe.
Remarque: Pour mettre fin à l’appel, vous pouvez simplement poser le combiné sur la base, à condition
de ne pas avoir désactivé la fonction RACCROC AUTO (AUTO HANG-UP).
8.3 Haut-parleur du combiné
Pendant un appel, vous pouvez appuyer sur
po ur bas culer entre le haut- parle ur et l ’écou teur d u comb iné
Page 45

FR
8.4 Régler le volume de l’écouteur
Vous disposez de 5 niveaux pour le volume de l’écouteur de votre combiné.
tPendant un appel, appuyez sur
pour sélectionner de « NIVEAU 1 » (VOLUME 1) à « NIVEAU 5 »
(VOLUME 5).
>Le réglage s’affiche.
>Lorsque vous raccrochez, le dernier niveau de volume sélectionné est conservé.
8.5 Régler le volume du haut-parleur
Vous disposez de 5 niveaux de volume pour le haut-parleur.
tPendant un appel mains-libres, appuyez sur
pour sélectionner de «NIVEAU 1 » (VOLUME 1) à
« NIVEAU 5 » (VOLUME 5).
>Le réglage s’affiche.
>Lorsque vous raccrochez, le dernier niveau de volume sélectionné est conservé.
8.6 Couper ou rouvrir le micro
tLorsque le micro est coupé, « MICRO COUPE » (MUTE ON) s’affiche et votre correspondant ne peut
pas vous entendre.
tPendant un appel, appuyez sur
pour couper ou rouvrir le micro.
8.7 Recherche
La fonction de recherche vous permet de localiser un combiné manquant s’il est à portée de la base et si
ses piles sont chargées.
tAppuyez sur la touche
sous la base.
>To us l e s c o m bi n é s s o u s cr i t s e t à p o r t ée d e l a ba s e so n n e nt .
Arrêtez la recherche en appuyant sur n’importe quelle touche du combiné, ou à nouveau sur la touche
sous la base.
8.8 Allumer ou éteindre le combiné
Appuyez sur
pendant plus de 2 secondes pour allumer ou éteindre le combiné en mode veille.
>Lorsque vous l’allumez pour la première fois, « CHERCHE… » (SEARCHING…) s’affiche jusqu’à ce
que le combiné trouve la base.
Remarque: Lorsque le combiné n’est pas sur la base, vous pouvez l’éteindre pour économiser les piles.
IMPORTANT :
Quand le combiné est « DESACTIVE » (OFF), vous ne pouvez passer aucun appel, y compris les appels
d’urgence. Il ne sonnera pas non plus pour un appel entrant.
Pour répondre à un appel, vous devrez le rallumer et vous devrez peut-être attendre que la liaison entre
le combiné et la base soit rétablie.
8.9 Verrouille r ou déverrouiller le c lavier
Vous pouvez verrouille r le clavie r po ur év iter d’appu yer accid entellement s ur les touc hes.
tEn mode veille, appuyez sur
pendant 2 secondes pour verrouiller le clavier.
>« CLAV. BLOQUE » (KEYS LOCKED) s’affiche sur le combiné.
tPour déverrouiller le clavier, appuyez de nouveau longuement sur .
Remarque: Lorsque le clavier est verrouillé, vous pouvez quand même répondre aux appels entrants.
Page 46

8.10 Passer un appel interne (modèles multicombinés uniquement)
Le système permet de réaliser des appels de type interphone entre deux combinés enregistrés sur la
même base. Il vous permet également de transférer des appels externes depuis un combiné vers un autre
et de réaliser des conférences à trois, entre deux combinés et un appel externe.
8.11 Passer un appel interphone
tEn mode veille, appuyez sur
.
>L‘appel interphone est établi automatiquement s‘il existe 2 combinés enregistrés.
>Si plus de 2 combinés sont enregistrés, les numéros des combinés disponibles pour l‘appel interphone
sont affichés.
tAppuyez sur le numéro de combiné que vous souhaitez appeler ou appuyez sur * pour appeler tous les
combinés.
tAppuyez sur
sur un combiné appelé pour répondre à l‘appel interne; les deux appelants internes
peuvent parler.
tPour mettre fin à l‘appel interne, appuyez sur
sur l‘un des combinés.
Remarque:
tVou s pouve z annuler l‘appel interphone avant q ue quelqu ‘un n‘y rép onde en a ppuyant s ur
ou sur
le combiné appelant.
tSi le combiné appelé n‘est pas décroché au bout d‘une minute, la tonalité d‘appel s‘interrompt
automatiquement.
tSi aucun autre combiné n‘est enregistré sur la base, vous entendez 4 bips et le combiné retourne en
mode veille.
8.12 Répondre à un appel externe pendant un appel interphone
Lorsque vous recevez un appel entrant externe pendant un appel interphone, vous entendez un son
d‘avertissement et vous avez le choix entre les actions suivantes:
tAppuyez sur
pour annuler l‘appel interphone et permettre aux combinés de recevoir la sonnerie
normale d‘appel entrant.
tAppuyez sur
pour répondre à l‘appel entrant et mettre fin à l‘appel interphone.
tAppuyez sur pour répondre à l‘appel entrant et mettre en attente l‘appel interphone.
tLorsque l‘appel externe entrant est pris et que l‘appel interphone est mis en attente, appuyez sur la
touche et maintenez-la enfoncée pour commencer une conférence téléphonique à trois avec les
interlocuteurs de l‘appel entrant et de l‘appel interphone.
tLorsque le combiné est relié à un appel externe, vous pouvez appuyer sur
pour lancer directement une
conférence téléphonique à trois.
8.13 Passer un appel interphone pendant un appel
Vous pouvez réaliser un appel de type interphone avec un autre combiné du système pendant un appel
téléphonique ou inviter un autre combiné du système à rejoindre une conférence téléphonique avec
l‘appelant externe et vous-même.
tPendant l‘appel, appuyez sur
pour mettre en attente l‘appel externe.
>L‘appel interphone est établi automatiquement s‘il existe 2 combinés enregistrés.
>Si plus de 2 combinés sont enregistrés, les numéros des combinés disponibles pour l‘appel interphone
sont affichés.
tAppuyez sur le numéro du combiné que vous souhaitez appeler ou appuyez sur
pour appeler tous
les combinés.
Remarque: Si le combiné appelé n‘est pas décroché ou si vous souhaitez annuler l‘appel interphone
avant que quelqu‘un n‘y réponde, appuyez sur pour revenir à l‘appel externe.
Page 47

FR
tAppuyez sur sur le combiné appelé pour répondre à l‘appel interne; les deux appelants internes
peuvent parler.
tLorsque la communication de type interphone est établie, vous avez le choix entre les actions suivantes
sur le combiné appelant:
>Appuyez sur la touche et maintenez-la enfoncée pendant 2 secondes pour relier les deux combinés
à l‘appel en mode de conférence.
>Appuyez sur
sur l‘un des combinés pour mettre fin à l‘appel interphone sur ce combiné et maintenir
l‘appel externe relié à l‘autre combiné.
8.14 Tran sf er t d‘ un a ppel ex te rn e à un a utre c om bi né
tPendant l‘appel, appuyez sur
pour mettre en attente l‘appel externe.
>L‘appel interphone est établi automatiquement s‘il existe 2 combinés enregistrés.
>Si plus de 2 combinés sont enregistrés, les numéros des combinés disponibles pour l‘appel interphone
sont affichés.
tAppuyez sur le numéro de combiné que vous souhaitez appeler ou appuyez sur
pour appeler tous
les combinés.
Remarque: Si le combiné appelé n‘est pas décroché ou si vous souhaitez annuler l‘appel interphone
avant que quelqu‘un n‘y réponde, appuyez sur pour revenir à l‘appel externe.
tAppuyez sur
sur le combiné appelé pour répondre à l‘appel interne; les deux appelants internes
peuvent parler.
tAppuyez sur
sur le combiné appelant pour transférer l‘appel externe au combiné appelé.
>L‘appel externe est transféré.
9. MÉMOIRE À ACCÈS DIRECT
Outre la mémoire du répertoire, il existe deux mémoires à accès direct (touches 1 et 2) sur le combiné.
En mode veille, appuyez longuement sur ces touches pour composer automatiquement le numéro de
téléphone mémorisé.
9.1 Ajouter des numéros de mémoire à accès direct
tDepuis l‘écran d‘accueil, appuyez sur
.
tAppuyez sur jusqu‘à «REPERTOIRE» (PHONEBOOK), puis appuyez sur pour sélectionner.
tAppuyez sur jusqu‘à « MEM. DIRECTE » (DIRECT MEM.), puis appuyez sur pour
sélectionner.
tAppuyez sur jusqu‘à «TOUCHE 1» (KEY 1) ou «TOUCHE 2» (KEY 2), puis appuyez sur
pour sélectionner.
>Le nom mémorisé est affiché. Si la mémoire est vide, «AUCUN NUMERO» (NO NUMBER) est affiché.
tAppuyez sur pour accéder au menu « MEM. DIRECTE » (DIRECT MEM.) afin d‘ajouter/de
modifier le nom ou le numéro.
tAppuyez à nouveau sur pour sélectionner «CHANGER NUM.» (EDIT NUMBER).
>L‘écran affiche le nom actuellement mémorisé ou «ENTRER NOM » (ENTER NAME) si la mémoire
est vide.
tModifiez ou saisissez le nom de votre contact, puis appuyez sur .
Si vous commettez une erreur, appuyez sur
pour effacer le dernier caractère saisi.
>L‘écran affiche le numéro actuellement mémorisé ou « ENTRER NUM. » (ENTER NUMBER) si la
mémoire est vide.
tModifiez ou entrez le numéro de votre contact, puis appuyez sur
.
Si vous commettez une erreur, appuyez sur pour effacer le dernier chiffre entré.
>Un son de confirmation est émis.
tAppuyez sur
pour revenir en mode veille.
Page 48

9.2 Supprimer des numéros de mémoire à accès direct
tDepuis l‘écran d‘accueil, appuyez sur
.
tAppuyez sur
jusqu‘à «REPERTOIRE» (PHONEBOOK), puis appuyez sur pour sélectionner.
tAppuyez sur jusqu‘à « MEM. DIRECTE » (DIRECT MEM.), puis appuyez sur pour
sélectionner.
tAppuyez sur jusqu‘à «TOUCHE 1» (KEY 1) ou «TOUCHE 2» (KEY 2), puis appuyez sur
pour sélectionner.
>«AUCUN NUMERO» (NO NUMBER) s‘affiche si la mémoire est vide. Sinon, le nom mémorisé est
affiché.
tAppuyez sur pour accéder aux options du menu.
tAppuyez sur jusqu‘à «SUPPRIMER» (DELETE), puis appuyez sur pour sélectionner.
>«CONFIRMER?» (CONFIRM?) s‘affiche.
tAppuyez à nouveau sur pour confirmer.
>Un son de confirmation est émis.
tAppuyez sur
pour revenir en mode veille.
10. RÉPERTOIRE
Vous pouvez stocker jusqu’à 200 contacts dans le répertoire. Chaque contact du répertoire peut contenir
un numéro de téléphone de 24 chiffres maximum et un nom de 12 caractères maximum.
10.1 Enregistrer un contact dans le répertoire
tDans l’écran d’accueil, appuyez sur
.
tAppuyez sur
jusqu’à « REPERTOIRE » (PHONEBOOK), puis appuyez sur pour sélectionner.
tAppuyez sur pour sélectionner « NOUV. ENTREE » (NEW ENTRY).
>« ENTRER NOM » (ENTER NAME) s’affiche à l’écran.
tEntrez le nom du contact (12 caractères maximum) au clavier.
tEn cas d’erreur, appuyez sur pour effacer le dernier caractère entré.
tAppuyez sur pour confirmer le nom.
>« ENTRER NUM. » (ENTER NUMBER) s’affiche à l’écran.
tEntrez le numéro du contact (24 chiffres maximum) au clavier.
tEn cas d’erreur, appuyez sur pour effacer le dernier chiffre entré.
tAppuyez sur pour confirmer.
>Vous entend ez un bip d e confirmati on.
tAppuyez sur
pour revenir au mode veille.
Remarque: Vous ne pouvez pas enregistrer de nouveau contact dans le répertoire quand la mémoire est
pleine. Dans ce cas, vous devez supprimer quelques contacts pour libérer de la mémoire pour les nouveaux.
10.2 Accéder au répertoire
tDans l’écran d’accueil, appuyez sur
pour ouvrir le répertoire.
tVou s pouvez aussi appuye r su r dans l’écran d’accueil, puis sur jusqu’à « REPERTOIRE »
(PHONEBOOK), puis sur et sur jusqu’à « LISTE » (VIEW ENTRIES), et enfin appuyer sur
pour ouvrir le répertoire.
>Les contacts du répertoire sont en classés par ordre alphabétique.
tAppuyez sur pour faire défiler les contacts.
tAppuyez sur
P
pour voir les détails du contact sélectionné.
tAppuyez sur
pour revenir au mode veille.
Remarque: Au lieu d’appuyer sur pour faire défiler les contacts, vous pouvez appuyer sur la touche
numérique correspondant à la première lettre du contact que vous cherchez.
Page 49

FR
Par exemple, en appuyant sur 2, vous verrez le premier contact commençant par A. En appuyant de
nouveau sur 2, vous verrez le premier contact commençant par B, etc.; appuyez ensuite sur
si
nécessaire pour trouver le contact que vous cherchez.
10.3 Modifier un contact du répertoire
tDans l’écran d’accueil, appuyez sur
pour ouvrir le répertoire.
tAppuyez sur pour sélectionner le contact que vous voulez modifier.
tAppuyez sur pour les options du répertoire.
tAppuyez sur jusqu’à « MODIFIER » (EDIT ENTRY), puis appuyez sur pour sélectionner.
>Le nom s’affiche.
tModifiez le nom à l’aide du clavier et utilisez pour effacer des caractères.
tAppuyez sur pour confirmer.
tModifiez le numéro, puis appuyez sur pour confirmer.
>Vous entend ez un bip d e confirmati on.
tAppuyez sur
pour revenir au mode veille.
10.4 Supprimer une entrée de répertoire
tDepuis l‘écran d‘accueil, appuyez sur
pour ouvrir le répertoire.
tAppuyez sur
pour sélectionner l‘entrée que vous voulez supprimer.
tAppuyez sur pour ouvrir les options du menu du répertoire.
tAppuyez sur
jusqu‘à «SUPPRIMER» (DELETE), puis appuyez sur pour sélectionner.
>«CONFIRMER?» (CONFIRM?) s‘affiche.
tAppuyez à nouveau sur pour confirmer.
>Un son de confirmation est émis.
tAppuyez sur
pour revenir en mode veille.
10.5 Supprimer toutes les entrées du répertoire
tDepuis l‘écran d‘accueil, appuyez sur
pour ouvrir le répertoire.
tAppuyez sur pour ouvrir les options du menu du répertoire.
tAppuyez sur jus qu‘à «SUPPRIM TOUT» ( DEL ETE ALL) , puis ap puyez su r pour s électio nner.
>«CONFIRMER?» (CONFIRM?) s‘affiche.
tAppuyez à nouveau sur pour confirmer.
>Un son de confirmation est émis.
tAppuyez sur
pour revenir en mode veille.
11. PRÉSENTATION DU NUMÉRO (DÉPEND DU RÉSEAU)
Si vous êtes abonné au service de présentation du numéro de votre réseau, le numéro de votre
correspondant s’affiche sur le combiné et l’appel est enregistré dans votre Journal (Call Log).
Si le nom de votre correspondant est stocké dans votre répertoire avec son numéro, le nom s’affiche et
l’appel est enregistré dans votre Journal (Call Log).
Remarque: Si l’appel provient d’un correspondant dont le numéro n’est pas disponible (par exemple
appel international ou en provenance d’un standard privé). « INDISPONIBLE » (UNAVAILABLE) s’affiche
sur le combiné et est enregistré dans le Journal (Call Log).
Si l’appel provient d’un correspondant dont le numéro est masqué, « MASQUER ID » (WITHHELD)
s’affiche sur le combiné et est enregistré dans le Journal (Call Log).
Si vous n’êtes pas abonné au service de présentation du numéro, « INCONNU » (UNKNOWN) s’affiche
sur le combiné et l’appel n’est pas enregistré dans le Journal (Call Log).
Les informations sur les appels entrants varient selon les pays et les opérateurs de réseau.
Page 50

11.1 Journal des appels
The Journal (Call Log) conserve en mémoire les 20 derniers appels externes reçus, y compris ceux
auxquels vous n’avez pas répondu.
Si plusieurs appels proviennent du même numéro, seul le plus récent est conservé.
Quand le Journal (Call Log) est plein, un nouvel appel remplace le plus ancien.
11.1.1 Accéder au journal des appels
tDans l’écran d’accueil, appuyez sur
.
tAppuyez sur pour défiler dans la liste des appels.
>Les appels sont affichés dans l’ordre chronologique, l’appel le plus récent en tête de la liste.
11.1.2 Enregistrer une entrée de journal dans le répertoire
tDepuis l‘écran d‘accueil, appuyez sur
.
tAppuyez sur pour sélectionner une entrée, puis appuyez sur .
tAppuyez à nouveau sur M pour sélectionner «ENREG. NUM.» (SAVE NUMBER).
tEntrez le nom du contact (12 caractères maximum), puis appuyez sur pour enregistrer.
tModifiez le numéro (si nécessaire), puis appuyez sur pour enregistrer l‘entrée.
>Un son de confirmation est émis.
tAppuyez sur
pour revenir en mode veille.
11.1.3 Supprimer une entrée du journal
tDepuis l‘écran d‘accueil, appuyez sur
.
tAppuyez sur pour sélectionner une entrée, puis appuyez sur .
tAppuyez sur jusqu‘à «SUPPRIMER» (DELETE), puis appuyez sur pour sélectionner.
>«CONFIRMER?» (CONFIRM?) s‘affiche.
tAppuyez à nouveau sur pour confirmer.
>Un son de confirmation est émis.
tAppuyez sur
pour revenir en mode veille.
11.2 Supprimer toutes les entrées du journal
tDepuis l‘écran d‘accueil, appuyez sur
.
tAppuyez sur .
tAppuyez sur +/- jusqu‘à «SUPPRIM TOUT» (DELETE ALL), puis appuyez sur pour sélectionner.
>«CONFIRMER?» (CONFIRM?) s‘affiche.
tAppuyez à nouveau sur pour confirmer.
>Un son de confirmation est émis.
11.3 Liste des appels émis
La liste des appels émis conserve en mémoire les 10 derniers numéros appelés. Chaque numéro peut
comporter un maximum de 24 chiffres.
11.3.1 Accéder à la liste des appels émis
tDans l’écran d’accueil, appuyez sur
.
tAppuyez sur pour défiler dans la liste des appels émis.
>Le dernier numéro appelé est le premier dans la liste.
>Si le numéro comporte plus de 14 chiffres, appuyez sur
P
pour voir les chiffres restants.
Page 51

FR
11.3.2 Enregistrer un numéro de rappel dans le répertoire
tDepuis l‘écran d‘accueil, appuyez sur
.
tAppuyez sur
pour sélectionner une entrée, puis appuyez sur .
tAppuyez à nouveau sur
pour sélectionner «ENREG. NUM.» (SAVE NUMBER).
tSaisissez le nom du contact (12 caractères maximum), puis appuyez sur .
tModifiez le numéro (si nécessaire), puis appuyez sur
pour enregistrer.
>Un son de confirmation est émis.
tAppuyez sur
pour revenir en mode veille.
11.3.3 Modifier un numéro de rappel
tDepuis l‘écran d‘accueil, appuyez sur
.
tAppuyez sur pour sélectionner une entrée, puis appuyez sur .
tAppuyez sur jusqu‘à «MODIFIER» (EDIT ENTRY), puis appuyez sur pour sélectionner.
tModifiez le numéro, puis appuyez sur pour confirmer.
>Un son de confirmation est émis.
tAppuyez sur
pour revenir en mode veille.
11.3.4 Supprimer un numéro de rappel
tDepuis l‘écran d‘accueil, appuyez sur
.
tAppuyez sur pour sélectionner une entrée, puis appuyez sur .
tAppuyez sur jusqu‘à «SUPPRIMER» (DELETE), puis appuyez sur pour sélectionner.
>«CONFIRMER?» (CONFIRM?) s‘affiche.
tAppuyez à nouveau sur pour confirmer.
>Un son de confirmation est émis.
tAppuyez sur
pour revenir en mode veille.
11.3.5 Supprimer toutes les entrées de la liste de rappel
tDepuis l‘écran d‘accueil, appuyez sur .
tAppuyez sur .
tAppuyez sur jus qu‘ à «SUPPRIM TOUT» (DELETE ALL), puis appuyez sur po ur sél ect ionne r.
>«CONFIRMER?» (CONFIRM?) s‘affiche.
tAppuyez à nouveau sur pour confirmer.
>Un son de confirmation est émis.
12. RÉGLAGES DE L‘HORLOGE ET DU RÉVEIL
12.1 Réglage de la date et de l‘heure
Si vous avez souscrit à un service d‘identification du numéro de l‘appelant, les réglages de l‘heure et de
la date sont mis à jour automatiquement à la réception de votre premier appel entrant, mais vous pouvez
être amené à corriger l‘année.
Vous pouvez égal ement ré gler ma nuellement la date et l‘he ure.
tDepuis l‘écran d‘accueil, appuyez sur
.
tAppuyez sur jusqu‘à « HORL.&REVEIL » (CLOCK&ALARM), puis appuyez sur pour
sélectionner.
tAppuyez à nouveau sur
pour sélectionner «DATE/HEURE» (DATE & TIME).
>La dernière date mémorisée est affichée et le troisième chiffre de l‘année clignote.
tSaisissez la date actuelle, puis appuyez sur pour confirmer.
>Par exemple, saisissez le 3 mai 2012 comme suit: [1], [2], [0], [5], [0], [3].
>Si vous commettez une erreur, appuyez sur
pour effacer le dernier chiffre entré.
Page 52

tSaisissez l‘heure actuelle, puis appuyez sur pour confirmer. Le format de l‘heure par défaut est «24
HEURES» (24 HOURS). Pour changer de format d‘heure, reportez-vous à la section Changer de format
de date en page 51.
>En format 24 heures, saisissez 13h30 comme suit: [1], [3], [3], [0].
>En format 12 heures, saisissez l‘heure, puis appuyez sur + pour sélectionner «am» ou sur - pour
sélectionner «pm».
>Si vous commettez une erreur, appuyez sur pour effacer le dernier chiffre entré.
>Un son de confirmation est émis.
tAppuyez sur
pour revenir en mode veille.
12.1.1 Changer de format d‘heure
L‘heure peut être affichée au format 12heures ou 24heures. Par défaut, le format est «24 HEURES» (24
HOURS).
tDepuis l‘écran d‘accueil, appuyez sur
.
tAppuyez sur jusqu‘à « HORL.&REVEIL » (CLOCK&ALARM) , puis appuyez sur pour
sélectionner.
tAppuyez sur jusqu‘à « CHOIX FORMAT » (SET FORMAT), puis appuyez sur pour
sélectionner.
tAppuyez à nouveau sur pour sélectionner «FORMAT HEURE» (TIME FORMAT).
>Le réglage actuel est affiché.
tAppuyez sur pour sélectionner «12 HEURES» (12 HOURS) ou «24 HEURES» (24 HOURS), puis
appuyez sur pour confirmer.
>Un son de confirmation est émis.
tAppuyez sur
pour revenir en mode veille.
12.1.2 Changer de format de date
La date peut être affichée au format mois/jour ou jour/mois. Par défaut, le réglage est « JJ/MM »
(DD/MM).
tDepuis l‘écran d‘accueil, appuyez sur .
tAppuyez sur jusqu‘à « HORL.&REVEIL » (CLOCK&ALARM) , puis appuyez sur pour
sélectionner.
tAppuyez sur jusqu‘à « CHOIX FORMAT » (SET FORMAT), puis appuyez sur pour
sélectionner.
tAppuyez sur jusqu‘à « FORMAT DATE » (DATE FORMAT), puis appuyez sur pour
sélectionner.
>Le réglage actuel est affiché.
tAppuyez sur pour sélectionner «JJ/MM» (DD/MM) ou «MM/JJ»(MM/DD), puis appuyez sur
pour confirmer.
>Un son de confirmation est émis.
tAppuyez sur
pour revenir en mode veille.
12.2 Réglages du réveil
Il est possible de régler un réveil sur un combiné afin qu‘il sonne à l‘heure programmée une seule fois ou
tous les jours.
Lorsqu‘un réveil est réglé, l‘icône de réveil s‘affiche sur l‘écran du combiné.
Lorsque l‘heure du réveil est atteinte, le combiné affiche «-REVEIL-» (-ALARM-) en clignotant sur l‘écran
et émet une alarme pendant 1 minute, au même niveau de volume que la sonnerie du combiné. Si la
sonnerie est désactivée, le réveil sonne au niveau de volume 1.
Lorsque le réveil sonne, vous pouvez appuyer sur n‘importe quelle touche pour arrêter la sonnerie, même
lorsque les touches sont verrouillées.
tDepuis l‘écran d‘accueil, appuyez sur
.
Page 53

FR
tAppuyez sur jusqu‘à « HORL.&REVEIL » (CLOCK&ALARM), puis appuyez sur pour
sélectionner.
tAppuyez sur jusqu‘à «REVEIL» (ALARM), puis appuyez sur pour sélectionner.
tAppuyez sur
jusqu‘à une option de réveil.
>«DESACTIVE» (OFF): désactive le réveil.
>«UNE FOIS» (ONCE): le réveil ne sonne qu‘une seule fois à l‘heure programmée.
>«TS LES JOURS» (DAILY): le réveil sonne tous les jours à l‘heure programmée.
tAppuyez sur
pour sélectionner l‘option.
tSi « UNE FOIS» (ONCE) ou « TS LES JOURS » (DAILY) est sélectionné, saisissez les heures et les
minutes de votre choix.
tAppuyez sur + pour sélectionner am ou sur - pour sélectionner pm si l‘heure est au format 12heures.
tAppuyez sur pour confirmer le réglage du réveil.
>Un son de confirmation est émis.
tAppuyez sur
pour revenir en mode veille.
12.2.1 Régler la sonnerie du réveil
Vous avez le cho ix entre 3 mélo dies de réveil.
tDepuis l‘écran d‘accueil, appuyez sur
.
tAppuyez sur jusqu‘à « HORL.&REVEIL » (CLOCK&ALARM) , puis appuyez sur pour
sélectionner.
tAppuyez sur jusqu‘à « MELOD REVEIL » (ALARM MELODY), puis appuyez sur pour
sélectionner.
tAppuyez sur pour sélectionner la sonnerie de réveil de votre choix (vous entendrez chaque
sonnerie en les sélectionnant), puis appuyez sur pour confirmer.
>Un son de confirmation est émis.
tAppuyez sur
pour revenir en mode veille.
13. RÉGLAGES
Votre téléphone est fourni avec un ensemble de réglages que vous pouvez modifier afin de personnaliser
votre téléphone à votre guise.
13.1 Régler le volume de la sonnerie
Vous pou vez rég ler le volume de la so nnerie du combiné du ni veau 1 au niveau 4, ou désa ctiv er la sonne rie.
tDepuis l‘écran d‘accueil, appuyez sur
.
tAppuyez sur jusqu‘à « PERSONNALIS. » (HANDSET OPTS), puis appuyez sur pour
sélectionner.
tAppuyez sur jus qu‘ à « MELODIES» (RINGER&TONES), puis appuyez sur pour s élect ionne r.
tAppuyez à nouveau sur pour sélectionner «VOL SONNERIE» (RING VOLUME).
tAppuyez sur pour sélectionner le réglage souhaité (vous entendrez chaque niveau de volume en
les sélectionnant), puis appuyez sur pour confirmer.
>Un son de confirmation est émis.
tAppuyez sur
pour revenir en mode veille.
Remarque: Appuyez sur la touche et maintenez-la enfoncée pour activer et désactiver la sonnerie
lorsque le combiné est en mode veille. L‘icône de sonnerie désactivée s‘affiche à l‘écran lorsque la
fonction de désactivation de la sonnerie est activée.
13.2 Régler la mélodie de la sonnerie
Vous avez le cho ix entre 10 mél odies de so nneries pou r vo s app els internes et externes .
Page 54

tDepuis l‘écran d‘accueil, appuyez sur .
tAppuyez sur
jusqu‘à « PERSONNALIS. » (HANDSET OPTS), puis appuyez sur pour
sélectionner.
tAppuyez sur jus qu‘à «MELODIES» (RINGER &TONES) , puis ap puyez su r pour s électio nner.
tAppuyez sur jusqu‘à «SONNERIES» (RING TONE), puis appuyez sur pour sélectionner.
tAppuyez sur
pour sélectionner la mélodie de la sonnerie de votre choix, de 1 à 10 (vous entendrez
chaque mélodie en les sélectionnant), puis appuyez sur pour confirmer.
>Un son de confirmation est émis.
tAppuyez sur
pour revenir en mode veille.
13.3 Régler le son des touches
Le combiné émet un son chaque fois que vous appuyez sur une touche. Vous pouvez choisir d‘activer ou
de désactiver ce son. Par défaut, le réglage est «ACTIVE» (ON).
tDepuis l‘écran d‘accueil, appuyez sur
.
tAppuyez sur jusqu‘à « PERSONNALIS. » (HANDSET OPTS), puis appuyez sur pour
sélectionner.
tAppuyez sur jus qu‘à «MELODIES» (RINGER &TONES) , puis ap puyez su r pour s électio nner.
tAppuyez sur jusqu‘à «BIP TOUCHES» (KEY TONE), puis appuyez sur pour sélectionner.
tAppuyez sur pour sélectionner «ACTIVE » (ON) ou «DESACTIVE » (OFF), puis appuyez sur
pour confirmer.
>Un son de confirmation est émis.
tAppuyez sur
pour revenir en mode veille.
13.4 Renommer le combiné
Vous pouvez pers onnaliser vot re c ombiné en modifiant l e no m affiché su r son écran en mode veille.
tDepuis l‘écran d‘accueil, appuyez sur
.
tAppuyez sur jusqu‘à «PERSONNALIS.» (HANDSET OPTS), puis appuyez sur .
tAppuyez sur pour sélectionner «NOM COMBINE» (HANDSET NAME).
tLe nom actuel du combiné s‘affiche.
tAppuyez sur pour supprimer les lettres une à une et saisissez le nouveau nom (10 caractères
maximum).
tAppuyez sur pour confirmer.
>Un son de confirmation est émis.
tAppuyez sur
pour revenir en mode veille.
13.5 Choix de la langue d’affichage
Vous pouvez chan ger la langue d’affi chage d e votre combi né.
tDans l’écran d’accueil, appuyez sur
.
tAppuyez sur jusqu’à « PERSONNALIS. » (HANDSET OPTS), puis appuyez sur pour
sélectionner.
tAppuyez sur jusqu’à « LANGUE » (LANGUAGE), puis sur pour sélectionner.
tAppuyez sur pour sélectionner la langue, puis sur pour confirmer.
>Vous entend ez un bip d e confirmati on.
tAppuyez sur
pour revenir au mode veille.
Remarque : Lorsque la langue d’affichage a été sélectionnée, les indications sur l’écran du combiné
s’affichent immédiatement dans cette langue.
Page 55

FR
13.6 Régler le raccrochage automatique
Cette fonction vous permet de mettre fin à un appel automatiquement en replaçant simplement le combiné
sur l‘unité de base (combiné Eclipse principal) ou sur le socle de chargement (combinés supplémentaires).
Par défaut, la fonction de raccrochage automatique est activée, mais il est possible de la désactiver.
tDepuis l‘écran d‘accueil, appuyez sur
.
tAppuyez sur jusqu‘à « PERSONNALIS. » (HANDSET OPTS), puis appuyez sur pour
sélectionner.
tAppuyez sur jusqu‘à « RACCROC AUTO» (AUTO HANG-UP), puis appuyez sur pour
sélectionner.
tAppuyez sur pour sélectionner «ACTIVE » (ON) ou «DESACTIVE » (OFF), puis appuyez sur
pour confirmer.
>Un son de confirmation est émis.
tAppuyez sur
pour revenir en mode veille.
13.7 Souscription du combiné
IMPORTANT : Lorsque vous achetez votre appareil, tous les combinés sont déjà souscrits à la base et vous
n’avez pas besoin de les souscrire de nouveau.
La souscription d’un combiné n’est nécessaire que si vous achetez des combinés supplémentaires, ou si
un combiné tombe en panne.
Vous pouvez souscrire jusqu’à 4 combinés à la même base et le numéro de chaque combiné (de 1 à 4)
s’affiche sur son écran.
Remarque: Un combiné ne peut être souscrit qu’à une seule base.
Pour souscrire ou dé-souscrire des combinés, vous devez d’abord entrer le code PIN. Le code PIN par
défaut est 0000.
13.8 Souscrire des combinés supplémentaires
tMaintenez la touche
sous la base enfoncée pendant environ 5 secondes.
>Le voyant des messages de la base clignote pendant 1 minute, indiquant que la base est en mode
de souscription.
tAppuyez sur sur le combiné.
tAppuyez sur jusqu’à « REGL AVANCES » (SETTINGS), puis sur pour sélectionner.
tAppuyez sur jusqu’à « SOUSCRIPTION » (REGISTRATION), puis sur pour sélectionner.
tEntrez le code PIN, puis appuyez sur
pour confirmer.
Remarque: Après avoir entré le code PIN,
>« ATTENDEZ… » (WAITING) clignote sur l’écran.
>Vous entendez un bip indiquant que la souscription a été effectuée et le combiné revient au mode
veille, son numéro affiché à l’écran.
>Si aucune base n’a été trouvée, vous entendez des bips d’erreur indiquant que la souscription a
échoué et « ENR.COMB.SVP » (PLS REG H/S) s’affiche à l’écran. Reprenez la procédure à partir de
l’étape 1 ci-dessus.
>Pendant les étapes 2 à 5, si vous n’appuyez sur aucune touche du combiné pendant 10 secondes,
la procédure de souscription est annulée. Dans ce cas, reprenez la procédure à partir de l’étape
1 ci-dessus.
Page 56

13.9 Annuler l‘enregistrement de votre combiné
Vous pouvez annuler l‘enregistrement du combiné que vous utilisez ou de tout autre combiné enregistré
sur la même base. Le code PIN principal est 0000.
tDepuis l‘écran d‘accueil, appuyez sur
.
tAppuyez sur jusqu‘à «REGL AVANCES» (SETTINGS), puis appuyez sur pour sélectionner.
tAppuyez sur jus qu‘ à « DESOUSCRIRE» ( DER EGI STER) , puis appuy ez sur pour sélec tionn er.
tSaisissez le code PIN principal, puis appuyez sur
pour confirmer.
tAppuyez sur
pour sélectionner le numéro du combiné dont vous souhaitez annuler l‘enregistrement,
puis appuyez sur
pour confirmer ou sur pour annuler la procédure.
Remarque: après avoir validé le combiné que vous voulez supprimer:
>Un son de confirmation est émis pour indiquer que l‘annulation de l‘enregistrement est réussie.
>«ENR.COMB.SVP» (PLS REG H/S) est affiché sur l‘écran d‘accueil du combiné non enregistré.
>Si vous n‘appuyez sur aucune touche du clavier dans les 10secondes, la procédure est abandonnée
et le combiné revient en mode veille.
13.10 Modifier le code PIN principal
Le code PIN principal sert à enregistrer/annuler l‘enregistrement des combinés et à accéder à distance
au répondeur. Le code PIN principal par défaut est 0000. La longueur maximale du code PIN principal est
de 8 chiffres.
Remarque : Si vous oubliez votre code PIN, vous pouvez rétablir le code PIN par défaut 0000 en
réinitialisant le combiné.
tDepuis l‘écran d‘accueil, appuyez sur
.
tAppuyez sur jusqu‘à «REGL AVANCES» (SETTINGS), puis appuyez sur pour sélectionner.
tAppuyez sur pour sélectionner «CHANGER PIN» (CHANGE PIN).
tSaisissez le code PIN principal actuel, puis appuyez sur pour confirmer.
>Le code PIN s‘affiche sous forme d‘astérisques (*) à l‘écran lorsque vous le saisissez.
tSaisissez le nouveau code PIN, puis appuyez sur pour confirmer.
>Un son de confirmation est émis.
tAppuyez sur
pour revenir à l‘écran d‘accueil.
13.11 Régler la première sonnerie (pour les combinés supplémentaires uniquement)
Si vous avez souscrit à un service d‘identification du numéro de l‘appelant et que vous ne souhaitez
pas entendre le téléphone sonner avant l‘affichage de l‘identité de l‘appelant, vous pouvez régler la
«1E SONNERIE» (FIRST RING) sur «DESACTIVE» (OFF).
tDepuis l‘écran d‘accueil de votre combiné supplémentaire, appuyez sur
.
tAppuyez sur jusqu‘à « REGL AVANCES » (ADVANCED SET), puis appuyez sur pour
sélectionner.
tAppuyez sur jusqu‘à «1E SONNERIE» (FIRST RING), puis appuyez sur pour sélectionner.
tAppuyez sur pour sélectionner «ACTIVE» (ON) ou «DESACTIVE» (OFF), puis appuyez sur
pour confirmer.
>Un son de confirmation est émis.
tAppuyez sur
pour revenir en mode veille.
13.12 Modifier la durée de rappel
Si vous êtes relié à un standard téléphonique ou à certains services réseau, il peut s‘avérer nécessaire
d‘appuyer sur
pour envoyer un signal Flash (également appelé rappel ou rappel par coupure de ligne).
Vous devez normalement laisser tel quel le réglage par défaut de la durée de rappel, c‘est-à-dire Court
Page 57

FR
(100ms). Vous pouvez toutefois le régler sur Moyen (270ms) ou Long (600ms) si votre téléphone est relié
à un standard téléphonique qui nécessite une durée de rappel différente.
tDepuis l‘écran d‘accueil, appuyez sur .
tAppuyez sur jusqu‘à «REGL AVANCES» (SETTINGS), puis appuyez sur pour sélectionner.
tAppuyez sur ju s qu ‘à «DUREE RAPPEL» (R E CA LL T IM E) , pu i s a pp u ye z s u r p ou r sé le c ti on n er.
tAppuyez sur pour sélectionner « COURT » (SHORT), « MOYEN » (MEDIUM) ou « LONG »
(LONG), puis appuyez sur
pour confirmer.
>Un son de confirmation est émis.
tAppuyez sur
pour revenir en mode veille.
13.13 Réinitialiser l’appareil
Cette fonction vous permet de restaurer les paramètres par défaut de votre téléphone.
Remarque: Après la réinitialisation, tous vos réglages personnels seront annulés, les entrées du journal
des appels et de la liste des appels émis seront supprimées et les paramètres par défaut du téléphone, y
compris le code PIN, seront restaurés. Cependant, votre répertoire ainsi que tous les messages enregistrés
seront conservés.
tDans l’écran d’accueil, appuyez sur
.
tAppuyez sur jusqu’à « REGL AVANCES » (SETTINGS), puis sur pour sélectionner.
tAppuyez sur pour sélectionner « REINITIALIS. » (RESET), puis sur pour sélectionner.
tAppuyez de nouveau sur pour confirmer.
>Vous entend ez un bip d e confirmati on: les paramètres par dé faut de l ’apparei l son t re stauré s.
14. RÉPONDEUR (Eclipse 15)
Votre téléphone dispose d’un répondeur qui prend les appels lorsqu’il est activé.
Le répondeur peut enregistrer jusqu’à 59 messages pour une durée maximale d’enregistrement d’environ
30 minutes, chaque message pouvant durer jusqu’à 3 minutes.
Lorsque le répondeur est activé, il décroche après le « NBR SONNERIE » (RING DELAY) que vous
avez défini.
Si vous avez sélectionné « REP. ENREG. » (RECORD MSGS), votre correspondant pourra vous laisser un
message après avoir écouté votre annonce.
Si vous avez sélectionné « REP. SIMPLE » (ANSWER ONLY), votre correspondant pourra écouter votre
annonce mais ne pourra pas vous laisser de message. Si la mémoire du répondeur est pleine, le voyant
du répondeur sur la base clignote rapidement, l’icône du répondeur sur le combiné clignote lentement
et le répondeur passe automatiquement en mode « REP. SIMPLE » (ANSWER ONLY) pour les nouveaux
appels. Vous devrez supprimer quelques messages pour libérer de la mémoire pour les nouveaux.
14.1 Activer ou désactiver le répondeur
tDans l’écran d’accueil, appuyez sur
.
tAppuyez de nouveau sur pour sélectionner « REPONDEUR » (ANS. SYSTEM).
tAppuyez sur jusqu’à « REP. ON/OFF » (ANS. ON/OFF), puis sur pour sélectionner.
tAppuyez sur pour sélectionner « ACTIVE » (ON) ou « DESACTIVE » (OFF), puis sur pour
confirmer.
>Vous entend ez un bip d e confirmati on.
tAppuyez sur pour revenir au mode veille.
Remarque: Si le répondeur est « DESACTIVE » (OFF) et que le code PIN est toujours réglé à sa valeur
par défaut 0000, le répondeur ne répondra pas aux appels.
Cependant, si le code PIN a été changé et l’accès à distance activé, le répondeur décrochera au bout de
14 sonneries pour permettre l’accès à distance et l’annonce du mode « REP. SIMPLE » (ANSWER ONLY)
sera lue.
Page 58

14.2 Mode de réponse
Le téléphone dispose de deux annonces préenregistrées correspondant aux deux modes de réponse
suivants: « REP. SIMPLE » (ANSWER ONLY) et « REP. ENREG. » (RECORD MSGS). Le mode de réponse
par défaut est « REP. ENREG. » (RECORD MSGS), ce qui permet à un correspondant de laisser un message
sur le répondeur après avoir écouté l’annonce. Ceci peut être changé pour le mode « REP. SIMPLE »
(ANSWER ONLY), qui ne permet pas à un correspondant de laisser un message sur le répondeur après
avoir écouté l’annonce.
14.2.1 Choix du mode de réponse
tDans l’écran d’accueil, appuyez sur
.
tAppuyez de nouveau sur pour sélectionner « REPONDEUR » (ANS. SYSTEM).
tAppuyez sur pour sélectionner « MODE REPOND. » (ANSWER MODE), puis sur pour
sélectionner.
tAppuyez sur pour sélectionner « REP. SIMPLE » (ANSWER ONLY) ou « REP. ENREG » (RECORD
MSGS), puis sur pour confirmer.
>Vous entend ez un bip d e confirmati on.
tAppuyez sur pour revenir au mode veille.
14.3 Réglages du répondeur
14.3.1 Régler le nombre de sonneries
Vous pouvez sélectionner le nombre de sonneries avant que le répondeur ne réponde aux appels et
ne lise l‘annonce. Vous pouvez programmer un nombre de sonneries compris entre 2 et 7 ou utiliser le
réglage «ECONOMIE» (TOLL SAVER).
tDepuis l‘écran d‘accueil, appuyez sur
.
tAppuyez à nouveau sur pour sélectionner «REPONDEUR» (ANS. SYSTEM).
tAppuyez sur jusqu‘à «REGL. REP» (ANS. SETTING), puis appuyez sur .
tAppuyez sur pour sélectionner «NBR SONNERIE» (RING DELAY).
tAppuyez sur pour sélectionner «2 SONNERIES» (2 RINGS) à «7 SONNERIES» (7 RINGS) ou
«ECONOMIE» (TOLL SAVER), puis appuyez sur pour confirmer.
>Un son de confirmation est émis.
tAppuyez sur
pour revenir en mode veille.
Remarque: si vous sélectionnez «ECONOMIE » (TOLL SAVER), le répondeur répond aux appels entrants
à la 5e sonnerie si vous n‘avez pas de nouveaux messages et à la 3e sonnerie si vous en avez.
Si vous appelez votre répondeur pour consulter vos messages et qu‘il ne vous répond pas à la 3e sonnerie,
alors vous pouvez raccrocher immédiatement, car cela signifie que vous n‘avez aucun nouveau message.
Cette fonction vous permet d‘économiser le prix d‘un appel longue distance lorsque vous consultez vos
messages à distance.
14.3.2 Activer/désactiver l‘accès à distance
tDepuis l‘écran d‘accueil, appuyez sur .
tAppuyez à nouveau sur pour sélectionner «REPONDEUR» (ANS. SYSTEM).
tAppuyez sur jusqu‘à «REGL. REP» (ANS. SETTING), puis appuyez sur pour sélectionner.
tAppuyez sur jusqu‘à «ACCÈS A DIST», puis appuyez sur pour sélectionner.
tAppuyez sur pour sélectio nner «ACTIVER» (ACTIVATE) ou «DESACTIVER» (DEACTIVATE), puis
appuyez sur pour confirmer.
>Un son de confirmation est émis.
tAppuyez sur
pour revenir en mode veille.
Remarque: lorsque l‘accès contrôlé à distance est activé, vous pouvez consulter les messages de votre
répondeur lorsque vous n‘êtes pas chez vous, en appelant avec un autre téléphone.
Page 59

FR
Le code PIN principal permet d‘accéder au répondeur à distance. Si votre répondeur est désactivé, vous
devez modifier le code PIN principal par défaut « 0000 » afin de pouvoir utiliser la fonction d‘accès à
distance et activer votre répondeur.
14.3.3 Modifier la langue de la voix
Vous êtes susceptible de pouvoir sélectionner une autre langue pour les annonces préenregistrées du
répondeur.
tDepuis l‘écran d‘accueil, appuyez sur
.
tAppuyez à nouveau sur pour sélectionner «REPONDEUR» (ANS. SYSTEM).
tAppuyez sur jusqu‘à «REGL. REP» (ANS. SETTING), puis appuyez sur pour sélectionner.
tAppuyez sur jusqu‘à «LANGUE» (LANGUAGE), puis appuyez sur pour sélectionner.
tAppuyez sur pour sélectionner la langue de votre choix (si disponible), puis appuyez sur
pour confirmer.
>Un son de confirmation est émis.
tAppuyez sur
pour revenir en mode veille.
14.4 Lecture des messages
Lorsqu’il y a des nouveaux messages sur le répondeur,
clignote sur l’écran du combiné.
tDans l’écran d’accueil, appuyez sur .
tAppuyez de nouveau sur pour sélectionner « REPONDEUR » (ANS. SYSTEM).
tAppuyez de nouveau sur pour sélectionner « ECOUTER » (PLAY).
>Vos message s sero nt auto matiquement lus à tr avers le haut -parleur du combiné.
>Le numéro du message, la date et l’heure de l’appel s’affichent à l’écran.
>Appuyez sur pour écouter vos messages en privé à travers l’écouteur de votre combiné.
tPendant la lecture, appuyez sur , puis sur pour les options suivantes :
REPETER (REPEAT) Pour réécouter le message en cours
SUIVANT (NEXT) Pour écouter le message suivant
PRECEDENT (PREVIOUS) Pour écouter le message précédent
SUPPRIMER (DELETE) Pour supprimer le message en cours
Remarque: Pour revenir à l’écran montrant le numéro du message, la date et l’heure, appuyez sur
.
tAppuyez sur pour revenir au mode veille.
14.5 Supprimer tous les messages
Remarque: Seuls les anciens messages peuvent être supprimés. Les nouveaux messages doivent d’abord
être écoutés avant de pouvoir être supprimés.
tDans l’écran d’accueil, appuyez sur
.
tAppuyez de nouveau sur pour sélectionner « REPONDEUR » (ANS. SYSTEM).
tAppuyez sur pour sélectionner « SUPPRIM TOUT » (DELETE ALL), puis appuyez sur .
tAppuyez de nouveau sur pour confirmer.
>Vous entend ez un bip d e confirmati on.
tAppuyez sur
pour revenir au mode veille.
Annonce
Lorsque le répondeur décroche, le correspondant entend l’annonce préenregistrée, sauf si vous avez
enregistré votre propre annonce.
Page 60

14.6 Annonce
Lorsque le répondeur décroche, le correspondant entend l’annonce préenregistrée, sauf si vous avez
enregistré votre propre annonce.
Le téléphone est livré avec deux annonces préenregistrées pour les modes de réponse suivants: «REP.
SIMPLE» (ANSWER ONLY) et «REP. ENREG.» (RECORD MSGS). Par défaut, le mode de réponse est
«REP. ENREG.» (RECORD MSGS). Il permet aux appelants de laisser un message sur le répondeur après
avoir écouté l‘annonce. Vous pouvez changer de mode et utiliser «REP. SIMPLE» (ANSWER ONLY). Ce
mode ne permet pas aux appelants de laisser un message sur le répondeur après avoir écouté l‘annonce.
14.6.1 Enregistrer une annonce personnalisée
Vous pouvez remplacer les annonce s pr éenreg istrées par vos propres annonc es p erson nalisées.
Remarque: La durée maximale d’une annonce est de 2 minutes.
tDans l’écran d’accueil, appuyez sur
.
tAppuyez de nouveau sur pour sélectionner « REPONDEUR » (ANS. SYSTEM).
tAppuyez sur jusqu’à « ENR. ANNONCE » (ANNOUNCEMENT), puis sur pour sélectionner.
tAppuyez sur pour sélectionner « REP. SIMPLE » (ANSWER ONLY) ou « REP. ENREG » (RECORD
MSGS), puis sur pour confirmer.
tAppuyez sur jusqu’à « ENREGISTRER » (RECORD ANNC), puis appuyez sur .
>Vous entend ez un bip d e confirmati on.
tParlez dans le combiné pour enregistrer votre nouvelle annonce, puis appuyez de nouveau sur
pour arrêter l’enregistrement.
>Vous entend ez un bip d e confirmati on.
tAppuyez sur
pour revenir au mode veille.
14.6.2 Écouter une annonce
tDepuis l‘écran d‘accueil, appuyez sur .
tAppuyez à nouveau sur pour sélectionner «REPONDEUR» (ANS. SYSTEM).
tAppuyez sur
jusqu‘à «ENR. ANNONCE » (ANNOUNCEMENT), puis appuyez sur pour
sélectionner.
tAppuyez sur
pour sélectionner «REP. SIMPLE» (ANSWER ONLY) ou «REP. ENREG.» (RECORD
MSGS), puis appuyez sur pour confirmer.
tAppuyez sur pour sélectionner «ECOUTER» (PLAY).
>L‘annonce est lue via le haut-parleur du téléphone.
>Appuyez sur
si vous souhaitez écouter l‘annonce en privé via l‘écouteur.
tAppuyez sur
pour revenir en mode veille.
14.6.3 Supprimer une annonce personnelle
Si vous voulez utiliser à nouveau l‘annonce par défaut, il vous suffit de supprimer votre annonce personnelle.
tDepuis l‘écran d‘accueil, appuyez sur .
tAppuyez à nouveau sur pour sélectionner «REPONDEUR» (ANS. SYSTEM).
tAppuyez sur jusqu‘à «ENR. ANNONCE » (ANNOUNCEMENT), puis appuyez sur pour
sélectionner.
tAppuyez sur jusqu‘à «REP. SIMPLE» (ANSWER ONLY) ou « REP. ENREG.» (RECORD MSGS),
puis appuyez sur pour confirmer.
tAppuyez sur jusqu‘à «SUPPRIMER» (DELETE), puis appuyez sur pour confirmer.
>L‘annonce préenregistrée par défaut est lue via le haut-parleur du téléphone.
>Appuyez sur
si vous souhaitez écouter l‘annonce en privé via l‘écouteur.
tAppuyez sur
pour revenir en mode veille.
Page 61

FR
14.7 Accès à distance
Le téléphone vous permet d‘écouter les messages de votre répondeur ou de commander votre répondeur
en l‘appelant depuis un autre téléphone à touches.
Pour accéder à votre répondeur à distance, vous devez entrer un code d‘accès à distance (le même que
votre code PIN principal).
Le code d‘accès à distance permet d‘éviter l‘accès à votre répondeur par des personnes non autorisées.
L‘accès à distance doit être activé si vous souhaitez utiliser cette fonction.
14.7.1 Accéder au répondeur à distance
tComposez votre numéro de téléphone depuis n‘importe quel téléphone à touches.
tLorsque votre répondeur répond à votre appel et commence à lire votre annonce, appuyez sur la
touche #.
>L‘annonce s‘arrête.
tSaisissez votre code d‘accès à distance (le même que votre code PIN principal) dans les 8 secondes à
l‘aide du clavier numérique du téléphone à touches.
Remarque : le répondeur met fin à l‘appel si vous ne saisissez pas le code PIN principal dans
les 8 secondes.
tSi le code est accepté, vous entendez un son de confirmation.
tLe répondeur commence à lire tous les messages enregistrés, en commençant par les nouveaux
messages. Si aucun message n‘est enregistré, vous entendez quatre bips.
tUtilisez le clavier du téléphone à touches pour réaliser les opérations suivantes:
To uc h es
1 Répéter le message précédent.
2 Lire les messages/Répéter le message actuel.
3 Passer au message suivant.
6 Supprimer le message actuel.
7 Activer le mode de répondeur REP. ENREG. (RECORD MSGS) sur le combiné Eclipse
principal ou REP & ENREG (ANSW.&RECORD) sur les combinés supplémentaires.
8 Arrêter la lecture du message.
9 Désactiver le répondeur.
tLorsque vous avez fini d‘écouter vos messages, raccrochez simplement le téléphone pour terminer.
Remarque:
Si votre répondeur est désactivé, mais que votre accès à distance est activé, le répondeur vous répond
après 14 sonneries, afin que vous puissiez y accéder à distance, et vous lit l‘annonce « REP. SIMPLE»
(ANSWER ONLY).
Si vous saisissez un code d‘accès à distance incorrect, vous entendez trois bips indiquant l‘erreur et vous
devez entrer à nouveau le code. Si vous saisissez un code d‘accès à distance erroné à deux reprises
consécutives, l‘appel est interrompu automatiquement.
Page 62

15. RÉSOLUTION DES PROBLÈMES
15.1 Vérifiez TOUJOURS que:
tVous avez suivi toutes les étapes figurant dans le guide de l‘utilisateur pour installer et configurer votre
téléphone.
tTo u s l e s c o n n ec t e u rs s o nt c o rr e c te m e n t i n s ér é s d a n s l e u r p r i s e.
tL‘alimentation secteur de l‘unité de base est activée au niveau de la prise.
tLes piles du combiné sont correctement installées et sont suffisamment chargées.
15.2 Utilisation quotidienne
«Je ne parviens pas à appeler ou à répondre à des appels.»
tSi l‘écran du combiné est vide, il a peut être été mis hors tension. Appuyez sur la touche
et maintenez-
la enfoncée sur le combiné pour le remettre sous tension.
tVérifiez que l‘adaptateur secteur de l‘unité de base est branché et que l‘alimentation est activée. L‘unité
de base nécessite une alimentation secteur pour que le téléphone fonctionne normalement et pas
seulement pour charger les piles du combiné.
tAssurez-vous d‘utiliser le câble téléphonique fourni avec votre téléphone. Il se peut que les autres câbles
téléphoniques ne fonctionnent pas.
tRapprochez le combiné de l‘unité de base.
tContrôlez le symbole de niveau des piles sur l‘écran. Si celui-ci est bas, replacez le combiné sur l‘unité
de base ou le socle de chargement pour recharger les piles.
t Désactivez l‘alimentation au niveau de la prise secteur, attendez un instant, puis réactivez-la. Cela peut
résoudre le problème.
«Je ne parviens pas à passer des appels.»
tSi l‘écran du combiné affiche CLAV. BLOQUE (KEYS LOCKED), appuyez et maintenez enfoncé * pour le
déverrouiller avant de pouvoir passer un appel.
tSeul un combiné (ou l‘unité de base) peut être relié à une ligne externe à la fois. Si l‘écran du combiné
affiche, la base est déjà en cours d‘utilisation par le répondeur ou un autre combiné.
«Lorsque j‘appuie sur les touches, rien ne se passe.»
tAssurez-vous que les piles sont bien placées dans le combiné. Si le symbole de niveau des piles est bas,
replacez le combiné sur l‘unité de base ou le socle de chargement pour le recharger.
«Lorsque je saisis un numéro, il s‘affiche à l‘écran, mais je ne parviens pas à passer d‘appel externe.»
tChangez l‘unité de base d‘emplacement et essayez un emplacement plus élevé, si possible, ou plus
éloigné des autres appareils électriques.
«Le téléphone ne sonne pas.»
tVér ifiez que l‘ adaptateur secteur de l‘ unité de ba se est bran ché et qu e l‘alimentat ion est act ivée.
tL‘unité de base nécessite une alimentation secteur pour que le téléphone fonctionne normalement et
pas seulement pour charger les piles.
tAssurez-vous d‘utiliser le câble téléphonique fourni avec votre téléphone.
tAssurez-vous que le volume de la sonnerie n‘est pas désactivé. Augmentez le réglage du volume de la
sonnerie.
«Mon appel a été coupé lorsque je me suis trouvé(e) hors de portée. À présent, je ne parviens plus
à utiliser mon combiné.»
tRapprochez le combiné de l‘unité de base avant d‘essayer d‘effectuer à nouveau un appel.
Page 63

FR
«Il y a des interférences et du bruit sur la ligne.»
tRapprochez le combiné de l‘unité de base ou changez-le de position.
tEssayez d‘éloigner l‘unité de base des autres appareils électriques, comme un téléviseur ou un ordinateur.
tPour une réception optimale, placez l‘unité de base aussi haut que possible. Par exemple, dans un
bâtiment à deux étages, le palier du premier étage est un emplacement idéal.
t«La fonction d‘affichage de l‘appelant ne fonctionne pas.»
tVous devez souscrire à un service d‘identification du numéro de l‘appelant auprès de votre prestataire
de services réseau.
tIl se peut que l‘appelant ait masqué son numéro ou qu‘il appelle depuis un réseau qui ne transmet pas
le numéro de l‘appelant (p. ex., s‘il effectue un appel international).
«Lorsque j‘essaye de passer un appel, j‘entends la tonalité occupée.»
tSi vous utilisez un système multicombiné, vérifiez si un appel n‘est pas déjà en cours sur un autre combiné.
«Le volume de l‘écouteur est faible pendant mes appels.»
tAssurez-vous de tenir l‘écouteur correctement contre votre oreille.
tRéglez le volume à l‘aide de .
«Je ne parviens pas à mémoriser une entrée de répertoire.»
tLe nombre maximal d‘entrées de répertoire est de 200 sur votre combiné. Vous devez supprimer des
entrées existantes afin de libérer de l‘espace pour en créer d‘autres.
15.3 Appel interphone et transfert
«Je ne parviens pas à transférer d‘appels.»
tAssurez-vous que l‘autre combiné se trouve à portée de l‘unité de base.
tAssurez-vous d‘avoir saisi le numéro correct de l‘autre combiné.
15.4 Piles
«Les piles du combiné se déchargent en une heure ou deux.»
tAvant d‘utiliser le combiné pour la première fois, vous devez le laisser charger sur l‘unité de base ou le
socle de chargement pendant au moins 15heures.
tIl peut s‘avérer nécessaire de remplacer les piles.
tVér ifiez le rac cord ement ent re l ‘unité de b ase et la p rise secteu r.
«Je tente de recharger les piles mais je vois toujours l‘avertissement de niveau faible.»
tVous devez remplacer les piles. Éliminez-les en toute sécurité: ne les brûlez pas, ne les immergez pas
dans de l‘eau, ne les démontez pas et ne les percez pas.
tN‘utilisez pas de piles non rechargeables dans le combiné. Celles-ci pourraient exploser et provoquer
des dommages.
15.5 Enregistrement
«Je ne parviens pas à enregistrer un combiné supplémentaire.»
tLe nombre maximal de 4 combinés a été atteint. Vous devez annuler l‘enregistrement d‘un combiné afin
d‘en enregistrer un autre.
Page 64

15.6 Répondeur
«Le répondeur n‘enregistre pas de messages.»
tAssurez-vous que le répondeur est activé.
tAssurez-vous que le répondeur est réglé sur le mode REP. ENREG. (RECORD MSGS).
tLa mémoire est peut être saturée. Si c‘est le cas, vous devez supprimer des messages.
«Je ne parviens pas à accéder au répondeur à distance.»
tAssurez-vous que l‘accès à distance est activé.
tAssurez-vous d‘avoir saisi correctement le code PIN d‘accès à distance (le même que votre code PIN
principal).
15.7 Si le problème persiste...
tDébranchez tous les autres appareils raccordés à la même ligne et essayez de passer un appel.
tDébranchez l‘unité de base de la ligne téléphonique et branchez-y un autre téléphone. Essayez de
passer un appel. Si vous y parvenez, la ligne fonctionne.
tSi vous n‘y parvenez pas et que vous utilisez un adaptateur secteur multiprise, retirez-le et branchez le
téléphone directement sur la prise.
tSi vous parvenez à passer un appel, l‘adaptateur est peut-être défectueux.
tSi vous ne parvenez pas à passer l‘appel, la défaillance peut se trouver dans la ligne principale. Contactez
votre prestataire de services.
Page 65

FR
16. NETTOYAGE ET ENTRETIEN
Ne nettoyez aucune partie de votre téléphone avec du benzène, des diluants ou autres solvants chimiques
car cela pourrait causer des dommages permanents qui ne seraient pas couverts par la garantie.
Au besoin, nettoyez le téléphone avec un chiffon humide.
Protégez votre téléphone contre la chaleur, l’humidité et la lumière directe du soleil, et ne le laissez
pas se mouiller.
17. GARANTIE ET SERVICE
Le téléphone est garanti 24mois mois à compter de la date d‘achat indiquée sur votre facture. Cette
garantie ne couvre pas les défaillances ou défauts dus à des accidents, à une utilisation non conforme, à
l‘usure ordinaire, à la négligence, à des défaillances de la ligne téléphonique, à la foudre, à une altération
de l‘équipement ou à toute tentative de réglage ou de réparation qui ne serait pas réalisée par des agents
agréés.
Conservez bien votre facture : elle constitue votre garantie.
17.1 Pendant la période de garantie
tDébranchez la base de la ligne téléphonique et du secteur.
tRemettez tous les éléments de votre téléphone dans l‘emballage d‘origine.
tRapportez l‘appareil au magasin où vous l‘avez acheté, accompagné de votre facture.
tN‘oubliez pas de mettre l‘adaptateur secteur dans l‘emballage.
17.2 Après l’expiration de la garantie
Si l‘appareil n‘est plus sous garantie, contactez-nous via www.aegtelephones.eu
Cet appareil ne fonctionne qu’avec des piles rechargeables. Si vous mettez des piles non rechargeables
dans le combiné et que vous le posez sur la base, le combiné sera endommagé et ceci N’EST PAS couvert
par la garantie.
18. DÉCLARATION CE
Ce produit est conforme aux exigences essentielles et à d‘autres dispositions applicables de la directive
R&TTE 1999/5/CE.
Vous trou vere z la dé claration de conformité sur le site : www.aegtelephones.eu.
Page 66

19. MISE AU REBUT DE L‘APPAREIL (RESPECT DE L‘ENVIRONNEMENT)
Lorsque l’appareil est hors d’usage, ne le jetez pas dans les ordures ménagères mais apportez-le à un
point de collecte où ses composants électriques et électroniques pourront être recyclés. Ceci est indiqué
par le symbole figurant sur le produit, dans le mode d’emploi ou sur l‘emballage. Certains matériaux de
l’appareil sont réutilisables si vous l‘apportez à un centre de recyclage. En permettant la réutilisation de
certaines pièces ou matières premières d’appareils hors d’usage, vous contribuez de façon importante
à la protection de l‘environnement. Veuillez vous adresser aux autorités locales pour plus d‘informations
concernant les points de collecte de votre région.
Les piles doivent être retirées avant la mise au rebut de l‘appareil. Éliminez les piles en respectant
l’environnement et la réglementation de votre pays.
20. CARACTÉRISTIQUES TECHNIQUES
Norme Té l é ph o n e s a n s- fi l nu m é r iq u e (D E C T )
Gamme de
fréquences
1,88 à 1,9 GHz
Bande passante
du canal
1,728 MHz
Portée Jusqu’à 300 m à l’extérieur, 50 m à l’intérieur
Autonomie Veille: 23 0 heures ; pa role : 13 heures
Durée de charge des piles 15 heures
Gamme de
température
Fonctionnement: 0 °C à 40 °C, stockage : -20 °C à 60 °C
Alimentation
électrique
Adaptateur secteur de la base:
Te n P a o : S 0 03 I B 0 60 0 0 5 0 & S 00 3 I V 06 0 0 0 50
Entrée 100-240 V ca 50-60 Hz ; sortie 6 V cc / 500 mA.
Adaptateur secteur du chargeur:
Ten Pao : S003IB0600015 & S003IV0600015
Entrée 100-240 V ca 50-60 Hz ; sortie 6 V cc / 150 mA.
Piles:
2 piles AAA 1,2 V, 650 mAh, NiMH (rechargeables)
Page 67

FR
Page 68

© 2012 Binatone Electronics International Limited
All rights reserved
Subject to avaibility. Rights of modification reserved.
AEG is a registered trademark used under license from AB Electrolux (publ)
www.aegtelephones.eu
Page 69

V1
DECT
TELEFON
ECLIPSE 10/15
BEDIENUNGSANLEITUNG
DE
Page 70

2
8
4
15
10
11
16
6
1
13 12
14
7
3
9
5
P2
P1 P3 P4
P5
Page 71

DE
1. UNSER EINSATZ FÜR DIE UMWELT
Vielen Dank, dass Sie sich für dieses Produkt entschieden haben. Dieses Gerät wurde mit größter Sorgfalt
entwickelt und zusammengebaut, um Ihnen ein exzellentes Produkt zu bieten und gleichzeitig die Umwelt
zu schonen. Deshalb liegt diesem Produkt eine Kurzanleitung bei, um die Papiermenge zu reduzieren.
So müssen weniger Bäume für die Herstellung von Papier abgeholzt werden. Die Bedienungsanleitung
zum Produkt mit ausführlicher Beschreibung aller Funktionen finden Sie auf unserer Website unter
www.aegtelephones.eu. Laden Sie sich diese Bedienungsanleitung bei Bedarf herunter, z. B. wenn
Sie die erweiterten Funktionen nutzen möchten. Um die Umwelt zu schonen, bitten wir Sie aber, die
Bedienungsanleitung nicht auszudrucken. Vielen Dank, dass Sie uns beim Umweltschutz unterstützen.
2. WICHTIGE SICHERHEITSHINWEISE
Bitte beachten und befolgen Sie diese Hinweise, um die Gefahr eines Feuers, elektrischen Schlags sowie
von Personenschäden so gering wie möglich zu halten:
tBitte ALLE Hinweise sorgfältig durchlesen.
tAlle Warnhinweise (auch auf dem Produkt) beachten und Anweisungen befolgen.
tZum Reinigen das Produkt immer erst von der Stromversorgung trennen. Keine flüssigen oder Reiniger
in Sprühdosen verwenden. Ein angefeuchtetes Tuch zum Reinigen verwenden.
tProdukt von Hitze, Feuchtigkeit und starker Sonneneinstrahlung fernhalten und darauf achten, dass es
nicht nass wird. Nicht in der Nähe von z. B. einer Badewanne, Spüle oder eines Swimmingpools verwenden.
tUm einen Brand oder Stromschläge zu vermeiden, Wandsteckdosen und Verlängerungskabel nicht
überlasten.
tDas Produkt in folgenden Fällen von der Stromversorgung trennen:
>Netzkabel und/oder -stecker sind beschädigt.
>Das Produkt funktioniert bei sachgemäßem Gebrauch nicht einwandfrei.
>Das Produkt ist heruntergefallen, und das Gehäuse ist beschädigt.
>Deutliche Leistungsveränderungen sind feststellbar.
tDas Telefon NIEMALS während eines Gewitters im Freien verwenden. Basisstation bei heftigen lokalen
Gewittern von der Telefonleitung und vom Netz trennen. Durch Blitzeinschlag verursachte Schäden sind
nicht von der Garantie abgedeckt.
tDieses Telefon nicht benutzen, um einen Gasaustritt zu melden, v.a. nicht in der Nähe der undichten
Stelle.
tNur die im Lieferumfang enthaltenen Nickel-Metallhydrid (Ni-Mh)-Akkus oder vom Hersteller empfohlene
Ersatzakkus verwenden. Bei Einsetzen falscher Akku- oder von Batterietypen besteht Explosionsgefahr.
Die Verwendung anderer Akkutypen oder nicht aufladbarer Einwegbatterien ist gefährlich. Dies kann
nicht nur Störungen, sondern auch Beschädigungen des Geräts oder Sachschäden verursachen. Der
Hersteller haftet nicht für Schäden, die durch Nichtbeachtung dieser Hinweise entstehen.
tKeine Ladestationen anderer Hersteller verwenden. Anderenfalls können die Akkus beschädigt werden.
tSicherstellen, dass die Akkus richtig im Fach eingesetzt sind.
tAkkus wie Batterien vorschriftsgemäß umweltfreundlich entsorgen. Akkus nicht ins Feuer oder
Wasser werfen, auseinandernehmen oder durchstechen.
3. BESTIMMUNGSGEMÄSSE VERWENDUNG
Dieses Telefon ist für den Anschluss an ein öffentliches analoges Telefonnetz oder oder den Anschluss an
eine analoge Nebenstelle einer kompatiblen Telefonanlage.
Page 72

4. LIEFERUMFANG
Im Lieferumfang ist enthalten:
t1 Mobilteil Eclipse
t1 Basisstation
t1 Netzteil
t1 Telefonanschlusskabel
t2 wiederaufladbare NiMH-Akkus vom Typ AAA
t1 Akkufachabdeckung für Mobilteil Eclipse
t1 Werkzeug zum Abheben der Akkufachabdeckung
t1 Bedienungsanleitung
5. MOBILTEIL UND VERBINDUNG ZUR BASISSTATION
tBeim Kauf des Telefons sind alle Mobilteile bereits an der Basisstation angemeldet und sollten sich nach
dem Einschalten direkt mit dieser verbinden.
tUm Mobilteil und Basisstation zusammen zu nutzen, müssen sie per Funk eine Verbindung zueinander
aufbauen können. Das Funksignal zwischen Mobilteil und Basisstation entspricht den üblichen Normen
für DECT-Telefone: Die maximale Reichweite beträgt im Außenbereich bis zu 300 Metern und in
Gebäuden bis zu 50 Metern. Bitte beachten:
>Große Metallobjekte wie Kühlschränke, Spiegel oder Aktenschränke, die sich zwischen Mobilteil und
Basisstation befinden, können das Funksignal stören.
>Massive Gebäudeteile wie Wände können die Signalstärke ebenfalls beeinträchtigen.
>Elektrische Geräte können Störungen verursachen und/oder die Reichweite beeinträchtigen.
tStellen Sie die Basisstation nicht in der Nähe weiterer Telefone, Fernseher oder Audioanlagen auf - es
könnte zu Störungen kommen.
tJe höher die Basisstation im Raum aufgestellt wird, desto besser kann das Funksignal empfangen
werden.
tWenn die Lautstärke des Mobilteils während eines Anrufs abnimmt oder es verzerrt klingt, verlassen Sie
mit dem Mobilteil die Reichweite der Basisstation. Bewegen Sie sich innerhalb von 20 Sekunden wieder
näher an die Basisstation, ansonsten wird die Verbindung möglicherweise unterbrochen.
Page 73

DE
6. TELEFON IN BETRIEB NEHMEN
6.1 Anschließen der Basisstation (siehe P4)
tSchließen Sie das Netzkabel (15) und das Telefonanschlusskabel (16) an der Basisstation an.
tStecken Sie anschließend das Netzteil an einer Steckdose (100-240VAC, 50-60Hz) ein und verbinden
Sie das Telefonanschlusskabel mit einer Telefonbuchse.
Warnung! Verwenden Sie nur die im Lieferumfang enthaltenen Kabel. Nur das beiliegende Netzteil
verwenden. Die Verwendung anderer Netzteile kann Beschädigungen des Geräts zur Folge haben.
Hinweis: Die Basisstation am besten direkt neben einer leicht zugänglichen Steckdose aufstellen. Das
Netzkabel unter keinen Umständen verlängern. Die Basisstation muss immer am Netz angeschlossen
bleiben; anderenfalls funktionieren angemeldete Mobilteile nicht.
6.2 Einsetzen und Aufladen der Akkus
tSetzen Sie die zwei beiliegenden Akkus unter Beachtung der Polarität (siehe Markierungen im Akkufach)
korrekt ein.
Warnung! Nur die im Lieferumfang enthaltenen Ni-Mh-Akkus verwenden.
tRichten Sie die Akkufachabdeckung auf dem Akkufach auf der Rückseite aus und lassen Sie die
Abdeckung mit etwas Druck einrasten.
tLegen Sie den Telefonhörer dann auf die Basisstation und laden Sie die Akkus für 15 Stunden auf.
>Sie hören einen doppelten Signalton, wenn Sie den Telefonhörer richtig auf die Basisstation gelegt
haben, und die Akkuanzeige an der Basis leuchtet auf (Ladevorgang).
Hinweis: Der Telefonhörer kann sich während des Ladevorgangs oder bei längerer Nutzung erwärmen.
Das ist normal und kein Defekt oder Produktfehler.
ACHTUNG
Bei Einsetzen falscher Akku- oder von Batterietypen besteht Explosionsgefahr. Akkus sind wie Batterien
vorschriftsgemäß umweltfreundlich zu entsorgen.
6.3 Abnehmen der Akkufachabdeckung des Eclipse-Telefonhörers (sieheP5)
Führen Sie den mitgelieferten Schlüssel wie abgebildet in die Aufnahme ein und drehen Sie den Schlüssel
im Uhrzeigersinn, um die rückseitige Akkufachabdeckung zu lösen.
Page 74

7. DAS TELEFON – ERSTE SCHRITTE
7.1 Übersicht von Tastaturfunktionen und Display-Anzeigen des Mobilteils und der Basisstation
Nr. Taste Funktion
1
Im Stand-by-Modus: Hauptmenü aufrufen
In Menüs: Funktion/Option auswählen, bestätigen und speichern
2
In Menüs: Nach oben blättern
Während Gesprächen/Nachrichtenwiedergabe: Lautstärke erhöhen
Im Stand-by-Modus: Anrufübersicht anzeigen
3
Im Stand-by-Modus: Anruf tätigen/annehmen
Während Gesprächen: Flash-Signal für Netzdienste senden
4
Im Stand-by-Modus: Anruf im Freisprechbetrieb tätigen/annehmen
Während Gesprächen: Zwischen „Hörer“- und Freisprechbetrieb umschalten
5
Für Tastensperre ein/aus Taste gedrückt halten
6
Im Stand-by-Modus: Wahlwiederholungsliste öffnen
7
Vorgang abbrechen
Während der Wahlvorbereitung: Letzte eingegebene Ziffer löschen
Während Gesprächen: Mikrofon stummschalten/Stummschaltung aufheben
(Taste erneut drücken)
8
In Menüs: Nach unten blättern
Während Gesprächen/Nachrichtenwiedergabe: Lautstärke verringern
Im Stand-by-Modus: Telefonbuch öffnen
9
Während Gesprächen: Gespräch beenden
Bei Einstellungen: Abbrechen und beenden (ohne zu speichern)
Im Stand-by-Modus: Telefonhörer ein-/ausschalten (Taste gedrückt halten)
10
Rufton ausschalten (Taste gedrückt halten)
Beim Wählen/Eingeben von Rufnummern im Telefonbuch: Taste zum Einfügen
einer Wahlpause gedrückt halten
11
Im Stand-by-Modus/Während Gesprächen: Intern anrufen bzw. verbinden
Page 75

DE
7.2 Angezeigte Symbole (sieheP2)
Symbol
Bedeutung
Zeigt an, dass die Akkus voll geladen sind.
(Animation zeigt Ladevorgang an.)
Zeigt an, dass die Leitung belegt ist.
Blinkt bei einem ankommenden Anruf.
Blinkt bei neuen Mailbox-Nachrichten auf (Netzdienst).
Zeigt an, dass neue entgangene Anrufe vorliegen oder die Anrufübersicht geöffnet ist.*
Zeigt an, dass das Telefonbuch geöffnet ist.
Zeigt an, dass der Wecker gestellt ist.
Zeigt an, dass der Rufton ausgeschaltet ist.
Zeigt an, dass der Telefonhörer angemeldet und in Reichweite der Basis ist.
Blinkt, wenn der Hörer außerhalb der Reichweite ist oder nach einer Basis sucht.
Zeigt an, dass der Anrufbeantworter eingeschaltet ist.
Blinkt langsam, wenn neue Nachrichten auf dem AB vorliegen bzw. wenn der Speicher des
Anrufbeantworters voll ist.
Zeigt eine erforderliche Bestätigung oder verfügbare Einstellung an.
Ermöglicht bei der Eingabe im Telefonbuch das Löschen der letzten Eingabe.
Erlaubt in Menüs, zur vorherigen Einstellung bzw. zum vorherigen Schritt zurückzugehen.
Bei eingeschaltetem Display verfügbar.
*Für diese Funktion muss das Leistungsmerkmal Mailbox bzw. CLIP beim Netzanbieter beauftragt sein –
ggf. kostenpflichtig.
7.3 Basisstation (siehe P3)
Nr.
Symbol/
Taste
Bedeutung/Funktion
12
Nur Eclipse 15
Leuchtet grün, wenn der Anrufbeantworter eingeschaltet ist.
Blinkt bei neuen Nachrichten.
Blinkt schnell, wenn der Speicher des ABs voll ist.
13
Leuchtet während des Ladevorgangs rot auf.
14
Taste drücken, um alle angemeldeten Mobilteile zu finden („Paging“). Zum Beenden
Taste erneut drücken oder eine beliebige Taste am Hörer drücken.
Taste gedrückt halten, um die Anmeldung einzuleiten.
Page 76

7.4 Menüübersicht und Menü
tIn der Startansicht des Mobilteils drücken Sie die Taste
um Zugriff auf „ANRUFBEAN.“
(ANS. SYSTEM) zu erhalten, der ersten Option in der Liste des Hauptmenüs.
tDrücken Sie die Tasten
oder , um zu den anderen Optionen der Menüliste zu gelangen.
tDrücken Sie die Taste
, um in ein Untermenü oder zu einer Funktion zu gelangen.
tDrücken Sie die Taste , um zur vorigen Menüebene zu gelangen.
tDrücken Sie die Taste
, um die aktuelle Aktion abzubrechen und zurück zur Startansicht zu gelangen.
Hinweis: Wenn am Mobilteil für 15 Sekunden keine Taste betätigt wird, kehrt das Display automatisch
zur Startansicht zurück.
ANRUFBEAN. TELEF.BUCH UHR & WECKER PERS.EINST ERW. EINST
ABSPIELEN NEUER EINTR. DATUM/ZEIT MOBILT.NAME PIN ÄNDERN
ALLE LÖSCHEN EINTRÄGE FORMAT MOBILT. TÖNE ANMELDUNG
ANS. EIN/AUS EINTR.ÄNDERN ZEIT FORMAT RUFTONLAUTST ABMELDEN
ANSAGE AUFN. LÖSCHEN DATUMSFORMAT RUFTONMELOD. ZURÜCKSETZEN
ANTW.- MO DUS ALLE LÖSCHEN WECKER TAS TEN TON FLASH-ZEIT
ANS. EINSTELLUNG DIREKT.SPEIC WECKTON SPRACHE
KLINGELZAHL AUT. AUFLEG.
FERNABFRAGE
SPRACHE
Page 77

DE
7.5 Te x t- u nd Z i ff er ne i ng ab e
In der Tabelle unten finden Sie ein Beispiel zur Eingabe. Drücken Sie die jeweilige Taste ggf. mehrmals, um
die gewünschte Eingabe von Buchstaben und Sonderzeichen vorzunehmen. Auf diese Weise können Sie
nicht nur Namen von Kontakten im Telefonbuch eingeben, sondern auch Ihren Telefonhörer umbenennen.
(Die Tasten sind mit den jeweils aufgedruckten Ziffern und Zeichen belegt.)
So geben Sie zum Beispiel den Namen Tom ein:
T Taste 8 einmal drücken
O Taste 6 dreimal drücken
M Taste 6 einmal drücken
Während der Eingabe zeigt eine Schreibmarke (Cursor) die aktuelle Position an.
Zeichen werden links von der Schreibmarke eingefügt.
Tipps zur Eingabe:
tNach der Eingabe eines Zeichens bewegt sich der Cursor anschließend eine Stelle weiter.
tDie letzte Eingabe (Buchstabe oder Ziffer) lässt sich mit der Taste
löschen.
Taste 1. Tasten-
druck
2. Tastendruck
3. Tastendruck
4. Tastendruck
5. Tastendruck
6. Tastendruck
1 Leerzeichen 1 _ < > *
2 A B C 2
3 D E F 3
4 G H I 4
5 J K L 5
6 M N O 6
7 P Q R S 7
8 T U V 8 ?
9 W X Y Z 9
0 0 - / Leerzeichen # +
* *
# #
Page 78

8. TELEFONIEREN & MEHR
8.1 Extern anrufen
8.1.1 Wahlvorbereitung
tGeben Sie die Rufnummer ein (max. 24 Ziffern). Bei Eingabe einer falschen Ziffer lässt sich diese mit der
Taste löschen.
tAnschließend die Taste
drücken, um die Nummer zu wählen.
8.1.2 Direktwahl
tDrücken Sie zuerst die Taste
.
tWählen Sie dann die Rufnummer.
8.1.3 Aus der Wahlwiederholungsliste anrufen
tDrücken Sie im Stand-by-Modus die Taste .
>Die zuletzt gewählte Rufnummer ist ausgewählt.
tBlättern Sie ggf. mit den Tasten zum gewün scht en Eintrag und drücken Sie anschließend die Taste
, um die ausgewählte Rufnummer zu wählen.
8.1.4 Aus der Anrufübersicht anrufen
tDrücken Sie im Stand-by-Modus die Taste .
tBlättern Sie ggf. mit den Tasten zum gewünsc hten Eintrag und drücken Sie anschließend die Taste
, um die ausgewählte Rufnummer zu wählen.
Hinweis: Damit die Rufnummer oder der Name von Anrufern angezeigt werden kann, muss das
Leistungsmerkmal CLIP beim Netzanbieter beauftragt sein.
8.1.5 Aus dem Telefonbuch anrufen
tDrücken Sie im Stand-by-Modus die Taste .
tBlättern Sie ggf. mit den Tasten zum gewünsc hten Eintrag und drücken Sie anschließend die Taste
, um den ausgewählten Kontakt anzurufen.
8.2 Anruf annehmen und Gespräch beenden
tDrücken Sie die Taste
am Hörer, wenn Ihr Telefon klingelt, um den Anruf anzunehmen.
tUm ein Gespräch zu beenden, drücken Sie die Taste
.
Warnung! Wenn das Telefon klingelt, den Hörer nicht zu nah an das Ohr halten, da die Lautstärke des
Klingeltons Ihr Gehör schädigen kann.
Hinweis: Sie können Gespräche auch dadurch beenden, indem Sie den Hörer wieder auf die Basisstation
legen. Die Funktion zur automatischen Gesprächsbeendigung „AUT. AUFLEG.“ (AUTO HANG-UP) darf
aber nicht deaktiviert sein.
8.3 Freisprechen ein-/ausschalten
Während eines Gesprächs können Sie mit der Taste bequem zwischen „Hörer“- und Freisprechbetrieb
umschalten.
Page 79

DE
8.4 Hörerlautstärke ändern
Auf dem Telefonhörer sind insgesamt 5 Einstellungen verfügbar.
tDrücken Sie während eines Gesprächs die Tasten
, um die gewünschte Einstellung („STUFE 1“
(VOLUME 1) bis „STUFE 5“ (VOLUME 5)) auszuwählen.
>Die aktuelle Einstellung wird angezeigt.
>Die Einstellung wird übernommen.
8.5 Freisprechlautstärke ändern
Es sind insgesamt 5 Einstellungen verfügbar.
tDrücken Sie während eines Gesprächs im Freisprechbetrieb die Tasten
, um die gewünschte
Einstellung („STUFE 1“ (VOLUME 1) bis „STUFE 5“ (VOLUME 5)) auszuwählen.
>Die aktuelle Einstellung wird angezeigt.
>Die Einstellung wird übernommen.
8.6 Mikrofon stummschalten/Stummschaltung aufheben
tWenn Sie den Hörer stummschalten, wird „STUMM EIN“ (MUTE ON) im Display angezeigt, der
Gesprächspartner am anderen Ende der Leitung kann Sie nicht mehr hören.
tDrücken Sie während eines Gesprächs die Taste , um das Mikrofon stummzuschalten, bei erneuten
drücken der Taste wird die Stummschaltung wieder aufgehoben.
8.7 Mobilteile finden („Paging“)
Wenn Sie Ihr Mobilteil verlegt haben, können Sie es mithilfe der Basis suchen, vorausgesetzt, es befindet
sich in Reichweite der Basisstation und verfügt über ausreichend Akkukapazität.
tDrücken Sie die Taste unten an der Basisstation.
>Alle an der Basis angemeldeten Mobilteile in Funktionsreichweite klingeln gleichzeitig.
Um die Suche zu beenden, eine beliebige Mobilteiltaste oder erneut die Paging-Taste
unten an der
Basis drücken.
8.8 Te l ef on hö re r e in -/ au s sc h al t en
Halten Sie die Taste
im Stand-by-Modus für mehr als 2 Sekunden gedrückt, um den Hörer ein- bzw.
auszuschalten.
>„SUCHE…“ (SEARCHING…) wird im Display angezeigt, bis der Hörer die Basis gefunden hat.
Hinweis: Sie können den Hörer ausschalten und so den Akku schonen, wenn sich der Hörer nicht auf der
Basis befindet.
WICHTIG:
Wenn das Mobilteil „AUS“ (OFF) ist, kann mit dem Telefon kein Anruf getätigt, also auch kein Notruf
abgesetzt werden. Zudem klingelt es bei einem eingehenden Anruf nicht.
Um einen ankommenden Anruf annehmen zu können, muss das Mobilteil erst wieder eingeschaltet
werden. Bitte beachten Sie, dass es dann einige Zeit dauern kann, bis die Funkverbindung zur Basis
wiederhergestellt ist.
Page 80

8.9 Ta st ens perre ei n-/aus schalt en
Sie können die Tasten des Hörers sperren, sodass unbeabsichtigte Tastenbetätigungen dann ohne
Auswirkung bleiben.
tUm die Tasten zu sperren, halten Sie im Stand-by-Modus die Taste
für 2 Sekunden gedrückt.
>„TASTENSPERRE“ (KEYS LOCKED) wird im Display angezeigt.
tZum Ausschalten der Tastensperre
erneut 2 Sekunden lang gedrückt halten.
Hinweis: Ankommende Anrufe können aber auch bei aktivierter Tastensperre angenommen werden.
8.10 Einen internen Anruf tätigen (nur Möglich wenn mehrere Mobilteile an der Basis angemeldet sind)
Das System ermöglicht interne Anrufe zwischen zwei Mobilteilen, die an derselben Basisstation
angemeldet sind. Sie können auch externe Anrufe von einem Mobilteil auf ein anderes weiterverbinden
und eine Dreierkonferenz mit 2 Mobilteilen und einem externen Anruf herstellen.
8.11 Einen internen Anruf tätigen
tDrücken Sie im Stand-by-Modus die Taste
.
>Wenn nur 2 Mobilteile angemeldet sind, wird sofort das zweite Mobilteil angerufen.
>Sind mehr als 2 Mobilteile angemeldet, werden die für eine interne Verbindung verfügbaren
Mobilteilnummern angezeigt.
tGeben Sie die Mobilteilnummer ein, die Sie anrufen möchten oder drücken Sie die Taste *, um alle
Mobilteile anzurufen.
tDrücken Sie die Taste
auf dem angerufenen Mobilteil, um den internen Anruf anzunehmen.
tUm den internen Anruf zu beenden, drücken Sie die Taste
auf einem der Mobilteile.
Hinweis:
tSie können den von einem Mobilteil ausgehenden internen Anruf durch Drücken der Tasten
oder
abbrechen, bevor er beantwortet wird.
tWird der interne Anruf nicht innerhalb einer Minute am angerufenen Mobilteil entgegengenommen, so
wird der interne Anruf automatisch beendet.
tWenn an der Basisstation kein weiteres Mobilteil angemeldet ist, ertönen 4 Pieptöne und das Gerät
kehrt in den Stand-by-Modus zurück.
8.12 Beantworten eines externen Anrufs während eines internen Anrufs
Wenn Sie während eines internen Anrufs einen externen Anruf erhalten, ertönt ein Hinweiston und Sie
haben folgende Auswahlmöglichkeiten:
tDrücken Sie die Taste
, um den internen Anruf abzubrechen und in beiden Mobilteilen den eingehenden
Anruf mit dem entsprechenden Klingelton anzunehmen.
tDrücken Sie die Taste
, um den eingehenden Anruf anzunehmen und den internen Anruf zu beenden.
tDrücken Sie die Taste , um den eingehenden Anruf zu beantworten und den internen Anruf zu halten.
tWenn der eingehende externe Anruf angenommen wurde und der interne Anruf gehalten wird, drücken
Sie die Taste , um eine Dreierkonferenz mit beiden Anrufern herzustellen.
Page 81

DE
8.13 Während eines externen Anrufs einen internen Anruf tätigen
Während eines Anrufs können Sie einen internen Anruf zu einem anderen Mobilteil tätigen oder ein
weiteres Mobilteil zu einer Konferenz mit Ihnen und dem externen Anrufer hinzuschalten.
tDrücken Sie während des Anrufs die Taste
, um den externen Anruf zu halten.
>Wenn nur 2 Mobilteile angemeldet sind, wird sofort das zweite Mobilteil angerufen.
>Sind mehr als 2 Mobilteile angemeldet, werden die für eine interne Verbindung verfügbaren
Mobilteilnummern angezeigt.
tGeben Sie die Mobilteilnummer ein, die Sie anrufen möchten oder drücken Sie die Taste
, um
alle Mobilteile anzurufen.
Hinweis: Wenn sie keine Antwort über das angewählte Mobilteil erhalten, oder Sie den internen
Anruf beenden möchten, bevor er angenommen wird, drücken Sie die Taste , um zum externen
Anruf zurückzukehren.
tDrücken Sie auf dem angerufenen Mobilteil die Taste
, um den internen Anruf entgegenzunehmen.
Beide Teilnehmer können intern sprechen.
tWenn die internen Anrufer miteinander verbunden sind, stehen vom anrufenden Mobilteil folgende
Optionen zur Verfügung:
>Drücken und halten Sie die Taste für 2 Sekunden gedrückt, um beide Mobilteile in den
Konferenzmodus zu schalten.
>Drücken Sie die Taste auf einem der Mobilteile, um den internen Anruf auf dem betreffenden
Mobilteil zu beenden und den externen Anruf auf dem anderen Mobilteil zu erhalten.
8.14 Einen externen Anruf auf ein anderes Mobilteil weiterleiten
tDrücken Sie während des Anrufs die Taste
, um den externen Anruf zu halten.
>Wenn nur 2 Mobilteile angemeldet sind, wird sofort das zweite Mobilteil angerufen.
>Sind mehr als 2 Mobilteile angemeldet, werden die für eine interne Verbindung verfügbaren
Mobilteilnummern angezeigt.
tGeben Sie die Mobilteilnummer ein, die Sie anrufen möchten oder drücken Sie die Taste
, um alle
Mobilteile anzurufen.
Hinweis: Wenn sie keine Antwort über das angewählte Mobilteil erhalten, oder Sie den internen Anruf
beenden möchten, bevor er angenommen wird, drücken Sie die Taste , um zum externen Anruf
zurückzukehren.
tDrücken Sie auf dem angerufenen Mobilteil die Taste
, um den internen Anruf entgegenzunehmen.
Beide Teilnehmer können intern sprechen.
tDrücken Sie die Taste
am Mobilteil das angerufen wurde, um den externen Anruf an das intern
angerufene Mobilteil weiterzuleiten.
>Der externe Anruf wird weitergeleitet.
9. DIREKTWAHLSPEICHER
Neben dem Speicher für das Telefonbuch verfügt das Mobilteil über 2 Direktwahlspeicher (Tasten 1 und 2).
Mit einem langen Tastendruck auf die Tasten im Stand-by-Modus wird die gespeicherte Telefonnummer
automatisch gewählt.
Page 82

9.1 Direktwahlspeicher hinzufügen
tDrücken Sie in der Startansicht die Taste
.
tDrücken Sie die Taste , um „TELEF.BUCH“ (PHONEBOOK) auszuwählen und anschließend die
Taste zum Auswählen.
tDrücken Sie die Taste
, um „DIREKT.SPEIC” (DIRECT MEM.) auszuwählen und anschließend die
Taste
zum Auswählen.
tDrücken Sie die Taste , um „TASTE 1” (KEY 1) oder „TASTE 2” (KEY 2) auszuwählen und
anschließend die Taste zum Auswählen.
tDer gespeicherte Name oder „KEINE NUMMER” (NO NUMBER) wird angezeigt, wenn kein Eintrag
vorhanden ist.
tDrücken Sie die Taste
, um zum Menüpunkt „DIREKT.SPEIC” (DIRECT MEM.) zu blättern und
einen Namen oder eine Nummer hinzuzufügen/zu bearbeiten.
tErneut die Taste
drücken, um „NR. ÄNDERN” (EDIT NUMBER) auszuwählen.
tDas Display zeigt den aktuell gespeicherten Namen oder einfach „NAME EINGEB.” (ENTER NAME),
wenn kein Eintrag vorhanden ist.
tNamen Bearbeiten oder eingeben und anschließend die Taste
drücken.
Wenn Ihnen beim Eingeben ein Fehler unterläuft, drücken Sie die Taste
, um das zuletzt eingegebene
Zeichen zu löschen.
tDas Display zeigt die aktuell gespeicherte Nummer oder einfach „NUM. EINGEB.” (ENTER NUMBER),
wenn kein Eintrag vorhanden ist.
tBearbeiten oder geben Sie die Nummer ein und drücken Sie anschließend die Taste
.
Wenn Ihnen beim Eingeben ein Fehler unterläuft, drücken Sie die Taste
, um die zuletzt eingegebene
Ziffer zu löschen.
>Ein Bestätigungston ertönt.
tDrücken Sie die Taste
, um zum Stand-by-Modus zurückzukehren.
9.2 Direktwahlspeicher löschen
tDrücken Sie in der Startansicht die Taste
.
tDrücken Sie die Taste , um „TELEF.BUCH” (PHONEBOOK) auszuwählen und anschließend die
Taste zum Auswählen.
tDrücken Sie die Taste , um „DIREKT.SPEIC” (DIRECT MEM.) auszuwählen und anschließend die
Taste zum Auswählen.
tDrücken Sie die Taste , um „TASTE 1” (KEY 1) oder „TASTE 2” (KEY 2) auszuwählen und
anschließend die Taste zum Auswählen.
t„KEINE NUMMER” (NO NUMBER) wird angezeigt, wenn kein Eintrag vorhanden ist. Ansonsten wird
der gespeicherte Name angezeigt.
tDrücken Sie die Taste , um in die Menüoptionen zu gelangen.
tDrücken Sie die Taste , um „LÖSCHEN” (DELETE) auszuwählen und anschließend die Taste
zum Auswählen.
t„BESTÄTIGEN?” (CONFIRM?) wird angezeigt.
tErneut die Taste drücken, um die Auswahl zu bestätigen.
>Ein Bestätigungston ertönt.
tDrücken Sie die Taste
, um zum Stand-by-Modus zurückzukehren.
10. TELEFONBUCH
Im Telefonbuch können Sie bis zu 200 Kontakte speichern. Für eine Nummer können Sie bis zu 24 Ziffern
und für den Namen von Kontakten bis zu 12 Zeichen eingeben.
10.1 Rufnummer im Telefonbuch speichern
tDrücken Sie bei Anzeige des Startbildschirms die Taste .
tWählen Sie mit den Tasten „TELEF.BUCH“ (PHONEBOOK) aus und drücken Sie dann die Taste
.
Page 83

DE
tIm Telefonbuch-Menü nochmals die Taste drücken, um „NEUER EINTR.“ (NEW ENTRY)
auszuwählen.
>„NAME EINGEB.“ (ENTER NAME) wird angezeigt.
tGeben Sie dann den Namen (max. 12 Zeichen) ein.
tBei Eingabe eines falschen Buchstabens lässt sich dieser mit der Taste löschen.
tMit der Taste bestätigen.
>„NUM. EINGEB.“ (ENTER NUMBER) wird angezeigt.
tGeben Sie anschließend die Rufnummer (max. 24 Ziffern) ein.
tBei Eingabe einer falschen Ziffer lässt sich diese mit der Taste löschen.
tMit der Taste bestätigen.
>Es ertönt ein Bestätigungston.
tMit der Taste
in den Stand-by-Modus zurückgehen.
Hinweis: Ist kein Speicherplatz mehr verfügbar, können keine weiteren Kontakte im Telefonbuch
gespeichert werden. Löschen Sie in diesem Fall gespeicherte Kontakte, um Platz für neue freizugeben.
10.2 Te le f on b uc h ö ff ne n
tDrücken Sie bei Anzeige des Startbildschirms die Taste .
tSie können das Telefonbuch auch wie folgt öffnen: Taste drücken, dann mit den Tasten
„TELEF.BUCH“ (PHONEBOOK) auswählen. Anschließend nochmals die Taste drücken und mit
den Tasten „EINTRÄGE“ (VIEW ENTRIES) auswählen. Mit bestätigen und Telefonbuch
öffnen.
>Die Einträge im Telefonbuch sind alphabetisch sortiert.
tMit den Tasten können Sie bei Anzeige der Einträge durch die Liste blättern.
tDrücken Sie bei Auswahl eines Kontaktes die Taste
P
, werden die Details zu diesem Eintrag
angezeigt.
tMit der Taste
gehen Sie in den Stand-by-Modus zurück.
Hinweis: Statt mit den Tasten
durch die Einträge zu blättern, können Sie auch einfach die Taste
drücken, die dem ersten Buchstaben des gesuchten Kontakts entspricht.
Beispiel: Durch Drücken der Taste 2 wird der erste Eintrag, der mit A beginnt, angezeigt. Drücken Sie
die Taste 2 erneut, wird der erste Eintrag unter B angezeigt usw. Anschließend mit den Tasten
wie
gewohnt blättern.
10.3 Kontaktdetails bearbeiten
tDrücken Sie bei Anzeige des Startbildschirms die Taste .
tWählen Sie anschließend mit den Tasten den gewünschten Kontakt aus.
tDann die Taste drücken, um die Menüoptionen anzuzeigen.
tWählen Sie mit den Tasten
„EINTR.ÄNDERN“ (EDIT ENTRY) aus. Nochmals die Taste
drücken.
>Der Name des Kontaktes wird angezeigt.
tÄndern Sie nun ggf. den Namen. Mit der Taste
lassen sich die Buchstaben nacheinander löschen.
tMit der Taste bestätigen.
tÄndern Sie anschließend ggf. die Rufnummer und drücken Sie dann die Taste
.
>Es ertönt ein Bestätigungston.
tMit der Taste
gehen Sie in den Stand-by-Modus zurück.
10.4 Einen Telefonbucheintrag löschen
tDrücken Sie in der Startansicht die Taste , um die Telefonbuchliste zu öffnen.
tDrücken Sie die Taste , um den Eintrag auszuwählen, den Sie löschen möchten.
tDrücken Sie die Taste , um die Optionen im Telefonbuchmenü zu öffnen.
tDrücken Sie die Taste , um „LÖSCHEN” (DELETE) auszuwählen und anschließend die Taste
zum Auswählen.
Page 84

>„BESTÄTIGEN?” (CONFIRM?) wird angezeigt.
tErneut die Taste
drücken, um die Auswahl zu bestätigen.
>Ein Bestätigungston ertönt.
tDrücken Sie die Taste
, um zum Stand-by-Modus zurückzukehren.
10.5 Alle Einträge in der Telefonbuchliste löschen
tDrücken Sie in der Startansicht die Taste
, um die Telefonbuchliste zu öffnen.
tDrücken Sie die Taste , um die Optionen im Telefonbuchmenü zu öffnen.
tDrücken Sie die Taste , um „ALLE LÖSCHEN” (DELETE ALL) auszuwählen und anschließend die
Taste zum Auswählen.
>„BESTÄTIGEN?” (CONFIRM?) wird angezeigt.
tErneut die Taste drücken, um die Auswahl zu bestätigen.
>Ein Bestätigungston ertönt.
tDrücken Sie die Taste
, um zum Stand-by-Modus zurückzukehren.
11. RUFNUMMERNANZEIGE (NETZABHÄNGIG)
Haben Sie das Leistungsmerkmal CLIP bei Ihrem Netzanbieter beauftragt, wird die Rufnummer des
Anrufers bei einem Anruf im Display angezeigt und in der Anrufübersicht (Call Log) gespeichert.
Haben Sie zu einer Rufnummer in Ihrem Telefonbuch einen Eintrag gespeichert, wird anstelle der
Rufnummer der Telefonbucheintrag angezeigt (und so in der Anrufübersicht (Call Log) gespeichert).
Hinweis: Wird aus netztechnischen keine Rufnummer übertragen, wird bei ankommenden Anrufen
„NICHT VERF.“ (UNAVAILABLE) im Display (und anschließend in der Anrufübersicht (Call Log)) angezeigt.
Hat der Anrufer die Übermittlung seiner Rufnummer unterdrückt, wird „ID VERBERGEN“ (WITHHELD) im
Display (und anschließend in der Anrufübersicht (Call Log)) angezeigt.
Haben Sie das Leistungsmerkmal zur Anzeige der Rufnummer des Anrufers nicht beantragt, wird bei
ankommenden Anrufen „UNBEKANNT“ (UNKNOWN) im Display angezeigt. (Solche Anrufe werden
nicht in der Anrufübersicht (Call Log) gespeichert.)
Die angezeigten Informationen bei ankommenden Anrufen sind landes- und netzanbieterabhängig.
11.1 Anrufübersicht
In der Anrufübersicht werden die Rufnummern der letzten 20 Anrufe gespeichert.
Dabei werden mehrere Anrufe von derselben Nummer einmal, d. h. nur der letzte Anruf wird in die Liste
aufgenommen.
Ist die Anrufübersicht voll, und kommen neue Einträge hinzu, wird der älteste Eintrag gelöscht.
11.1.1 Anrufübersicht öffnen
tDrücken Sie bei Anzeige des Startbildschirms die Taste
.
tMit den Tasten können Sie in der Liste nach oben bzw. unten blättern.
>Die Anrufe werden in chronologischer Reihenfolge angezeigt, d. h. der letzte Anruf ist der erste
Eintrag in der Liste.
11.1.2 Einen Eintrag aus der Anrufliste im Telefonbuch speichern
tDrücken Sie in der Startansicht die Taste
.
tDrücken Sie die Taste , um einen Eintrag auszuwählen und anschließend die Taste .
tErneut die Taste drücken, um „NUM. SPEICH.” (SAVE NUMBER) auszuwählen.
tGeben Sie den Namen ein (maximal 12 Zeichen) und drücken Sie anschließend die Taste zum
Speichern.
tBearbeiten Sie die Nummer (im Bedarfsfall) und drücken Sie anschließend die Taste , um den
Page 85

DE
Eintrag zu speichern.
>Ein Bestätigungston ertönt.
tDrücken Sie die Taste
, um zum Stand-by-Modus zurückzukehren.
11.1.3 Einen Eintrag aus der Anrufliste löschen
tDrücken Sie in der Startansicht die Taste
.
tDrücken Sie die Taste , um einen Eintrag auszuwählen und anschließend die Taste .
tDrücken Sie die Taste , um „LÖSCHEN” (DELETE) auszuwählen und anschließend die Taste
zum Auswählen.
>„BESTÄTIGEN?” (CONFIRM?) wird angezeigt.
tErneut die Taste drücken, um die Auswahl zu bestätigen.
>Ein Bestätigungston ertönt.
tDrücken Sie die Taste
, um zum Stand-by-Modus zurückzukehren.
11.2 Alle Einträge aus der Anrufliste löschen
tDrücken Sie in der Startansicht die Taste
.
tDrücken Sie die Taste .
tDrücken Sie die Taste +/-, um „ALLE LÖSCHEN” (DELETE ALL) auszuwählen und anschließend die
Taste zum Auswählen.
>„BESTÄTIGEN?” (CONFIRM?) wird angezeigt.
tErneut die Taste drücken, um die Auswahl zu bestätigen.
>Ein Bestätigungston ertönt.
11.3 Wahlwiederholungsliste
In der Wahlwiederholungsliste stehen die 10 zuletzt gewählten Rufnummern. Dabei können zu jedem
Eintrag max. 24 Ziffern angezeigt werden.
11.3.1 Wahlwiederholungsliste öffnen
tDrücken Sie bei Anzeige des Startbildschirms die Taste .
tMit den Tasten können Sie in der Liste nach oben bzw. unten blättern.
>Die Einträge sind chronologisch sortiert, d. h. die zuletzt gewählte Rufnummer ist der erste Eintrag in
der Liste.
>Besteht eine Rufnummer aus mehr als 14 Ziffern, können Sie die weiteren Ziffern mit der Taste
P
anzeigen.
11.3.2 Eine Wahlwiederholungsnummer im Telefonbuch speichern
tDrücken Sie in der Startansicht die Taste .
tDrücken Sie die Taste , um einen Eintrag auszuwählen, anschließend die Taste .
tErneut die Taste drücken, um „NUM. SPEICH.” (SAVE NUMBER) auszuwählen.
tGeben Sie den Namen ein (maximal 12 Zeichen) und drücken Sie anschließend die Taste .
tBearbeiten Sie die Nummer (im Bedarfsfall) und drücken Sie anschließend die Taste , um den
Eintrag zu speichern.
>Ein Bestätigungston ertönt.
tDrücken Sie die Taste
, um zum Stand-by-Modus zurückzukehren.
11.3.3 Eine Wahlwiederholungsnummer bearbeiten
'UFNHQ6LHLQGHU6WDUWDQVLFKWGLH7DVWH
'UFNHQ6LHGLH7DVWH XPHLQHQ(LQWUDJDXV]XZlKOHQXQGDQVFKOLHHQGGLH7DVWH
'UFNHQ6LH GLH 7DVWH XP „EINTR.ÄNDERN” (',7 (175< XQG DQVFKOLHHQG GLH 7DVWH
]XP$XVZlKOHQ
Page 86

%HDUEHLWHQ6LHGLH1XPPHUXQGGUFNHQ6LHDQVFKOLHHQG ]XU%HVWlWLJXQJ
>Ein Bestätigungston ertönt.
'UFNHQ6LHGLH7DVWH
XP]XP6WDQGE\0RGXV]XUFN]XNHKUHQ
11.3.4 Eine Wahlwiederholungsnummer löschen
tDrücken Sie in der Startansicht die Taste .
tDrücken Sie die Taste , um einen Eintrag auszuwählen und anschließend die Taste .
tDrücken Sie die Taste , um „LÖSCHEN” (DELETE) auszuwählen und anschließend die Taste
zum Auswählen.
>„BESTÄTIGEN?” (CONFIRM?) wird angezeigt.
tErneut die Taste drücken, um die Auswahl zu bestätigen.
>Ein Bestätigungston ertönt.
tDrücken Sie die Taste
, um zum Stand-by-Modus zurückzukehren.
11.3.5 Alle Einträge in der Wahlwiederholungsliste löschen
tDrücken Sie in der Startansicht die Taste
.
tDrücken Sie die Taste .
tDrücken Sie die Taste
, um „ALLE LÖSCHEN” (DELETE ALL) auszuwählen und anschließend die
Taste
zum Auswählen.
>„BESTÄTIGEN?” (CONFIRM?) wird angezeigt.
tErneut die Taste drücken, um die Auswahl zu bestätigen.
>Ein Bestätigungston ertönt.
12. EINSTELLUNGEN FÜR UHR UND WECKER
12.1 Datums- und Uhrzeiteinstellungen
Wenn Sie über einen Anschluss mit Rufnummernerkennung verfügen, werden das Datum und die Uhrzeit
automatisch bei Ihrem ersten eingehenden Anruf eingestellt, Sie müssen aber eventuell noch das korrekte
Jahr einstellen.
Sie können Datum und Uhrzeit auch von Hand eingeben.
tDrücken Sie in der Startansicht die Taste
.
tDrücken Sie die Taste , um „UHR & WECKER“ (CLOCK&ALARM) auszuwählen und anschließend
die Taste zum Auswählen.
tErneut die Taste drücken, um „DATUM/ZEIT” (DATE & TIME) auszuwählen.
>Das zuletzt gespeicherte Datum wird angezeigt, wobei die dritte Ziffer bei der Jahresangabe blinkt.
tGeben Sie das aktuelle Datum ein und drücken Sie die Taste zur Bestätigung.
>Eingabe 03 Mai 2012 als [1], [2], [0], [5], [0], [3].
>Wenn Ihnen beim Eingeben ein Fehler unterläuft, drücken Sie die Taste , um die zuletzt
eingegebene Ziffer zu löschen.
tGeben Sie die aktuelle Zeit ein und drücken Sie die Taste zur Bestätigung. Das voreingestellte
Zeitformat ist 24 STUNDEN. (Zum Ändern des Zeitformats siehe Datumsformat ändern auf Seite 51.)
>Für das 24-Stunden-Format, geben Sie ein 1:30 nachmittags als [1], [3], [3], [0].
>Für das 12-Stunden-Format, geben Sie die Zeit ein und drücken Sie die Taste + zur Auswahl Vormittag
oder die Taste - zur Auswahl Nachmittag.
>Wenn Ihnen beim Eingeben ein Fehler unterläuft, drücken Sie die Taste , um die zuletzt
eingegebene Ziffer zu löschen.
>Ein Bestätigungston ertönt.
tDrücken Sie die Taste
, um zum Stand-by-Modus zurückzukehren.
Page 87

DE
12.1.1 Zeitformat ändern
Die Zeit kann im 12- oder 24-Stunden-Format angezeigt werden. Die Standardeinstellung ist 24 STUNDEN.
tDrücken Sie in der Startansicht die Taste
.
tDrücken Sie die Taste
, um „UHR & WECKER“ (CLOCK&ALARM) auszuwählen und anschließend
die Taste zum Auswählen.
tDrücken Sie die Taste , um „FORMAT” (SET FORMAT) auszuwählen und anschließend die T
aste
zum Auswählen.
tErneut die Taste drücken, um ZEIT FORMAT auszuwählen.
>Die aktuelle Einstellung wird angezeigt.
tMit der Taste
zwischen 12-STUNDEN oder 24-STUNDEN auswählen, anschließend mit der Taste
bestätigen.
>Ein Bestätigungston ertönt.
tDrücken Sie die Taste
, um zum Stand-by-Modus zurückzukehren.
12.1.2 Datumsformat ändern
Das Datum kann entweder im Format Monat/Tag oder Tag/Monat angezeigt werden. Die
Standardeinstellung ist TT/MM.
tDrücken Sie in der Startansicht die Taste
.
tDrücken Sie die Taste , um „UHR & WECKER“ (CLOCK&ALARM) auszuwählen und anschließend
die Taste zum Auswählen.
tDrücken Sie die Taste , um „FORMAT” (SET FORMAT) auszuwählen und anschließend die
Taste zum Auswählen.
tDrücken Sie die Taste , um „DATUMSFORMAT” (DATE FORMAT ) auszuwählen und anschließend
die Taste zum Auswählen.
>Die aktuelle Einstellung wird angezeigt.
tDrücken Sie die Taste , um „TT/MM” (DD/MM) oder „MM/TT” (MM/DD) auszuwählen und
anschließend die Taste zum Auswählen.
>Ein Bestätigungston ertönt.
tDrücken Sie die Taste
, um zum Stand-by-Modus zurückzukehren.
12.2 Weckereinstellungen
Das Mobilteil kann als Wecker genutzt werden, der nur einmal ertönt oder jeden Tag erneut.
Wenn eine Weckzeit eingestellt ist, erscheint in der Anzeige das Weckersymbol.
Wenn die Weckzeit erreicht ist, erscheint ein blinkendes „-WECKER-” (-ALARM-) auf dem Display des
Mobilteils und der Weckton ertönt für 1 Minute in der am Mobilteil voreingestellten Lautstärke. Bei
abgeschaltetem Klingelton wird in Lautstärkeeinstellung 1 geklingelt.Der Weckton lässt sich auch bei
aktivierter Tastensperre durch Drücken einer beliebigen Taste am Mobilteil abschalten.
tDrücken Sie in der Startansicht die Taste
.
tDrücken Sie die Taste
, um „UHR & WECKER“ (CLOCK&ALARM) auszuwählen und anschließend
die Taste zum Auswählen.
tDrücken Sie die Taste , um „WECKER” (ALARM) auszuwählen und anschließend die Taste
zum Auswählen.
tDrücken Sie die Taste
für Weckoptionen.
>AUS (OFF): Wecker ausschalten
>EINMALIG (ONCE): Der Wecker ertönt einmal zur eingestellten Zeit.
>TÄG LI CH (DAILY): Der Wecker ertönt täglich zur eingestellten Zeit.
tDrücken Sie die Taste , um eine der Optionen auszuwählen.
tWenn „EINMALIG” (ONCE) oder „TÄGLICH” (DAILY) ausgewählt wurde, geben Sie die gewünschte
Uhrzeit ein.
Page 88

tDrücken Sie die Taste +, um Vormittag auszuwählen oder die Taste -, um Nachmittag auszuwählen, wenn
die Zeit im 12-Stunden-Format angezeigt wird.
tDrücken Sie die Taste , um die Weckereinstellungen zu bestätigen.
>Ein Bestätigungston ertönt.
tDrücken Sie die Taste
, um zum Stand-by-Modus zurückzukehren.
12.2.1 Weckton einstellen
Sie können zwischen 3 Wecktönen auswählen.
tDrücken Sie in der Startansicht die Taste
.
tDrücken Sie die Taste , um „UHR & WECKER“ (CLOCK&ALARM) auszuwählen und anschließend
die Taste zum Auswählen.
tDrücken Sie die Taste , um „WECKTON” (ALARM MELODY) auszuwählen und anschließend die
Taste zum Auswählen.
tDrücken Sie die Taste , um den gewünschten Weckton auszuwählen (der ausgewählte Ton ertönt
dabei kurz) und anschließend die Taste zur Bestätigung.
>Ein Bestätigungston ertönt.
tDrücken Sie die Taste
, um zum Stand-by-Modus zurückzukehren.
13. EINSTELLUNGEN
Ihr Telefon verfügt über einige Voreinstellungen, die Sie Ihren persönlichen Erfordernissen anpassen
können.
13.1 Klingeltonlautstärke einstellen.
Sie können die Klingeltonlautstärke des Mobilteils zwischen Stufe 1 bis 4 einstellen, oder den Klingelton
abschalten.
tDrücken Sie in der Startansicht die Taste
.
tDrücken Sie die Taste , um „PERS.EINST” (HANDSET OPTS) auszuwählen und anschließend die
Taste zum Auswählen.
tDrücken Sie die Taste , um „MOBILT. TÖNE” (RINGER&TONES) auszuwählen und anschließend
die Taste zum Auswählen.
tErneut die Taste drücken, um „RUFTONLAUTST” (RING VOLUME) auszuwählen.
tDrücken Sie die Taste , um die gewünschte Einstellung (jede Lautstärke wird wie eingestellt
abgespielt) und anschließend die Taste zur Bestätigung.
>Ein Bestätigungston ertönt.
tDrücken Sie die Taste
, um zum Stand-by-Modus zurückzukehren.
Hinweis: Drücken Sie die Taste und halten Sie diese gedrückt, um den Klingelton auszuschalten,
wenn sich das Mobilteil im Stand-by-Modus befindet. Das Symbol für den abgeschalteten Klingelton
erscheint im Display, wenn dieser abgeschaltet ist.
13.2 Ruftonmelodie einstellen
Sie können zwischen 10 verschiedenen Melodien für interne/externe Anrufe auswählen.
tDrücken Sie in der Startansicht die Taste
.
tDrücken Sie die Taste , um „PERS.EINST” (HANDSET OPTS) auszuwählen und anschließend die
Taste zum Auswählen.
tDrücken Sie die Taste
, um „MOBILT. TÖNE” (RINGER&TONES) auszuwählen und anschließend
die Taste
zum Auswählen.
tDrücken Sie die Taste
, um „RUFTONMELOD.” (RING TONE) auszuwählen und anschließend die
Page 89

DE
Taste zum Auswählen.
tDrücken Sie die Taste , um die gewünschte Anrufmelodie 1 bis 10 (jede Melodie ertönt, sobald sie
angewählt wurde) auszuwählen und anschließend die Taste
zum Auswählen.
>Ein Bestätigungston ertönt.
tDrücken Sie die Taste
, um zum Stand-by-Modus zurückzukehren.
13.3 Tastenton einst ellen
Jede Tastenbetätigung quittiert das Mobilteil mit einem Tastenton. Der Tastenton lässt sich ein- oder
ausschalten. Die Voreinstellung ist „EIN”.
tDrücken Sie in der Startansicht die Taste
.
tDrücken Sie die Taste , um „PERS.EINST” (HANDSET OPTS) auszuwählen und anschließend die
Taste zum Auswählen.
tDrücken Sie die Taste
, um „MOBILT. TÖNE” (RINGER&TONES) auszuwählen und anschließend
die Taste zum Auswählen.
tDrücken Sie die Taste
, um „TASTENTON” (KEY TONE) auszuwählen und anschließend die Taste
zum Auswählen.
tDrücken Sie die Taste , um „EIN” (ON) oder „AUS” (OFF) auszuwählen und anschließend die
Taste
zum Auswählen.
>Ein Bestätigungston ertönt.
tDrücken Sie die Taste
, um zum Stand-by-Modus zurückzukehren.
13.4 Umbenennen des Mobilteils
Sie können das Mobilteil Ihren persönlichen Vorlieben anpassen und den im Stand-by-Modus angezeigten
Namen ändern.
tDrücken Sie in der Startansicht die Taste
.
tDrücken Sie die Taste , um „PERS.EINST” (HANDSET OPTS) auszuwählen und anschließend die
Taste .
tDrücken Sie die Taste , um „MOBILT.NAME” (HANDSET NAME) auszuwählen.
tDer aktuelle Name des Mobilteils wird angezeigt.
tDrücken Sie die Taste , um die Buchstaben zu löschen und geben Sie einen neuen Namen ein
(maximal 10 Zeichen).
tDrücken Sie zur Bestätigung.
>Ein Bestätigungston ertönt.
tDrücken Sie die Taste
, um zum Stand-by-Modus zurückzukehren.
13.5 Display-Sprache einstellenx
Sie können sich die Display-Texte in verschiedenen Sprachen anzeigen lassen.
tDrücken Sie bei Anzeige des Startbildschirms die Taste
.
tWählen Sie mit den Tasten „PERS.EINST“ (HANDSET OPTS) aus und drücken Sie dann die Taste
.
tWählen Sie anschließend mit den Tasten „SPRACHE“ (LANGUAGE) aus. Erneut die Taste
drücken.
tDann mit den Tasten zur gewünschten Sprache blättern. Mit auswählen und bestätigen.
>Es ertönt ein Bestätigungston.
tMit der Taste
in den Stand-by-Modus zurückgehen.
Hinweis: Wurde die Display-Sprache geändert, werden die Display-Texte sofort in der gewählten Sprache
angezeigt.
Page 90

13.6 Automatisches Auflegen einstellen
Mit dieser Funktion beenden Sie ein Gespräch automatisch, indem Sie das Mobilteil einfach auf
die Basisstation (Eclipse-Hauptapparat) oder die Ladestation zurücklegen (zusätzliche Mobilteile).
Standardmäßig ist die Funktion automatisches Auflegen aktiviert diese, lässt sich aber abschalten.
tDrücken Sie in der Startansicht die Taste
.
tDrücken Sie die Taste , um „PERS.EINST” (HANDSET OPTS) auszuwählen und anschließend die
Taste zum Auswählen.
tDrücken Sie die Taste , um „AUT. AUFLEG.“ (AUTO HANG-UP) auszuwählen und anschließend
die Taste
zum Auswählen.
tDrücken Sie die Taste
, um „EIN” (ON) oder „AUS” (OFF) auszuwählen und anschließend die
Taste zum Auswählen.
>Ein Bestätigungston ertönt.
tDrücken Sie die Taste
, um zum Stand-by-Modus zurückzukehren.
13.7 Mobilteil anmelden
WICHTIG: Die Telefonhörer sind im Lieferzustand bereits an der Basisstation angemeldet, sodass Sie das
Telefon direkt verwenden können.
Eine Anmeldung ist somit also nur erforderlich, wenn Sie zusätzliche Mobilteile anmelden möchten oder
ein Mobilteil ersetzen müssen.
An einer Basisstation können Sie bis zu vier Mobilteile anmelden, wobei die Nummer der einzelnen
Mobilteile (1 bis 4) in deren Display angezeigt wird.
Hinweis: Ein Mobilteil kann nur an jeweils einer Basis angemeldet sein.
Zum An- bzw. Abmelden von Mobilteilen ist die Eingabe der System-PIN erforderlich. Als System-PIN ist
standardmäßig 0000 voreingestellt.
13.8 Weitere Mobilteile anmelden
tHalten Sie zunächst die Paging-Taste
unten an der Basis für ca. 5 Sekunden gedrückt.
>Die Nachrichtenanzeige an der Basis blinkt dann für maximal 1 Minute.
tDrücken Sie dann am Mobilteil, welches Sie anmelden möchten, die Taste
.
tAnschließend mit den Tasten „ERW. EINST“ (SETTINGS) auswählen und die Taste drü cken .
tWählen Sie nun mit den Tasten „ANMELDUNG“ (REGISTRATI ON) aus. Erneut drücken.
tGeben Sie die System-PIN ein; mit der Taste
bestätigen.
Hinweis: Nach Eingabe der System-PIN blinkt
>WARTEN... (WAITING) im Display.
>War die Anmeldung erfolgreich, ertönt ein Bestätigungston, und der Telefonhörer wechselt automatisch
wieder in den Stand-by-Betrieb. (Die Nummer des Mobilteils wird nun im Display angezeigt.)
>Wurde bei Eingabe der System-PIN keine Basis gefunden, hören Sie Fehlertöne. Die Anmeldung war
nicht erfolgreich, und „MOBIL.ANMELD“ (PLS REG H/S) wird im Display eingeblendet. Gehen Sie in
diesem Fall nochmals wie hier beschrieben vor.
>Bei keiner Tastenbetätigung für 10 Sekunden während der Schritte 2 bis 5 wird der Vorgang
abgebrochen. Starten Sie in dem Fall die Anmeldung nochmals mit Schritt 1.
13.9 Ein Mobilteil abmelden
Sie können das von Ihnen verwendete Mobilteil oder jedes andere, an einer Basisstation angemeldeten
Mobilteil, abmelden. Die Master-PIN ist 0000.
tDrücken Sie in der Startansicht die Taste
.
Page 91

DE
tDrücken Sie die Taste , um „ERW. EINST” ( SETTINGS) auszuwählen und anschließend die Taste
zum Auswählen.
tDrücken Sie die Taste
, um „ABMELDEN” (DEREGISTER) auszuwählen und anschließend die
Taste
zum Auswählen.
tGeben Sie die Master-PIN ein und Drücken Sie die Taste zur Bestätigung.
tDrücken Sie die Taste , um die Nummer des Mobilteils auszuwählen, das Sie abmelden möchten
und anschließend die Taste
zur Bestätigung oder die Taste , um den Abmeldevorgang
abzubrechen.
Hinweis: Nachdem Sie das Mobilteil bestätigt haben, das Sie abmelden möchten:
>Es ertönt ein Bestätigungston, der die erfolgreiche Abmeldung anzeigt.
>„MOBIL.ANMELD” (PLS REG H/S) wird in der Startansicht des nicht angemeldeten Mobilteils
angezeigt.
>Wird am Mobilteil nicht innerhalb von 10 Sekunden eine Taste gedrückt, wird der Vorgang abgebrochen
und das Mobilteil kehrt zurück in den Stand-by-Modus.
13.10 Voreingestellte Master-PIN ändern
Die Master-PIN ist erforderlich zum An-/Abmelden der Mobilteile und für den Fernzugriff auf
den Anrufbeantworter. Die voreingestellte Master-PIN ist 0000. Die Master-PIN darf maximal 8 Zeichen
lang sein.
Hinweis: Wenn Sie die PIN vergessen haben, können Sie das Mobilteil mit einem Reset auf die
voreingestellte 0000 zurücksetzen.
tDrücken Sie in der Startansicht die Taste
.
tDrücken Sie die Taste , um „ERW. EINST” (ADVANCED SETTINGS) auszuwählen und anschließend
die Taste zum Auswählen.
tDrücken Sie die Taste
, um „PIN ÄNDERN” (CHANGE PIN) auszuwählen.
tGeben Sie die aktuelle Master-PIN ein und drücken Sie anschließend die Taste zur Bestätigung.
>Die PIN wird bei der Eingabe mit Sternchen (*) im Display dargestellt.
tGeben Sie die neue PIN ein und drücken Sie anschließend die Taste
zur Bestätigung.
>Ein Bestätigungston ertönt.
tDrücken Sie die Taste
, um zurück zur Startansicht zu gelangen.
13.11 Stellen Sie den ersten Klingelton ein (nur für zusätzliche Mobilteile)
Wenn Sie bei Ihrem Telefonanbieter die Rufnummernerkennung freigeschaltet haben und den Klingelton
nicht hören möchten, bevor die Rufnummernerkennung angezeigt wird, können Sie den „1. RUFTON”
(FIRST RING) auf „AUS” (OFF) stellen.
tIn der Startansicht des zusätzlichen Mobilteils drücken Sie
.
tDrücken Sie die Taste , um „ERW. EINST” (ADVANCED SET) auszuwählen und anschließend die
Taste zum Auswählen.
tDrücken Sie die Taste , um „1. RUFTON” (FIRST RING) auszuwählen und anschließend die Taste
zum Auswählen.
tDrücken Sie die Taste , um „EIN” (ON) oder „AUS” (OFF) auszuwählen und anschließend die
Taste zum Auswählen.
>Ein Bestätigungston ertönt.
tDrücken Sie die Taste
, um zum Stand-by-Modus zurückzukehren.
Page 92

13.12 Rückrufzeit / Flash-Zeit ändern
Hinweis: die Flash-, Rückruf- oder auch TBR-Funktion dient zur Steuerung von Netzfunktionen und wird
im Regelfall beim Betrieb an einer Nebenstellentelefonanlage benötigt.
Wenn Ihr Telefon an einer Nebenstelle einer Telefonanlage betrieben wird, müssen Sie diese Taste drücken,
um ein Flash-Signal (auch Rückruf oder TBR genannt) zu erzeugen. Dadurch erkennt die Telefonanlage,
dass Sie eine andere interne Nebenstelle anwählen oder Steuerfunktionen der Telefonanlage nutzen
möchten. Ihr Telefon ist auf die Flash-Zeit „Kurz“ (kurz = 100 ms) voreingestellt. Diese kann jedoch im
Bedarfsfall auf die Werte „Mittel“ (mittel = 270 ms) oder „Lang“ (lang = 600 ms) geändert werden. Prüfen
Sie bitte im Bedarfsfall welche Flash-Zeit Ihre Telefonanlage verwendet, diese Information finden Sie
üblicherweise in der Bedienungsanleitung Ihrer Telefonanlage.
tDrücken Sie in der Startansicht die Taste
.
tDrücken Sie die Taste , um „ERW. EINST” (SETTINGS) auszuwählen und anschließend die Taste
zum Auswählen.
tDrücken Sie die Taste , um „RÜCKRUFZEIT” (RECALL TIME) auszuwählen und anschließend die
Taste
zum Auswählen.
tDrücken Sie die Taste
, um „KURZ” (SHORT), „MITTEL” (MEDIUM) oder „LANG” (LONG)
auszuwählen und anschließend die Taste zum Auswählen.
>Ein Bestätigungston ertönt.
tDrücken Sie die Taste
, um zum Stand-by-Modus zurückzukehren.
13.13 Te le f on zu r üc ks e tz e n
Mit dieser Funktion können Sie individuelle Einstellungen und Änderungen zurücksetzen.
Hinweis: Durch das Zurücksetzen des Telefons (u. a. der System-PIN) werden alle persönlichen
Einstellungen sowie die Einträge der Anrufübersicht und Wahlwiederholungsliste gelöscht. Die Einträge
des Telefonbuchs und auch alle aufgenommenen Nachrichten auf dem AB bleiben erhalten, alle anderen
Einstellungen werden aber zurückgesetzt.
tDrücken Sie bei Anzeige des Startbildschirms die Taste
.
tAnschließend mit den Tasten „ERW. EINST“ (SETTINGS) auswählen und die Taste drü cken .
tWählen Sie nun mit den Tasten „ZURÜCKSETZEN“ (RESET) aus. Erneut die Taste drücken.
tDrücken Sie nochmals die Taste , um das Zurücksetzen zu bestätigen.
>Sie hören einen Bestätigungston, und das Telefon wurde zurückgesetzt.
14. ANRUFBEANTWORTER (Nur Eclipse 15)
Das Telefon verfügt über einen Anrufbeantworter (AB), auf dem Ihnen Anrufer Nachrichten hinterlassen
können (dazu muss der Anrufbeantworter jedoch eingeschaltet sein).
Der AB hat einen Speicher für ca. 30 Minuten Aufzeichnungszeit und kann maximal 59 Nachrichten (mit je
bis zu 3 Minuten Länge) aufzeichnen.
Ist der Anrufbeantworter eingeschaltet, nimmt er ankommende Anrufe nach der eingestellten
„KLINGELZAHL“ (RING DELAY) an.
Haben Sie die Option „ANTW+AUFNEH.“ (RECORD MSGS) eingestellt, können Anrufer nach der
Hinweisansage Nachrichten auf dem AB hinterlassen.
Haben Sie die Option „NUR ANTW.“ (ANSWER ONLY) eingestellt, hören Anrufer zwar die Hinweisansage,
können aber keine Nachrichten hinterlassen. Ist der Speicher voll, wird automatisch die Ansage „NUR
ANTW.“ (ANSWER ONLY) abgespielt. Zudem blinkt die LED an der Basisstation schnell, und das ABSymbol im Display des Telefonhörers langsam, um Sie darauf hinzuweisen. Löschen Sie in dem Fall einige
oder alle alten Nachrichten auf dem AB, damit neue Nachrichten aufgezeichnet werden können.
Page 93

DE
14.1 Anrufbeantworter ein-/ausschalten
tDrücken Sie bei Anzeige des Startbildschirms die Taste
.
tErneut die Taste drücken, um „ANRUFBEAN.“ (ANS. SYSTEM) auszuwählen.
tWählen Sie nun mit den Tasten „AB EIN/AUS“ (ANS. ON/OFF) aus. Erneut die Taste
drücken.
tDann mit den Tasten die Option „EIN“ (ON) oder „AUS“ (OFF) auswählen und abschließend mit
der Taste bestätigen.
>Es ertönt ein Bestätigungston.
tMit der Taste
in den Stand-by-Modus zurückgehen.
Hinweis: Ist der AB „AUS“ (OFF) und als System-PIN noch 0000 eingestellt, nimmt der Anrufbeantworter
keine ankommenden Anrufe an.
Wurde die System-PIN aber geändert, und ist die Fernabfrage aktiviert, nimmt der AB ankommende
Anrufe nach 14 Klingelzeichen an. Die Ansage „NUR ANTW.“ (ANSWER ONLY) wird abgespielt.
14.2 Ansagemodus
In dem Telefon sind zwei Standardansagen gespeichert – für die beiden Modi „NUR ANTW.“ (ANSWER
ONLY) und „ANTW+AUFNEH.“ (RECORD MSGS). Standardmäßig ist der Modus „ANTW+AUFNEH.“
(RECORD MSGS) eingestellt, sodass Ihnen Anrufer nach der Hinweisansage Nachrichten auf dem AB
hinterlassen können. Sie können allerdings auch den Modus „NUR ANTW.“ (ANSWER ONLY) einstellen.
In dem Fall hören Anrufer zwar die Hinweisansage, können aber keine Nachrichten hinterlassen.
14.2.1 Ansagemodus einstellen
tDrücken Sie bei Anzeige des Startbildschirms die Taste
.
tErneut die Taste drücken, um „ANRUFBEAN.“ (ANS. SYSTEM) auszuwählen.
tWählen Sie nun mit den Tasten „ANTW.-MODUS“ (ANSWER MODE) aus und drücken Sie
nochmals die Taste .
tDann mit den Tasten den gewünschten Modus – „NUR ANTW.“ (ANSWER ONLY) oder
„ANTW+AUFNEH.“ (RECORD MSGS) – auswählen und abschließend mit der Taste bestätigen.
>Es ertönt ein Bestätigungston.
tMit der Taste
in den Stand-by-Modus zurückgehen.
14.3 Anrufbeantworter-Einstellungen
14.3.1 Klingelverzögerung einstellen
Sie können die Anzahl der Klingelzeichen einstellen, bevor der Anrufbeantworter antwortet und mit dem
Abspielen Ihrer persönlichen Ansage beginnt. Sie können die Klingelverzögerung auf 2 bis 7 Klingelzeichen
oder auf „SPARMODUS“ (TOLL SAVER) einstellen.
tDrücken Sie in der Startansicht die Taste
.
tErneut die Taste drücken, um „ANRUFBEAN.“ (ANS. SYSTEM) auszuwählen.
tDrücken Sie die Taste
, um „AB-EINSTELL.” (ANS. SETTING) auszuwählen und drücken Sie
anschließend die Taste .
tDrücken Sie die Taste , um „KLINGELZAHL” (RING DELAY) auszuwählen.
tDrücken Sie die Taste
, um „2 x KLINGELN“ (2 RINGS) – „7 x KLINGELN“ (7 RINGS) oder
„SPARMODUS” (TOLL SAVER) auszuwählen und anschließend die Taste zum Auswählen.
>Ein Bestätigungston ertönt.
tDrücken Sie die Taste
, um zum Stand-by-Modus zurückzukehren.
Page 94

Hinweis: Wenn Sie „SPARMODUS” (TOLL SAVER) auswählen, reagiert der Anrufbeantworter beim
fünften Klingelton auf einen eingehenden Anruf, wenn keine neuen Nachrichten vorliegen und auf das
dritte Klingelzeichen, wenn neue Nachrichten vorliegen.
Wenn Sie den Anrufbeantworter anrufen um zu prüfen, ob neue Nachrichten vorliegen und dieser nicht
nach dem dritten Klingelton reagiert, können sie unverzüglich auflegen und wissen, dass keine neuen
Nachrichten vorliegen. Diese Funktion kann Ihnen Kosten sparen, vor allem wenn Sie aus großen
Entfernungen anrufen, um Ihre Nachrichten abzuhören.
14.3.2 Fernabfrage aktivieren/deaktivieren
tDrücken Sie in der Startansicht die Taste
.
tErneut die Taste drücken, um „ANRUFBEAN.“ (ANS.SYSTEM) auszuwählen.
tDrücken Sie die Taste , um „AB-EINSTELL.” (ANS. SETTING) auszuwählen und drücken Sie
anschließend die Taste zum Auswählen.
tDrücken Sie die Taste , um „FERNABFRAGE“ (REMOTE ACC.) auszuwählen und anschließend
die Taste zum Auswählen.
tDrücken Sie die Taste , um „AKTIVIEREN“ (ACTIVATE) oder „DEAKTIVIEREN“ (DEACTIVATE )
auszuwählen und anschließend die Taste zum Auswählen.
>Ein Bestätigungston ertönt.
tDrücken Sie die Taste
, um zum Stand-by-Modus zurückzukehren.
Hinweis: Sobald die Fernabfrage aktiviert wurde, können Sie die auf dem Anrufbeantworter gespeicherten
Meldungen auch aus der Ferne von einem anderen Telefon aus abhören.
Die Master-PIN wird für die Fernabfrage des Anrufbeantworters benötigt. Wenn Ihr Anrufbeantworter
abgeschaltet ist, müssen Sie die Voreinstellung 0000 der Master-PIN ändern, um über den Fernzugriff den
Anrufbeantworter einschalten zu können.
14.3.3 Sprache ändern
Sie können für die automatischen Ansagen des Anrufbeantworters auch andere Sprachen auswählen.
tDrücken Sie in der Startansicht die Taste .
tErneut die Taste drücken, um „ANRUFBEAN.“ (ANS. SYSTEM) auszuwählen.
tDrücken Sie die Taste , um „AB-EINSTELL.” (ANS. SETTING) auszuwählen und drücken Sie
anschließend die Taste zum Auswählen.
tDrücken Sie die Taste , um „SPRACHE” ( LANGUAGE) auszuwählen und anschließend die Taste
zum Auswählen.
tDrücken Sie die Taste , um die von Ihnen bevorzugte Sprache (wenn verfügbar) auszuwählen und
anschließend die Taste zum Auswählen.
>Ein Bestätigungston ertönt.
tDrücken Sie die Taste
, um zum Stand-by-Modus zurückzukehren.
14.4 Nachrichten anhören
Neue, noch nicht angehörte Nachrichten auf dem AB werden durch Blinken des Symbols
im Display
signalisiert.
tDrücken Sie bei Anzeige des Startbildschirms die Taste .
tErneut die Taste drücken, um „ANRUFBEAN.“ (ANS. SYSTEM) auszuwählen.
tMit der Taste dann „ABSPIELEN“ (PLAY) auswählen.
>Der Lautsprecher schaltet sich automatisch ein, und die Wiedergabe startet.
>Im Display werden die Nummer der Nachricht sowie Datum und Uhrzeit des Anrufs angezeigt.
>Für die Wiedergabe der Nachrichten über den Hörer die Taste drücken.
tMit den Tasten und haben Sie während der Wiedergabe Zugriff auf folgende Funktionen:
Page 95

DE
WIEDERHOLEN (REPEAT) Aktuelle Nachricht nochmals abspielen
WEITER (NEXT) Nächste Nachricht abspielen
ZURÜCK (PREVIOUS) Vorherige Nachricht abspielen
LÖSCHEN (DELETE) Aktuelle Nachricht löschen
Hinweis: Um zur Anzeige der Nummer der Nachricht mit Datum/Uhrzeit des Anrufs zurückzugehen, die
Taste
drücken.
tMit der Taste
gehen Sie in den Stand-by-Modus zurück.
14.5 Alle Nachrichten löschen
Hinweis: Es können nur „alte“ Nachrichten gelöscht werden, d. h. Nachrichten müssen erst angehört
werden, damit sie gelöscht werden können.
tDrücken Sie bei Anzeige des Startbildschirms die Taste
.
tErneut die Taste drücken, um „ANRUFBEAN.“ (ANS. SYSTEM) auszuwählen.
tWählen Sie anschließend mit den Tasten „ALLE LÖSCHEN“ (DELETE ALL) aus; Taste
drücken.
tLöschvorgang mit der Taste nochmals bestätigen.
>Es ertönt ein Bestätigungston.
tMit der Taste
in den Stand-by-Modus zurückgehen.
14.6 Ansagen
Wenn der Anrufbeantworter einen Anruf annimmt, wird die Standardansage abgespielt, wenn Sie keine
persönliche Ansage aufgenommen und eingestellt haben.
Das Telefon wird mit zwei automatischen Ansagen für die beiden Antwortmodi geliefert: „NUR ANTW.”
(ANSWER ONLY) und „ANTW+AUFNEH.” (RECORD MSGS). Der standardmäßige Antwortmodus ist
„ANTW+AUFNEH.” (RECORD MSGS). Der Anrufer kann nach dem Anhören der Ansage eine Nachricht
auf dem Anrufbeantworter hinterlassen. Dies kann in den Modus „NUR ANTW.” (ANSWER ONLY)
geändert werden, der Anrufern nach dem Anhören der Ansage keine Möglichkeit zum Hinterlassen einer
Nachricht auf dem Anrufbeantworter bietet.
14.6.1 Persönliche Ansage aufnehmen
Sie können die Standardansage mit einer persönlichen Ansage wie hier beschrieben ersetzen.
Hinweis: Die maximale Aufnahmedauer beträgt 2 Minuten.
tDrücken Sie bei Anzeige des Startbildschirms die Taste
.
tErneut die Taste drücken, um „ANRUFBEAN.“ (ANS. SYSTEM) auszuwählen.
tDann mit den Tasten „ANSAGE AUFN.“ (ANNOUNCEMENT) auswählen und die Taste
drücken.
tWählen Sie nun mit den Tasten den gewünschten Modus – „NUR ANTW.“ (ANSWER ONLY) oder
„ANTW+AUFNEH.“ (RECORD MSGS) – aus und drücken Sie erneut die Taste .
tDann mit den Tasten „ANSAGE AUFN.“ (RECORD ANNC) auswählen. Taste drücken.
>Es ertönt ein Bestätigungston.
tSprechen Sie jetzt Ihre Ansage in den Telefonhörer und beenden Sie die Aufnahme mit der Taste .
>Es ertönt ein Bestätigungston.
tMit der Taste
in den Stand-by-Modus zurückgehen.
Page 96

14.6.2 Ansage abhören
tDrücken Sie in der Startansicht die Taste .
tErneut die Taste
drücken, um „ANRUFBEAN.“ (ANS.SYSTEM) auszuwählen.
tDrücken Sie die Taste , um „ANSAGE AUFN.” (ANNOUNCEMENT) auszuwählen und
anschließend die Taste
zum Auswählen.
tDrücken Sie die Taste , um „NUR ANTW.” (ANSWER ONLY) oder „ANTW+AUFNEH.” (RECORD
MSGS) auszuwählen und anschließend die Taste zum Auswählen.
tDrücken Sie die Taste
, um „ABSPIELEN“ (PLAY) auszuwählen.
>Die Ansage ist über den Lautsprecher des Telefons zu hören.
>Drücken Sie die Taste
, wenn Sie die Ansage nur über das Mobilteil anhören möchten.
tDrücken Sie die Taste
, um zum Stand-by-Modus zurückzukehren.
14.6.3 Eine persönliche Ansage löschen
Wenn Sie die voreingestellte Ansage wieder nutzen möchten, löschen Sie einfach Ihre persönliche Ansage.
tDrücken Sie in der Startansicht die Taste .
tErneut die Taste drücken, um „ANRUFBEAN.“ (ANS.SYSTEM) auszuwählen.
tDrücken Sie die Taste , um „ANSAGE AUFN.” (ANNOUNCEMENT) auszuwählen und
anschließend die Taste zum Auswählen.
tDrücken Sie die Taste , um „NUR ANTW.” (ANSWER ONLY) oder „ANTW+AUFNEH” (RECORD
MSGS) auszuwählen (RECORD MSGS) und anschließend die Taste zum Auswählen.
tDrücken Sie die Taste , um „LÖSCHEN“ (DELETE) auszuwählen und anschließend die Taste
zum Auswählen.
>Die voreingestellte automatische Ansage ertönt durch den Lautsprecher des Telefons.
>Drücken Sie die Taste
, wenn Sie die Ansage nur über das Mobilteil anhören möchten.
tDrücken Sie die Taste
, um zum Stand-by-Modus zurückzukehren.
14.7 Fernabfrage
Über Ihr Telefon können Sie die auf dem Anrufbeantworter gespeicherten Nachrichten abhören. Mit
einem Tonwahltelefon können Sie den Anrufbeantworter auch bedienen.
Sie müssen eine Fernabfrage-PIN (dieselbe wie Ihre Master-PIN) eingeben, um Zugriff auf die Fernabfrage
Ihres Anrufbeantworters zu erhalten.
Die PIN für die Fernabfrage dient dem Schutz vor unautorisiertem Zugriff auf Ihren Anrufbeantworter.
Wenn Sie diese Funktion nutzen möchten, müssen Sie die Fernabfrage einrichten.
14.7.1 Fernabfrage des Anrufbeantworters
tWählen Sie Ihre Telefonnummer von einem Tonwahltelefon aus.
tWenn der Anrufbeantworter den Anruf annimmt und mit dem Abspielen der Ansage beginnt, drücken
Sie die Taste #.
>Der Anrufbeantworter stoppt das Abspielen der Ansage.
tGeben Sie über die Tastatur des Tonwahltelefons innerhalb von 8 Sekunden Ihre Fernabfrage-PIN ein
(dieselbe wie Ihre Master-PIN).
Hinweis: Der Anrufbeantworter legt auf, wenn Sie nicht binnen 8 Sekunden die Master-PIN eingegeben
haben.
tWurde die PIN angenommen, hören Sie einen Bestätigungston.
tDer Anrufbeantworter beginnt mit dem Abspielen aller gespeicherten Nachrichten. Zuerst sind die
neuesten zu hören. Sind keine Nachrichten vorhanden, hören Sie vier Pieptöne.
tMit den Tasten eines Tonwahltelefons können Sie folgende Funktionen steuern:
Page 97

DE
Tasten
1 Vorh erige Nachricht erneut abspielen.
2 Nachrichten abspielen / Aktuelle Nachricht wiederholen.
3 Überspringen, um zur nächsten Nachricht zu gelangen.
6 Aktuelle Nachricht löschen.
7 Schalten Sie den Anrufbeantworter in den Modus ANS. AUFNEH (RECORD MSGS)
oder ANTW+AUFNEH. (ANSW. &RECORD) .
8 Abspielen einer Nachricht unterbrechen.
9 Anrufbeantworter ausschalten.
tWenn Sie Ihre Nachrichten abgehört haben, legen Sie einfach auf.
Hinweis:
Ist Ihr Anrufbeantworter abgeschaltet, die Fernabfrage jedoch aktiviert, antwortet der Anrufbeantworter
nach 14 Klingelzeichen, sodass Sie eine Fernabfrage durchführen können. Die Ansage „NUR ANTW.”
(ANSWER ONLY) ist zu hören.
Wenn Sie eine falsche Fernabfrage-PIN eingeben, hören Sie einen dreifachen Fehlerton. Danach müssen
Sie die PIN erneut eingeben. Wenn Sie zweimal hintereinander eine falsche Fernabfrage-PIN eingeben,
wird der Anruf automatisch beendet.
Page 98

15. FEHLERSUCHE
15.1 IMMER prüfen:
tSie haben bei der Inbetriebnahme Ihres Telefons alle in der Bedienungsanleitung angegebenen
Schritte befolgt.
tAlle Stecker sind sicher in die jeweiligen Buchsen eingesteckt.
tDie Stromversorgung der Basisstation ist eingeschaltet und der Stecker steckt in der Steckdose.
tDie Akkus des Mobilteils sind korrekt und sicher eingelegt und vollständig aufgeladen.
15.2 Im Alltagsgebrauch
„Ich kann weder Anrufen, noch erhalte ich Anrufe”
tWenn das Display des Mobilteils leer bleibt, ist es möglicherweise ausgeschaltet. Drücken Sie die Taste
und halten Sie diese gedrückt, um das Mobilteil wieder einzuschalten.
tStellen Sie sicher, dass die Basisstation mit einer Steckdose verbunden ist und der Strom eingeschaltet
ist. Die Basisstation benötigt Netzspannung für den normalen Betrieb und nicht nur zum Aufladen der
Akkus des Mobilteils.
tVergewi ssern Sie sich, dass Sie das mitgelieferte Telefonanschlusskabel verwenden. Andere
Telefonanschlusskabel funktionieren möglicherweise nicht.
tGehen Sie mit dem Mobilteil näher an die Basisstation heran.
tSchauen Sie sich das Symbol für den Ladezustand der Batterie auf dem Display an. Wenn es schwach
ist, stellen Sie das Mobilteil in die Basisstation oder die Ladestation, um die Akkus wieder aufzuladen.
t D en Stecker der Stromversorgung aus der Steckdose ziehen. Einen Moment abwarten, dann den
Stecker wieder einstecken. Damit sollte das Problem beseitigt sein.
„Ich kann keine Anrufe tätigen”
tWenn im Display des Mobilteils die Anzeige TA STEN SPERRE (KEYS LOCKED) erscheint, drücken und
halten Sie * gedrückt, um es zu entriegeln, bevor Sie einen Anruf tätigen.
tEs kann immer nur ein Mobilteil (oder die Basisstation) mit einem externen Anrufer verbunden sein.
Wenn das Display des Mobilteils anzeigt, dass die Basisstation bereits vom Anrufbeantworter oder
einem anderen Mobilteil in Anspruch genommen wird.
„Wenn ich die Tasten drücke passiert nichts”
tVergewi ssern Sie sich, dass die Akkus im Mobilteil ordnungsgemäß eingelegt sind. Wenn das
Batteriesymbol auf dem Display ‘schwach’ anzeigt, stellen Sie das Mobilteil zum Aufladen der Akkus in
die Basisstation oder Ladestation.
„Wenn ich eine Nummer eingebe, erscheint diese auch auf dem Display, aber ich kann keinen
externen Anruf tätigen”
tVer suchen Sie es mit einem anderen Aufstellort für die Basisstation - möglichst an einem höher
gelegenen Platz oder weiter entfernt von elektrischen Geräten.
„Das Telefon klingelt nicht”
tStellen Sie sicher, dass die Basisstation mit einer Steckdose verbunden ist und der Strom
eingeschaltet ist.
tDie Basisstation benötigt Netzspannung für den normalen Betrieb und nicht nur zum Aufladen der
Akkus des Mobilteils.
tStellen Sie sicher, dass das mitgelieferte Telefonanschlusskabel verwendet wird.
tVergewi ssern Sie sich, dass die Lautstärke des Klingeltons nicht ausgeschaltet ist. Stellen Sie den
Klingelton lauter.
„Mein Anruf wurde unterbrochen, als ich mich außerhalb der Reichweite der Basisstation bewegte.
Ich kann das Mobilteil nicht mehr benutzen.”
tGehen Sie mit dem Mobilteil näher an die Basisstation heran, bevor Sie den nächsten Anruf tätigen.
Page 99

DE
„Ich höre Störgeräusche in der Leitung”
tGehen Sie mit dem Mobilteil näher an die Basisstation heran oder wechseln Sie Ihren Standort.
tStellen Sie die Basisstation möglichst weit entfernt von anderen elektrisch betriebenen Einrichtungen
auf wie TV oder Computer.
tDen besten Empfang erhalten Sie, wenn Sie die Basisstation an einem möglichst hohen Punkt aufstellen.
In einem zweistöckigen Gebäude bietet sich dafür der Übergang in den ersten Stock an.
„Die Rufnummernanzeige funktioniert nicht”
tDiese Funktion ist nur verfügbar, wenn Sie bei Ihrem Telefonanbieter die Rufnummernerkennung
freigeschaltet haben.
tDer Anrufer hat die Rufnummernunterdrückung eingeschaltet. Oder er ruft über einen Netzanbieter an,
der die Rufnummernanzeige deaktiviert hat (z.B. bei internationalen Anrufen).
„Wenn ich einen Anruf tätigen möchte, höre ich nur das Besetztzeichen”
tWenn Sie ein System mit mehreren Mobilteilen verwenden, prüfen Sie, ob mit einem anderen Mobilteil
bereits telefoniert wird.
„Die Lautstärke des Mobilteils ist bei einem Anruf sehr gering”
tStellen Sie sicher, dass Sie das Mobilteil richtig an Ihr Ohr halten.
tStellen Sie die Lautstärke mit der Taste ein.
„Ich kann einen Telefonbucheintrag nicht abspeichern”
tDie maximale Anzahl von 200 Telefonbucheinträgen im Mobilteil ist erreicht. Um neue Einträge
vornehmen zu können, müssen Sie zunächst alte Einträge löschen.
15.3 Intern Anrufen und Anrufe weiterleiten
„Ich kann einen eingehenden Anruf nicht weiterleiten”
tStellen Sie sicher, dass sich das andere Mobilteil in Funkreichweite der Basisstation befindet.
tVergewi ssern Sie sich, dass Sie die korrekte Nummer des anderen Mobilteils eingegeben haben.
15.4 Batterien
„Die Batterien des Mobilteils sind bereits nach ein oder zwei Stunden schwach”
tVor dem ers ten Gebrauch muss das Mobilteil mindestens 15 Stunden in der Basisstation oder der
Ladestation vollständig aufgeladen werden.
tMöglicherweise müssen Sie die Batterien gegen neue ersetzen.
tPrüfen Sie die Verbindung zwischen Basisstation und Steckdose.
„Ich versuche die Batterien wiederaufzuladen, bekomme jedoch ständig die Anzeige, dass der
Ladezustand zu niedrig ist”
tErsetzen Sie die Batterien gegen neue. Entsorgen Sie leere Batterien ordnungsgemäß - Leere Batterien
niemals in Wasser eintauchen, verbrennen oder mit spitzen Gegenständen durchstechen.
tVer wenden Sie keinesfalls nicht-wiederaufladbare Trockenbatterien in Ihrem Mobilteil - diese können
explodieren und Schäden verursachen.
15.5 Anmeldung
„Ich kann kein weiteres Mobilteil anmelden”
tDie maximale Anzahl von 4 Mobilteilen ist erreicht. Sie müssen erst eines der Mobilteile abmelden,
bevor Sie ein neues anmelden können.
Page 100

15.6 Anrufbeantworter
„Der Anrufbeantworter zeichnet keine Nachrichten auf”
tStellen Sie sicher, dass der Anrufbeantworter eingeschaltet ist.
tVergewi ssern Sie sich, dass der Antwortmodus auf ANTW+AUFNEH. (RECORD MSGS) eingestellt ist.
tDer Nachrichtenspeicher ist voll. Wenn dies der Fall ist, löschen Sie bitte einige Nachrichten.
„Ich habe per Fernabfrage keinen Zugriff auf meinen Anrufbeantworter”
tStellen Sie sicher, dass die Fernabfrage aktiviert ist.
tStellen Sie sicher, dass Sie die korrekte Fernabfrage-PIN (dieselbe wie die Master-PIN) eingegeben
haben.
15.7 Wenn der Fehler weiterhin besteht...
tTrennen Sie alle anderen Geräte, die mit dieser Amtsleitung verbunden sind und tätigen Sie einen Anruf.
tTrennen Sie die Basisstation von der Amtsleitung und stecken Sie einen anderen Telefonapparat an.
Tätigen Sie einen Anruf. Wenn das funktioniert, ist die Amtsleitung in Ordnung.
tWenn Sie nicht telefonieren können, und die Steckdose mit einem Doppelstecker nutzen, entfernen Sie
den Doppelstecker und stecken Sie den Stecker für das Telefon direkt in die Steckdose.
tWenn Sie jetzt telefonieren können, ist möglicherweise der Doppelstecker defekt.
tWenn Sie keinen Aufruf tätigen können, liegt der Fehler möglicherweise in der Amtsleitung. Kontaktieren
Sie Ihren Netzanbieter.
 Loading...