

Page 1

B9872-5
User manual Oven
Page 2

Contents
2
Thank you for choosing one of our high-quality products.
To ensure optimal and regular performance of your appliance please read this
instruction manual carefully. It will enable you to navigate all processes perfectly
and most efficiently. To refer to this manual any time you need to, we
recommend you to keep it in a safe place. And please pass it to any future owner
of the appliance.
We wish you much joy with your new appliance.
CONTENTS
SAFETY INFORMATION 3
Children and vulnerable people safety
3
General safety 3
Installation 3
Electrical connection 4
Use 4
Care and cleaning 4
Risk of fire 5
Pyrolytic cleaning 5
Oven lamp 5
Service centre 5
Disposal of the appliance 5
PRODUCT DESCRIPTION 6
General overview 6
Inside of door 6
Oven accessories 6
BEFORE FIRST USE 7
Initial Cleaning 7
Setting the language 7
Setting the time 7
Activating theSMELL FILTER YES/NO 7
DAILY USE 8
Indicators 8
Menu status bar 8
Symbol status bar 8
Oven buttons 8
Menu operation 9
Switching on/off the appliance 9
Setting the oven function 9
Changing the oven temperature 9
Stopping the oven function 9
Cooling fan 9
Residual heat indicator 10
Oven functions 10
Meat programmes 10
Telescopic runners - Inserting the Oven
Accessories 11
Turn spit 12
Meatprobe 12
Automatic programmes 13
Meat programmes with weight input 14
Meat programmes with meat probe 14
Options menu 14
RECIPE MENU 15
Setting a recipe 15
Memory menu 15
Saving settings for "personal recipes"
Finding settings for “personal recipes”
Overwriting a memory position 16
SETTINGS MENU 16
Adjusting the SETTINGS MENU 17
More hints for SETTINGS MENU 18
Pre-heating with the RAPID HEAT UP
function 18
Clock functions 19
Setting the clock functions 19
CHILD LOCK 20
BUTTON LOCK 20
Automatic cut-out 20
CARE AND CLEANING 21
Pyrolytic cleaning 21
Reminder function for pyrolytic cleaning
Telescopic shelf runners 22
Oven lamp 23
Oven door and glass panels 24
WHAT TO DO IF… 25
INSTALLATION 26
ENVIRONMENT CONCERNS 28
16
16
22
Page 3

Safety information
GREAT BRITAIN & IRELAND - GUARANTEE/
CUSTOMER SERVICE 29
Subject to change without notice
SAFETY INFORMATION
Before the installation and use, read this manual carefully:
• For your personal safety and the safety of your property
• For the respect of the environment
• For the correct operation of the appliance.
Always keep these instructions with the appliance also if you move or sell it.
The manufacturer is not responsible if incorrect installation or use results in damage.
Children and vulnerable people safety
• This appliance can be used by children aged from 8 years and above and persons with
reduced physical, sensory or mental capabilities or lack of experience and knowledge if
they have been given supervision or instruction concerning use of the appliance in
safe way and understand the hazards involved. Children shall not play with the appliance.
• Keep all packaging away from children. There is the risk of suffocation or physical injury.
• Keep children and animals away from the appliance when the door is open or the ap-
pliance is in operation. There is the risk of injury or other permanent disability.
• If the appliance has Child lock or Key lock function, use it. It prevents children and
animals from accidental operation of the appliance.
3
General safety
• Do not change the specifications of this appliance. There is the risk of injury and dam-
age to the appliance.
• Do not let the appliance stay unattended during operation.
• Switch off the appliance after each use.
Installation
• Only an approved electrician can install and connect the appliance. Contact an ap-
proved service centre. This is to prevent the risks of structural damage or physical injury.
• Make sure that the appliance is not damaged because of transport. Do not connect a
damaged appliance. If necessary, contact the supplier.
• Remove all packaging, stickers and layers from the appliance before first use. Do not
remove the rating plate. It can invalidate the guarantee.
• Make sure that the appliance is disconnected from the power supply during the instal-
lation.
• Be careful when you move the appliance. The appliance is heavy. Always use safety
gloves. Do not lift the appliance by the handle.
• The electrical installation must have an isolation device which lets you disconnect the
appliance from the mains at all poles. The isolation device must have a contact opening width of minimum 3 mm.
• You must have correct isolation devices: line protecting cut-outs, fuses (screw type
fuses removed from the holder), earth leakage trips and contactors.
892944625 - A- 062010
Page 4

Safety information
4
• Before the installation, make sure that the kitchen cabinet has the recess dimensions
applicable.
• Make sure that the appliance is installed below and adjacent safe structures.
• Keep the minimum distances to the other appliances and units.
• The appliance cannot be positioned on a base.
• Built in ovens and built in cooking surfaces are attached with special connection sys-
tem. To prevent damage to the appliance, only use an appliance with the appliances
from the same manufacturer.
Electrical connection
• The appliance must be earthed.
• Make sure that the electrical data on the rating plate agree with your domestic power
supply.
• Information on the voltage is on the rating plate.
• Always use a correctly installed shockproof socket.
• Do not use multi-way plugs, connectors and extension cables. There is the risk of fire.
• Do not replace or change the mains cable. Contact the service centre.
• Make sure not to squash or cause damage to the mains plug (if applicable) and cable
behind the appliance.
• Do not pull the mains cable to disconnect the appliance. Always pull the mains plug –
if applicable.
Use
• The appliance is only for domestic use. Do not use the appliance for commercial and
industrial use.
• Only use the appliance for domestic cooking tasks. This is to prevent physical injury to
persons or prevent damage to property.
• Do not use the appliance as a work surface or storage surface.
• The interior of the appliance and the accessories become hot during use. There is the
risk of burns. Use safety gloves when you insert or remove the accessories or pots.
• Be careful when you remove or install the accessories to prevent damage to the oven
enamel.
• Always stay away from the appliance when you open the door while the appliance is
in operation. Hot steam can release. There is the risk of skin burns.
• To prevent damage or discoloration to the enamel:
– do not put any objects directly on the appliance floor and do not cover it with alu-
minium foil;
– do not put hot water directly into the appliance;
– do not keep moist dishes and food in the appliance after you finish the cooking.
• Discoloration of the enamel has no effect on the performance of the appliance
• Do not apply pressure on the open door.
• Always close the appliance door when you cook, even while grilling.
Care and cleaning
• Before maintenance, switch off the appliance and disconnect the appliance from the
power supply.
• Before maintenance, make sure that the appliance is cold. There is the risk of burns.
There is the risk that the glass panels can break.
Page 5

Safety information
• Keep the appliance clean at all times. A build-up of fats or other foodstuff can result
in a fire.
• Regular cleaning prevents the surface material from deteriorating
• Use a deep baking tray for very moist cakes to prevent that fruit juices cause stains
that can be permanent.
• For your personal safety and the safety of your property, only clean the appliance with
water and a soap. Do not use flammable products or products that can cause corrosion.
• Do not clean the appliance with steam cleaners, high-pressure cleaners, sharp objects,
abrasive cleaning agents, abrasive sponges and stain removers
• If you use an oven spray, follow the instructions from the manufacturer.
• Do not clean the glass door with abrasive cleaning agents or metal scraper. Heat resistant surface of the inner glass can break and shatter.
• When the door glass panels are damaged they become weak and can break. You must
replace them. Contact the service centre.
• Be careful when you remove the door from the appliance. The door is heavy!
• Do not clean catalytic enamel (if applicable).
Risk of fire
• Open the door carefully. The use of ingredients with alcohol can cause a mixture of
alcohol and air. There is the risk of fire.
• Do not let sparks or open flames come near the appliance when you open the door.
• Do not put flammable products or items that are wet with flammable products, and/or
fusible objects (made of plastic or aluminium) in, near or on the appliance.
Pyrolytic cleaning
• Do not leave the appliance unattended during Pyrolytic cleaning.
• Do not try to open the door and do not cut the power supply during Pyrolytic cleaning.
• Keep children away during pyrolytic cleaning. The appliance becomes very hot. There is
the risk of burns.
• During pyrolytic cleaning, stubborn dirt can cause discoloration to the enamel. Discoloration to the enamel has no effect on the performance of the appliance
5
Oven lamp
• Disconnect the appliance from the power supply before the replacement of the oven
lamp. There is the risk of electrical shock!
Service centre
• Only an approved engineer can repair or work on the appliance. Contact an approved
service centre.
• Use only original spare parts.
Disposal of the appliance
• To prevent the risk of physical injury or damage
– Disconnect the appliance from the power supply.
– Cut off the mains cable and discard it.
– Discard the door catch. This prevents children or small animals from being closed
inside of the appliance. There is the risk of suffocation.
Page 6
Product description
6
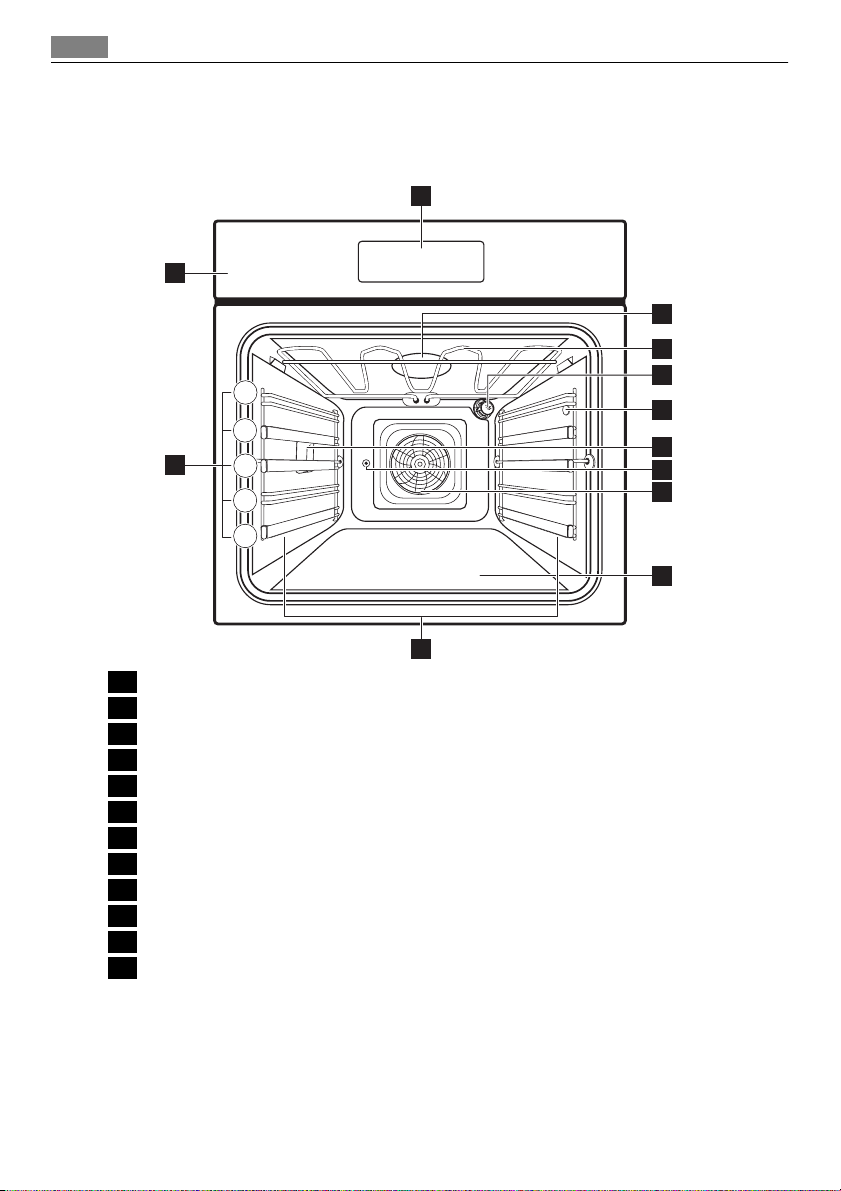
PRODUCT DESCRIPTION
General overview
1
5
4
12
3
2
1
2
3
4
5
6
7
8
9
10
11
1 Control panel
2 Electronic programmer
3 Smell filter
4 Heating element
5 Oven lamp
6 Meat probe socket
7 Oven lamp
8 Turnspit hole
9 Fan and rear wall heating element
10 Bottom heat
11 Oven shelf runners, removable
12 Shelf positions
Inside of door
You will find the shelf position number on the inside of the oven door.
Oven accessories
•
Oven shelf
For cookware, cake tins, roasts.
Page 7

•
Flat baking tray
For cakes and biscuits.
•
Nonstick deep roasting pan
To bake and roast or as pan to collect fat.
•
Meat probe
To measure how far the meat is cooked.
•
Turn spit
For roasting larger joints of meat and poultry.
BEFORE FIRST USE
WARNING!
Refer to "Safety information" chapter.
Initial Cleaning
• Remove all parts from the appliance.
• Clean the appliance before first use.
Refer to chapter "Care and Cleaning".
Setting the language
1. Connect the appliance to the power supply.
The display shows SPRACHE EINSTELLEN - LANGUAGE MENU .
2.
3. Use
or to set the language.
Use
to confirm.
The texts in the display are in the set language.
Before first use
7
Setting the time
The display shows TIME OF DAY .
You cannot use the appliance if the time is not set.
1. Use
2. Use
Refer to “Settings menu” to change the settings.
or to set the correct time.
to confirm.
The appliance is now ready to use.
Activating the SMELL FILTER YES/NO
After the language is set, the display shows SMELL FILTER MENU .
The smell filter limits odours.
When the smell filter is on, it sets on and off automatically.
1.
2. Use
or to choose between SMELL FILTER ON and SMELL FILTER OFF .
Use
to confirm.
Page 8
Daily use
8
DAILY USE
WARNING!
Refer to "Safety information" chapter.
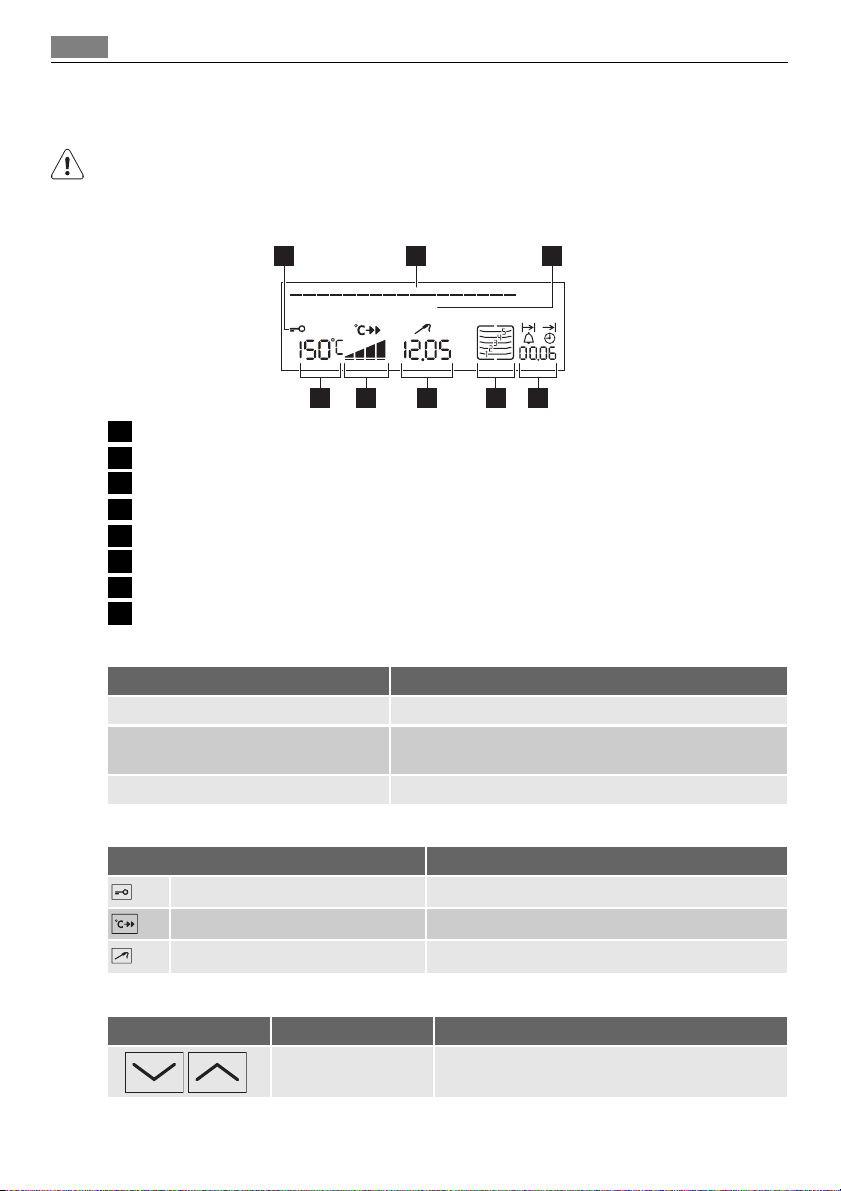
Indicators
1 Symbol status bar
2 Menu status bar
3 Text line
4 Clock functions. Period of operation
5 Shelf levels
6 Time. Meat core temperature
7 Heat indicator
8 Temperature
1 2 3
XXXXX XXXX
45678
Menu status bar
A bar in the status bar flashes. The position in a menu is shown.
The status bar is not shown. • The appliance starts to heat.
Every second bar is shown. The Smell filter is operating.
Symbol status bar
Door lock The door is locked. Pyrolytic function operates.
RAPID HEAT UP RAPID HEAT UP is in operation.
MEATPROBE The MEATPROBE is installed.
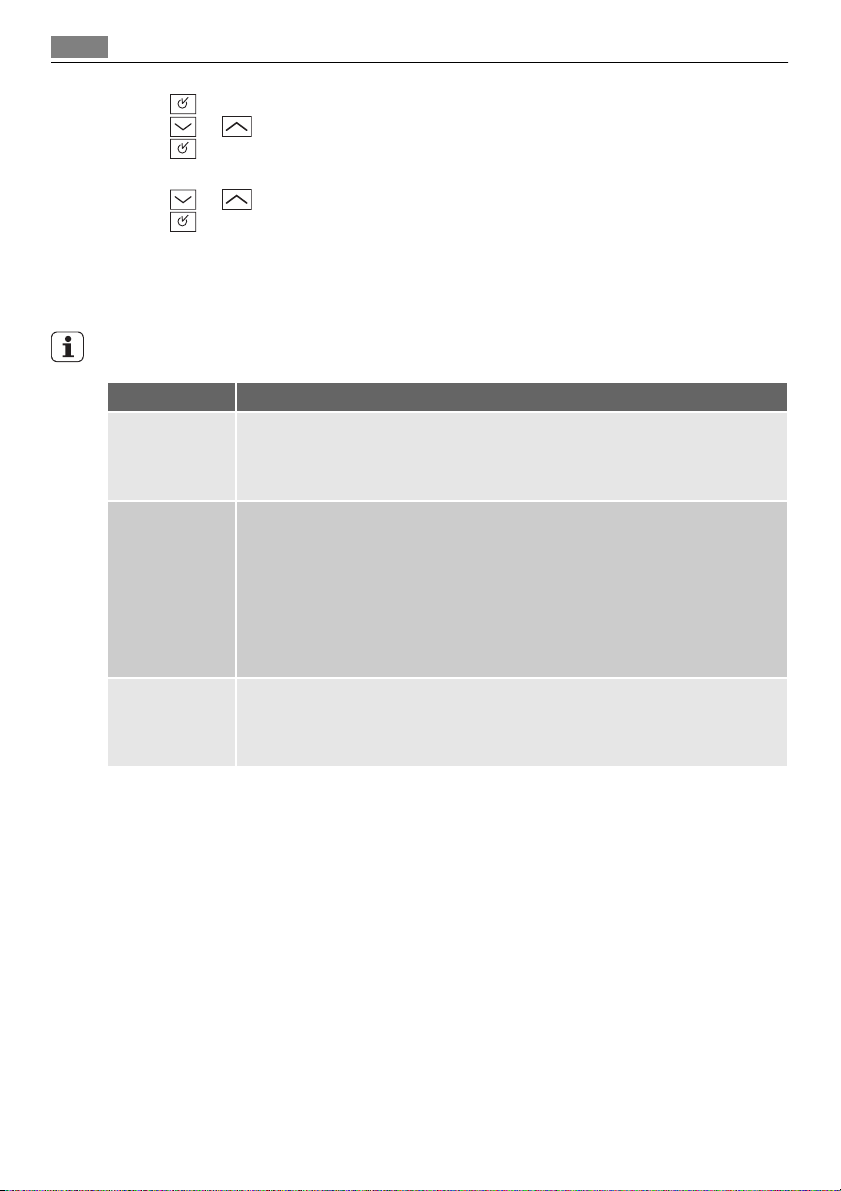
Oven buttons
Button Function Description
Indication Function
• The set time starts to count down.
Symbol Function
DOWN, UP
To set the oven function.
To move up and down in the menu.
Page 9
Button Function Description
To open the Options menu.
OPTION
OK To confirm or open the submenu.
ON/OFF To switch the appliance on or off.
RAPID HEAT UP To switch the rapid heat up function on or off.
To close the Options menu (push and hold the
button).
Daily use
9
SELECTION
PLUS, MINUS
To select oven function, clock function and
MEATPROBE.
To set values (e.g. temperature, time, weight, degree of cooking).
Menu operation
Use or to move in menu
to access the Options menu from the Oven functions menu
Use
to access the Options submenu from the Options menu
Use
Switching on/off the appliance
Use to switch on the appliance.
The display shows the OVEN FUNCTIONS menu.
to switch off the appliance.
Use
Setting the oven function
Use or to set the oven function.
The display shows the recommended temperature.
The appliance starts to heat.
When the appliance operates at the set temperature, you can hear an acoustic signal.
Changing the oven temperature
Use or to set the temperature.
Showing the oven temperature
When you use
and at the same time the display shows the temperature in the oven.
Stopping the oven function
To stop an oven function touch or again and again until the display shows OVEN
FUNCTIONS .
Cooling fan
When the appliance operates, the cooling fan switches on automatically. If you switch
off the appliance, the cooling fan continues to operate until the appliance cools down.
Page 10
Daily use
10
Residual heat indicator
When you switch off the oven, the bars on the display show the residual heat.
Oven functions
Function Application
To bake food on maximum three levels at the same time.
TRUE FAN
FAN BAKING
SLOW COOK
CONVENTIONAL
ROTITHERM
DUAL GRILL
SINGLE GRILL
KEEP WARM
DEFROST
BASE HEAT
Set the oven temperature 20 °C - 40 °C lower than for
CONVENTIONAL .
To bake food with more intensive browning and a crispy
base on one level. Set the oven temperature 20 - 40 °C
lower than for CONVENTIONAL .
To prepare very tender, juicy roasted food.
To bake and roast food on one level.
To roast larger meat joints or poultry with bones on one
level. To brown food or to cover food with breadcrumbs
or cheese.
To grill flat food in large quantities. To toast bread.
To grill flat food in the middle of the grill. To toast bread.
To keep food warm.
To defrost frozen food.
To bake cakes with a crispy base.
Meat programmes
Meat programmes with
weight input
POULTRY
PORK
BEEF
VEAL
GAME
Meat programmes with
weight input
TOP SIDE BEEF
BEEF SCAN
PORK JOINT
VEAL
Application Weight
Chicken, duck, goose 0.9 - 4.7 kg
Roast pork, shoulder of pork 1.0 - 3.0 kg
Roast beef, pot roast 1.0 - 3.0 kg
Roast veal 1.0 - 3.0 kg
Venison, rabbit 1.0 - 3.0 kg
Application Weight
• TOP SIDE BEEF RARE
• TOP SIDE BEEF MED.
• TOP SIDE BEEF WELL
• BEEF SCAN RARE
•BEEF SCAN MED.
•BEEF SCAN WELL
- -
- -
Roast beef- Scandinavian style
-
(no browning)
Page 11

Daily use
11
Meat programmes with
weight input
LAMB JOINT
GAME
BONED POULTRY
Application Weight
- -
- -
- -
Refer to the booklet „Tables, Tips and Recipes“ for information on the oven functions,
oven programmes and automatic recipes.
Telescopic runners - Inserting the Oven Accessories
Put the flat baking tray or the deep roasting pan
on the telescopic runners. Hook the holes on the
edges onto the retaining pins on the telescopic
runners.
Put the oven shelf on the telescopic runners so
that the feet point downwards.
The high rim around the oven shelf is an additional device to prevent cookware from slipping.
Inserting the oven shelf and deep roasting
pan together
Put the oven shelf on the deep roasting pan. Put
the oven shelf and the deep roasting pan on the
telescopic runners. Hook the holes on the edges
onto the retaining pins on the telescopic runners.
Page 12

Daily use
12
Turn spit
Inserting the food into the turn spit:
• Place a fork on the turn spit.
• Then position the food and a second fork.
Make sure that the food is in the middle of
the turn spit.
• Use the screws to tighten the forks.
Inserting the turn spit:
• Place the baking tray in the first shelf posi-
tion from the bottom.
• Insert the turn spit support at the front on
the right-hand side in shelf position five
from the bottom.
The clip must be kept down to keep the handle secure on the turn spit.
• Push the tip of the spit into the turnspit hole on the left-hand side of the back wall of
the oven until it locks into place.
• Place the groove in front of the handle on the notch provided on the turn spit support.
• Remove the handle.
• Choose the Turn spit oven function.
Meatprobe
Meat probe measures the core temperature of the meat. When the meat is at the set
temperature, the oven switches off automatically.
There are 2 temperatures to be set:
• The oven temperature: See Roasting Table in the booklet „Tables, Tips and Recipes“
• The core temperature: See Meat probe Table in the booklet „Tables, Tips and Recipes“
Only use the meat probe supplied or original replacement parts.
5
3
1
Page 13

Daily use
1. Switch on the appliance.
2. Put the point of the meat probe into the
centre of the meat.
3. Put the meat probe plug into the socket
on the side wall of the oven.
4. The display shows MEATPROBE and
5. Use or in less than 5 seconds to
set the core temperature.
After 5 seconds the display changes to
the current core temperature.
If the display shows OVEN FUNCTIONS before you set the core temperature, use
6. Set the oven function and, if necessary, the oven temperature.
The appliance calculates an approximate end time. An end time is different for the different quantities of the food, the set oven temperatures (minimum 120°C) and the operating modes. The appliance calculates the end time in approximately 30 minutes.
The meat probe must stay in the meat and in the meat probe socket during the cooking
procedure. While the appliance calculates an approximate end time, the display shows a
square that flashes.
7. When the meat is at the set core temperature, an acoustic signal sounds. The appliance switches off automatically.
Use any button to stop the signal.
8. Remove the meat probe plug from the socket and remove the meat from the oven.
WARNING!
The meat probe is hot! There is the risk of burns! Be careful when you remove the point
of the meat probe and the meat probe.
9. Switch off appliance.
For the meat programmes with the meat probe, refer to the automatic programmes.
until flashes. Set the core temperature.
13
Changing the core temperature
1. Use
2. Use
The core temperature is displayed from 30°C.
again and again until the display shows MEATPROBE .
or to change the core temperature.
Automatic programmes
These 3 automatic programmes give optimum settings for each type of meat or other
recipes:
• Meat programmes with weight input ( OVEN FUNCTIONS menu)
• Meat programmes with meat probe ( OVEN FUNCTIONS menu)
• Automatic recipes (Options menu)
Page 14

Daily use
14
Meat programmes with weight input
If you set the weight of the meat, the appliance calculates the roasting time.
1.
2. While the weight flashes, use or to set the weight of the meat.
If you do not change the weight in less than 5 seconds, the meat programme starts. To
change the weight after the programme starts, use
programme starts.
3. For POULTRY meat programme turn the food when you hear an acoustic signal and
or to set the meat programme.
Use
The weight flashes.
The setting changes in steps of 0.1 kg (for POULTRY in steps of 0.2 kg).
The display shows the length of the programme. The time counts down.
in less than 2 minutes after the
the display shows TURN-OVER MEAT .
When the meat programme is completed, you will hear an acoustic signal.
Meat programmes with meat probe
When you install the meat probe, you can find more meat programmes in the OVEN FUNCTIONS menu.
1. Switch on the appliance and install the meat probe.
The display shows MEATPROBE and
2.
3. Remove the meat probe.
WARNING!
The meat probe is very hot. There is a risk of burns when you remove the meat probe.
or to set the MEATPROBE programme.
Use
When the MEATPROBE programme is completed, you can hear an acoustic signal.
Use any button to switch off the acoustic signal.
flashes.
Options menu
OPTIONS MENU
RECIPE MENU
MEMORY MENU
CLEANING MENU
SETTINGS MENU
1. Use to open the Options menu.
2.
3. Use to open the menu.
Going back in the menu
Use the menu option BACK to go back to a higher menu.
Canceling a selection
Push and hold
or to set the menu option.
Use
The menu status bar shows the position in the menu.
to cancel a setting procedure.
Page 15

Daily use
The display shows OVEN FUNCTIONS menu.
RECIPE MENU
RECIPE MENU
BAKING RECIPES ROASTING RECIPES OTHER RECIPES
LEMON SPONGE CAKE PIZZA CAKE MIX
SWEDISH CAKE POTATO GRATIN FROZEN PIZZA
SPONGE CAKE ONION TARTE DRYING HERBS
CHEESE CAKE QUICHE LORRAINE PRESERVING
FRUIT CAKE LASAGNE
STREUSEL PLAIT CANNELLONI
YEAST PLAIT MEAT CASSEROLE
WHITE BREAD FISH STEAKS
Refer to the booklet “Tables, Tips and Recipes” for more data on the oven functions, oven
programmes and automatic recipes.
Setting a recipe
1. Use to open the Options menu.
2. Use
3.
4. Use
5.
Recipe Category OTHER RECIPES :
For CAKE MIX and FROZEN PIZZA use
ded temperature by 5°C.
6. When the cooking time is completed, “00:00” and
Delaying the start time
If the programme operates for less than 2 minutes, you can delay the start of a programme (refer to clock function END).
to open RECIPE MENU .
or to set the recipe category.
Use
to open, for example ROASTING RECIPES menu.
or to set the recipe.
Use
If you do not change the setting in some seconds, the appliance starts to heat up in
this setting.
or to increase or decrease the recommen-
flash, the oven heating
switches off and you can hear an acoustic signal.
Use any button to switch off the acoustic signal.
15
Stopping the cooking time early
• Push and hold
•
Use
or or
or
• Set the menu option BACK .
Memory menu
You can save the optimum settings for your personal recipes.
Page 16

Daily use
16
• There are 10 memory positions for recipes;
• There are 10 memory positions for recipes with set core temperatures for the meat probe.
Saving settings for "personal recipes"
1. Set the oven function and the oven temperature.
2. If necessary, use
time (refer to “Clock functions”)
or
use
to open the MEATPROBE function and set the core temperature (refer to ”
Meatprobe ” section).
3. Use
4. Use
5. Use to set the memory position
6.
7. Use
8. Do these steps again for the full name of your “personal recipe“.
There are 18 fields for names of personal recipes.
to open the Options menu.
to set the menu option STORE MEMORY .
The display shows the first free memory position.
The first letter in the text line flashes.
or to set the correct letter.
Use
or to move the cursor to the right or to the left.
The subsequent letter flashes. You can change the letter.
to open the clock function DURATION and set the cooking
9. Use and hold
The displays shows SAVED .
You can also change settings during or at the end of a baking process or roasting process.
to save the name of your personal recipe.
Finding settings for “personal recipes”
1. Switch on the appliance.
2.
Use
You can find your first 3 “personal recipes” directly in the OVEN FUNCTIONS menu.
You can find more personal recipes in the MEMORY MENU under the START MEMORY
menu option.
to set the “personal recipe“.
Overwriting a memory position
You can overwrite full memory positions. Refer to “Saving settings for personal recipes”.
At step 4 of the procedure, use
to set the recipe that you want to overwrite.
SETTINGS MENU
MENU DESCRIPTION
SMELL FILTER MENU
SMELL FILTER ON
The function is on, when a baking or roasting process is started.
Page 17

MENU DESCRIPTION
SMELL FILTER OFF
HEAT+HOLD ON
HEAT+HOLD OFF
EXTRA TIME ON
EXTRA TIME OFF
RAPID HEAT UP ON
RAPID HEAT UP OFF
INDICATOR ON
INDICATOR OFF
BUTTON TONE MENU
BUTTON TONE MENU
ERROR TONE MENU
ERROR TONE MENU
•English
• ......
RESTORE SETTINGS
Daily use
The function only switches itself on for self-cleaning (after about
100 hours).
HEAT+HOLD MENU
The function is switched on after the clock function DURATION or
END is completed.
The function is switched off.
EXTRA TIME MENU
The function is switched on after the clock function DURATION or
END is completed. Touch
or
to finish cooking.
The function is switched off.
RAPID HEAT UP MENU
The function is switched on with the applicable oven functions.
The function is not switched on with the applicable oven functions.
RESIDUAL HEAT MENU
If the appliance is switched off, the residual heat indicator comes
on. Touch
roasting. .
If the appliance is switched off, the residual heat indicator does
not come on. Touch
ing or roasting.
TONE ON : If you touch a button, the appliance confirms with an
acoustic signal.
TONE OFF : If you touch a button, the appliance does not confirm
with an acoustic signal.
TONE ON : If you do a step that cannot be done, you can hear an
acoustic signal.
TONE Off : If you do a step that cannot be done, you cannot hear
an acoustic signal.
To set the language in the display.
To go back to the factory settings.
to manually switch it off for individual baking or
SOUND MENU
LANGUAGE MENU
FACTORY SETTINGS
if you want to set 10 minutes extra
to manually switch it on for individual bak-
17
Adjusting the SETTINGS MENU
1. Use to open the Options menu.
2.
or to set SETTINGS MENU .
Use
Page 18
Daily use
18
3. Use to open SETTINGS MENU .
4.
5. Use
or to go to the necessary setting.
Use
.
The display shows the set value.
6.
or to set the new value.
Use
7. Use
The display shows SAVED for some seconds and goes back to the OVEN FUNCTIONS
menu.
More hints for SETTINGS MENU
You can change different base settings permanently.
MENU DESCRIPTION
SMELL FILTER
HEAT+HOLD
MENU
EXTRA TIME
MENU
• The energy consumption is higher when the SMELL FILTER is activated.
• If you deactivate the smell filter, it activates itself after 100 hours of baking or roasting, in order to self-clean.
• The SMELL FILTER also activates itself during pyrolytic cleaning.
HEAT+HOLD function keeps prepared food warm at 80° for 30 minutes, after
the baking procedure or roasting procedure is completed.
Conditions for the HEAT+HOLD function:
• The set temperature is more than 80°C.
• The HEAT+HOLD function has a constant duration.
When the function is completed, you will hear an acoustic signal. HEAT+HOLD
function operates for 30 minutes. After 30 minutes the appliance switches off.
HEAT+HOLD function stays on if you change to other oven functions.
EXTRA TIME MENU makes the oven function continue after the set time ends.
• Applicable for all oven functions with DURATION or Auto Weight.
• Not applicable for oven functions with MEATPROBE .
When the cooking time is completed, you will hear an acoustic signal.
Pre-heating with the RAPID HEAT UP function
RAPID HEAT UP function decreases the pre-heating time.
You can switch on RAPID HEAT UP function with these oven functions:
•TRUE FAN
•FAN BAKING
• CONVENTIONAL
•ROTITHERM
Pre-heat an empty oven for these types of food:
• Biscuits
• Bread rolls
•Swiss rolls
It is not necessary to pre-heat an empty oven for most baking programmes and roasting
programmes.
Refer to the booklet „Tables, Tips and Recipes“ for information on the oven functions,
oven programmes and automatic recipes.
Page 19

Daily use
Do not put the food into the appliance until RAPID HEAT UP function is completed and
the appliance operates with the set function.
1. Set the oven function.
2. If necessary, change the recommended temperature.
3. Use
. The display shows .
If the heat indicator bars flash one after the other, RAPID HEAT UP function is on.
If the appliance is at the set temperature, the heat indicator bars are on.
You can hear an acoustic signal. The display stops to show
.
The appliance continues to heat in the set oven function and oven temperature.
4. Put the food in the appliance.
If you generally prefer to put food into a pre-heated oven, you can switch on RAPID
HEAT UP function permanently (refer to SETTINGS MENU ). Then you can switch off RAPID HEAT UP function with the button
.
Clock functions
SYMBOL FUNCTION DESCRIPTION
MINUTE MINDER To set a countdown (max. 99 minutes). This function has
DURATION To set how long the appliance has to be in operation.
END To set the switch-off time for an oven function.
TIME OF DAY To set, change or control the time of day.
no effect on the operation of the appliance.
You can use DURATION and END at the same time, if the
appliance is to be switched on and off automatically later.
19
• If you set a clock function, the symbol flashes for approximately 5 seconds. In these 5
seconds, touch
or to set the time.
• If you set the time, the symbol continues to flash for approximately 5 seconds. After
these 5 seconds, the symbol comes on. The time starts to count down.
• If you do not set one of the clock functions MINUTE MINDER
END
, the display shows the duration of the oven function.
, DURATION or
If you use the clock functions DURATION and END , the appliance switches off
the heating elements when 90% of the time is completed. The appliance uses the residual heat to continue the cooking process until the time is completed (3-20 minutes).
Setting the clock functions
1. Set the oven function (not necessary for MINUTE MINDER and TIME OF DAY ).
2. Use
3. Use
4. Use any button to switch off the acoustic signal.
again and again until the display shows the necessary clock function and the
related symbol, for example MINUTE MINDER
.
or to set the necessary time.
You can hear an acoustic signal for 2 minutes when the time is completed. The appliance switches off.
“00.00” and the related function indicator flash.
Page 20

Daily use
20
With DURATION and END the oven switches off automatically.
After
You can only change the TIME OF DAY if :
• the CHILD LOCK is not switched on;
• none of the clock functions DURATION and END are set;
• no oven function is set.
and used at the same time, the display shows PROGRAMMED .
CHILD LOCK
WARNING!
Switch on CHILD LOCK when there are children. CHILD LOCK makes sure that children do
not accidentally switch on the appliance.
Switching on the child lock
1. If necessary, switch on the appliance.
Do not set an oven function.
2. Use
Switching off the child lock
1. If necessary, switch on the appliance.
2. Use
and at the same time until the display shows CHILD LOCK .
The CHILD LOCK is on.
and at the same time until the display stops to show CHILD LOCK .
CHILD LOCK switches off.
BUTTON LOCK
BUTTON LOCK prevents that you accidentally change the oven functions.
Switching on BUTTON LOCK
1. If necessary, switch on the appliance.
2. Set the oven function.
3. Use
Switching off BUTTON LOCK
1. Use
BUTTON LOCK does not prevent that you accidentally switch off the appliance. If you
switch off the appliance, BUTTON LOCK switches off.
and at the same time until the display shows BUTTON LOCK .
BUTTON LOCK is on.
and at the same time for approximately 2 seconds until the display stops
to show BUTTON LOCK .
BUTTON LOCK switches off.
Automatic cut-out
The appliance switches off after some time:
• if you do not switch off the appliance;
• if you do not change the oven temperature.
Oven temperature Switch-off time
30 °C -120 °C 12.5 h.
Page 21

Care and cleaning
Oven temperature Switch-off time
120 °C - 200 °C 8.5 h.
200 °C -250 °C 5.5 h.
250 °C -maximum °C 3.0 h.
After an automatic cut-out, use any button to operate the appliance again.
If you set the clock function DURATION or END , the automatic cut-out switches
off.
CARE AND CLEANING
WARNING!
Refer to "Safety information" chapter.
• Clean the front of the appliance with a soft cloth with warm water and washing up
liquid.
• To clean metal surfaces use a usual cleaning agent
• Clean the oven interior after each use. Thus you can remove dirt more easily and it
does not burn on.
• Clean stubborn dirt with a special oven cleaner.
• Clean all oven accessories (with a soft cloth with warm water and cleaning agent) after each use and let them dry.
• If you have nonstick accessories, do not clean them using an aggressive agents, sharp
edged objects or dishwasher. It can destroy nonstick coating!
21
Pyrolytic cleaning
WARNING!
Keep children away during pyrolytic cleaning. The appliance becomes very hot. There is
risk of burns.
Before pyrolytic cleaning, remove all removable parts (the shelf support rails, the accessories, etc.) from the appliance.
If the shelf runners are in the appliance, the display shows C1-REMOVE RUNNERS . You
cannot start pyrolytic cleaning because of an automatic cut-out.
Operating pyrolytic cleaning
1. Manually remove the most stubborn dirt.
2. Use
3.
4. Use
5. Use
6.
to open the Options menu.
or to set CLEANING MENU .
Use
to open.
to set PYROLUXE MENU .
or to set the duration for Pyroluxe.
Use
PYROLUXE LIGHT
PYROLUXE NORMAL
for a low degree of dirt (2:15)
for a medium degree of dirt (2:45)
Page 22

Care and cleaning
22
PYROLUXE HEAVY
for a high degree of dirt (3:15)
The display shows DURATION . The pyrolytic cleaning starts.
Do not open the door during the heating time. If you open the door, you cancel the pyrolytic cleaning.
The oven lamp does not operate. If the appliance is at the set temperature, the door
locks. The lock symbol is active until you unlock the door.
You can delay the switch-off time with the clock function END .
Reminder function for pyrolytic cleaning
The reminder function tells the user when pyrolytic cleaning is necessary.
The reminder function switches on when you set the appliance to the factory settings.
Switch on and off the reminder function in the options menu with CLEANING MENU .
Setting the reminder function:
1. The displays shows PYROLUXE? for some time after an oven function is completed.
Use
to confirm.
2.
or to set one of these settings:
Use
PYROLUXE YES
PYROLUXE NO
RESET REMINDER
To open the menu for pyrolytic cleaning.
Refer to “Pyrolytic cleaning” to continue.
To ignore the reminder function.
After the subsequent baking processes or roasting processes, the reminder function shows again and again until the
pyrolytic cleaning is completed.
To erase the memory function of the reminder. The reminder function starts to calculate again with the subsequent
cooking procedure.
Telescopic shelf runners
You can remove the telescopic runners to clean the side walls.
Removing the telescopic runners
1. Pull the front of the telescopic runners
away from the side wall.
Page 23

Care and cleaning
2. Pull the telescopic runners from the rear
side of the wall and remove the telescopic runners.
1
Installing the telescopic runners
Install the telescopic runners in the opposite sequence.
The retaining pins on the telescopic shelf runners must point to the front!
CAUTION!
Do not clean the telescopic runners in the dishwasher. Do not lubricate the telescopic
runners.
Oven lamp
WARNING!
There is a danger of electrical shock!
23
2
Before you change the oven lamp:
• Switch off the oven.
• Remove the fuses in the fuse box or switch off the circuit breaker.
Put a cloth on the bottom of the oven for protection of the oven light and glass cover.
Replacing the oven lamp
1. You can find the lamp glass cover at the back of the cavity.
Turn the lamp glass cover counterclockwise to remove it.
2. Clean the glass cover.
3. Replace the oven lamp with applicable 300°C heat-resistant oven lamp.
Use the same oven lamp type.
4. Install the glass cover.
Replacing the oven lamp:
1. You can find the lamp glass cover at the left side of the cavity.
Remove the left shelf support rail.
Page 24

Care and cleaning
24
2. Use a narrow, blunt object (e.g. a tea-
spoon) to take off the glass cover and
clean it.
3. If necessary: Replace the oven light bulb
with applicable 300°C heat-resistant
oven light bulb.
Use the same oven lamp type.
4. Install the glass cover.
5. Install the left shelf support rail.
Oven door and glass panels
To clean the oven door remove it.
CAUTION!
Be careful when you remove the door from the appliance. The door is heavy!
Removing the oven door
1. Open the oven door as far as it goes.
2. Lift up clamping levers (A) on the two
door hinges fully.
A
A
3. Close the oven door until the first posi-
tion (angle approximately 45°).
4. Hold of the oven door with one hand on
each side and pull it away from the oven
at an upwards angle.
5. Now you can remove the inner glass pan-
els and clean them.
To install the door follow the procedure
in reverse.
CAUTION!
Be careful with the glass, it can break.
The oven door has 2, 3 or 4 panels of glass (depends on the model)
Put the oven door with the outer side down on a soft and level surface to prevent scratches
45°
Page 25

What to do if…
25
Removing and cleaning the door glasses
1. Hold the door trim (B) on the top edge
of the door at the two sides and push inwards to release the clip seal.
B
2. Pull the door trim to the front to remove
it.
3. Hold the door glass panels on their top edge one by one and pull them upwards out
of the guide
4. Clean the door glass panels.
To install panels follow the procedure in reverse. Insert the smaller panel first, then
the larger.
WHAT TO DO IF…
WARNING!
Refer to "Safety information" chapter.
Problem Possible cause Solution
The oven does not heat up. The appliance is switched off. Switch on the appliance.
The oven does not heat up. The clock is not set. Set the clock. Refer to "Setting
The oven does not heat up. The necessary settings are not
The oven does not heat up. The automatic cut-out is
The oven does not heat up. The fuse is released. Make sure, if the fuse is the
set.
switched on.
the clock".
Make sure, the settings are cor-
rect.
Refer to „Automatic cut-out“.
cause for the malfunction. If
the fuse releases again and
again, refer to an authorized
electrician.
Page 26

Installation
26
Problem Possible cause Solution
The oven lamp does not operate.
The display shows C1. You want to start the pyrolytic
The display shows F11. • There is a short circuit of
The display shows F2. • The door is not closed cor-
The display shows an error
code that is not in this list.
The turn spit does not rotate. The necessary oven function is
The turn spit does not rotate. The turn spit is not correctly in-
The oven lamp is defective. Replace the oven lamp.
cleaning but you did not remove the shelf rails (or telescopic shelf rails).
the meat probe.
• The meat probe plug is not
correctly installed into the
meat probe socket.
rectly.
• The door lock is defect.
There is an electronic fault. • Switch off the appliance
not set.
stalled into the turnspit hole.
Remove the shelf rails (or telescopic shelf rails) from the
oven.
Install the meat probe plug as
far as possible.
• Close the door correctly.
• Switch off the appliance
with the house fuse or the
safety switch in the fuse
box and switch it on again.
• If the display shows F2
again, refer to the Customer Care Department.
with the house fuse or the
safety switch in the fuse
box and switch it on again.
• If the display shows the error code again, refer to the
Customer Care Department.
Refer to "Oven functions".
Refer to "Turn spit".
If you cannot find a solution to the problem yourself, contact your dealer or the service
centre.
The necessary data for the service centre is on the rating plate. The rating plate is on the
front frame of the oven cavity.
We recommend that you write the data here:
Model (MOD.) .........................................
Product number (PNC) .........................................
Serial number (S.N.) .........................................
INSTALLATION
WARNING!
Refer to "Safety information" chapter.
Page 27

The built-in unit must meet the stability requirements of DIN 68930.
2
200 cm
541
560 min.
590
20
530 min.
546
584
10
Installation
114
594
10
27
550 min.
30
max. R1200 mm
140
130
567
21
594
alternativ 100
H05VV-F
H05RR-F
min. 1600 mm
Page 28

Environment concerns
28
2x3,5x25
90
º
ENVIRONMENT CONCERNS
The symbol on the product or on its packaging indicates that this product may not
be treated as household waste. Instead it should be taken to the appropriate collection
point for the recycling of electrical and electronic equipment. By ensuring this product is
disposed of correctly, you will help prevent potential negative consequences for the
environment and human health, which could otherwise be caused by inappropriate
waste handling of this product. For more detailed information about recycling of this
product, please contact your local council, your household waste disposal service or the
shop where you purchased the product.
Packaging material
The packaging material is environmentally-friendly and recyclable. Plastic parts are
marked with international abbreviations such as PE, PS, etc. Dispose of the packaging material in the containers provided for this purpose at your local waste management facility.
Page 29

GREAT BRITAIN & IRELAND - Guarantee/Customer Service
GB
IE GREAT BRITAIN & IRELAND - GUARANTEE/CUSTOMER
SERVICE
Standard guarantee conditions
We, Electrolux, undertake that if within 12 months of the date of the purchase this Electrolux appliance or any part thereof is proved to be defective by reason only of faulty
workmanship or materials, we will, at our option repair or replace the same FREE OF
CHARGE for labour, materials or carriage on condition that:
• Appliance has been correctly installed and used only on the electricity supply stated
on the rating plate.
• Appliance has been used for normal domestic purposes only, in accordance with manufacturer's instructions.
• Appliance hasn't been serviced, maintained, repaired, taken apart or tampered with by
person not authorised by us.
• Electrolux Service Force Centre must undertake all service work under this guarantee
• Any appliance or defective part replaced shall become the Company's property.
• This guarantee is in addition to your statutory and other legal rights.
Exclusions
• Damage, calls resulting from transport, improper use, neglect, light bulbs, removable
parts of glass, plastic.
• Costs for calls to put right appliance which is improperly installed, calls to appliances
outside United Kingdom.
• Appliances found to be in use within a commercial environment, plus those which are
subject to rental agreements.
• Products of Electrolux manufacturer that are not marketed by Electrolux
29
Service and Spare Parts. Please contact your local Service Force Centre: 08445 616
616 (Call will be routed to Service Force Centre covering your postcode area). For ad-
dress of local Service Force Centre and further information, please visit: www.serviceforce.co.uk Before calling out an engineer, please ensure you have read the details un-
der the heading "What to do if...". When you contact the Service Force Centre you will
need to give the following details: Your name, address and postcode, your telephone number, clear concise details of the fault, model and serial number of the appliance (found
on the rating plate), the purchase date. Please note a valid purchase receipt or guarantee
documentation is required for in guarantee service calls.
Customer Care. Please contact our Customer Care Department: Electrolux Major Appliances, Addington Way, Luton, Bedfordshire, LU4 9QQ or visit our website at www.electrolux.co.uk
Customer Care Depart-
ment,
Electrolux 08445 613 613
AEG-Electrolux 08445 611 611
Zanussi-Electrolux 08445 612 612
Tel: (Calls may be recorded for training purposes)
Page 30

30
For Customer Service in The Republic of Ireland please contact us at the address below:
Electrolux Group (Irl) Ltd, Long Mile Road, Dublin 12, Republic of Ireland
Tel: +353 (0)1 4090751, Email: service.eid@electrolux.ie
GB
European Guarantee: This appliance is guaranteed by Electrolux in each of the countries listed at the back of this user manual, for the period specified in the appliance guarantee or otherwise by law. If you move from one of these countries to another of the
countries listed, the appliance guarantee will move with you subject to the following qualifications:-
• The appliance guarantee starts from the date you first purchased the appliance which
will be evidenced by production of a valid purchase document issued by the seller of
the appliance.
• The appliance guarantee is for the same period and to the same extent for labour and
parts as exists in your new country of residence for this particular model or range of
appliances.
• The appliance guarantee is personal to the original purchaser of the appliance and can-
not be transferred to another user.
• The appliance is installed and used in accordance with instructions issued by Electro-
lux and is only used within the home, i.e. is not used for commercial purposes.
• The appliance is installed in accordance with all relevant regulations in force within
your new country of residence.
The provisions of this European Guarantee do not affect any of the rights granted to you
by law.
WWW.ELECTROLUX.COM
Albania +35 5 4 261 450 Rr. Pjeter Bogdani Nr. 7 Tirane
Belgique/België/Belgien +32 2 363 04 44 Bergensesteenweg 719, 1502 Lembeek
Česká republika +420 261302111 Budějovická 3, Praha 4, 140 21
Danmark +45 70 11 74 00 Sjællandsgade 2, 7000 Fredericia
Deutschland +49 180 32 26 622 Fürther Str. 246, 90429 Nürnberg
Eesti +37 2 66 50 030 Pärnu mnt. 153, 11624 Tallinn
España +34 902 11 63 88 Carretera M-300, Km. 29,900 Alcalá de
France 08 44 62 26 53 www.electrolux.fr
Great Britain +44 8445 616 616 Addington Way, Luton, Bedfordshire
Hellas +30 23 10 56 19 70 4, Limnou Str., 54627 Thessaloniki
Hrvatska +385 1 63 23 338 Slavonska avenija 3, 10000 Zagreb
Henares Madrid
LU4 9QQ
Page 31

31
Ireland +353 1 40 90 753 Long Mile Road Dublin 12
Italia +39 (0) 434 558500 C.so Lino Zanussi, 26 - 33080 Porcia (PN)
Latvija +371 67313626 Kr. Barona iela 130/2, LV-1012, Ri‐
Lietuva +370 5 278 06 03 Ozo 10a, LT-08200 Vilnius
Luxembourg +352 42 431 301 Rue de Bitbourg, 7, L-1273 Hamm
Magyarország +36 1 252 1773 H-1142 Budapest XIV, Erzsébet
Nederland +31 17 24 68 300 Vennootsweg 1, 2404 CG - Alphen aan
Norge +47 81 5 30 222 Risløkkvn. 2 , 0508 Oslo
Österreich +43 18 66 400 Herziggasse 9, 1230 Wien
Polska +48 22 43 47 300 ul. Kolejowa 5/7, Warszawa
Portugal +35 12 14 40 39 39 Quinta da Fonte - Edificio Gonçalves Zar-
Romania +40 21 451 20 30 Str. Garii Progresului 2, S4,
Schweiz - Suisse - Svizzera +41 62 88 99 111 Industriestrasse 10, CH-5506 Mägenwil
Slovenija +38 61 24 25 731 Gerbičeva ulica 98, 1000 Ljubljana
Slovensko +421 (02) 32141334 Electrolux Slovakia s.r.o., Electrolux Do-
Suomi www.electrolux.fi
Sverige +46 (0)771 76 76 76 Electrolux Service, S:t Göransgatan 143,
Türkiye +90 21 22 93 10 25 Tarlabaşı caddesi no : 35 Taksim
Россия +7 495 937 7837 129090 Москва, Олимпийский
Україна +380 44 586 20 60 04074 Київ, вул.Автозаводська,
ga
királyné útja 87
den Rijn
co - Q 35 -2774-518 Paço de Arcos
040671 RO
máce spotrebiče SK, Seberíniho 1, 821
03 Bratislava
S-105 45 Stockholm
İstanbul
проспект, 16, БЦ "Олимпик"
2а, БЦ "Алкон"
Page 32

www.aeg-electrolux.com/shop
892944625 - A- 062010
 Loading...