

Page 1

COMPETENCE 730 E-m
Der umschaitbare Elektro-Einbauherd
La cuisinière électrique encastrable
multi-cuisson
The Convertible Build-In Electric Cooker
AEG
Gebrauchsanweisung
Mode d’emploi
Operating Instructions
Page 2
Hello
Page 3

Contents
Safety instructions
For the installer 88
For the user 88/89
Appliance description
Features
Rrst use
Operating the switches
Precleaning the oven
Hobs
Hob user protection 92
Features
General
Operating the hobs
Variable oven
General
Fume extraction
Fleating modes
Shelf levels
Switching on and off
Oven space divider tor ail heating modes
Baking
Roasting and steaming
Flat grilling
Special preparation methods with hot air
- Menu-cooking
- Defrosting
- Bottling
90
91
91
93-96
97
98/99
100
100
101
102
103
104/105
106-108
108-110
111/112
113
114
115
Cleaning and care
Cooking area
Oven
Special accessories
What to do if ■ ■. 124
Customer services
a
<D
116-119
119-122
123
125
87
Page 4

Safety instructions
Forthe Thesafetyrequirementsobligemanufactiirerstogivetheiollowing
installer instructions:
For installation in a kitchen unit, my attached installation instructions
must be noted.
For the - Should any fractures, cracks, or other defects appear in my
user high-grade glass-ceramic oven ceiling, please immediately
stop using my oven.
For your additional safety against any subsequent switchon, remove my cooker frises or switch off the automatic
safety system. Rease notify promptly the service centre
covering your area.
88
Page 5

If you use my oven space divider, the heated oven space
divider should only be piaoed in my oven compiete (iower
part with heating eiement and cover).
Whenyou use me to prepare your food, my hobs and/orthe oven
door become hot. Therefore keep small children well away from
me.
Tlhis especially applies when you are grilling or pyrolyticaliy
cleaning my oven (if available).
Overheated fats and oils rapidly ignite. When using me to pre
pare food in fat or oil (e.g. chipped potatoes), please remain
nearby.
Do not use me to heat your room.
Take care when connecting electrical appliances to plug sockets
in the cooker vicinity. Connection leads should not come within
reach of hot hobs/cooking zones or get trapped under the hot
oven door.
To avoid damage to my glass-ceramic surface, you should not
use my cooking area as a storage area.
Do not place any hot frying pans or saucepans on the edge of
the cooking area as this can cause damage.
Never cover my cooking surface with protective toil. This can
cause damage.
The glowing red heat of my cooking zones can shine out over the
edge of the marked zone, according to the angle at which you
look at it.
My glass-ceramic cooking area (where featured) is extremely
resistant, though not unbreakable. It may be damaged by any
sharp or hard objects falling on to the cooking surface.
Should any fractures, cracks, or other defects appear, I must be
separated from the mains supply by the device required on the
fixed wiring side. Before doing so, please switch my 4 hob
switches to 0.
Never line my oven floor with aluminium foil and never place any
pan, pot etc. on my floor, since the oven enamel will otherwise be
damaged by the heat congestion caused.
Iftheovenisfitted with a cooling fan, it can happen that this conti
nues to run afterthe oven has been switched off (with all switches
in the "0” or “Off’ position). The fan can also switch itself on as a
result of residual warmth in the oven. If so, it will switch itself off
again automatically.
Fruit juices dripping from the oven sheet leave stains that you wiil
find hard to remove.
I comply with radio interference suppression specifications
EN 55014 (previously EC Directive 87/308/ECC) and as appro
priate with EN 60555 relating to the Retroactive Effect on the
Mains Supply,
89
Page 6
Appliance description
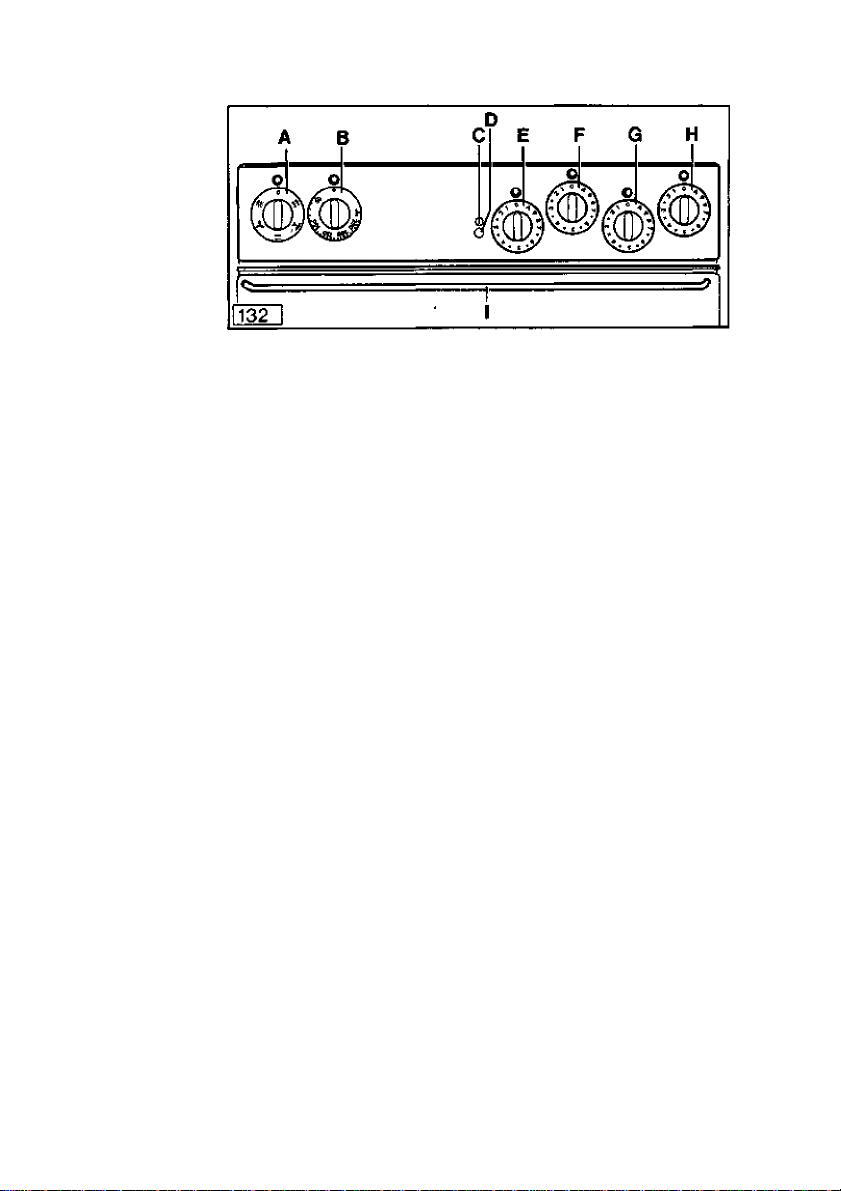
Features A Switch for oven cooking functions with pilot lamp {amber)
lights up when my oven is switched on
B Oven pilot lamp (red) lights up when my oven is heating
C Pilot lamp (red) for user protection display
D User protection button
E Switch for front LH Automatic hob, with pilot lamp (amber)
F Switch for rear LH Automatic hob, with pilot lamp (amber)
G Switch for front RH Automatic hob, with pilot lamp (amber)
H Switch for rear RH Automatic hob, with pilot lamp (amber)
I Handle for opening my oven door
90
Page 7

First use
My switch A can be turned both right and left from any position.
Further information on this feature is given in the “Hobs" and “Oven”
sections.
You must bea iittie more careful with my switch Bforthe oven tem
peratures. You can only turn it clockwise (to the right) as far as the
grilling symbol It is reset by turning to left.
The same aiso applies to my switches, E, F, G, and H for the auto
matic hobs. You can also only turn these switches clockwise (to the
right) to their fullest extent
When you switch on one of my switches, a pilot lamp (amber)
lights up above.
Before using my oven for the first time, please clean all accessories
(baking sheet, drip-pan, combination grid, etc.) with warm
washing-up liquid suds. Then switch my heating mode switch to the
top and bottom heat symbol § and my temperature switch to
250°C and thus operate my empty oven with the door closed if
possible for 1 hour.
The odour occurring is noi harmfui to the health. To avoid any nuis
ance, you should ventilate your room well during this time.
When I have cooled down, please also dean my oven with warm
washing-up liquid suds.
Operating
the switches
Precleaning
the
oven
91
Page 8
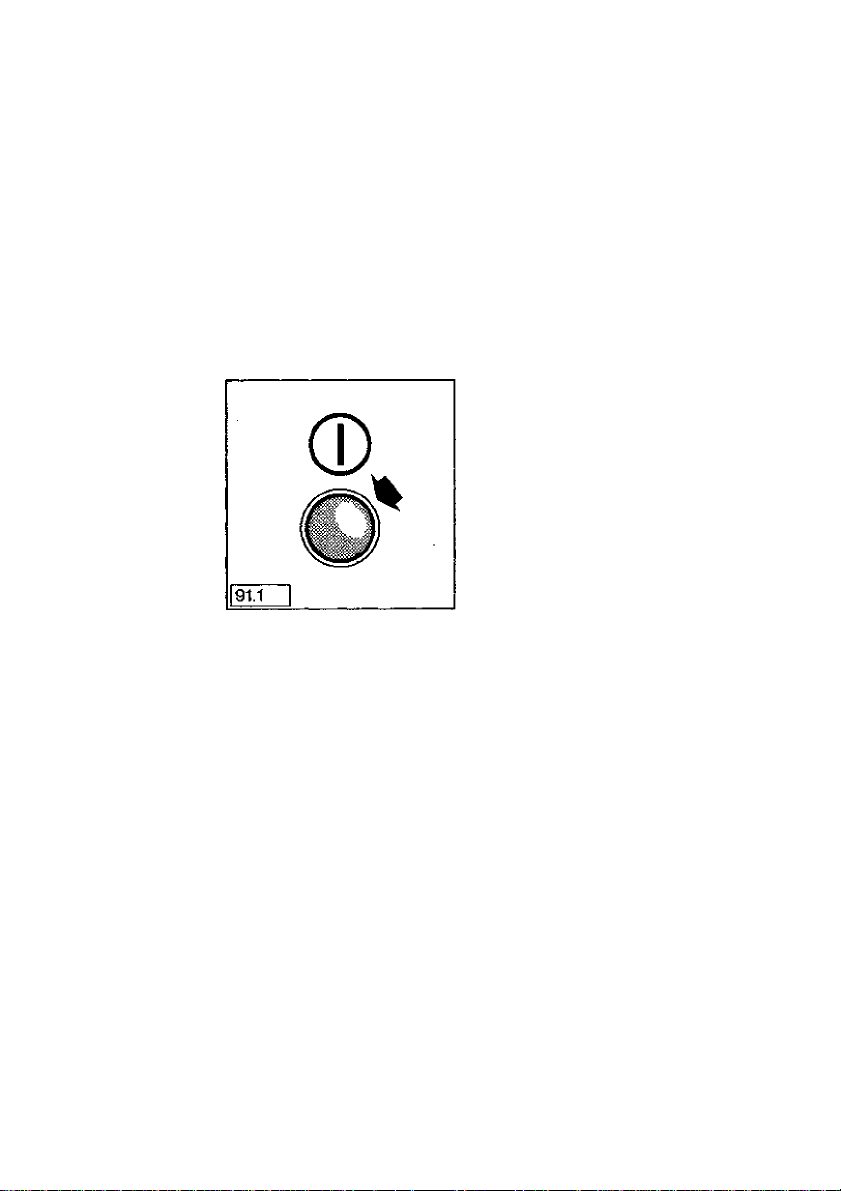
Hob user TTie user protection feature is intended to protect my hobs
protection against any unauthorized use (child safety through two inde
pendent operations).
3 houi^ after the last operation of a hob switch, all hobs are
automatically pitched off.
Switching Owing to the safety precautions noted, please proceed as fbl-
on hobs lows when using my hobs:
- Press user protection button. Red pilot (amp comes on,
- Switch on required hob(s) immediately thereafter.
Important: If you should ever accidentally not keep to the sequence
of firstly pressing the user protection button and secondly switching
on the hob, please turn the hob switch back to “0” and start again.
It the cooking cycle is everto last for morefhanS hours, you can turn
one of my hobs (preferably one of the ones you are not using) on and
off again quickly. This extends the cooking time by a further 3 hours.
It is best to do this after a certain time, e, g, after an hour or two.
Switching ■ When cooking is to be ended, switch my hob switch(es) to the zero
off hobs position.
92
Page 9
Hobs
Depending on the kind of cooking hob I am fitted with, you will find
different kinds 'of hotplates:
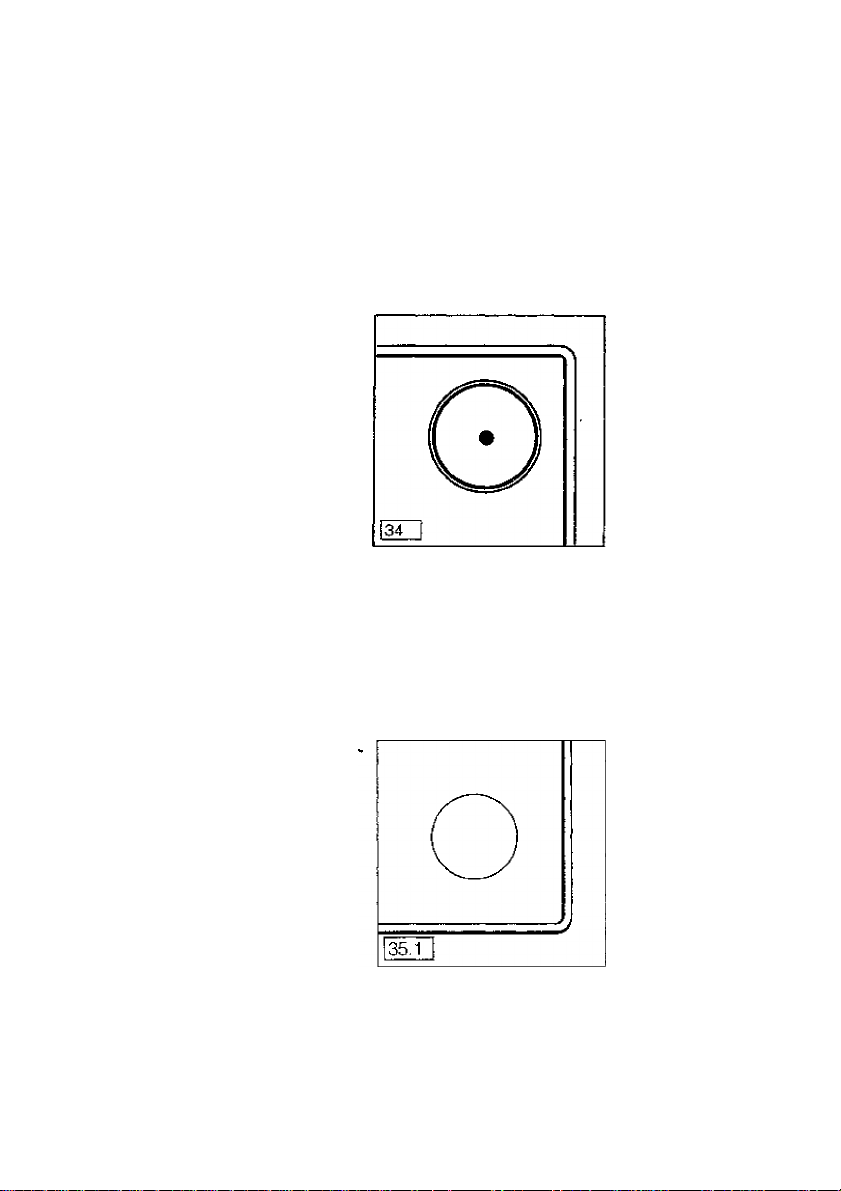
■ High-speed hob
My cast-iron hotplate differs from ordinary cast-iron hotpiates
because it is more efficient, and thus can cook more quickiy. It is
marked by a small red dot - this disappears after a short time
through being constantly warmed up and cleaned. It is adjusted in
the usual way.
The following are arranged under the extremely temperature-resis
tant glass-ceramic cooking hob according to model:
■ Single-ring cooking zones
This cooking zone is adjusted solely by means of the switches fitted
in the switch panel.
Features
QIass-ceramfc
hob
93
Page 10
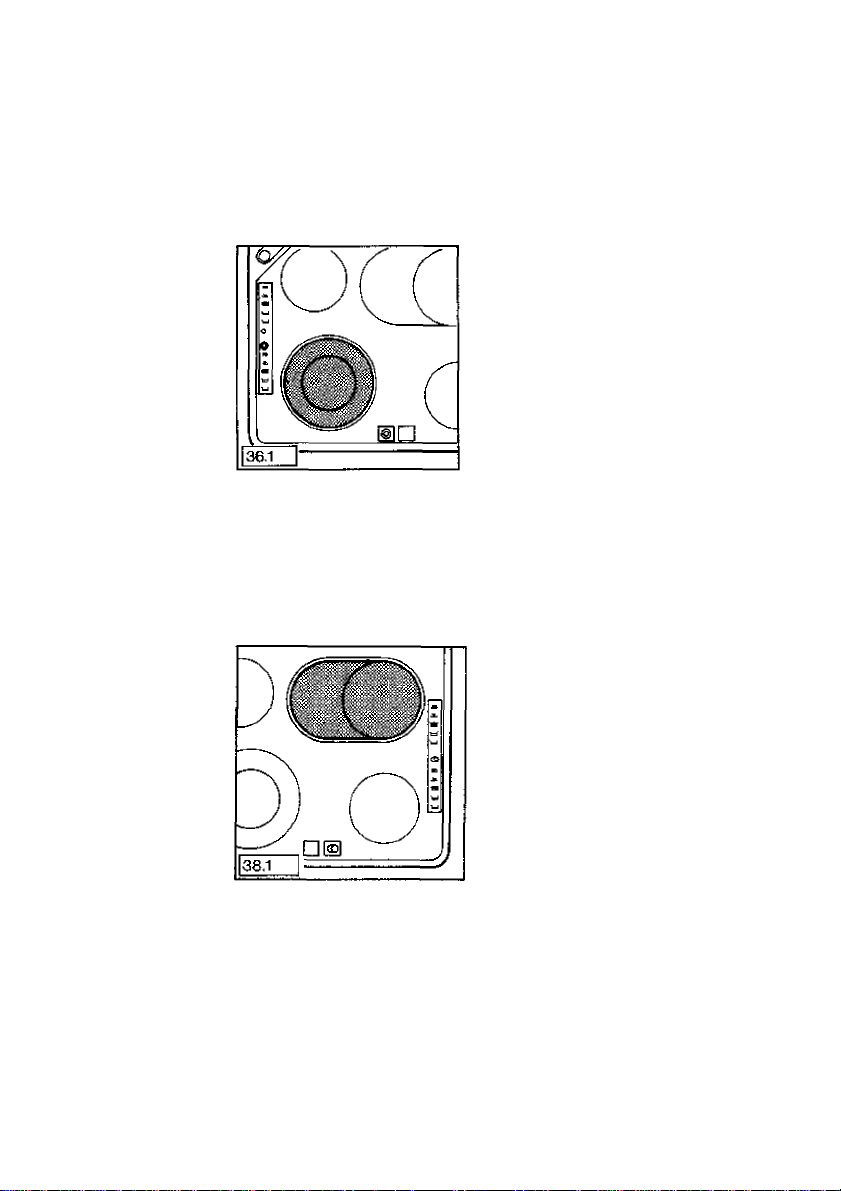
■ Double-rfng cooking zones
The second ring of the cooking zone can only be turned on when the
relevant switch on the switch panel is also on. The touch-button®
in the glass-ceramic hob is pressed lightly and the red control lamp
comeson. Both heatingcircuitsareadjustedand turned off by the
switch on the switch panel.
■ Frying zone
My heating is arranged in a circle and is controlled by the relevant
switch on the switch panel, whilethe heating for the roasting zone is
turned on by lightly touching the
ceramic hob. Both heating circuits are turned off by means of the
switch in the switch panel.
touch^rutton @ in the glass-
94
Page 11
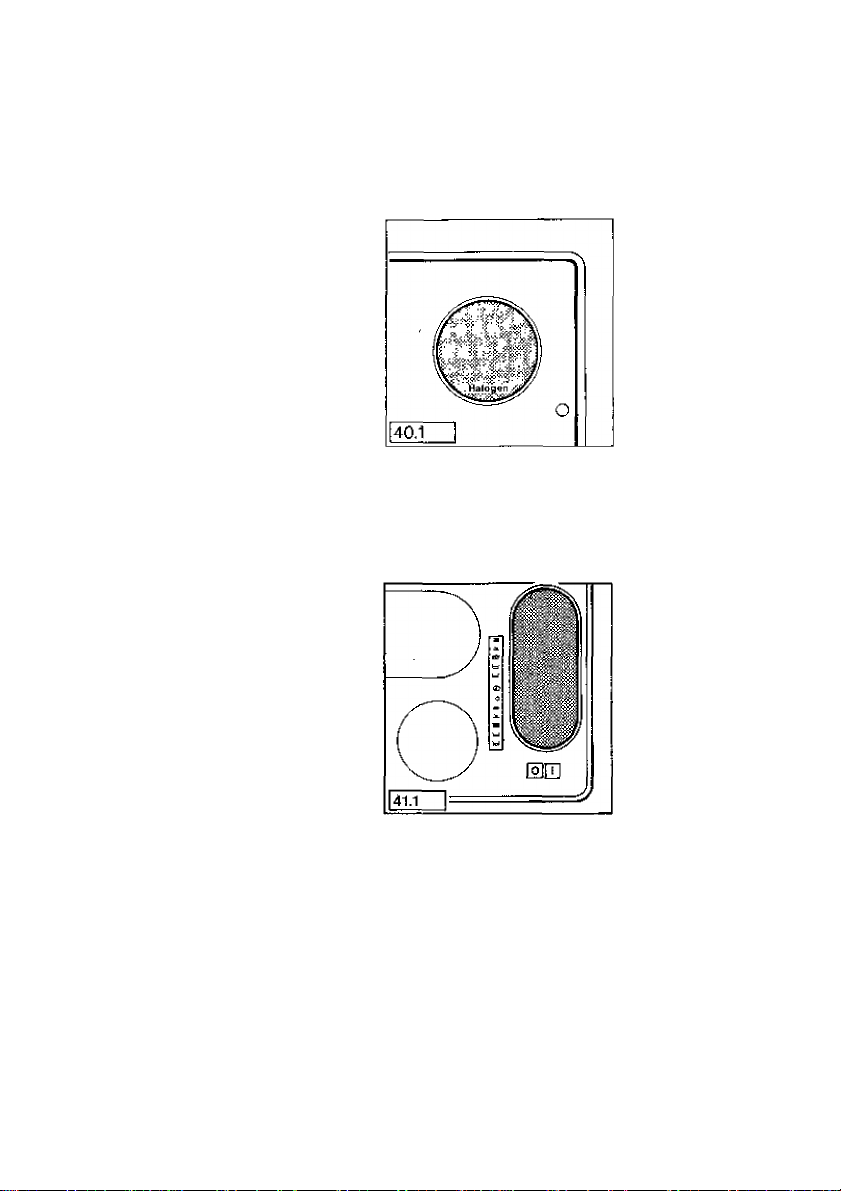
■ Halogen cooking zone
This cooking zone is heated by a special high-intensity halogen
lamp, which is controiied by the reievant switch in the switch panei.
Caution: Do not stare hard at the halogen lamps of the radiant
cooking hobs.
■ Warming zone
My zone for keeping plates or meals warm is switched on by lightly
touch i ng the touch-button [T], and switched off again by touchi ng
it again lOj.
£D
iD
95
Page 12
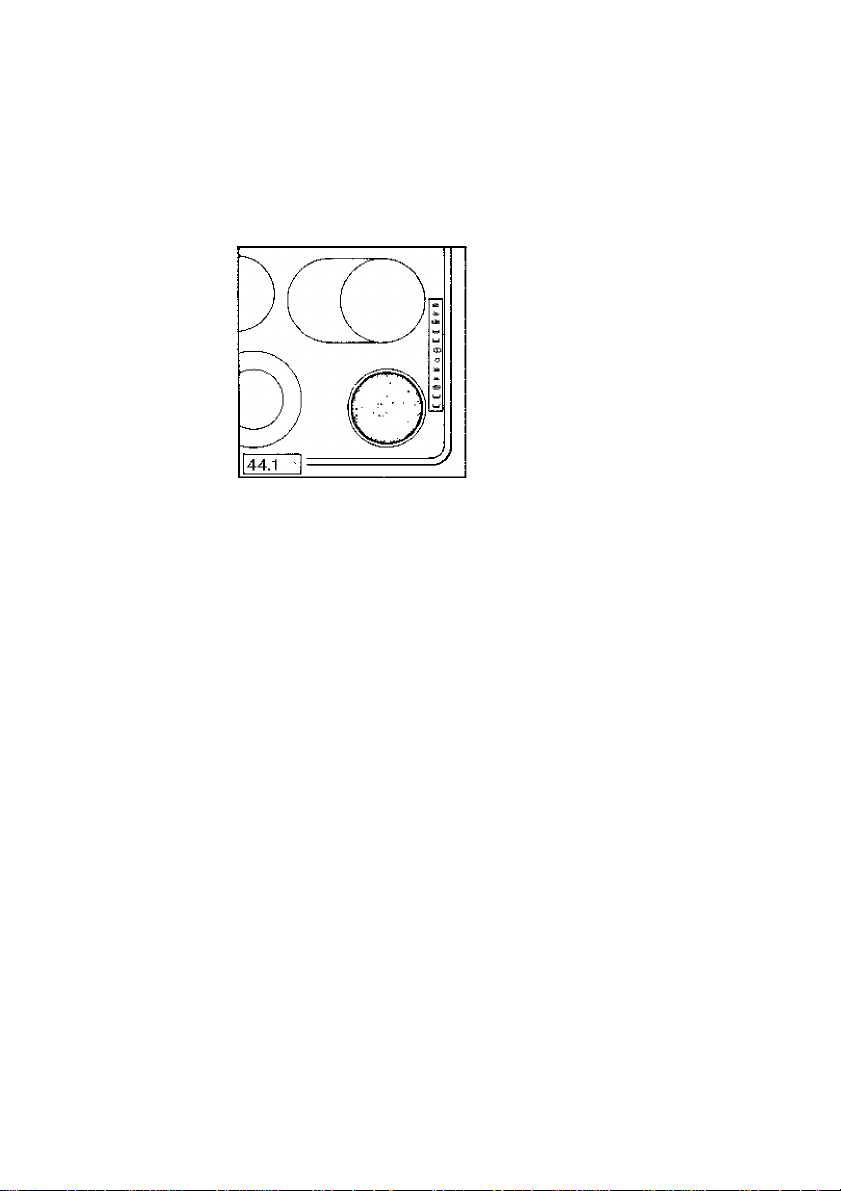
■ UsOT guidance
For each of my cooking zones there are five symbols with control
lights that show at what setting the various cooking processes can
be done.
The symbols signify:
Heating up, frying at
high temperature
viiLi Frying
Steaming/Boiling
tzT Parboiling
l=r Melting
Please also follow the table on setting the automatic cooking zones,
■ Residual heat indicator
For each of my glass-ceramic cooking zones there is a control light,
on the left orthe right in the glass-ceramic hob, which lights up if the
cooking zone is hot As soon as the cooking zone cools down the
light goes out
■ Escape of steam and fumes from the oven
The fumes from my oven can escape through the openings at the
backof myhob.You will find more details in the section onfumeout-
let from the oven.
96
Page 13
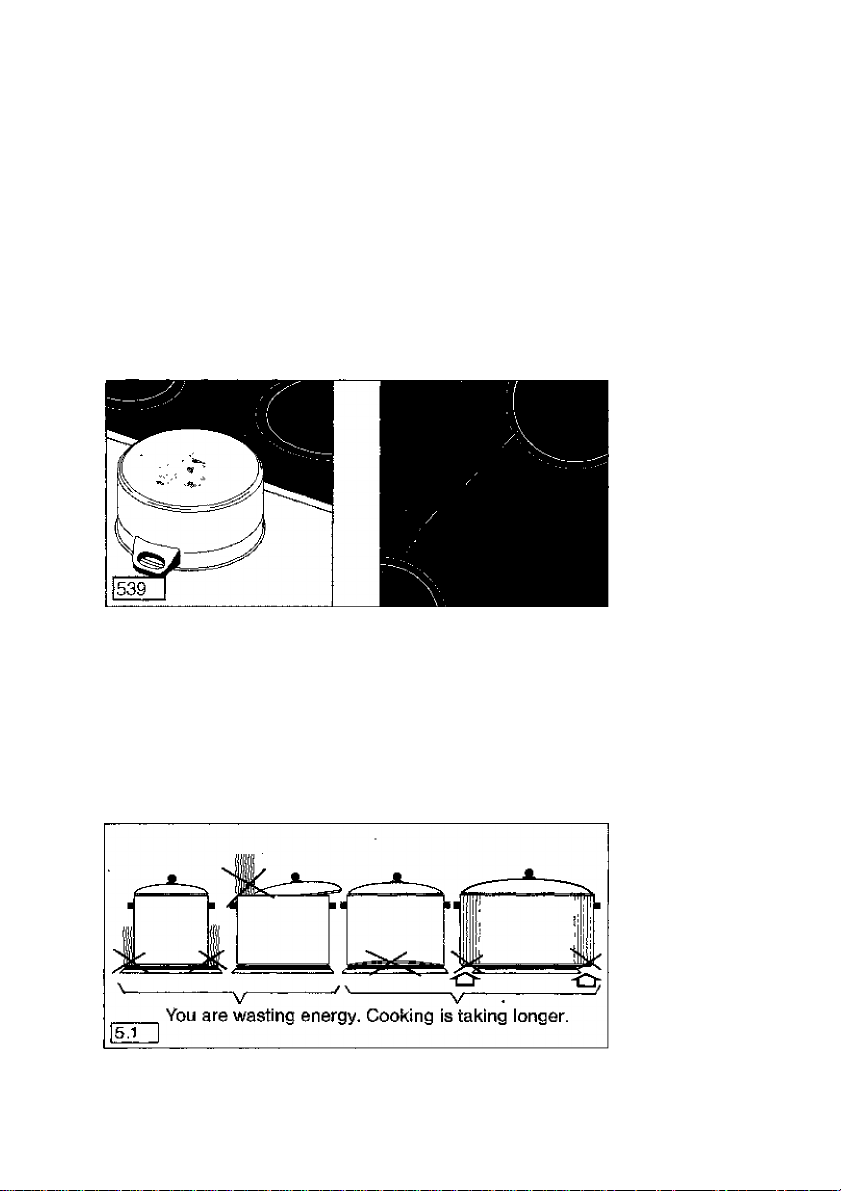
The better the pot, the better the cooking resuit,
■ You can tell good cookware by the pot bottom and not by the
material from which the pot is made.
■ The bottom should be as thick and flat as possible. It should also
not be rough {as e.g. on casMron pots), since scratches arise
when the pot is shifted.
■ Use high^ided pots for dishes requiring plenty of liquid, and
the nothing can boil over.
■ Prevent enamelled pots orfrying pans from boiling dry. Their bot
toms can be destroyed ifthishappensandthen they scratch the
cooking area when they are shifted. Pots and frying pan bottoms
with sharp edges also have a scouring effect.
■ The pot bottom and the hob must be of equal size. Please make
sure that your cookware stands in the centre of the hob.
My hobs should always be dean, since soiled hobs and cook
ware bottoms not only damage my glass-ceramic cooking area
(if available), but also increase power consumption.
Make good use of the afterheat by switching off the hob just before
cooking ends,
You waste energy and/or cooking takes longer if,..
General
- Cookware
Pot Pot lid Pot bottom Pot too large
too small not closed uneven (glass-ceramic)
97
Page 14
Operating the
cooking zones
- beforehand
- Bolling/
frying on the
automatic hob
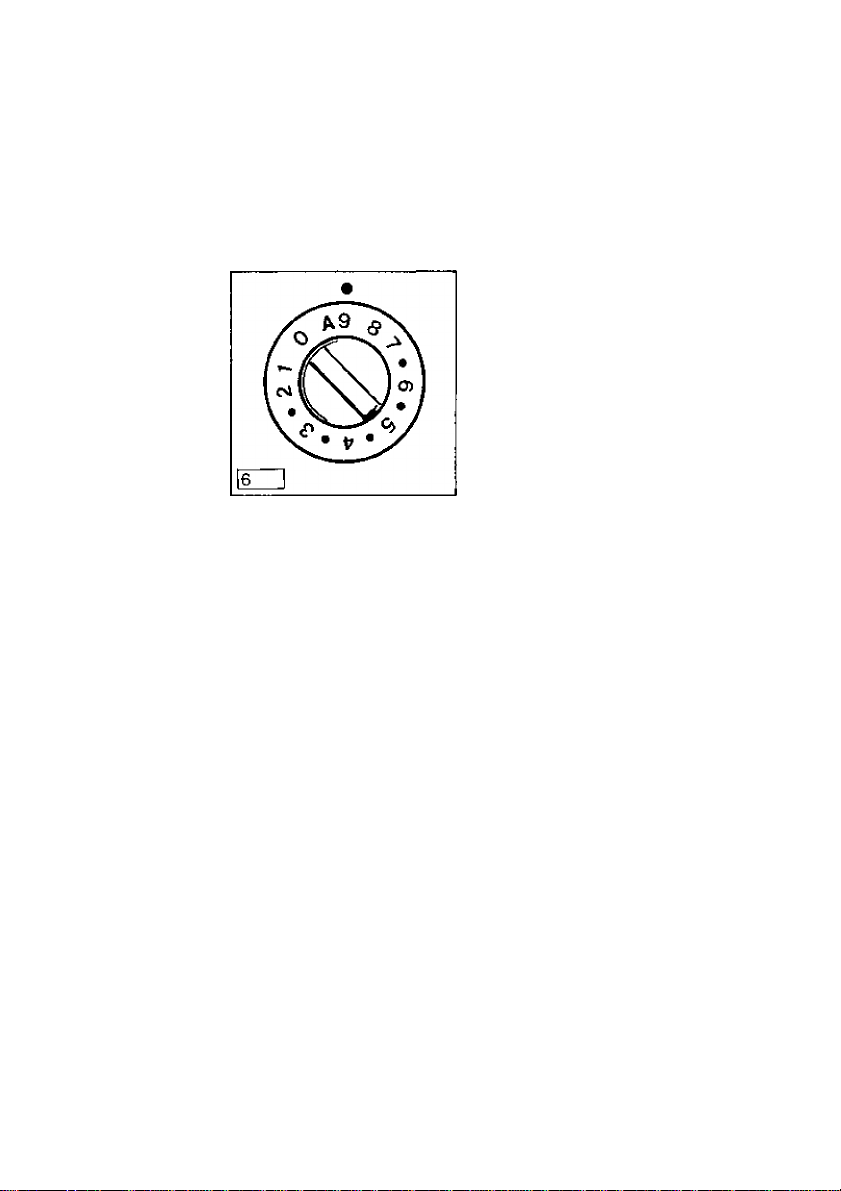
After switching on a cooking zone, you will hear me buzz. This is a
feature of my radiant heating system not inany way impair my ope
ration !
Never place food in aluminium foil or plastip containers on my hot
cooking area, since that will have an extremely detrimental effect on
the glass-ceramic cooking surface!
Without the
automatic
system
WfUithe
automatic
system
98'
You can also use my automatic hobs without the automatic system.
You should then switch me on only as far as setting 9.
When starting to fry, set the switch referringtothehobto9 until the
fat is hot. Then place thefood to be fried inthe pan andturnthe switch
back to 6 or higher as necessary.
When staitingto boil, setthe switch referring tothehobto 9,Tosim-
mer, turn the switch back to 1 to 5 as necessary.
Intermediate settings, e. g. 3 • {or * 2 only with electronic indicator),
are at all times possible.
When starting to boil within the 1-8 region (not on setting 9), my
automatic system relieves you of the need to switch overto my sim
mering level.
Tum the knob to the right as far as it will go, to LeHer A (the rele
vant pilot light comes on, but only if I have an electronic display).
When you let go of the knob, it will jump back to setting 9.
Then, turn the knob back to the required simmering level (1 to 8).
My automatic system selects for you the boiling-up time at the
start of cooking and then itself switches back the power corre
sponding to the simmering setting selected.
The automatic system and/or the hob is switched off by turning to 0,
The following table shows you examples of the suitability of switch
settings 1 to 9.
Page 15

Switch setting
tMiiS, g Boiling up
7-8 Fasl firying Deep fat frying of chipped potatoes.
, 6-7 Siow firying Frying of meat, schnitzels.
Suitable for
Boiling up iarge quantities of water.
Boiiing noodles
Fast frying of nneat, e.g. goulash.
Fritting of e.g. potatoes.
Frying fillets, steaks
Cordon Bleu, cutlets, panoakes,
meatballs. Making roux. Light frying
of sausages, liver, eggs.
Deep-frying of doughnuts
Boillng/frying
taMe for tfie
automatic hob
Cooking
4-5
HMT
3-4 Steaming
issr
trd"
Creeing
2-3
1-2 MeWng
T=r
only with induction hobs
Cooking large quantities of food,
single-portion meals and soups.
Steaming of potatoes. Making gravy
Steaming of vegetables or stewing
of meat. Making rice pudding
Creeing of rice and milk puddings
(stir occasionally)^*.
Steaming of small quantities of
potatoes or vegetables.
Heating of ready meals
Omelette, custard, sauce hollandaise.
Keeping food warm. Melting of butter,
chocolate, gelatine
Afterheat, off-position
99
Page 16
Oven
General
' Fume
outlet
Before using for the first time, please note the section describing
precieaning of the oven.
You can operate my oven with either traditional top and bottom heat,
hot air, or in two (three) griliing modes, exactly as you wish and
according to your recipe, since I have the practical type of conver
tible oven. You will find more detailed instructions under the
methods of preparation and the safety instructions for the user.
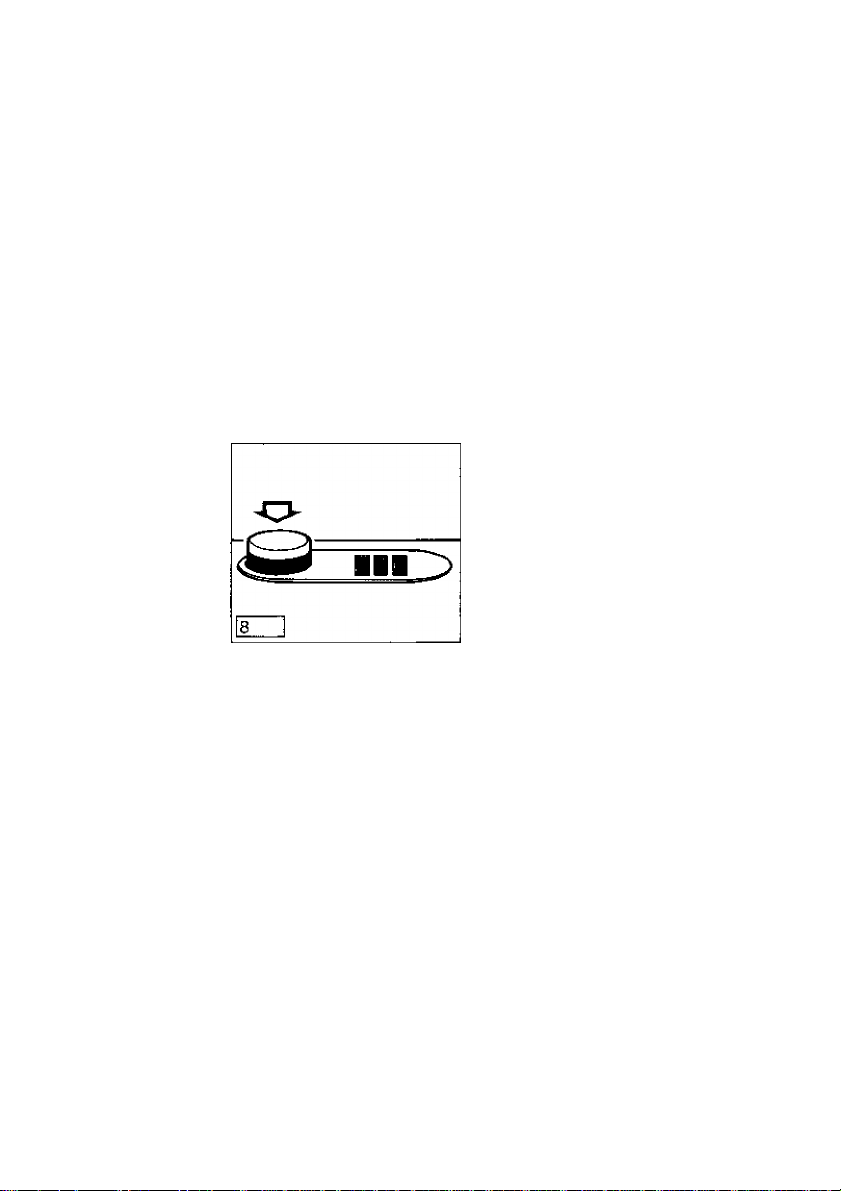
My fume outlet in the cooking area (see illustration) can be opened
or closed with the push-button. Please press my push-button only
when the hobs are not operational to exclude the possibility of burn
ing, Should you operate my push-button when the hobs are hot,
however, we recommend you to use an'object such as e. g. a cook
ing spoon to open or close.
100
*niis enables you to control the humidity in my oven during bak
ing or roasting and thus save yourseif energy or even the need
to add water.
Closed: Push-button released, red edge visible
Open: Push-button pressed
During preheating and during the first third of the time when baking
bread or breadrolls, you can close my fume outlet to obtain better
rising and browning.
During roasting, you should also keep myfume outlet dosed, unless
you want to achieve a crispy meat surface, as e. g. during the grilling
of poultry.
Please follow the tables on baking and/or roasting.
Page 17

My cooking function options: - Cooking
functions
Top and bottom heat
In this mode, the heat uniformly radiates from above and below.
Your roastturns out crisp and succulent. You should always roast
or bake only at one level, however, to ensure uniform application
of heat.
Hot air
___
A fan ensures oonfinuous oirculafion of uniformly hot air. Your
cake receives heat the same intensity of heat from all sides,
enabling you to roast, bake, and stew at three levels.
You save time and also power owing to the low temperatures
used.
Infratherm grilling
The grill combination and hot air are together in action!
Tbis enables you to grill or roast larger joints of meat and poultry
at one level. This cooking function Is also ideal for "au gratin’’
cooking and crisping-over.
Flat grilling
The grill attachment is fully utilized in this mode, e.g. for succulent
steaks and schnitzels or for slices of halibut and salmon.
Double-circuit grill
Use my large grilling area@ for high-speed grilling ortoasting of
larger quantities.
For smaller quantities, e. g. grilled steaks or possibly 4 slices of
toast, it is sufficient to switch on my small grilling area {economy
grill) B.
101
Page 18
- Shelf
levels
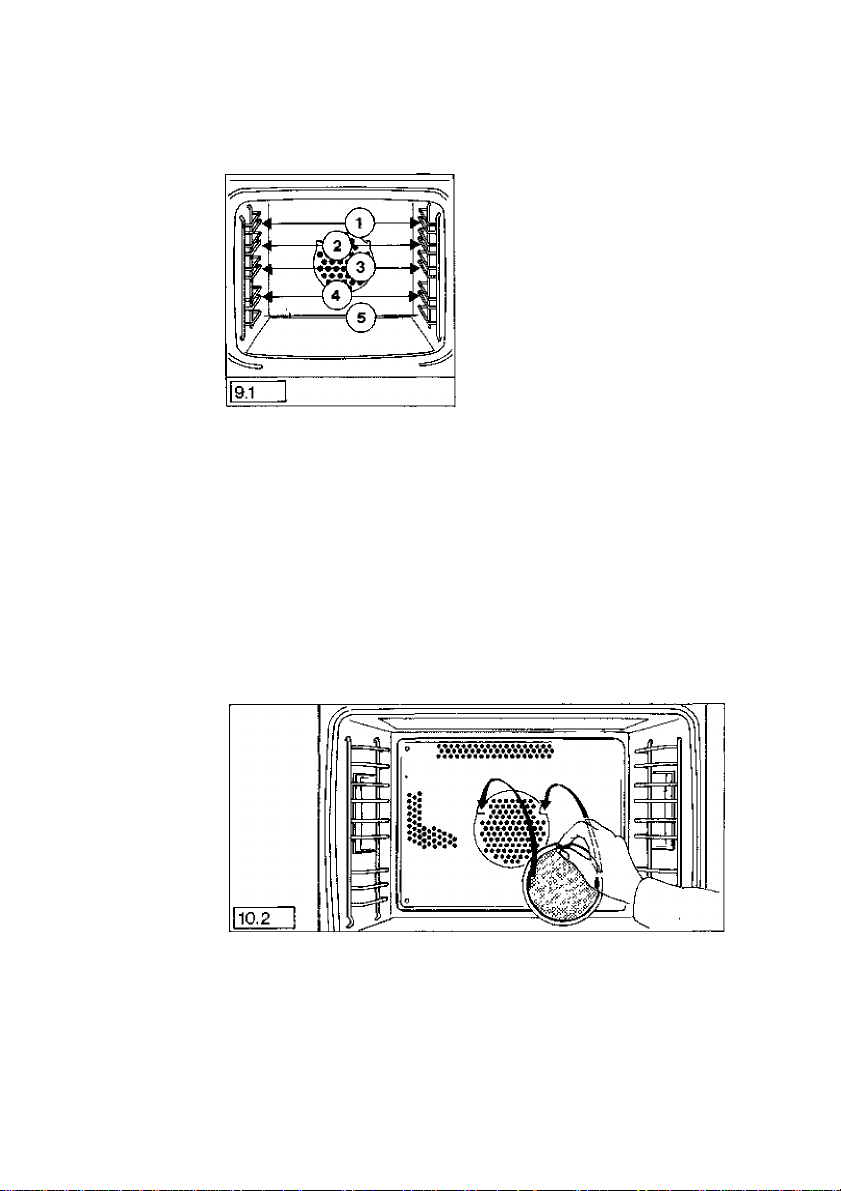
Both sides of my oven have a shelf level grid. These grids can take a
grid, drip-pan, or baking sheet at 5 levels.
- Grease filter
Inserting
grease filter
The grease filter supplied protects my fan against soiling. It must
always be inserted when
- I am heated by hot air and meat is being roasted in un
covered pans or on the grid (i.e. do not insert when baking!),
- during infratherm grilling in the drip-pan or grilling in an
uncovered pan.
Hold the grease filter by the grip and insert both retaining rings (see
illustrations) from above downwards into the openings on the oven
rear wall.
Make sure that the grease filter exactly closes the opening.
cci
<3
102
§
Page 19
Switch my oven off before you start cleaning it, i.e. all switdies
for the oven have to be at tfie “0” or "Off” position.
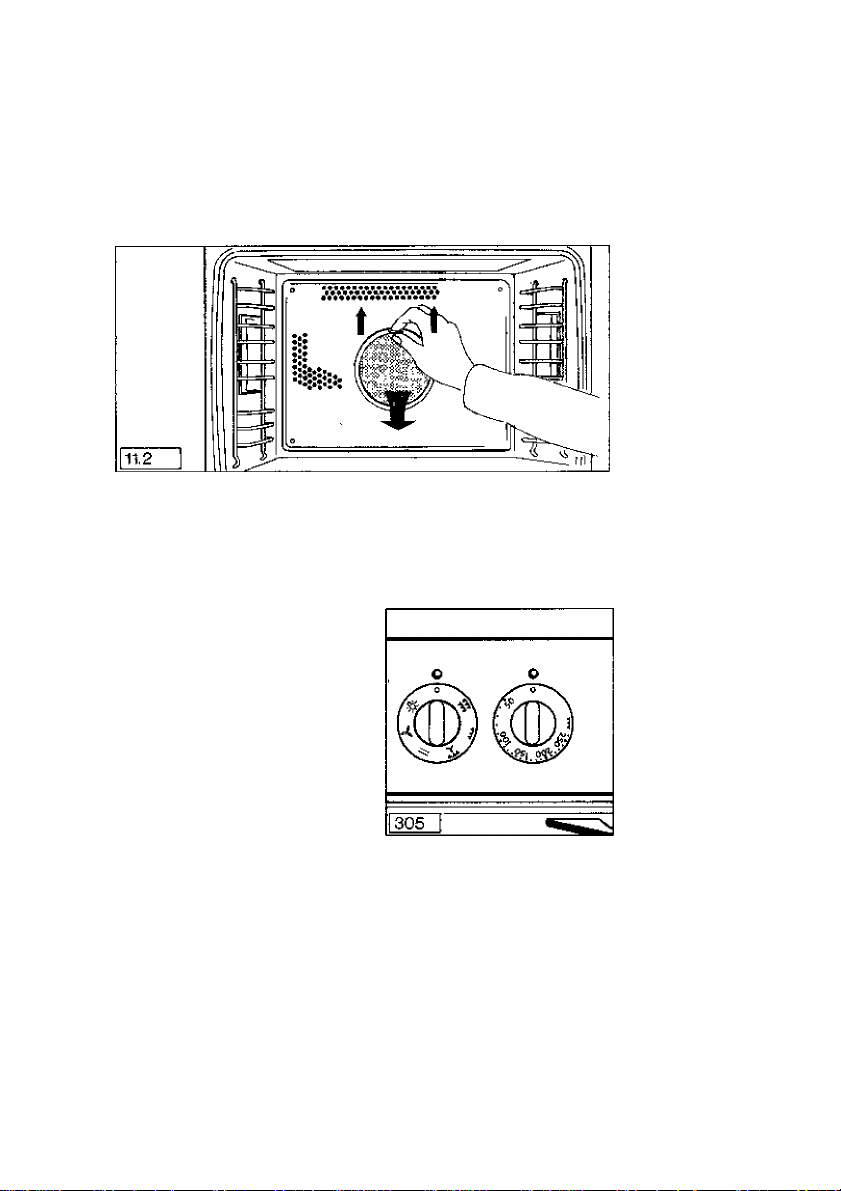
The grease filter has to be cleaned as and when necessary. To do
this, take hold of it by the handle and puli it out upwards from the
back wall of the oven.
Boil it briefly in the same cleaning product as you use in the dish
washing machine, or with soft soap. Fit it back in-but not until it is
dry - from on top into the openings in the rear wall of the oven.
Cleaning the
grease filter
— Switching on and off
First decide with which heating modeyouwanttouse my oven. Then
set my switches - heating modes - to the corresponding symbol
e.g. É for hot air. Then turn my oven temperature switch to the
necessarytemperature. Turn this switch to the right to a higher tem
perature. The red pilot lamp shows as long as the oven is being heat
ed and goes out as soon asthesettemperature is atta! ned. It comes
back on when the oven is being reheated.
If you preheat my oven (see corresponding note in the Tables), do
not insert the food to be baked/roasted until the red pilot lamp first
goes out. To utilize the afterheat, you should switch off my oven
around 5-10 minutes before the end of the baking/roasting time.
To do this, turn my oven temperature switch to the left to the Off
position and the heating mode switch to 0.
103
Page 20
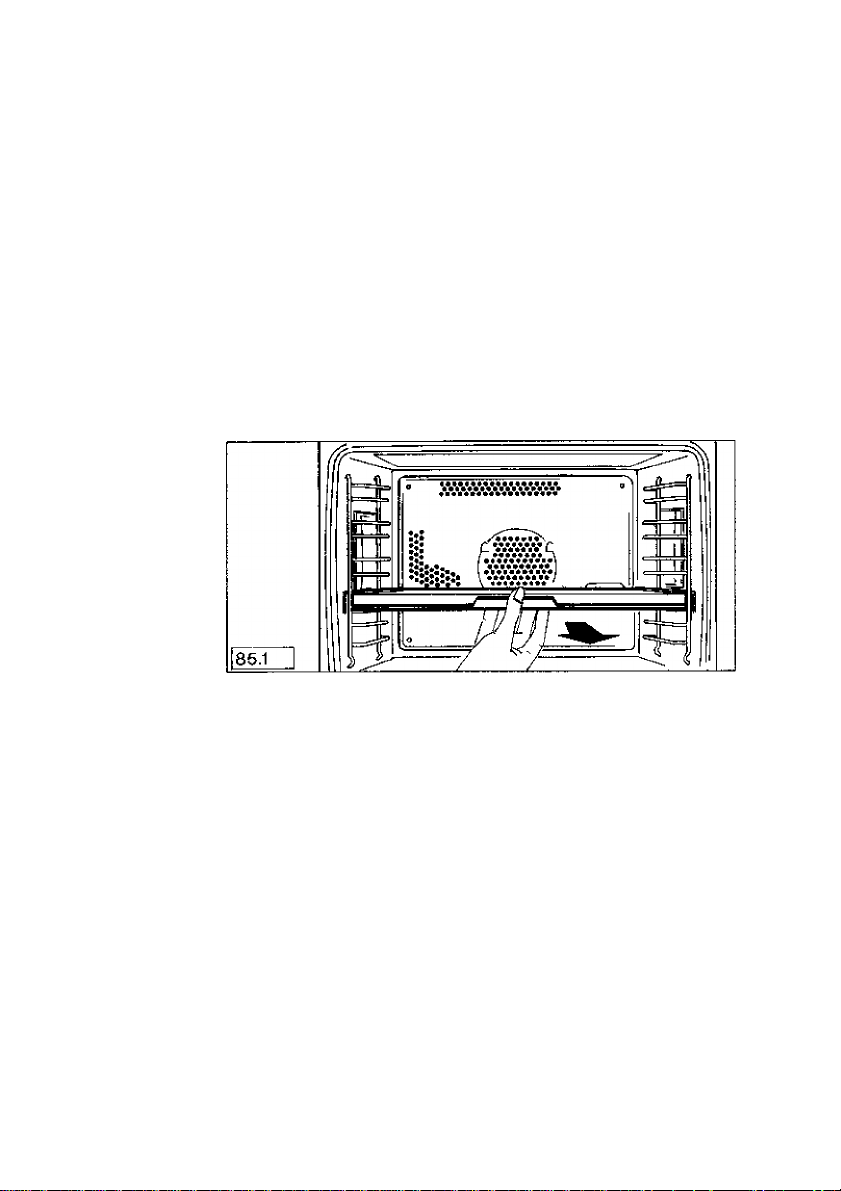
Oven space My oven size (with oven space divider) is arranged for everyday
divider use.
This means that you can roast joints or poultry up to a size of around
2 kg and bake at max. 2 levels.
When you use me in this way, you make the following savings in
comparison with conventional ovens:
Energy, and my cleaning is also easier fr»* you, since you can
detach the cover of my heated oven space dhnder for cleaning.
While you are cooking in my upper oven, you can use die lower
part for warming of crockery or for the storage of unused acces
sories.
The oven space divider can be inserted in all operation modes!
104
If you are roasting large joints or poultry - such as a goose or
turkey - or baking at 3 levels, detach my heated oven space
divider to enlarge my oven.
Page 21
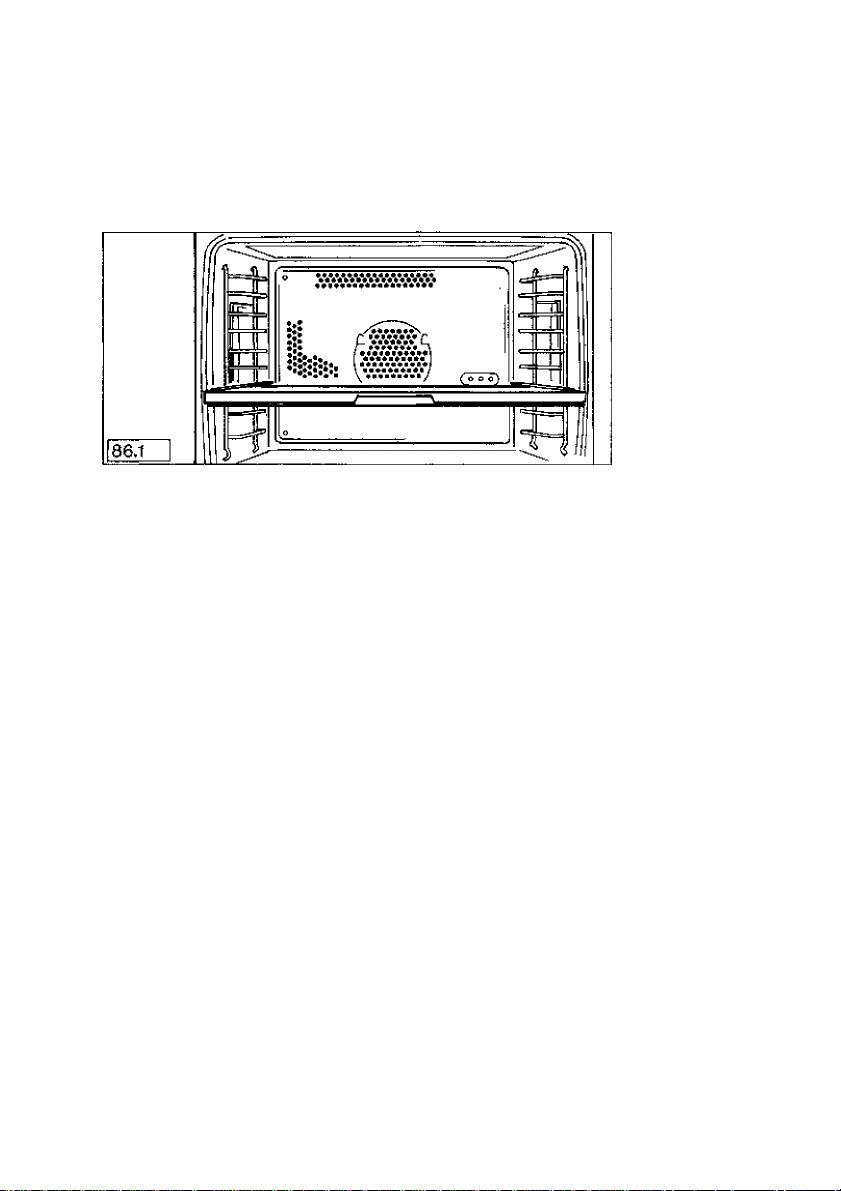
If you remove my heated oven space divider to enlarge my oven or
for cleaning, set my cooking function switch and oven tempera
ture switch to 0 and the Off position respectiveiy. To remove my
oven space divider, slightly liftthis forward (front side of oven) and
at the same time puii it fdrwards out of my oven!
To remove.,
the oven space
space divider
For your safety, my plug socket on the oven back panel is automati
cally closed when you take out the heated oven space divider.
Important: Never insert my heaited oven space divider without a
cover!
When inserting it, make sure that the oven space divider is
pushed right in!
(5
You should
also be aware
of the
following
105
Page 22

Baking
- with top/
bottom heat
g
Bakeware:
You can use me to bake cakes either in baking forms or on bak
ing sheets. The material from which the bakeware is made is
extremely important
The most important differences:
1. Black sheet baking forms, coated baking forms, or goid bak
ing forms are the best, since they absorb heat and transfer it to
the dough most rapidiy, implying foryou shorter baking times
and lower power consumption.
2. White sheet baking forms refiect the heat, i, e, they repel it.
Cakes which you bake in such forms have a longer baking
time, do not become so nicely brown, and require a longer
baking time. When baking with top/bottom heat, you should
therefore not use white sheet baking forms.
Baking at one level
Place the food to be baked at one level only, Theflatter the pastry,
the higher you should place it in my oven.
Baking times and baking temperatures
In many cases, it is not necessary to preheat me. The recom
mended temperatures and times given in the attached table are
guidance values. Deviations may possibly occur in practice.
Baking in this heating mode, I bake at several levels simultaneously -
wltti hot air quickly and economically - to save you time. I also bake different
cakes atthe same time, e, g, fruit cakes and almond cakes. You need
only make sure that the prescribed temperatures for the various
items roughly coincide.
You should also take note that more steam arises when several bak
ing sheets are inserted at any one time. This especially applies to
fruit cakes. In the case of very moist fruit, e, g. damsons, therefore
bake on only two sheets at most at any one time.
106
If the appliance has an oven space divider, only put in 1 sheet
with fniit tarts or pies.
When you are baking on several baking trays at once, please
keep an eye on the upper tray and if necessary take it out
sooner.
Page 23
Baking times and temperatures
During baking with hot air, it is also not necessary to preheat me
for most types of oakes. Exceptions are indicated in the attached
baking fable.
If you want to bake different types of cakes at the same time, the
prescribed temperatures should coincide. The baking times can
be adapted by subsequent insertion or removal of items. During
the initial period, the baking table will be of great assistance to
you.
The recommended temperatures and times given in the
attached table are guidance values. Deviations may possibly
occur in practice.
When baking several cakes on baking sheets or in forms, you
should prolong the time indicated in theJable for one sheet or
form by around 10-20 minutes.
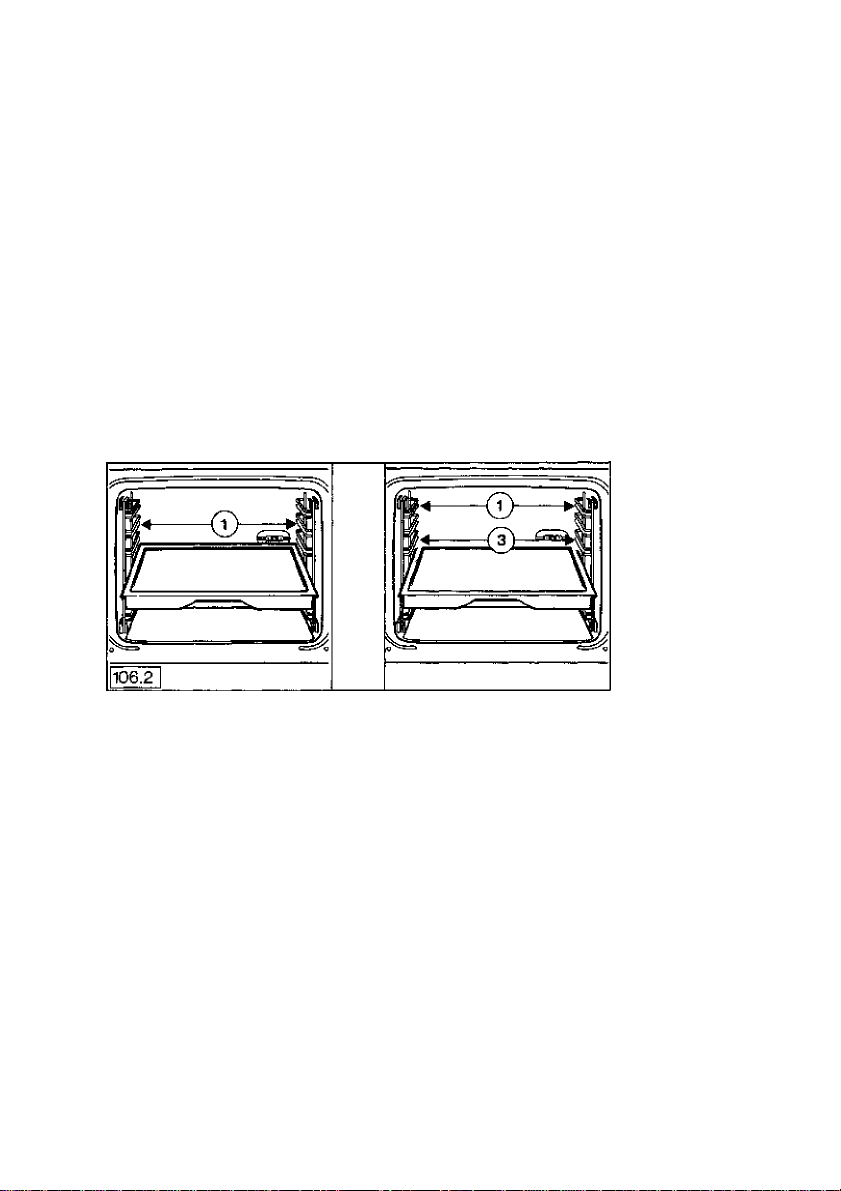
Baking at one or more levels with space divider.
In the size-reduced oven, you can simultaneously bake on2 baking
in the large oven.
107
Page 24
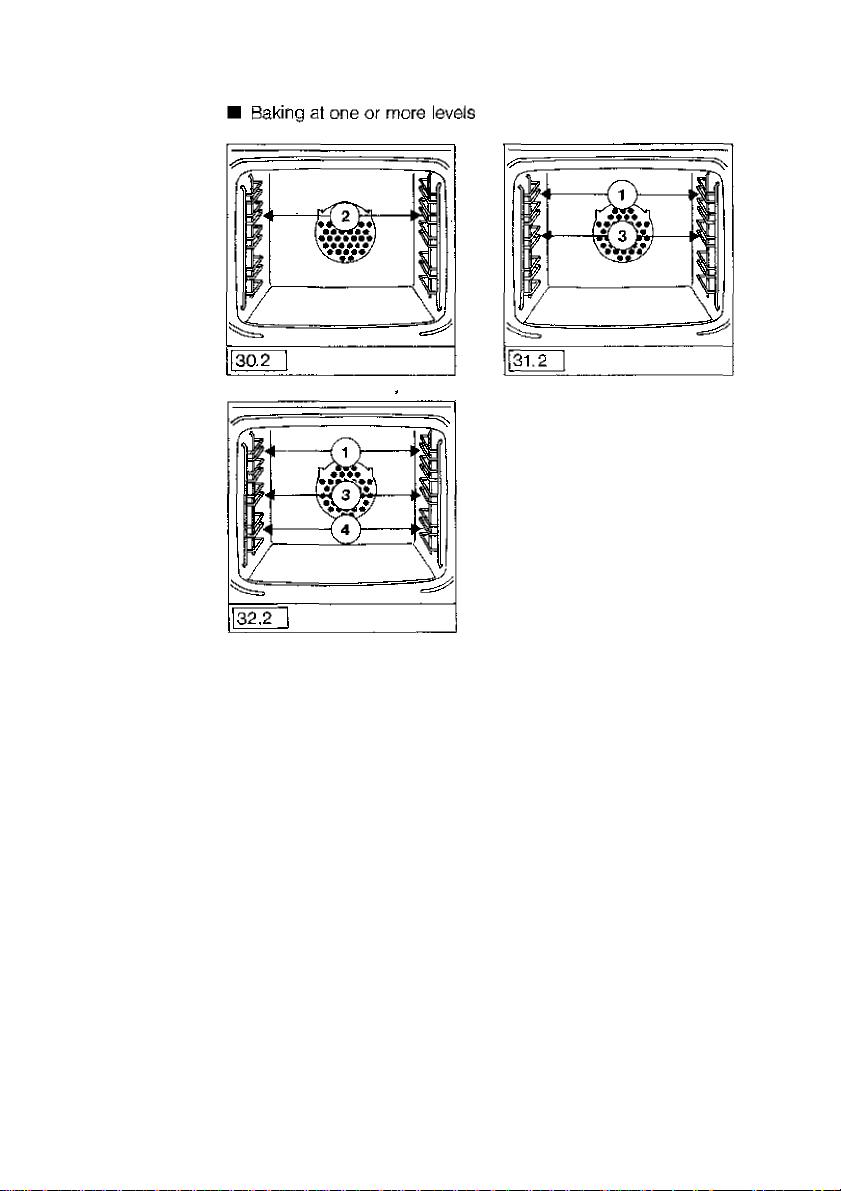
You can also simultaneously bake on 3 baking sheets.
You can obtain additional baking sheets and grids asspecial acces
sories.
Roasting
steaming
- Heating
modes
108
Please choose the most favourable heating mode from my vari
ous options:
Top/bottom heat
Hot air
Infratherm grilling
The bold type in the attached table gives you the.insertion level
and temperature indications.
s
(5
Page 25
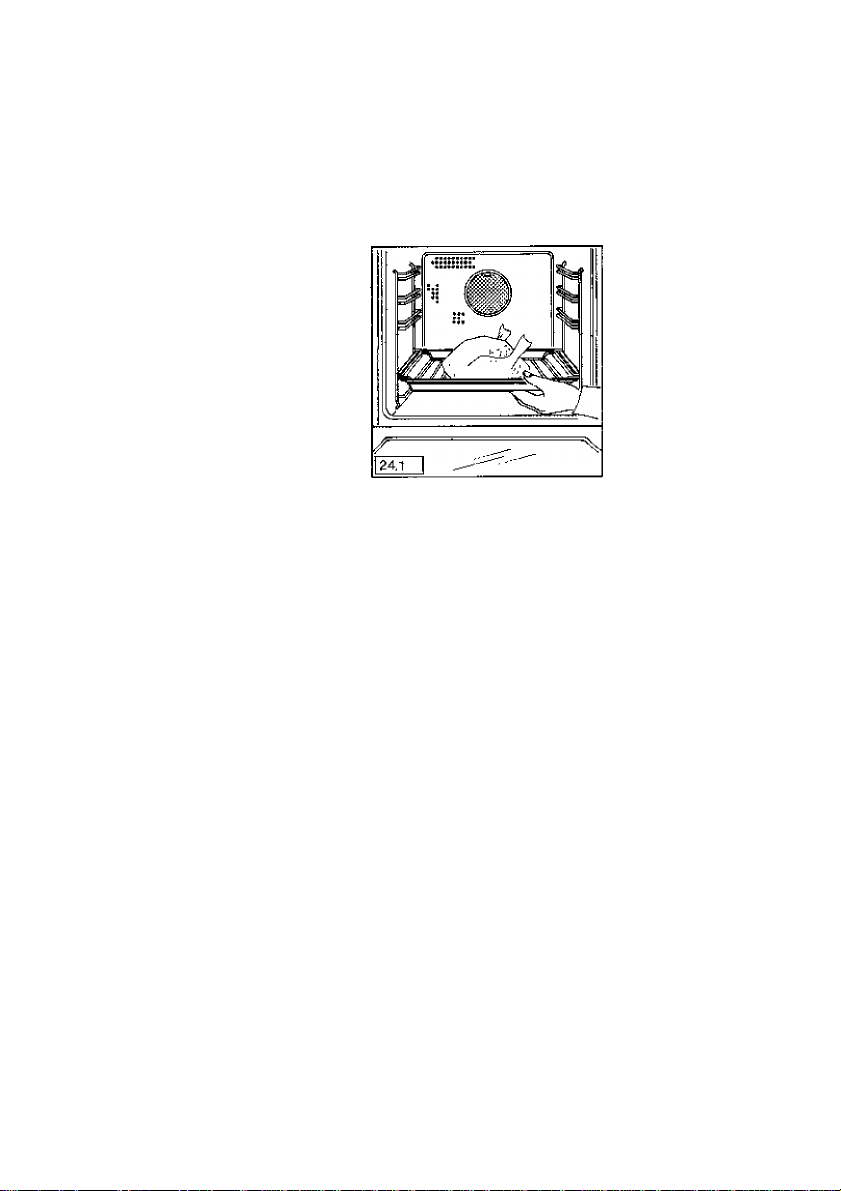
Recommend atiotis
For all heating modes, the following applies:
Meatand fish should only be roasted in theoven fromt kg weight.
When using drip-pans with a grid, liquid should be added where
necessary {e.g. during prolonged roasting times) so that dripping
fat and meat juices do not burn.
My drip-pan can be inserted with the wire grid on top of it This
makes it easier to handte. My accessories are fitted witti a speciai tipping mechanism to prevent them from being puiled out
The larger the roast which you entrust to me, the longer must the
roasting or grilling time be set. The roasting/grillingtimesdepend
on the type, quantity, and quality ot the meat, in practice, devia
tions from the indications given in the tables and recipes may
therefore arise.
So that any evaporated liquid can be supplemented, I recom
mend you during the roasting time to check your meat/fish from
time to time.
After around half the cooking time, the meat/poultry should be
turned so that it is uniformly browned right round.
&
yj
- Tempera
ture, roasting/
grilling time
109
Page 26

Ovenware Meat, poultry, and fish should be roasted in roasting pans, forms or in
mydrip-pan. Ifyouuse potsorforms, never place them on the floor of
my oven, but on the grid, which you should insert at the 2nd or 3rd
ievel from above depending on the size of the roast.
For roasting, we recommend you to use:
Dishes
Oven
un
covered
ware
covered
Drip
without
grid
■pan
with
grid
Roast pork
Roast lamb
Roast mutton
Roast veal
Roast pickled beef
Braised steak
Mince
Duck, large
Goose
Pork chops, 1-2
3-4
Chicken pieces, 1-2
3-4
Turkey
Small poultry
Roast beef
Fillet steak
Game
•
. •
•
•
•
•
•
•
•
•
•
•
•
•
•
•
•
•
110
Fish
Deep-frozen meat •
•
Page 27

You can crispí ly grill all flat pieces of meat and fish which cart also be
fried in the pan and are not heavier than 1 kg: steaks, chops, etc. You
shouid season large pieces of meat/fish shortly before grilling and
small ones shortly afterwards.
Turn the si ices of meat/fish after half the grilling time so that the slices
are uniformly grilled on both sides. You need only turn flat si ices and
pieces once; larger round pieces should be turned several times.
nease insert my drip-pan and combination grid together in my
2nd ievei from above.
Set my heating mode switch and my temperature switch to the
flat griiling svmboi W and/or
The indicated grilling times may only be guidance values, since,
precisely during grilling, the times depend on thetype and thickness
of the food to be grilled and the degree of cooking.
On appliances with a double-circuit grill you should set the grill
to grill symbol @ for small amounts and to symbol @ for larger
amounts.
Fume opening: open
You can ciean the drip-pan and grid more easiiy by soaking
my drip-pan/grid in washing-up liquid suds immediateiy after
griliing.
Preheat my oven 5 min., and always grill with the oven door
closed. You will thereby save power.
Flat grilling
Recommendaitions
111
Page 28
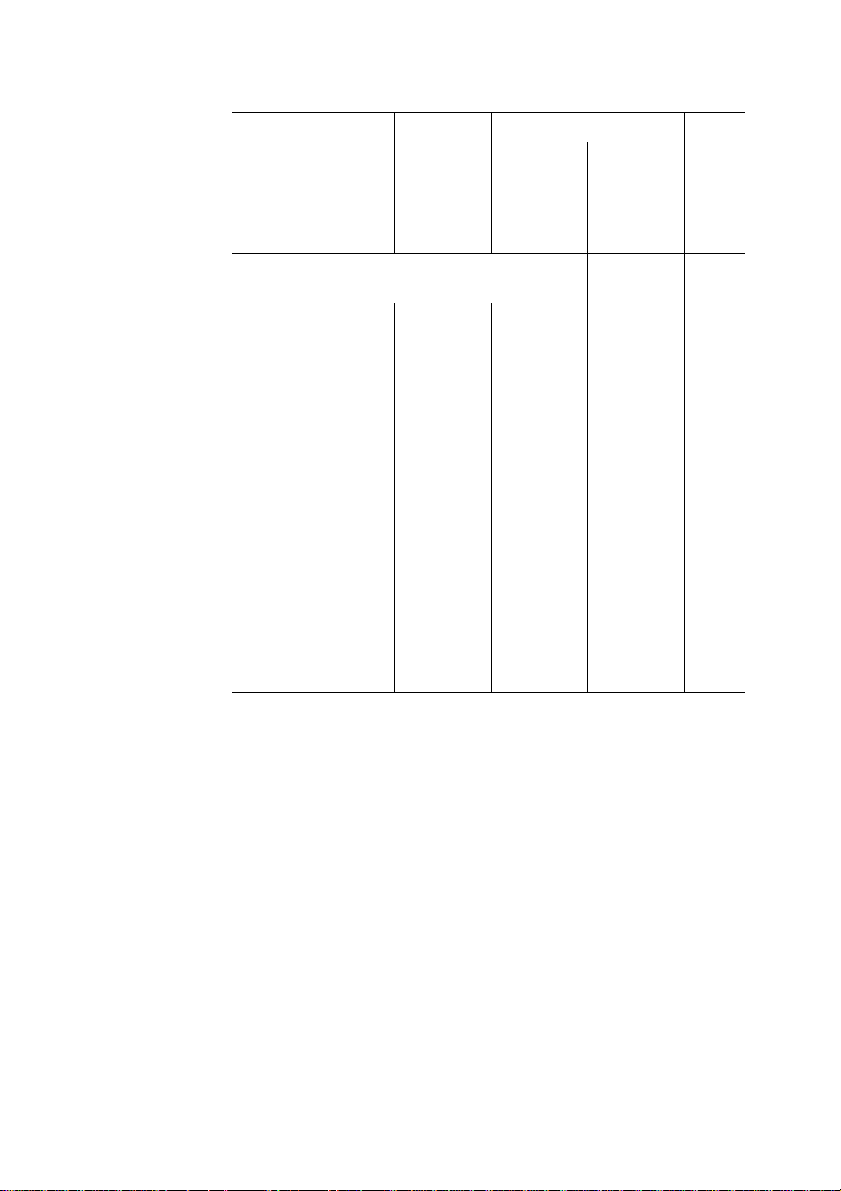
Flat grilling
table
Type/quantity Shelf Grilling time Insert
height for
drip-pan/
grid, from
above in
each case
Pork chop, pork schnitzel, meatballs,
veal schnitzel, mutton and
lamb chops 2nd
Pork fillet 2nd
Frying sausage 2nd 8-10 min.
Kebab 2nd 7- 8 min. 5- 6 min. “L_r
Fillet steaks,
veal steaks
Fillet beef,
roast beef
(around 1 kg)
Slices of liver 2nd 3- 4 min. 2- 3 min. “L_r
Chicken, halved
(around 500g each)
Fish fillet 2nd 6- 7 min. 4- 5 min.
Trouf, around
200-250 g each
Toast 2nd 2- 3 min. 2- 3 min. _I
Toasted snacks
*} Remove intermediate floor (if featured)!
2nd
2nd 10-12 min. 10-12 min.
3rd*} 10-15 min. 10-12 min.
2nd 4- 7 min. 3- 6 min.
2nd 6- 8 rhin. m—r
1st side 2nd side grid
8-10 min. 6- 8 min.
10-12 min.
6- 7 min. 5- 6 min.
inside outside
6-10 min.
6- 8 min.
“L_r
“1__T
^_r
-L_J-
m__r
----
L
112
Page 29

■ When menu cooking, please remove my oven space divider
(if available).
■ That is the truly amazing feature of my hotair oven. You can cook
a Gomplefe menu all at once. Fish, meat, and dessert in one se
quence. The fish does not taste of dessert, and the dessert does
not taste of meat. Taste and smell do not mix.
■ The dishes you want to cook should need roughly the same
cooking temperatures.
■ As soon as meat is cooked in an open vessel, please insert the
grease filter.
Baked items indicated in the table as having around 20 °C lower
temperatures can be coordinated with the meat dishes (see
attached table on baking, roasting, and steaming). Differences of
around 10 °C can be compensated by shorter or longer cooking
times.
The shelf height must be selected depending on the individual
foods to be cooked. Dishes with shortest cooking times should be
inserted above. If several forms are to be placed above each other, a
grid or drip-pan can be arbitrarily used to hold them.
- Menu
cooking
in the iargo
oven
Menu example;
Stuffed peppers with rice and
cottage cheese soufflé.
Ovenware: Fireproof forms
Shelf heights: Rice and cottage cheese soufflé
level 5 from above
Stuffed peppers
level 3 from above
Heating mode: hot air
Temperature:
Cooking time:
175-180 °C
around 1 hour
10 minutes
Afterheat: 5 minutes
Fume opening: open
113
Page 30
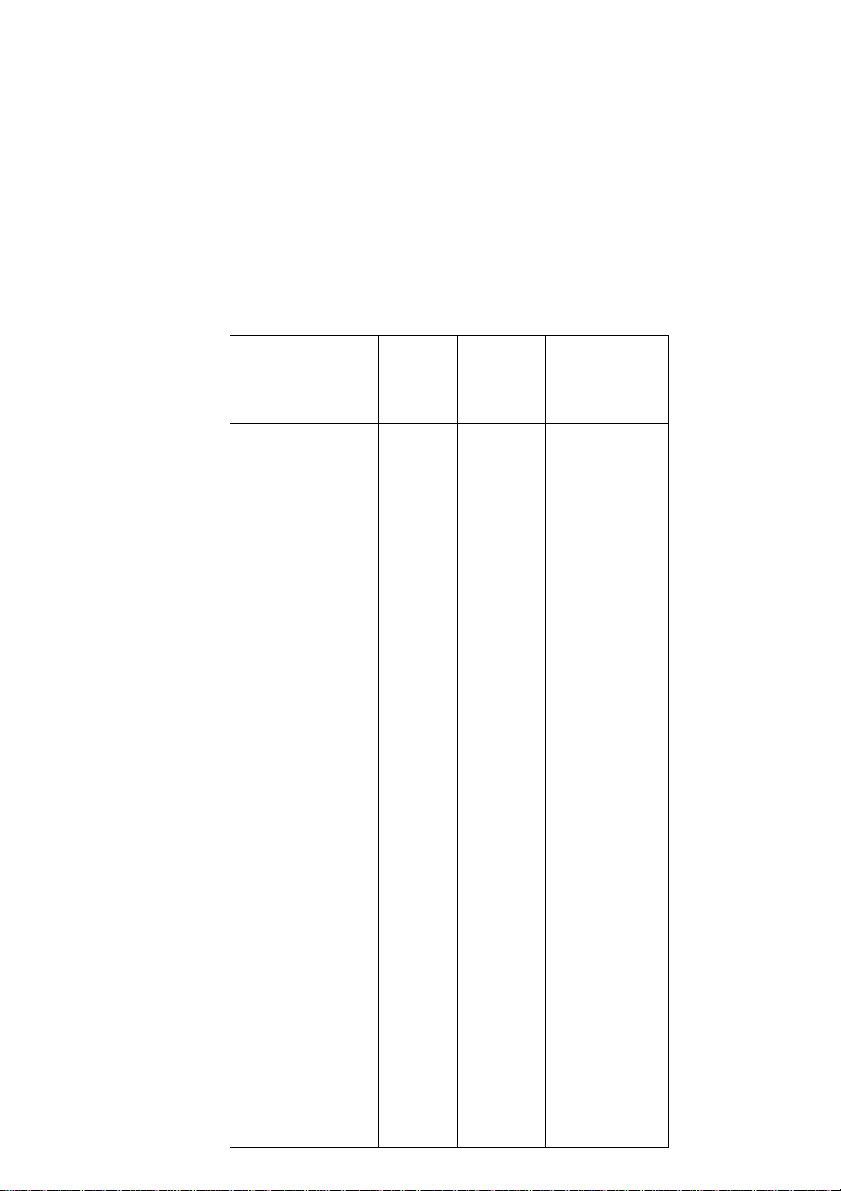
- Defrosting
Dishes inflataiuminiumcontainersdefrostespecially well, since
aluminium is a good heat conductor. For freezing and subse
quent defrosting of meat and vegetable dishes, fiat aluminium
forms should therefore be used. For defrosting of raw and deepfrozen meat and fruit, closed, fireproof forms are especially wellsuited.
As theahelf height, basically the 2nd level from above should be
used. For holding of forms and aluminium containers, the grid or
drip-pan can be used.
Defrosting
table
Type of
foodstuff
Deep-frozen
Tempe
rature
200
convenience foods
(1-4 servings)
Va Cite from sheet
200 0.15-0.20 Defrosted and
in aluminium foil
'/2 cheesecake
200
or apple tart
in aluminium toil
Bread
200
around 500 g
in aluminium toll
Breadbuns 200
Fruit,
200 0.15 and
e.g. strawberries,
raspberries in closed
glass container
Time
h/min.
0.40-0.50 Defrost and
warm to eating
temperature
ready to serve
0.30-0.45 Defrosted and
ready to serve
0.15 and
0.30
Defrosted and
ready to serve
afterheat
0.15 and
0.10
Defrosied and
ready to serve
afterheat
Defrosted and
0,15
ready to serve
afterheat
Fume
opening
open
dOS’
ed
114
Raw, frozen mast
meat (e.g, I’/ikg
roast pork)
Deep-frozen chicken,
around 1000 g
(cover with
greaseproof paper)
180-200 2,00-2.30
(depend
ing on
meat type)
50
1,00-1.15 Defrosted for
Defrosted and
simultaneously
roasted
roasting and
grilling
Page 31

For bottling, use only commerdaily available bottling jars (jars
with rubberhngsand glass lids). Never use jars with screwfittings
or bayonet catches or metai tins. And make sure you use fresh
foodstuffs!
The oven holds 6 bottling jars of 1-1'^ litres capacity.
Place 1 cup of hot water in the drip-pan so that the necessary
humidity is retained in the oven.
As the shelf height, use the 4th level from above. The jarsshould
not touch, must wherever possible be filled to the same level with
the same contents, and must be securely damped.
To switch on, turn my heating mode switch to hot airland the
oven temperature switch to 160°C.
Fume opening: closed
Keep an eye on the food being bottled.
As soon as the liquid in thefi rst jars (when bottling fruit or picided
cucumbers) begins to bubble (afteraround45 minutes for 1-litre
jars) switch off the oven, but allow the jars to stand a further
30 minutes or so - around 15 minutes for tender fruit, e.g. straw
berries - in the closed oven.
When bottling vegetables or mea^ set back my oven tempera
ture switch to 100 °C as soon as the liquid in the fi rst jars begins
to bubble and allow the contents to cook for a further
60-90 minutes. Then switch off the oven with both my switches
and allowthejarstostandafurtherSO minutes intheclosed oven.
- BotUing
£
115
Page 32
Cleaning and care
Glass-ceramic
ccoking area
- Principles
' Special
soiling
If you have coordinated aglass-ceramic cooking area with me, alew
principles should be observed despite its special virtue of being
easy-care:
It is important to ciean my cooking area every time it has been
used!
1. Never use aggressive cleaners, such as e.g. coarse scouring
agents or abrasive pan cleaners.
2. Always clean the cooking area when itisslightlysoiled-prefera
bly after each use.
For this purpose, use a damp cloth and alitile washing-up liquid.
Then wipe the cooking area dry with a clean cioth. No cleaner
residues should remain on the surface,
3. Thoroughly clean the whole cooking area once a week. For this
purpose, use “Sidol Stainless Steel Gloss”, “Steel-Fix”, or "WKTop”.
Then thoroughly clean the whole cooking area with clean water
and wipe dry with a clean cloth. Please make sure that no cleaner
residues remain on the surfacelThecooking area may otherwise
be damaged!
4. Only use the recommended cleaning products!
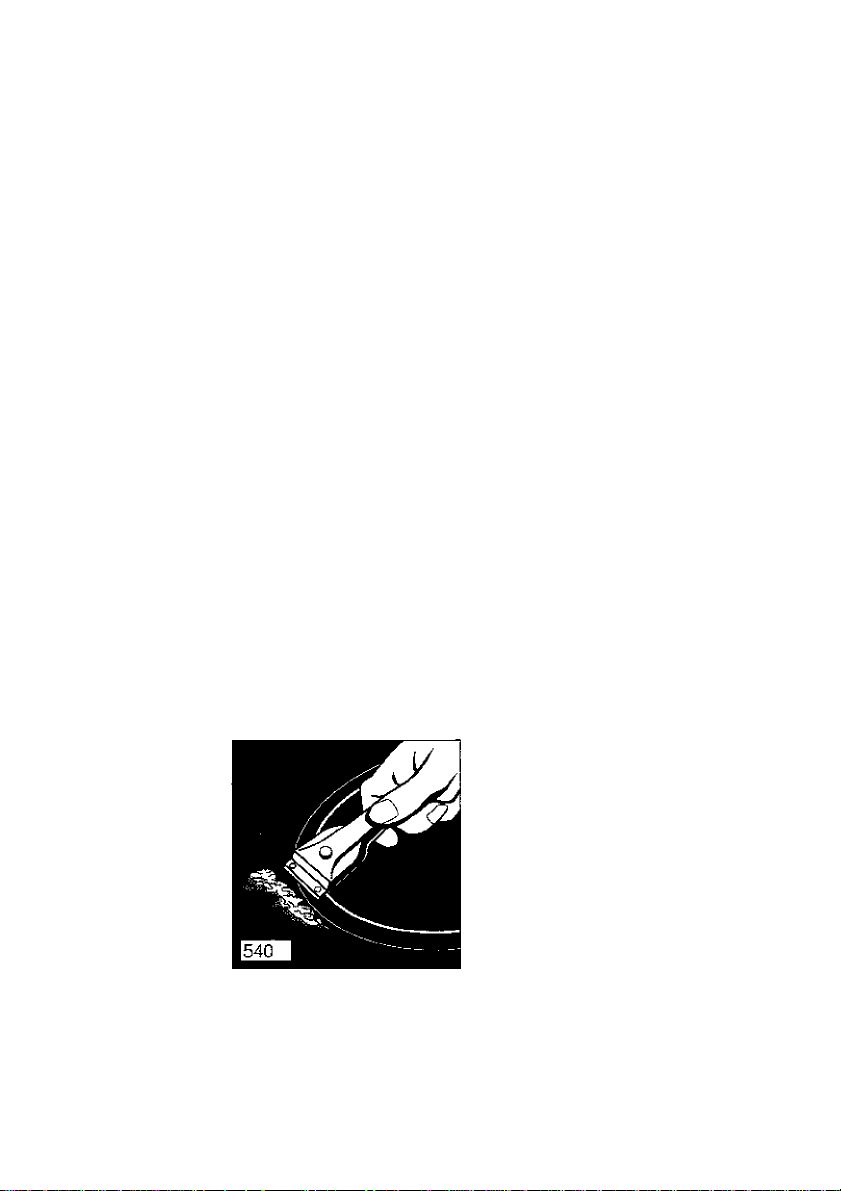
Boiled-over tood
First soften with a wet cioth and then remove thefood residues with a
glass or razor-blade scraper. Take care to avoid injuring your
self!
Then clean the cooking area as described under 3.
116
Page 33
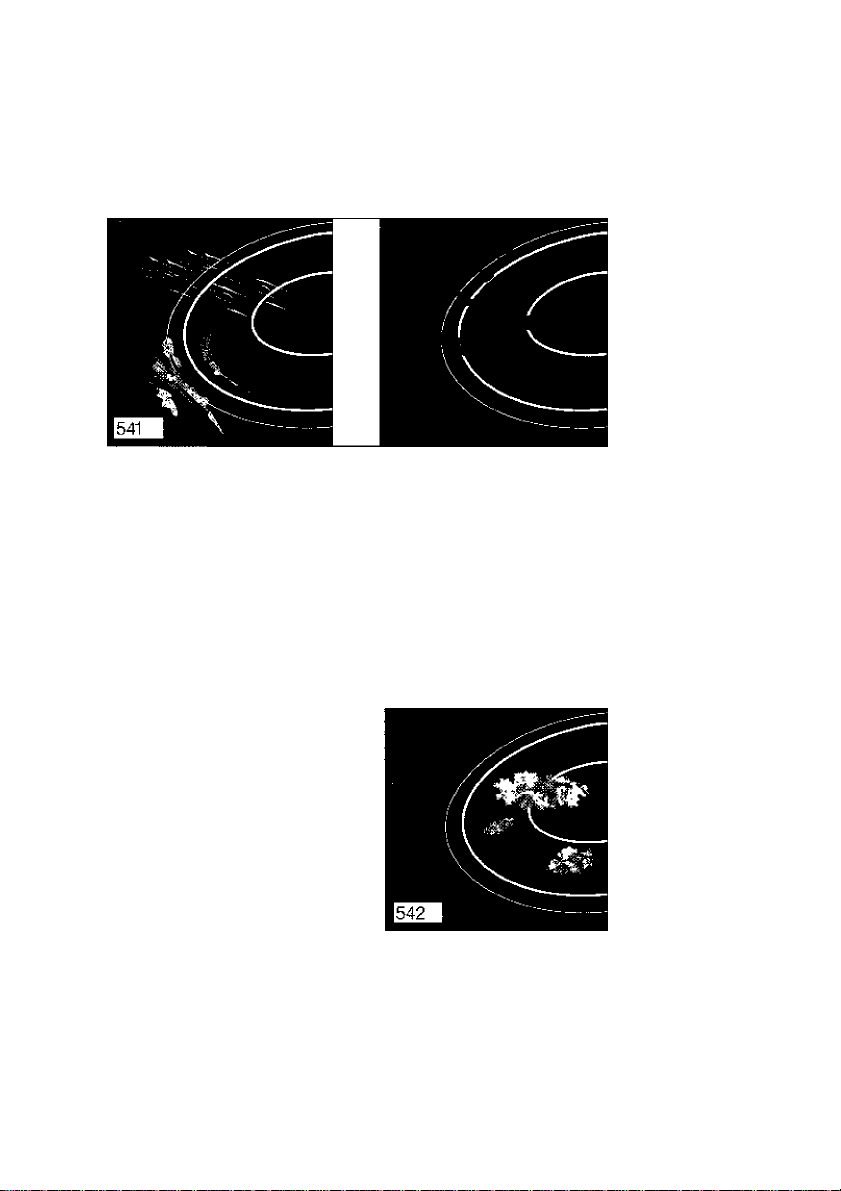
Bumed'On sugar,
melted plastic
Remove this at once - when still hot - with a glass scraper,^s other
wise permanent damage could result. Then clean the cooking area
as described under 3,
You can prevent damage due to sugar or sugar-containing foods by
caring for your glass-ceramic cooking area withCollo-ProfiorCera-
fix.
Stains
(Scale stains or mother-of-pearl-like glossy stains, or discoloura-
tionswith a metallic glint (saucepan rubbings),formed during cook
ing) are best removed when the hobs are still warm (not hot). For this
purpose, also use “Sidol Stainless Steel Gloss”, “Steel-Fix”, or “WK-
Top”. Proceed exactly as described under 3.
Grains of sand or grit
which tall on to the cooking area may cause scratches when pots
are moved about Please make sure therefore that no grains of sand
or grit remain on the cooking area.
117
Page 34
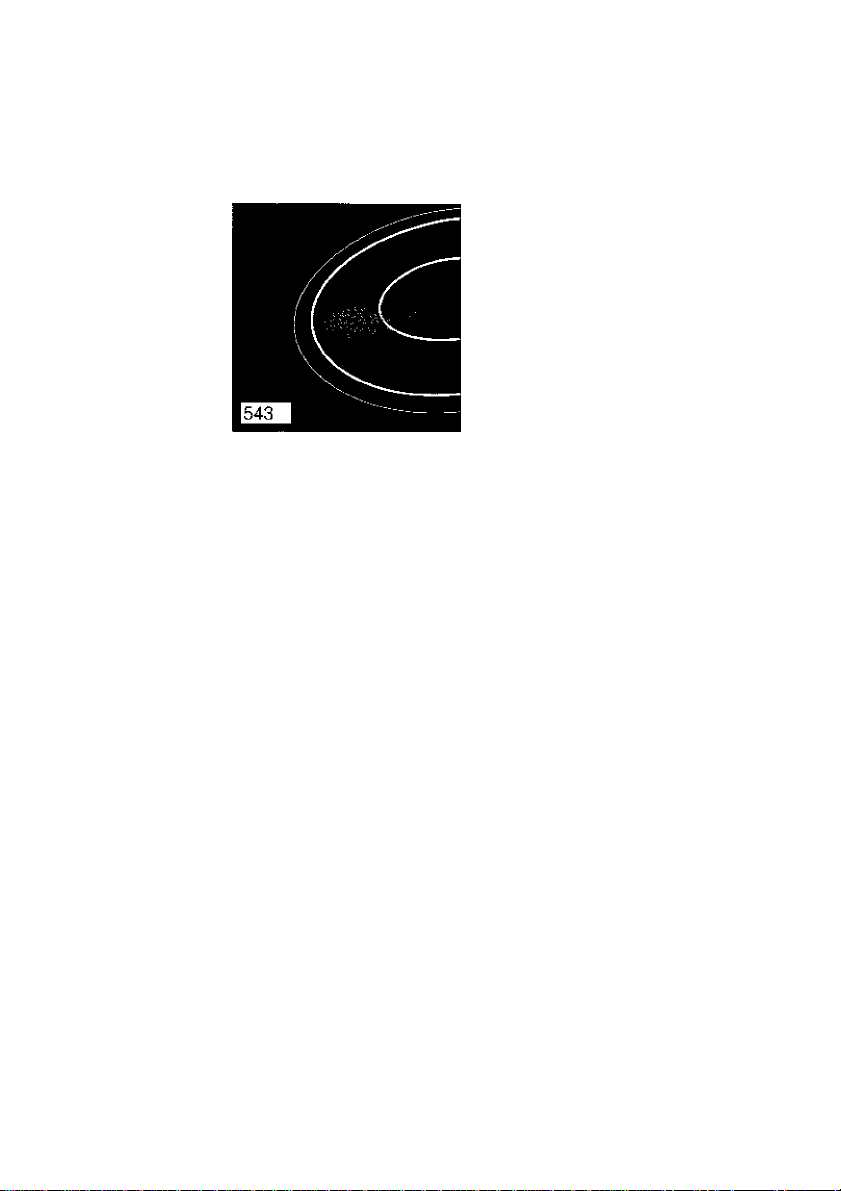
' Special
soiling
Sanded finish
The use of aggressive cleaning products and rough-bottomed
saucepans gives the surface a sanded finish after a time, and dark
patches will appear.
You can obtain suitable cleaners, cleansing agents, and a glass
scraper from the AEG Service Centre.
Hob unit with
cast iron hobs
Please clean heavy soiling of the cast iron hobs with afine scouring
agent or sponge. Then lightly heat and allow to dry.
Please notethat cleaners are unsuitable for the stainless steel edge
of the cast iron hob and stainless steel hob unit, since they cause
scratches.
Thermal loading during cooking may cause slight yellowing of the
stainless steel edge and stainiess steel hob unit. This depends on
the physical nature of the material (its tendency to tarnish).
These discolorations can be easily removed with “WK-Top” or
“Steelfix".
In order to avoid the danger of corrosion between the edge of
the hob and the hob unit, please note the following instructions:
- N.ever lay any wet saucepan lids e.g. if steam has condensed
inside them) on my hobs.
- Only put pots or pans on my hobs if they are dry underneath.
- Make sure that the pot or pan isalways bigger than the diameter
of my hob (never smaller), so that no food can boil over and run
down onto my surface.
- After cleaning my hobs, heat them up for a short time to dry the
surface out.
118
Page 35

Make sure that my hob covers or my decorative lids (if I have
any) are dry on the inside when you place them on my hobs or
close them.
To care for my hobs, you can occasionally use a iiltle sewingmachine oil (finally polish with paper} or other cleaners and cieansing agents, such as Colio-Elektroi, which you can obtain from the
AEG Service Centre.
Never use butter, bacon, or the like!
Normal cleaning
Oven
Clean my oven after each use. This makes fat splashes easiest to
remove. For stubborn soiling, use K2rOven Cleaner, Huy, Cello
Grill Cleaner, or Express Oven Cleaner.
To clean my glass-ceramic ceiling (if avaijable), you can
safeiy use oven spray or, for heavy soiling, a glass scraper.
Then wipe with clean water to remove all cleaner residues.
Never use aggressive cleaners, such as e. g. coarse scouring
agents or abrasive pan cleaners. You can obtain suitable
cleaners and cleansing agents from the AEG Service Centre.
You can illuminate my oven for cleaning. To do this, turn my oven Oven
switch or my heating mode switch to the lamp position |^. lighting
■ Thorough cleaning
For thorough cleaning, you can detach various parts:
119
Page 36
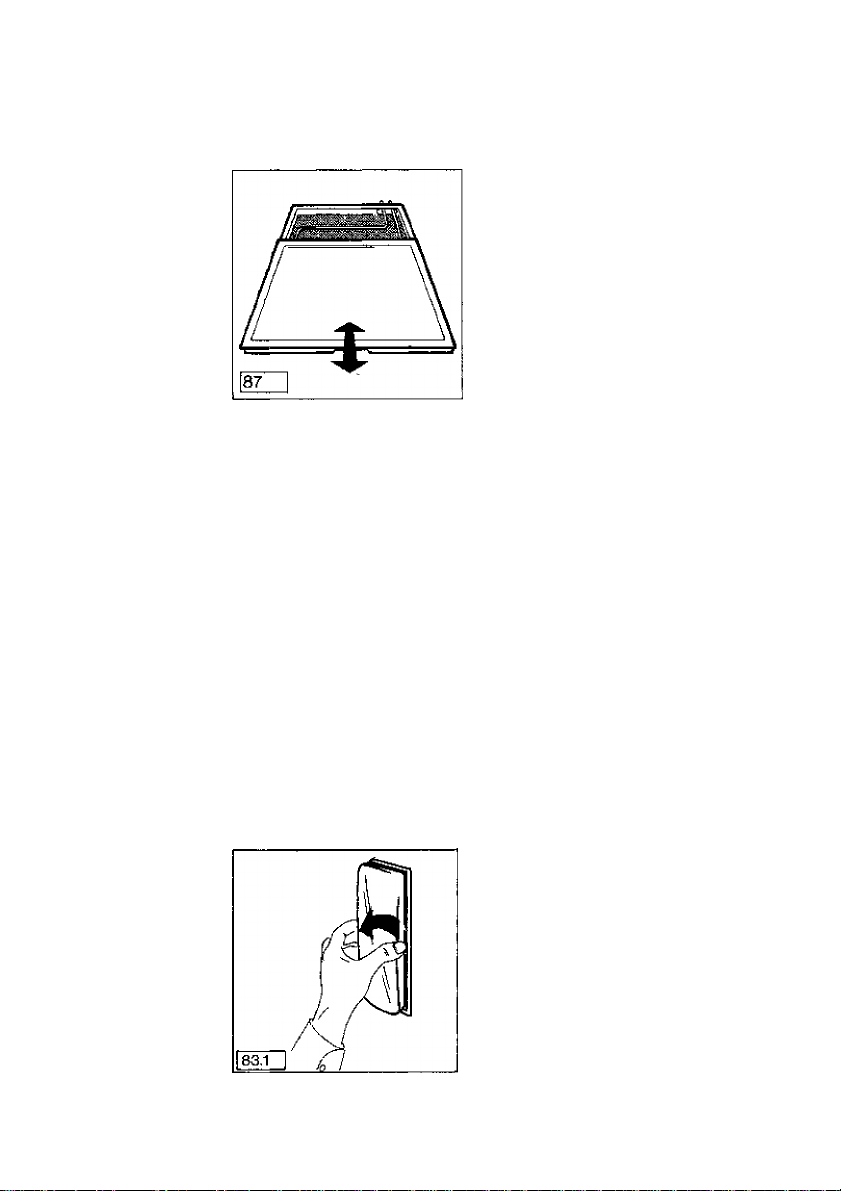
Cleaning
my heated
oven space
divider
My heated oven space divider should be removed for cleaning. The
upper cover can be pulled fon/vards and cleaned in a sink.
Important: Never hold or place my heating element and the low
er part of my oven space dividef in watter or in a dishwasher!
After cleaning and drying, especially the heating element contacts,
re-assemble the oven space dividerand slide it into the appropriate
shelf level provided in my oven.
Important: My heated oven space divider may only be inserted
in my oven complete (lower part with heating element and
cover)!
Cleaning
and
replacing the
light bulbfs)
120
Important; Switch off my fuses on the fixed wiring side (safety
box) (remove screw-in fuses from holder).
To clean the glass covers and change my light bulb(s), the glass
cover should only be removed by hand!
Important; Please never use any tools!
After changing the light bulb(s), clip the protective glass cover
back in position.
Page 37
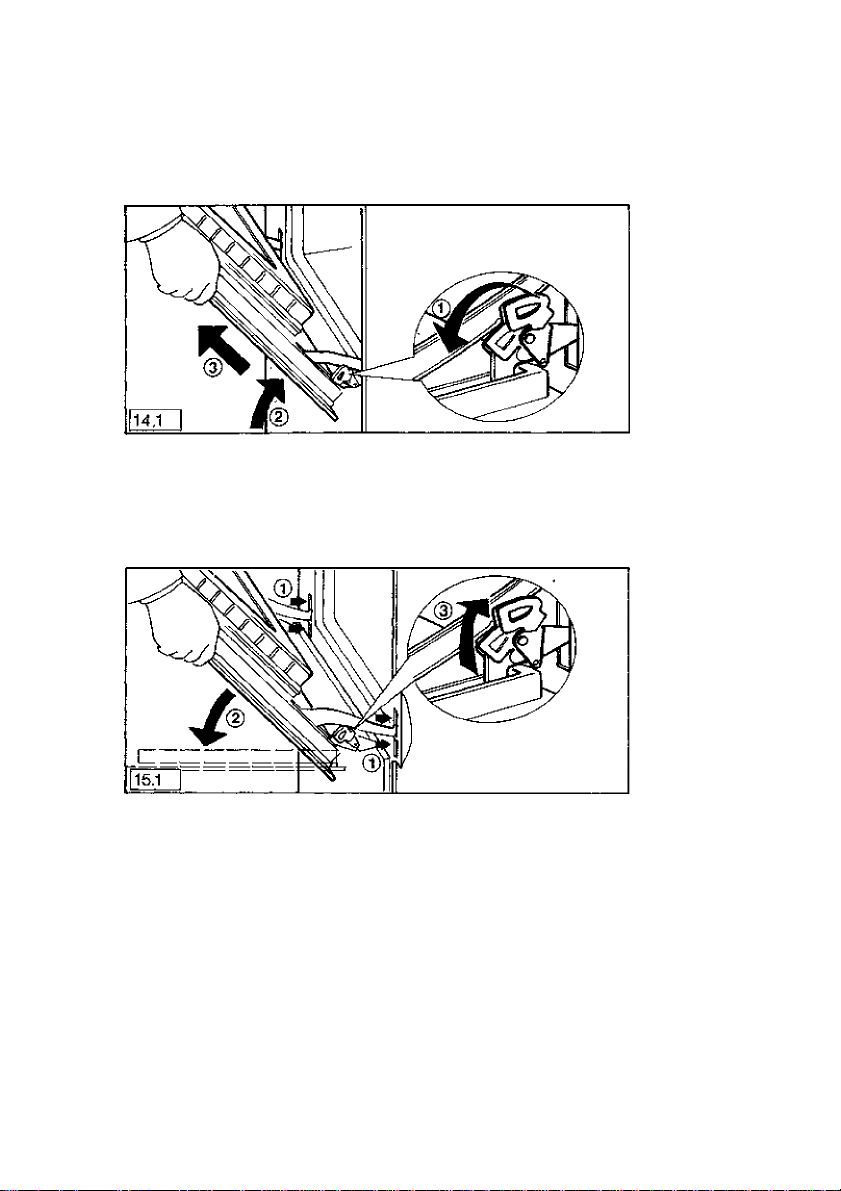
To detach the door
1. Lift the door catch on both door hinges (see illustration),
2. Lift the door in the direction of closure and pull out forwards
(grip at the sides - do not pull on the door handle!).
To re-insert the door;
1. Insert the door with both brackets into the oven.
2. Fold door downwards and turn back door catch
illustration).
(see
Detaching the
oven door
121
Page 38
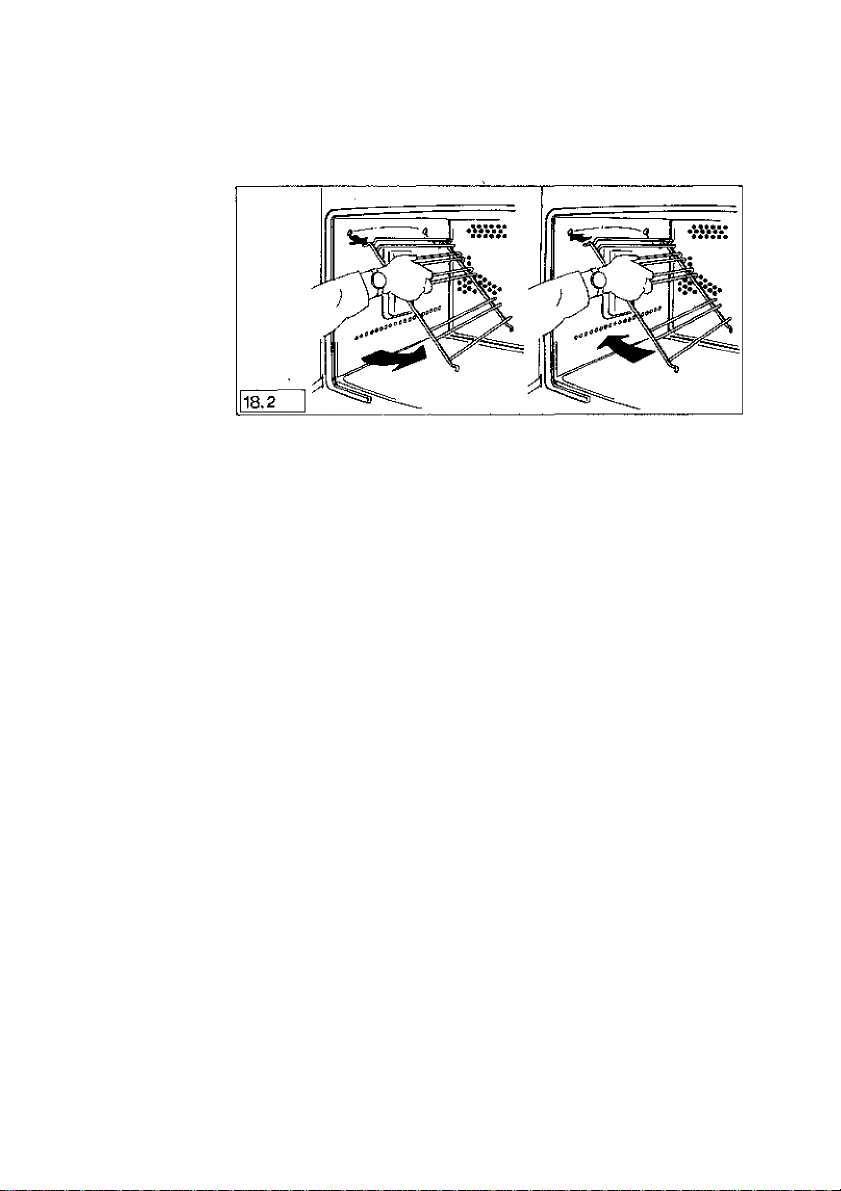
Dismantling
and installing
the shelf grid
Shelf grid
To clean the side walls of the oven, the shelf grid (see illustration)
can be taken out.
Pull the shelf grid inwards and then detach above.
Re-insert in the reverse sequence.
Cleaning the
grease filter
Grease filter
Boif the grease filter in water with dishwasher cleaner or soft
soap.
122
Page 39
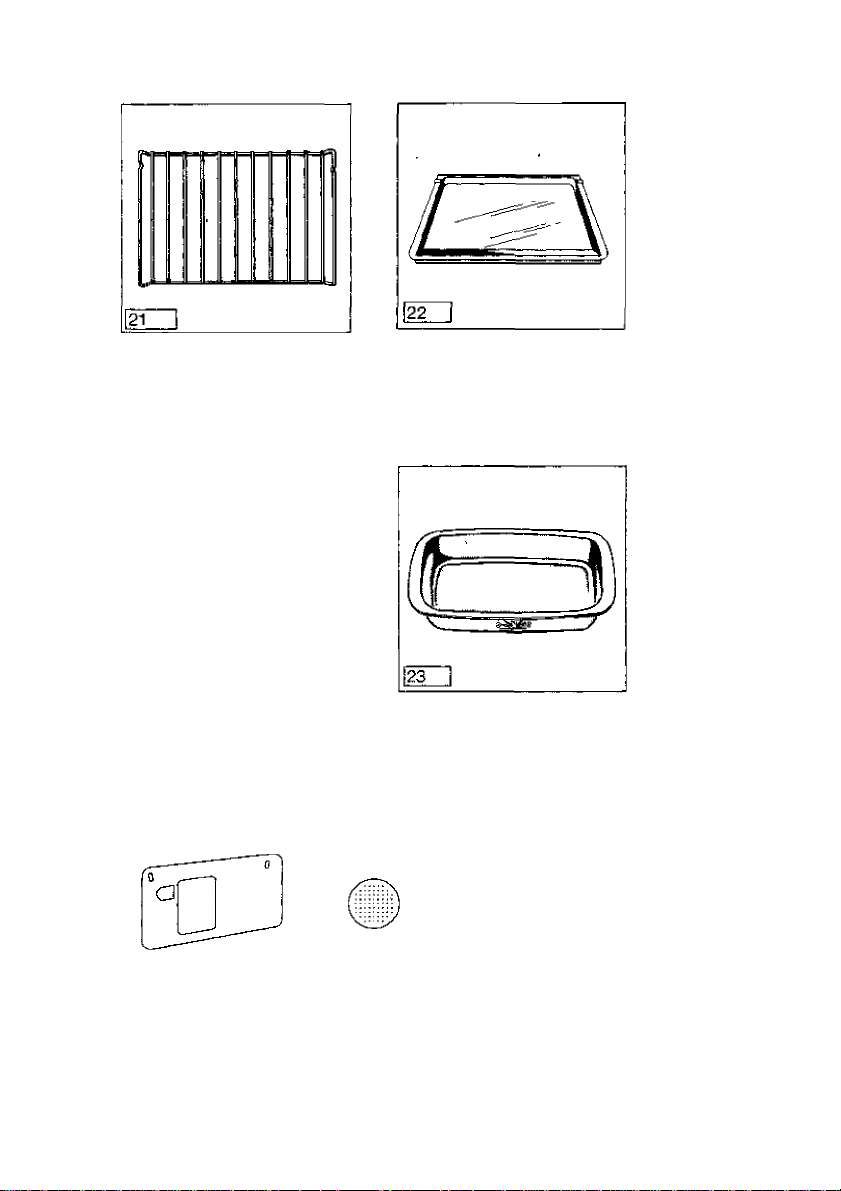
special accessorie?
Second grid to hold
bakeware
E-No,: 611898 622
Baking sheet
E-No.: 611898620
Glass-ceramic roast pan
(for placing on grid)
E-No.: 611899660
O
247,1
Catalytic set KTGV
E-No.: 611 898607
123
Page 40

What to do if...
Faults
you can rectify
yourself
... the pilot lamps do not show?
... the oven does not heat?
1. You may well have not operated all relevant switches or
2. the fuse on the fixed wiring side (safety box) has blown.
3. ImportaiTt: Reese make sure that my oven door is fully
closed!
... the fuses keep blowing?
Please call an approved electrical installer.
... the oven lighting fails?
See Cleaning and care on page 120.
Failure of my oven lamp(s) does not fòli under the guarantee.
If, however, you decidete cali in the service centre to help with any of
the stated instructions or on grounds offaultyoperation, the service
engineer’s visit cannot be made free of charge even during the gua
rantee period.
AEG electrical appliances comply with the valid safety require
ments. Re pairs to electrical appliances should only be performed by
a trained electrician. Improper repairs may place the user at serious
risk
124
5
<3
&
Page 41
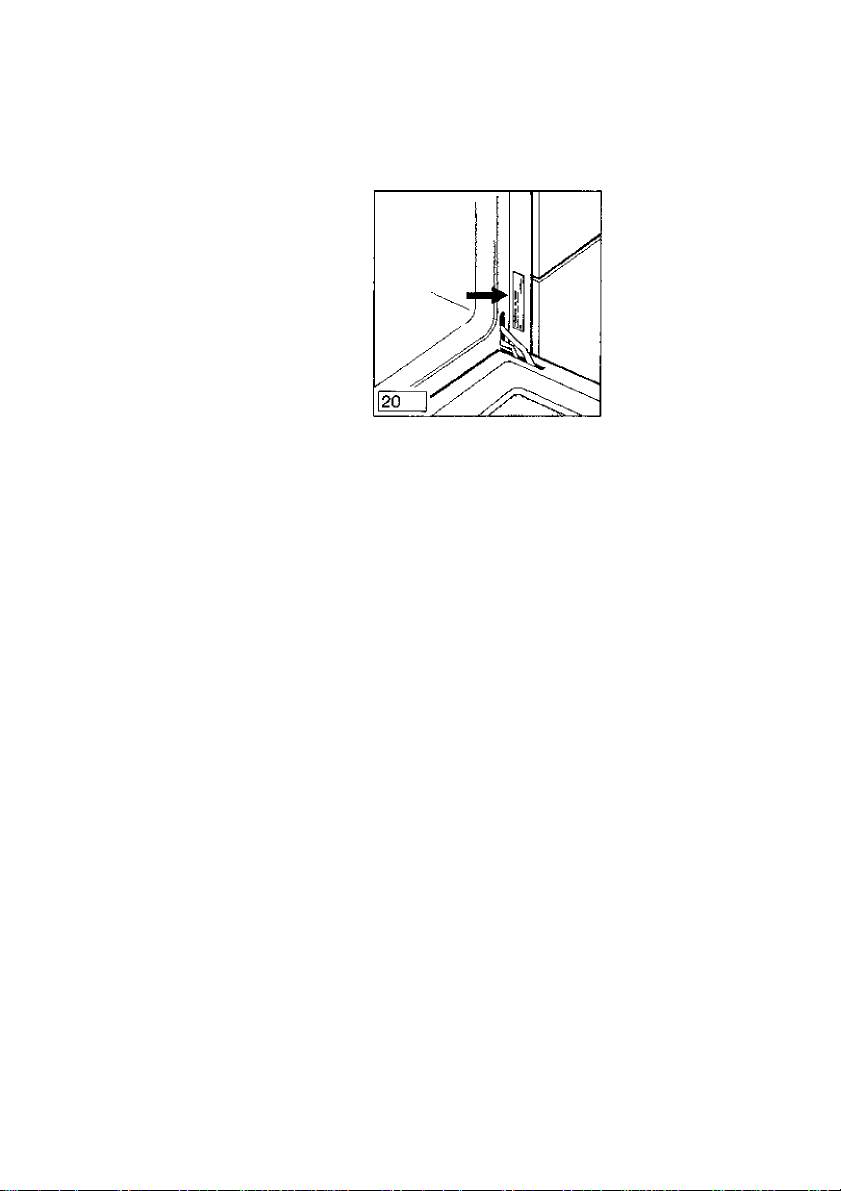
Customer service
!f you cannot find any referencetoapartioularfault in myoperating
instruotions, please contact our service centre.
When doing so, quote the E-No. and F-No. of your oven, which you
will find on my rating plate/arrow.
Your indication of these numbers enables the service centre to
make precise identification of the required spare part so that I can
be repaired at the engineer's first visit You will thus save yourself
additional costs due to any possible repeated trips by the service
engineer.
So that these numbers are always to hand, you are recommended
to enter them here.
E-Na
..................................................
F-No...................................................
125
 Loading...