

Page 1

Label System Manual
Contents
1: Product Introduction ........................................................................ 2
2: Connecting Base Station ................................................................... 5
3: Activating AP and ESL ....................................................................... 7
(1) get username and password of the ESL platform .......................... 7
(2) log in to the ESL platform .............................................................. 8
(3) add new AP .................................................................................... 8
(4) activate the new AP ..................................................................... 10
4. Import Product Information ............................................................ 12
(1) download product information template .................................... 12
(2) fill in the product information table ............................................ 13
(3) import the product information table ......................................... 15
5.Binding ESL With Product ................................................................. 16
(1) creat new account ....................................................................... 16
(2) bind the account with PDA .......................................................... 17
6. Modifying product information ....................................................... 20
(1) modify product information ........................................................ 20
(2) import the product information table ......................................... 21
Page 2

1. Product introduction
(1) Software System :
Check the state of hardware and software, manage and refresh ESL.
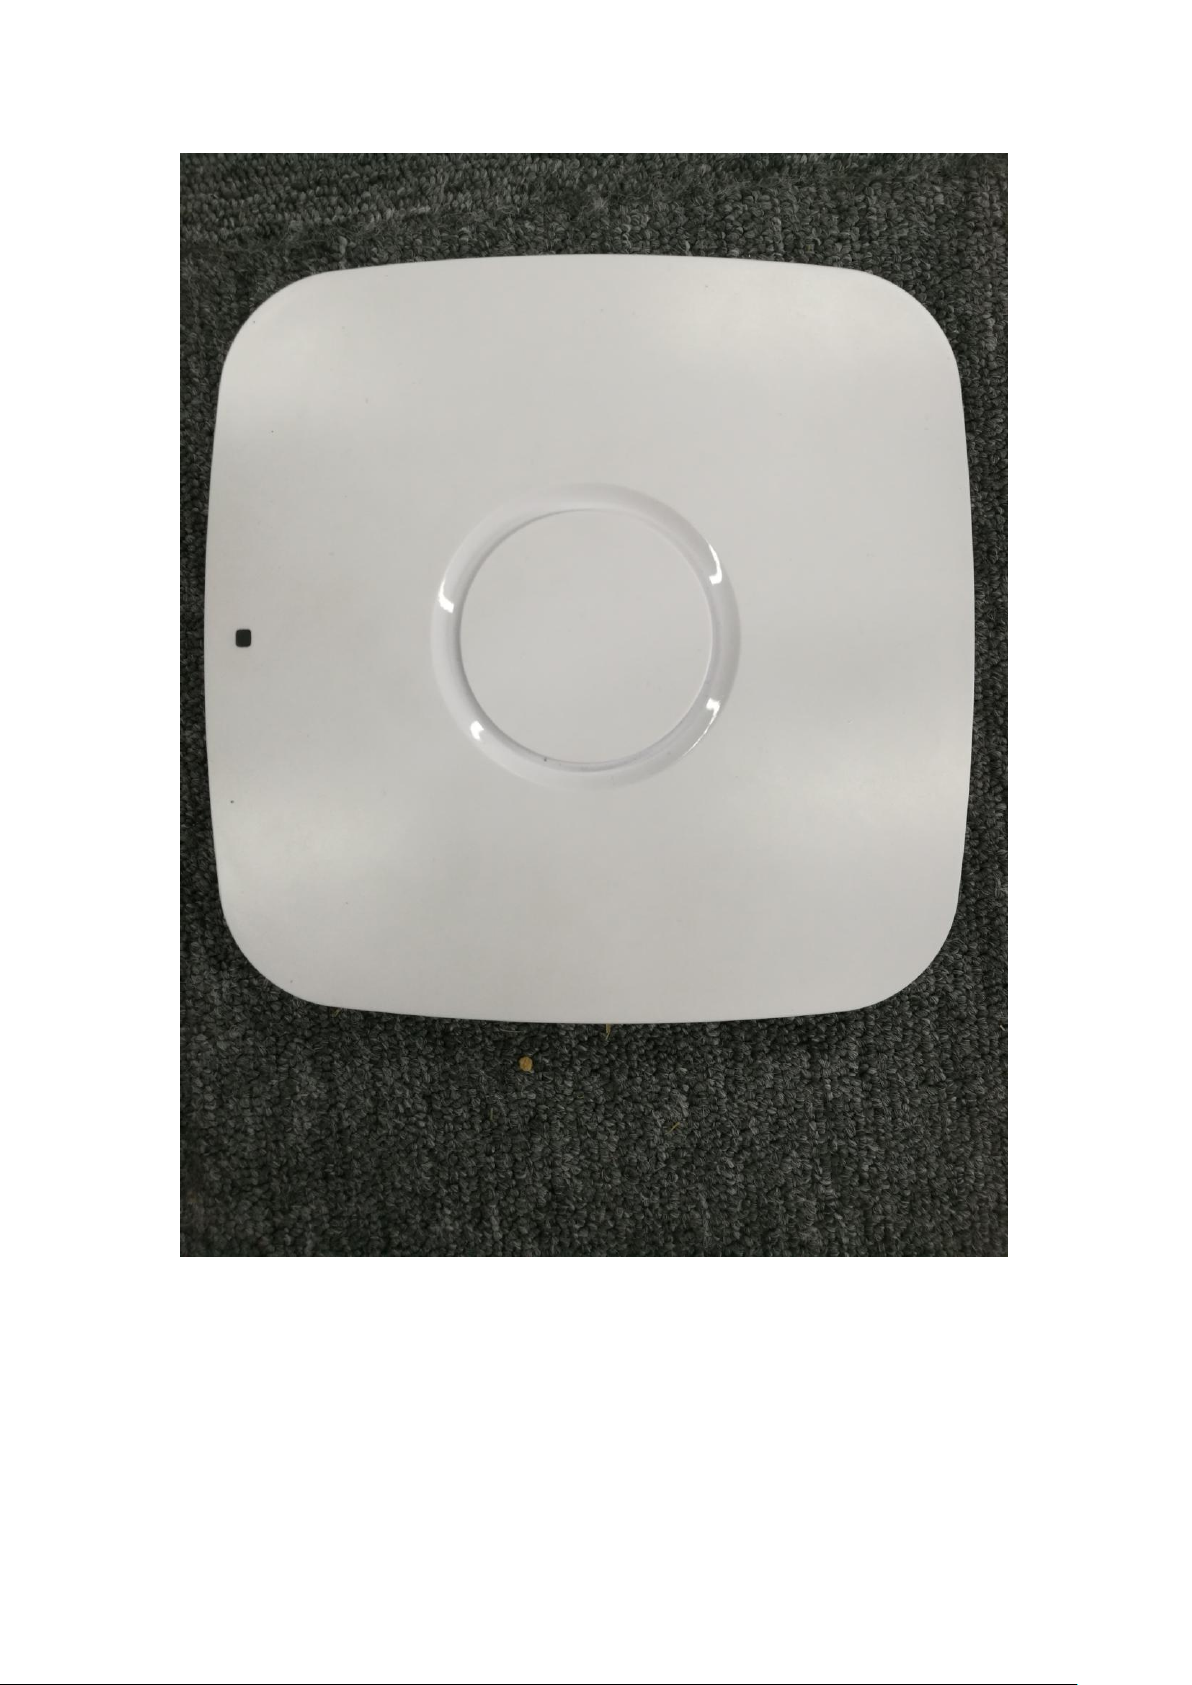
(2) AP
AP works together with ESLs and transmits data.
Page 3
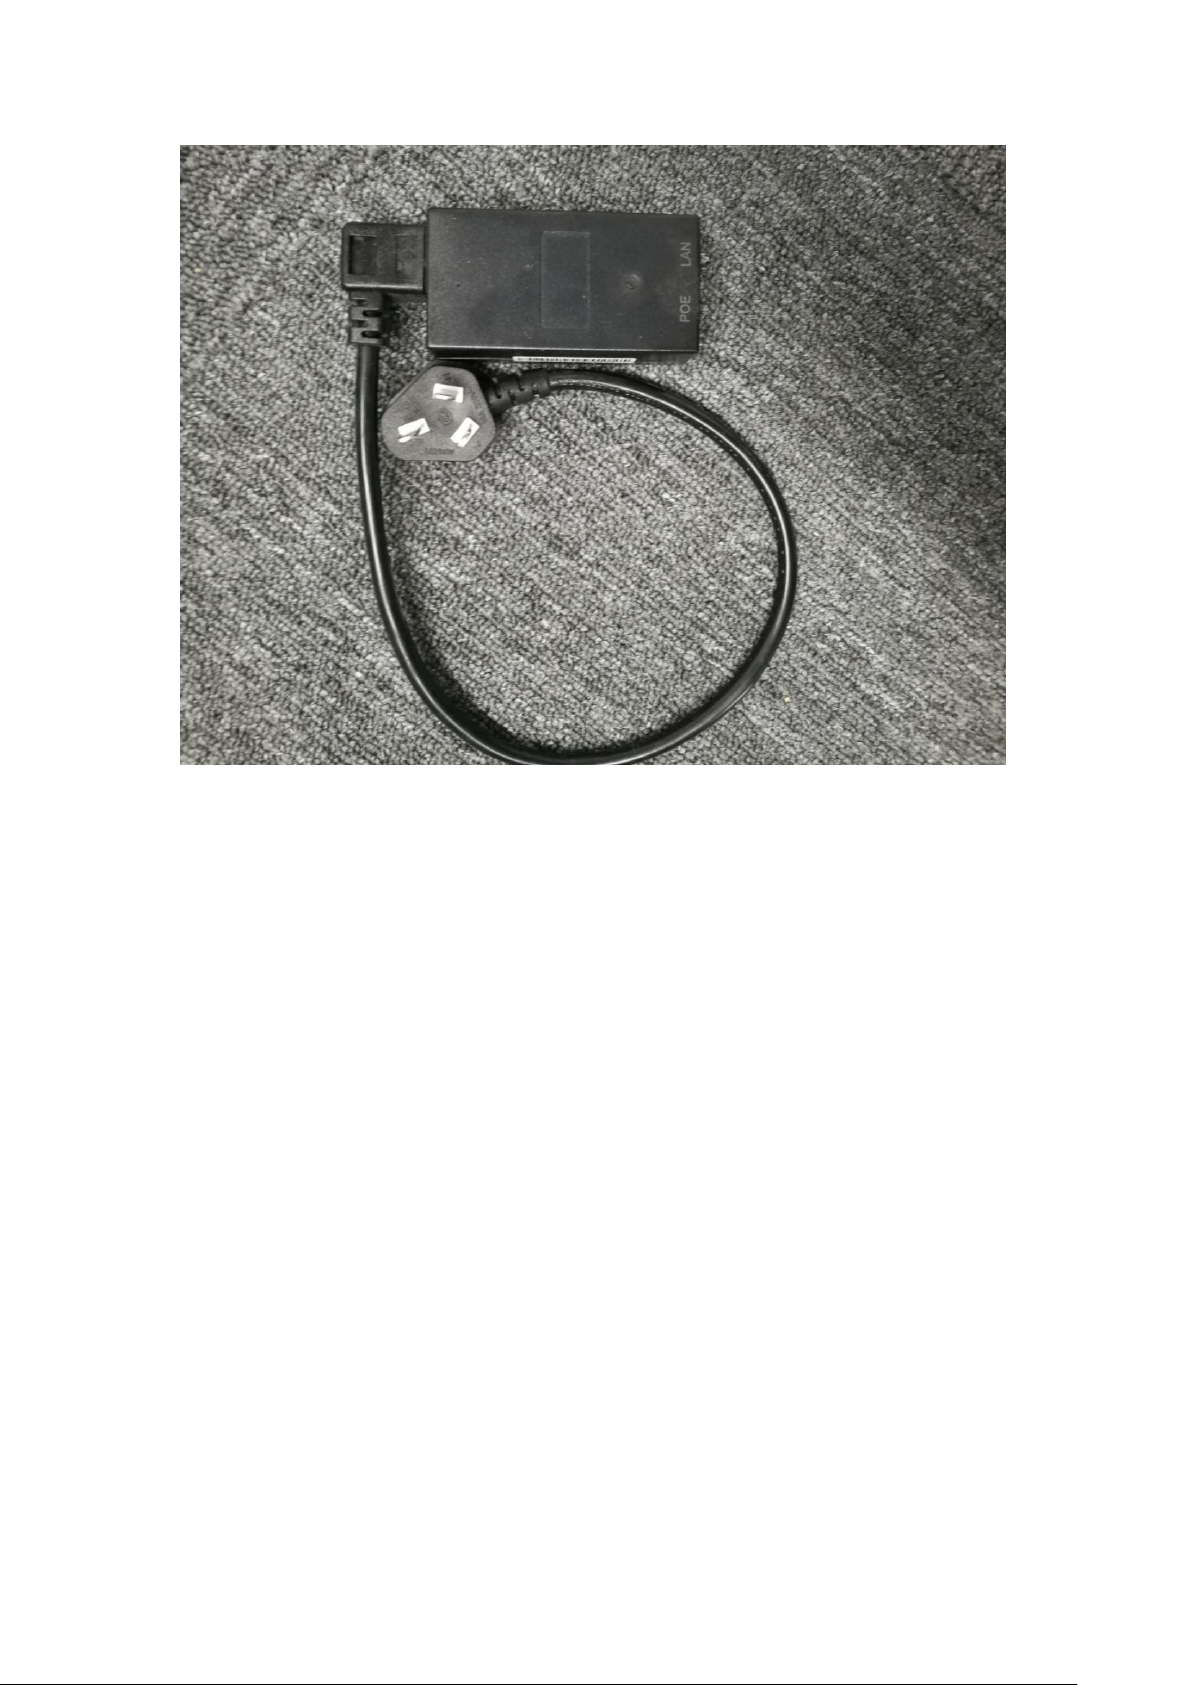
PoE Power Supply: Provide power to the AP and connect to the
external network, having PoE port connecting with AP and LAN
ports connecting to the external network.
Page 4
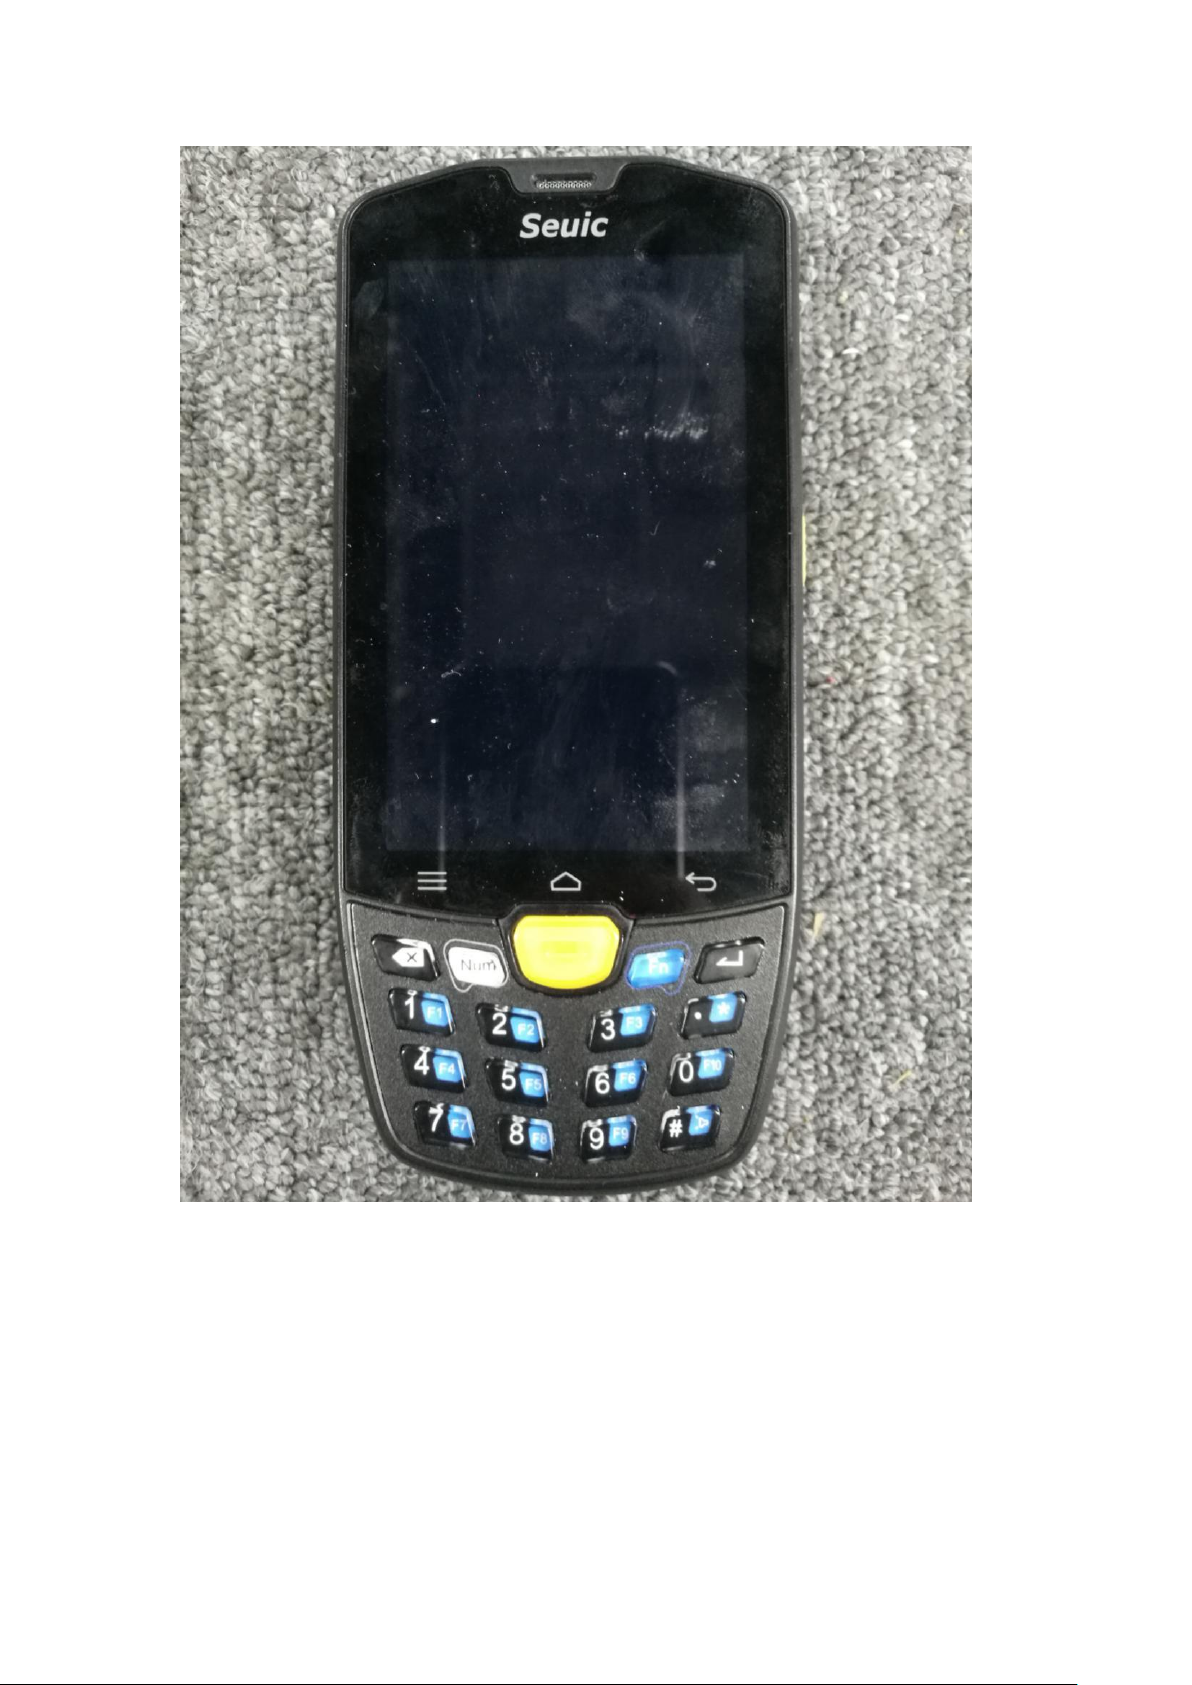
(3) PDA
Binding the product with ESLs.
Page 5
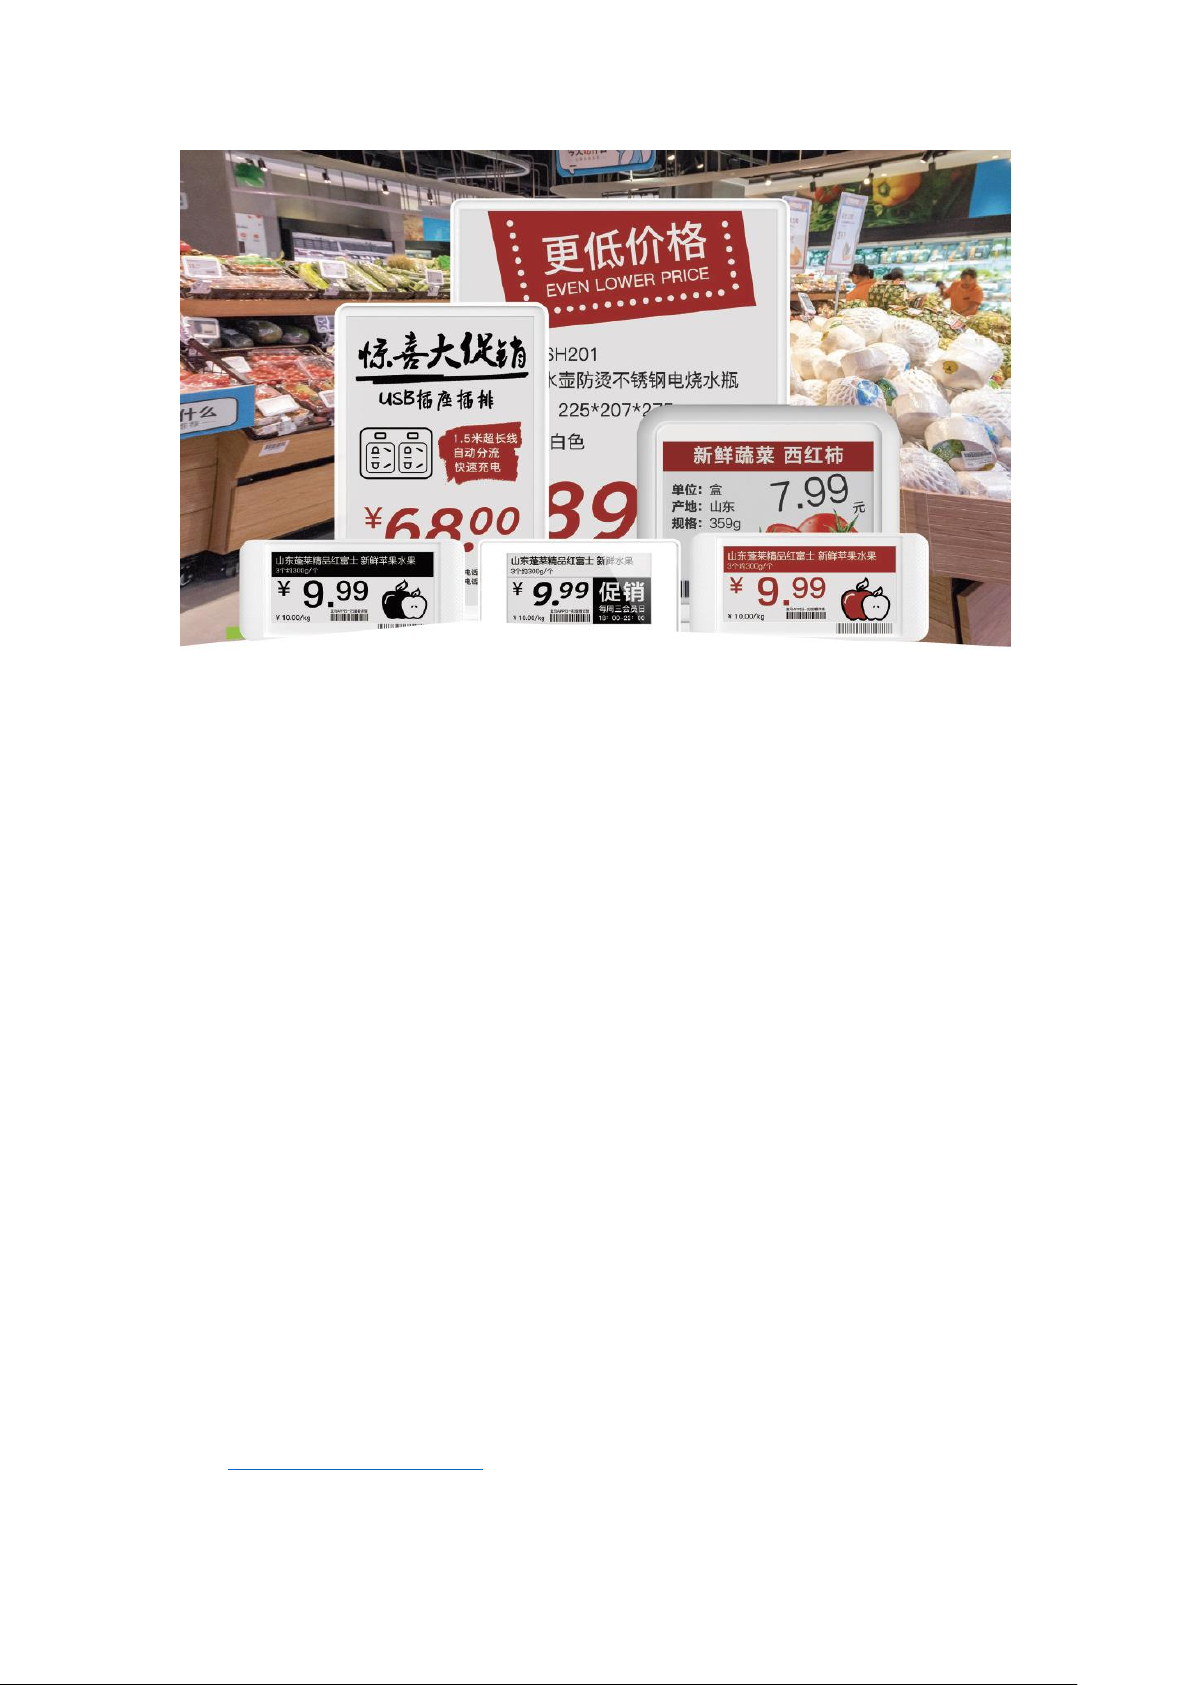
(4)电子价签
ESL works around AP.
Page 6
2. Merchant- Store and Account
(1) Add merchant and get merchant account in the ESL
platform
Please provide your company's business license to the sales staff for record.
After confirming the complete information, our company will add the
merchant for your company, as well as the merchant administrator's account
and password. The sales staff will forward the account and password of the
merchant administrator to your company.
(2)Log in ESL platform
Copy http://47.52.135.163:8888/#/ to a browser and open it, enter merchant administrator user
name and password.
Page 7
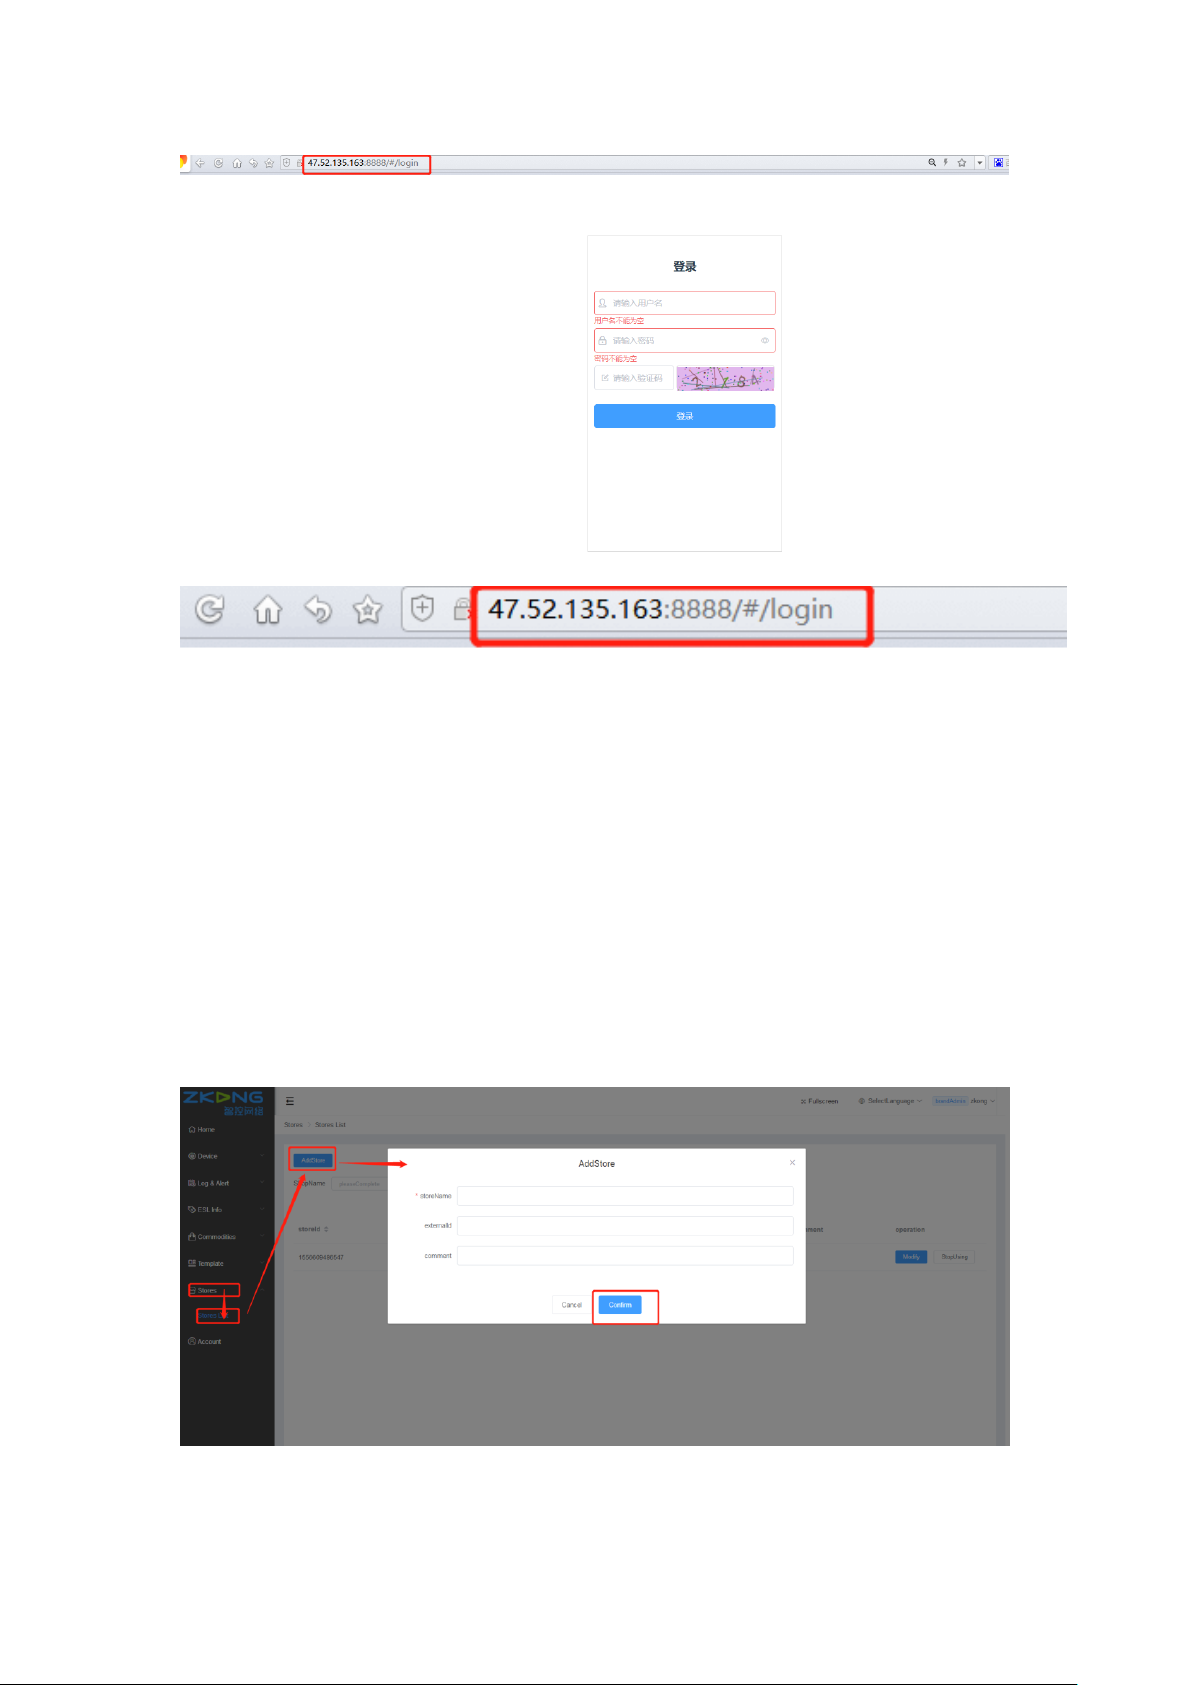
(3)Add new store
Remarks: multiple stores can be built under one merchant’s account. Base stations, ESLs, PDAs,
products and templates are all associated with the stores.
1、After logging in the system, click "stores" - "stores list" - "add store" .
2、Enter the store name and click “confirm”.
Page 8
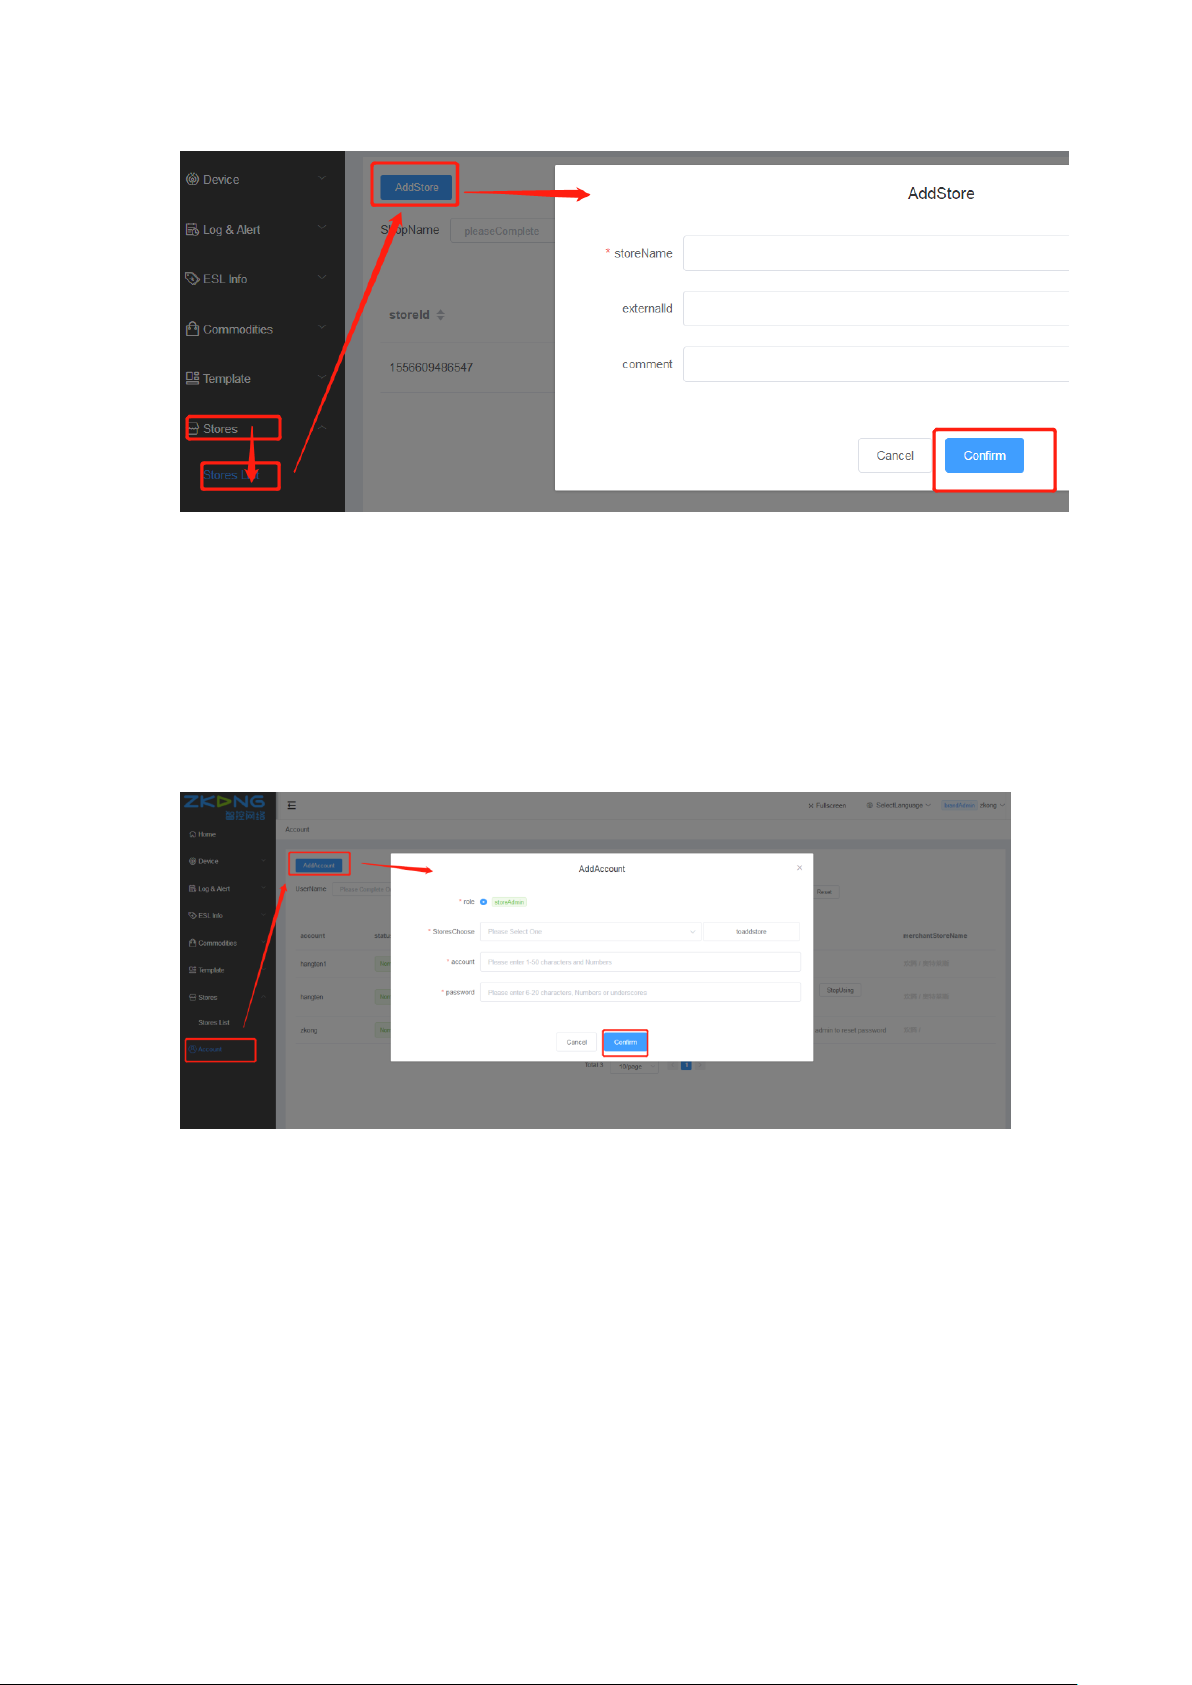
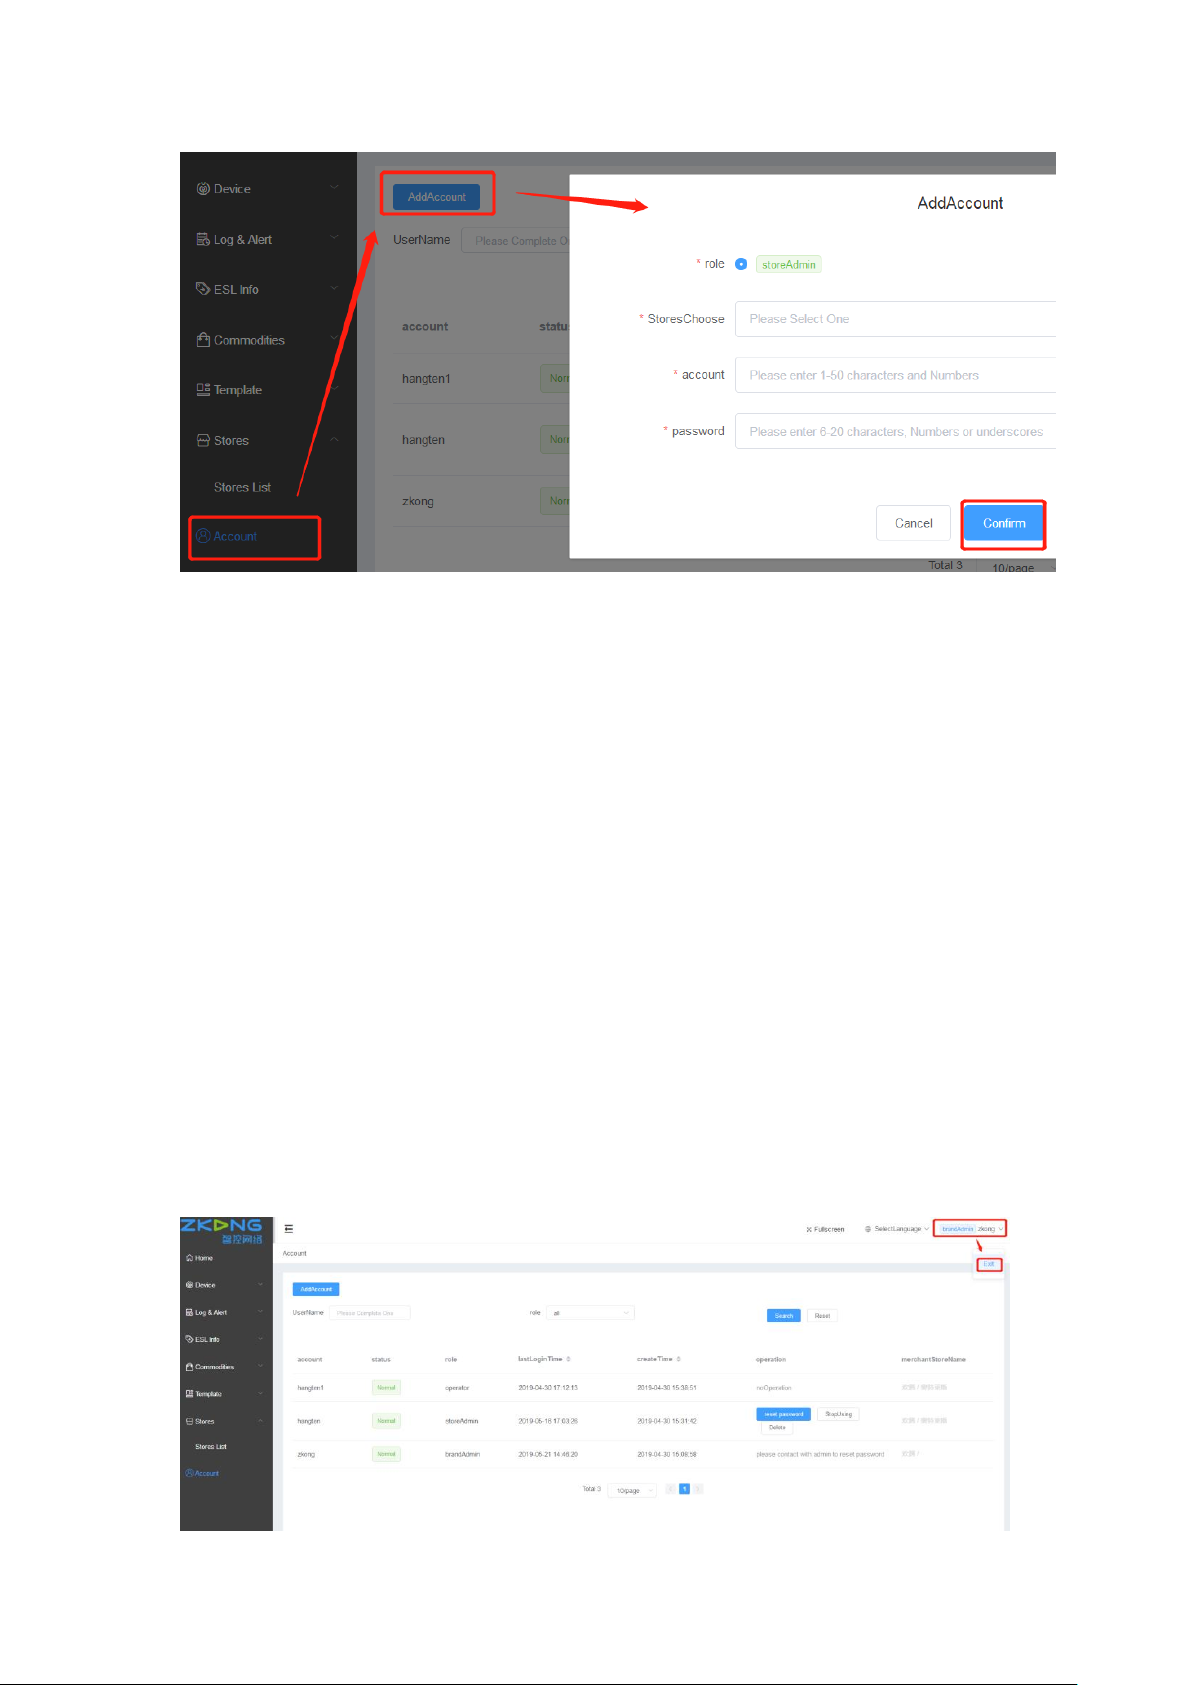
(4)Add new store manager account
1. Click "account " - "add account";
2. Select the new store;
3. Fill in the user name and password;
4. Click “Confirm” to complete it;
Page 9
(5)Added/Edited Template classification and Template Type.
Template classification and template type are the identification fields of commodity matching
templates. It's used in both commodity and template modules, so you need to set it up in
advance.
(6)Add merchant template
Store template module, can be imported into the business template.Templates created in the
business template module, all stores can be copied to stores, reuse, saving time for each store to
make its own template.
(7)Login with the store manager's account
1. Click the login account in the upper right corner and log out. Log out your current login
account.
2. Login with the new store manager’s account and password.
Page 10

3. Add the store template
1. Click "template" - "store template" to enter the page of store template
2. Click” new store template” to enter the new template page
Page 11

3. Edit the basic setting information of the template
(1) Fill in the template name
(2) Select the scene. "Normal " means the display after binding the goods, and "Unbinding"
means the display of ESL unbinding
(3) Select size, resolution, color and model.
(4)Select the template type, which is used to match the corresponding attribute of the
commodity. (Remarks: only commodity with the same template attributes are binding with the
corresponding ESLs, and the corresponding ESL will show the template)
(5) Click “detail”.
Page 12

4. Edit template details
(1) Add elements according to requirements and edit it.
(2) After completion, click the “submit” in the upper right corner.
Page 13

Page 14

4. Import commodity information
(1)Download the product information template
Click“commodities”——“import list”——“download”
Page 15

(2)Fill in the product information in the template
Open the downloaded “item_export_template” table. The item * is a required item. Delete the
sample commodity information and fill in the commodity information that you need to import.
Column items cannot be removed, added or deleted.
➢ Merchant ID*:it’s provided by Hangzhou Zkong Technical Service
Department, please apply to Hangzhou Zkong
➢ Store ID*:click on “System Management”——“Store”,Store ID
➢ Item ID*:fill in it at will, just can be numbers,can’t start with 0, in the same
store, items ID must be unique, such as:123123
➢ Item Code*:fill in the item code, in the same store, item code must be
unique, such as:6932571061293
➢ Item Title*:just write the item name, such as:coffee
➢ Item Price(unit cent integer)*:the unit is cent, such as:8 dollars needs to
write 800
➢ Item Unit*:such as:bag
➢ Item Grade*:such as:qualified
➢ Item Origin*:such as:USA
➢ Item QR Code Link:feel free to fill in,can be used as an entrance to the
online mall,such as https://item.jd.com/100000205012.html
➢ Whether to promote(yes true no false ):promotion fill in TRUE; no
promotion fill in FALSE
After filling in all options, save the item_export_template
(3) Import item_export_template
1. Click "commodities" -- "import list" -- "import" -- "upload import file", select the
item_export_template table that has been filled in, and click ok after uploading.
2. View the list page (refresh the page if there is no response within one minute). The first log
shows successful processing to upload successfully.
3. If the number of processing failures is more than 0, the error file can be downloaded and
opened to check the error cause.
Page 16

Page 17

5. Connect base station
1. Take out PoE power injector, plug in inset socket, and connect PoE port of PoE injector to base
station( white cable connection).
2. The LAN port of the PoE injector is connected to the router, as shown in the figure below
Remarks: the router's address is allocated automaticly.
Page 18

3. Activate ESL
ESL will be placed around the online AP (within a radius of 15m) and will be activated
automatically in 10 minutes.
Page 19

6.Add AP
After logging in, enter the system, click "device" -- "base station " -- "add", and pop up the
window "Add”.
Page 20

Example as follows:
Device MAC: There is a device MAC on the back of the base station. Please fill in the MAC address
in the red box as below. The MAC address A0A3xx,( 0 is zero, not the letter O).
Page 21

Done, click"Confirm” to check the AP state of the in the list.
Page 22

7.ESL binding with the commodity
7.1 Single binding
Click "bind" on the page of "binding list" - "binding list", fill in the barcode of goods to be binding and the barcode of ESL in the
popup of binding relationship, and click "show immediately after binding".
Page 23

7.2 Batch binding
1、Download batch binding template. Click "ESL info" - "batch binding" - "download template ",
download the template.
Page 24

2、Fill in the commodity barcode and ESL barcode in the template.
Page 25

3、Import the template document of the filled information.
7.3 Using PDA binding
(1)turn on and connect to WiFi
PDA has a small power button on the top, long press for switch, short press for wake up scree.
After wake up, PDA can be connected to the Internet, the same operation as the mobile phone.
(2)Use the APP
Open the "ESL" app in PDA, enter the user name and password of the store manager, and
then click "bind ESL".
Press the yellow button in the middle of the PDA (no need of manual input of 69 codes), scan the 69 codes of the product firstly,
showing the product name information, and then scan the black bar code of ESL (in the lower right corner of cover). PDA will
show “submit successfully” and ESL will display product information automatically.
Page 26

Page 27

8.Modify product information
(1) Modify product information
Modify the information of the item in item_export_template, and save it after the modification
“Product barcode” cannot be modified. If modified, it will be a new product, which needs to be
re-binding.
(2) Import item_export_template
1. Click "commodities" -- "import list" -- "import" -- "upload import file", select the
item_export_template table that has been filled in, and click ok after uploading.
2. View the list page (refresh the page if there is no response within one minute). The first log
shows successful processing to be uploaded successfully.
3. If the number of processing failures is more than 0, the error file can be downloaded and
opened to check the error cause.
Page 28

Page 29

After successful uploading, the
corresponding ESL will automatically change
the display information
9.Regulatory information
This device complies with Part 15 of the FCC Rules. Operation is subject to the
following two conditions:
(1) This device may not cause harmful interference, and
(2) This device must accept any interference received, including interference that
may cause undesired operation.
Attention that changes or modification not expressly approved by the party
responsible for compliance could void the user’s authority to operate the equipment.
Note: This product has been tested and found to comply with the limits for a Class
B digital device, pursuant to Part 15 of the FCC Rules. These limits are designed to
provide reasonable protection against harmful interference in a residential
installation. This product generates, uses, and can radiate radio frequency energy
and, if not installed and used in accordance with the instructions, may cause
harmful interference to radio communications. However, there is no guarantee that
interference will not occur in a particular installation. If this product does cause
harmful interference to radio or television reception, which can be determined by
turning the equipment off and on, the user is encouraged to try to correct the
interference by one or more of the following measures:
—Reorient or relocate the receiving antenna.
—Increase the separation between the equipment and receiver.
—Connect the equipment into an outlet on a circuit different from that to which the
receiver is connected.
—Consult the dealer or an experienced radio/TV technician for help.
This equipment complies with FCC radiation exposure limits set forth for an
uncontrolled environment. This equipment should be installed and operated with
minimum distance 20cm between the radiator & your body.
 Loading...