

ADP Midmark User manual

Installation Instructions
Oil-Less Valve Replacement Kit
Part #HGA85335
Description:
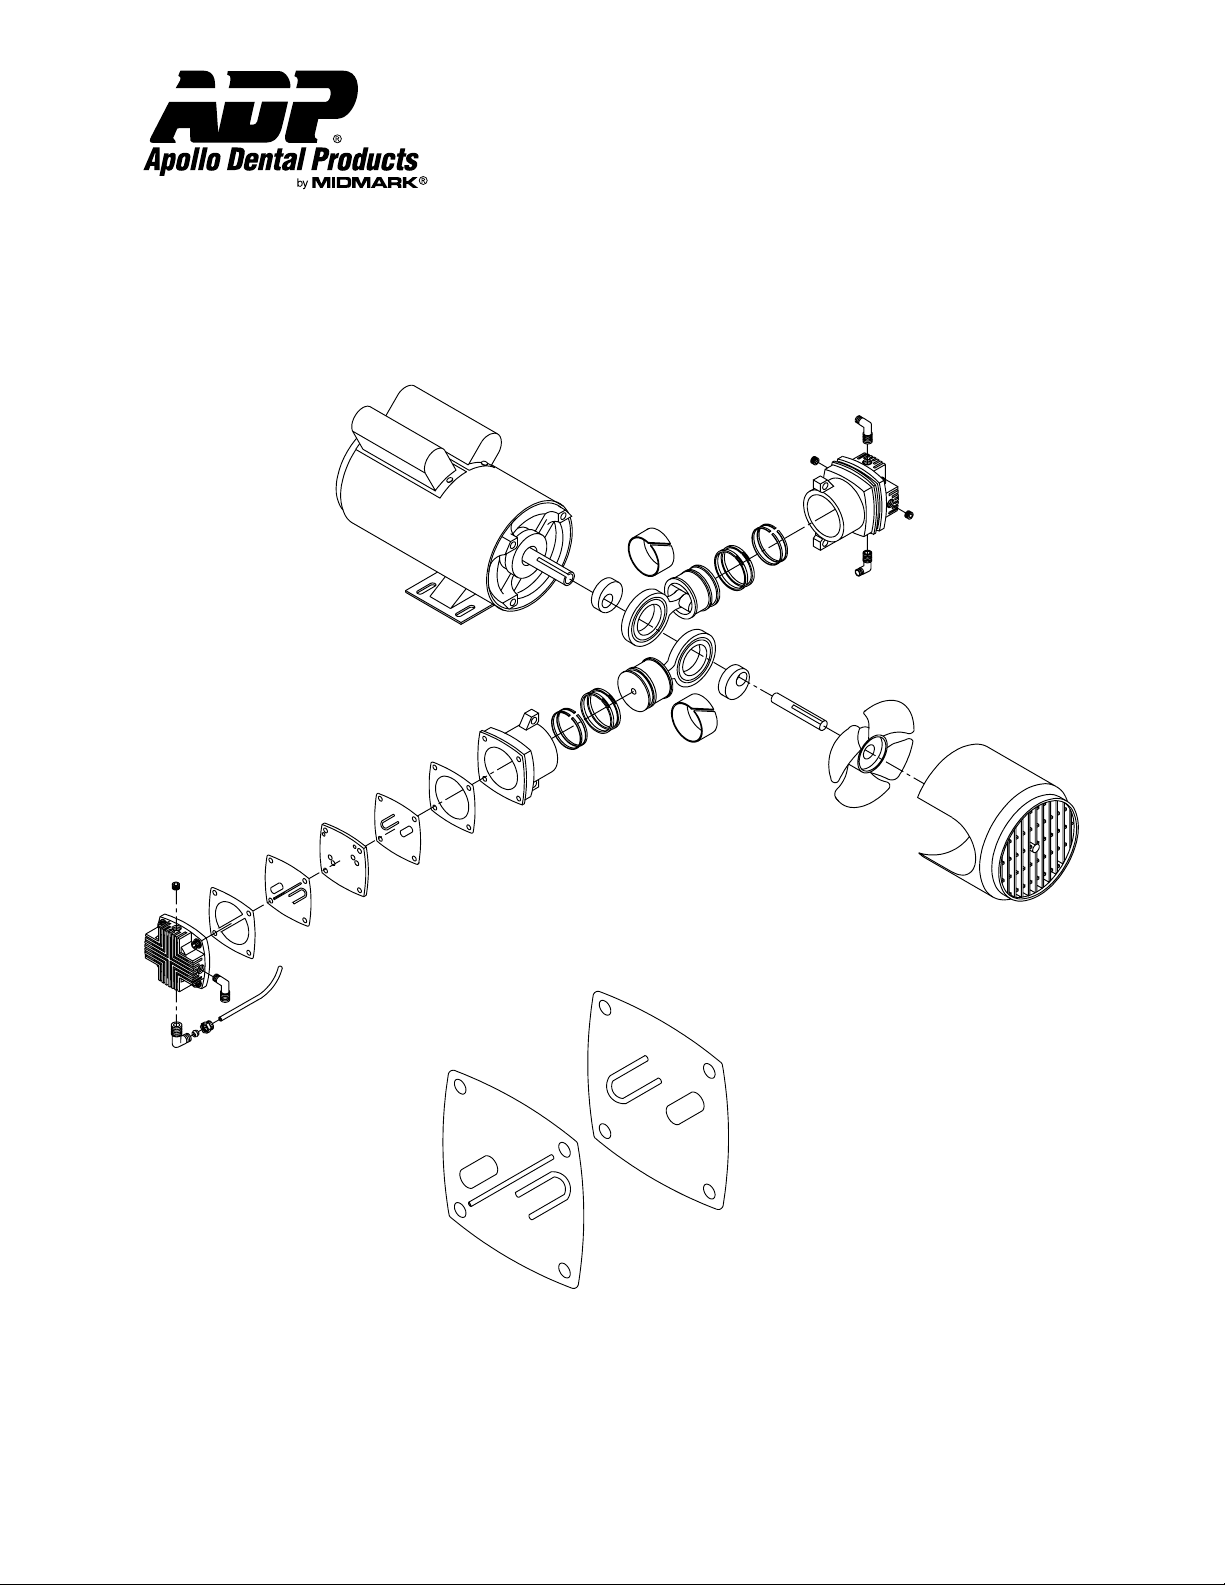
Apollo Dental Products offers repair kits for repairing worn or damaged head components on all oil-less, reciprocating compressor
units. The kits include head gaskets, cylinder gaskets, valve plates, inlet valves, outlet valves, and piston rings. HGA85325 includes
enough parts to rebuild two cylinder heads, while HGA85335 will replace parts for 4 cylinder heads.
Installation:
A. Disassembly
1. Disconnect the compressor from electrical power by turning the unit off at main breaker.
2. Disconnect compressed air discharge lines from compressor head(s).
3. Remove the shroud, cylinder head, and valve components. Note the position and order of all components, especially inlet and
outlet valves, for later assembly.
4. Remove the cylinder head and piston rings.
5. Clean all parts prior to assembly. Do not use any chlorinated solvents to clean valves, or any liquid to flush units. All parts,
except the valves, can be cleaned with an industrial cleaning solvent.
B. Assembly
1. Install piston seals, rings, and rider rings on pistons, being sure to locate the ring joints approximately opposite each other.
2. Attach cylinder to bracket with cylinder screws and washers. Tighten screws finger tight.
3. Move pistons to top dead center position. Adjust each cylinder flush with the top of the cylinder.
4. Torque cylinder screws to 150-160 inch pounds.
5. Stack the valve components in order as originally assembled.
6. Install the cylinder head and head screws. The exhaust ports in the cylinder heads have been marked by omitting the ends of
two of the fins. Do not tighten head screws at this time.
7. Install manifold nuts and seals on the manifold and assemble into opposite cylinder head and manifold.
8. Torque all head screws to 150-160 inch pounds.
9. Turn the fan by hand to ensure that the rod assembly is not hitting the head. If the head and piston interfere, loosen the
cylinders and readjust.
10. Position manifold and tighten manifold nut two turns beyond hand tight.
11. Re-torque all screws after running for 10 minutes.
Warranty Information: 90 Days
All ADP accessories are thoroughly inspected and tested in accordance with rigid specifications and standards. Our accessories are guaranteed against any
defective material and workmanship from the date of shipment; provided that the installation, operation, and maintenance is done in accordance with ADP
procedures as outlined in our Installation and Maintenance Guides. Warranty cards must be returned to ADP within ten days of installation to effect warranty. No
other warranties or guarantees, expressed or implied are made.
ADP’s obligation under the warranty is to provide parts for the repair or, at its option, to provide the replacement product (excluding labor). All special, incidental
and/or consequential damages are excluded. We will not issue credit for accessories without first attempting to correct the problem in the field. Written notice of
breach of warranty must be given to ADP within the warranty period. The warranty does not cove damage resulting form improper installation or maintenance,
accident or misuse. The warranty does not cover damage resulting from the use of cleaning, disinfecting or sterilizing chemicals and processes. The warranty does
not cover vacuum failures due to hard water deposits. Failure to follow instructions provided in ADP’s Installation and Maintenance Guides may void the warranty.
Apollo Dental Products, Inc. • 245 W. Dakota Ave. • Clovis, CA 93612 • Technical Support
(559) 292-1444 • (800) 233-4151 • Fax (559) 292-1555 • www.apollodental.com
Page 1
AMI60750 Rev. 10/01
Installation Instructions
Oil-Less Valve Replacement Kit
Part #HGA85335
Technical Service - (800) 233-4151
INLET
OUTLET
NOTE: Valve Position Upon Disassembly
Page 2
AMI60750 Rev. 10/01
 Loading...