

Page 1

T E C H N O L O G I E S
Step 1
Separate the top from the bottom cover of
the drive enclosure by loosening the screw.
SATA Connector
HD
Switch
PCB
Step 3
Wrap the shock absorbers around
the hard drive and PCB.
User Guide
Ruby eSATAp ExDrive
(REDESP, REDESPU3)
Installing your HD to the
Ruby eSATAp ExDrive
Step 2
Align the SATA connector in the
2.5” hard drive with the SATA
connector on the PCB.
Shock Absorbers
Bottom of PCB
Step 4
Turn over the PCB and secure the hard
drive to the PCB with the mounting
screws that come with the kit.
www.addonics.com
v3.1.11
Technical Support
If you need any assistance to get your unit functioning properly, please have your
product information ready and contact Addonics Technical Support at:
Hours: 8:30 am - 6:00 pm PST
Phone: 408-453-6212
Email: http://www.addonics.com/support/query/
Page 2
Step 5
Mount the board to the bottom cover.
Bottom Cover
Step 6
Put the top cover on by holding it in
near vertical position and sliding the
two metal clips inside the two small
slots on the rear of the bottom cover.
Step 7
Lower the front of the top cover and making sure the two covers lined up
properly. Tighten the small retaining screw on the front of the bottom cover to
close the enclosure.
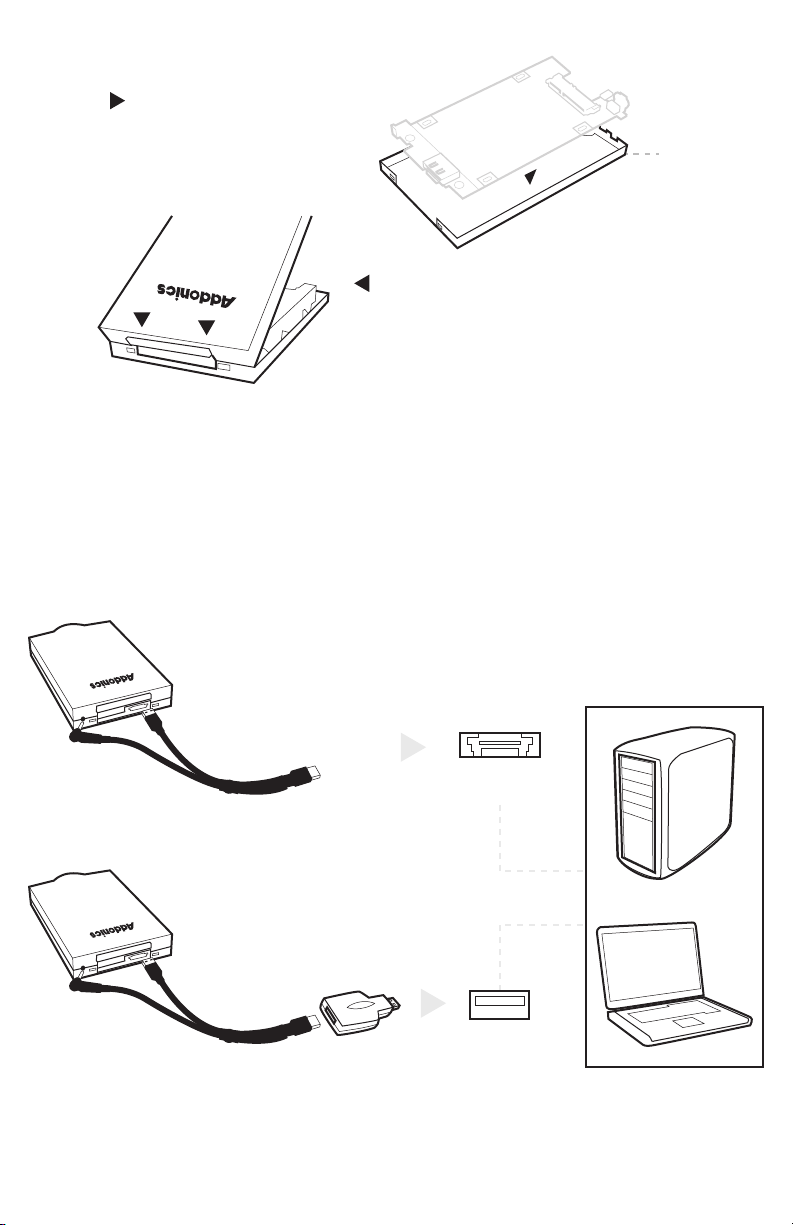
Connecting the Ruby Enclosure to Your Computer
Universal eSATAp Cable
Universal eSATAp Cable
eSATAp to USB 3.0 Adapter
(REDESPU3 Only)
Hybrid eSATA Port
(eSATAp)
or
USB 3.0/2.0 Port
 Loading...