

Page 1
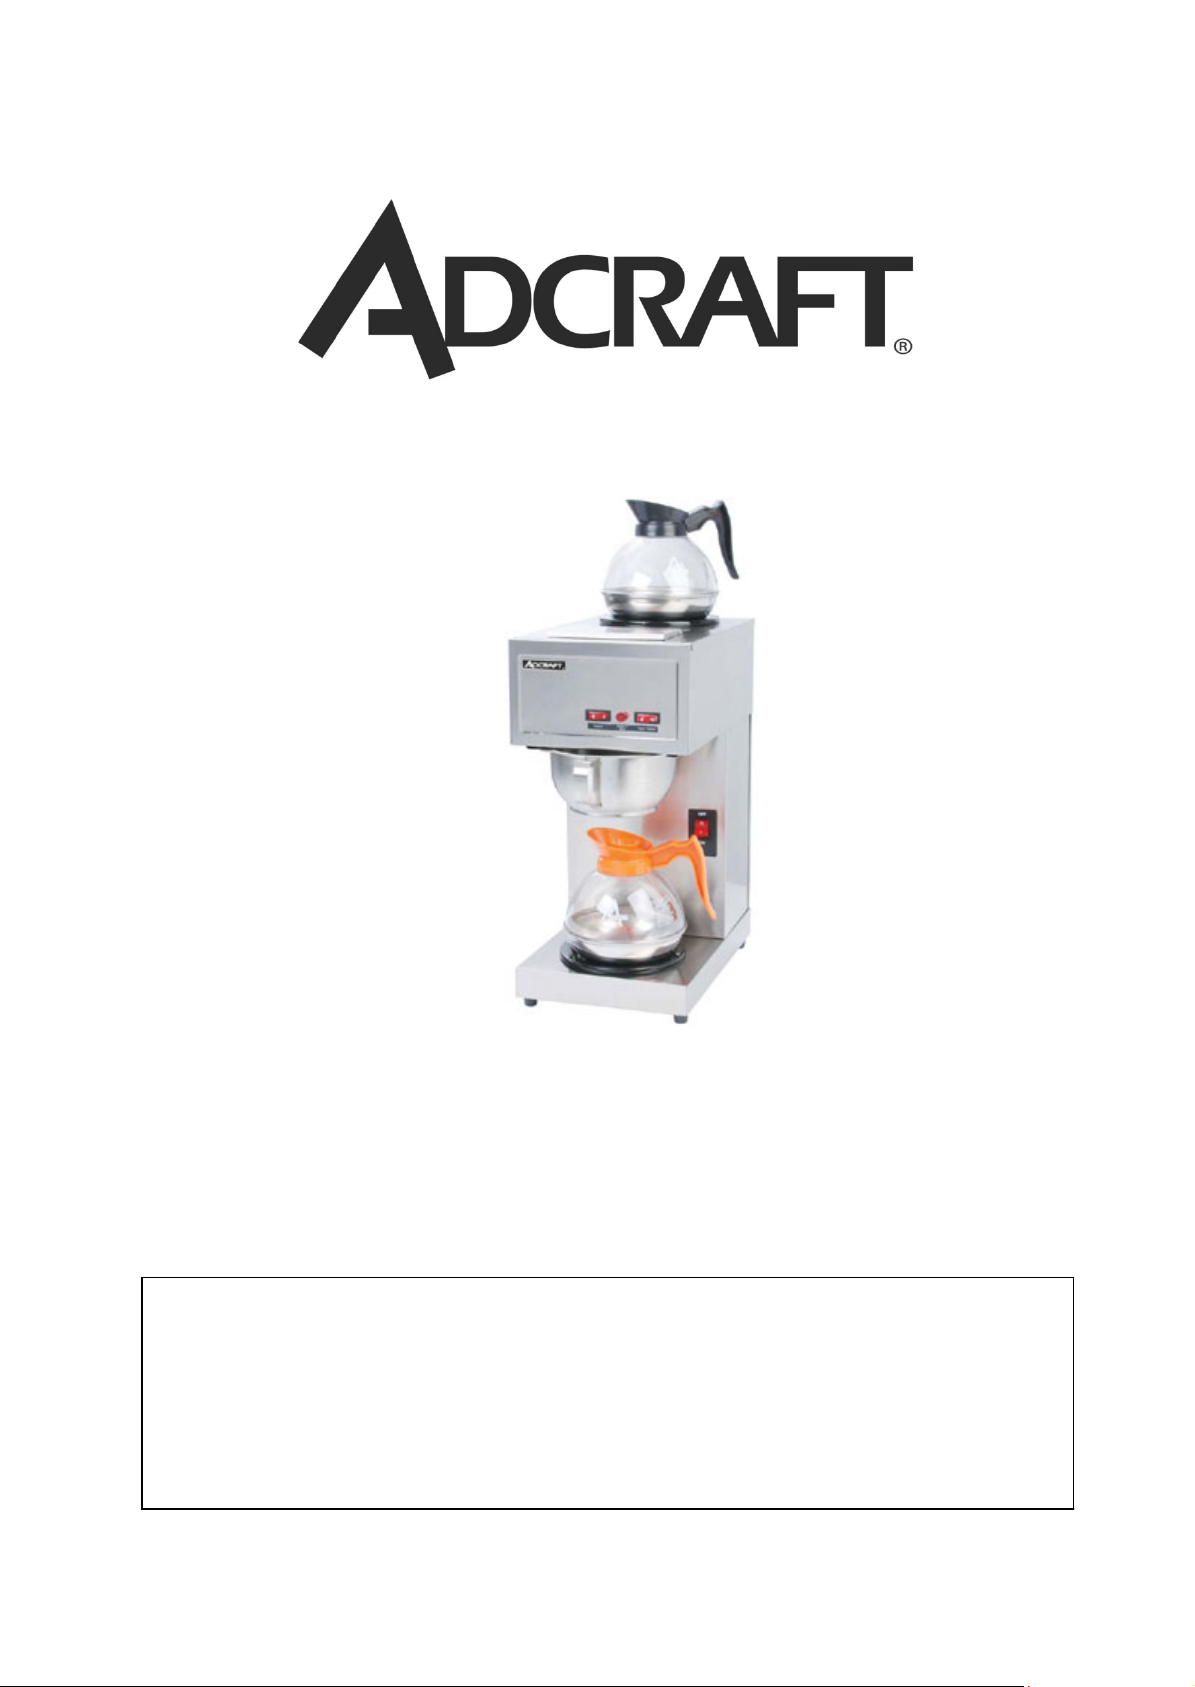
CBS-2
Coffee Brewer
This manual contains impor t a nt i nfor m a t ion regarding your
Admiral Craft unit. Please read this manual thoroughly prior to
equipment set-up, operation a nd m ai nt e na nc e. Failure to comply
with regular maintenance guidelines outl ined in this manual may
void the warranty. MUST READ!!!
Page 2
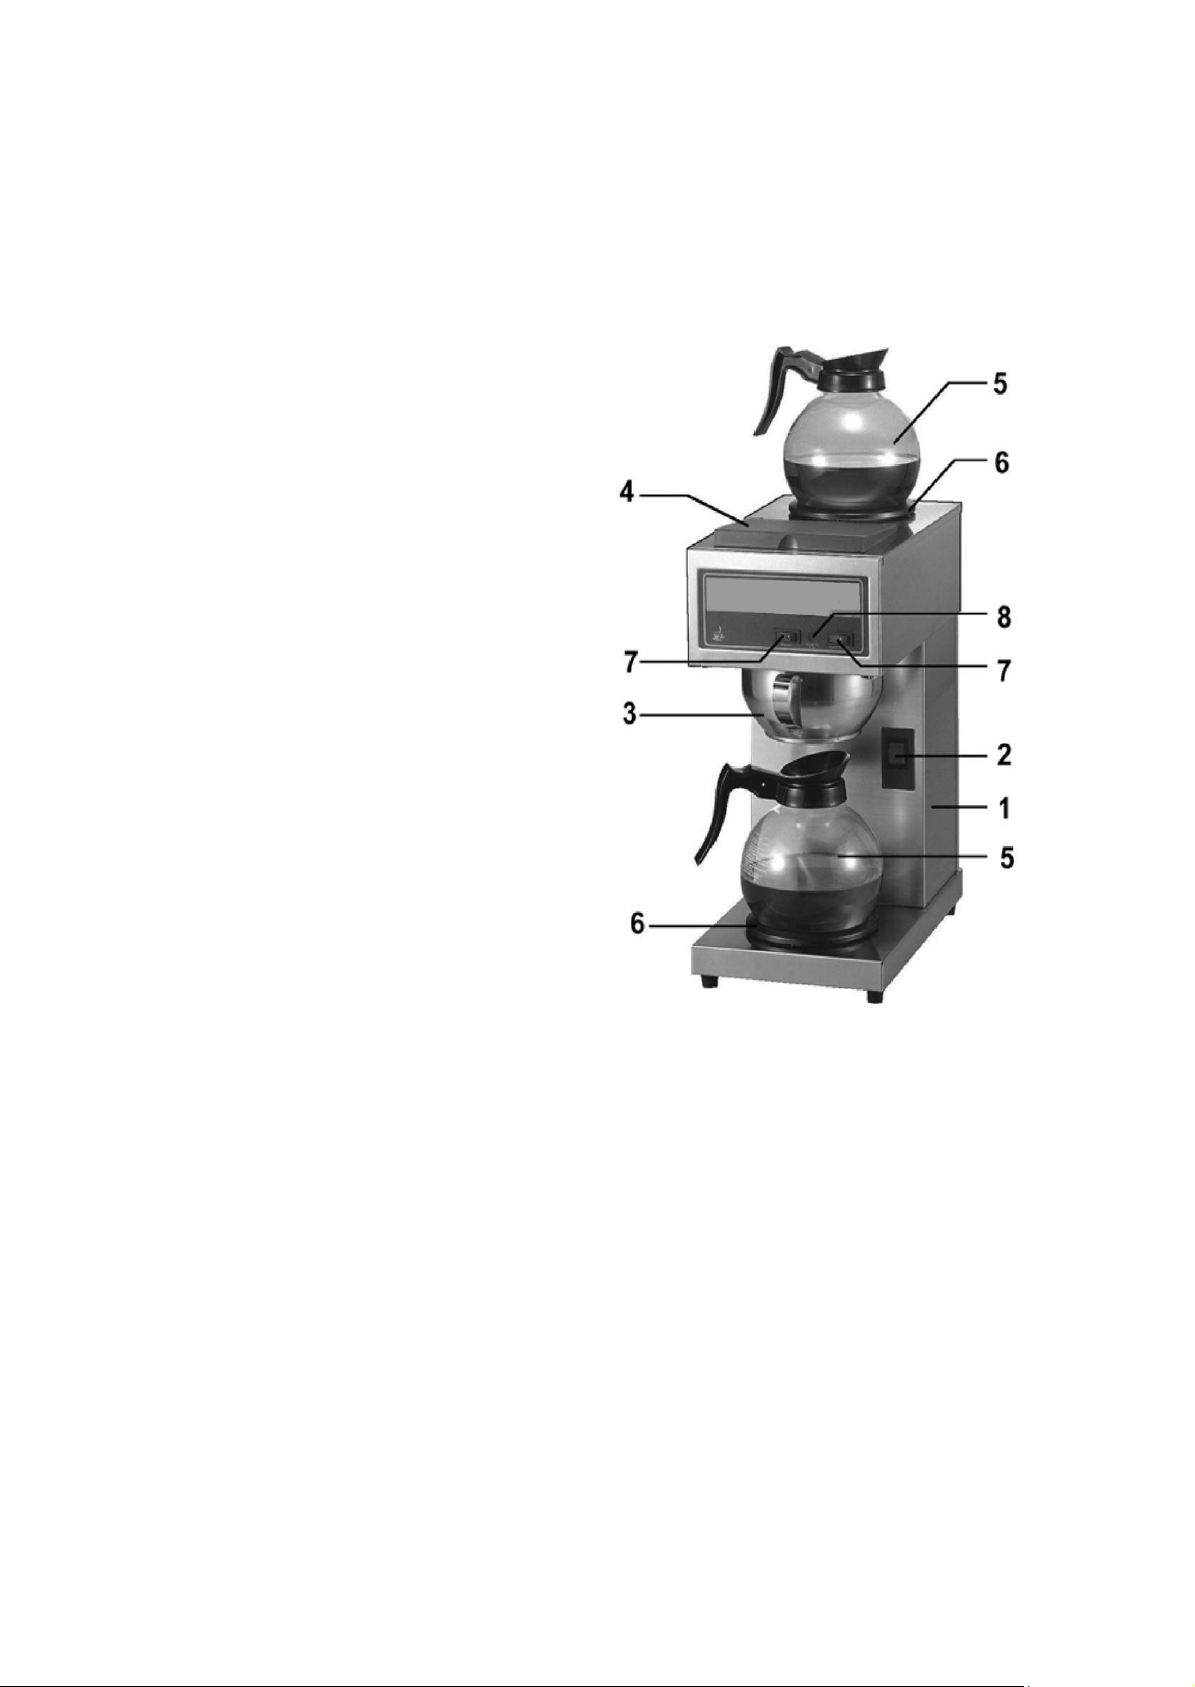
Please refer to the following parts and diagram when reading the
remainder of this manual.
1 Body of Machine
2 Power Switch
3 Filter Basket
4 Water Entrance
5 Coffee Pot ( **Not Included**)
6 Heating Plate
7 Heating Plate Power Switch
8 "Ready" Indicator
Warnings:
-
Never immerse the machine in water. If the machine has been
immersed, it must be dried and checked by an authorized
technician before being used again.
-
Never pour hot water into the water entrance.
-
When the machine is in use, some parts of the machine are
very hot, please ensure the power cord does not touch hot
parts. The user should also be careful not to touch the hot parts.
-
Remain in the vicinity of the machine while machine is in
operation
.
Page 3
Installation: (When the machine is used for the first time)
ELECTRICAL REQUIREMENTS
The brewer has an attached cord set rated 120 volts AC, 60 Hz, 15 Amps,
single phase, and with a grounding pin. Improper electrical installation will
damage electronic components.
CAUTION: The brewer must be disconnected
from the power source throughout the initial setup, except when specified in the instructions.
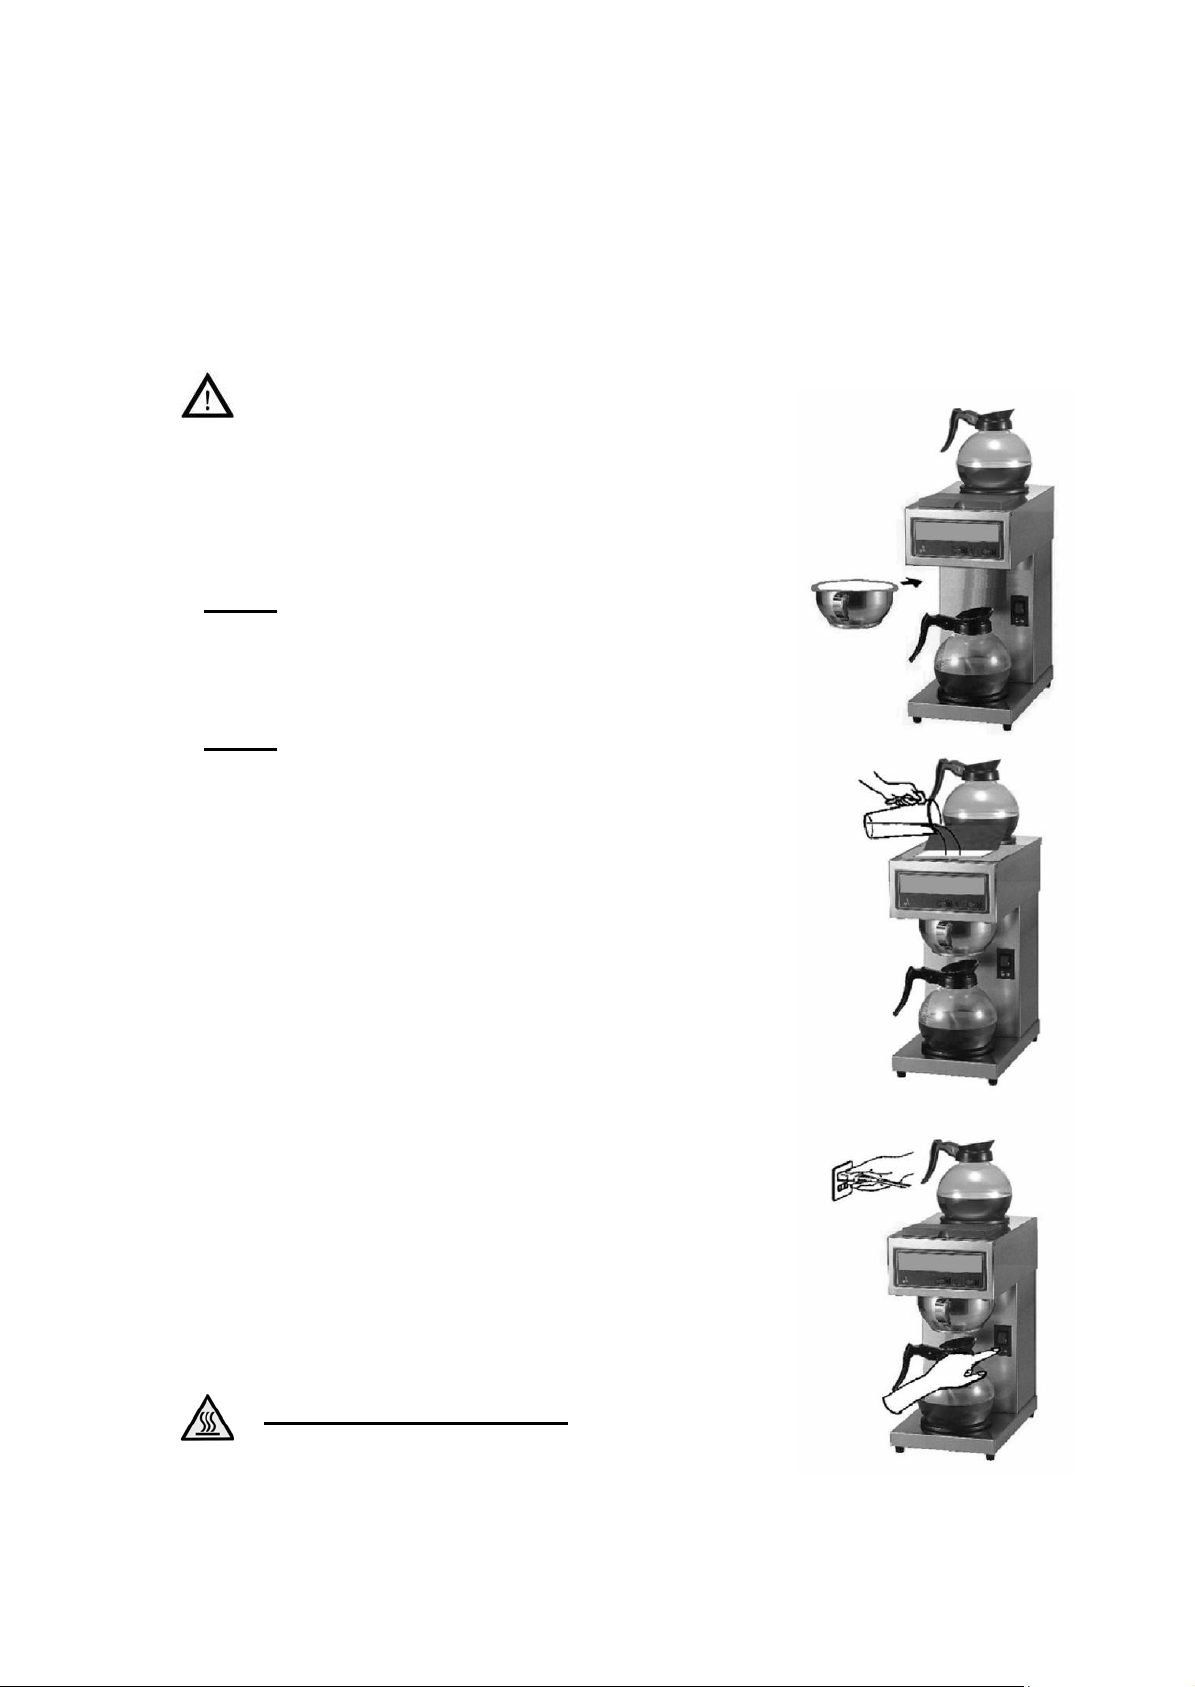
1. Place the Machine on a firm and horizontal table.
2. Put spring and wedge it on the bottom of the
Basket.
3. Slide the Filter Basket into the rails.
4. Place a decanter at the base of machine, under the
Basket.
5. Pour 5 liters of cool water into the machine
through the Water Entrance (#4). Allow approximately
two minutes between each carafe to flow into the
tank.
6. Allow the water to flow into the pot or server, wait
approximately 5 minutes after the water stops
flowing.
7. Discard the water in the pot or server and replace it
on the base or the Lower Hot Plate.
8. The brewer is now ready for use.
9. Plug the power cord into the power outlet and turn
power switch to the "ON" position, the brewer will
begin heating.
10.When the "Ready to Brew" indicator lights up, the
machine is ready for use.
CAUTION : Hot Surface.
Page 4

COFFEE BREWING
-
Make sure the “Spring” is wedged well at the
bottom of 3 Filter Basket.
-
Insert a 12 cup filter into the Filter Basket.
-
Pour selected coffee grounds into the filter and
shake it gently to level the bed of grounds.
-
Slide the Filter Pan into position, and ensure that
there is an empty pot or server on the base (or on
the Lower Hot Plate).
-
Confirm the "Ready to Brew" Indication is lit.
-
Pour one pot of tap water into the screened area on
top of the brewer.
-
Coffee will flow out from the Filter Basket into the
server very quickly.
-
When brewing is completed, the coffee can be
served immediately.
-
Discard the grounds and filter.
-
The "Ready to Brew" indication will turn off, and
the Boiler will start heating again.
-
When the "Ready to Brew" indication lights up,
another pot of coffee can be brewed at any time.
During operation, it is normal to hear hissing or
sizzling sounds as the water is heating.
Always turn power switch “OFF”, when brewer is
not in use
If steam appears from around the Filter Basket
during stand-by condition, then the control
thermostat may need to be adjusted downward to
compensate for high altitudes. Please refer to the
adjustment process instructions on the “Adjustment
Instructions” page.
Page 5

CLEANING
1. Use of a damp cloth with a mild, non-abrasive, liquid
detergent is recommended for cleaning all surfaces
of Brewer.
2. Check and clean the “spray head”, ensure that the
spray head holes remain open.
3. You may open the “spray head” to clean if
water-scales (limestone) have covered the holes.
4. In hard water areas, user may need to check the
“spray head” every day. It will help prevent liming problems.
The brewer can not be cleaned by a water jet.
Ensure that the silicon seal on the “spray head” remains in
De-sediment
In areas with hard water, chalk and limestone will accumulate when the
machine is used. To keep the machine in the best condition and ensure each
brew tastes consistent, we recommend that the user De-sediment when the
Machine has brewed for about 600 cycles, or has been used for 6 months,
whichever is first.
The De-sediment process must be conducted by trained professional
personnel, and it is suggested that a service technician be contacted to
perform the service. The De-sediment process is completed as follows;
1. Add 500-ml condensed lemon juice or De-scaler into 1 liter of water.
2. Slide Filter Pan into position.
3. Place an empty Decanter at the correct position under the Filter Pan.
4. Pour the lemon juice solution into the machine.
5. Wait 20~30 minutes to enable the De-scale solution to run through with
6. Open the Top cover and unscrew the lid of water tank.
7. Take off the lid on water tank carefully, there are components
8. Take off the tank, pour the water away and wash it several times.
9. Replace the Tank, Lid, back and screw the lid on.
10. Repeat the Installation steps. (Fill up the tank).
11. The machine is ready for use.
place at all times.
sediments and disconnected the plug from the power source.
mounted on the lid. The operator should avoid touching or bumping them.
There is silicon seal on the groove of Lid, ensure it is always in
place.
Page 6

Adjustment Instructions
Adjust the temperature:
Warning: This adjustment should be process
by qualified technician or service person only.
Adjustment Water Temperature:
The temperature of machine has been set
between 94 – 96 º C. To adjust this
setting;
Open the top cover of machine so that
the temperature controller can be seen.
Turn it very slowly. An accessory knob with temperature ratings is
available for service personnel to assist in setting the thermostat.
For best tasting coffee results;
Use distilled water, or soft and/or filtered water
Choose a quality coffee supplier
Use fresh coffee grounds
Keep coffee grounds in a sealed container, and keep them cool.
Page 7

CBS-2
VER811
Page 8

CBS-2
VER811
Page 9

Coffee Brewer - CBS-2
Reference
Number Part Number Description
1 CBS-1 Foot
2 Bottom Cover
3 Base Frame
4 Power Cord Ring
5 CBS-5 Plug , Power Cord, Strain Releif, Power Cord Clip
6 CBCP-6 Indicator Light, Red
10 CBS-10 Power Switch
11 Outside Switch Holder
12 Inside Switch Holder
13 Body Frame
14 Outflow Pipe
15 Draining Pipe Copper Tube
17 Rear Cover
18 CBS-18 Thermomstat
19 Hold-Down Strap
20 CBS-20 Main Heater
21 CBS-21 Adjustable Thermostat
22 Fever Partition
23 Mica Heater Fixer
25A CBS-25 Mica Heater
26A Warming Plate
28 Shaft for Metal Lid of Water Resivior
29A Lid of Water Reservoir
30A Mesh of Water Entrance
32A Upper Cover
33 Steam Hose
34 Inflow Pipe
35 Outflow Pipe
36 Lid of Tank
38 Block-Thermostat Tube
39 CBS-39 Tank Gasket
41 Water Basin
42 Boiler Tank
44 CBS-44 Relay
45 Upper Frame
46 Indicate Panel
47 CBS-47 Switch for Warming Plate
49 Outflow Pipe
50 Elbow-Out
51A Sprinker Holder
53 CBS-53 S/S Filter Pan and "W" Spring
55 CBS-55 Spinkler Gasket
56 Sprinkler
57 Screw of Sprinkler
VER811
Page 10

ACE
Equipment
One Year Limited
Warranty
Admiral Craft Equipment Corp. (ACE) warrants its equipment against defects in materials and workmanship, subject
to the following conditions:
ACE Equipment is warranted for one year, effective from the date of purchase by the original owner. A copy of the
original receipt or other proof of purchase is required to obtain warranty coverage. This warranty applies to the original
owner only, and is not assignable.
Should any product fail to function in its intended manner under normal use within the limits defined in this
warranty, at ACE’s discretion, such product will be repaired, replaced with a r efurbished unit, or replaced with a ne w
unit by ACE, after defective unit has been inspected and defect has been confirmed. ACE does not assume any liability
for extended delays in replacing any item beyond its control. This warranty does not apply to rubber and non-metallic
synthetic parts that may need to be replaced due to normal usage, wear or lack of preventative maintenance.
This warranty covers products shipped into the 48 contiguous United States, Hawaii, and metropolitan areas of Alaska
and Canada. Warranty coverage on products used outside the 48 contiguous United States, Hawaii and metropolitan
areas of Alaska and Canada may vary. Contact ACE for details at 1-800-223-7750
The following conditions are not covered by warranty:
•
Equipment failure relating to improper installation, improper utility connection or supply and problems due to
improper ventilation.
•
Equipment that has not properly been maintained, damage from improper cleaning, and water damage
to controls.
•
Equipment that has not been used in an appropriate manner, or has been subject to misuse, neglect, abuse,
accident, alteration, negligence, damage during transit, delivery or installation, fire, flood, riot, or act of God.
•
Equipment that has the model number or serial number removed or altered.
•
Equipment on which the security seal has been broken.
If the equipment has been changed, altered, modified, or repaired without express written permission from ACE, then the
manufacturer shall not be liable for any damages to any person or to any property, which may result from the use of this
equipment thereafter.
This equipment is intended for commercial use only and this warranty is void if equipment is used in other than a
commercial application.
For warranty and non-warranty related issues please call ACE at 1-800-223-7750 ext 3 to speak to technical support.
When calling please have your model number, serial number and proof of purchase ready. To purchase replacement
parts, receive online technical support or fill out a warranty claim visit
necessary to contact the place where you originally purchased your product from.
“THE FOREGOING WARRANTY IS IN LIEU OF ANY AND ALL WARRANTIES EXPRESSED OR IMPLIED
INCLUDING ANY IMPLIED WARRANTY OF MERCHANTABILTY OR FITNESS FOR PARTICULAR
PURPOSES AND CONSTITUES THE ENTIRE LIABILITY OF ACE. IN NO EVENT DOES THE LIMITED
WARRANTY EXTEND BEYOND THE TERMS STATED HEREIN.”
VER0112
www.admiralcraftequipment.com. It is not
 Loading...