

Page 1
Instruction manual
1282 CLASSIC
Safety Information
Important - Please read these instructions fully before installing
or operating
Power source
• Opening or removing covers may expose you to
dangerous voltages or other hazards.
• Use suitable power sources - Plug the product into a
suitable power source, as described in the operating
instructions or as marked on the product.
• The supply voltage should be the same as that
indicated in the technical specifications and the
appliance rating plate.
• Do not bend, stretch or pull the supply cable in order
to avoid electric shock.
• Do not allow the product to be submerged in
water. Do not expose headphone socket or battery
compartment to water, as water entering the set may
cause major damage.
Moisture and water
• Do not use this apparatus near water or moisture.
• Do not use this product near a bathtub, washbowl, kitchen
sink, and laundry tub, in a wet basement, near a swimming
pool, or anywhere else that water or moisture is present.
Heat sources and flames
• Batteries shall not be exposed to excessive heat such
as sun, fire or the like.
Servicing and repairs
• Refer all servicing to qualified service personnel
• Servicing is required when the apparatus has been
damaged in any way: such as liquid has been spilled or
objects have fallen into the apparatus; the apparatus
has been exposed to rain or moisture, does not operate
normally, or has been dropped.
Getting to know your portable
mp3 player
Please read these instructions carefully. They contain important
information which will help you get the best from your product
and ensure safe and correct installation and operation.
If you require any further assistance, our technical experts are
happy to help. For full details, refer to the product support
section at the end of these instructions.
Accessories
1. 1282 CLASSIC player
2. USB charging cable
3. Earphones (with 2 extra sleeves)
4. Instruction manual
Track1.FLAC
002 02:37
48KHz
1024KBPS 004 03:37
EQ
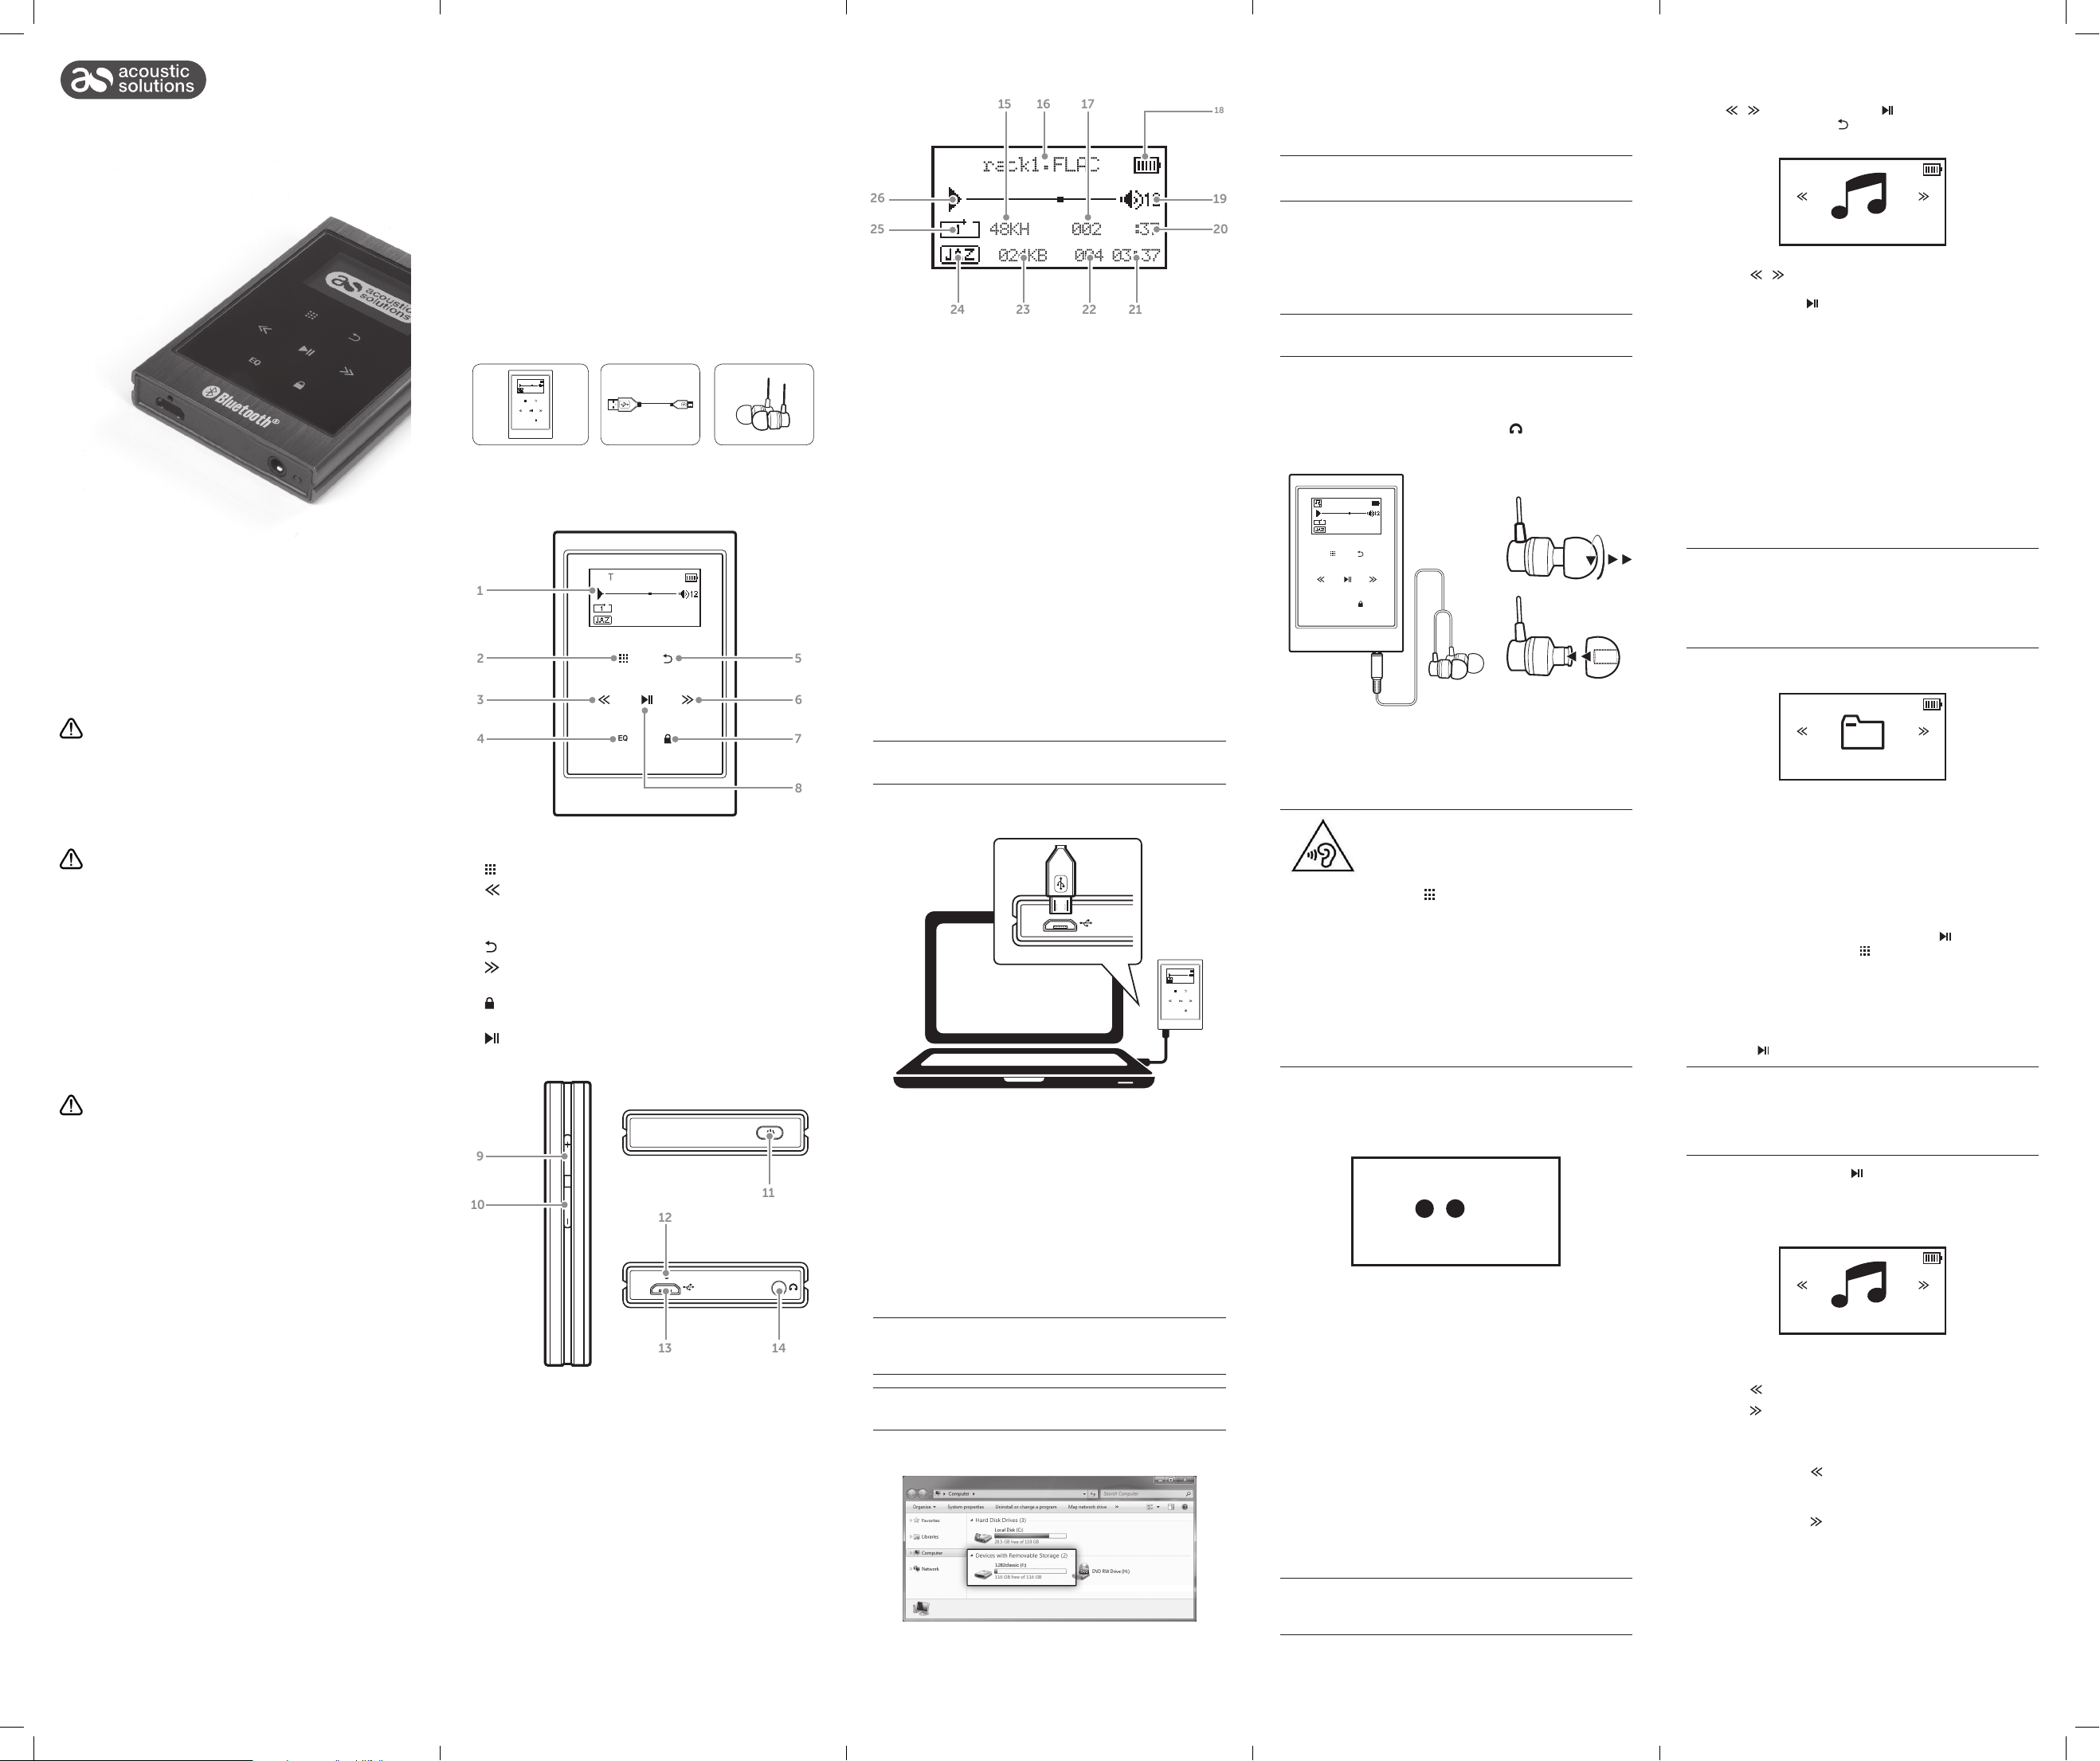
Functions and controls
1
2
3
4
1. OLED display
2.
MENU: Press for function options
3.
SKIP BACKWARDS/SCROLL UP: Press to skip to a
previous track or to scroll upwards through menus.
4. EQ: Press to enter EQ selection menu.
BACK: Press to return to the previous screen.
5.
6.
SKIP FORWARDS/SCROLL DOWN: Press to skip to the
next track or to scroll downwards through menus.
7.
KEYPAY LOCK: Press to disable the keypad buttons being
pressed.
8.
PLAY/PAUSE/SELECT: Press for play and pause functions
and select.
9
10
Track1.FLAC
002 02:37
48KHz
1024KBPS 004 03:37
EQ
12
5
6
7
8
11
Functions and controls continued
1615 17
Track1.FLAC
26
25
48KHz
002 02:37
1024KBPS 004 03:37
22
24
23
15. FREQUENCY: Displays the frequency of each audio track.
16. TRACK NAME: Displays the track name from the ID3 tag.
17. TRACK NUMBER: Displays the track number.
18. BATTERY LEVEL: Displays the charge level of the internal
battery.
19. VOLUME LEVEL: Displays the volume level.
20. TIMECODE: Displays the timecode of the current track.
21. TRACK LENGTH: Displays the total length of the current
track.
22. TOTAL TRACKS IN FOLDER: Displays the total number of
tracks in the selected folder.
23. BIT RATE: Displays the bit rate of the current track.
24. EQ MODE: Displays the current EQ setting.
25. PLAY MODE: Displays the playback mode setting.
26. PLAY/PAUSE: Displays the PLAY or PAUSE icon depending
on the status.
21
Using your portable mp3 player
Getting started
Follow the below steps to charge the player.
The player requires charging fully before use to ensure
battery longevity.
1. Take the supplied USB cable and connect the MICRO USB
end into the charge socket on the bottom of the player.
Track1.FLAC
48KHz
002 02:37
1024KBPS 004 03:37
EQ
2. Connect the other end of the USB cable to a USB port on a
PC/ laptop and power up.
3. As the mp3 player receives power the loading screen will
be displayed and the battery charge icon will slowly fill to
indicate the charge level.
4. After power up the mp3 player will connect to the
PC/ laptop and a storage device will appear in the ‘My
Computer’ drive list named ‘1282classic’.
Transferring music to the mp3 player
18
19
20
Transferring music to the mp3 player continued
2. Double click ‘My Computer’ Or ‘Computer’ on some
operating systems. Look for ‘Removable disks or storage’
option and locate the device named ‘1282classic’ and
double click.
Do not disconnect the USB cable at any time when copying
data to or from the device.
3. Drag and drop media files into the removable device. You
can create additional folders using the operating system
installed on your PC/ laptop.
4. Close the removable device window and disconnect
the player from your pc/ laptop after data transfer has
completed.
If you are charging the mp3 player while transferring files
DO NOT disconnect the player until fully charged.
Connecting earphones
1. Insert the 3.5mm jack in to the earphone socket on the
bottom of the player marked with the symbol. (Fig 1)
2. Ensure the jack is pushed in far enough to click into place.
Track1.FLAC
002 02:37
48KHz
1024KBPS 004 03:37
EQ
Fig 2.
Fig 3.
Fig 1.
3. The earphones are supplied with small, medium and large
sound isolating sleeves. Twist and pull to remove from each
earphone. (Fig 2)
4. Push each sleeve onto the earphone as shown (Fig 3).
Ensure each sleeve is secure.
To prevent possible hearing damage, do not
listen at high volume levels for long periods.
When the volume is adjusted to 85dB the
above icon will appear on the display.
Press the ‘ ’ button to continue.
If you hear no sound during playback, do not turn the
volume up as the music may suddenly begin at a high
volume.
Excessive sound pressure from earphones and headphones
can cause hearing loss.
To avoid damaging your ears, adjust the volume to the
lowest safe level before playing, and turn up to the desired
level when playback has started.
Power On/ Off
1. Press and hold the POWER button on top of the player until
all three digits light up and the player powers off.
1 2 3
Navigating the music library continued
1. Navigate to the MUSIC option from the main menu using
the / buttons. Pressing the button will select a
highlighted option. The button will return to the previous
menu.
Music
2. Use the
/ buttons to navigate the library options from:All Songs, Artists, Albums, Genres, Playlists and Update
Playlists. Press the button to select.
• All Songs Displays all tracks in an alpha numeric
order.
• Artists Displays a list of folders named by Artist.
When selected each album is presented
as folders.
• Albums Displays all albums as folders in an alpha
numeric order.
• Genres Displays a list of genres generated from
the transferred files ID3 tags.
• Playlists Displays a list of playlists.
• Update playlists See ‘Update playlist’ section overleaf.
Artist, Album & Genre selection is intended for light users.
Tracks will be sorted and selections available up to a
maximum of 4000 in total.
Experienced users with larger music collections should use
the ‘File browser’ from the main menu.
File browser
Browser
As an alternative viewing option to the music library you can
browse files as they are stored on the internal memory. So files
in folders will be displayed in folders and files not in folders will
be displayed as such.
The operational functions are the same as the music library.
Playing music
1. After highlighting a song to play, press the button to
begin playback or press the button and select ‘Play’ from
the list.
2. After the song has played the next song in the alpha
numeric list will play automatically, unless there is only one
song found in the folder.
3. To play an album/ folder; select the first track in the list and
press the
The default play mode is REPEAT ALL. When all tracks in
an album/ folder have played, playback will repeat starting
from track 01.
See ‘Playback modes’ for more information.
4. During playback press the
track. Press again to resume.
5. To return to the currently playing track at any time select the
NOW PLAYING option from the main menu.
button.
button to pause the current
Getting started
You’ll soon be enjoying your new Portable mp3 jukebox.
It all begins here, with your instructions. Don’t worry, there’s
nothing too technical coming up. Just simple, step-by-step
guidance to get you up and running quickly. Sound good?
Then let’s get started.
Help and Guidance
We’re here to help you get the most from your Portable mp3
jukebox. Should you require any guidance, a simple solution
can often be found online at:
www.argos-support.co.uk
If you still require further assistance, call one of our experts on
0345 600 3021.
13
14
9. VOLUME +: Press to increase the volume output.
10. VOLUME -: Press to decrease the volume output.
11. POWER: Press to dim the display or press and hold to
power off the player.
12. RESET: Press to reset the player.
13. USB PORT: Used for charging and file transfer.
14. EARPHONE PORT: Connect earphones with 3.5mm jack.
Follow the below steps to copy audio tracks from your PC or
MAC to the internal memory of the mp3 player.
WARNING: Audio tracks with digital copy protection can
ONLY be played back by the hardware/software they where
purchased from and will not function on this device.
Audio tracks can be transferred during the charge process;
but could result in a slightly longer charge process.
1. Follow the steps in ‘Getting Started’ to connect to a PC/
laptop and load the internal storage device.
2. To power the player on press and hold the POWER button
for 2 seconds.
Backlight dim
1. Press the POWER button on top of the player when
powered on to dim the backlight.
2. Press once more to illuminate the backlight.
Using your portable mp3 player
Navigating the music library
Once the player is fully charged, and you have copied music
to the device follow the below instructions to begin browsing
your music.
After copying lots of files to the player, there may be a delay
after disconnecting from a PC/ laptop while the software
organises the files.
Now Playing
Skipping tracks
1. Use the button to skip to the previous track.
2. Use the
button to skip to the next track.
Fast searching tracks
1. Press and hold the button to fast rewind the current
playing track. Release the button to resume normal
playback.
2. Press and hold the
playing track. Release the button to resume normal
playback.
button to fast forward the current
Page 2
Using your portable mp3 player
Volume control
1. To adjust the volume levels press the VOLUME + or
- buttons (on the side) to increase or decrease the level.
When the volume is adjusted to 85dB this icon
will appear on the display to indicate a level that
could cause damage to your hearing has been
reached.
2. Press the ‘
Key lock
To prevent buttons being pressed when the player is in a
pocket or such like, you can activate the keylock function.
1. Press the
animated lock being closed.
2. Press again to unlock. The animated lock will now open
and the button functions will be available once more.
EQ modes
1. Press the EQ button to display a list of EQ settings.
2. Use the
highlight each setting any currently playing audio will
temporarily adopt the EQ setting to allow you to hear the
difference.
3. To select the EQ setting press the
be stored and displayed on the PLAY screen.
Refer to functions and controls for a detailed description of
the playback screen.
Custom EQ setting
4. Select the ‘Custom’ option at the bottom of the EQ list to
program your own EQ setting. Once selected the below
screen will be displayed.
BASS TREBLE
5. Use the
from -5 to +5. Press the button to skip between the BassMid-Treble settings.
6. Press the
To use this setting at any time, select the custom option
from the EQ list.
Playback modes
When playing multiple tracks for example an album, you can
choose how the player deals with selecting the next track.
1. Use the
press the button to select.
Play All
Repeat 1
Repeat All
Shuffle
Creating a playlist
Follow the below steps to program a playlist of tracks.
1. You can easily add a playing track to a playlist by pressing
the
’ button to continue.
button to activate the lock. You will see an
/ buttons to scroll through the list. As you
button. The setting will
2 0 1 -1 2
B L M H T
/ buttons to increase or decrease the levels
button to store the setting for use.
/ buttons to scroll through the options, and
Plays all tracks in a folder in sequence and
stops after the last track has played.
Plays the current track repeatedly.
Plays all tracks in a folder in sequence and
repeats after the last track has played.
Plays all tracks in a folder in random order.
button and selecting ‘Add to Playlist’.
2/2
Play
Add to PlayList
Editing a playlist
1. From the MUSIC menu select PLAYLISTS.
2. Select a playlist 1-3 and press the
tracks in the playlist.
3. Highlight a song you wish to delete and press the
Using the
PLAYLIST’ option and press the button twice to delete the
track.
4. To remove all tracks from the selected playlist press the
button. Using the / buttons select the ‘CLEAR
PLAYLIST’ option and press the button twice to clear the
selected playlist.
/ buttons select the ‘REMOVE FROM
Play
Remove from Playl
Clear Playlist
button to view the
button.
2/3
Deleting tracks/ folders
1. Navigate to the BROWSER option from the main menu
using the / buttons.
Browser
2. Highlight a song or folder you wish to delete and press the
button.
3. Using the
press the button.
4. Navigate to the YES option and press the
more to delete.
/ buttons select the ‘DELETE’ option and
button once
Update playlist
When deleting folders & songs that are included in a playlist.
Occasionally the reference to the files may remain after
deleting. If this situation occurs follow the steps below.
1. From the MUSIC menu select UPDATE PLAYLISTS.
2. The software will scan the file system and remove any
orphaned links to deleted songs & albums.
3. Press the
button to return back to the MUSIC menu.
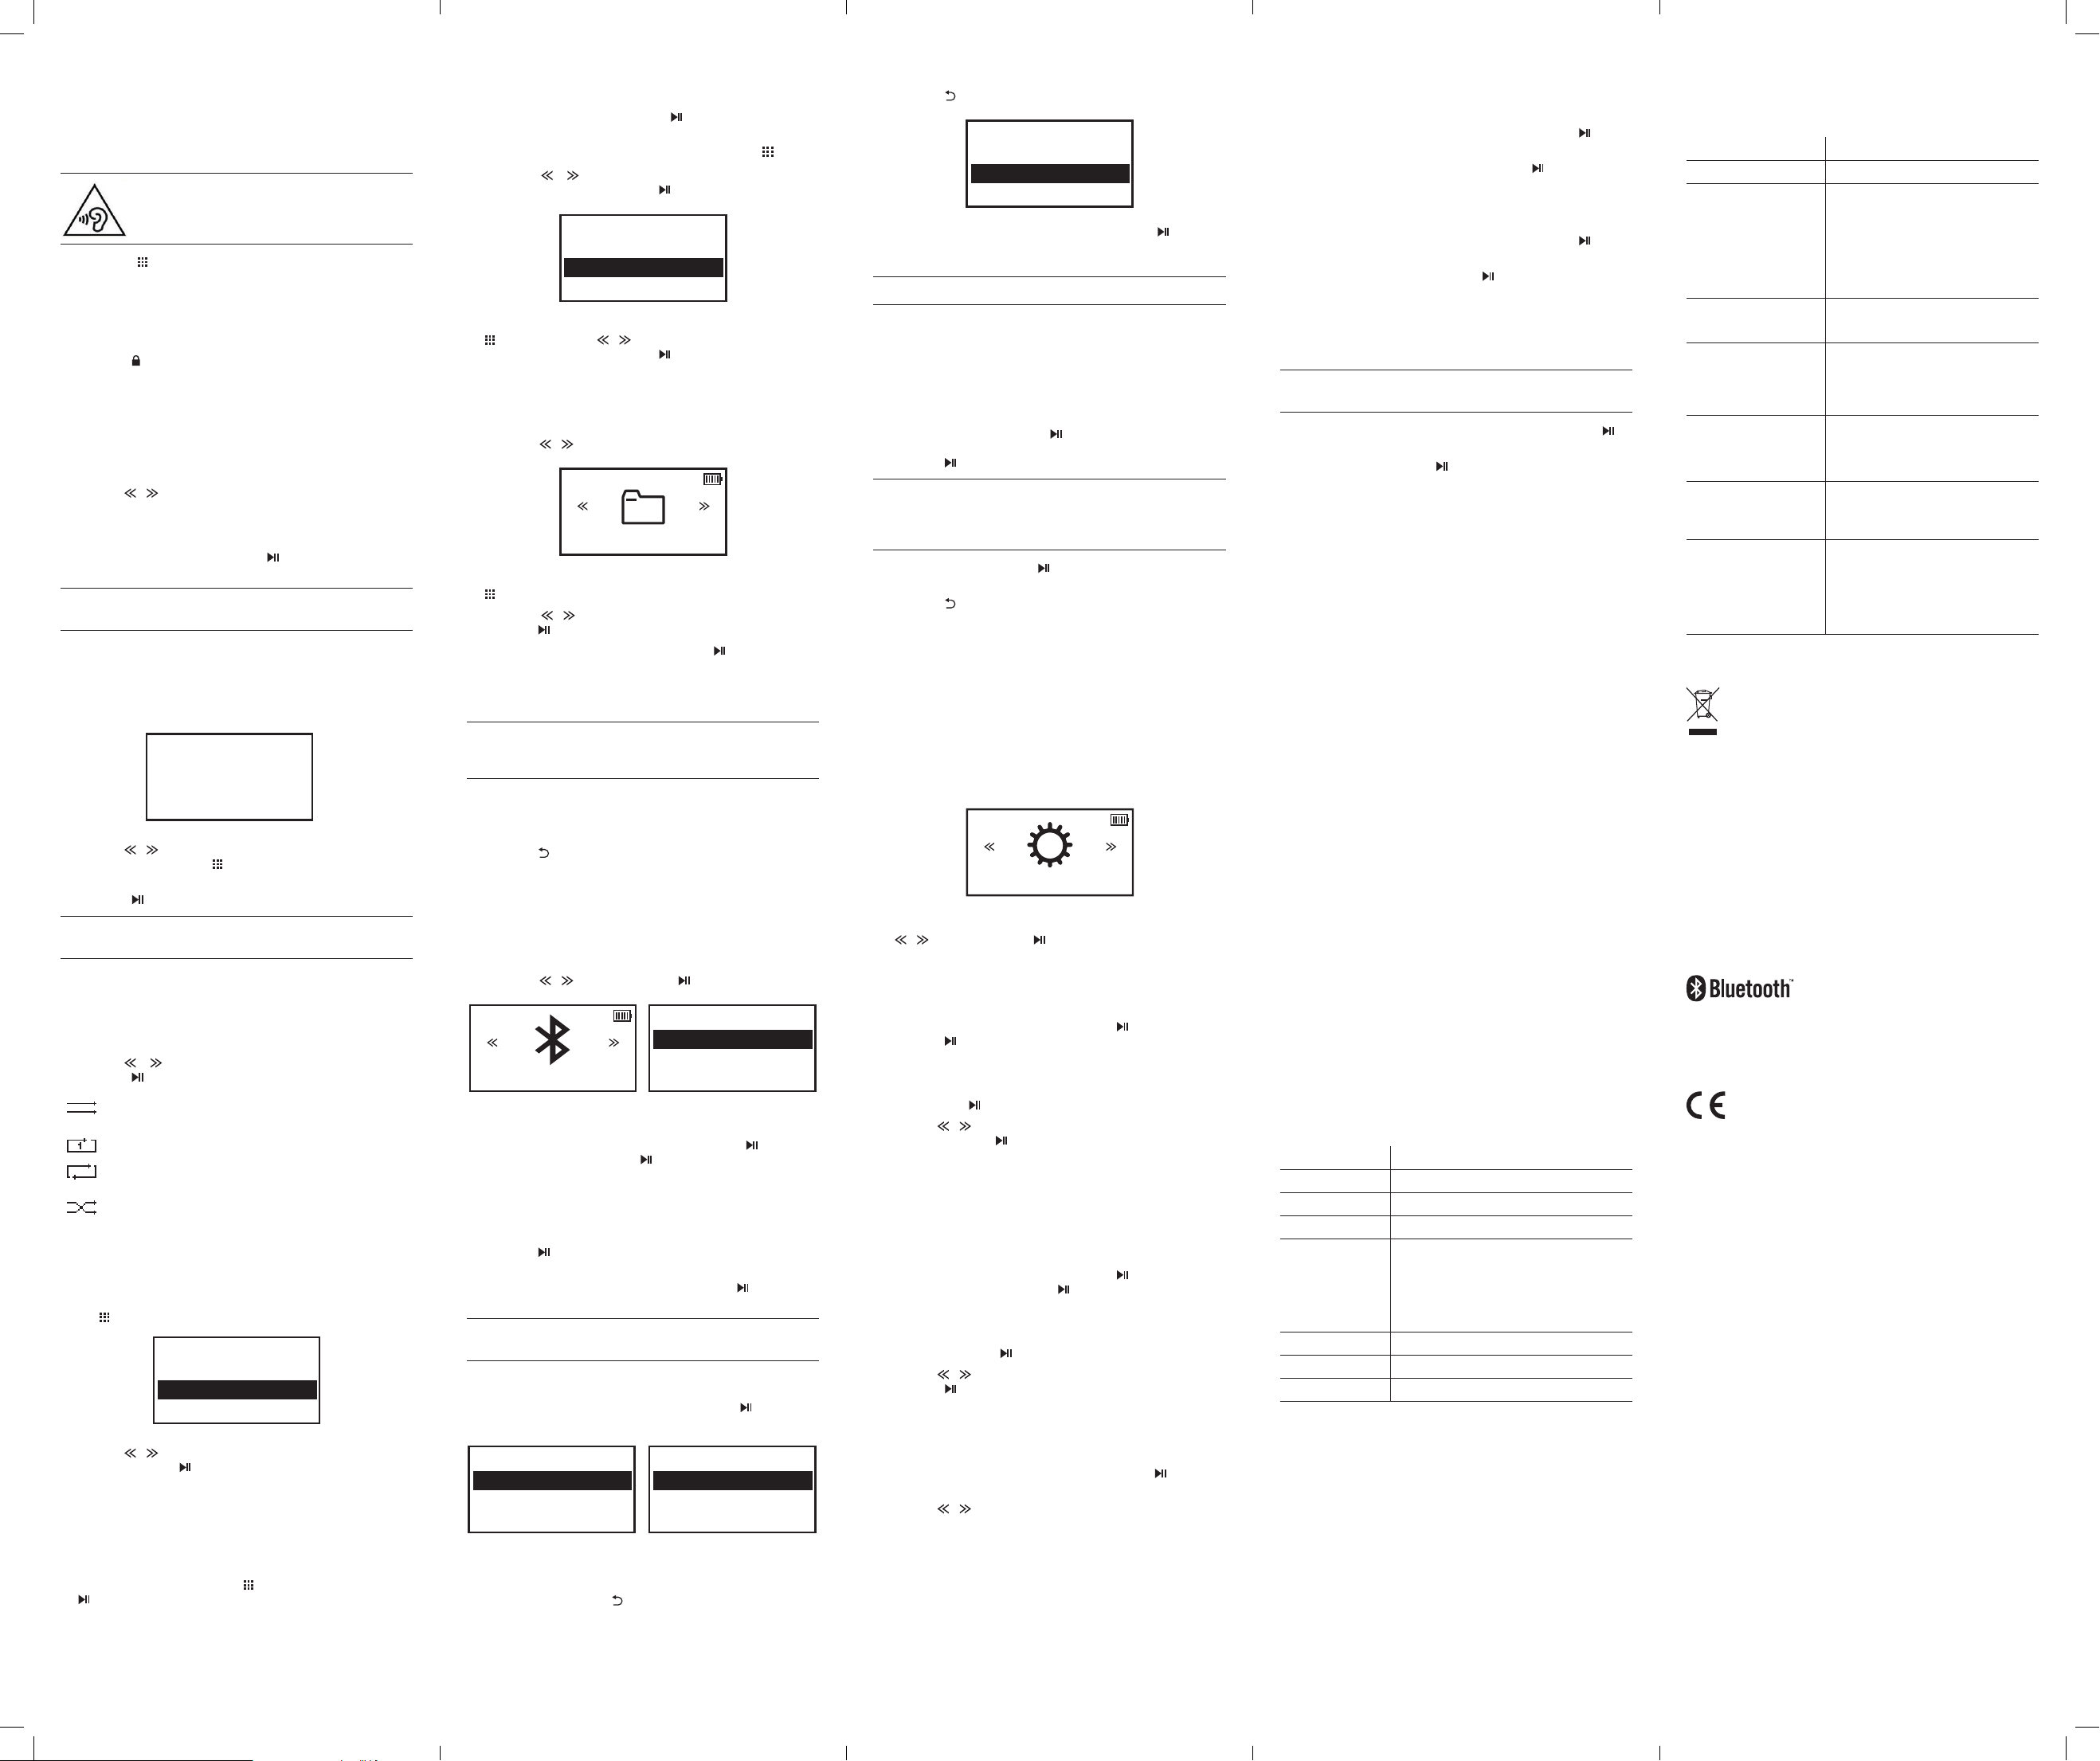
Connecting a bluetooth device
When using the Bluetooth connection, you can listen to audio
wirelessly from a Bluetooth audio device (For example an MP3
player) within 10 metres of the Micro System unit.
1. Navigate to the BLUETOOTH option from the main menu
using the
Fig 4. Fig 5.
2. Highlight the BT ON/OFF option and press the
Select BT ON and press the button once more. The
words ‘Bluetooth enabled’ will appear to indicate bluetooth
mode is now active. After a brief period the main Bluetooth
menu will re-load. (Fig 5)
3. You can now search for Bluetooth receiver devices such
as a speaker. Select SEARCH DEVICE from the menu and
press the
locate any compatible devices within range. (Fig 6)
4. Select your device from the list and press the
twice to pair the devices.
If you turn off either device before pairing is complete the
process will need to be repeated.
5. When you have paired a device; you no longer need to
search each time you wish to connect. You can simply
navigate to the DEVICE LIST option; press the
select the device from the list.
/ buttons. Press the button to enter. (Fig 4)
1/2
BT On
BT Off
Bluetooth
button.
button. A search operation will be performed to
button
button and
Switching off bluetooth
1. Press the button repeatedly until you see this screen.
Exit BT
Yes
No
2. Select YES from the option menu and press the
to return to the main menu and disconnect any paired
bluetooth devices.
The devices will remain in the DEVICE LIST for the next use.
button
Playing music with bluetooth
1. Select ALL MUSIC from the bluetooth menu.
2. All songs and Albums are displayed in the same manner as
the BROWSER. With files in folders displayed in folders and
files not in folders displayed as such.
3. Locate a song and press the
To play an album/ folder; select the first track in the list and
press the button.
The default play mode is REPEAT ALL and cannot be
changed. When all tracks in an album/ folder have played,
playback will repeat starting from track 01. See ‘Playback
modes’ for more information.
4. During playback press the
track. Press again to resume.
5. Press the
time.
6. To return to the currently playing track select the BT NOW
PLAYING option from the bluetooth main menu.
button to return to the bluetooth menu at any
button to begin playback.
button to pause the current
Bluetooth EQ modes
Setting an EQ sound mode is identical to the operation
described earlier in the ‘EQ modes’ section of this manual.
System settings
Settings
Navigate to the SETTINGS option from the main menu using
the / buttons. Press the button to enter the menu.
Sleep timer
Follow the below instructions to set a power off timer.
1. Highlight POWER SAVING and press the
press the button once more to enter the SLEEP TIME
settings.
2. The default setting is OFF (the unit will not shut down until
you choose to). To set a shut down timer select SLEEP TIME
and press the
3. Use the
minutes. Press the button to store the setting.
4. After the preset time has elapsed the player will shut down
into standby mode.
button.
/ buttons to select a time from 10-300
Idle timer
Follow the below instructions to set a timer that will shut down
the player into standby mode when idle.
1. Highlight POWER SAVING and press the
IDLE TIME and then press the button once more to enter
the settings.
2. The default setting is OFF (meaning the player will not shut
down when idle). To set an idle shut down timer select IDLE
TIME and press the
3. Use the
Press the button to store the setting.
/ buttons to select a time from 10-60 seconds.
button.
Backlight settings
button. Then
button. Select
Information
Firmware information
1. Highlight the INFORMATION setting and press the button
to display the information options.
2. Select FIRMWARE VERSION and press the
display the firmware revision information.
button to
Disk space
1. Highlight the INFORMATION setting and press the button
to display the information options.
2. Select DISK SPACE and press the
free & total space available on the internal memory.
button to display the
Factory default
To restore all settings to the defaults follow the below steps.
This operation only restores settings to their defaults and
does not delete any files.
1. Highlight the FACTORY DEFAULT setting and press the
button.
2. Select YES and press the
button.
Lossless audio information
To get the best quality sound reproduction, this portable mp3
player can store and play back CD quality uncompressed and
compressed lossless audio files:
Compressed
• APE 16bit ‘fast’ & ‘normal’
• FLAC 16bit
Uncompressed
• WAV 16bit
• WAV 24bit-48k translated to 16bit
To maximise storage capacity MP3 compresses files discarding
sounds which a human ear can’t audibly perceive.
The lower the bit rate, the more data is thrown away giving
lower quality music, BUT Lossless audio compression however
retains every single bit of detail from the original recording,
whilst still reducing file sizes to give CD quality sounding music.
Care and maintenance
After use
• Power off the player.
Care and cleaning
• All care and cleaning operations should be carried out with
the unit unplugged from a PC/ laptop.
• Occasionally wipe the cabinet with a lint free duster. Never
clean the unit with liquids or solvents.
Technical specification
Specification Rating
Dimensions 77 x 52 x 12mm
Weight 77g
Screen 1.3” OLED
Supported audio
formats
Battery 1000mA lithium battery
Internal memory 128GB
Bluetooth 2.1 +EDR
MP3: Bitrate 8Kbps-320Kbps
WMA: Bitrate 5Kbps-384Kbps
FLAC: Sample rate 8KHz-48KHz, 16 bit
APE: Sample rate 8KHz-48KHz, 16 bit
WAV: Sample rate 8KHz-48KHz, 8-24 bit
Product support
Troubleshooting
Problem Solution
No power • The player requires charging.
No sound • The volume level is too low.
• No compatible audio files have
been transferred to the player.
• Earphones not connected.
• Audio file is corrupt (try another
file).
Sound is distorted • Lower the volume.
• Check the EQ settings.
Bluetooth sound is
interrupted
The player has
powered off
A song/ Album/
Folder keeps
repeating
I cannot pair a
bluetooth device
Disposal
• Disposal of your old product. Your product is designed and
manufactured with high quality materials and components,
which can be recycled and reused
• When this crossed out wheeled bin symbol is attached to
a product it means the product is covered by the European
Directive 2002/96/EC.
• Please make yourself aware of the local collection system
for electrical and electronic products.
• Please act according to your local rules and do not dispose
of your old products with your normal household waste.
• The correct disposal of your old product will help prevent
potential negative consequences for the environment and
human health.
The Bluetooth® word mark and logos are registered
trademarks owned by Bluetooth SIG, Inc. and any use of such
marks is under license.
This product is intended for use within the UK. This
equipment complies with the essential requirements
for the Radio Equipment and Telecommunications
Terminal Equipment Directive RED 2014/53/EU.
Declaration of Conformance
Hereby, Argos Ltd, declares that this Band II LPD device is in
compliance with the essential requirements and other relevant
provisions of Directive 1999/5/EC. The complete declaration of
conformity can be obtained by contacting
http://www.argos-support.co.uk/
• The player is too far away from
the receiver device.
• There is an obsticle in the path of
the two devices.
• Press and hold the POWER button
to wake the player. refer to the
‘Sleep timer’ section for more
information.
• Refer to the ‘Playback modes’
section for more information.
• Check that another previously
paired device is not connected
already. Refer to ‘Connecting
a bluetooth device’ section for
more details on un-pairing a BT
device.
2. Use the
track to. Press the button twice to add the track.
3. To add a track or an album from the library simply highlight
the track or album folder and repeat steps 1-2.
/ buttons to select a playlist (1-3) to add the
Playing a playlist
1. From the MUSIC menu select PLAYLISTS.
2. Select a playlist 1-3; press the
button to begin playback.
button and then press the
1/1
BT Speaker
Fig 6.
6. From here you can select CONNECT (to connect to the
device) or UNPAIR (Remove the device from the list). You
may need to press the
main menu. (Fig 7)
Connect
Unpair
Fig 7.
button to return to the Bluetooth
1/2
Set a period when the backlight dims to save power.
1. Highlight the BACKLIGHT setting and press the
display the options.
2. Use the
60s, 90s, 120s or ALWAYS ON) that the backlight will stay
illuminated for and then dim. Selecting ALWAYS ON means
the display backlight will not dim unless you press the
POWER button on the top of the player.
/ buttons to select a time period (20s, 40s,
button to
 Loading...