

Page 1

Swift 7
Quick Guide
Enjoy the benefits of having an Acer ID
With an Acer ID, you can:
• Create your own connected world.
• Get the latest offers and product information.
• Register your device for quick, personalized customer support.
How to sign up for an Acer ID
1. Ensure you are connected to the Internet.
2. Open the Acer Portal app.
3. Install any required updates.
4. Sign up for an Acer ID or sign in if you already have an Acer ID.
Register your Acer product
You can register your product from Acer Portal directly by selecting
Also use this Acer ID to register this product.
After we receive your product registration, you will be sent a confirmation email with
important data. Keep this email in a safe place.
Manage your registered products
Once you have completed the registration process, you can log onto account.acer.com
using your Acer ID and password to see and manage all your registered products.
Note: It may take a few days for your information to be updated to the database.
Obtaining Acer accessories
We are happy to inform you that Acer's warranty extension program and notebook
accessories are available online. Come and visit our online shop and find what you need
at store.acer.com.
The Acer Store is being progressively rolled out, and may not yet be available in some
regions. Please check regularly to see when it will be available in your country.
Page 2

© 2016. All Rights Reserved.
Swift 7
Covers: SF713-51
This revision: September 2016
Model number: ____________________________________________
Serial number: _____________________________________________
Date of purchase: __________________________________________
Place of purchase: __________________________________________
ENVIRONMENT
Temperature:
- Operating: 5 °C to 35 °C
- Non-operating: -20 °C to 65 °C
Humidity (non-condensing):
- Operating: 20% to 80%
- Non-operating: 20% to 80%
Page 3

3
English
First things first
We would like to thank you for making an Acer notebook your choice for meeting your
mobile computing needs.
Your guides
To help you use your Acer notebook, we have designed a set of guides:
First off, the Setup Guide helps you get started with setting up your computer.
The Quick Guide introduces you to the basic features and functions of your new
computer.
For more on how your computer can help you to be more productive, please refer to
the Swift 7 User’s Manual. The Swift 7 User’s Manual contains useful information
applying to your new computer. It covers basic topics such as using the keyboard and
audio, etc.
This guide contains detailed information on such subjects as system utilities, data
recovery, expansion options and troubleshooting. In addition it contains warranty
information and the general regulations and safety notices for your notebook.
The User’s Manual can be downloaded from the Acer support website by going to:
http://go.acer.com/?id=17883
Software installation
The first time you turn on your computer, it will automatically install software and set
up for use. This may take some time, please do not turn off your computer; wait until
the installation has finished.
Recovery
You should create recovery backups as soon as you can. The Acer Recovery
Management program allows you to create recovery backups and then to restore or
reinstall applications and drivers provided by Acer.
Having trouble?
Acer provides several options to support your purchase.
Acer support
Make sure you write down your computer serial number, date and place of purchase
and model name on the area provided in this guide; save your proof of purchase.
Before you call us, please write down any error message that accompanies the
Page 4

4
English
problem, and have the computer in front of you and switched on if possible. Having
these items to hand when contacting us will ensure better and quicker service.
First things first
Acer website
Remember to visit www.acer.com and refer to the support section for up-to-date
information, help, drivers and downloads.
Warranty and contact information
You can find information about the warranty for your computer and how to contact
technical support in your computer’s Warranty.
Page 5

5
English
3
2
1
Your Acer notebook tour
After setting up your computer as illustrated in the Setup Guide, let us show you
around your new Acer computer.
Screen view
# Icon Item Description
1 Webcam
2 Screen Displays computer output.
3 Microphones
Web camera for video communication.
A light next to the webcam indicates that the
webcam is active.
Internal stereo digital microphones for sound
recording.
Page 6
6
English
1
3
2
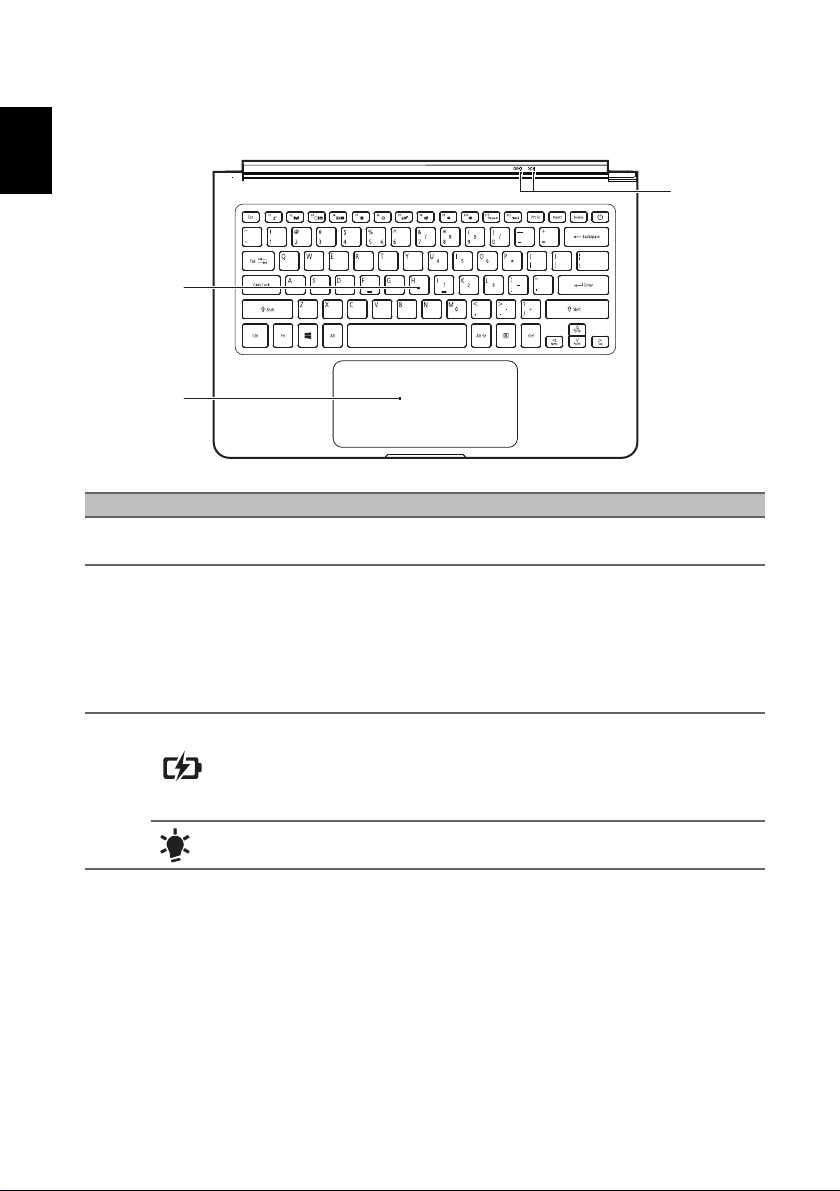
Keyboard view
# Icon Item Description
1 Keyboard
2 Touchpad
Battery indicator
3
For entering data into your computer.
See "Using the keyboard" on page 8.
Touch-sensitive pointing device.
The touchpad and selection buttons form a single
surface.
Press down firmly on the touchpad surface to
perform a left click.
Press down firmly on the lower right corner to
perform a right click.
Indicates the computer’s battery status.
Charging: The light shows amber when the
battery is charging.
Fully charged: The light shows blue when in AC
mode.
Your Acer notebook tour
Power indicator Indicates the computer’s power status.
Page 7

English
Right view
21 3
# Icon Item Description
1 Headset/speaker jack
2
3
USB Type-C port with
DC-in
USB Type-C port with
DC-in
USB Type-C information
• USB 3.1 Gen 1 with transfer speeds up to 5 Gps.
• Supports DisplayPort™ audio/video output (one port only).
• Delivers up to 3 A at 5V DC for USB charging.
• DC-in: requires power adapter or power source providing 45 W at 18~20 V.
For optimal performance, please use a certified Acer power adapter or USB Power
Delivery device.
Connects to audio devices (e.g., speakers,
headphones) or a headset with microphone.
Connects to the provided USB Type-C power
adapter and to USB devices with a USB Type-C
connector.
Supports DisplayPort over USB-C.
Connects to the provided USB Type-C power
adapter and to USB devices with a USB Type-C
connector.
7
Page 8

8
English
2
1
Base view
# Icon Item Description
1 Battery reset pinhole
2 Speakers Deliver stereo audio output.
Simulates removing and reinstalling the battery.
Insert a paperclip into the hole and press for four
seconds.
Using the keyboard
Using the keyboard
The keyboard has full-sized keys and an embedded numeric keypad, separate
cursor, lock, Windows, function and special keys.
Special keys
Your computer’s keyboard includes keys that activate special functions. The function
of each key is clearly marked with an icon.
Icon Function Description
Fn
Hotkey for second
function
Sleep Puts the computer in Sleep mode.
Airplane mode Turns on / off the computer's network devices.
Activates a second function on certain keys.
E.g. press the Fn key to activate the F1 to F12 keys.
Page 9

English
Icon Function Description
Display toggle
Display off
Brightness down Decreases the screen brightness.
Brightness up Increases the screen brightness.
Touchpad toggle Turns the built-in touchpad on and off.
Speaker toggle Turns the speakers on and off.
Volume down Decreases the sound volume.
Volume up Increases the sound volume.
Switches display output between the display screen,
external monitor (if connected) and both.
Turns the display screen backlight off to save power. Press
any key to return.
9
PauseBr
NumLk
Pause / Break Sends a Break command.
Numeric Lock Turns Numeric Lock on or off.
Hotkeys
The computer uses hotkeys (key combinations) to access function keys and
navigation commands.
To activate hotkeys, press and hold the Fn key before pressing the other key in the
hotkey combination.
Hotkey Function Description
Fn + Special keys (see
page 8)
Fn +
Fn +
Fn +
Fn +
Function keys Activates the F1 to F12 keys.
Home Scrolls to the beginning of a document.
End Scrolls to the end of a document.
Page up Scrolls up a page in a document.
Page down Scrolls down a page in a document.
 Loading...