

Page 1

Aspire Notebook Series
Acer recommends...
Productivity Software
Work Great with Microsoft® Office 2010
with Office 2010.
Photo editing
Facebook, YouTube or Windows Live.
Search & Decide with Bing
more informed decisions.
- Easily edit and print your photos with Windows Live Photo Gallery. Then share them on
-- Find and organize the answers you need using Bing™, so you can make faster,
Quick Guide
- Express your ideas, solve problems and simplify everyday projects
Page 2

© 2011. All Rights Reserved.
Aspire Notebook Series Quick Guide
Original Issue: 02/2011
Model number: __________________________________
Serial number: ___________________________________
Date of purchase: ________________________________
Place of purchase: ________________________________
Page 3

First things first
We would like to thank you for making an Acer notebook your choice for
meeting your mobile computing needs.
Your guides
To help you use your Acer notebook, we have designed a set of guides:
First off, the setup poster helps you get started with setting up your computer.
The Aspire Generic User Guide contains useful information applying to all
models in the Aspire product series. It covers basic topics such as using the
keyboard and audio, etc. Please understand that due to its nature, the Generic
User Guide will occasionally refer to functions or features which are only
contained in certain models of the series, but not necessarily in the model you
purchased. Such instances are marked in the text with language such as "only
for certain models".
The Quick Guide introduces you to the basic features and functions of your new
computer. For more on how your computer can help you to be more productive,
please refer to the Aspire Generic User Guide. This guide contains detailed
information on such subjects as system utilities, data recovery, expansion
options and troubleshooting. In addition it contains warranty information and
the general regulations and safety notices for your notebook. It is available in
Portable Document Format (PDF) and comes preloaded on your notebook.
Follow these steps to access it:
1 Click on Start > All Programs > AcerSystem.
2 Click on Aspire Generic User Guide.
3
Note: Viewing the file requires Adobe Reader. If Adobe Reader is not
installed on your computer, clicking on Aspire Generic User Guide will run
the Adobe Reader setup program first. Follow the instructions on the screen
to complete the installation. For instructions on how to use Adobe Reader,
access the Help and Support menu.
Page 4
4
English
1
3
4
2
5
67
8
9
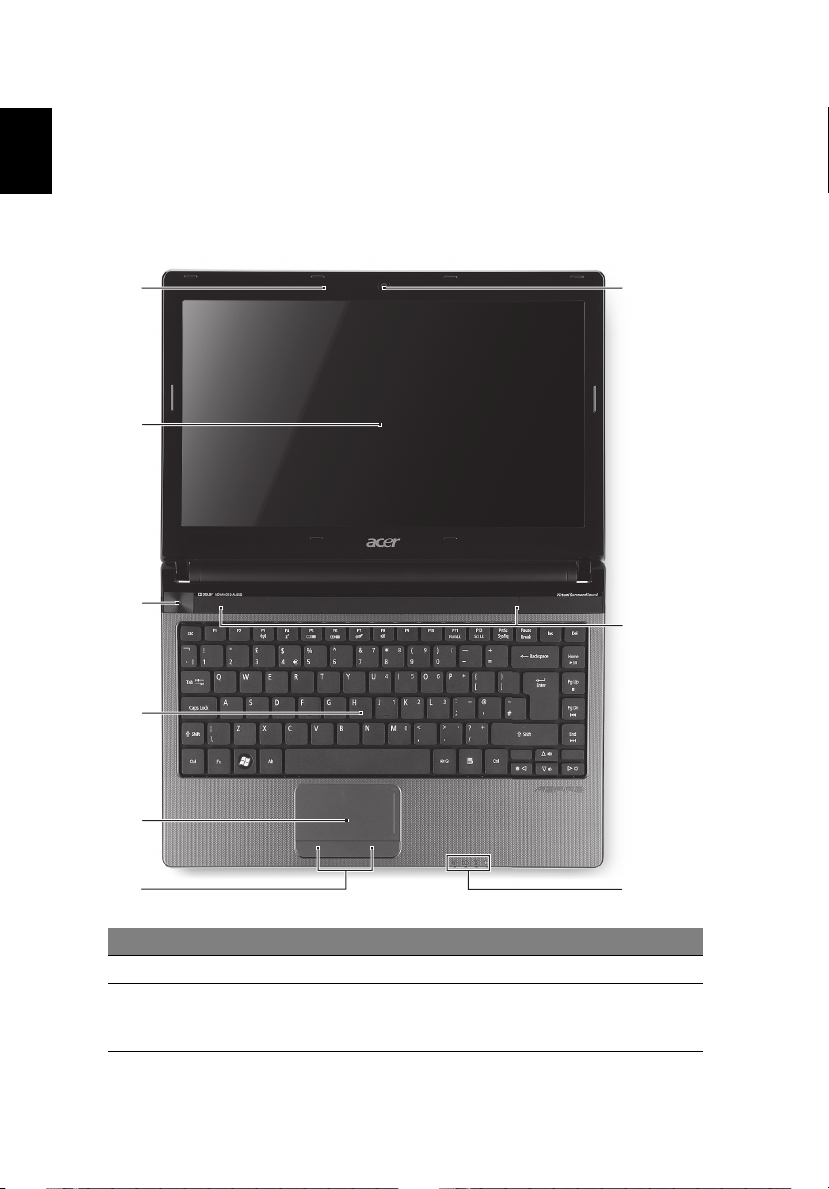
Your Acer notebook tour
After setting up your computer as illustrated in the setup poster, let us show
you around your new Acer notebook.
Top view
# Icon Item Description
1 Microphone Internal microphone for sound recording.
2 Display screen Also called Liquid-Crystal Display (LCD),
displays computer output (configuration
may vary by model).
Page 5
English
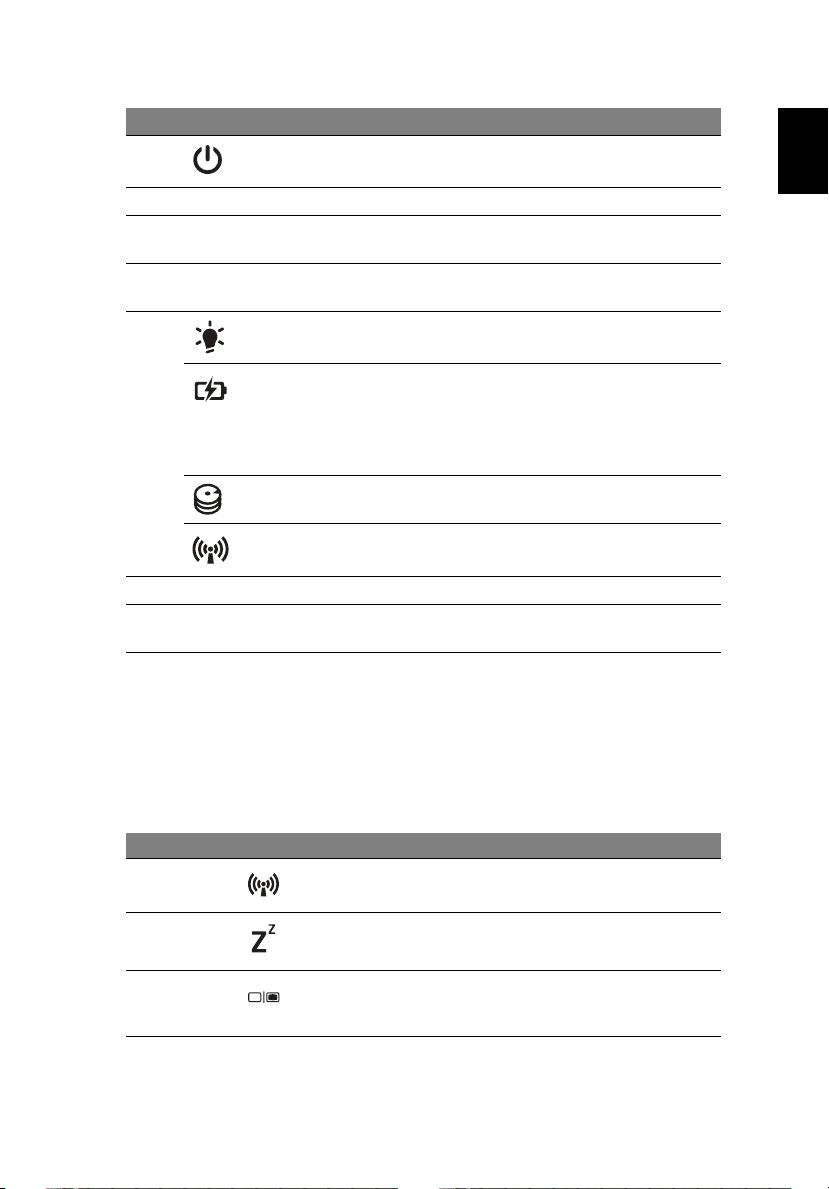
# Icon Item Description
3 Power button /
indicator
4 Keyboard For entering data into your computer.
5 Touchpad Touch-sensitive pointing device which
6 Click buttons (left
and right)
7 Power indicator Indicates the computer's power status.
Battery indicator Indicates the computer's battery status.
HDD indicator Indicates when the hard disk drive is
Communication
indicator
8 Speakers Deliver stereo audio output.
9Integrated
webcam
Turns the computer on and off. Indicates
the computer's power status.
functions like a computer mouse.
The left and right buttons function like
the left and right mouse buttons.
1. Charging: The light shows amber when
the battery is charging.
2. Fully charged: The light shows blue
when in AC mode.
active.
Indicates the computer’s wireless
connectivity device status.
Web camera for video communication.
5
Hotkeys
The computer employs hotkeys or key combinations to access most of the
computer's controls like screen brightness and volume output.
To activate hotkeys, press and hold the <Fn> key before pressing the other key
in the hotkey combination.
Hotkey Icon Function Description
<Fn> + <F3> Communication Enables/disables the computer’s
<Fn> + <F4> Sleep Puts the computer in Sleep mode.
<Fn> + <F5> Display toggle Switches display output between
communication devices.
the display screen, external monitor
(if connected) and both.
Page 6
6
English
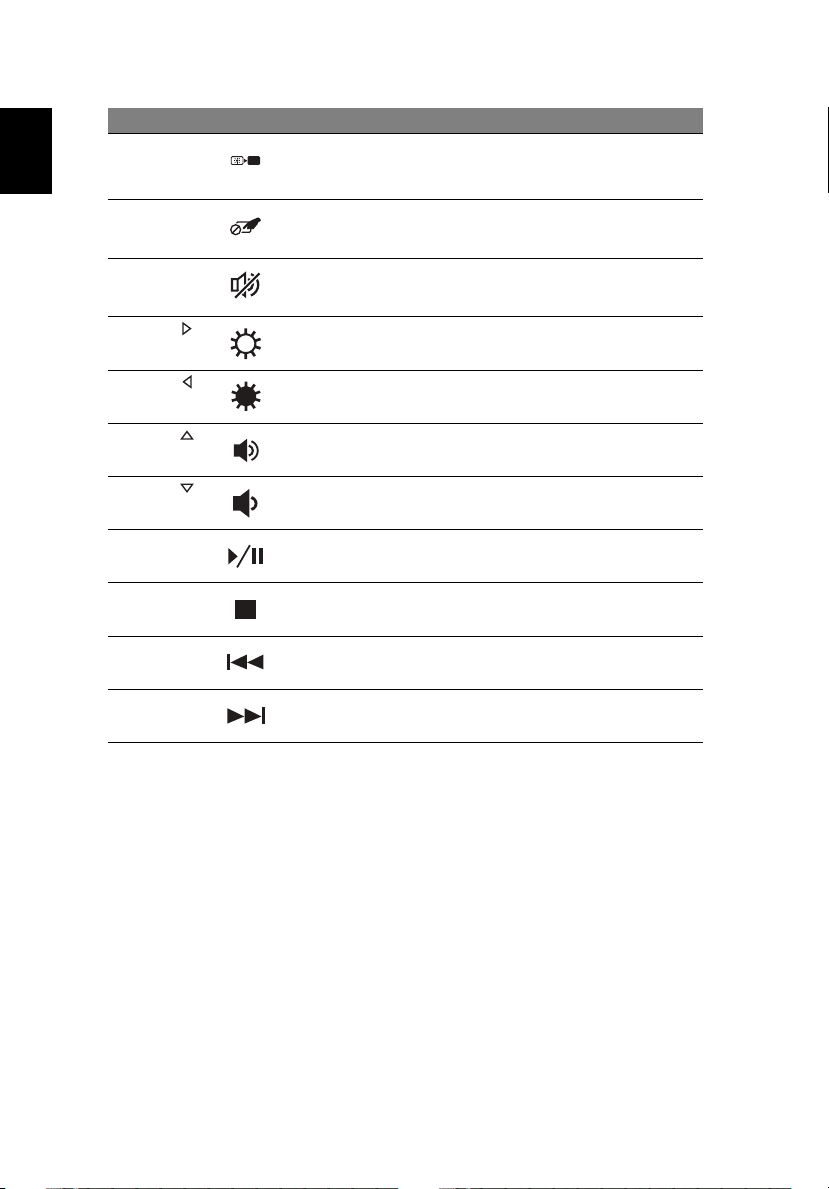
Hotkey Icon Function Description
<Fn> + <F6> Screen blank Turns the display screen backlight
off to save power. Press any key to
return.
<Fn> + <F7> Touchpad
toggle
<Fn> + <F8> Speaker toggle Turns the speakers on and off.
Turns the internal touchpad on and
off.
<Fn> + < >
<Fn> + < >
<Fn> + < >
<Fn> + < >
<Fn> +
<Home>
<Fn> +
<Pg Up>
<Fn> +
<Pg Dn>
<Fn> +
<End>
Brightness up Increases the screen brightness.
Brightness
down
Volume up Increases the sound volume.
Volume down Decreases the sound volume.
Play/Pause Play or pause a selected media file.
Stop Stop playing the selected media file.
Previous Return to the previous media file.
Next Jump to the next media file.
Decreases the screen brightness.
Page 7
English
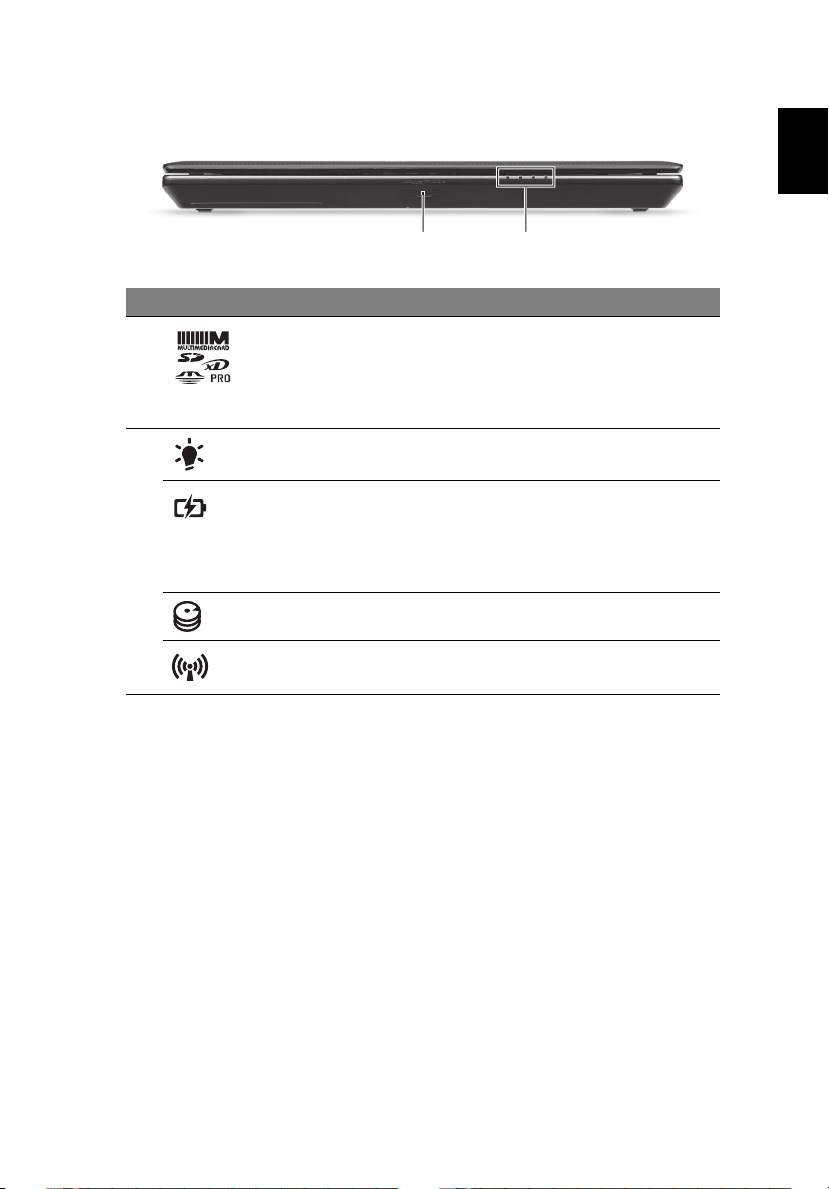
Closed front view
12
# Icon Item Description
1 Multi-in-1 card reader Accepts Secure Digital (SD),
2 Power indicator Indicates the computer's power status.
Battery indicator Indicates the computer's battery status.
HDD indicator Indicates when the hard disk drive is
Communication
indicator
MultiMediaCard (MMC), Memory Stick
PRO (MS PRO), xD-Picture Card (xD).
Note: Push to remove/install the card.
Only one card can operate at any time.
1. Charging: The light shows amber
when the battery is charging.
2. Fully charged: The light shows blue
when in AC mode.
active.
Indicates the computer’s wireless
connectivity device status.
7
Page 8
8
English
231456
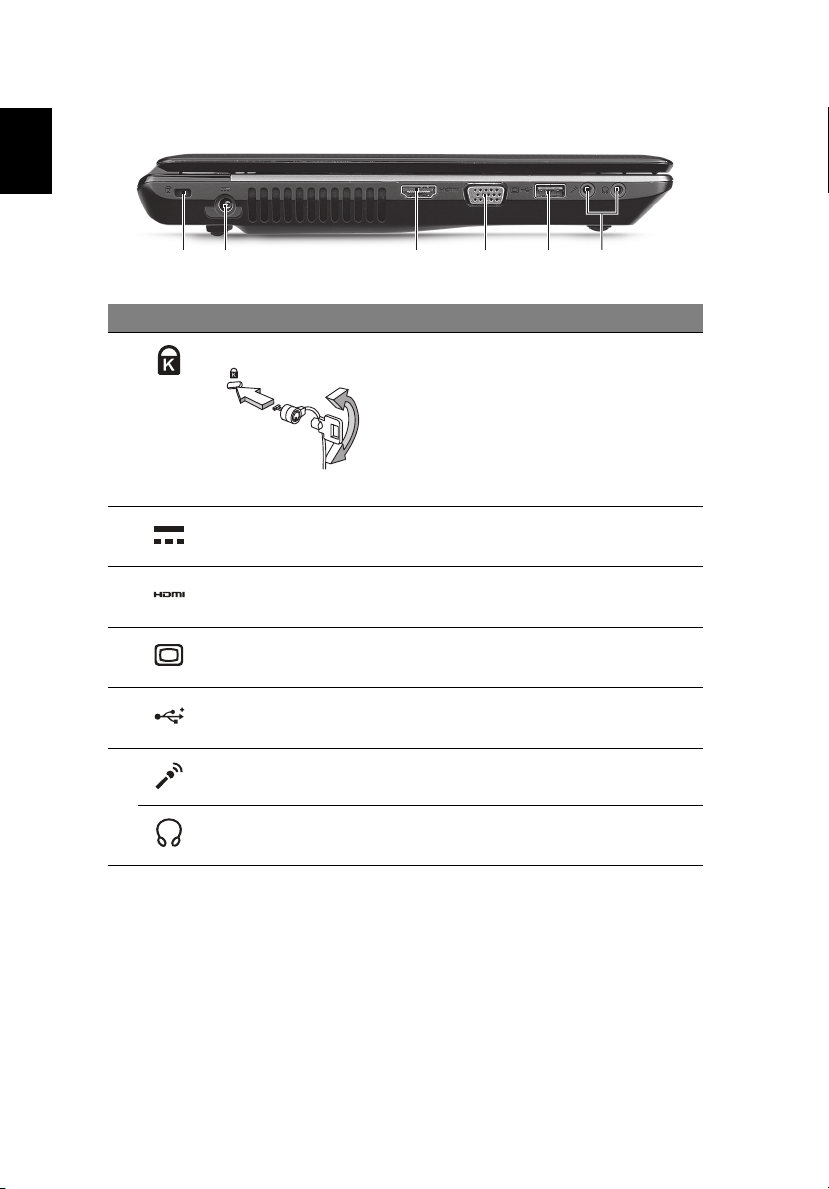
Left view
# Icon Item Description
1 Kensington lock slot Connects to a Kensington-compatible
computer security lock.
Note: Wrap the computer security lock
cable around an immovable object such
as a table or handle of a locked drawer.
Insert the lock into the notch and turn
the key to secure the lock. Some keyless
models are also available.
2 DC-in jack Connects to an AC adapter.
3 HDMI port Supports high-definition digital video
connections.
4 External display
5 USB 2.0 port Connects to USB 2.0 devices (e.g., USB
6
(VGA) port
Microphone jack
Headphones/speaker
jack
Connects to a display device (e.g.,
external monitor, LCD projector).
mouse, USB camera).
Accepts inputs from external
microphones.
Connects to audio devices
(e.g., speakers, headphones).
Page 9
English
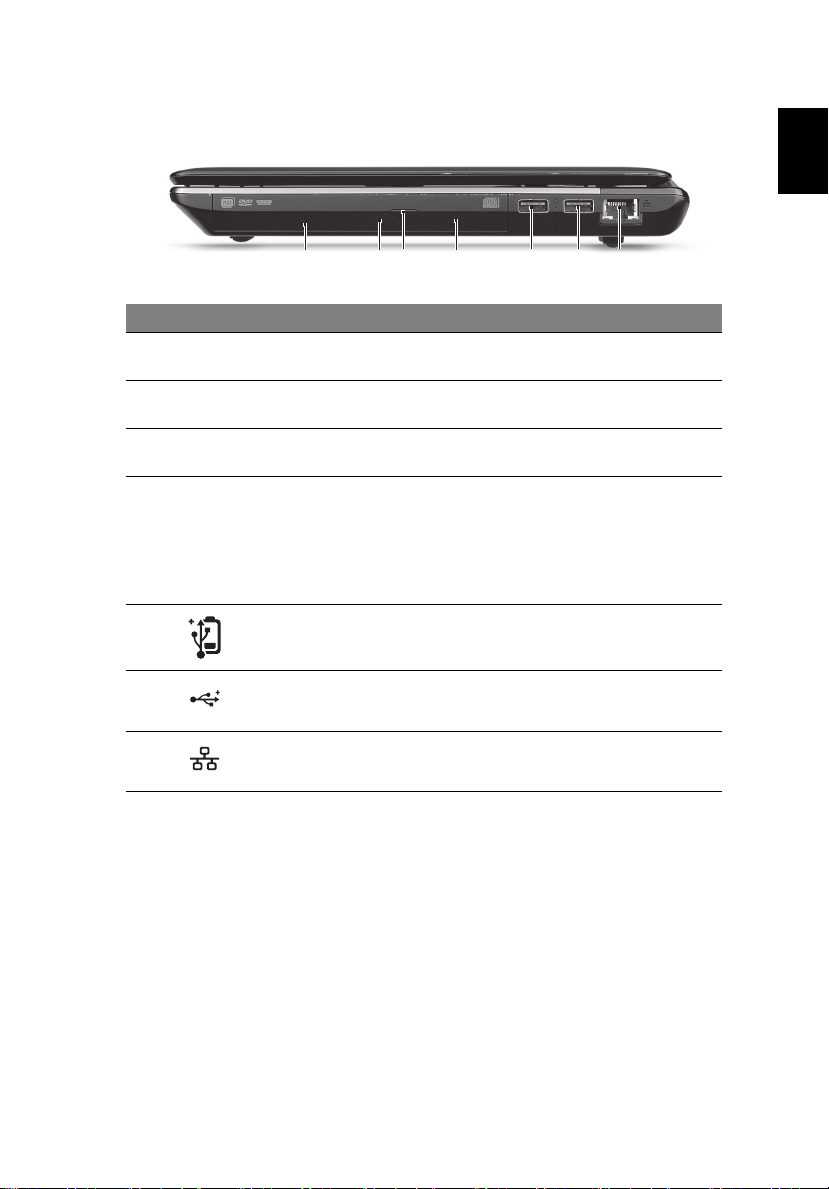
Right view
2134567
# Icon Item Description
1 Optical drive Internal optical drive; accepts CDs or
DVDs.
2 Optical disk access
indicator
3 Optical drive eject
button
4 Emergency eject
hole
5
6 USB 2.0 port Connects to USB 2.0 devices (e.g., USB
USB 3.0 port Connects to USB devices.
Lights up when the optical drive is
active.
Ejects the optical disk from the drive.
Ejects the optical drive tray when the
computer is turned off.
Note: Insert a paper clip to the
emergency eject hole to eject the
optical drive tray when the computer
is off.
A USB 3.0 port can be distinguished by
its blue connector.
mouse, USB camera).
9
7 Ethernet (RJ-45)
port
Connects to an Ethernet 10/100/1000based network.
Information on USB 3.0
• Supports power-off USB charging, allowing you to charge supported
mobile devices while the notebook is switched off.
• Defined by the USB 3.0 (SuperSpeed USB) specification.
• Devices without USB 3.0 certification may not be compatible.
Page 10
10
English
1
2
4
3
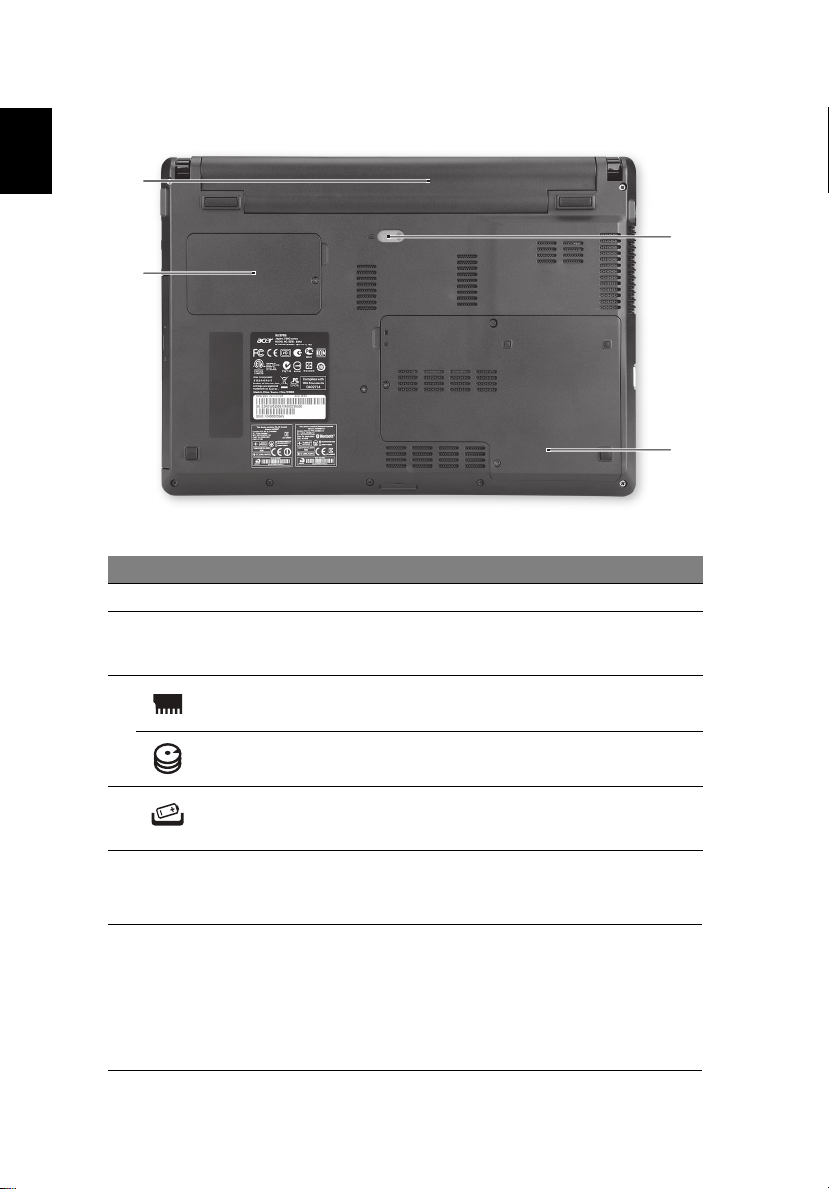
Base view
# Icon Item Description
1 Battery bay Houses the computer's battery pack.
2 Communication
module bay
3Memory
compartment
Houses the computer’s communication
module (configuration may vary by
model).
Houses the computer's main memory.
Hard disk bay Houses the computer's hard disk (secured
4 Battery release latch/
lock
Environment
• Temperature:
• Operating: 5 °C to 35 °C
• Non-operating: -20 °C to 65 °C
• Humidity (non-condensing):
• Operating: 20% to 80%
• Non-operating: 20% to 80%
with screws).
Releases the battery for removal.
Insert a suitable tool into the latch and
slide to release.
 Loading...