

Page 1
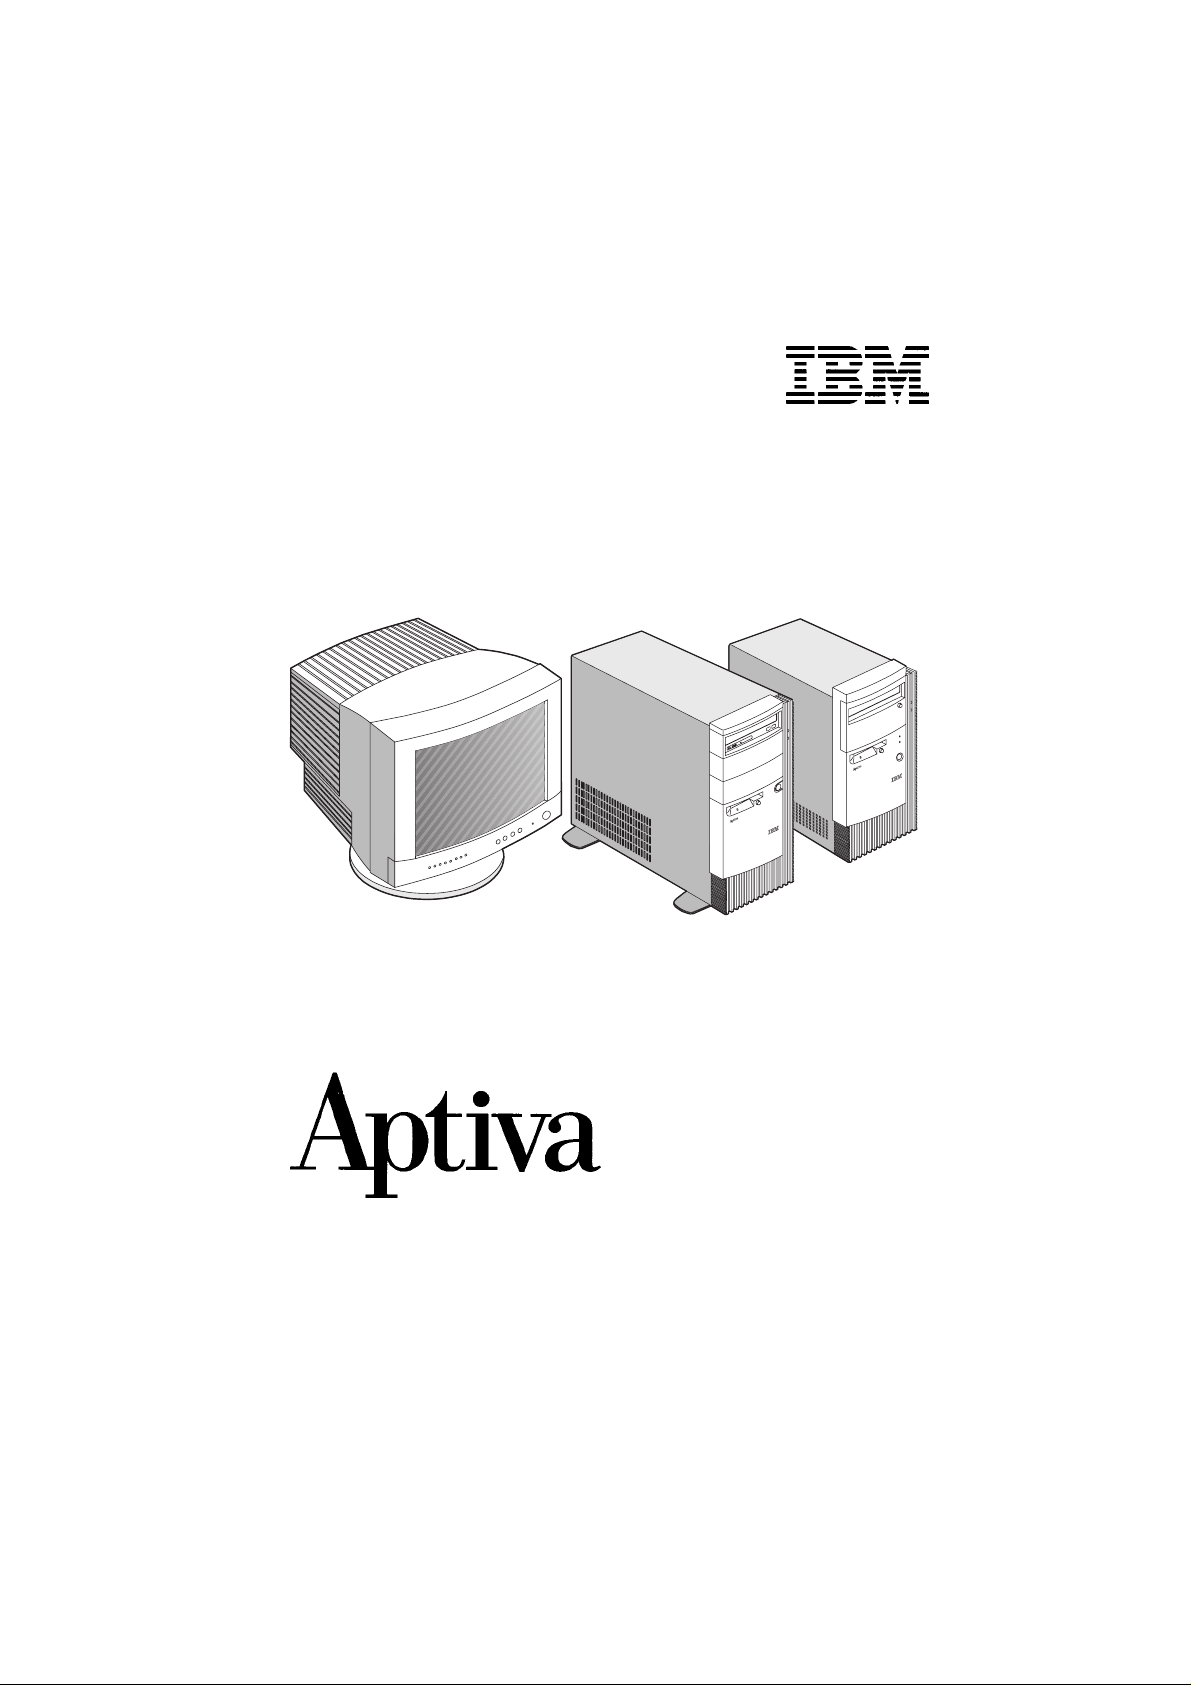
Hardware Maintenance Service
for Service Level A
Machine Type 2153, 2139
IBM Monitors Type 2124, 2126 and 2127
2124
2139/2153
2126/2127
Page 2

First Edition (June 1998)
The following paragraph does not apply to any state or country where such
provisions are inconsistent with local law: INTERNATIONAL BUSINESS
MACHINES CORPORATION PROVIDES THIS PUBLICATION "AS IS"
WITHOUT WARRANTY OF ANY KIND, EITHER EXPRESSED OR IMPLIED,
INCLUDING, BUT NOT LIMITED TO, THE IMPLIED WARRANTIES OF
MERCHANTABILITY OR FITNESS FOR A PARTICULAR PURPOSE.
References to IBM products, programs, or services do not imply that IBM
intends to make them available outside the United States. This publication
could include technical inaccuracies or typographical errors. Changes are
periodically made to the information herein; these changes will be made in
later editions. IBM may make improvements and/or changes in the product(s)
and/or the program(s) at any time. Address comments abo ut this pub lic ation
to IBM Corporation, Dept. E23/962-2, 455 Park Place, Lexington, KY 405111856, USA. Information you supply may be used by IBM without obligation.
For copies of publications related to this product, call toll free 1-800-IBM-7282
in the Continental U.S.A. In Canada, call toll free 1-800-465-7999.
© Copyright International Business Machines Corporation 1998.
All rights reserved.
Note to U.S. Government Users – Documentation related to restricted rights –
Use, duplication or disclosure is subject to restrictions set forth in GSA ADP
Schedule Contract with IBM Corp.
Page 3

Contents
Notices...........................................................................................................V
Voltage Supply Switch Settings................................................................VI
Safety Information....................................................................................VII
Laser Compliance Statement.............................................................XXXVI
Trademarks.......................................................................................XXXVII
Preface............................................................................................XXXVIII
General Information...................................................................................1-1
Introduction...................................................................................................1-2
Product Overview.........................................................................................1-2
Hardware Interfaces.....................................................................................1-7
CMOS Reset................................................................................................1-8
Power-On Password.....................................................................................1-9
Flash (BIOS) Update Procedure.................................................................1-10
BIOS-contained Model Number and Serial Number...................................1-11
BIOS Setup Utility.......................................................................................1-12
Working with the Setup Menus.............................................................1-12
Viewing System Information, Video Information and Model Information1-14
Disk Drives............................................................................................1-15
Input/Output Ports.................................................................................1-17
Power Management..............................................................................1-17
Startup Options.....................................................................................1-18
Date and Time......................................................................................1-18
Advanced Options.................................................................................1-18
Specifications.............................................................................................1-22
Operating Requirements............................................................................1-24
Special Tools..............................................................................................1-24
Check Procedures......................................................................................2-1
Introduction...................................................................................................2-2
Start..............................................................................................................2-3
Index of Symptoms, Messages, Error Codes, or Beeps...............................2-8
Troubleshooting..........................................................................................2-24
Factory-Installed Storage Devices........................................................2-25
Factory-Installed Modem Card..............................................................2-28
Audio (Not Supported by Diagnostics Program)...................................2-30
CD/DVD-ROM Drive.............................................................................2-32
Memory.................................................................................................2-33
Keyboard..............................................................................................2-34
Mouse...................................................................................................2-35
Power Supply........................................................................................2-37
II
Page 4

Monitor..................................................................................................2-40
Undetermined Problems.......................................................................2-42
Diagnostic Aids .......................................................................................... 3-1
Introduction................................................................................................... 3-2
Power-On Self Test......................................................................................3-2
Diagnostic Diskette....................................................................................... 3-3
Using the Diagnostic Diskette.................................................................3-3
Using Diagnostic Program from Recovery CD........................................ 3-4
Diagnostics Program Features................................................................3-4
Repairing Information................................................................................4-1
Removals and Replacements (Machine Type 2153)....................................4-2
Identifying the Parts of the System Unit.................................................. 4-3
Cover......................................................................................................4-5
Bay Panels.............................................................................................. 4-7
Bays 1, 2 (5.25-In. Internal/External Bays) ............................................. 4-9
Bay 3,4 (3.5-In. Diskette/Hard Disk Drives) ..........................................4-10
Power Supply........................................................................................ 4-13
Adapter Cards....................................................................................... 4-14
Memory(DIMM)..................................................................................... 4-15
Processor.............................................................................................. 4-16
System Backup Battery.........................................................................4-18
Indicator LED and Cable....................................................................... 4-23
System Board.......................................................................................4-24
Removals and Replacements (Machine Type 2139)..................................4-26
Identifying the Parts of the System Unit................................................ 4-27
Cover....................................................................................................4-29
Bay Panels............................................................................................ 4-32
Bays 1, 2, 3 (5.25-In. Internal/External Bays) .......................................4-34
Bay 4, 5 (3.5-In. Diskette/Hard Disk Drives) .........................................4-35
Power Supply........................................................................................ 4-37
Adapter Cards....................................................................................... 4-39
Memory(DIMM)..................................................................................... 4-40
Pentium II Processor Module................................................................ 4-41
Installing the Processor Heat Sink and Fan.......................................... 4-43
System Backup Battery.........................................................................4-46
Indicator LED and Cable....................................................................... 4-47
System Board.......................................................................................4-48
Handling ESD-Sensitive Parts.................................................................... 4-50
Software Recovery Procedure....................................................................4-51
Parts/Test Point Locations........................................................................5-1
Introduction................................................................................................... 5-2
Machine Type 2153 System Board Layout................................................... 5-3
2153 System Board Jumper Settings......................................................5-4
2153 Processor Type Jumper Settings................................................... 5-6
Notice III
Page 5

2153 System Board Connectors and Functions......................................5-7
Machine Type 2139 System Board Layout................................................... 5-8
2139 System Board Jumper Settings....................................................5-13
2139 System Board Connectors and Functions....................................5-14
Power Supply Cable Connector Specifications...........................................5-15
Main Output Pin Assignment ................................................................ 5-15
Factory-Installed Modem Card Layout........................................................5-17
Factory-Installed Modem Card Connector Functions............................5-17
3.5-In. Hard Disk Drive Jumper Locations (For 2153)................................5-18
3.5-In. Hard Disk Drive Jumper Settings...............................................5-20
3.5-In. Hard Disk Drive Jumper Locations (For 2139)................................5-21
3.5-In. Hard Disk Drive Jumper Settings...............................................5-22
5.25-In Hard Disk Drive Jumper Locations (For 2153)...............................5-23
5.25-In Hard Disk Drive Jumper Settings..............................................5-23
5.25-In Hard Disk Drive Jumper Locations (For 2139)...............................5-24
5.25-In Hard Disk Drive Jumper Settings..............................................5-24
CD-ROM Drive ........................................................................................... 5-25
CD-ROM Drive Rear Panel Connectors and Features.......................... 5-27
CD-ROM Drive Jumper Settings...........................................................5-27
DVD-ROM Drive......................................................................................... 5-28
DVD-ROM Drive Rear Panel Connectors and Features.......................5-29
DVD-ROM Drive Jumper Settings.........................................................5-29
DIMM Configurations.................................................................................. 5-30
System Board Connector Pin Signals......................................................... 5-30
Monitor Port Signals..............................................................................5-30
Serial Port Signals................................................................................5-30
Parallel Port Signals..............................................................................5-31
Mouse Port Signals............................................................................... 5-31
Keyboard Port Signals..........................................................................5-31
Diskette Drive Cable Connector Signals............................................... 5-32
IDE Cable Connector Signals...............................................................5-33
Safety Inspection Guide.............................................................................6-1
General Guidelines....................................................................................... 6-2
Parts Catalog .............................................................................................. 7-1
Abbreviations................................................................................................ 7-2
Assembly 1: Machine Type 2153 System Unit.............................................7-3
Assembly 2: Machine Type 2153 Diskette, Hard Drive.................................7-5
Assembly 3: Machine Type 2153 CD/DVD-ROM, Modem Card, Speaker and
Microphone................................................................................................... 7-6
Assembly 4: Machine Type 2153 Monitor and Power Cord.......................... 7-8
Assembly 5: Machine Type 2153 Keyboard and Mouse...............................7-9
Assembly 6: Machine Type 2153 Software.................................................7-11
Assembly 1: Machine Type 2139 System Unit - Exterior............................ 7-12
Assembly 2: Machine Type 2139 System Unit - Interior.............................7-13
IV
Page 6

Assembly 3: Machine Type 2139 Diskette, Hard Disk Drives.....................7-15
Assembly 4: Machine Type 2139 CD/DVD-ROM, Modem Card, Speaker and
Micropone................................................................................................... 7-17
Assembly 5: Machine Type 2139 Keyboard and Mouse.............................7-19
Assembly 6: Machine Type 2139 Zip Drive and Network Adapter.............. 7-20
Assembly 7: Machine Type 2139 Software.................................................7-21
Appendix A. FRU Number Index
Appendix B. Online Support Information
Appendix C. Model/Monitor Configurations and FRU Part Numbers
Index
Notice V
Page 7

Notices
References in this publication to IBM products, programs, or services do not
imply that IBM intends to make these available in all countries in which IBM
operates. Any reference to an IBM product, program, or service is not
intended to state or imply that only IBM’s product, program, or service may be
used. Any functionally equivalent product, program, or service that does not
infringe any of IBM’s intellectual property rights, or other legally protectable
rights, may be used instead of the IBM product, program, or service.
References in this publication to IBM products, programs, or services are
purely hardware-related and do not cover circumstances of software
problems. Evaluation and verification of operation in conjunction with other
products, program, or services, except those expressly designated by IBM are
the user’s responsibility.
IBM may have patents or pending patent applications covering subject matter
in this document. The featuring of these patents, pending or otherwise, in this
document does not give you any license to these patents. You can send
license inquires, in writing, to the IBM director of Commercial Relations, IBM
Corporation, Purchase, NY10577.
Voltage Supply Switch Settings
Your IBM Aptiva Personal Computer
be set correctly for your voltage supply. If your monitor or system unit has a
voltage switch, complete these steps to make sure each switch is set
correctly:
1. Determine the correct voltage switch setting for your area:
Voltage Supply Range Voltage Switch Setting
100-125 V 110 V
200-240 V 220 V
2. Locate the voltage switch on the back of your monitor or system unit. If the
setting shown on the switch is:
• Correct: start setting up your IBM Aptiva computer.
• Incorrect: change the voltage switch setting.
VI
might
have voltage switches, which must
Page 8
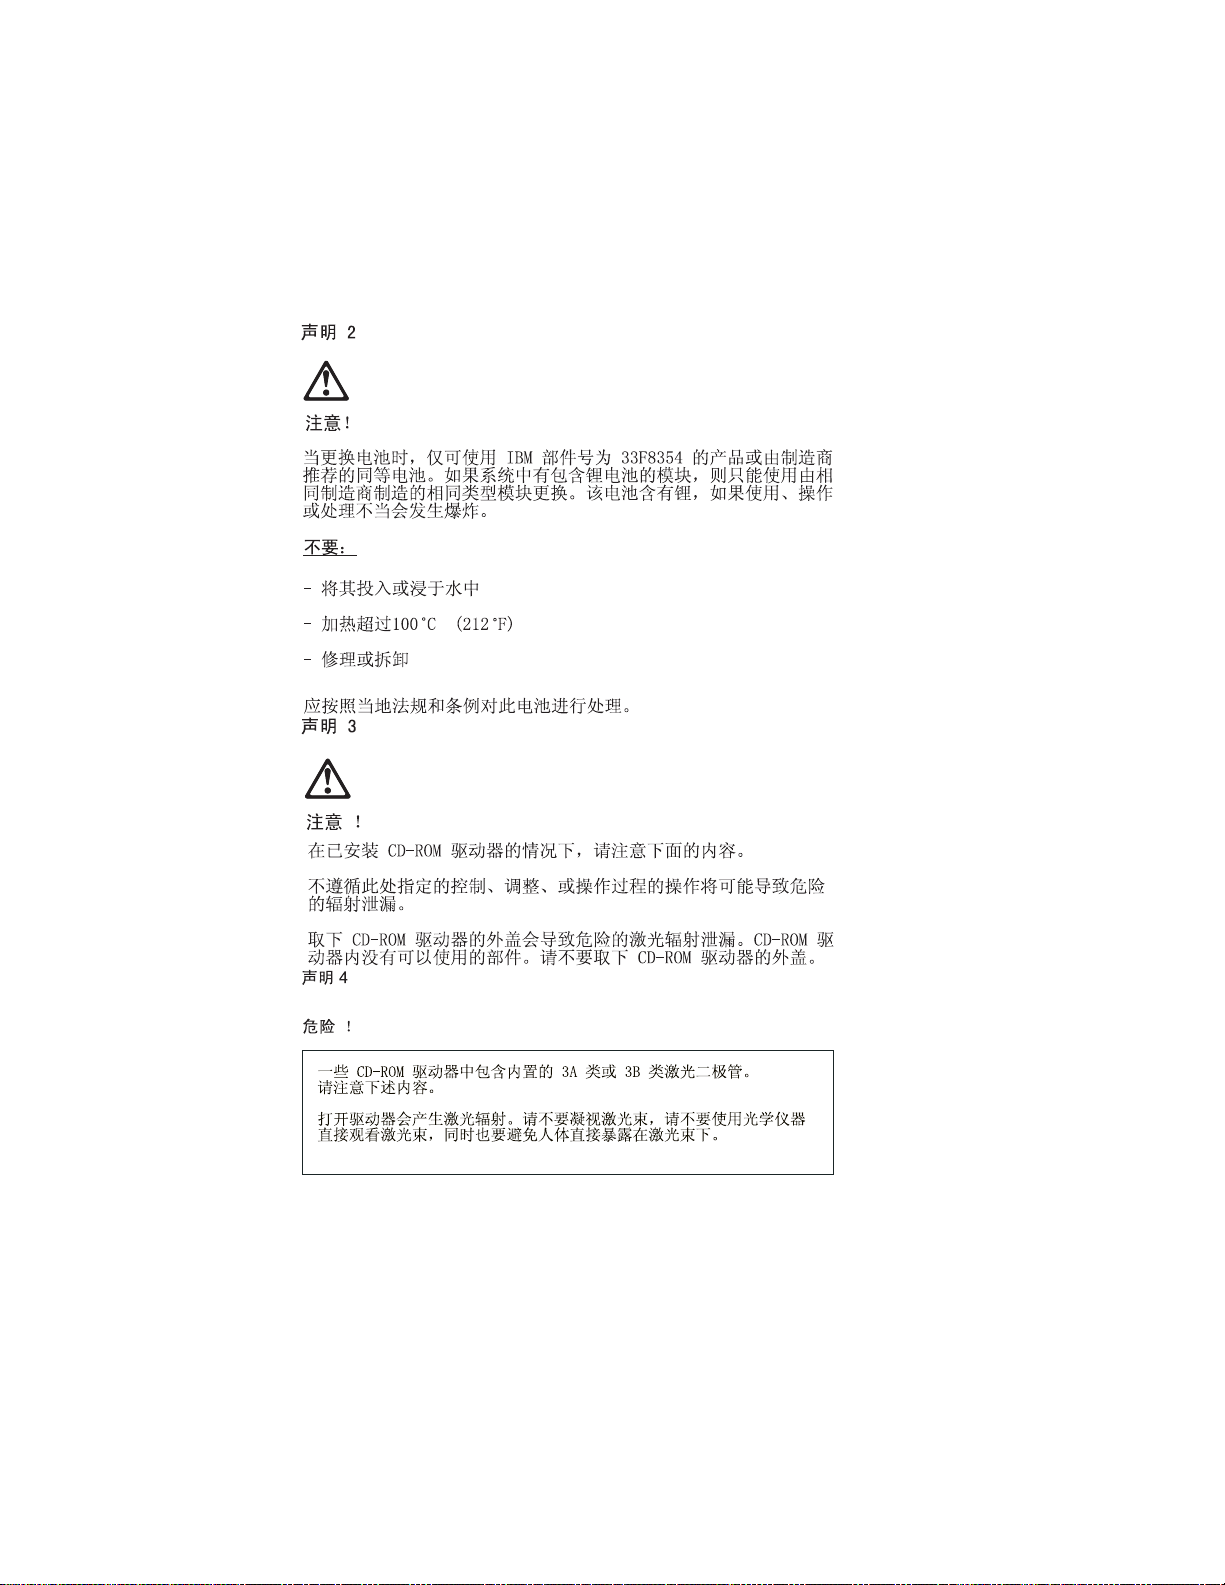
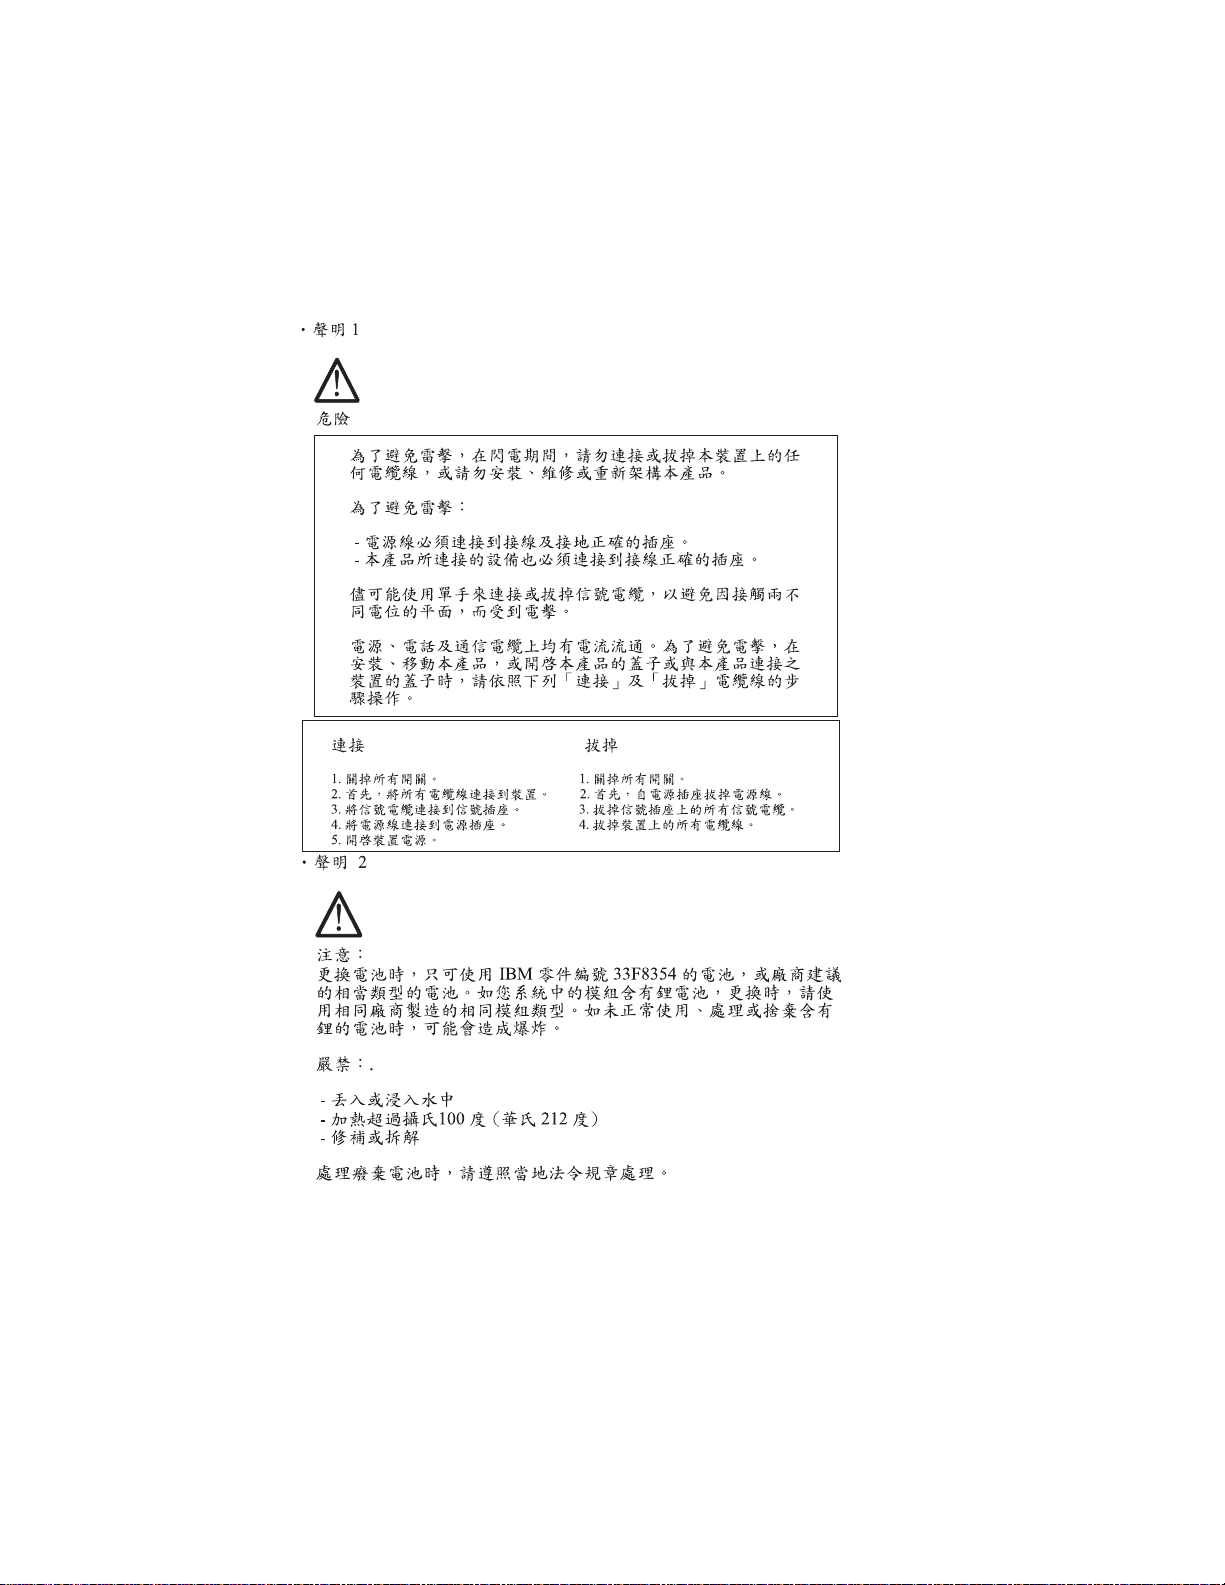
Safety Information
DANGER
To avoid a shock hazard, do not connect or disconnect any cables or
perform installation, maintenance, or reconfiguration of this product
during an electrical storm.
To avoid shock hazard:
The power cord must be connected to a properly wired and
•
earthed receptacle.
Any equipment to which this product will be attached must also
•
be connected to properly wired receptacles.
When possible, use one hand to connect or disconnect signal cables to
prevent a possible shock from touching two surfaces with different
electrical potentials.
Electrical current from power, telephone, and communications cables is
hazardous. To avoid shock hazard, connect and disconnect cables as
described following when installing, moving, or opening covers of this
product or attached devices.
VI
Page 9

To Connect To Disconnect
1. Turn Everything OFF. 1. Turn Everything OFF.
2. First, attach all cables to devices. 2. First, remove power cord(s) from
outlet
Attach signal cables to receptacles. 3. Remove signal cables from
3.
receptacles.
Attach power cord(s) to outlet. 4. Remove all cables from devices.
4.
5. Turn device ON
NOTE: In the UK, by law, the
telephone cable must be connected
after the power cord.
NOTE: In the UK, the power cord
must be disconnected after the
telephone cable.
Notice VII
Page 10
Caution
When replacing the battery, use only IBM Part Number 33F8354 or an
equivalent type battery recommended by the manufacturer. If your
system has a module containing a lithium battery, replace it only with
the same module type made by the same manufacturer. The battery
contains lithium and can explode if not properly used, handled, or
disposed of.
Do not
Dispose of the battery as required by local ordinances or regulations.
:
:
• Throw or immerse into water
• Heat to more than 100°C (212°F)
• Repair or disassemble
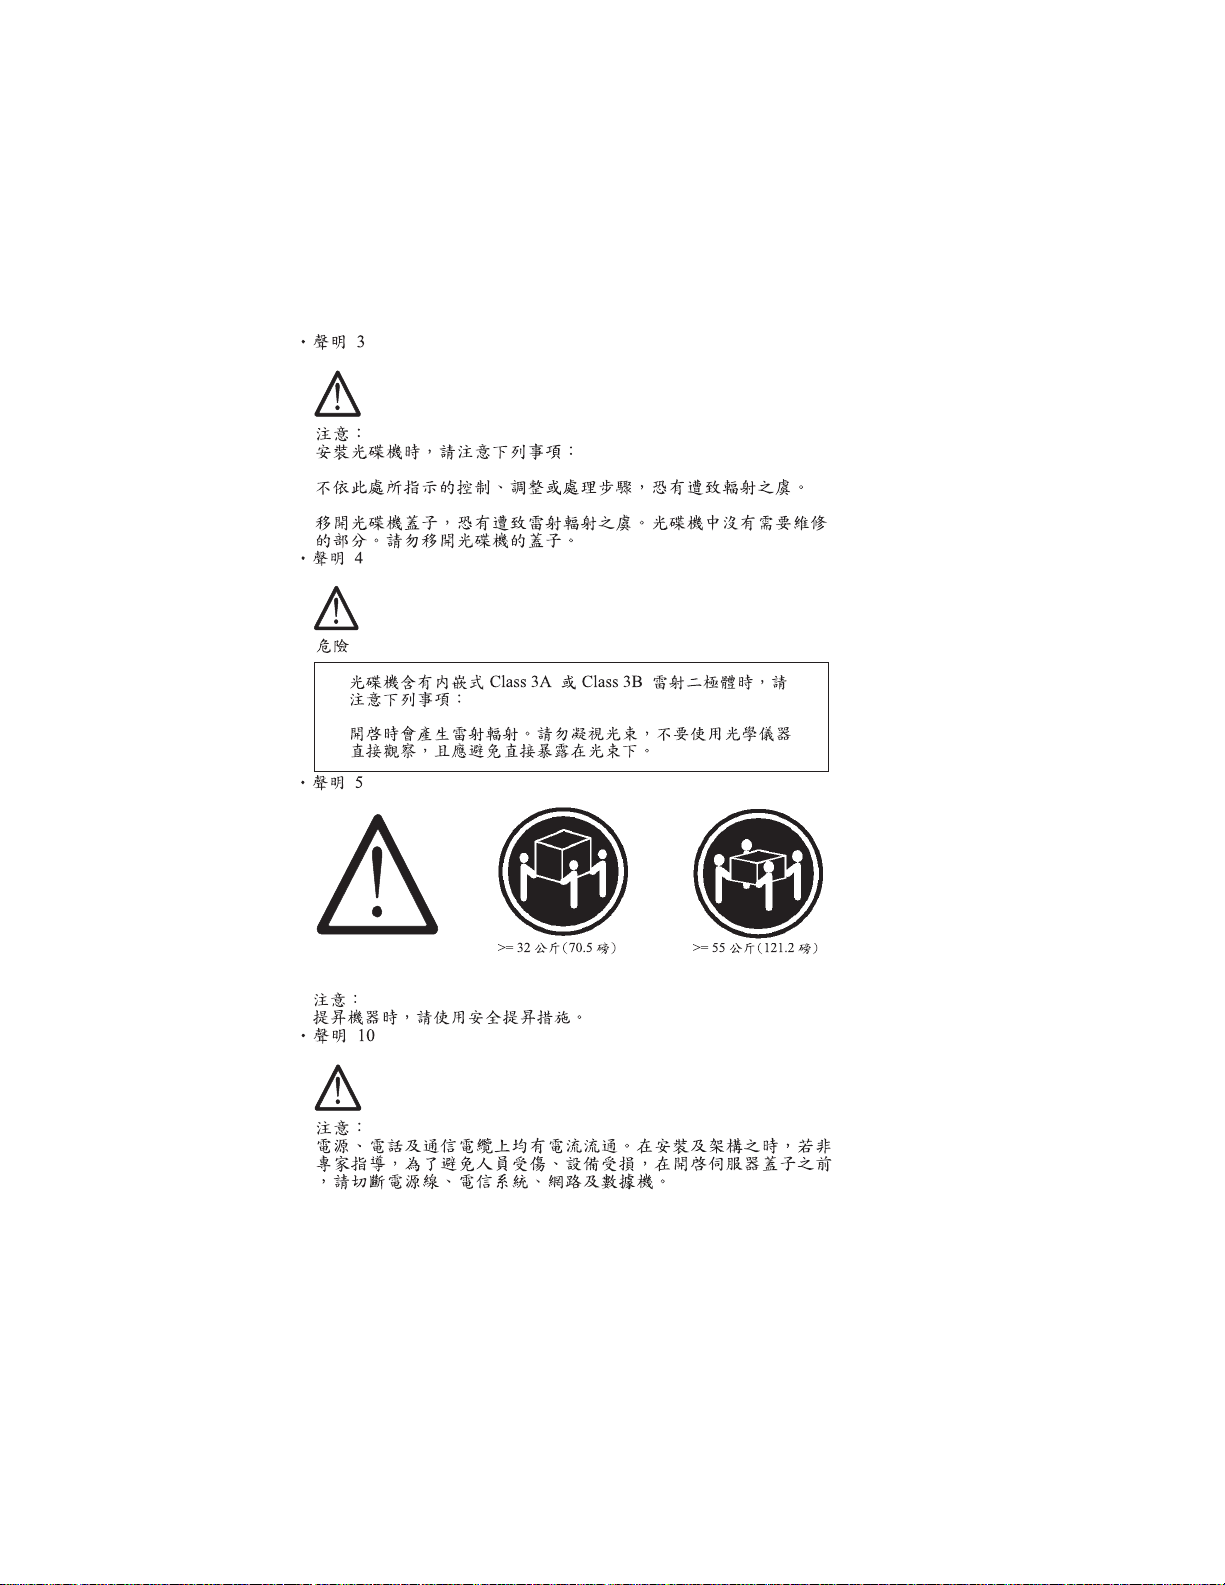
Caution
When a CD-ROM drive is installed, note the following.
Use of controls or adjustments or performance of procedures other than
those specified herein might result in hazardous radiation exposure.
Removing the covers of the CD-ROM drive could result in exposure to
hazardous laser radiation. There are no serviceable parts inside the CDROM drive. Do not remove the CD-ROM drive covers.
VIII
:
Page 11
DANGER
Some CD-ROM drives contain an embedded Class 3A or Class 3B laser
diode. Note the following.
Laser radiation when open. Do not stare into the beam, do not view directly
with optical instruments, and avoid direct exposure to the beam.
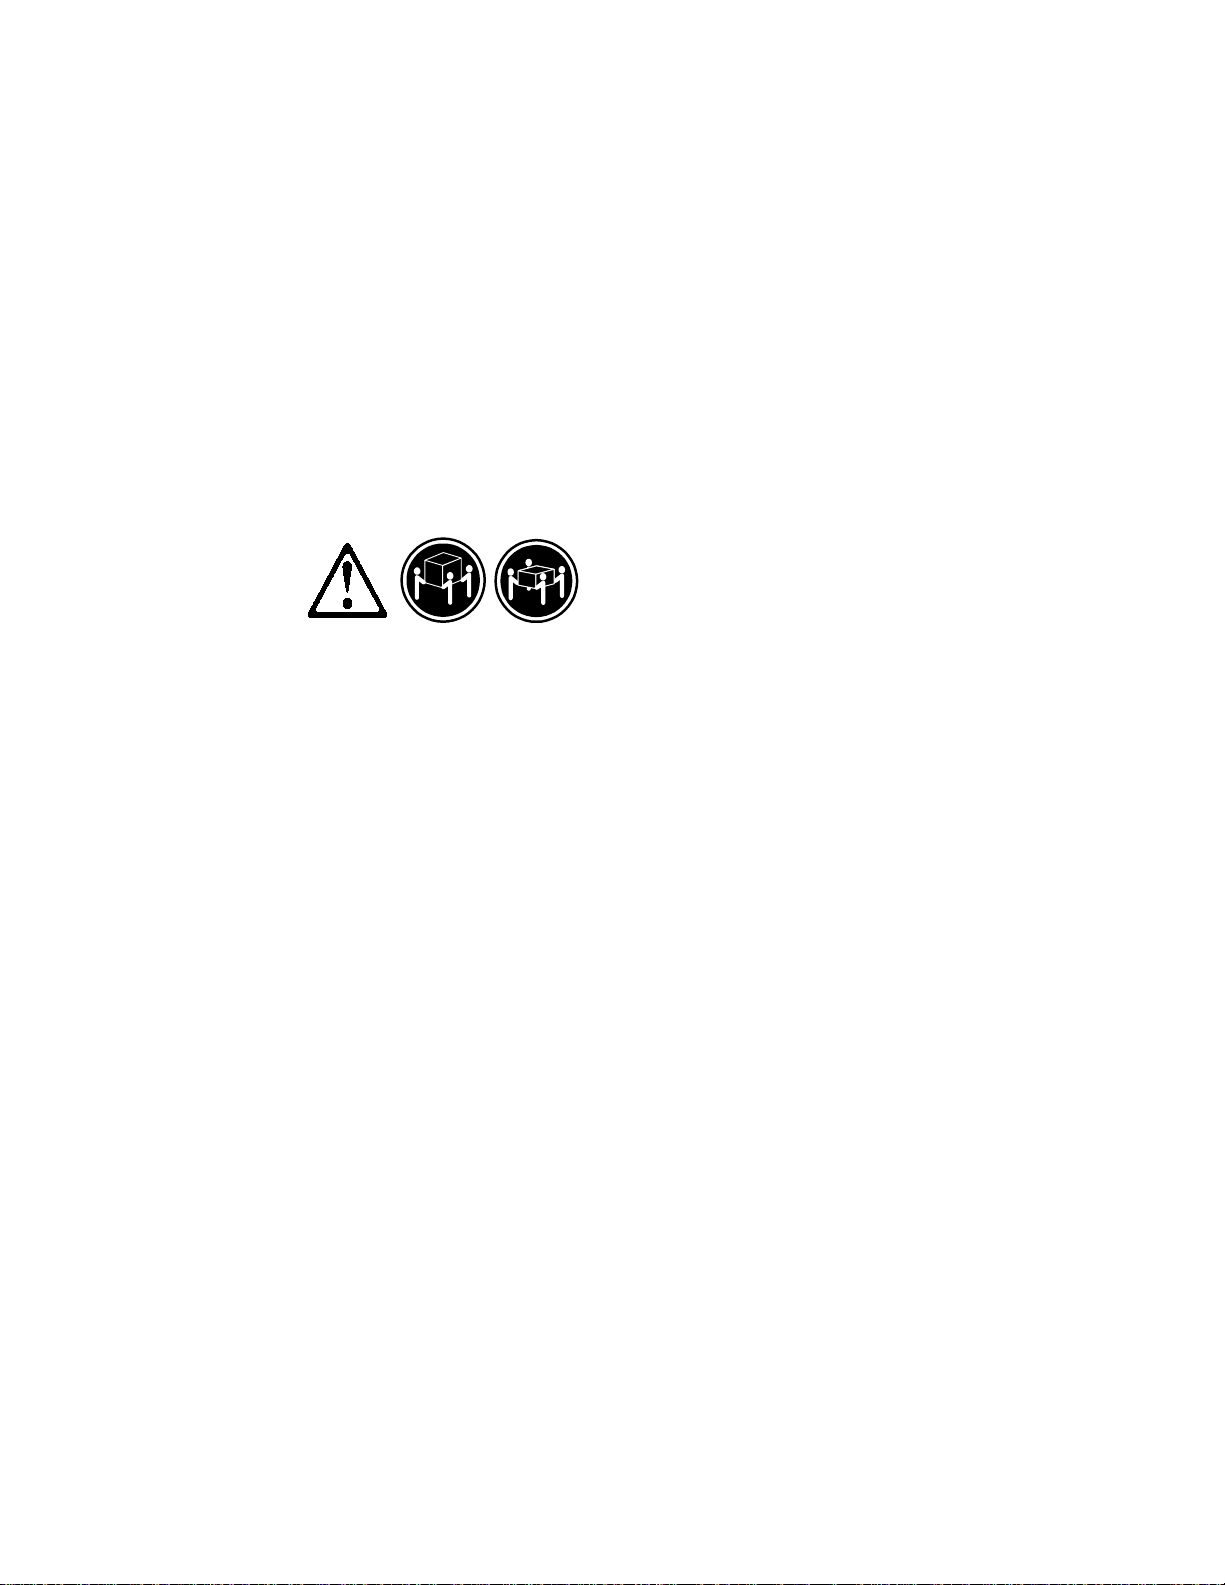
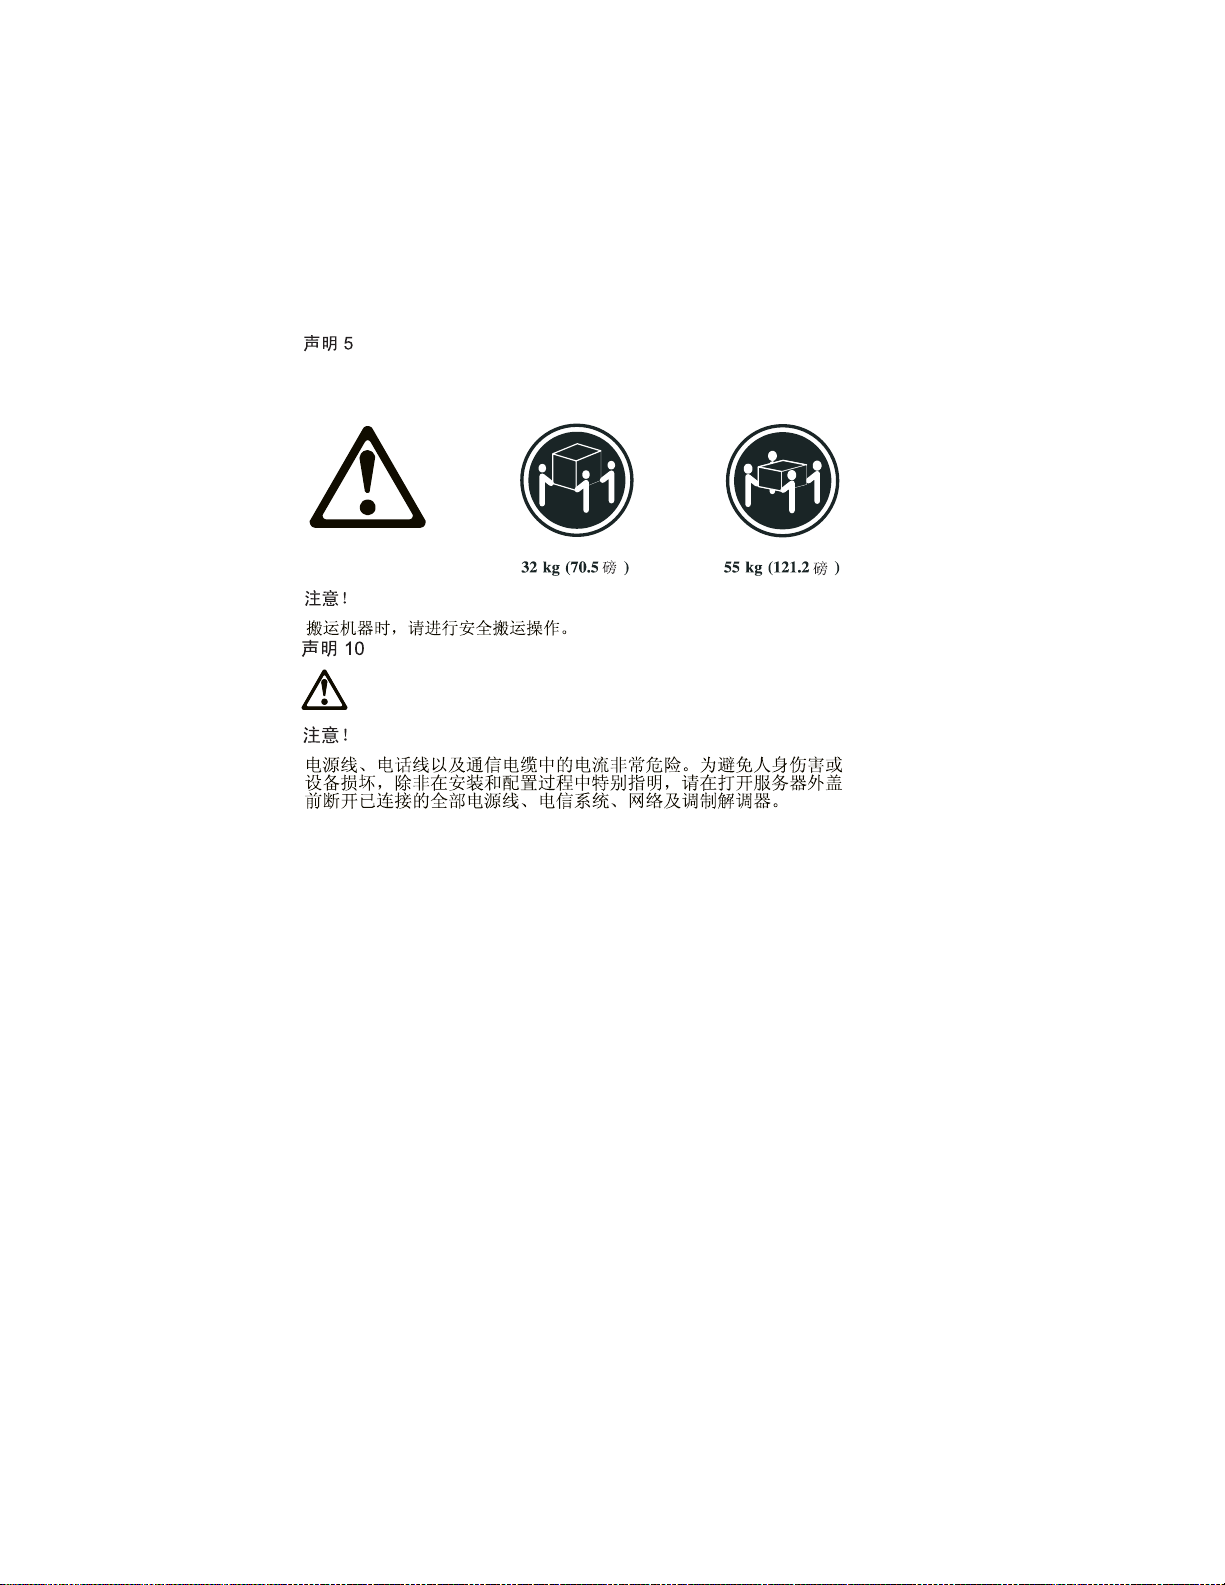
≥32 Kg ≥55Kg
(70.5 (121.2
lbs) lbs)
Notice IX
Page 12
Caution
Use safe lifting practices when lifting your machine.
:
Caution
Electrical current from power, telephone, and communication cables can
be hazardous. To avoid personal injury or equipment damage,
disconnect the attached power cords, telecommunications systems,
networks, and modems before you open the server covers, unless
instructed otherwise in the installation and configuration procedur es.
:
PERIGO
Para evitar choques elétricos, não conecte ou desconecte nenhum cabo, nem
efetue instalação, manutenção ou reconfiguração deste produto durante uma
tempestade com raios.
Para evitar choques elétricos:
•
O cabo de alimentação deve ser conectado a um receptáculo
corretamente instalado e aterrado.
•
Todos os equipamentos aos quais este produto será conectado devem
também ser conectados a receptáculos corretamente instalados.
Quando possível, utilize uma das mãos para conectar ou desconectar cabos
de
sinal, para evitar um possível choque ao tocar duas superfícies com
potenciais elétricos diferentes.
A corrente elétrica proveniente de cabos de alimentação, de telefone e de
comunicação é perigosa. Para evitar choques elétricos, conecte e desconecte
os cabos conforme descrito a seguir, ao instalar, movimentar ou abrir
tampas deste produto ou de dispositivos conectados.
X
Page 13

Para Conectar
Para Desconectar
1. DESLIGUE tudo.
2. Conecte primeiro todos os
cabos nos dispositivos.
3. Conecte os cabos de sinal nos
receptáculos.
4. Conecte o(s) cabo(s) de
alimentação nas tomadas.
5. LIGUE o dispositivo.
1. DESLIGUE tudo.
2. Remova primeiro o(s) cabo(s) de
alimentação das tomadas.
3. Remova os cabos de sinal dos
receptáculos.
4. Remova todos os cabos dos
dispositivos.
Notice XI
Page 14
cuidado:
Ao substituir a bateria, utilize apenas o Número de Peça IBM 33F8354
ou um tipo de bateria equivalente recomendado pelo fabricante. Se seu
sistema possuir um módulo com uma bateria de lítio, substitua-o apenas
pelo mesmo tipo de módulo, produzido pelo mesmo fabricante. A bateria
contém lítio e pode explodir se não for utilizada, manuseada e descartada
de forma adequada.
Não:
•
Jogue ou coloque na água
Aqueça a mais de 100°C (212°F)
•
Conserte nem desmonte.
Descarte a bateria conforme requerido pelas disposições e
regulamentações locais
cuidado:
Quando uma unidade de CD-ROM estiver instalada, observe o seguinte.
A utilização de controles ou ajustes ou a execução de procedimentos
diferentes daqueles especificados nesta publicação pode resultar em
exposição perigosa à radiação.
.
A remoção das tampas da unidade de CD-ROM pode resultar em
exposição a radiação perigosa de laser. Não existem peças que possam
ser consertadas no interior da unidade de CD-ROM. Não remova as
tampas da unidade de CD-ROM.
XII
Page 15
PERIGO
Algumas unidades de CD-ROM contém um diodo de laser da Classe 3A
ou da Classe 3B. Observe o seguinte.
Radiação de laser quando aberto. Não olhe diretamente para o feixe de
laser, não olhe diretamente com instrumentos óticos, e evite exposição
direta ao raio.
≥32 Kg ≥55Kg
(70,5 (121,2
lbs) lbs)
cuidado:
Utilize práticas seguras para levantamento de peso ao levantar sua
máquina.
cuidado:
A corrente elétrica proveniente de cabos de alimentação, de telefone e de
comunicação é perigosa. Para evitar ferimentos pessoais ou danos aos
equipamentos, desconecte os cabos de alimentação, sistemas de
telecomunicação, redes e modems antes de abrir as tampas do servidor, a
menos que receba outras instruções nos procedimentos de instalação e
configuração.
Notice XIII
Page 16
XIV
Page 17
Notice XV
Page 18
XVI
Page 19
Notice XVII
Page 20
XVIII
Page 21

PERIGO
Pour éviter tout risque de choc électrique, ne manipulez aucun câble et
n'effectuez aucune opération d'installation, d'entretien ou de
reconfiguration de ce produit au cours d'un orage.
Pour éviter tout risque de choc électrique :
•
Les cordons d'alimentation du présent produit et de tous
les appareils qui lui sont connectés doivent être branchés
sur des socles de prise de courant correctement câblés et
mis à la terre.
Afin d'éviter tout risque de choc électrique provenant d'une différence de
potentiel de terre, n'utilisez qu'une main, lorsque cela est possible, pour
connecter ou déconnecter les cordons d'interface.
Le courant électrique passant dans les câbles de communication, ou les
cordons téléphoniques et d'alimentation peut être dangereux. Pour éviter
tout risque de choc électrique, lorsque vous installez ou que vous déplacez
le présent produit ou des périphériques qui lui sont raccordés, reportezvous aux instructions ci-dessous pour connecter et déconnecter les
différents cordons.
Notice XIX
Page 22

Connexion
Déconnexion
1. Mettez les unités hors tension.
2. Commencez par brancher tous les
cordons sur les unités.
3. Branchez les câbles d'interface sur
les prises.
4. Branchez les cordons
d'alimentation sur un socle de prise
de courant.
5. Mettez les unités sous tension.
1. Mettez les unités hors tension.
2. Commencez pas débrancher les
cordons alimentation des socles de
prise de courant.
3. Débranchez les câbles d'interface des
prises.
4. Débranchez tous les câbles des
unités.
XX
Page 23
attention:
Remplacez la pile usagée par une pile de référence identique
exclusivement - voir la référence IBM - ou par une pile équivalente
recommandée par le fabricant. Si votre système est doté d'un module
contenant une pile au lithium, vous devez le remplacer uniquement par
un module identique, produit par le même fabricant. La pile contient du
lithium et présente donc un risque d'explosion en cas de mauvaise
manipulation ou utilisation.
•
Ne la jetez pas à l'eau.
•
Ne l'exposez pas à une température supérieure à 100°C.
•
Ne cherchez pas à la réparer ou à la démonter.
Pour la mise au rebut, reportez-vous à la réglementation en vigueur.
attention:
Si une unité de CD-ROM est installée, prenez connaissance des
informations suivantes :
Pour éviter tout risque d'exposition au rayon laser, respectez les
consignes de réglage et d'utilisation des commandes, ainsi que les
procédures décrites dans le présent document.
Pour éviter une exposition directe au rayon laser, n'ouvrez pas l'unité de
CD-ROM. Vous ne pouvez effectuer aucune opération de maintenance à
l'intérieur.
Notice XXI
Page 24
PERIGO
Certaines unités de CD-ROM contiennent une diode laser de classe 3A
ou 3B. Prenez connaissance des informations suivantes :
Rayonnement laser lorsque le carter est ouvert. Évitez de regarder
fixement le faisceau ou de l'observer à l'aide d'instruments optiques. Évitez
une exposition directe au rayon.
≥32 Kg ≥55Kg
XXII
Page 25
attention:
Ce produit pèse un poids considérable. Faites-vous aider pour le
soulever.
attention:
Le courant électrique circulant dans les câbles de communication et les
cordons téléphoniques et d'alimentation peut être dangereux. Pour votre
sécurité et celle de l'équipement, avant de retirer les carters du serveur,
mettez celui-ci hors tension et déconnectez ses cordons d'alimentation,
ainsi que les câbles qui le relient aux réseaux, aux systèmes de
télécommunication et aux modems (sauf instruction contraire
mentionnée dans les procédures d'installation et de configuration).
VORSICHT
Aus Sicherheitsgründen bei Gewitter an diesem Gerät keine Kabel anschließen
oder lösen. Ferner keine Installations-, Wartungs- oder
Rekonfigurationsarbeiten durchführen.
Aus Sicherheitsgründen:
•
Gerät nur an eine Schutzkontaktsteckdose mit ordnungsgemäß
geerdetem Schutzkontakt anschließen.
•
Alle angeschlossenen Geräte ebenfalls an
Schutzkontaktsteckdosen mit ordnungsgemäß geerdetem
Schutzkontakt anschließen.
Signalkabel möglichst einhändig anschließen oder lösen, um einen Stromschlag
durch Berühren von Oberflächen mit unterschiedlichem elektrischem Potential
zu vermeiden.
Elektrische Spannungen von Netz-, Telefon- und Datenübertragungsleitungen
sind gefährlich. Um einen Stromschlag zu vermeiden, nur nach den
Anweisungen arbeiten, die für Installation, Transport oder Öffnen von
Gehäusen dieses Produkts oder angeschlossenen Einheiten gelten.
Notice XXIII
Page 26
Kabel anschließen
Kabel lösen
1. Alle Geräte ausschalten und
1. Alle Geräte ausschalten.
Netzstecker ziehen.
2. Zuerst Netzstecker von
2. Zuerst alle Kabel an Einheiten
Steckdose lösen.
anschließen.
3. Signalkabel von
3. Signalkabel an
Anschlußbuchsen lösen.
Anschlußbuchsen anschließen.
4. Alle Kabel von Einheiten lösen.
4. Netzstecker an Steckdose
anschließen.
5. Gerät einschalten.
achtung:
Eine verbrauchte Batterie nur durch eine Batterie mit der IBM
Teilenummer 33F8354 oder durch eine vom Hersteller empfohlene
Batterie ersetzen. Wenn Ihr System ein Modul mit einer LithiumBatterie enthält, ersetzen Sie es immer mit dem selben Modultyp vom
selben Hersteller. Die Batterie enthält Lithium und kann bei
unsachgemäßer Verwendung, Handhabung oder Entsorgung
explodieren.
Die Batterie nicht
•
mit Wasser in Berührung bringen.
•
über 100 C erhitzen.
•
reparieren oder zerlegen.
Die örtlichen Bestimmungen für die Entsorgung von Sondermüll
beachten.
XXIV
Page 27

achtung:
Wenn ein CD-ROM-Laufwerk installiert ist, beachten Sie folgendes.
Steuer- und Einstellelemente sowie Verfahren nur entsprechend den
Anweisungen im vorliegenden Handbuch einsetzen. Andernfalls kann
gefährliche Laserstrahlung auftreten.
Das Entfernen der Abdeckungen des CD-ROM-Laufwerks kann zu
gefährlicher Laserstrahlung führen. Es befinden sich keine Teile
innerhalb des CD-ROM-Laufwerks, die vom Benutzer gewartet werden
müssen. Die Verkleidung des CD-ROM-Laufwerks nicht öffnen.
Notice XXV
Page 28
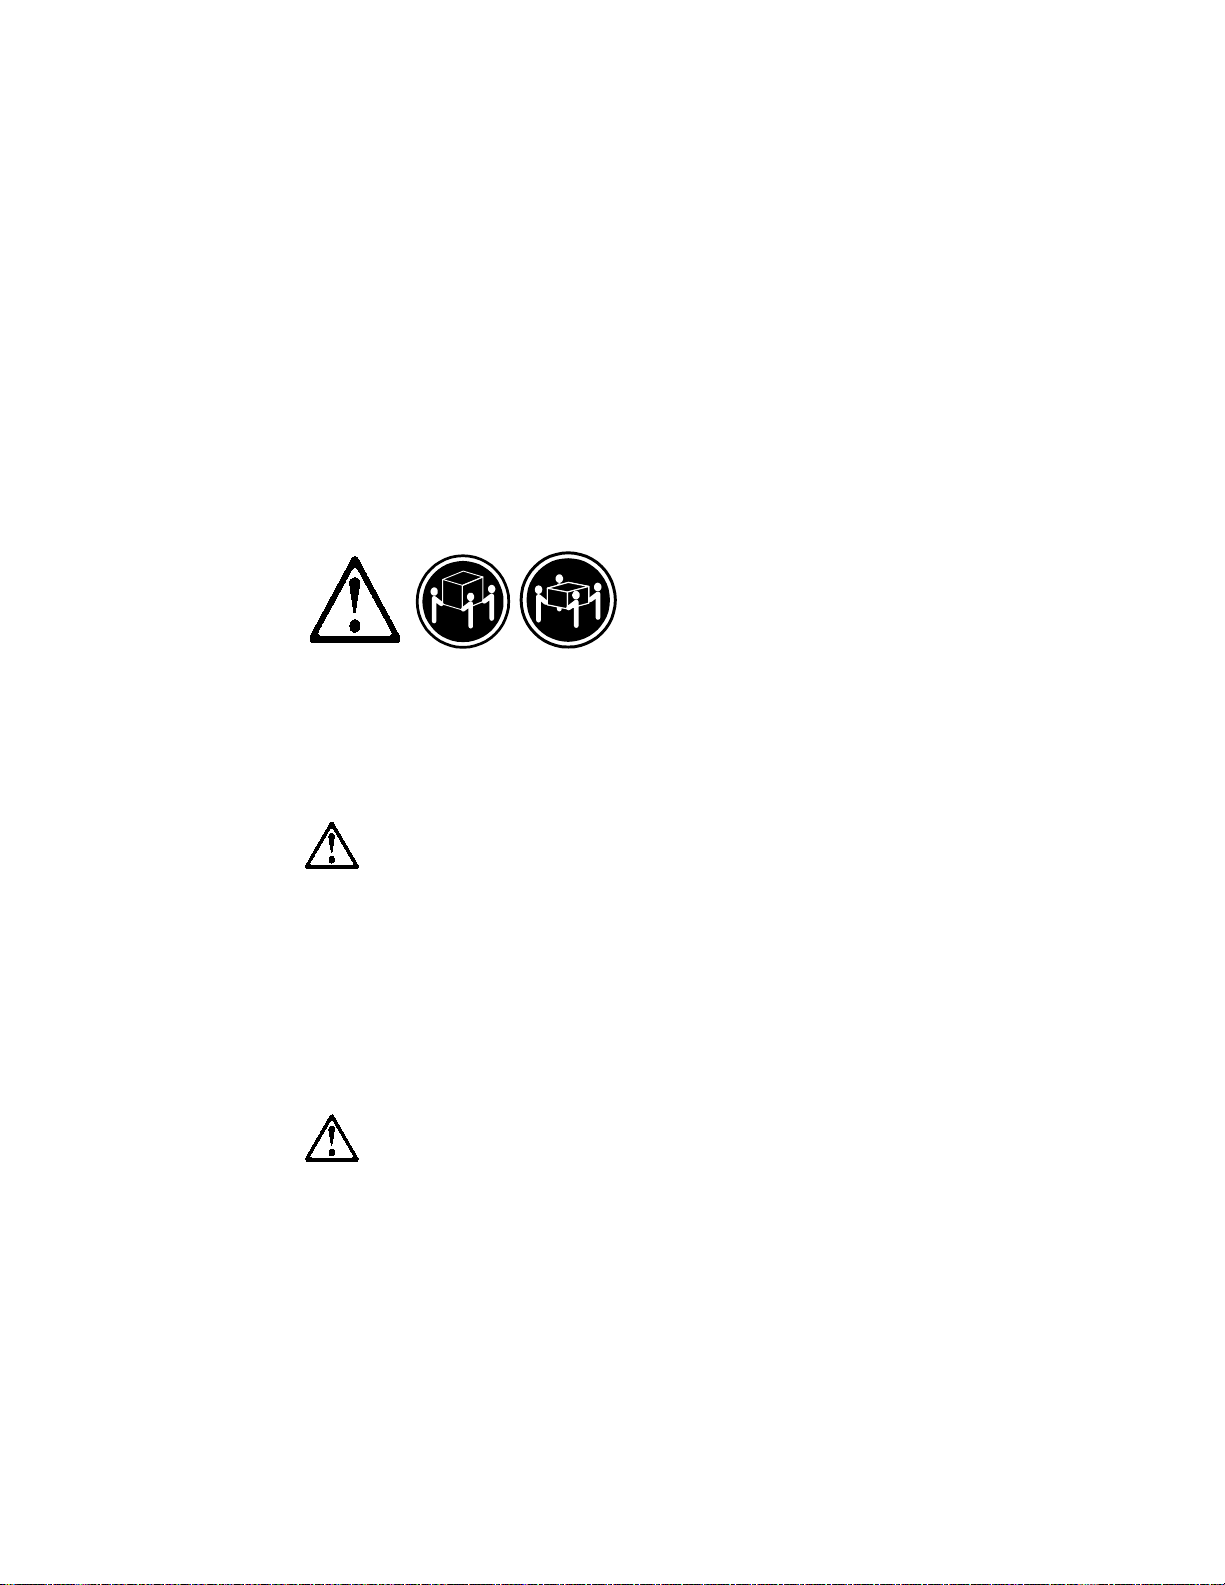
VORSICHT
Manche CD-ROM-Laufwerke enthalten eine eingebaute Laserdiode der
Klasse 3A oder 3B. Die nachfolgend aufgeführten Punkte beachten.
Laserstrahlung bei geöffneter Tür. Niemals direkt in den Laserstrahl
sehen, nicht direkt mit optischen Instrumenten betrachten und den
Strahlungsbereich meiden.
≥32 Kg ≥55Kg
achtung:
Beim Anheben der Maschine die vorgeschriebenen
Sicherheitsbestimmungen beachten.
achtung:
An Netz-, Telefon- und Datenleitungen können gefährliche elektrische
Spannungen anliegen. Um eine Gefährdung des Benutzers oder
Beschädigung des Geräts zu vermeiden, ist der Server auszuschalten. Die
Verbindung zu den angeschlossenen Netzkabeln,
Telekommunikationssystemen, Netzwerken und Modems ist vor dem
Öffnen des Servergehäuses zu unterbrechen (sofern in Installations- und
Konfigurationsanweisungen nicht anders angegeben).
XXVI
Page 29

PERICOLO
Per evitare il pericolo di scosse elettriche durante i temporali, non collegare
o scollegare cavi, non effettuare l'installazione, la manutenzione o la
riconfigurazione di questo prodotto.
Per evitare il pericolo di scosse elettriche:
•
collegare il cavo di alimentazione ad una presa elettrica
correttamente cablata e munita di terra di sicurezza;
•
collegare qualsiasi apparecchiatura collegata a questo
prodotto ad una presa elettrica correttamente cablata e
munita di terra di sicurezza.
Quando possibile, collegare o scollegare i cavi di segnale con una sola mano
per evitare il rischio di scosse derivanti dal contatto con due superfici a
diverso potenziale elettrico.
La corrente elettrica circolante nei cavi di alimentazione, del telefono e di
segnale è pericolosa. Per evitare scosse elettriche, collegare e scollegare i cavi
come descritto quando si effettuano l'installazione, la rimozione o l'apertura
dei coperchi di questo prodotto o durante il collegamento delle unità.
Per collegare
1. SPEGNERE tutti i dispositivi.
2. Collegare prima tutti I cavi alle
unità.
3. Collegare i cavi di segnale alle
prese.
4. Collegare il(i) cavo(i) di
alimentazione alla presa
elettrica.
Per scollegare
1. SPEGNERE tutti i dispositivi.
2. Rimuovere prima il(i) cavo(i) di
alimentazione dalla presa
elettrica.
3. Rimuovere i cavi di segnale
dalle prese.
4. Rimuovere tutti i cavi dalle
unità.
5. ACCENDERE le unità.
Notice XXVII
Page 30
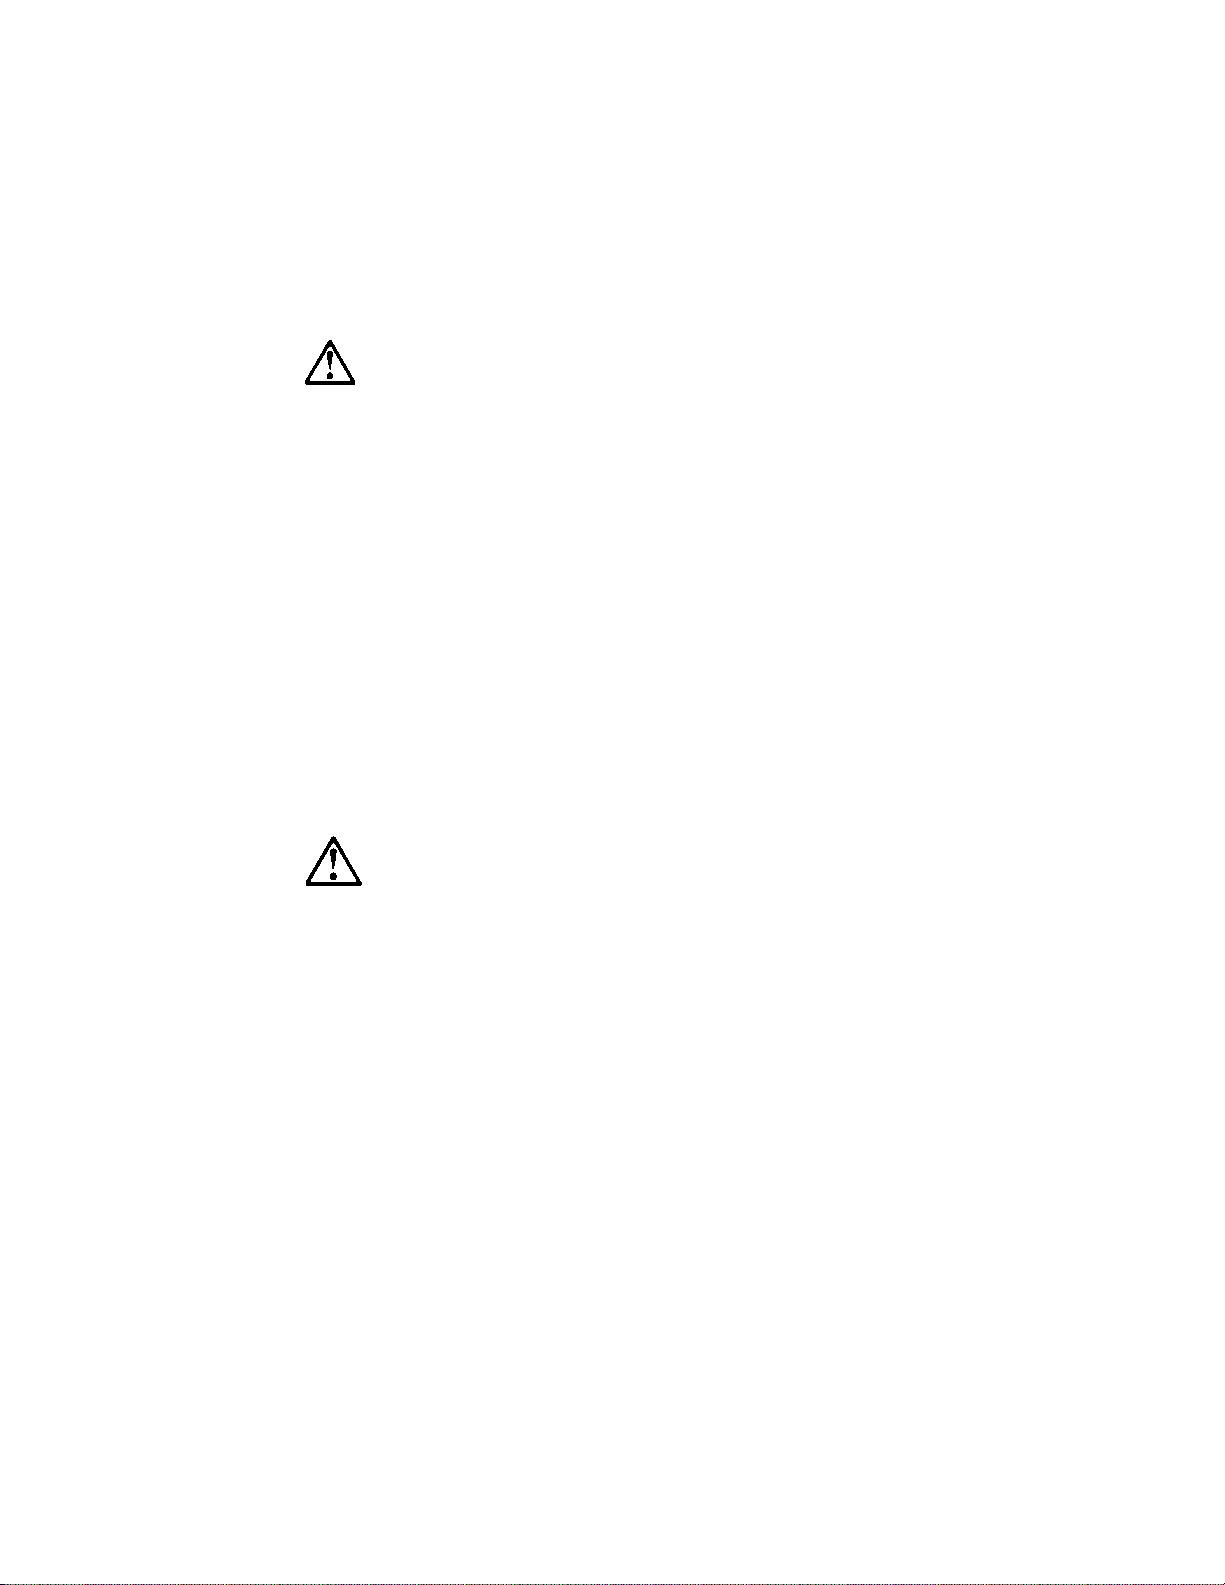
ATTENZIONE:
Quando si sostituisce la batteria, utilizzare solo una batteria IBM o
batterie dello stesso tipo o di tipo equivalente consigliate dal produttore.
Se il sistema di cui si dispone è provvisto di un modulo contenente una
batteria al litio, sostituire tale batteria solo con un tipo di modulo uguale
a quello fornito dal produttore. La batteria contiene litio e può esplodere
se utilizzata, maneggiata o smaltita impropriamente.
Evitare di:
•
Gettarla o immergerla in acqua
•
Riscaldarla ad una temperatura superiore ai 100°C
•
Cercare di ripararla o smaltirla
Smaltire secondo la normativa in vigore (D.Lgs 22 del 5/2/97) e
successive disposizioni nazionali e locali.
ATTENZIONE:
Quando è installata un'unità CD-ROM, notare quanto segue:
L'utilizzo di controlli, regolazioni o l'esecuzione di procedure non
descritti nel presente manuale possono provocare l'esposizione a
radiazioni pericolose.
L'apertura di un'unità CD-ROM può determinare l'esposizione a
radiazioni laser pericolose. All'interno dell'unità CD-ROM non vi sono
parti su cui effettuare l'assistenza tecnica. Non rimuovere i coperchi
dell'unità CD-ROM.
XXVIII
Page 31
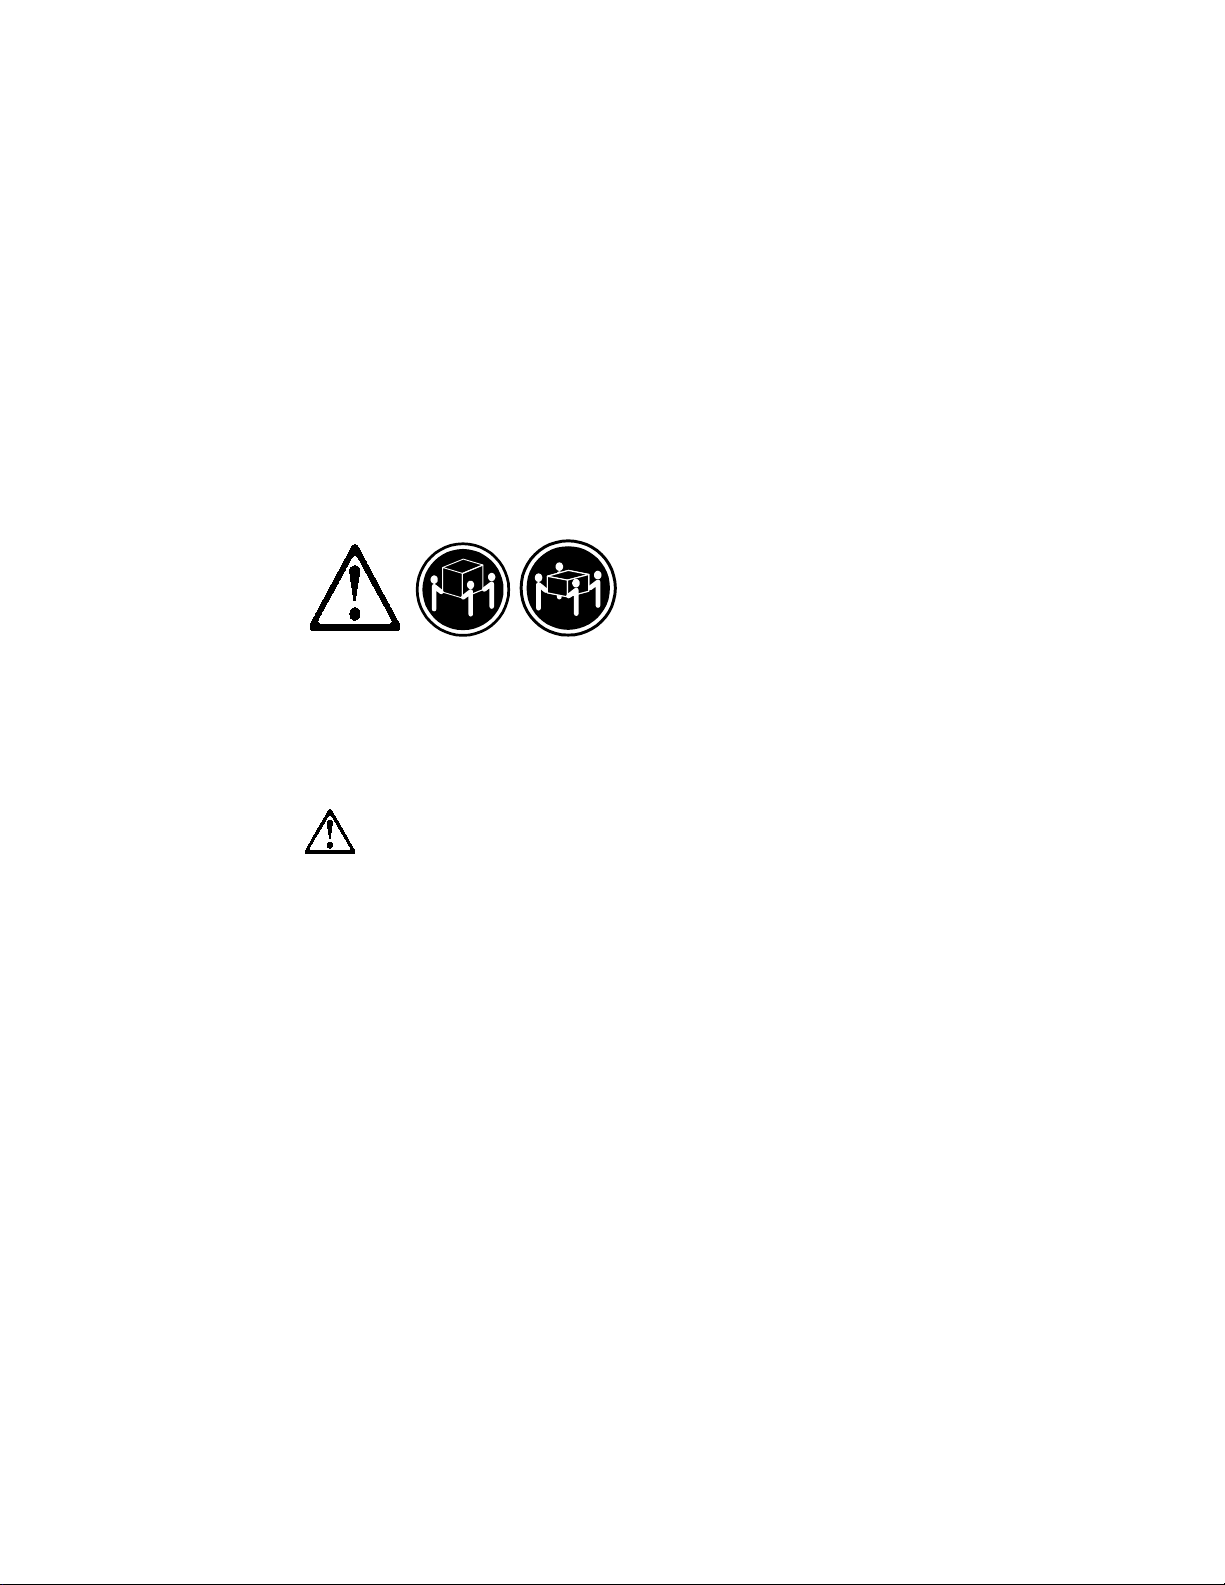
PERICOLO
Alcune unità CD-ROM contengono all'interno un diodo laser di Classe 3A o
Classe 3B. Prestare attenzione a quanto segue:
Aprendo l'unità vengono emesse radiazioni laser. Non fissare il fascio, non
guardarlo direttamente con strumenti ottici ed evitare l'esposizione diretta
al fascio.
≥32 Kg ≥55Kg
ATTENZIONE:
Durante il sollevamento della macchina seguire delle norme di di
sicurezza.
ATTENZIONE:
La corrente circolante nei cavi di alimentazione, del telefono e di segnale
è pericolosa. Per evitare situazioni pericolose per le persone o
danneggiamenti all'apparecchiatura, scollegare i cavi di alimentazione, i
sistemi di telecomunicazioni, le reti e ed i modem prima di aprire i
coperchi del servente se non diversamente indicato nelle procedure di
installazione e configurazione.
Notice XXIX
Page 32
XXX
Page 33
Notice XXXI
Page 34
XXXII
Page 35
PELIGRO
Para evitar una posible descarga eléctrica, no conecte ni desconecte los
cables ni lleve a cabo ninguna operación de instalación, de mantenimiento o
de reconfiguración de este producto durante una tormenta eléctrica.
Para evitar una posible descarga:
•
El cable de alimentación debe conectarse a un receptáculo
con una instalación eléctrica correcta y con toma de tierra.
•
Los aparatos a los que se conecte este producto también
deben estar conectados a receptáculos con la debida
instalación eléctrica.
Cuando sea posible, utilice una sola mano para conectar o desconectar los
cables de señal a fin de evitar una posible descarga al tocar dos superficies
con distinto potencial eléctrico.
La corriente eléctrica de los cables de comunicaciones, teléfono y
alimentación puede resultar peligrosa. Para evitar una posible descarga, siga
las indicaciones de conexión y desconexión de los cables siempre que tenga
que instalar, mover o abrir las cubiertas de este producto o de los
dispositivos acoplados.
Instrucciones de conexión
1. Apague todos los componentes
(OFF).
2. En primer lugar, conecte todos
los cables a los dispositivos.
3. Conecte los cables de señal a
los receptáculos.
4. Conecte los cables de
alimentación a las tomas.
Instrucciones de desconexión
1. Encienda todos los componentes
(ON).
2. En primer lugar, retire los cables
de alimentación de las tomas.
3. Retire los cables de señal de los
receptáculos.
4. Retire todos los cables de los
dispositivos.
5. Encienda el dispositivo (ON).
Notice XXXIII
Page 36
caution:
Al cambiar la batería, utilice únicamente la batería IBM Número de
pieza 33F8354 o un tipo de batería equivalente recomendado por el
fabricante. Si el sistema tiene un módulo que contiene una batería de
litio, sustitúyalo únicamente por el mismo tipo de módulo del mismo
fabricante. La batería contiene litio y puede explotar si no se utiliza,
manipula o desecha correctamente.
Lo que no debe hacer
•
Tirar o sumergir el producto en agua.
•
Exponer el producto a una temperatura superior a 100°C.
•
Reparar o desmontar el producto.
Cuando quiera desechar la batería, siga las disposiciones y
reglamentaciones locales.
caution:
Cuando instale una unidad de CD-ROM, tenga en cuenta la siguiente
información.
Si se llevan a cabo controles o ajustes o se utilizan métodos que no se
atengan a lo aquí especificado, se puede producir una exposición
peligrosa a las radiaciones.
Si se retiran las cubiertas de la unidad de CD-ROM, se puede producir
una peligrosa exposición a radiaciones de láser. Dentro de la unidad de
CD-ROM no existen piezas reparables. No retire las cubiertas de la
unidad de CD-ROM.
XXXIV
Page 37
PELIGRO
Algunas unidades de CD-ROM tienen incorporado un diodo de láser de Clase
3A o de Clase 3B Tenga en cuenta la siguiente información.
Cuando la unidad está abierta se generan emisiones de rayos láser. No dirija
la mirada al haz, no lo observe directamente con instrumentos ópticos y evite
la exposición directa.
≥32 Kg ≥55Kg
caution:
Alce la máquina con cuidado; el sobrepeso podría causar alguna lesión.
caution:
La corriente eléctrica de los cables de comunicaciones, de teléfono y de
alimentación puede resultar peligrosa. Para evitar posibles lesiones o
daños del aparato, desconecte los cables de alimentación, los sistemas de
telecomunicaciones, las redes y los módems antes de abrir las cubiertas
del servidor, salvo que se indique lo contrario en las instrucciones de las
operaciones de instalación y configuración.
Notice XXXV
Page 38

Laser Compliance Statement
The CD/DVD-ROM drive in the computer is a laser product. The CD/DVDROM drive's classification label (sample shown below) is located on the drive.
CLASS 1 LASER PRODUCT
APPAREIL A LASER CLASSE 1
LASER KLASSE 1
LUOKAN 1 LASERLAITE
PRODUIT LASER
CATEGORIE 1
The CD/DVD-ROM drive is certified in the U.S. to conform to the requirements
of the Department of Health and Human Services 21 Code of Federal
Regulations (DHHS 21 CFR) Subchapter J for Class 1 laser products.
In other countries, the drive is certified to conform to the requirements of
EN60825.
Class 1 laser products are not considered to be hazardous. The CD/DVDROM drive has an internal Class 1, 0.5-milliwatt, aluminum gallium-arsenide
laser that operates at a wavelength of 760 to 810 manometers.
The design of the laser system and the CD/DVD-ROM drive ensures that
there is no exposure to laser radiation above a Class 1 level during normal
operation, user maintenance, or servicing conditions.
XXXVI
Page 39

Trademarks
The following are trademarks of the IBM Corporation in the United States or
other countries or both:
Aptiva
AT
HelpCenter
IBM
Operating System/2
Intel, Pentium, MMX, EtherExpress, and LANDesk are trademarks or
registered trademarks of Intel Corporation.
Microsoft, MS-DOS, Windows, and Windows NT are trademarks or registered
trademarks of Microsoft Corporation.
Other company, product, and service names may be trademarks or service
marks of others.
OS/2
Personal System/2
PS/1
PS/2
Notice
XXXVII
Page 40

Preface
This manual contains service information for the
(SL-A)
model of the IBM Aptiva Personal Computer, worldwide.
This manual is intended to be used as a stand-alone document to service
Aptiva machine type 2153/2139 products. It is divided into the following
chapters:
Notices
service this computer.
General Information
Check Procedures
failing Field Replaceable Unit (FRU).
Diagnostic Aids
failures.
Repairing Information
and reassemble the computer.
Parts/Test Point Locations
locations of the major parts, jumpers, and connectors .
Safety Inspection Guide
for safety problems before putting the machine under a Maintenance
Agreement.
Parts Catalog
individual FRUs.
Appendix A, FRU Number Index
order.
Appendix B, Online Support Information
information.
Appendix C, Model/Monitor Configurations and FRU Part Numbers
contains models and FRUs listed by part number for all countries.
contains important safety information and notices required to
contains a brief description of this manual.
provides step-by-step instructions that aid in locating the
explains how to use the diagnostics tools for isolating
contains illustrations and descriptions to disassemble
contains illustrations and descriptions of the
contains information about inspecting a machine
contains descriptions, illustrations, and part numbers for
contains part numbers listed in numerical
2153/2139 Service Level A
contains online support
XXXVIII
Page 41

General Information
General Information ................................................................................... 1-1
Introduction................................................................................................... 1-2
Product Overview.........................................................................................1-2
Hardware Interfaces.....................................................................................1-7
CMOS Reset ................................................................................................ 1-8
Power-On Password.....................................................................................1-9
Flash (BIOS) Update Procedure.................................................................1-10
BIOS-contained Model Number and Serial Number...................................1-11
BIOS Setup Utility....................................................................................... 1-12
Working with the Setup Menus.............................................................1-12
Viewing System Information, Video Information and Model Information1-14
Disk Drives............................................................................................ 1-15
Input/Output Ports................................................................................. 1-17
Power Management.............................................................................. 1-18
Startup Options.....................................................................................1-19
Date and Time......................................................................................1-19
Advanced Options.................................................................................1-19
Specifications.............................................................................................1-23
Operating Requirements ............................................................................ 1-25
Special Tools..............................................................................................1-25
Copyright IBM Corp. 1998 1-1
Page 42

Introduction
This chapter gives a general overview of the Aptiva Machine Type 2153/2139,
describes the standard and optional feature s, and detai ls fun ctio nal and
environmental specifications.
Product Overview
Machine Type 2153/K6 contains one ISA slot and one shared PCI/ISA slot,
and the system board supports the AMD processor. Machine Type
2153/Celeron contains two ISA slot, two PCI slot and one shared PCI/ISA
slot, and the system board supports the Celeron processor Machine Type
2139 contains one ISA slot, two PCI slots and one shared PCI/ISA slot, and
the system board supports the Pentium II processor. Both support
Accelerated Graphics Port (AGP), which allows all installed system memory to
be used as texture memory, yielding a huge texture footprint to enhance 3D
graphical display performance.
Listed below are 2153 and 2139 system features:
Processors (Machine Type 2153/K6)
•
Processor with the capabilities of MMX™ technology
•
Socket-7 Zero Insertion Force (ZIF) connector. You must remove the old
processor to install an upgrade processor.
•
Detachable CPU heat sink with fan.
•
One of the following processors can be installed:
−
AMD K6-2 266 processor; 66 MHz external, 266 MHz internal
−
AMD K6-2 300 processor; 100 MHz external, 300 MHz internal
−
AMD K6-2 333 processor; 95 MHz external, 333 MHz internal
−
AMD K6-2 350 processor; 100 MHz external, 350 MHz internal
Processors (Machine Type 2139, 2153/Celeron)
•
Processor with the capabilities of MMX™ technology
•
Processor in Single Edge Contact (S.E.C.) cartridge packaging technology
•
Dual Independent Bus architecture separates dedicated external system
bus and dedicated internal high-speed ca che bus sock etab ility
•
One of the following processors can be installed:
1-2
Page 43

−
Intel Pentium II –350, 400, 450 MHz internal, 100 MHz external
(2139)
−
Intel Celeron –300, 333 MHz internal, 66 MHz external
(2153/Celeron)
Memory
•
512-KB Pipeline Burst Static RAM (PBSRAM). Fixed onboard for 2153/K6,
built-in Pentium II processor for 2139, 128-KB PBSRAM built-in Celeron
processor for 2153/Celeron.
•
Onboard fixed video Synchronize Graphics RAM (SGRAM), 2- or 4-MB for
Machine Type 2153, 4-MB for 2139.
•
168-pin synchronous dynamic random access memory (SDRAM), dual
inline memory module (DIMM) sockets.
−
2 memory sockets for Machine Type 2153, 3 sockets for 2139.
−
16-MB, 32-MB, 64-MB or 128-MB DIMM.
−
PC-100(64-bit, non ECC, 100MHz, 3.3volt) DIMMs with gold
contacts.(PC-66 for 2153/Celeron)
−
For 2153, maximum memory is 256MB, for 2139 maximum
memory is 384MB.
External Ports
•
Video port (15-pin D-sub connector)
•
Parallel port (25-pin D-sub connector)
•
Serial port (9-pin D-sub connector)
•
Game/MIDI port (15-pin D-sub connector)
•
Keyboard port (6-pin PS/2 mini-din connector)
•
Mouse port (6-pin PS/2 mini-din connector)
•
Two USB ports
•
Microphone-in jack
•
Speaker-out jack
•
Line-in jack
Diskette Drive
•
AT-type
General Information 1-3
Page 44

•
3.5-in. 1.44 MB slimline diskette drive.
Hard Disk Drive
•
3.5-in., 1-in. height or 5.25-in, 1-in. height IDE AT drive.
•
128 KB "look-ahead" cache memory in hard disk drive.
•
Average and minimum 12 ms seek time, access time varies for the hard
disk drive and the hard disk drive manufacturer.
CD/DVD-ROM Drive
•
5.25-in. high-performance, 32X CD-ROM IDE/AT drive(for 2153), 32X CD-
ROM IDE/AT drive and 2X DVD(both for 2139).
•
Read data and play audio from standard and mini CD-ROM and audio
compact discs (audio CDs). DVD media supported on DVD models.
Multimedia
•
One pair of external speakers with power adapter (some may come with
an additional sub-woofer and power adapter)
•
Noise canceling microphone. (available on certain models)
Power Management
•
Compliant to ACPI and supports display power management signaling
(DPMS) monitor.
•
Software shutdown by Windows 98.
•
System enters standby mode if any of following conditions are met:
−
Execute standby from Windows 98 Start menu
−
Press system power button if it sets to act as standby function.
See "Power Management Mode" on page 1-17.
−
Standby timer set in the Windows 98 power utility timer elapses
without system activity.
•
Monitor enters standby mode if Windows 98 power utility timer elapses
system sleep timer set in the BIOS elapses.
•
Support modem ring wake up from standby. See "Modem Wake-Up on
Ring" on page 1-18.
1-4
Page 45

Power Supply
•
95 W or 145 W switchable high/low voltage power supply(145 W for 2139
only)
•
Standard ATX power supply with +5V standby power
Internal Cabling
•
Two 40-pin ribbon cables for hard disk drive and CD/DVD-ROM drive.
•
One 34-pin ribbon cable for AT diskette drive.
•
One 4-pin (2-wire) cable for hard disk drive light-emitting diode (LED).
•
One 3-pin (3-wire) cable for power light-emitting diode (LED).
•
One 2-pin (2-wire) cable for power switch.
•
One 4-pin modem voice-in/speaker-out cable.
Modem
•
56.6 Kbps ISA plug and play modem adapter card with data/fax/voice or
voice-less features.
•
Telephone line-out (RJ-11) connector.
•
Telephone line-in (RJ-11) connector.
Monitor
•
Super video graphics array (SVGA) monitor.
•
Compliant to VESA power saving mode.
•
Connector for a detachable grounded 3-wire power cord.
•
1.8-m (5.8-ft) attached signal cable.
•
Auto-sensing power input for 100 Vac to 240 Vac.
•
15” (13.6” viewable image size) monitor
−
0.28-mm dot pitch
−
Automatic scanning horizontal frequencies from 30KHz to 54KHz
and all vertical frequencies between 50Hz and 120Hz.
−
DDC2A/B support
•
15” (13.7” viewable image size) monitor
−
0.28-mm dot pitch
General Information 1-5
Page 46

−
Automatic scanning horizontal frequencies from 30KHz to 69KHz
and all vertical frequencies between 50Hz and 120Hz.
−
DDC1/2B+ support and OSD (on-screen display) menu
•
17” (15.7” viewable image size) monitor
−
0.27-mm dot pitch
−
Automatic scanning horizontal frequencies from 30KHz to 72KHz
and all vertical frequencies between 50Hz and 120Hz.
−
DDC1/2B+ support and OSD (on-screen display) menu
Keyboard
•
104-key, 105-key or 109-key rubber dome Rapid Access keyboard with
1.8-m (5.8-ft) cable.
•
PC Next keyboard
Mouse
•
2 button Sleek PS/2 mouse with 1.8-m (5.8-ft) cable for 2153
•
2 button ScrollPoint PS/2 mouse for 2139
1-6
Page 47
Hardware Interfaces
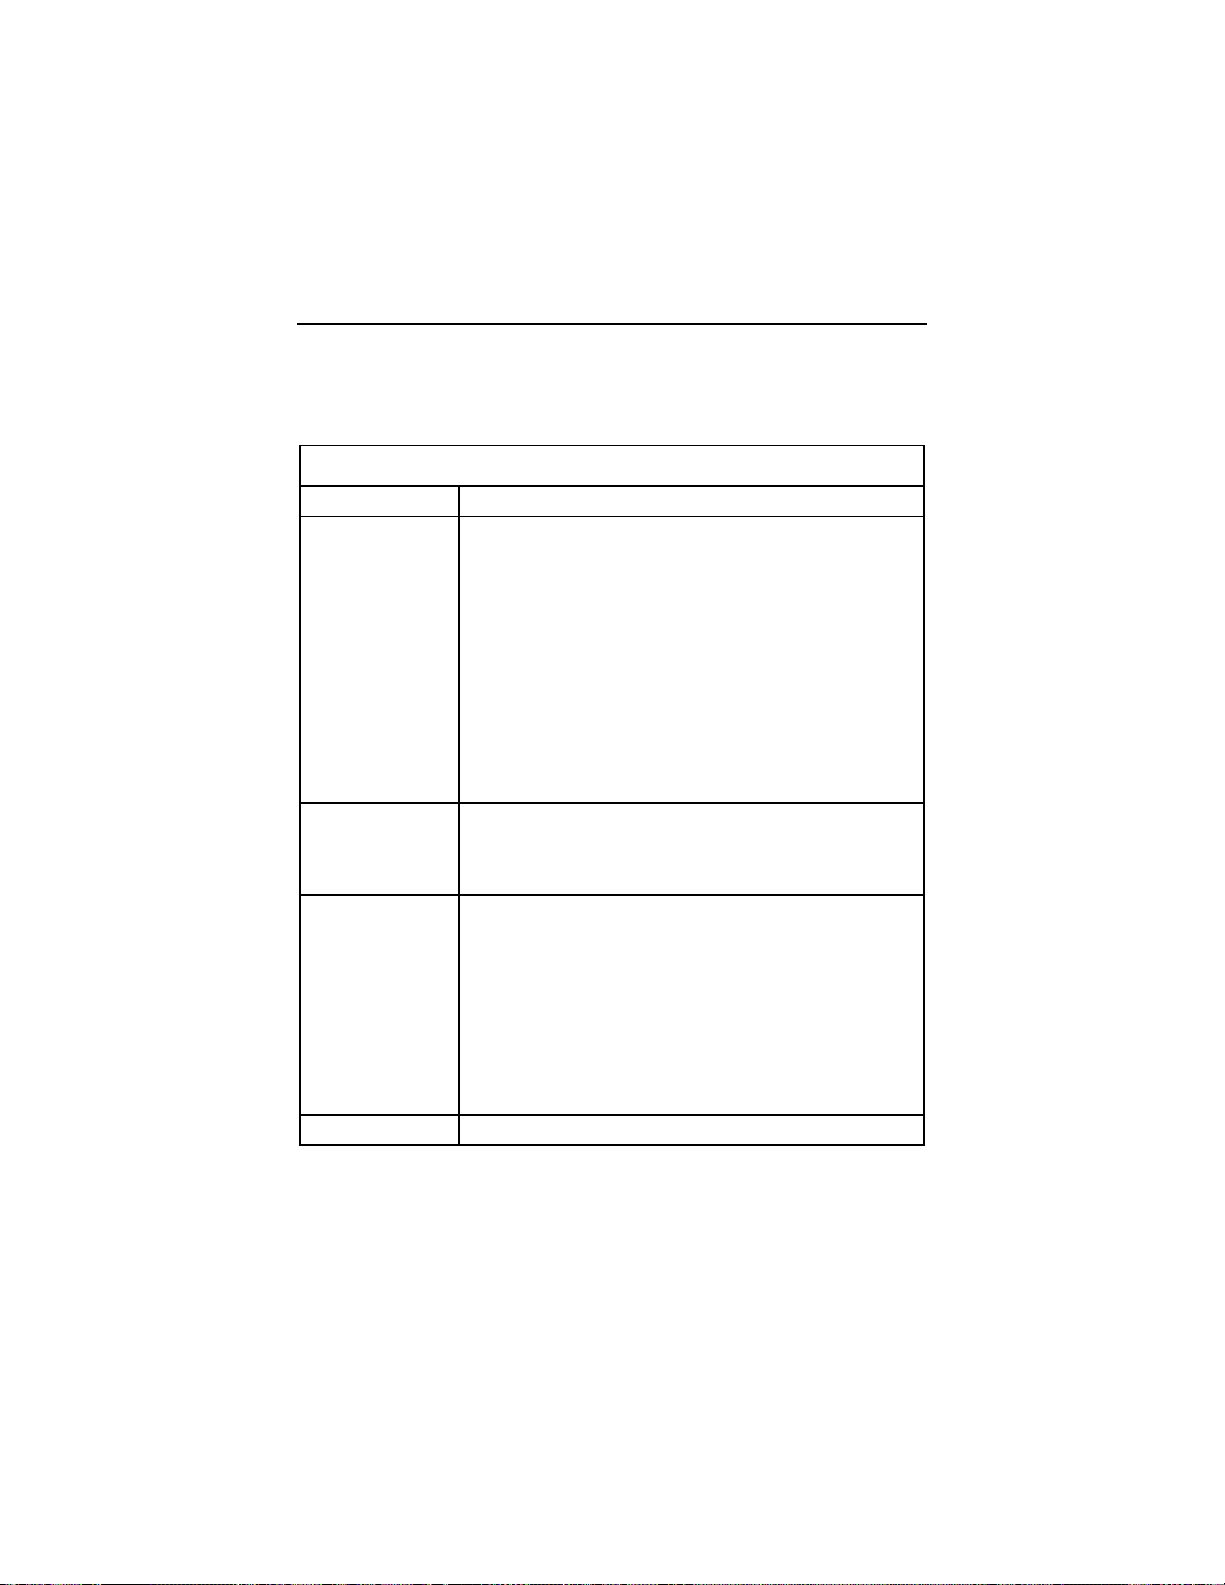
The following peripheral interfaces for adapters, options, and drives are
supported in the system unit.
Table 1- 1 System Board Hardware Interfaces
Item Interface
Expansion slot
for I/O adapter
cards
Hard disk drives
CD/DVD-ROM
drive
Diskette drive AT diskette interface
Machine Type 2153:
One PCI (peripheral component interconnect) v2.1
compatible expansion slots that operates at 33 MHz
bus speed for K6 and two PCI for Celeron
Two IBM AT-ISA Plug and Play compatible expansion
slots that operates at 8 MHz bus speed.
Note: 1 PCI/1ISA slot share and 1 ISA independent slot
Machine Type 2139:
Three PCI v2.1 compatible expansion slots that
operates at 33 MHz bus speed
Two IBM AT-ISA Plug and Play compatible expansion
slots that operates at 8 MHz bus speed. 1 PCI/ISA
share.
Two PCI local bus Enhanced IDE v1.0 compatible hard
disk drive interfaces that support PIO mode up to mode
5 , DMA 32-bit access up to mode 2 and Ultra 33
Synchronous DMA up to mode 2 (33M bytes/sec).
5.25-in. high-performance, twenty four-speed (24X)
and thirty two-speed (32X) C D-ROM IDE/AT drive
(only for 2153)
Support Bootable CD-ROM Format specification
version 1.0.
Compliant to Audio-CD, Video-CD, CD-ROM/XA,
Karaoke-CD, and Photo-CD (both single and multisession) format.
DVD 2X (for both 2139 and 2153)
General Information 1-7
Page 48
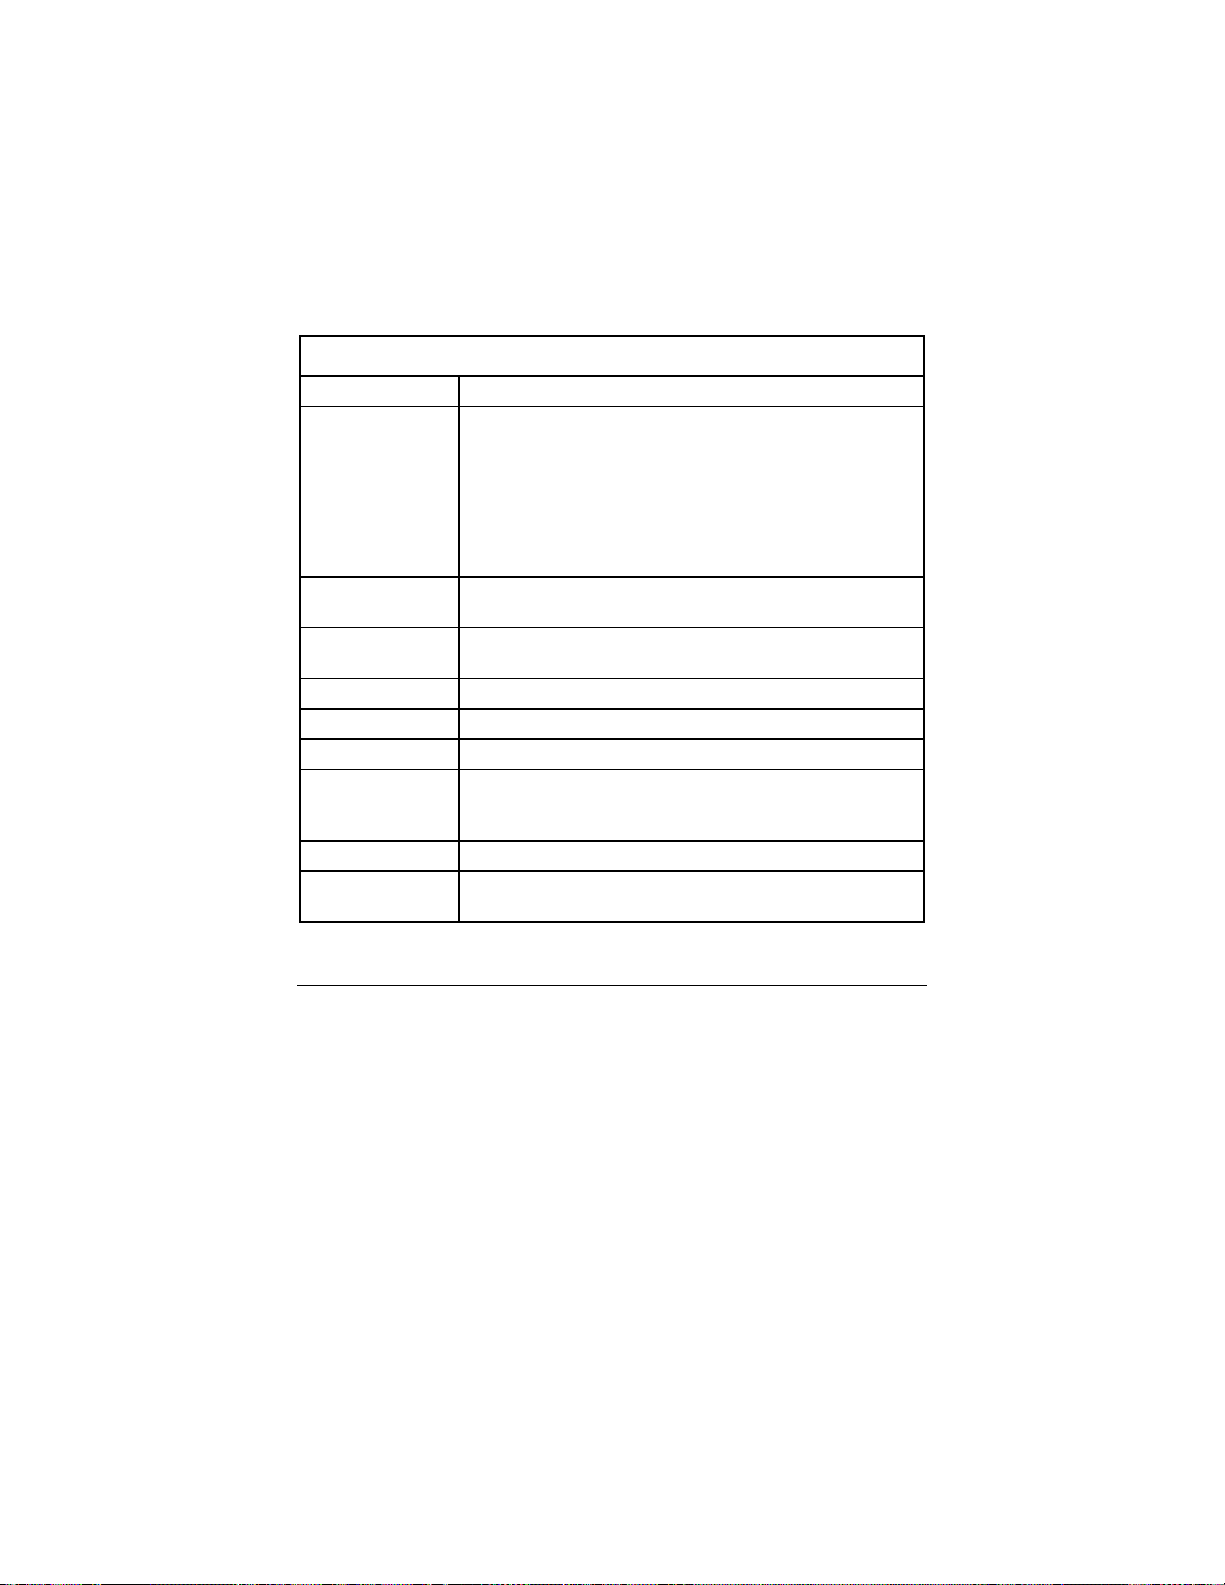
Table 1- 1 System Board Hardware Interfaces
Item Interface
Video Physical interface is compatible with the IBM Personal
System/2 (PS/2) VGA interface.
Machine Type 2153:
ATI Rage Pro Turbo AGP 2X or 1X VGA on board.
Machine Type 2139:
ATI Rage Pro Turbo AGP 2X to enhance 3D graphical
display performance.
Modem One 56.6 Kbps IBM AT-ISA plug and play modem
adapter card with data/fax/voice features.
Audio CS4235KQ is compatible with Sound Blaster (Creative
Labs, Inc.).
Pointing device IBM PS/2-compatible mouse
Keyboard device IBM PS/2-compatible keyboard
Serial port 9-pin connector wit h RS232D electrical interface
Parallel port
Game port Game port interface for joystick. It also supports MIDI.
USB
Supports SPP (IBM PC/XT, PC/AT, PS/2) compatible,
EPP (IEEE 1284 compliance), ECP (IEEE 1284
compliance) interface.
M5237 USB controller integrated in the M1543 south
bridge.
CMOS Reset
This system does not deny access to BIOS Setup Utility. Execute “Load BIOS
Default Settings” in BIOS Setup to clear the corrupted CMOS data. See
“Loading the Default Settings” on page 1-13.
1-8
Page 49

Power-On Password
A power-on password denies access to the system by an unauthorized user
when the system is powered on. When a power-on password is active, the
password prompt appears on the screen each time the system is powered on.
The system starts after the proper password is entered.
In some cases, you might be required to service a system with an active and
unknown power-on password. To clear a password from the system, first
identify the system, password jumper/switch by referring to "Machine Type
2153/K6 System Board " on page 5-3 or "Machine Type 2153/Celeron System
Board Layout" on page 5-8, then follow these steps.
1. Turn off system unit.
2. Unplug power cable from the electrical outlet.
WARNING:
Machine Type 2153:
password check process. See "Machine Type 2153/K6 System Board " on
page 5-3.
Machine Type 2139:
password check process. See "Machine Type 2153/Celeron System Board
Layout" on page 5-8.
4. Plug power cable, turn on the system, and depress F1 during POST to
enter BIOS Setup menu.
5. Select “Advanced Options”, then enter “Security Options” and set “PowerOn Password” setting to “None” to clear password.
6. Save and exit from BIOS Setup.
7. Turn off the system, unplug power cable from electrical outlet.
Machine Type 2153:
position to enable password check process. See "Machine Type 2153/K6
System Board on page 5-3.
Machine Type 2139:
position to bypass password check process. See "Machine Type
2153/Celeron System Board Layout" on page 5-8.
IMPORTANT:
in the Setup Utility.
Do not attempt these steps with the power cord plugged into
the electrical outlet. The power supply maintains +5 Vdc of
standby power when the power cord is plugged. System damage
might result if the power cord is not unplugged during testing.
Set switch 2 of SW3 to Off position to bypass
Set switch 2 of S1 to On position to bypass
Set switch 2 of SW3 to On (enable password check)
Set switch 2 of SW1 to On (bypass password check)
To reinstall the password, the user must enter a password
General Information 1-9
Page 50

Flash (BIOS) Update Procedure
NOTE:
1. Prepare a bootable DOS diskette disk with AFLASH.EXE, MSG.DAT,
2. Insert the diskette and boot from drive A.
3. At the DOS prompt, type A:> AFLASH VXXYYZZ.BIN then press Enter.
4. The program updates the BIOS automatically.
5. Wait for the update to complete (indicated by the beeps).
7. Power off system after the BIOS is completely updated.
The flash update procedure does not change the model number and
serial number information in BIOS.
VXXYYZZ.RN and VXXYYZZ.BIN files
NOTE:
WARNING:
IMPORTANT:
WARNING:
The AFLASH.EXE and MSG.DAT are flash utility programs. The
VXXYYZZ.RN file has the BIOS checksum information. The
VXXYYZZ.BIN is BIOS source code binary file.
Do not boot with any memory related driver such as
HIMEM.SYS, EMS.SYS ….
Verify the BIOS checksum value shown on screen is the
same as the one in VXXYYZZ.RN file.
Do not turn off the system power while the BIOS is
programming, or the flash ROM will be destroyed.
1-10
Page 51

BIOS-contained Model Number and Serial Number
The model number and serial number information is stored in BIOS ROM and
displayed in the “Model Information” of BIOS Setup main menu. If a service
repair is completed by replacing a new system board or a new BIOS ROM,
then you are required to input the original system’s model number and serial
number into the new BIOS ROM.
Follow these steps to input the model number and serial number to BIOS:
1. Prepare a bootable DOS diskette with CHGDMI.EXE and MODEL.DMI
files.
2. Insert the diskette and boot from drive A.
WARNING:
4. At the DOS prompt, type A:>CHGDMI/W then press Enter. When the
screen shows:
Enter the model number and press Enter to continue. You can type a
maximum of 16 characters (without spaces).
5. When the screen shows:
Enter the serial number and press Enter to continue. You can type a
maximum of 16 characters (without spaces).
6. Type A:>CHGDMI/D and press Enter to display and verify your input
model number and serial number information.
Do not boot with any memory related driver such as
HIMEM.SYS, EMS.SYS ….
System Product Name:
System Serial Number:
General Information 1-11
Page 52
BIOS Setup Utility
The Setup Utility lets you review and change important information about the
computer and its hardware.
Working with the Setup Menus
Starting the Setup Utility
Follow these steps to enter Setup when the computer is off:
1. Turn on your monitor.
2. Turn on the system un it.
3. When you see the IBM Aptiva logo, press F1 to enter Setup and display
the Main Menu.
If you have previously set a power-on password, you are prompted to type in
the password after you press the F1 key. See the section “Power-On
Password” on page 1-9 for information on setting, changing, or removing the
password.
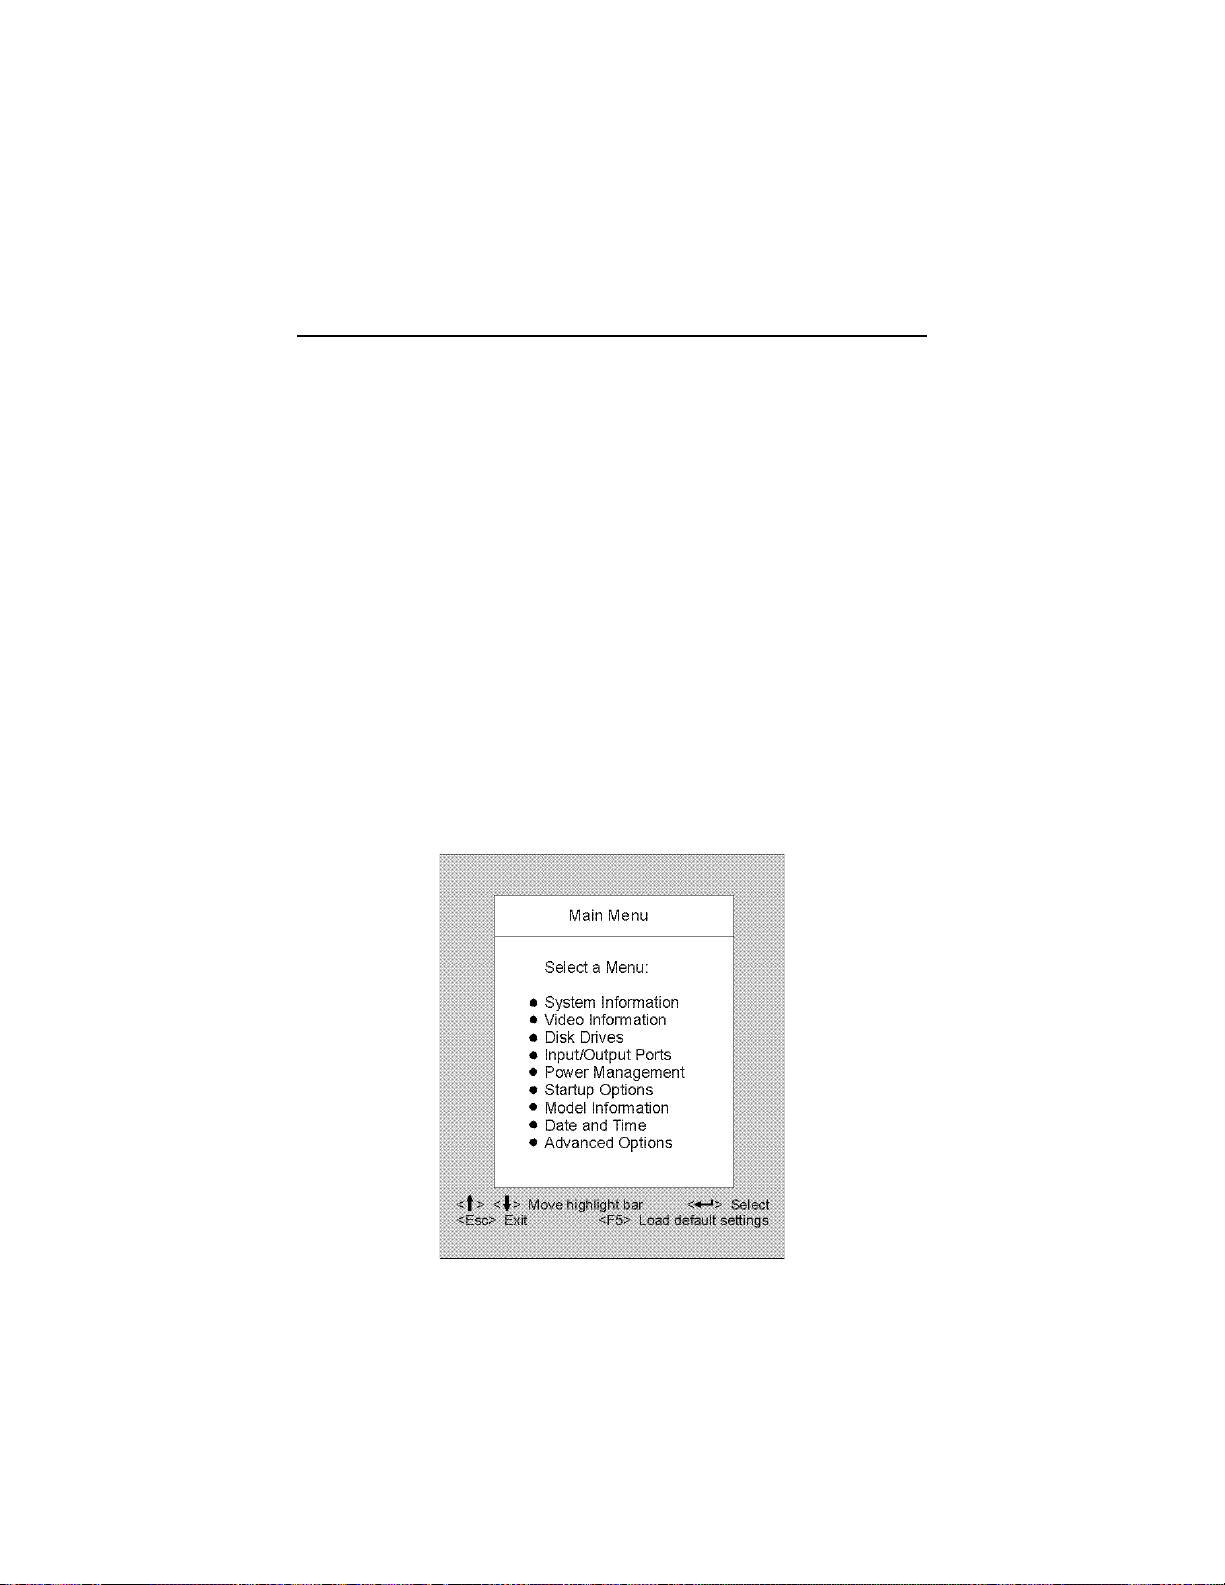
Refer to the Setup Utility Main Menu below.
1-12
Page 53

The following table lists specific keys on the keyboard that will help you move
through the Setup menus:
Keys Function
Down- or uparrow key
Left- or rightarrow key
PgUp Press this key to move from a menu to the
PgDn Press this key to move from a menu to the
F1 Press this key if you want help for a selected
Esc After viewing or making changes to the settings
Enter Press this key to choose a highlighted option
Changing Parameter Settings
In the Setup menus, the configuration information that you can change is
enclosed in brackets like these: [ ]. You cannot change any information that is
not enclosed in brackets. Use the up- or down-arrow keys to highlight options
then press Enter to display a menu. When changing the setting of a particular
parameter, highlight the setting then use the left- or right-arrow key to change
the setting.
Use these arrow keys to highlight an option on
the menu. (Press the Enter key to choose the
option.)
Use these arrow keys to make a selection and
change an option’s setting. On some menus,
you can use these keys to move from one field
to another.
menu immediately preceding it. This key works
only in options with multiple menus.
menu immediately following it. This key works
only in options with multiple menus.
menu option.
on a menu, press this key to exit the menu.
from a menu.
Loading the Default Settings
When you purchase an Aptiva computer, it is already configured for use. The
original configuration settings, also called factory or default settings, are
stored in the CMOS. Setup includes an option Load Default Settings that lets
you reload the original configuration at any time.
If you have made changes in Setup but would like to restore the default
settings, follow these steps:
1. Press F5 to load default settings. A dialog box appears confirming if you
want to load the default settings.
General Information 1-13
Page 54

2. Use the left-arrow key to select Yes, then press Enter.
3. Press Esc to exit Setup.
A dialog box appears confirming if you want to save the CMOS settings (in
this case, the default settings that you reloaded).
4. Use the left-arrow key to select Yes, then press Enter to save the changes
in CMOS.
You must load the Setup default settings in the following instances:
−
When you replace the system battery
−
When you customize your system configuration settings and some
resource assignments conflict causing the computer to hang
Exiting Setup
When you complete your changes or finish viewing information, return to the
main menu. From this location, you can exit Setup and save your changes or
exit without saving your changes.
Follow these steps to exit Setup:
1. From the main menu, press the Esc key.
2. The Exit Setup dialog box appears. If you have made changes in the
parameter settings, it will contain an option for saving your changes.
- If you would like to save your changes, press the left-arrow key to select
the option Yes then press Enter to save your changes and exit Setup.
- If you do not want to save your changes, press the right-arrow key to
select the option No then press Enter, to exit Setup without saving.
Viewing System Information, Video Information and Model Information
To view general hardware information about your computer, select the System
Information option from the Setup main menu. The items displayed in the
System Information menu are not configurable.
Setup automatically updates this menu when you do either of the following:
−
Add or change hardware on your computer
−
Make changes to other menus in Setup and save those changes
To view the video information such as the video controller, and video memory,
select the video information option from the setup menu.
1-14
Page 55

Select primary display adapter to initialize onboard VGA as the boot display
device. Select Auto to initialize PCI add-on VGA card as the boot display
device if a PCI add-on card is found; otherwise, onboard VGA will be
initialized.
To view the computer information such as the model number, serial number,
and BIOS version and date, select the Model Information option from the
Setup main menu. Like in the System Information menu, the items displayed
are not configurable.
Disk Drives
If you install a new diskette, hard disk, or CD/DVD-ROM drive, BIOS autodetects the presence of these devices. Enter Setup to identify or verify the
type of drive installed in the computer.
If you want to change any drive setting, select Disk Drives from the main
menu. The Disk Drives menu appears showing the diskette drive and IDE
drive parameters.
Diskette Drive (A or B)
These options display the size and storage capacity of the currently installed
diskette drive or drives. Empty drive bays are indicated with a “None” setting.
Your Aptiva computer comes with a diskette drive A. If you add an additional
diskette drive, it will be designated as diskette drive B.
IDE Hard Disk and CD/DVD-ROM Drives
The Disk Drives menu includes four IDE drive items that allow you to
configure the hard disk drives and the CD/DVD-ROM drive. Selecting any one
of these items displays a submenu with details on a particular IDE drive.
The IDE drive items are identified as follows:
−
IDE Primary Channel Master
system board and set as the master device. This is the hard disk
that comes preinstalled with your computer.
is attached to IDE connector 1 on the
−
IDE Primary Channel Slave
connector 1 on the system board and set as the slave device.
−
IDE Secondary Channel Master
connector 2 on the system board and set as the master device.
−
IDE Secondary Channel Slave
connector 2 on the system board and set as the slave device.
Normally, a preinstalled CD/DVD-ROM drive is connected here.
NOTE:
The CD/DVD-ROM drive information does not appear among
these options. Click on the System Information option in the
Setup main menu to verify the presence of a CD/DVD-ROM drive.
(if installed) is attached to IDE
(if installed) is attached to IDE
(if installed) is attached to IDE
General Information 1-15
Page 56

Proceed to the following for details on the parameters under each IDE drive
submenu.
Type
This item specifies the number of cylinders, heads, and sectors, and the size
of a particular IDE drive. If no information appears opposite the parameters,
there is no drive installed in that channel.
Hard Disk Block Mode
This function enhances disk performance depending on the hard disk in use.
BIOS automatically detects if your hard disk supports this feature.
Setting to Auto allows data transfer in blocks (multiple sectors) to increase the
data transfer rate. If your system does not boot after setting this parameter to
Auto, change the setting to Disabled. The default setting for this parameter is
Auto.
Advanced PIO Mode
The advanced PIO mode feature improves system performance by allowing
the use of faster hard disk drives. If your hard disk supports this feature, you
may set this parameter to Auto (default), Mode 0, Mode 1, Mode 2, Mode 3, or
Mode 4 depending on the hard disk requirements. See the documentation that
came with the hard disk.
If your hard disk does not support this function, set this parameter to Disabled.
Hard Disk Size > 528MB
This enhanced IDE feature works only under DOS and Windows
environments. If set to Auto, which is the default, BIOS allows you to use a
hard disk with a capacity of more than 528MB. This is made possible through
the Logical block address (LBA) mode translation. You may be required to set
this parameter to Disabled if you use other operating systems.
To prevent data loss, set this parameter to Auto if you are using a hard disk
with more than 528MB capacity that was previously configured through the
LBA mode. If you use a hard disk configured through the user-specific
cylinder-head-sector (CHS) mode, set this parameter to Disabled.
Hard Disk 32-bit Access
Setting this parameter to Enabled improves system performance by allowing
the use of the 32-bit hard disk access. This enhanced IDE feature only works
under DOS, Windows 3.x, Windows 98, and Novell NetWare. If your software
does not support this function, set this parameter to Disabled. The default
setting is Enabled.
1-16
Page 57

Input/Output Ports
From the Setup main menu, select the Input/Output Ports option to view or
change port configuration settings. The Input/Output Ports menu appears.
This menu lets you configure serial and parallel ports.
Also included in this menu are items for enabling or disabling the onboard
controller chipsets.
Onboard Communication Ports
Serial Port
Your computer comes with a 9-pin serial port. This parameter displays the
current address for serial port. The default setting Base Address is 2F8. The
default IRQ is 3.
Parallel Port
Your computer comes with one parallel port. This parameter shows the default
Enabled to activate the parallel port. The default base address is 378h. The
default IRQ is 7.
The default mode is ECP. The default DMA is 3.
Onboard PS/2 Mouse (IRQ12)
This parameter enables or disables the onboard PS/2 mouse. When set to
Enabled, it allows you to use the onboard PS/2 mouse. When set to Disabled,
it deactivates the mouse and frees IRQ 12 for the use of other devices (for
2139).
Onboard USB
This parameter allows you to enable or disable the universal serial bus (USB)
controller. The default setting is Enabled.
USB /Keyboard Mode
keyboard outside of Windows. The default is Disabled.
Onboard Audio Chip
This parameter enables or disables the onboard audio controller chipset. This
item does not appear in the menu if there is no physical audio chipset on the
system board. The default setting is Enabled.
This parameter enables or disables the use of a USB
Power Management
The system power management features allow you to reduce power
consumption.
General Information 1-17
Page 58

NOTE:
Power Management Mode
When the Power Management Mode parameter is set to Enabled, you can
configure the different power saving timers to your desired settings. Setting
this parameter to Disabled deactivates the power management feature and all
the timers. The default setting is Enabled.
Power Switch< 4 sec.
When set to Suspend, this parameter adds the suspend function to the
system power button on the front panel. The suspend function allows you to
put the system into suspend mode by pressing the power button for less than
four seconds while the system is on. When this parameter is set to Power off,
the power button simply turns the system power on or off. This parameter is
set to Power off by default.
Modem Wake-Up on Ring
This parameter allows you to enable or disable the Modem Wake-Up on Ring
feature. When enabled and if the computer is in suspend, an incoming call
automatically resumes normal power on mode. When disabled, the system
does not return to the “normal on” state even if there is an incoming modem
access. The default setting is Enabled.
These Power Management settings do not work in Windows 98.
Use the Control Panel Power utility for Win98 Power
Management settings.
Startup Options
From the Setup main menu, select Startup Options to view or change start-up
configuration settings. The Startup Options menu appears. This menu
identifies the start-up devices.
Date and Time
From the Setup main menu, select the Date and Time option to view or
change the system clock from the Date and Time menu.
Advanced Options
From the Setup main menu, select the Advanced Options option to view or
change a variety of configuration settings. The Advanced Options menu
appears, with the following options:
−
Security Options
1-18
Page 59

−
Memory/Cache Options
−
PnP/PCI Options
−
Onboard Floppy Disk Controller
−
Onboard IDE Primary Channel
−
Onboard IDE Secondary Channel
Each of these options opens an additional menu.
Security Options
The Security Options menu lets you change the settings of the following
parameters:
−
Power-on Password
−
Disk Drive Control
Power-on Password
Select this parameter and press the left- or right-arrow key to display the
Power-on Password window. In this window, you can set up a password to
restrict the use of your computer. You can also change or remove the
password.
If you set up a power-on password, you must type this password each time
you turn on your computer. If you do not key in the correct password, you
cannot use your computer. You must also type this password if you want to
enter Setup.
−
Setting a Power-On
Onboard Floppy Disk Controller
This parameter allows you to enable or disable to onboard floppy disk
controller chipset. When set to Enabled, the controller enables the diskette
drive on your computer. When set to Disabled, the controller deactivates the
drive but simultaneously frees IRQ 6 which is normally assigned to the
diskette drive. You may then assign IRQ 6 to another device.
Onboard IDE Primary Channel
This parameter allows you to enable or disable the onboard IDE primary
channel controller. Setting this parameter to Enabled lets you use the primary
IDE connector (IDE 1) to connect up to two IDE drives. Setting to Disabled
General Information 1-19
Page 60

deactivates IDE 1 but frees IRQ 14 for the use of other devices. The default
setting is Enabled.
Onboard IDE Secondary Channel
This parameter allows you to enable or disable the onboard IDE secondary
channel controller. Setting this parameter to Enabled lets you use the
secondary IDE connector (IDE 2) to connect up to two IDE drives. Setting to
Disabled deactivates IDE 2 but frees IRQ 15 for the use of other devices. The
default setting is Enabled.
Memory/Cache Options
The Memory/Cache Options menu allows you to configure the Level 1 and
Level 2 caches. Enabling the cache parameters optimize system
performance.
Some older applications, however, may not run properly with the caches
enabled. Set the parameters to Disabled when you run these applications.
Disabling the caches will degrade system performance.
PnP/PCI Options
The parameters in the PnP/PCI Options menu allow you to set the IRQ
assignments for your PCI devices.
PCI IRQ Setting
This parameter allows for automatic or manual configuration of PCI devices. If
you use Plug and Play devices, you can keep the default setting Auto. The
system then automatically configures the Plug and Play devices. If you install
non-Plug and Play adapter cards, set this parameter to Manual. This allows
you to assign resources to non-Plug and Play cards first.
PCI IRQ Sharing
When set to Yes, this parameter allows you to assign the same IRQ to more
than one PCI device installed in the system. When set to No, you must assign
different IRQs to the PCI devices. The default setting is Yes.
VGA Palette Snoop
The VGA palette snoop function allows the system to refresh all ISA and PCI
graphic adapters installed in the syste m. This is need ed if you inst all an
additional graphics overlay card such as an MPEG or an advanced 3D
graphics adapter. If the image on your monitor has problems after installing
such an adapter, set this parameter to Enabled. Otherwise, leave it to the
default Disabled to achieve better performance.
1-20
Page 61

Plug and Play OS
When this parameter is set to Yes, BIOS initializes only Plug and Play boot
devices, then the Plug and Play operating system takes care of the other
devices. When set to No, BIOS initializes all Plug and Play boot and non-boot
devices.
Set this parameter to Yes if you are using the Windows 98 operating system.
Set to No if you run any other operating system. The default setting is Yes.
Reset Resource Assignments
Set this parameter to Yes to avoid IRQ conflict when installing non-Plug and
Play cards.
Before you install non-Plug and Play cards, set this parameter to Yes, exit
Setup and turn off the computer. This clears all resource assignments and
allows BIOS to reassign resources to all installed Plug and Play devices the
next time the system boots. After clearing the resource data, the parameter
resets to the default setting No.
General Information 1-21
Page 62

Specifications
Dimension (width x depth x height):
•
System unit:
−
195 mm (7.68 in.) x 455 mm (17.9 in.) x 428 mm (16.85 in.)(for
2139)
−
190 mm (7.48 in.) x 370 mm (14.57 in.) x 384 mm (15.12 in.)(for
2153)
•
15” Monitor /13.6” viewable image size:
−
370 mm x 396 mm x 382 mm
•
15” Monitor / 13.7” viewable image size:
−
370 mm x 396 mm x 382 mm
•
17” Monitor / 15.7” viewable image size:
−
413 mm x 445 mm x 434 mm
Weight:
•
System unit:
−
12.7 kg (28 lb) for 2139
−
10 kg (22 lb) for 2153
•
15” Monitor /13.6” viewable image size:
−
13.0 kg (28.6 lb)
•
15” Monitor /13.7” viewable image size:
−
13.0 kg (28.6 lb)
•
17” Monitor /15.7” viewable image size:
−
18.5 kg (40.8 lb)
Environment:
•
Temperature for system unit:
−
Power on: 10° to 35°C (50° to 95°F)
−
Power off: -10° to 60°C (14° to 140°F)(for 2139)
−
Power off: -20° to 60°C (-4° to 140°F)(for 2153)
•
Temperature for 15” (13.1”/13.6” viewable image size) monitor types:
−
Power on: 10° to 35°C
1-22
Page 63

−
Power off: -20° to 60°C
•
Temperature for 15”/17” (13.7”/15.7” viewable image size) monitor types:
−
Power on: 5° to 40°C (15"), 10° to 35°C (17")
−
Power off: -20° to 60°C (15"), -20° to 60°C (17")
•
Humidity for system unit:
−
Power on: 20% to 80%
−
Power off: 20% to 80%
•
Humidity for monitor :
−
Power on: 20% to 80% (15"), 8% to 80% (17")
−
Power off: 20% to 90% (15"), 20% to 90% (17")
Power consumption:
•
System unit:
−
Maximum: 95 Watts(for 2153) and 145 Watts(for 2139)
•
15” (13.1”/13.6” viewable image size) monitor types:
−
Maximum: 90 Watts
•
15”/17” (13.7”/15.7” viewable image size) monitor types:
−
Maximum: 80 Watts (15"), 130 Watts (17")
Electrical input:
•
Input voltage for system unit (Sine-wave input is required) :
−
Low Range: 90 Vac to 132 Vac
−
High Range: 180 Vac to 264 Vac
•
Input voltage for monitor (Sine-wave input is required) :
−
88 Vac to 264 Vac (15")
−
90 Vac to 264 Vac (17")
General Information 1-23
Page 64

Operating Requirements
All machines require two power inputs: one on the system unit and one on the
monitor display.
The system units come with a voltage selector switch, allowing selection of
voltage of either 110 Vac or 220 Vac. This switch must be in the 220 Vac
position when the machine is plugged into a 220 Vac electrical outlet.
The required power input for the monitor shipped with the system unit is autosensing type and does not require any voltage switch adjustment.
Special Tools
The following special tool is required to service this system when running
diagnostics program (PC-Doctor):
•
Wrap plugs, P/N 72X8546
1-24
Page 65

Check Procedures
Check Procedures...................................................................................... 2-1
Introduction................................................................................................... 2-2
Start..............................................................................................................2-3
Index of Symptoms, Messages, Error Codes, or Beeps...............................2-8
Troubleshooting.......................................................................................... 2-25
Factory-Installed Storage Devices........................................................ 2-26
Factory-Installed Modem Card..............................................................2-29
Audio (Not Supported by Diagnostics Program) ................................... 2-31
CD/DVD-ROM Drive.............................................................................2-34
Memory.................................................................................................2-36
Keyboard .............................................................................................. 2-37
Mouse................................................................................................... 2-38
Power Supply........................................................................................ 2-40
Monitor..................................................................................................2-43
Undetermined Problems.......................................................................2-45
Copyright IBM Corp. 1998 2-1
Page 66

Introduction
This chapter contains the check procedur es used to diagnose the causes of
product failures. The diagnostic information consists of:
Start:
level symptoms, the check procedure directs you to more detailed procedures
to help resolve machine failures.
This is the starting point for any diagnostic action. Based on high-
Index of Symptoms, Messages, Error Codes, or Beeps:
BIOS Error Messages, Codes, Beeps, and Error Symptoms list symptoms
along with their probable causes, and direct you to the applicable check
procedures to help resolve machine failures. These tables also list the field
replaceable units (FRUs) most likely to cause a particular problem.
The tables for
Check Procedures:
Symptoms, Messages, Error Codes, or Beeps tables point you to a specific
check procedure, proceed to that section. If there are any notes or instructions
at the top of the page, read them before you begin with the procedure.
Carefully read each step of the check procedure and perform the steps as
instructed. If you do not remember the location of a specific part or test point,
or an adjustment or removal procedure, see the chapter that contains that
information. Always return to the check procedure after you do this. In some
cases, you are referred to other check procedures to detect the cause of the
failure.
When the Start check procedure or the Index of
2-2
Page 67

Start
This is the entry point for all check procedures. The check proc edures use
failure symptoms, Power-On Self Test (POST) error codes, or beeps to help
determine the defective field replaceable unit (FRU). Follow the suggested
check procedures or use the diagnostics diskette to determine the problem
FRU.
IMPORTANT:
This book comes with a diagnostic program diskette. This diskette should be
used ONLY with
Computers. Do not use this diskette on other models.
POST error codes and error messages are displayed on the screen after the
IBM logo. A beep will precede each error code or message. Please refer to
“Index of Symptoms, Messages, Error Codes, or Beeps” on page 2-8 for
additional help.
All voltages in the check procedures are positive unle ss otherwise indicated.
Use frame ground for all voltage checks unless otherwise specified.
IMPORTANT:
Replace FRUs ONLY when it is determined that the error is
not a result of software, loose contacts, or dirty component surfaces.
Any FRU change should be verified by running a complete test
(“Diagnostics - All Tests” in PC-Doctor diagnostics program).
2153/2139 Service Level A (SL-A)
There is a Power Override switch located at the back of the
machine, just above the connector for the power cable. If the system
does not power on after pressing the power button, situated on the
front of the machine, please check the power cable and the Power
Override switch. If the Power Override switch is switched on, no
power is supplied to the system.
IBM Aptiva Personal
NOTE:
The hard disk drive contains pre-loaded software. Refer to "Software
Recovery Procedure" on page 4-51 to reinstall the original software. Be sure
to reload the software on the primary hard disk drive (Drive C) when replacing
it.
If the check procedures instruct you to replace a FRU and the error
message persists, an option adapter card mig ht be caus ing the
failure. Remove all option adapter cards, one at a time, until the
error changes or the problem is no longer apparent. Replace the last
option adapter card removed.
Check Procedures 2-3
Page 68

IMPORTANT:
How to Diagnose Combined FRUs:
than one FRU, any of the FRUs might cause an error code. Before replacing
the device or adapter, remove the FRUs one by one to see if the symptoms
change.
The drives in the system you are servicing may have been
rearranged, or the drive startup sequence has changed. Be
extremely careful during write operations, such as copying, saving, or
formatting. Data or programs can be overwritten if you select an
incorrect drive.
software from the hard disk drive before you reload the
software.
Ask the customer to back up any additional
If an adapter or device consists of more
If a newly replaced FRU does not correct the problem:
reached this point of the check procedures and were instructed to replace a
FRU but doing so did not correct the problem, reinstall the original FRU and
go through "Start" again.
If you want to print a copy of a BIOS Setup Utility screen to an attached
printer, press
Print Screen
key while the following screen is displayed.
If you have
PLEASE READ THE FOLLOWING:
Human Error is a cause for concern when applied to
check procedures. It exists in every first time set of
analysis procedures. It is therefore essential for
effective and time-efficient servicing that each stage of
every procedure be verified. (For example: When a
symptom is found, or when a symptom appears to have
been cured; the preceding steps should be repeated for
accuracy of analysis.)
001 - START
To begin, note the following:
−
Disable the setting of “Fast POST Mode” from BIOS Setup.
−
To disable or reset the power-on password, see "Power-On
Password” on page 1-9.
−
Disconnect all external cables and devices including speakers and
microphone from the system unit, except for the keyboard, mouse,
and monitor.
−
Power off the system unit before moving it or when replacing FRUs.
−
Remove all adapter cards, except for the factory-installed modem
adapter card and any other IBM Aptiva factory-installed adapter
cards.
−
Disconnect all drives except:
2-4
Page 69

• 3.5-in. diskette drive
• Hard disk drive
• IBM Aptiva factory-installed devices (such as a CD-ROM drive)
−
Ensure that all power cords and cables are connected properly.
−
Ensure that the monitor brightness and contrast controls are not
turned down.
−
Power on the system unit.
NOTE:
002 - DOES AN IBM LOGO SCREEN APPEAR? (YES, READ AHEAD.
003 - DOES SYSTEM LOAD THE DIAGNOSTICS PROGRAM FROM THE
Some monitors have a detachable system I/O signal cable between
the monitor and the system unit. In this case, check this signal cable
before replacing the unit. See "Monitor Port Signals" on page 5-30 for
pin identification.
−
Ensure correct monitor refresh rate.
−
Note any symptoms, messages, error codes, or beeps.
−
Make sure that there are no diskette or CD in the drives.
NO, GO TO STEP 004.)
−
Insert diagnostics diskette in the diskette drive.
DISKETTE DRIVE? (YES, READ AHEAD. NO, GO TO STEP 004.)
−
Follow the instructions on the screen and select
diagnostics program menu.
−
−
NOTE:
−
Tech Support Form
Select
then generate a system configuration report.
Compare the system configuration list with the actual devices
installed in system.
If necessary, remove the machine cover and visually compare the
devices installed in system to those shown in the system
configuration report.
Go to step 006.
from the menu, press F5 to execute,
Utility
from the
004 - DO ANY MESSAGES, ERROR CODES, OR SYMPTOMS APPEAR?
(YES, READ AHEAD. NO, GO TO STEP 005)
−
Go to “Index of Symptoms, Messages, Error Codes, or Beeps” on
page 2-8.
−
End.
Check Procedures 2-5
Page 70

005 -
−
If the keyboard responds incorrectly, go to "Keyboard" on page 2-
34.
−
If monitor problems appear, such as jittering, shifting, or being out
of focus, go to "Monitor" on page 2-40.
006 - DOES THE SYSTEM CONFIGURATION REPORT CORRECTLY
IDENTIFY THE DEVICES INSTALLED IN SYSTEM? (YES, READ
AHEAD. NO, GO TO STEP 007.)
−
−
−
007 -
−
−
008 - DOES THE DIAGNOSTICS FINISH WITHOUT ANY ERRORS? (YES,
READ AHEAD. NO, GO TO STEP 009.)
−
• Check all adapter card jumper settings.
• Check all adapter card switch settings.
• Check all adapter card cables and connectors. Make sure that all of
• Run the
• If an error or other symptom is displayed, go to “Index of
• If no error can be detected or the symptom is intermittent, go to
−
Diagnostics
Select
Select and execute
Go to step 008.
The system configuration report shows only those devices
supported by the diagnostics diskette.
If a device is missing from the list and is not factory installed, refer
to the service manual provided for that device. (Refer to the
Appendix C, "Model/Monitor Configurations and FRU Part
Numbers" to determine the factory-installed devices in the model
you are servicing.)
Diagnostics \ All Tests
If the
system still indicates a failure:
the above are set correctly and show the correct voltages and
continuity. Replace any defective cables or adapter cards. See
"Power Supply Cable Connector Specifications" on page 5-15 and
"Machine Type 2153/K6 System Board " on page 5-3 or "Machine
Type 2153/Celeron System Board Layout" on page 5-8.
Diagnostics \ All Tests
Symptoms, Messages, Error Codes, or Beeps” on page 2-8.
“Undetermined Problems” on page 2-42.
End
from the diagnostics program menu.
All Tests
.
did not detect a failure but the
again.
2-6
Page 71

009 -
−
If the last test stops and you cannot continue, first make sure all
switches, power connectors, cables, and jumpers are set correctly
and show the correct voltages and continuity.
−
Take note of any messages, error codes, beeps, or new symptoms.
Go to "Index of Symptoms, Messages, Error Codes, or Beeps" on
page 2-8.
−
If there is no error symptom or the error symptom is intermittent, go
to “Undetermined Problems” on page 2-42.
Check Procedures 2-7
Page 72

Index of Symptoms, Messages, Error Codes, or Beeps
How to Use Error Messages:
combinations that occur to diagnose failures. If more than one failure occurs,
begin the diagnosis from the first failure that appeared. The cause of the first
failure can result in false messages, error codes, or beeps. If you did not
receive any messages, error codes, or beeps, see if the symptom is listed in
Table 2-2, "Error Symptoms List” on page 2-14.
ATTENTION:
POST:
On Self Test (POST). The machine performs the POST each time it is
powered on. Use this information throughout the diagnostic procedures. The
POST is a series of system checks and initializations that verify the correct
operation of the base system.
After a successful POST, the system attempts to load operating system. The
system can be customized for different startup (boot) methods by the BIOS
Setup Utility. See “Startup Options” on page 1-18.
The system's default startup sequence automatically looks for the operating
system files in the hard disk if these files are not found in the diskette.
NOTE:
Table 2-1 lists BIOS error codes, messages, and beeps to their possible
causes, table 2-2 lists error symptoms and their possible causes. The most
likely cause is listed first. Make sure you complete all items in the cause or
"Action/FRU" column. When servicing a system, always begin with "Start" on
page 2-3.
When you have deemed it necessary to replace a FRU, and
did so, you must run a total system check to ensure that no other
activity has been affected by the change. This system check can be
done through the diagnostics program (Select
select and execute
Some diagnostic aids are resident in the machine, such as the Power-
Remember that POST does not test all areas, but only those that
allow the system to operate well enough to run the diagnostics
program.
Use the messages, error codes, and beeps
Diagnostics
All Tests
from PC-Doctor).
, then
If you are unable to correct the problem using these two index tables, go to
“Undetermined Problems” on page 2-42.
NOTES:
1. If an error message and incorrect audio response occur, diagnose the
error message first.
2-8
Page 73
2. If you cannot run the diagnostics program tests but did receive a POST
error code, diagnose the POST error message.
3. If you did not receive any error message, look for a description of your
error symptoms in “Error Symptoms List” in table 2-2.
Check all power supply voltages, switch, and jumper settings before you
replace the system board. Also check the power supply voltages if you
have a “system no-power” condition. (See "Power Supply Cable
Connector Specifications" on page 5-15, "Machine Type 2153/K6 System
Board " on page 5-3 and "Machine Type 2153/Celeron System Board
Layout" on page 5-8.)
4. If you are unable to correct the problem by using the “BIOS Error Codes,
Messages, And Beeps List” table and “Error Symptoms List” table, go to
“Undetermined Problems” on page 2-42.
Table 2- 1 BIOS Error Codes, Messages, and Beeps List
BIOS Error Codes,
Messages, beeps
NOTE:
or beeps in left column. If directed to a check procedure, replace the FRU
indicated in the check procedure. If no check procedure is indicated, the
first Action/FRU listed in right column is the most likely cause.
0111
0127
0161
0162
To diagnose a problem, first find the BIOS error messages, codes,
POST Error Codes and Messages
I/O Parity Error
CPU Speed Error
Bad CMOS Battery
Equipment Configuration
Error
Action/FRU
ISA adapter card
System board
Check CPU speed
DIP switches
System board
Load default settings in setup.
CMOS battery.
System board.
Ensure the equipment (diskette drive, hard
disk drive, keyboard, mouse, etc. ) are
connected properly and are set correctly in
BIOS Setup.
Load default settings in setup.
CMOS battery should be replaced.
System board.
Check Procedures 2-9
Page 74
Table 2- 1 BIOS Error Codes, Messages, and Beeps List
BIOS Error Codes,
Messages, beeps
NOTE:
or beeps in left column. If directed to a check procedure, replace the FRU
indicated in the check procedure. If no check procedure is indicated, the
first Action/FRU listed in right column is the most likely cause.
0201
0662
0962
1162
1755
1762
To diagnose a problem, first find the BIOS error messages, codes,
Memory Error at
MMMM:SSSS:OOOOh
(R:xxxxh, W:xxxxh)
Onboard Floppy Drive
Conflict(s)
Onboard Parallel Port
Conflict(s)
Onboard Serial Port
Conflict(s)
Hard Disk Drive(s) Write
Protected
Onboard IDE Channel
Conflict(s)
Action/FRU
Insert the memory modules in the DIMM
sockets properly, then reboot the system.
Memory module. See the “Step 005” of
“Memory” on page 2-33 to replace memory
module.
System board.
Enter BIOS Setup and load the default
settings.
Remove all adapter cards that are NOT
factory-installed, then reboot the system
Enter BIOS Setup and load the default
settings.
Remove all adapter cards that are NOT
factory-installed, then reboot the system.
Enter BIOS Setup and load the default
settings.
Remove all adapter cards that are NOT
factory-installed, then reboot the system.
Ensure that the hard disk drive is not set to
[Write Protected] in the Security Options in
BIOS Setup.
Load default settings in Setup.
Hard disk drive cable/connection.
Hard disk drive.
Enter BIOS Setup and load the default
settings.
Remove all adapter cards that are NOT
factory-installed, then reboot the system.
2-10
Page 75
Table 2- 1 BIOS Error Codes, Messages, and Beeps List
BIOS Error Codes,
Messages, beeps
NOTE:
or beeps in left column. If directed to a check procedure, replace the FRU
indicated in the check procedure. If no check procedure is indicated, the
first Action/FRU listed in right column is the most likely cause.
1780
1781
1782
1783
1800
To diagnose a problem, first find the BIOS error messages, codes,
IDE Primary Channel
Master Drive Error
IDE Primary Channel
Slave Drive Error
IDE Secondary Channel
Master Drive Error
IDE Secondary Channel
Slave Drive Error
PnP ISA Card(s) Disabled
Action/FRU
A warning message to indicate there has
been change of IDE Primary (Secondary)
Channel Master (Slave) device.
Load default settings in Setup.
Check IDE drive jumper. See “3.5-In. Hard
Disk Drive Jumper Locations” on page 5-18
or "5.25-In Hard Disk Drive Jumper Location"
on page 5-23.
IDE drive power.
IDE drive cable/connection.
IDE drive.
A warning message to indicate there has
been change of IDE Primary (Secondary)
Channel Master (Slave) device.
Load default settings in Setup.
Check IDE drive jumper. See “3.5-In. Hard
Disk Drive Jumper Locations” on page 5-18
or "5.25-In Hard Disk Drive Jumper Location"
on page 5-23.
IDE drive power.
IDE drive cable/connection.
IDE drive.
Enter BIOS Setup and set the Reset
Resource Assignments parameter to Yes,
then reboot the system.
Remove all adapter cards that are NOT
factory-installed, then reboot the system
Check Procedures 2-11
Page 76
Table 2- 1 BIOS Error Codes, Messages, and Beeps List
BIOS Error Codes,
Messages, beeps
NOTE:
or beeps in left column. If directed to a check procedure, replace the FRU
indicated in the check procedure. If no check procedure is indicated, the
first Action/FRU listed in right column is the most likely cause.
180X
1962
8602
To diagnose a problem, first find the BIOS error messages, codes,
Resource Conflict(s)
Insert system diskette and
press <Enter> to reboot
Onboard Pointing Device
Conflict(s)
Action/FRU
Enter BIOS Setup and set the Reset
Resource Assignments parameter to Yes,
then reboot the system.
Load default settings in Setup.
Remove all non factory-installed cards.
Ensure that the System Boot Drive
parameter in the Startup Options of BIOS
Setup is not set to [Drive A only].
Load default settings in Setup.
Insert a system diskette into diskette drive
and reboot system.
Ensure the diskette drive configuration
setting in BIOS Setup is correct.
Hard disk drive power.
Diskette drive.
System board.
Enter BIOS Setup and load the default
settings.
Remove all adapter cards that are NOT
factory-installed, then reboot the system.
2-12
Page 77
Table 2- 2 BIOS Error Codes, Messages, and Beeps List
BIOS Error Codes,
Messages, beeps
NOTE:
or beeps in left column. If directed to a check procedure, replace the FRU
indicated in the check procedure. If no check procedure is indicated, the
first Action/FRU listed in right column is the most likely cause.
(2: long, 1: short)
For 2153/K6 and 2139
To diagnose a problem, first find the BIOS error messages, codes,
2-1-2-2
2-1-1-1
2-1-2-1
2-1-1-2
2-2-2-1
2-2-1-2
2-1-1
1-1
2-2-1-1-1
2-2-1-1
2-2-2-1
2-2-2-1-1
2-2-2-1-1-1
Action/FRU
Beeps
DMA internal register test fail
KBC (keyboard controller) self test fail or not
installed
System DRAM refresh cycle out of spec.
Shutdown byte in RTC/CMOS r/w test failure
The first 128KB of base memory r/w test
failure
The BIOS code in flash ROM is corrupted
Video buffer error
Console does not exist and message
displayed to terminal
No DIMM installed
No SPD or revision is not correct (Rev must
be 1.2 or later)
Registered & Unregistered DIMMs are mixed
EDO DIMM & SDRAM DIMM are mixed
66MHz DIMM running on 100MHz
Check Procedures 2-13
Page 78
Table 2- 2 Error Symptoms List
Error Symptoms Action/FRU
NOTE:
column. If directed to a check procedure, replace the FRU indicated in the
check procedure. If no check procedure is indicated, the first Action/FRU
listed in right column is the most likely cause.
NOTE:
clock setting should be exactly set to match its speed requirement before
diagnosing any processor problems.
Processor fan does not run
Processor test failed. Processor.
NOTE:
contact leads are clean before diagnosing any system problems.
Memory test failed. “Memory” on page 2-33.
Incorrect memory size shown
To diagnose a problem, first find the error symptom in the left
Processor / Processor Fan
Normally, the processor fan should be operative, and the processor
Ensure that the system is not in power saving
but power supply fan runs.
Ensure that the memory modules are installed properly and the
or repeated during POST.
mode. See “Power Management” on page 1-
17.
With the system power on, measure the
voltage of processor fan connector FN1 (see
"Machine Type 2153/K6 System Board " on
page 5-3 or see "Machine Type
2153/Celeron System Board Layout" on page
5-8). Its reading should be +12Vdc.
Processor fan.
System board.
System board.
System Board and Memory
System board
“Insert the memory modules in the DIMM
sockets properly, then reboot the system.
Memory module. See the “Step 005” of
“Memory” on page 2-33 to replace memory
module.
System board.
2-14
Page 79
Table 2- 2 Error Symptoms List
Error Symptoms Action/FRU
NOTE:
column. If directed to a check procedure, replace the FRU indicated in the
check procedure. If no check procedure is indicated, the first Action/FRU
listed in right column is the most likely cause.
System works but fails to
System hangs before system
System hangs after system
Blinking cursor only; system
NOTE:
and its read/write head is clean before diagnosing any diskette drive
problems.
Media and drive are
To diagnose a problem, first find the error symptom in the left
Load default settings.
enter power saving mode
when the Power Saving
Mode is set to [Enabled],
and power saving timer set
in BIOS has elapsed.
boot.
boot.
does not work.
Ensure that the diskette drive is configured correctly in BIOS Setup
mismatched.
In Win98, check settings in Control Panel
Power utility.
Reload software from Recovery CD.
“Index of Symptoms, Messages, Error
Codes, or Beeps” on page 2-8.
“Undetermined Problems” on page 2-42.
Execute a system test (“Diagnostics/All
Tests” in PC-Doctor diagnostics program)
and set it to stop at “Halt on Error” to see the
potential cause of the problem.
“Undetermined Problems” on page 2-42.
“Start” on page 2-3.
Diskette/IDE drive connection/cables
Diskette/IDE disk drives
“Undetermined Problems” on page 2-42.
System board
Diskette Drive
Ensure that the diskette drive is configured
correctly in the Disk Drives of BIOS Setup.
Ensure that the diskette drive is correctly
formatted.
Diskette drive connection/cab le
Diskette drive
System board
Check Procedures 2-15
Page 80
Table 2- 2 Error Symptoms List
Error Symptoms Action/FRU
NOTE:
column. If directed to a check procedure, replace the FRU indicated in the
check procedure. If no check procedure is indicated, the first Action/FRU
listed in right column is the most likely cause.
Diskette drive does not work.
Diskette drive read/write error. Diskette.
Diskette drive LED comes on
Diskette drive LED fails to
Diskette drive test failed. Diskette
To diagnose a problem, first find the error symptom in the left
Ensure that the diskette drive is not set to
[None] in the Disk Drives of BIOS Setup.
Diskette drive power
Diskette drive connection/cab le
Diskette drive
System board
Ensure that the diskette drive is not set to
[Write protect] in the Security Options of
BIOS Setup.
Diskette drive cable.
Diskette drive.
System board.
Diskette
for more than 2 minutes
when reading data.
light, and the drive is
unable to access for more
than 2 minutes.
Diskette drive connection/cab le
Diskette drive
System board
Diskette
Diskette drive power
Diskette drive connection/cab le
Diskette drive
System board
Diskette drive
Diskette drive cable
System board
2-16
Page 81
Table 2- 2 Error Symptoms List
Error Symptoms Action/FRU
NOTE:
column. If directed to a check procedure, replace the FRU indicated in the
check procedure. If no check procedure is indicated, the first Action/FRU
listed in right column is the most likely cause.
NOTE:
cable/jumper are set correctly before diagnosing any hard disk drive
problems.
Hard disk drive test failed. Load default settings.
Hard disk drive format error. Load default settings.
Hard disk drive write error. Load default settings.
Hard disk drive LED fails to
To diagnose a problem, first find the error symptom in the left
Hard Disk Drive
Ensure hard disk drive is configured correctly in BIOS Setup,
Hard disk drive cable.
Hard disk drive.
System board.
Hard disk drive cable.
Hard disk drive.
System board.
Hard disk drive.
With the system power on, measure the
light, but system operates
normally.
voltage of hard disk LED connector CN2( see
“Machine Type 2153/K6 System Board " on
page 5-3) or CN6 (see "Machine Type
2153/Celeron System Board Layout" on page
5-8. Its reading should be:
CN2(for 2153) HDD Idle/Active
CN6(for 2139) HDD Idle/Active
pin-1 +5 Vdc / +5 Vdc
pin-2 +5 Vdc / 0 Vdc
pin-3 +5 Vdc / 0 Vdc
pin-4 +5 Vdc / +5 Vdc
Hard drive LED cable.
Check Procedures 2-17
Page 82
Table 2- 2 Error Symptoms List
Error Symptoms Action/FRU
NOTE:
column. If directed to a check procedure, replace the FRU indicated in the
check procedure. If no check procedure is indicated, the first Action/FRU
listed in right column is the most likely cause.
NOTE:
cable/jumper are set correctly and its laser beam is clean before diagnosing
any CD/DVD-ROM drive problems.
CD/DVD-ROM drive LED
Software asks to reinstall
Software displays a reading
CD/DVD-ROM drive LED
CD/DVD-ROM drive cannot
CD/DVD-ROM drive does not
To diagnose a problem, first find the error symptom in the left
CD/DVD-ROM Drive
Ensure CD/DVD-ROM drive is configured correctly in BIOS Setup,
CD/DVD may have dirt or foreign material on
flashes for more than 30
seconds before LED
shutting off.
disc.
CD/DVD error.
doesn’t come on but works
normally.
load or eject when the
system is turned on and its
eject button is pressed and
held.
read and there are no error
codes or messages are
displayed.
it. Check with a known good disc.
CD/DVD is not inserted properly.
CD/DVD is damaged.
CD/DVD-ROM drive
“CD-ROM Emergency-exit <option 1>” on
page 5-25 or CD-ROM Emergency-exit
Option <2> page 5-26.
CD/DVD-ROM drive power.
"CD/DVD-ROM Drive" on page 2-32.
CD/DVD-ROM drive
CD may have dirt or foreign material on it.
Check with a known good disc.
Ensure that the CD/DVD-ROM driver is
installed properly.
CD/DVD-ROM drive.
2-18
Page 83
Table 2- 2 Error Symptoms List
Error Symptoms Action/FRU
NOTE:
column. If directed to a check procedure, replace the FRU indicated in the
check procedure. If no check procedure is indicated, the first Action/FRU
listed in right column is the most likely cause.
CD/DVD-ROM drive can play
Real-time clock is inaccurate.
To diagnose a problem, first find the error symptom in the left
Ensure that the headphone jack of the
audio CD but no sound
output.
CD/DVD-ROM has an output, then check if
the audio cable from CD/DVD-ROM drive to
system board CN15 (see "Machine Type
2153/K6 System Board "on page 5-3) or CN9
(see "Machine Type 2153/Celeron System
Board Layout" on page 5-8) is connected
properly.
Turn up the sound volume.
Speaker power/connection/cable.
CD/DVD-ROM drive.
Real-Time Clock
Ensure that the information in the Date and
Time of BIOS Setup is set correctly.
Load default settings.
CMOS battery.
System board
Audio software program
invokes but no sound
comes from speakers.
Data/fax modem software
program invokes but cannot
receive/send data/fax
Audio
Speaker power/connection/cable.
Modem
“Factory-Installed Modem Card” on page 2-
28.
Check Procedures 2-19
Page 84
Table 2- 2 Error Symptoms List
Error Symptoms Action/FRU
NOTE:
column. If directed to a check procedure, replace the FRU indicated in the
check procedure. If no check procedure is indicated, the first Action/FRU
listed in right column is the most likely cause.
Fax/voice modem software
Modem ring cannot wake up
Video memory test failed.
Video adapter failed.
Display problem:
To diagnose a problem, first find the error symptom in the left
Ensure that the modem voice-in/speak-out
program invokes but has no
sound output. (Data files
are received normally;
voice from modem cannot
be produced, but system
sound feature works
normally.)
system from suspend
mode.
- Incorrect colors
- No high intensity
- Missing, broken, or
incorrect characters
- Blank monitor(dark)
- Blank monitor(bright)
- Distorted image
- Unreadable monitor
- Other monitor problems
cable from modem adapter card to system
board CN14 (see “Machine Type 2153/K6
System Board "on page 5-3) or CN8 (see
"Machine Type 2153/Celeron System Board
Layout" on page 5-8) is connected properly.
“Factory-Installed Modem Card” on page 2-
28.
If not using Win98, then ensure that the
“Modem Wake-Up on Ring” in BIOS Setup is
set to [Enabled].
Ensure that the modem ring-in cable from the
modem adapter card to system board CN9 (
see “Machine Type 2153/K6 System Board
"on page 5-3) or CN10 (see "Machine Type
2153/Celeron System Board Layout" on page
5-8) is connected properly.
In Win 98 ensure that telephone application
is configured correctly for your modem and
set to receive messages and/or faxes.
Video and Monitor
Remove all non factory cards.
Load default settings (if screen is readable).
System board
Monitor signal connection/cable.
Monitor
System board
2-20
Page 85
Table 2- 2 Error Symptoms List
Error Symptoms Action/FRU
NOTE:
column. If directed to a check procedure, replace the FRU indicated in the
check procedure. If no check procedure is indicated, the first Action/FRU
listed in right column is the most likely cause.
Display changing colors. Monitor signal connection/cable
Display problem not listed
NOTE:
ports’ presence before diagnosing any parallel/serial ports problems.
Serial or parallel port loop-
Printing failed. Ensure that the printer driver is properly
Printer problems. Refer to the service manual for the printer.
To diagnose a problem, first find the error symptom in the left
Monitor
System board
"Monitor" on page 2-40.
above (including blank or
illegible monitor).
Execute “Load BIOS Default Settings” in BIOS Setup to confirm
back test failed.
Load default settings(if screen is readabl e).
System board
Parallel/Serial Ports
Make sure that the LPT# or COM# you test is
the same as is set in BIOS Setup.
Loop-back.
System board.
installed.
Refer to the service manual for the printer.
Printer.
Printer cable.
System board.
Check Procedures 2-21
Page 86
Table 2- 2 Error Symptoms List
Error Symptoms Action/FRU
NOTE:
column. If directed to a check procedure, replace the FRU indicated in the
check procedure. If no check procedure is indicated, the first Action/FRU
listed in right column is the most likely cause.
Game port does not respond
Diagnostics programs canno t
Missing diagnostics files(s). Diagnostics diskette.
Some or all keys on keyboard
Pressing power switch cannot
Pressing power switch cannot
To diagnose a problem, first find the error symptom in the left
Joystick
Connect a joystick to the game port, then
or does not work.
be executed.
do not work.
turn off system.. (Only
unplug power cord from
electrical outlet can turn off
system.)
turn on system..
execute “Interactive Test/Joystick” test in PCDoctor diagnostics program.
System board.
Diagnostic Program
Reboot the system from the diagnostics
diskette.
Load default settings.
Diagnostics diskette.
Memory module.
System board.
Keyboard
“Keyboard “on page 2-34.
Power Supply
See ”Power Switch< 4 sec.” on page 1-18.
Power switch cable assembly
"Power Supply" on page 2-37.
System board
Check the “kill” switch on the power supply if
it is off.
Power switch cable assembly.
2-22
Page 87
Table 2- 2 Error Symptoms List
Error Symptoms Action/FRU
NOTE:
column. If directed to a check procedure, replace the FRU indicated in the
check procedure. If no check procedure is indicated, the first Action/FRU
listed in right column is the most likely cause.
Executing software shutdown
No system power, or power
Any other problems. “Undetermined Problems” on page 2-42.
To diagnose a problem, first find the error symptom in the left
Load default settings.
from Windows98 Start
menu cannot turn off
system. (Only pressing
power switch can force
system to turn off).
supply fan is not running.
Reload software from Recovery CD.
"Power Supply" on page 2-37.
System board.
On 2139 make sure JPX2 is installed. (near
CN1)
Other Problems
Check Procedures 2-23
Page 88

Troubleshooting
Failing Parts or Assemblies:
a problem to one part or assembly. The last step of the specific check
procedure you are using indicates that a part or assembly is failing. You
should inspect the part or assembly before you decide to replace it. It might be
loose, dirty, or in need of a small repair. The check procedures might lead you
to two, or even three, possible failing parts or assemblies. The parts that might
be failing are listed in order of the most probable failure. Also, the FRU parts
are defined as replaced units and are not repaired in the field.
Measuring Voltages:
voltages on cable plugs and electronic board connectors. If you are asked to
measure voltage at several places on a plug or connector, a chart next to or
near the instruction indicates the number of the plug or connector, the pin
numbers you should measure, the signal name, and the correct voltage for the
condition you are measuring. Measure the voltage only at the pins listed in the
chart. Remember to set the meter on the correct scale and to put the meter
leads in the correct position for the voltage you are asked to measure.
NOTE:
Use frame ground as the ground reference. Attach the black (ground)
lead of meter to frame ground, except where specified otherwise.
Some check procedure steps instruct you to measure
The check procedures generally help you trace
2-24
Page 89

Factory-Installed Storage Devices
Use this check procedure to test any factory-installed drives.
ATTENTION:
NOTE:
001 - START
002 - DO ANY POST MESSAGES, ERROR CODES, BEEPS, OR
003 -
NOTE:
The customer may have customized settings in the Setup Utility
(other than default settings) on the computer you are servicing.
Running the Setup Utility might alter those settings. Take note of the
current settings and verify that the customer settings are in place
when service is complete.
If you cannot access the hard disk drive or load a diskette from Drive
A or load a CD from the CD-ROM drive, make sure that the BIOS
Setup Utility has the startup sequence set with diskette, CD-ROM,
and hard disk drives.
−
Insert the diagnostics diskette into the diskette drive.
−
Power-off then power-on the system unit.
SYMPTOMS OCCUR? (YES, READ AHEAD. NO, GO TO STEP 003)
−
Go to “Index of Symptoms, Messages, Error Codes, or Beeps” on
page 2-8.
−
End.
−
−
−
Utility
Select
Select and execute
generate a system configuration report.
Compare the system configuration list with the actual devices
installed in system.
If necessary, remove the cover and visually compare the devices
installed in the system unit to those shown in the Tech Support
Form.
from the menu.
Tech Support Form
from the menu to
004 - IF THE NUMBER OF DISKETTE, HARD DISK, OR CD-ROM DRIVE
IS NOT CORRECT, READ AHEAD; OR GO TO STEP 005.
−
Check the cable installation of all disk drives.
−
Diskette drive should be connected to the system board connector
CN12 (see “Machine Type 2153/K6 System Board "on page 5-3) or
Check Procedures 2-25
Page 90

CN11 (see "Machine Type 2153/Celeron System Board Layout" on
page 5-8).
−
IDE Primary Channel Master and Slave Drives in BIOS Setup
should be connected to the system board connector CN11(see
“Machine Type 2153/K6 System Board "on page 5-3) or CN12 (see
"Machine Type 2153/Celeron System Board Layout" on page 5-8).
−
IDE Secondary Channel Master and Slave Drives in BIOS Setup
should be connected to the system board connector CN10(see
“Machine Type 2153/K6 System Board "on page 5-3) or CN13 (see
"Machine Type 2153/Celeron System Board Layout" on page 5-8).
NOTE:
The CD-ROM drive that comes with system unit should be
configured as IDE Secondary Channel Master device.
−
Check the hard disk and CD-ROM drives jumper settings. See “3.5In. Hard Disk Drive Jumper Locations” on page 5-18 or "5.25-In
Hard Disk Drive Jumper Location" on page 5-23 and "CD/DVDROM Drive" on page 2-32.
−
Check the voltages of all disk drive power connectors. See “Power
Supply Cable Connector Specifications” on page 5-15.
−
Correct the parameter settings under Disk Drives in the BIOS
Setup. See “Disk Drives” on page 1-15.
−
In the BIOS Setup, check that the correct drive size is set for the
flagged drive shown in the Installed Devices list.
−
Load default settings.
−
If the problem remains, check the continuity on the drive and the
cable and replace it if necessary. If that does not fix the problem,
replace the system board.
−
End.
005 –
−
−
−
• If an error or other symptom appears, go to “Index of Symptoms,
2-26
Diagnostics
Select
menu. Select and execute
diskette drive. Select and execute
test hard disk drive.
Interactive Tests
Select
main menu, then select and execute
want to test CD-ROM drive.
If the diagnostics program did not detect a failure, but the system
still displays a failure:
Messages, Error Codes, or Beeps” on page 2-8.
from the PC-Doctor diagnostics program main
Floppy Disk Test
Hard Disk Test
from the PC-Doctor diagnostics program
CD-ROM/DVD Test
if you want to test
if you want to
if you
Page 91

• If no error can be detected or the symptom is intermittent, go to
“Undetermined Problems” on page 2-42.
−
End.
Check Procedures 2-27
Page 92

Factory-Installed Modem Card
NOTE:
001 - START
002 -
The factory-installed modem is a 56.6 Kbps modem with a cable of
microphone-in and speaker-out from system board.
−
Power off the system unit.
−
In Windows 98 Device Manager, ensure that the modem is not
configured with a conflicting COM port and IRQ setting.
−
Ensure that the communication software is configured with the
correct COM and IRQ settings (same COM port and IRQ as the
modem).
−
Ensure that all communication parameters (baud rate, data, stop
and parity bits) are properly configured and are identical on both
sides.
−
Connect the phone line to the LINE port of the modem card.
NOTE:
Check the outside phone line by connecting a working telephone
to the telephone wall jack. Listen for a dial tone to ensure that
the phone line is good.
−
Insert the diagnostics diskette into the diskette drive.
−
Power on the system unit.
Select
Select
Diagnostics
All Tests,
then execute
menu,
−
−
Modem
test.
003 - DOES THE MODEM PASS THE TEST? (YES, READ AHEAD. NO,
GO TO STEP 004.)
−
Power off the system unit.
−
Remove all adapter cards.
−
Connect a hard disk drive with pre-loaded Windows 98.
−
Power on the system unit.
−
Perform the following steps under Windows 98.
NOTE:
1. Start Microsoft Windows 98.
2-28
If an operating system other than Microsoft Windows 98 is
installed, the program screens and icons may differ from these
instructions.
Page 93

2. Select the
3. Select
4. Select an on-line service station, dial and connect to it.
004 - CAN THE MODEM DIAL OUT AND CONNECT TO ANY BBS
SUCCESSFULLY? (YES, READ AHEAD. NO, GO TO STEP 005.)
−
The modem adapter functions normally.
−
End.
005 -
−
Ensure that Windows 98 is properly installed, then power off the
system unit.
−
Plug the modem adapter card into a different ISA expansion slot.
−
Go to step 002.
−
If the error symptom still remains, replace the modem adapter card.
−
End.
Start
Program
icon.
, then select
Accessories, Hyper Terminal
.
Check Procedures 2-29
Page 94

Audio (Not Supported by Diagnostics Program)
NOTE:
Audio tests for the sound card cannot be carried out in the PC Doctor
DOS diagnostics program. It is, however, possible to carry out a dial
tone test for the modem.
001 - START
002 - DO ANY POST MESSAGES, ERROR CODES, BEEPS, OR
While performing this check, you may need to enter and exit
Microsoft Windows 98 several times. When instructed to select an
icon or button, double-click on the item with the mouse.
For more information about using Microsoft Windows 98, see the
user's guide that came with the computer.
If an operating system other than Microsoft Windows 98 is installed,
the program screens and icons may differ from these instructions.
−
Power off the system unit.
−
Remove all adapter cards.
−
Connect a hard disk drive with pre-loaded Windows 98.
−
Power on the system unit.
−
Load default settings in setup (audio may be disabled).
SYMPTOMS APPEAR? (YES, READ AHEAD. NO, GO TO STEP
003)
−
Go to “Index of Symptoms, Messages, Error Codes, or Beeps” on
page 2-8.
−
End.
003 - DO ANY MESSAGES OR ERROR CODES DISPLAY AFTER POST
COMPLETES BUT BEFORE MICROSOFT WINDOWS 98 STARTS?
(YES, READ AHEAD. NO, GO TO STEP 004)
NOTE:
004 -
2-30
If POST does not complete, answer this question "No."
−
Ensure that Windows 98 is properly installed.
−
End.
−
Perform the following under Windows 98.
Page 95

NOTE:
1. Start Microsoft Windows 98.
2. Select the
3. Select
4. Select the
5. In the Sound window, select chimes from the
005 - IS THE PREVIEW BUTTON, OR ACTION IN OTHER SOFTWARE,
006 -
007 - DO YOU HEAR ANY SOUND FROM THE SPEAKER? (YES, READ
If an operating system other than Microsoft Windows 98 is
installed, the program screens and icons may differ from these
instructions.
Start
icon.
Settings
other adapter card software, select an action from a menu in that
software.)
SELECTABLE ON THE SCREEN (SHOWN IN BLACK AND NOT
GRAY)? (YES, GO TO STEP 006. NO, READ AHEAD.)
−
Ensure that Windows 98 is properly installed.
−
Go to step 001.
−
Select the
AHEAD. NO, GO TO STEP 008.)
−
The audio feature is functioning normally. Click Cancel to close the
dialog box. Exit Microsoft Windows 98.
−
If the symptom remains or has changed, go to “Index of Symptoms,
Messages, Error Codes, or Beeps” on page 2-8.
−
End.
, then select
Sound
Preview
icon.
Control Panel
button from the Sound window.
.
Names
field. (To test
008 -
−
Make sure that the volume control is not turned low.
−
Make sure that the speaker and its adapter are not damaged.
−
Make sure that the speaker is plugged in speak-out jack. See
“Machine Type 2153/K6 System Board "on page 5-3 or "Machine
Type 2153/Celeron System Board Layout" on page 5-8.
−
If the error cannot be resolved, replace the system board.
−
End.
Check Procedures 2-31
Page 96

CD/DVD-ROM Drive
001 - START
−
Insert the diagnostics diskette into the diskette drive and ensure
that there is no CD/DVD in the CD/DVD-ROM drive.
−
002 - DO YOU SEE A MESSAGE “NO CD/DVD-ROM DRIVE OR MSCDEX
DEVICE DRIVER INSTALLED.”? (YES, READ AHEAD. NO, GO TO
003.)
−
−
−
−
003 - DO THE TESTS OF OPEN/CLOSE TRAY BY DIAGNOSTICS
PROGRAM AND BY DEPRESSING CD/DVD-ROM DRIVE BUTTON
WORK? (YES, READ AHEAD. NO, GO TO STEP 006.)
−
004 - CAN A CD/DVD BE READ FROM THE CD/DVD-ROM DRIVE? (YES,
THEN THE CD/DVD-ROM DRIVE FUNCTIONS NORMALLY. NO,
READ AHEAD.)
−
Interactive Tests
Select
ROM Test
Exit the diagnostics program and power off the system.
Check and ensure that the CD/DVD-ROM drive power cable and
audio and data cables are not damaged and are connected
properly.
Check and ensure that the CD/DVD-ROM drive driver is loaded
correctly.
Load default settings.
Load a known good data CD/DVD into the CD/DVD-ROM drive and
try to read its content by typing DIR at DOS prompt.
Try reading the CD/DVD with a known good CD/DVD-ROM drive.
.
menu, then select and execute
CD/DVD-
005 - IS THE CD/DVD STILL NOT READABLE? (YES, READ AHEAD.
NO, GO TO STEP 006.)
−
Replace system board.
−
End.
006 -
−
Replace CD/DVD-ROM drive.
−
End.
2-32
Page 97

Memory
001 - START
−
Power off the system unit.
−
Insert the diagnostics diskette into the diskette drive.
−
Ensure that all DIMMs are installed correctly.
−
Power on the system unit.
−
Take note of any messages, error codes, or symptoms.
002 - DO YOU RECEIVE POST MEMORY ERROR MESSAGE? (YES,
READ AHEAD. NO, GO TO STEP 003)
−
Enter BIOS Setup Utility then reboot the system. Take note of any
messages, error codes, or symptoms. If the error message
remains, go to step 005.
003 -
−
Follow the screen instructions to run the
004 - DOES THE MEMORY TEST COMPLETE WITHOUT AN ERROR?
(YES, READ AHEAD. NO, GO TO STEP 005.)
−
The system memory is now functioning correctly. If you suspect an
Memory
005 -
intermittent problem, run the
−
End.
−
Replace each DIMM, one at a time, with a known working DIMM of
the same size and type.
−
If the problem does not appear, it means that the last DIMM
replaced is defective. If all DIMMs on the system board, have been
replaced and the problem remains, replace syste m board.
−
Go to step 001.
NOTE:
If on startup, there is no memory inserted on system board, you
will hear 2-2-1-1-1 for 2153, and 2-2-1-1-1 for 2139. (2: long
beep, 1: short beep)
Memory
test again.
test.
Check Procedures 2-33
Page 98

Keyboard
001 - START
−
Power off system unit and ensure the keyboard plug is connected
properly.
002 -
−
Insert the diagnostics diskette into the diskette drive and power on
the system unit.
−
003 - DOES THE KEYBOARD FUNCTION CORRECTLY? (YES, READ
AHEAD. NO, GO TO STEP 004.)
−
−
004 - ARE THERE ANY STUCK KEYS OR ANY GRIME IN THE GAP OF
KEYCAPS? (YES, READ AHEAD. NO, GO TO STEP 005.)
−
−
005 - ARE THERE ANY BROKEN PINS IN THE KEYBOARD PLUG? (YES,
GO TO STEP 007. NO, READ AHEAD.)
−
Interactive Tests
Select
Keyboard is functioning normally.
End.
Power off the system unit. Carefully remove the grime and solve
the stuck keys problem.
Go to step 001.
Try with a known good keyboard.
menu, then execute
Keyboard
test.
006 - DOES THE ERROR SYMPTOM STILL REMAIN? (YES, READ
AHEAD. NO, GO TO STEP 007.)
−
Replace the system board.
−
End.
007 -
−
Replace the keyboard.
−
End.
2-34
Page 99

Mouse
NOTE:
001 - START
002 -
003 - DO YOU SEE THE MOUSE CURSOR IN THE DIAGNOSTICS
004 - DOES THE MOUSE BUTTON WORK? (YES, READ AHEAD. NO,
005 - DOES THE MOUSE MOVE SMOOTHLY AND KEEP X AND Y
A sticking key button can cause the mouse to operate incorrectly. If
you suspect this, go to "Keyboard" on page 2-33.
−
Make sure that the mouse ball turns freely.
−
Make sure that the mouse plug connects properly.
−
Power off the system unit.
−
Insert the diagnostics diskette into the diskette drive.
−
Power on the system unit.
−
Select
PROGRAM? (YES, READ AHEAD. NO, GO TO STEP 011)
−
Test right (left) button and check if right (left) button works.
GO TO STEP 007)
−
Test mouse cursor movement.
COORDINATES CHANGED? (YES, READ AHEAD. NO, GO TO
STEP 006)
−
Mouse is functioned normally.
−
End.
Interactive Tests
menu, then execute
Mouse
test.
006 -
007
−
Power off the system unit.
−
Open mouse bottom cover and clean track ball.
−
Go to step 002.
−
Power off the system unit.
−
Check the mouse plug.
Check Procedures 2-35
Page 100

008 - ARE THERE ANY BROKEN PINS IN THE MOUSE PLUG? (YES, GO
TO STEP 010. NO, READ AHEAD.)
−
Try with a known good mouse.
009 - DO THE ERROR SYMPTOMS STILL REMAIN? (YES, READ
AHEAD. NO, GO TO STEP 010.)
−
Replace the system board.
−
End
010 -
−
Replace the mouse.
−
End.
011 -
−
Exit diagnostics program.
−
Ensure that the mouse driver is properly installed.
−
Go to step 002.
2-36
 Loading...