


SERIAL #
MODEL #
EVOLUTION ELECTRIC
MANUAL FOR
ESPEK
IMPORTANT WARRANTY INFORMATION:
For product warranty activation, the Product Registration Form must be submitted to AccuTemp Products, Inc. after installation of the appliance.
Product Registration Form
These installation instructions have been prepared for qualified electric equipment installation personnel, who should perform the installation, initial field start-up and complete the equipment adjustments described in this manual.
SP8017-1007 |
ACCUTEMP PRODUCTS, INC. · 8415 N. CLINTON PARK · FORT WAYNE, IN 46825 · 800.480.0415 · www.accutemp.net |
Table of contents
Table of contents |
1 |
Document history |
1 |
Safety warnings Definitions |
2 |
INSTALLATION |
3-4 |
OPERATION |
6-10 |
BASIC TROUBLESHOOTING |
11 |
SERVICE INFORMATION |
12-22 |
SCHematics |
23-30 |
Service parts |
31-39 |
WARRANTY |
40 |
Document history
CURRENT |
Date |
Prior |
DATE |
CHANGE |
REVISION |
|
Revision |
|
|
1007 |
8-31-10 |
N/A |
|
Initial release of manual |
SP8017-1007 |
EVOLUTION ELECTRIC STEAMER |
PAGE 1 |

SAFETY WARNINGS
SYMBOL DEFINITIONS
Symbols are used to attract your attention to possible dangers. They are only effective if the operator uses proper accident prevention measures. Some of the symbols are boxed text, while other maybe just picture icons. Please give this information the respect they deserve for safe operation.
WARNING TEXT BOXES
Below are definitions of the warning text boxes:
DANGER
Indicates a imminently hazardous situation which, if not avoided will, result in death or serious injury
• WARNING
Indicates a potentially hazardous situation which, if not avoided will, will result in death or serious injury
CAUTION
Indicates a potentially hazardous situation which, if not avoided will, will result in minor or moderate injury
NOTE
Advises reader of information or instructions vital to the operation or maintenance of the equipment
Symbols
Below are the definitions of the symbols used in the manual
ALERT
Notifies the reader of an important message or warning, usually safety related
INFORMATION
Notifies the reader of an important information.
Caution - Hot
Caution - HIGH VOLTAGE
EARTH GROUND
SP8017-1007 |
EVOLUTION ELECTRIC STEAMER |
PAGE 2 |
INSTALLATION
UNPACKING
This appliance was carefully inspected before shipment from the factory. The transportation company assumes full responsibility for safe delivery to the customer until customer acceptance of the package. Careful inspection of the packaging and the appliance should be completed before acceptance from the transportation company.
Only qualified service technicians/electricians should preform the installation to ensure that all electrical and safety requirements are met and that all wiring and plumbing installations is preformed in accordance with all national, state and local codes.
The installation must conform with local codes, or in the absence of local codes, with the National Electric Code.
Location and Placement
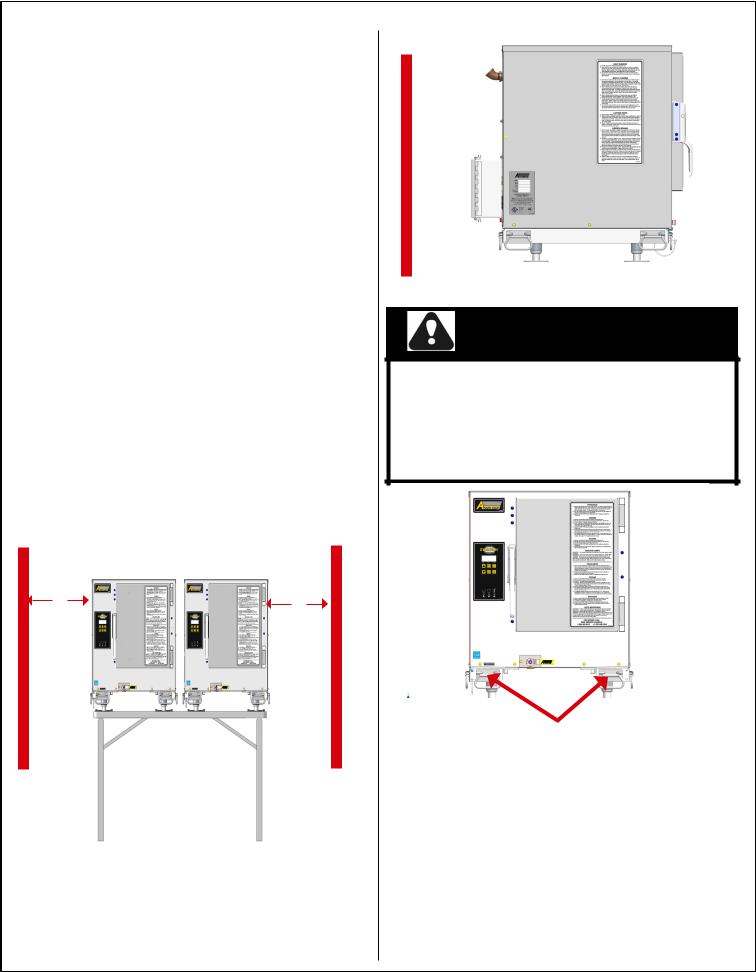
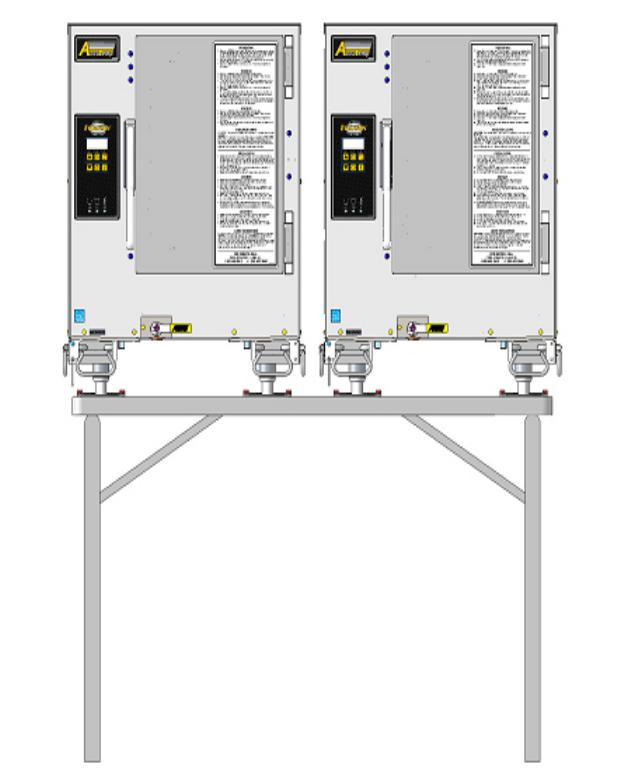
The appliance must be placed on the special designed supplied stand. Clearance must be maintained for proper operation and access to the circuit breaker inside the power pack. See Fig. 1 & Fig 2
|
EQUIPMENT CLEARANCE |
1” |
1” |
Fig 1
 7”
7”
Fig 2
CAUTION
This appliance is extremely heavy. For safe handling, the installer should obtain help as needed or employ appropriate material handling equipment to remove appliance from it’s packaging and move it into its final location.
Fig 3
LIFTING HANDLES
Appliance LIFTING
Appliances are heavy enough to require additional manpower or powered assistance when installed on the stand. This model
Evolution Electric appliance incorporates front and side lifting handles that must be used to lift the appliance on to the stand. This table has retaining brackets that the appliance flanged feet must slide into to secure it to the table. See Fig 3
SP8017-1007 |
EVOLUTION ELECTRIC STEAMER |
PAGE 3 |
INSTALLATION
LEVELING
This appliance must be installed in a level condition. An out of level condition may cause erratic operation and damage. Damage of this kind is not covered by the limited warranty.
The appliance is leveled by screwing in and out the four flanged feet while using a spirit level front to back and left to right.
The flanged feet of the appliance are easier to adjust if they are not interlocked into the retaining brackets of the stand. However than can be adjusted if interlocked into the retaining brackets
of the stand
ELECTRICAL REQUIREMENTS
The AccuTemp Evolution Electric appliance has been designed, manufactured and tested to meet
or exceed the Underwriters Laboratories safety standards. To ensure safety is maintained in your installation, it is important that the following paragraphs are understood before attempting to apply power to your appliance. If there is any doubt as to whether your supply receptacle is of the correct voltage, amperage, or is properly grounded, consult a qualified electrician or serviceman.
POWER REQUIREMENTS AC power requirements are listed on the data plate located on the left side access panel on all Evolutions. This appliance should never be connected to a circuit operating at more than 150 VAC to ground and should always be connected to an individual branch circuit. Make sure the voltage at the supply receptacle is within ±10% of the voltage listed on the Evolution data plate. Connection
to any other voltage may permanently damage your appliance or cause premature component failure. Damage of this type is not covered under the product warranty. Each Evolution Electric appliance for ESPEK comes equipped with a power pack with a internal breaker that is rated for the power requirements of each appliance.
Damage caused by removal or modification of pf the power pack is not covered by appliance limited warranty.
WARNING
Only personnel qualified to work with electricity should install this equipment. Improper installation can cause personal injury or damage to the equipment.
ELECTRICAL INSTALLATION
This appliance is designed with a power pack for connection to line power or a generator.
If connecting to a generator make sure to unplug the power to the appliance and turn off the circuit breaker in the appliance power pack. The appliance can be plugged back in after the generator power output has stabilized.
Once plugged back in turn the breaker to the on position.
DANGER
This appliance Must be properly grounded, in accordance with all National, State and local electrical codes.
GROUNDING INSTRUCTIONS
Grounding provides a path for electric current to reduce risk of shock. This product is equipped with a power pack. The power pack must be plugged into a receptacle that is properly installed and grounded in accordance with all National, State and local electrical codes or in the absence of local electrical codes with the National Electric Code,ANSI/NFPA70, or the
Canadian Code, CSA C22.2 as applicable. Under no circumstances shall the plugs grounding prong be cut or bent to fit a receptacle other than the one specified.
Do not use any adapters.
DANGER
Any in-field modification made that bypass the safety features of this appliance will result in serious injury or death.
WARNING
Any in-field modifications made without written authorization fromAccuTemp Products, Inc. will void all written and oral warranties.
SP8017-1007 |
EVOLUTION ELECTRIC STEAMER |
PAGE 4 |

OPERATIONS
OPERATING INSTRUCTIONS
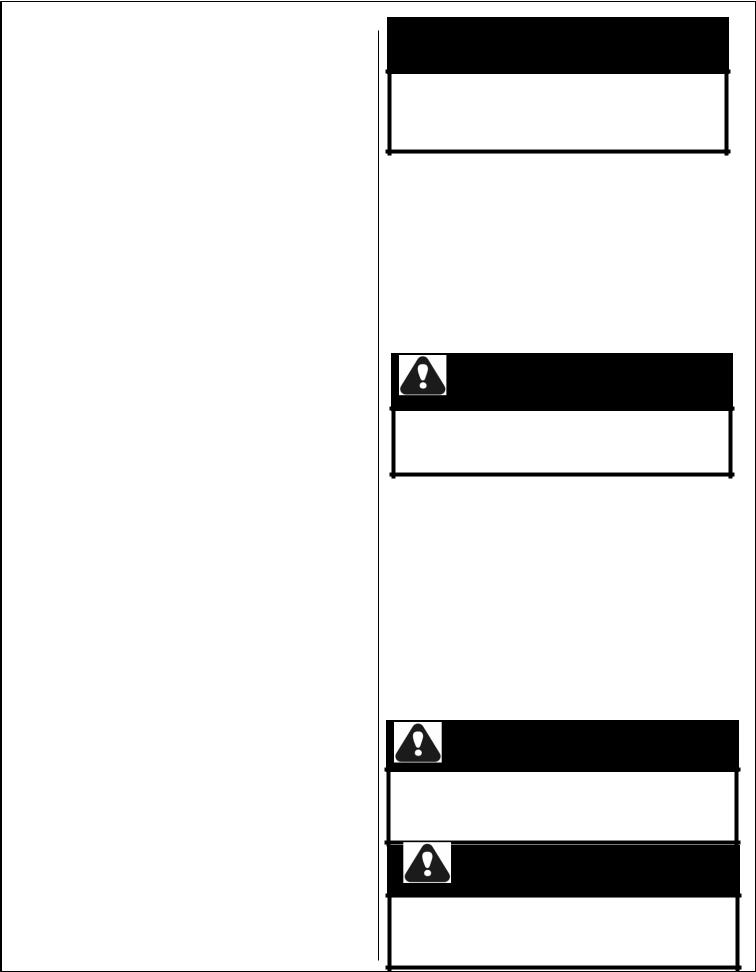
Operator display & Keypad
door latch
drain valve
 Front Lift handles
Side Lift handle
Adjustable flanged feet
SP8017-1007 |
EVOLUTION ELECTRIC STEAMER |
PAGE 5 |
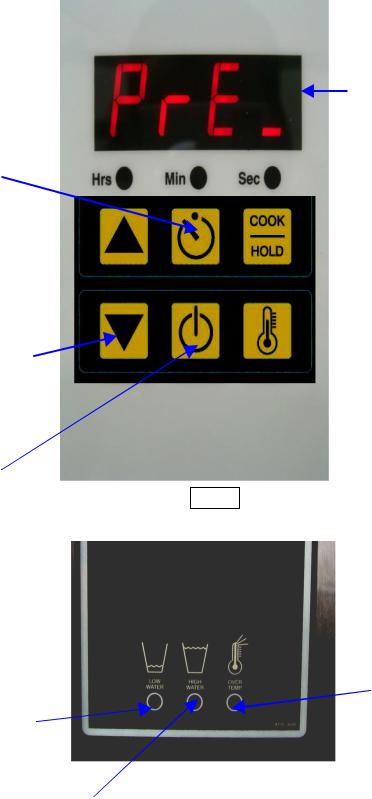
OPERATIONS
Timer
Increase Time 
Decrease Ti
On/Off
Low Water
Lamp
High Water Lam
Operator Display
Pre-Heat mode displayed
 Cook or Hold
 Display Temperature
Fig. 6
Over
Temperature
Lamp
Fig. 8
SP8017-1007 |
EVOLUTION ELECTRIC STEAMER |
PAGE 6 |

OPERATIONS
SAFETY WARNINGS
WARNING
When accessing the cooking chamber , be sure to always stand back while slowing opening the door to allow the chamber to vent off the steam. Never reach into the cooking chamber before it has completely vent off the steam
Never reach into the cooking chamber or handle hot items without wearing the proper hot gloves. Steam coming out of the holes on the right side of the cooking chamber is invisible and can cause severe burns
Never use wet or damp gloves as moisture can conduct heat quickly.
Never reach into the cooking chamber or handle hot items without wearing the proper hot gloves. Steam coming out of the holes on the right side of the cooking chamber is invisible and can cause severe burns
Keep the floor in front of the equipment clean and dry. If spills occur, clean immediately to avoid potential injuries.
CAUTION
Do not manually fill water above the water level mark on the left side of the cooking chamber.
Do not use abrasive materials, such as wire brushes, metal scouring pads or to clean the cooking chamber bottom.
SP8017-1007 |
EVOLUTION ELECTRIC STEAMER |
PAGE 7 |
OPERATIONS
PREHEATING ( Fig 5 )
1.Depress the On/Off Key to turn on the appliance. The display will indicate PrE.
2.Once the appliance is preheated and ready to cook, the display will indicate
3.COO (Cook Mode) or HLd (Hold Mode).
4.Depress the DISP TEMP button to display the current cooking chamber temperature.
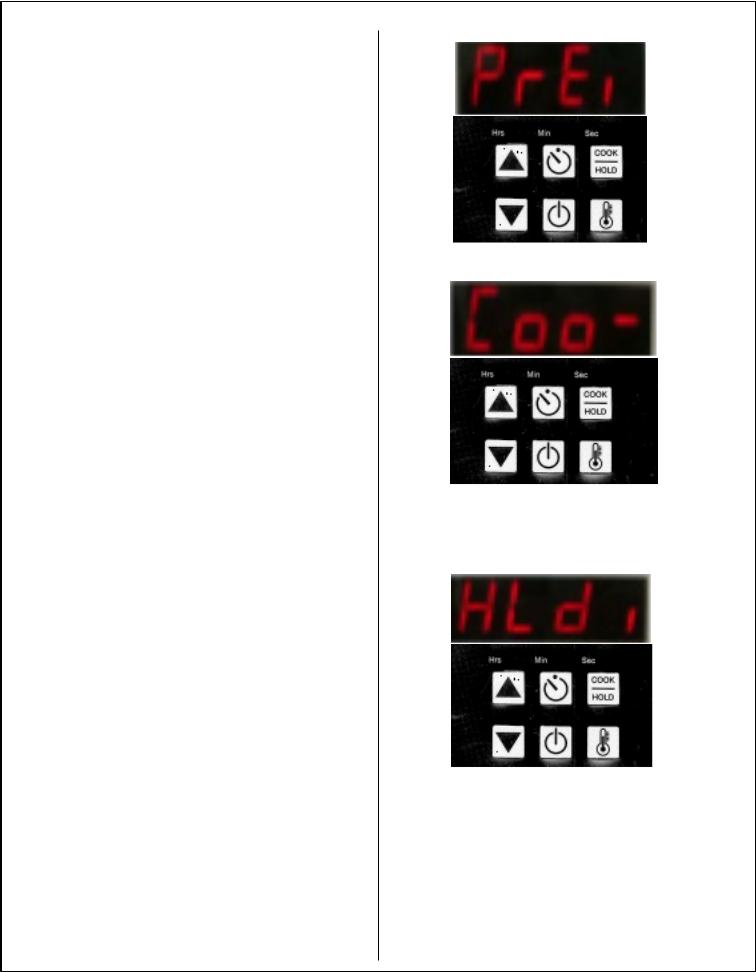
COOKING ( Fig 6 )
1.Depress the COOK/HOLD button to select the
Cook Mode (COO).
2.Open the door and place food into the cooking chamber. Shut the door.
3.Cooking begins immediately.
4.Timer — Depress the TIMER button and depress the ARROW keys [▲ or ▼]until the desired time is displayed. The timer starts automatically. At the end of the timed cycle, a beeper will sound.
5.Depress the DISP TEMP button to display the current cooking chamber temperature.
HOLDING ( Fig 7 )
In “Hold” the appliance temperature is set for
180° F from the factory. The hold temperature can be changed to a single value for temperatures ranging from150° F to 190° F. See page 14 for programming this function.
Hold can also be used during downtimes to save energy and water while keeping the appliance preheated.
1.Depress the COOK/HOLD button to select the
Hold Mode (HLd).
2.Open the door and place food into the cooking chamber. Shut the door.
3.Food will be held at the preset holding temperature. The factory default setting is set at 180° F.
4.Depress the DISP TEMP button to display the current cooking chamber temperature.
Fig 5
Fig 6
Fig 7
SP8017-1007 |
EVOLUTION ELECTRIC STEAMER |
PAGE 8 |
OPERATIONS
PARTIAL LOADS
The Evolution is designed to cook quickly with exceptional pan-to-pan uniformity on full loads of food.
Excellent pan-to-pan uniformity can be achieved with partial loads if the pans are optimally placed in the appliance. For partial loads using 2½” deep pans, the top position in the appliance is used first followed by the second pan placed in third pan position from the top and then the third pan in the fifth pan position from the top. Placing the pans in these positions will optimize the cooking time and pan- to-pan uniformity. See Fig 4
1st PAN 2nd PAN
3rd PAN
Fig 4
DAILY PREPARATION FOR USE - CONNECTIONLESS MODEL
Preparing the Evolution Connection-Less model for use each day requires very little time and effort.
Simply verify that the appliance is clean, the drain valve is in the closed position and the cooking chamber is filled with approximately 2½ Gallons of tap water. Close the door and push the ON/Off key on the keypad. The water level will need to be monitored and filled as required. Do not use the low water warning lamp as the indicator to check the water level as this can damage the appliance over time.
SP8017-1007 |
EVOLUTION ELECTRIC STEAMER |
PAGE 9 |
OPERATIONS
CLEANING - CONNECTIONLESS
DAILY CLEANING
1.Turn the appliance off and wait for the appliance to cool.
2.Open the drain valve and allow the cooking chamber to drain completely. Remove the pan rails and steam collector (Fig 9) Wipe the inside of the cooking chamber, water sensors, pan rails and steam collector with a clean cloth. Clean the door gasket, inside of door and front face of the cooking chamber.
3.Install the steam collector and pan rails.
Once the water in the drain pan has sufficiently cooled empty the drain pan wipe down and replace . Leave the door open overnight.
WEEKLY CLEANING
1.Close the drain valve and add 1 cup (8 ounces or 0.24 liters) of white vinegar to the cooking chamber and fill with approximately 2½ Gallons of tap water , shut the door and turn the appliance on.
2.After 15 minutes, turn the appliance off and allow the appliance to cool. Open the drain valve and allow the cooking chamber to drain completely.
3.To rinse close the drain valve, fill with approximately 2½ gallons tap water , close the door and start the appliance Cook Mode.
Let it run for 15 minutes, turn the appliance off and allow the appliance to cool. Open the drain valve and allow the cooking chamber to drain completely.
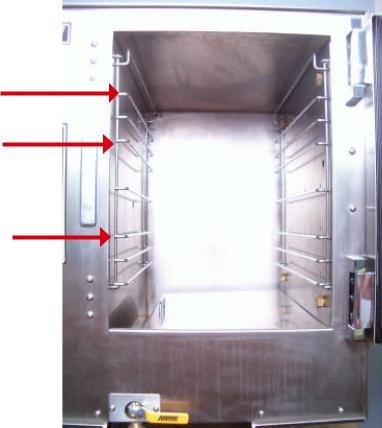
4.Remove the pan racks, steam collector and steam distributor for cleaning. Clean the water sensors with a non-metallic cleaning pad. Wipe the inside of the cooking chamber, water sensors, pan rails (Fig 9),steam distributor (Fig. 9), steam collector (Fig. 9).
5.Install the steam collector first, resting the steam distributor on top of the collector align the retaining fasteners and hand tighten and then install the pan rails. Leave door open overnight.
WARNING
Warning: Do not use a water jet or pressure washer to clean the appliance
Pan Rail
Steam Collector
Appliance Distributor
Fig 9
SP8017-1007 |
EVOLUTION ELECTRIC STEAMER |
PAGE 10 |

BASIC TROUBLESHOOTING
WARNING LIGHTS
LOW WATER — The appliance is low on water or the water sensors need to be cleaned.
HIGH WATER (CONNECTED MODELS ONLY) Not Utilized on this model
OVER TEMP — The appliance has overheated. It may have run out of water. Carefully open the door, allowing steam to escape and then check the water level in the bottom of the appliance If it is nearly empty, Clean the water level sensor probes (white buttons) located in the front left corner and the wall immediately around them being careful not to get burned (protective gloves are strongly recommended). Refill the appliance with 2 1/2 gallons of tap water and restart
If the appliance has plenty of water, allow it to cool. This normally takes a few minutes. When the Over Temp light goes out, restart the appliance.
Food Is Over Cooked
Check that the proper cook time is being used.
Food Is Under Cooked
Make sure you are using adequate time a. Extra time may be required if pans are covered or if product is left in plastic bags or similar packaging.
Make sure the door is closed. When the door opens the heat is turned off until it is shut
Make sure the appliance is in the Cook Mode; Push the Display Temperature button to ensure the appliance is at the boiling point of water taking into account your elevation above sea level. If it isn’t the appliance maybe in the Hold Mode. Variations in temperature can also be caused by frozen product just being put in or with the connected model a fresh measure of tap water was activated. These will shortly come up to temperature as long as the door is closed.
Food Is Under Cooked
Try using perforated pans as they allow steam to penetrate from all directions, maximizing heat transfer and giving you the shortest cooking times. Try distributing the product more evenly within the appliance and or pans, if possible.
Make sure the water drain valve on the front of the Evolution is tightly closed.
The appliance may appear to be cooking normally if the valve is slightly open but efficiency may be compromised.
Check the door seal for food debris. Food debris on the face of the door seal or under flap may cause appliance to appear to be cooking normally but efficiency may be compromised.
Nicks or cuts in the door seal may also cause inefficient cooking.
Appliance won’t come on
Verify that the breaker in the power pack is in the active position
Verify that the power pack is plugged in
Appliance doesn’t heat
If the operator’s display doesn’t light up, See section“ Appliance won’t come on”.
Verify the appliance door is closed, as the heat won’t turn on if the door is open.
Steam comes out the door
Verify that the door is completely closed and latched.
If the appliance was just filled with water, wait a minute to see if it stops. After the appliance is refilled with water it is normal for some steam to come out the door for a brief amount of time, usually less than one
Appliance Temperature is low
Make sure door is closed
Verify that the low water light isn’t on
Verify the appliance is in the Cook Mode not the Hold Mode
SP8017-1007 |
EVOLUTION ELECTRIC STEAMER |
PAGE 11 |
SERVICE INFORMATION
SP8017-1007 |
EVOLUTION ELECTRIC STEAMER |
PAGE 12 |
 Loading...