

Page 1

eXpeRAID
Command Line Interface
User Guide
Nov 05, 2007
Version: 1.0
Page 2

5F, 38 TAIYUAN ST, JHUBEI, HSINCHU, TAIWAN, R.O.C.
TITLE EXPERAID COMMAND LINE INTERFACE USER GUIDE
PROJECT “DESKTOP RAID” DOCUMENT STATUS OFFICIAL RELEASE
REV. G–05-NOV-2007
ACCUSYS, INC.
Revision History
Rev – A
11-JUN -2007
Rev – B
10-AUG -2007
Rev – C
14-AUG -2007
Rev – D
03-SEP -2007
Rev – E
19-OCT -2007
Rev – F
02-NOV -2007
Rev – G
05-NOV -2007
JeffChang 1. Initial Draft.
ShoneCheng
ShoneCheng
ShoneCheng
ShoneCheng
ShoneCheng 6. Modified the description in section 2.1 Pre-action.
ShoneCheng 7. Of ficial release version 1.0.
2. Removed unnecessary commands and modified command
names to match GUI’s.
3. Modified some command names and parameters of command
‘SetLunMap’, ‘CreateShot’ and ‘MigrateArray’, added Appendix I
for Migration command reference. Added ‘CancelSplitSchedule’
command.
4. Removed parameter “Array” for CreateArray command. Added
DumpMiscInfo and DumpDriveInfo commands. Modified the
description of DumpCtrlEvent command.
5. Removed CLI command “BatteryState”. Added Chapter 1
“Introduction” and Chapter 2 “Using CLI”, the original Chapter 1
had been moved to Chapter 3.
PAGE 2 OF 27
Page 3

5F, 38 TAIYUAN ST, JHUBEI, HSINCHU, TAIWAN, R.O.C.
TITLE EXPERAID COMMAND LINE INTERFACE USER GUIDE
PROJECT “DESKTOP RAID” DOCUMENT STATUS OFFICIAL RELEASE
REV. G–05-NOV-2007
ACCUSYS, INC.
PAGE 3 OF 27
Contents
1. Introduction......................................................................6
1.1 Overview..................................................................................................................6
2. Using CLI..........................................................................7
2.1 Pre-action.................................................................................................................7
2.2 Execution Mode.......................................................................................................8
2.2.1 Interactive Mode.............................................................................................8
2.2.2 Non-interactive Mode.....................................................................................8
2.2.2.1 CLI script Mode
2.2.2.2 Shell script Mode
3. CLI Command Line Configuration .............................10
3.1 CLI Command Format...........................................................................................10
3.2 CLI Reply Status....................................................................................................11
3.3 CLI Command Set .................................................................................................12
3.3.1 Basic CLI Commands...................................................................................12
3.3.1.1 main
3.3.1.2 CtrlIndex
3.3.1.3 CheckPassword
3.3.1.4 SetPassword
3.3.1.5 CtrlName
3.3.1.6 RunScript
3.3.1.7 exit
3.3.2 Information Display Commands...................................................................14
3.3.2.1 DumpArrayInfo
3.3.2.2 DumpSliceInfo
3.3.2.3 DumpJBODInfo
3.3.2.4 DumpCtrlEvent
3.3.2.5 DumpCtrlInfo
3.3.2.6 DumpLockDriveInfo
3.3.2.7 DumpSnapShotInfo
3.3.2.8 DumpMiscInfo
3.3.2.9 DumpDriveInfo
Page 4

5F, 38 TAIYUAN ST, JHUBEI, HSINCHU, TAIWAN, R.O.C.
ACCUSYS, INC.
TITLE EXPERAID COMMAND LINE INTERFACE USER GUIDE
PROJECT “DESKTOP RAID” DOCUMENT STATUS OFFICIAL RELEASE
REV. G–05-NOV-2007
3.3.3 Basic Array Configuration Commands.........................................................16
3.3.3.1 CreateArray
3.3.3.2 DeleteArray
3.3.3.3 CreateJBOD
3.3.3.4 DeleteJBOD
3.3.3.5 SetSlice
3.3.3.6 SetLunMap
3.3.3.7 DeleteLunMap
3.3.4 Advanced Array Configuration Commands..................................................19
3.3.4.1 ExpandArray
3.3.4.2 MigrateArray
3.3.4.3 RebuildParity
PAGE 4 OF 27
3.3.4.4 VerifyParity
3.3.4.5 RefreshArray
3.3.4.6 RefreshPriority
3.3.4.7 UnlockDrive
3.3.5 Mirror Snapshot Configuration Commands..................................................21
3.3.5.1 CreateShot
3.3.5.2 DeleteShot
3.3.5.3 ResyncShot
3.3.5.4 SplitShot
3.3.5.5 SplitSchedule
3.3.5.6 CancelSplitSchedule
3.3.6 Miscellaneous Commands............................................................................23
3.3.6.1 DiskLagProof
3.3.6.2 NCQMode
3.3.6.3 SMARTMode
3.3.6.4 SMARTPollingPeriod
3.3.6.5 BeeperMode
3.3.6.6 EQMode
3.3.6.7 CtrlCache
3.3.6.8 SyncCacheMode
3.3.6.9 PrefetchNumber
3.3.6.10 DriveCacheMode
3.3.6.11 CtrlTime
3.3.7 Firmware Update Commands.......................................................................26
Page 5

5F, 38 TAIYUAN ST, JHUBEI, HSINCHU, TAIWAN, R.O.C.
TITLE EXPERAID COMMAND LINE INTERFACE USER GUIDE
PROJECT “DESKTOP RAID” DOCUMENT STATUS OFFICIAL RELEASE
REV. G–05-NOV-2007
ACCUSYS, INC.
PAGE 5 OF 27
3.3.7.1 UpdateSystemCode
3.3.7.2 UpdateBootCode
3.3.7.3 UpdateBIOSEFI
Appendix I. .........................................................................27
Page 6

5F, 38 TAIYUAN ST, JHUBEI, HSINCHU, TAIWAN, R.O.C.
TITLE EXPERAID COMMAND LINE INTERFACE USER GUIDE
PROJECT “DESKTOP RAID” DOCUMENT STATUS OFFICIAL RELEASE
REV. G–05-NOV-2007
ACCUSYS, INC.
PAGE 6 OF 27
1. Introduction
This user guide provides eXpeRAID Command Line Interface (CLI) instructions for
configuring and maintaining your eXpeRAID. Before using this CLI, we assume that you
have already installed your controller in your system. If you have not yet installed
eXpeRAID, see Accusys eXpeRAID Installation User manual for instructions.
1.1 Overview
This Command Line Interface (CLI) is provided for you to configure and manage the
Accusys eXpeRAID components in Linux, Mac or Windows. The CLI is useful under
environments where a graphical user interface (GUI) is not available. Through CLI, you
can perform most of the storage management tasks that you perform with the eXpeRAID
storage manager GUI. CLI commands can be executed under either interactive or
non-interactive (script) mode, providing higher level API functionalities.
1.2 Supported Operating Systems
• Windows: XP, 20xx, Vista, …, etc.
• Linux: Fedora Code, SuSE, Debian, …, etc.
• Mac: Mac Pro, G5 …, etc.
CLI supports both 32-bit and 64-bit versions. Be sure you are using the correct version.
Page 7

5F, 38 TAIYUAN ST, JHUBEI, HSINCHU, TAIWAN, R.O.C.
TITLE EXPERAID COMMAND LINE INTERFACE USER GUIDE
PROJECT “DESKTOP RAID” DOCUMENT STATUS OFFICIAL RELEASE
REV. G–05-NOV-2007
ACCUSYS, INC.
PAGE 7 OF 27
2. Using CLI
2.1 Pre-action
Before using CLI, make sure the controller(s) has been connected to the host and the driver(s)
of the controller(s) has been installed on the OS properly.
Under Linux, you may need to execute the following command to let CLI find the controller
normally: mknod /dev/ACS_CDEVi c NUM i
where number NUM is determined by referencing the Character devices listed in
/proc/devices in which the string ACS_CDEV is located. The number i should be 0
when only one controller is found. If other controllers are found, use 1, 2.. for i
to make node of each controller one by one.
Anyway, the necessity of this procedure depends on how the driver is installed.
Example for Linux special case:
1. Type: insmod acs_ame.ko [Enter] under the folder where the driver “acs_ame.ko” is located.
2. Type: cat /proc/devices [Enter], a list of Character devices will appear, in which the device
number of ACS_CDEV is 253(The value alters through different systems.)
Page 8

5F, 38 TAIYUAN ST, JHUBEI, HSINCHU, TAIWAN, R.O.C.
TITLE EXPERAID COMMAND LINE INTERFACE USER GUIDE
PROJECT “DESKTOP RAID” DOCUMENT STATUS OFFICIAL RELEASE
REV. G–05-NOV-2007
ACCUSYS, INC.
PAGE 8 OF 27
3. Type: mknod /dev/ACS_CDEV0 c 253 0 [Enter], a device file “ACS_CDEV0” will be
created and CLI will be able to find the controller through this device file.
2.2 Execution Mode
There are two methods to run CLI commands - interactive mode and non-interactive mode.
For each mode, all commands and parameters must follow the CLI command format to be
executed normally.
2.2.1 Interactive Mode
To trigger CLI interactive mode, simply run the CLI execution file under the
command line of the OS. If the controller has been found, a password verification
prompt for the default controller will appear. After inputting the correct password,
the CLI prompt “CLI>” will appear. All CLI commands can be executed under this
prompt.
2.2.2 Non-interactive Mode
There are two types of non-interactive mode for CLI. One calls the CLI command
"RunScript" to execute pre-written script files which contain bunches of CLI
commands. The other one calls CLI commands by adding them as the parameter
of the CLI execution file individually.
The scripts of both types of non-interactive mode are written based on the following
format:
acs_cli <CLI command> [Parameters of the CLI command]
which can be executed as a single command under the command line of the OS.
2.2.2.1 CLI script Mode
Page 9

5F, 38 TAIYUAN ST, JHUBEI, HSINCHU, TAIWAN, R.O.C.
TITLE EXPERAID COMMAND LINE INTERFACE USER GUIDE
PROJECT “DESKTOP RAID” DOCUMENT STATUS OFFICIAL RELEASE
REV. G–05-NOV-2007
ACCUSYS, INC.
PAGE 9 OF 27
This non-interactive mode is implemented by calling the CLI command "RunScript".
For example:
In Sample1.sh(Included in the folder where CLI application is located) under Linux,
it contains the following commands:
./acs_cli RunScript acs_sample1.script
./acs_cli RunScript acs_sample2.script
Both acs_sample1.script and acs_sample2.script contain a bunch of CLI commands.
2.2.2.2 Shell script Mode
This mode is implemented by executing all CLI commands following the format:
acs_cli <CLI command> [Parameters of the CLI command]
For example:
In Sample2.sh under Linux, it contains commands like
./acs_cli CtrlIndex 0
./acs_cli CheckPassword 00000000
…
The first line sets the controller index to 0 and the second line verifies the password
of the controller with index 0.
To complete both Sample1.sh and Sample2.sh successfully, the active controller must
have 4 Spare drives(On slot 1~4) connected. For both scripts, all 4 drives will be
restored to Spare after completing the script successfully.
Page 10
5F, 38 TAIYUAN ST, JHUBEI, HSINCHU, TAIWAN, R.O.C.
TITLE EXPERAID COMMAND LINE INTERFACE USER GUIDE
PROJECT “DESKTOP RAID” DOCUMENT STATUS OFFICIAL RELEASE
REV. G–05-NOV-2007
ACCUSYS, INC.
3. CLI Command Line Configuration
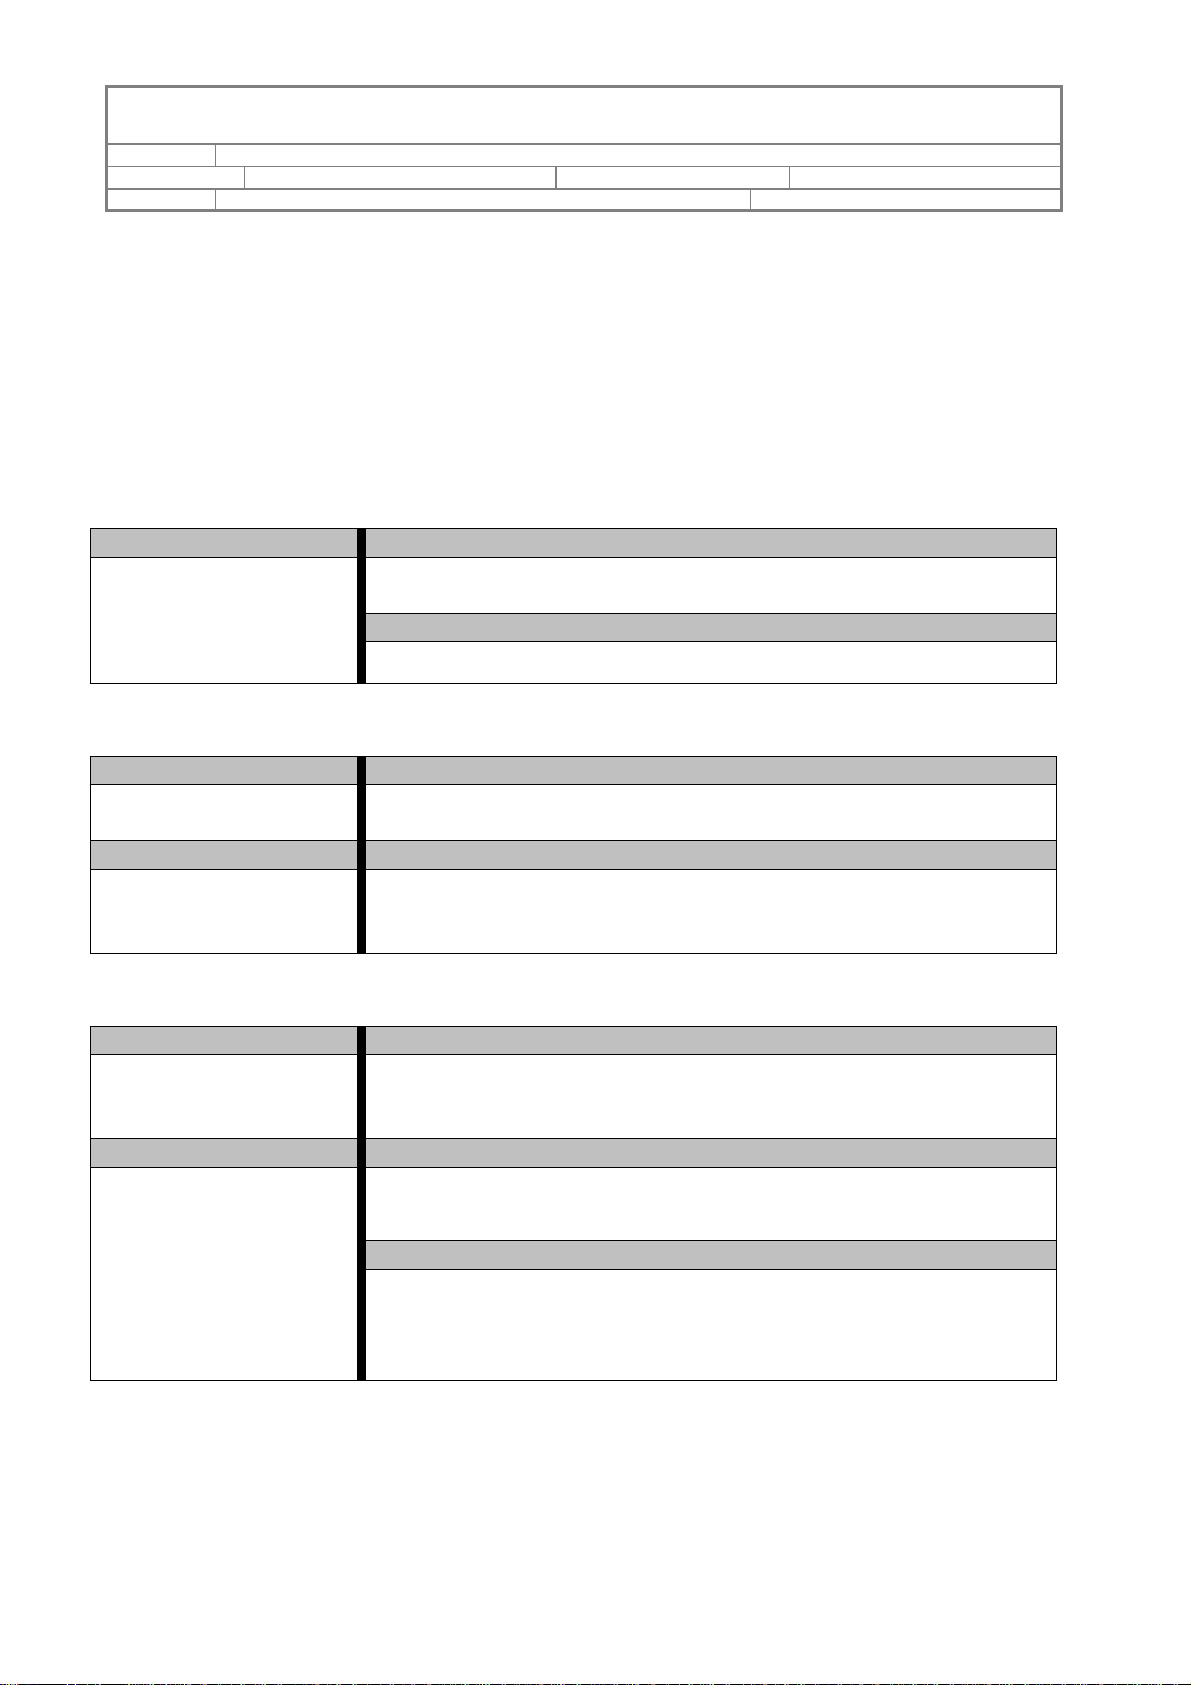
3.1 CLI Command Format
Command Name Command Description
Command
Parameter 1 Parameter Description
[Format 1]
Parameter 2
[Format 2]
Parameter 3
…
Parameter n
[Format n]
Example
PAGE 10 OF 27
Command Format field description:
Command Name: CLI Command Name.
Parameter 1 ~ n: CLI Command Parameters.
Command Description: Describe CLI Commands in brief.
Parameter Description: Describe Parameters in detail.
Example: Gives an example for the command.
Command Syntax:
<Command Name> [Forma t 1] …[Format n]
Format Conventions:
<text> indicates items that user must specify.
[text] The text item within brackets is optional.
< :> indicates the ‘or’ condition. For which user has a choice for the options listed within,
and only one can be specified.
<~> indicates the value range. For which user has a choice for the values within the range,
and only one can be specified.
<,> indicates a separation between integer values.
Page 11

5F, 38 TAIYUAN ST, JHUBEI, HSINCHU, TAIWAN, R.O.C.
TITLE EXPERAID COMMAND LINE INTERFACE USER GUIDE
PROJECT “DESKTOP RAID” DOCUMENT STATUS OFFICIAL RELEASE
REV. G–05-NOV-2007
ACCUSYS, INC.
PAGE 11 OF 27
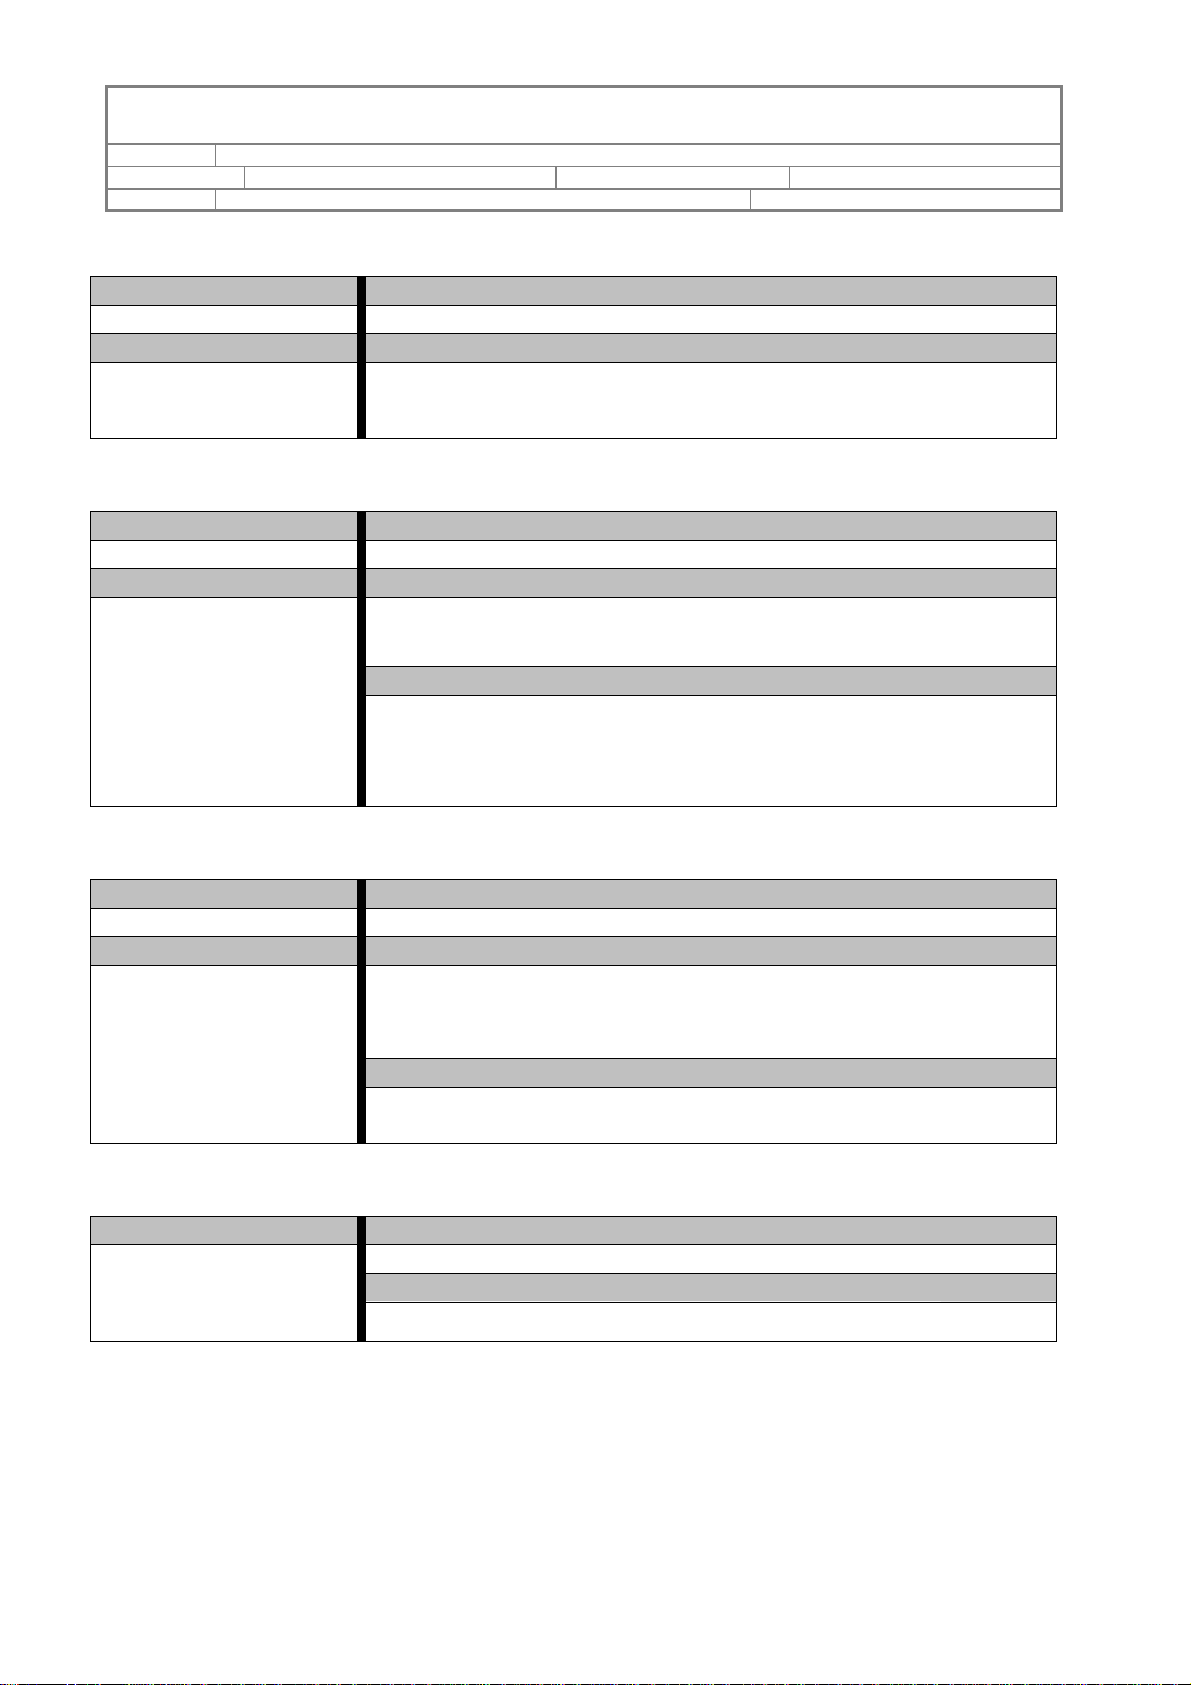
3.2 CLI Reply Status
z InBand(Controller) command success.
z InBand command failed.
CLI will display “Reason: <Error reason description>”.
z Invalid command: CLI receives unrecognized commands.
z Invalid parameter “Param”: CLI receives incorrect parameter of the input command.
CLI will display the command usage when this error occurs under the interactive mode.
z Syntax error: Parameter(s) of the input command doesn’t match the command syntax.
CLI will also display the command usage under the interactive mode.
z Other errors: <Specific error description>.
Page 12
5F, 38 TAIYUAN ST, JHUBEI, HSINCHU, TAIWAN, R.O.C.
N
TITLE EXPERAID COMMAND LINE INTERFACE USER GUIDE
PROJECT “DESKTOP RAID” DOCUMENT STATUS OFFICIAL RELEASE
REV. G–05-NOV-2007
ACCUSYS, INC.
3.3 CLI Command Set
3.3.1 Basic CLI Commands
3.3.1.1
Command Name Command Description
Main
Use this command to show the main information page, which lists all
available CLI commands with brief descriptions.
Parameter Description
/A
PAGE 12 OF 27
3.3.1.2
Command Name Command Description
CtrlIndex Use this command to set a specified controller to be active. The default
controller will be set to controller 0 if it exists.
Parameter 1 Parameter Description
Controller index:
<0~n>
Controller index:
<0~n>, where n stands for the maximum index number of the available
controller(s).
3.3.1.3
Command Name Command Description
CheckPassword Use this command to verify password of the active controller. The
controller commands can only be issued after the password being
verified.
Parameter 1 Parameter Description
Password:
<CHARS>
Password:
CHARS must be an 8-character alphabetic string.
Example
CLI>CheckPassword 00000000 [Enter]
If 00000000 is a correct password for the active controller, then CLI
will return success and the controller can receive commands normally
after that.
Page 13
5F, 38 TAIYUAN ST, JHUBEI, HSINCHU, TAIWAN, R.O.C.
N
TITLE EXPERAID COMMAND LINE INTERFACE USER GUIDE
PROJECT “DESKTOP RAID” DOCUMENT STATUS OFFICIAL RELEASE
REV. G–05-NOV-2007
ACCUSYS, INC.
PAGE 13 OF 27
3.3.1.4
Command Name Command Description
SetPassword Use this command to set password of the active controller.
Parameter 1 Parameter Description
Password:
<CHARS>
Password:
CHARS must be an 8-character alphabetic string.
3.3.1.5
Command Name Command Description
CtrlName Use this command to set controller name of the active controller.
Parameter 1 Parameter Description
Controller Name:
<CHARS>
Controller Name:
CHARS may not exceed 16 characters.
Example
CLI>CtrlName Ctrl1 [Enter]
The controller name will be set to ‘Ctrl1’. If the number of characters
in parameter 1 is more than 16, the additional characters will be
ignored.
3.3.1.6
Command Name Command Description
RunScript Use this command to run CLI commands from a pre-written script file.
Parameter 1 Parameter Description
File Path:
<[DIR] <FileName>>
File Path:
Specify an existing script file(FileName) located in the specified
directory.
Example(Under Linux environment)
CLI> RunScript /tmp/script1 [Enter]
CLI will start to run commands written in the script file ‘script1’
3.3.1.7
Command Name Command Description
Exit
Use this command to quit CLI command line interface.
Parameter Description
/A
Page 14

5F, 38 TAIYUAN ST, JHUBEI, HSINCHU, TAIWAN, R.O.C.
N
N
N
TITLE EXPERAID COMMAND LINE INTERFACE USER GUIDE
PROJECT “DESKTOP RAID” DOCUMENT STATUS OFFICIAL RELEASE
REV. G–05-NOV-2007
ACCUSYS, INC.
PAGE 14 OF 27
3.3.2 Information Display Commands
3.3.2.1
Command Name Command Description
DumpArrayInfo Use this command to display information of the specified array.
Parameter 1 Parameter Description
Array No.:
<1~4>
Array No.:
Specified array number from 1 ~ 4 for information display.
Example
CLI>DumpArrayInfo 1 [Enter]
CLI will display the information of Array 1 if it exists.
T3.3.2.2T
Command Name Command Description
DumpSliceInfo Use this command to display slice information of the specified array.
Parameter 1 Parameter Description
Array No.:
<1~4>
Array No.:
Specified array number from 1 ~ 4 to display slice information.
3.3.2.3
Command Name Command Description
DumpJBODInfo
Use this command to display JBOD information of the active
controller.
Parameter Description
/A
3.3.2.4
Command Name Command Description
DumpCtrlEvent
Use this command to display event(s) of the active controller. CLI will
display up to 32 latest events(if any) each time when this command has
been issued.
Parameter Description
/A
3.3.2.5
Command Name Command Description
DumpCtrlInfo
Use this command to display controller information of the active
controller.
Parameter Description
/A
Page 15
5F, 38 TAIYUAN ST, JHUBEI, HSINCHU, TAIWAN, R.O.C.
N
N
N
N
TITLE EXPERAID COMMAND LINE INTERFACE USER GUIDE
PROJECT “DESKTOP RAID” DOCUMENT STATUS OFFICIAL RELEASE
REV. G–05-NOV-2007
ACCUSYS, INC.
3.3.2.6
Command Name Command Description
DumpLockDriveInfo
Use this command to display information of all locked drives.
Parameter Description
/A
3.3.2.7
Command Name Command Description
DumpSnapShotInfo
Use this command to display information of all existing mirror
snapshots.
Parameter Description
/A
PAGE 15 OF 27
3.3.2.8
Command Name Command Description
DumpMiscInfo
Use this command to display information of miscellaneous settings.
Parameter Description
/A
3.3.2.9
Command Name Command Description
DumpDriveInfo
Use this command to display information of all drives.
Parameter Description
/A
Page 16

5F, 38 TAIYUAN ST, JHUBEI, HSINCHU, TAIWAN, R.O.C.
TITLE EXPERAID COMMAND LINE INTERFACE USER GUIDE
PROJECT “DESKTOP RAID” DOCUMENT STATUS OFFICIAL RELEASE
REV. G–05-NOV-2007
ACCUSYS, INC.
PAGE 16 OF 27
3.3.3 Basic Array Configuration Commands
3.3.3.1
Command Name Command Description
CreateArray Use this command to create an array with specified RAID level.
Parameter 1 Parameter Description
RAID Level:
<Level=<R0:R1:R5:R6:
R01>>
Parameter 2
Stripe Size:
<Stripe=<8:16:32:64:128:2
56>>
Parameter 3
Initialization Type:
<Type=<Fly:Evaluation>>
Parameter 4
Member Drives:
<Drive=<z1,x~y,z2>>
RAID Level:
R0: RAID Level 0
R1: RAID Level 1
R5: RAID Level 5
R6: RAID Level 6
R01: RAID Level 0+1
Stripe Size:
Measures in KB.
1 KB=2 Blocks.
Initialization Type:
Fly: On-the-fly initialization
Evaluation: Performance evaluation
Member Drives:
Drive=<z1,x~y,z2>
where z1, z2, x and y stand for drive numbers and y must be larger
then x.
Example
CLI>CreateArray Level=R5 Stripe=128 Type=Fly Drive=3,4,6~8
[Enter]
Array will be created with drive 3,4,6,7,8 with an unused array number
if all specified drives are available. If all array numbers have been used
CLI will reply error.
Page 17

5F, 38 TAIYUAN ST, JHUBEI, HSINCHU, TAIWAN, R.O.C.
TITLE EXPERAID COMMAND LINE INTERFACE USER GUIDE
PROJECT “DESKTOP RAID” DOCUMENT STATUS OFFICIAL RELEASE
REV. G–05-NOV-2007
ACCUSYS, INC.
PAGE 17 OF 27
3.3.3.2
Command Name Command Description
DeleteArray Use this command to delete a specified array.
Parameter 1 Parameter Description
Array No.:
<1~4>
Array No.:
Specify an array number to be deleted.
Example
CLI>DeleteArray 1 [Enter]
Array 1 will be deleted if it exists and is not in use.
3.3.3.3
Command Name Command Description
CreateJBOD Use this command to create JBOD with the specified drive number.
Parameter 1 Parameter Description
Drive No.:
<1~n>
Drive No.:
<1~n>, where n stands for maximum available drive number.
3.3.3.4
Command Name Command Description
DeleteJBOD Use this command to delete an existing JBOD.
Parameter 1 Parameter Description
JBOD No.:
<1~n>
JBOD No.:
<1~n>, where n stands for maximum JBOD number.
3.3.3.5
Command Name Command Description
SetSlice Use this command to set a slice for the specified array.
Parameter 1 Parameter Description
Array No.:
<Array=<1~4>>
Parameter 2
Slice Number:
<Slice=<0~15>>
Parameter 3
Slice size:
<Size=xxx>>
Array No.:
Specify an array number to set slice.
Slice Number:
Specify the slice number to be created.
Slice size:
Measures in GBytes. Set “Size=0” to delete a slice.
Example
CLI>SetSlice Array=1 Slice=0 Size=120 [Enter]
Slice 0 will be set to 120GB if Array 1 exists and the free capacity of
Array 1 is large enough(>120GB).
Page 18

5F, 38 TAIYUAN ST, JHUBEI, HSINCHU, TAIWAN, R.O.C.
TITLE EXPERAID COMMAND LINE INTERFACE USER GUIDE
PROJECT “DESKTOP RAID” DOCUMENT STATUS OFFICIAL RELEASE
REV. G–05-NOV-2007
ACCUSYS, INC.
PAGE 18 OF 27
3.3.3.6
Command Name Command Description
SetLunMap Use this command to set a Lun Map for an existing slice or JBOD.
Parameter 1 Parameter Description
LUN No.:
<Lun=<0~63>>
Parameter 2
Array No.:
<Array=<1~4>:
JBOD= <1~n>>
Parameter 3
Slice No.:
LUN No.:
Specify the Lun number to be mapped.
Array No.:
Array =1~4, Maps Lun to a specified Array
JBOD=1~n, Maps Lun to a specified JBOD
Slice No.:
This parameter is not needed when parameter 2 uses JBOD.
<Slice= <0~15>>
Example
CLI>SetLunMap Lun=0 JBOD=1 [Enter]
Lun 0 will be mapped to JBOD1 if it exists.
CLI>SetLunMap Lun=0 Array=1 Slice=0 [Enter]
Lun 0 will be mapped to slice 0 of array 1 if it exists.
3.3.3.7
Command Name Command Description
DeleteLunMap Use this command to delete an existing Lun Map.
Parameter 1 Parameter Description
LUN No.:
<0~63>
Lun No.:
Specify the Lun number to be unmapped.
Page 19

5F, 38 TAIYUAN ST, JHUBEI, HSINCHU, TAIWAN, R.O.C.
p
TITLE EXPERAID COMMAND LINE INTERFACE USER GUIDE
PROJECT “DESKTOP RAID” DOCUMENT STATUS OFFICIAL RELEASE
REV. G–05-NOV-2007
ACCUSYS, INC.
PAGE 19 OF 27
3.3.4 Advanced Array Configuration Commands
3.3.4.1
Command Name Command Description
ExpandArray Use this command to expand an array with specified drive count.
Parameter 1 Parameter Description
Array No.:
<Array=<1~4>>
Parameter 2
Drive Count:
<DriveCnt=<1~n>>
Array No.:
Specify an array number to be expanded.
Drive Count:
Specify how many drives will be expanded to the array. Drive Count
must not be larger then the number of spare drives.
Example
CLI>ExpandArray Array=1 DriveCnt=3 [Enter]
Array 1 will be expanded with 3 drives if Array 1 exists and the spare
drive quantity are more then or equal to 3.
3.3.4.2
Command Name Command Description
MigrateArray Use this command to migrate an array from the original RAID level to
a specified RAID level.
Parameter 1 Parameter Description
Array No.:
<Array=<1~4>>
Parameter 2
Target RAID Level:
<TargetLevel=<R0:R1:R5:
R6:R01>>
Parameter 3
Drive Count:
<DriveCnt=xxx>
Array No.:
Specify an array number to be migrated.
Target RAID Level:
Specify the target RAID level for the specified array to be migrated to.
Drive Count:
Specify the total drive count which the target RAID level would have.
Please refer to the Array Migration Matrix listed in Appendix I to
check the migration legality.
Example
CLI>MigrateArray Array=1 TargetLevel=R5 DriveCnt=4 [Enter]
Array 1 will be migrated from the original RAID level to RAID level 5
which has a total member drive count of 4 if Array 1 exists and all
arameters follow the rule of the Array Migration Matrix.
Page 20

5F, 38 TAIYUAN ST, JHUBEI, HSINCHU, TAIWAN, R.O.C.
TITLE EXPERAID COMMAND LINE INTERFACE USER GUIDE
PROJECT “DESKTOP RAID” DOCUMENT STATUS OFFICIAL RELEASE
REV. G–05-NOV-2007
ACCUSYS, INC.
PAGE 20 OF 27
3.3.4.3
Command Name Command Description
RebuildParity Use this command to rebuild parity of an array which contains parity.
i.e. RAID 5 or RAID 6.
Parameter 1 Parameter Description
Array No.:
<Array=<1~4>>
Parameter 2
State setting:
<State=<Start:Stop>>
Array No.:
Specify an array number to rebuild parity.
Status setting:
Start or stop the parity rebuilding of the specified array.
Example
CLI>RebuildParity Array=1 State=Start [Enter]
Array 1 will start to rebuild parity if it exists and is configured as
RAID 5 or RAID 6.
3.3.4.4
Command Name Command Description
VerifyParity Use this command to verify parity of an array which contains parity.
i.e. RAID 5 or RAID 6
Parameter 1 Parameter Description
Array No.:
<Array=<1~4>>
Parameter 2
State setting:
<State=<Start:Stop>>
Array No.:
Specify an array number to verify parity.
Status setting:
Start or stop the parity verification of the specified array.
3.3.4.5
Command Name Command Description
RefreshArray Use this command to refresh data of the specified array.
Parameter 1 Parameter Description
Array No.:
<Array=<1~4>>
Parameter 2
State setting:
<State=<Start:Stop:Pause>
>
Array No.:
Specify an array number to be refreshed.
State setting:
Start, stop the array refreshment or just pause the refreshment and
restart it with ‘State=Start’ parameter any time after it has been paused.
Example
CLI>RefreshArray Array=1 State=S tart[Enter]
Array 1 will start to refresh data if it exists.
Page 21

5F, 38 TAIYUAN ST, JHUBEI, HSINCHU, TAIWAN, R.O.C.
y
b
TITLE EXPERAID COMMAND LINE INTERFACE USER GUIDE
PROJECT “DESKTOP RAID” DOCUMENT STATUS OFFICIAL RELEASE
REV. G–05-NOV-2007
ACCUSYS, INC.
PAGE 21 OF 27
3.3.4.6
Command Name Command Description
RefreshPriority Use this command to set the priority of array refreshment. This setting
would be applied to all arrays which are being refreshed.
Parameter 1 Parameter Description
<High:Medium:Low> Select the priority for array refreshment function.
3.3.4.7
Command Name Command Description
UnlockDrive Use this command to unlock a locked drive.
Parameter 1 Parameter Description
Drive No.:
<1~n>
Drive No.:
<1~n>, where n stands for the maximum locked drive number.
3.3.5 Mirror Snapshot Configuration Commands
3.3.5.1
Command Name Command Description
CreateShot Use this command to create a mirror snapshot.
Parameter 1 Parameter Description
Shot No.:
<Shot=<1~8>>
Parameter 2
Source Array No.:
<SourceArray=<1~4>:
SourceJBOD=<1~n>>
Parameter 3
Source Slice No.:
<SourceSlice= <0~15>>
Parameter 4
Backup Array No.:
<BackupArray =<1~4>:
BackupJBOD=<1~n>>
Parameter 5
Backup Slice No.:
<BackupSlice= <0~15>>
Shot No.:
Specify the mirror snapshot number to be created.
Source Array No.:
SourceArray =1~4, uses an array as the source shot.
SourceJBOD=1~n, uses JBOD as the source shot.
Backup Array No.:
BackupArray =1~4, uses an array as the backup shot.
BackupJBOD=1~n, uses JBOD as the backup shot.
Slice No.:
This parameter is not needed when parameter 2 or parameter 4 uses
JBOD.
Example
CLI>CreateShot Shot=1 SourceArra
BackupJBOD =1 [Enter]
Shot 1 will be created and data in slice 0 of Array 1 will start to
to JBOD1 if all parameters meet legal conditions.
=1 SourceSlice=0
ackup
Page 22

5F, 38 TAIYUAN ST, JHUBEI, HSINCHU, TAIWAN, R.O.C.
TITLE EXPERAID COMMAND LINE INTERFACE USER GUIDE
PROJECT “DESKTOP RAID” DOCUMENT STATUS OFFICIAL RELEASE
REV. G–05-NOV-2007
ACCUSYS, INC.
3.3.5.2
Command Name Command Description
DeleteShot Use this command to delete a mirror snapshot.
Parameter 1 Parameter Description
Shot No.:
<1~8>
Shot No.:
Specify an existing mirror snapshot to be deleted.
3.3.5.3
Command Name Command Description
ResyncShot Use this command to resynchronize a mirror snapshot.
Parameter 1 Parameter Description
Shot No.:
<1~8>
Shot No.:
Specify an existing mirror snapshot to be resynchronized.
PAGE 22 OF 27
3.3.5.4
Command Name Command Description
SplitShot Use this command to split a mirror snapshot.
Parameter 1 Parameter Description
Shot No.:
<1~8>
Shot No.:
Specify an existing mirror snapshot to be split.
3.3.5.5
Command Name Command Description
SplitSchedule Use this command to schedule the split time of the specified mirror
snapshot.
Parameter 1 Parameter Description
Shot No.:
<Shot=<1~8>>
Parameter 2
Year:
<Year=<0~99>>
Shot No.:
Specify an existing mirror snapshot to assign split schedule.
Year:
Year=xx means Year 20xx.
Parameter 3 Example
Month:
<Month=<1~12>>
Parameter 4
Day:
CLI>SplitScheduling Shot=1 Year=07 Month=12 Day=15 Hour=0
Min=0 [Enter]
Shot 1 will start to split at 2007/12/15 0:0 if shot 1 exists and has not
been split yet.
<Day=<1~31>>
Parameter 6
Hour:
<Hour=<0~23>>
Parameter 7
Minute:
<Min=<0~59>>
Page 23

5F, 38 TAIYUAN ST, JHUBEI, HSINCHU, TAIWAN, R.O.C.
TITLE EXPERAID COMMAND LINE INTERFACE USER GUIDE
PROJECT “DESKTOP RAID” DOCUMENT STATUS OFFICIAL RELEASE
REV. G–05-NOV-2007
ACCUSYS, INC.
PAGE 23 OF 27
3.3.5.6
Command Name Command Description
CancelSplitSchedule Use this command to cancel split schedule for the specified mirror
snapshot.
Parameter 1 Parameter Description
Shot No.:
<1~8>
Shot No.:
Specify an existing mirror snapshot to cancel schedule.
3.3.6 Miscellaneous Commands
3.3.6.1
Command Name Command Description
DiskLagProof Use this command to enable or disable Disk Lag Proof mode. This
mode is only effective on RAID Level 5.
Parameter 1 Parameter Description
<Enable:Disable> Enable / Disable Disk Lag Proof mode.
3.3.6.2
Command Name Command Description
NCQMode Use this command to enable or disable NCQ(native command queue)
mode.
Parameter 1 Parameter Description
<Enable:Disable> Enable / Disable NCQ mode.
3.3.6.3
Command Name Command Description
SMARTMode Use this command to enable or disable SMART pre-failure warning
mode.
Parameter 1 Parameter Description
<Enable:Disable> Enable / Disable SMART pre-failure warning mode.
Page 24

5F, 38 TAIYUAN ST, JHUBEI, HSINCHU, TAIWAN, R.O.C.
TITLE EXPERAID COMMAND LINE INTERFACE USER GUIDE
PROJECT “DESKTOP RAID” DOCUMENT STATUS OFFICIAL RELEASE
REV. G–05-NOV-2007
ACCUSYS, INC.
PAGE 24 OF 27
3.3.6.4
Command Name Command Description
SMARTPollingPeriod Use this command to set the polling frequency of SMART pre-failure
warning mode.
Parameter 1 Parameter Description
Polling Time:
<1Min:15Min:30Min:
Polling Time:
Set Polling Time as the SMART polling period.
60Min:2Hr:4Hr:8Hr>
3.3.6.5
Command Name Command Description
BeeperMode Use this command to enable or disable the controller beeper.
Parameter 1 Parameter Description
<Enable:Disable> Enable/Disable controller beeper.
3.3.6.6
Command Name Command Description
EQMode Use this command to enable or disable Equalization Mode.
Parameter 1 Parameter Description
<Enable:Disable> Enable / Disable Equalization Mode.
3.3.6.7
Command Name Command Description
CtrlCache Use this command to enable or disable controller cache.
Parameter 1 Parameter Description
<Enable:Disable> Enable/Disable controller cache.
3.3.6.8
Command Name Command Description
SyncCacheMode Use this command to enable or disable Synchronize Cache mode.
Parameter 1 Parameter Description
<Enable:Disable> Enable/Disable Synchronize Cache mode.
Page 25

5F, 38 TAIYUAN ST, JHUBEI, HSINCHU, TAIWAN, R.O.C.
TITLE EXPERAID COMMAND LINE INTERFACE USER GUIDE
PROJECT “DESKTOP RAID” DOCUMENT STATUS OFFICIAL RELEASE
REV. G–05-NOV-2007
ACCUSYS, INC.
PAGE 25 OF 27
3.3.6.9
Command Name Command Description
PrefetchNumber Use this command to assign the maximum pre-fetch number.
Parameter 1 Parameter Description
Pre-fetch Number:
<1:2:4:8:16:32:64:128>
Pre-fetch Number:
The basic unit of maximum pre-fetch number is one stripe. For
example, if the maximum pre-fetch number is 8 and the stripe size is
128KB, then the maximum pre-fetch size is 8x128KB.
3.3.6.10
Command Name Command Description
DriveCacheMode Use this command to enable or disable drive cache(s).
Parameter 1 Parameter Description
Drive No.:
<Drive=<1~n:All>>
Parameter 2
Switch setting:
<Switch
=<Enable:Disable>>
Drive No.:
Specify a drive or all drives to enable or disable cache.
<1~n>, where n stands for maximum existing drive number.
Drive=All, the command will have effect on all existing drives.
Switch setting:
Enable or disable the cache(s) on the specified drive(s).
3.3.6.11
Command Name Command Description
CtrlTime Use this command to set controller time.
Parameter 1 Parameter Description
Year:
<Year=<0~99>>
Parameter 2
Year:
Year=xx means year 20xx.
Month:
<Month =<1~12>>
Parameter 3
Day:
<Day =<1~31>>
Parameter 5
Hour:
<Hour=<0~23>>
Parameter 6
Minute:
<Min =<0~59>>
Parameter 7
Second:
<Sec =<0~59>>
Page 26
5F, 38 TAIYUAN ST, JHUBEI, HSINCHU, TAIWAN, R.O.C.
TITLE EXPERAID COMMAND LINE INTERFACE USER GUIDE
PROJECT “DESKTOP RAID” DOCUMENT STATUS OFFICIAL RELEASE
REV. G–05-NOV-2007
ACCUSYS, INC.
PAGE 26 OF 27
3.3.7 Firmware Update Commands
3.3.7.1
Command Name Command Description
UpdateSystemCode Update system code for the active controller. The controller needs to be
restarted for the new system code to take effect.
Parameter 1 Parameter Description
File Path:
<[DIR] <FileName>>
3.3.7.2
Command Name Command Description
UpdateBootCode Update boot code for the active controller. The controller needs to be
Parameter 1 Parameter Description
File Path:
<[DIR] <FileName>>
File Path:
Specify an existing System Code image file(FileName) located in the
specified directory.
restarted for the new boot code to take effect.
File Path:
Specify an existing Boot Code image file(FileName) located in the
specified directory.
3.3.7.3
Command Name Command Description
UpdateBIOSEFI Update BIOS and EFI firmware for the active controller. The controller
needs to be restarted for the new BIOS/EFI to take effect.
Parameter 1 Parameter Description
File Path:
<[DIR] <FileName>>
File Path:
Specify an existing BIOS/EFI image file(FileName) located in the
specified directory.
Page 27
5F, 38 TAIYUAN ST, JHUBEI, HSINCHU, TAIWAN, R.O.C.
TITLE EXPERAID COMMAND LINE INTERFACE USER GUIDE
PROJECT “DESKTOP RAID” DOCUMENT STATUS OFFICIAL RELEASE
REV. G–05-NOV-2007
ACCUSYS, INC.
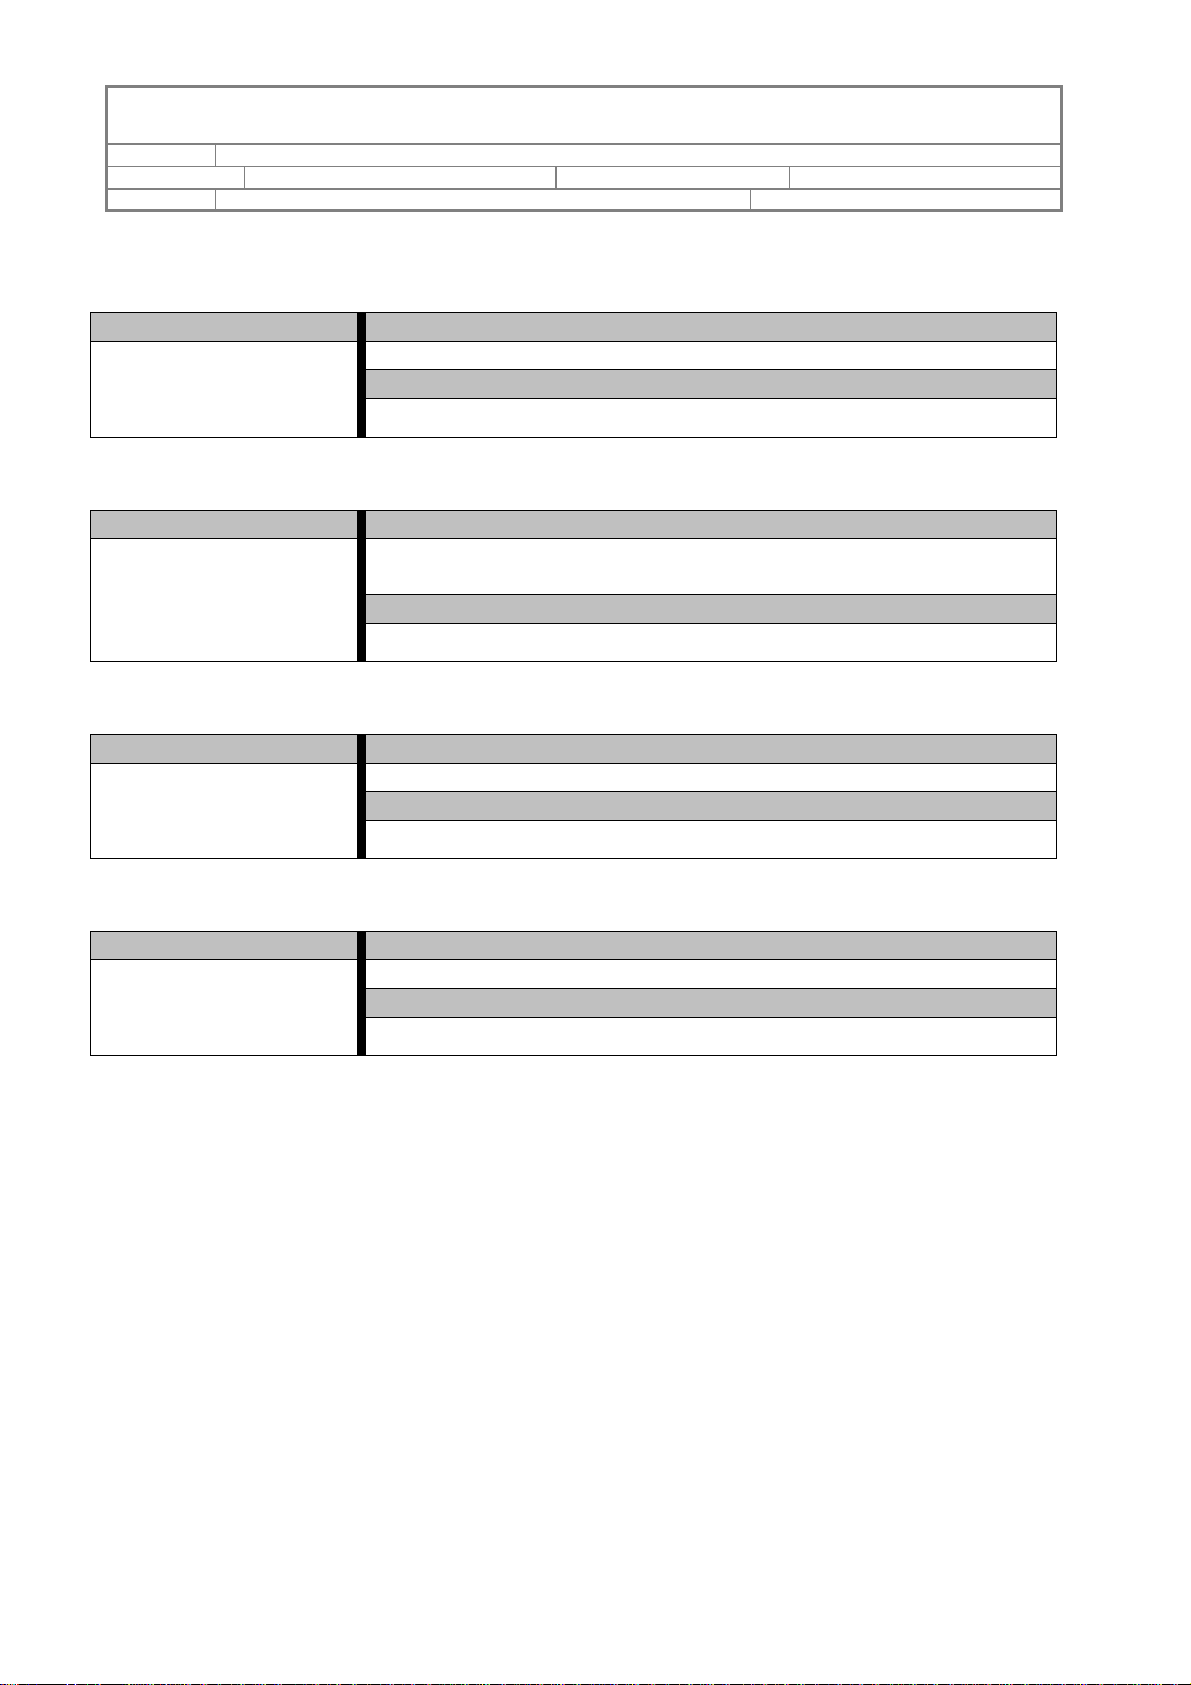
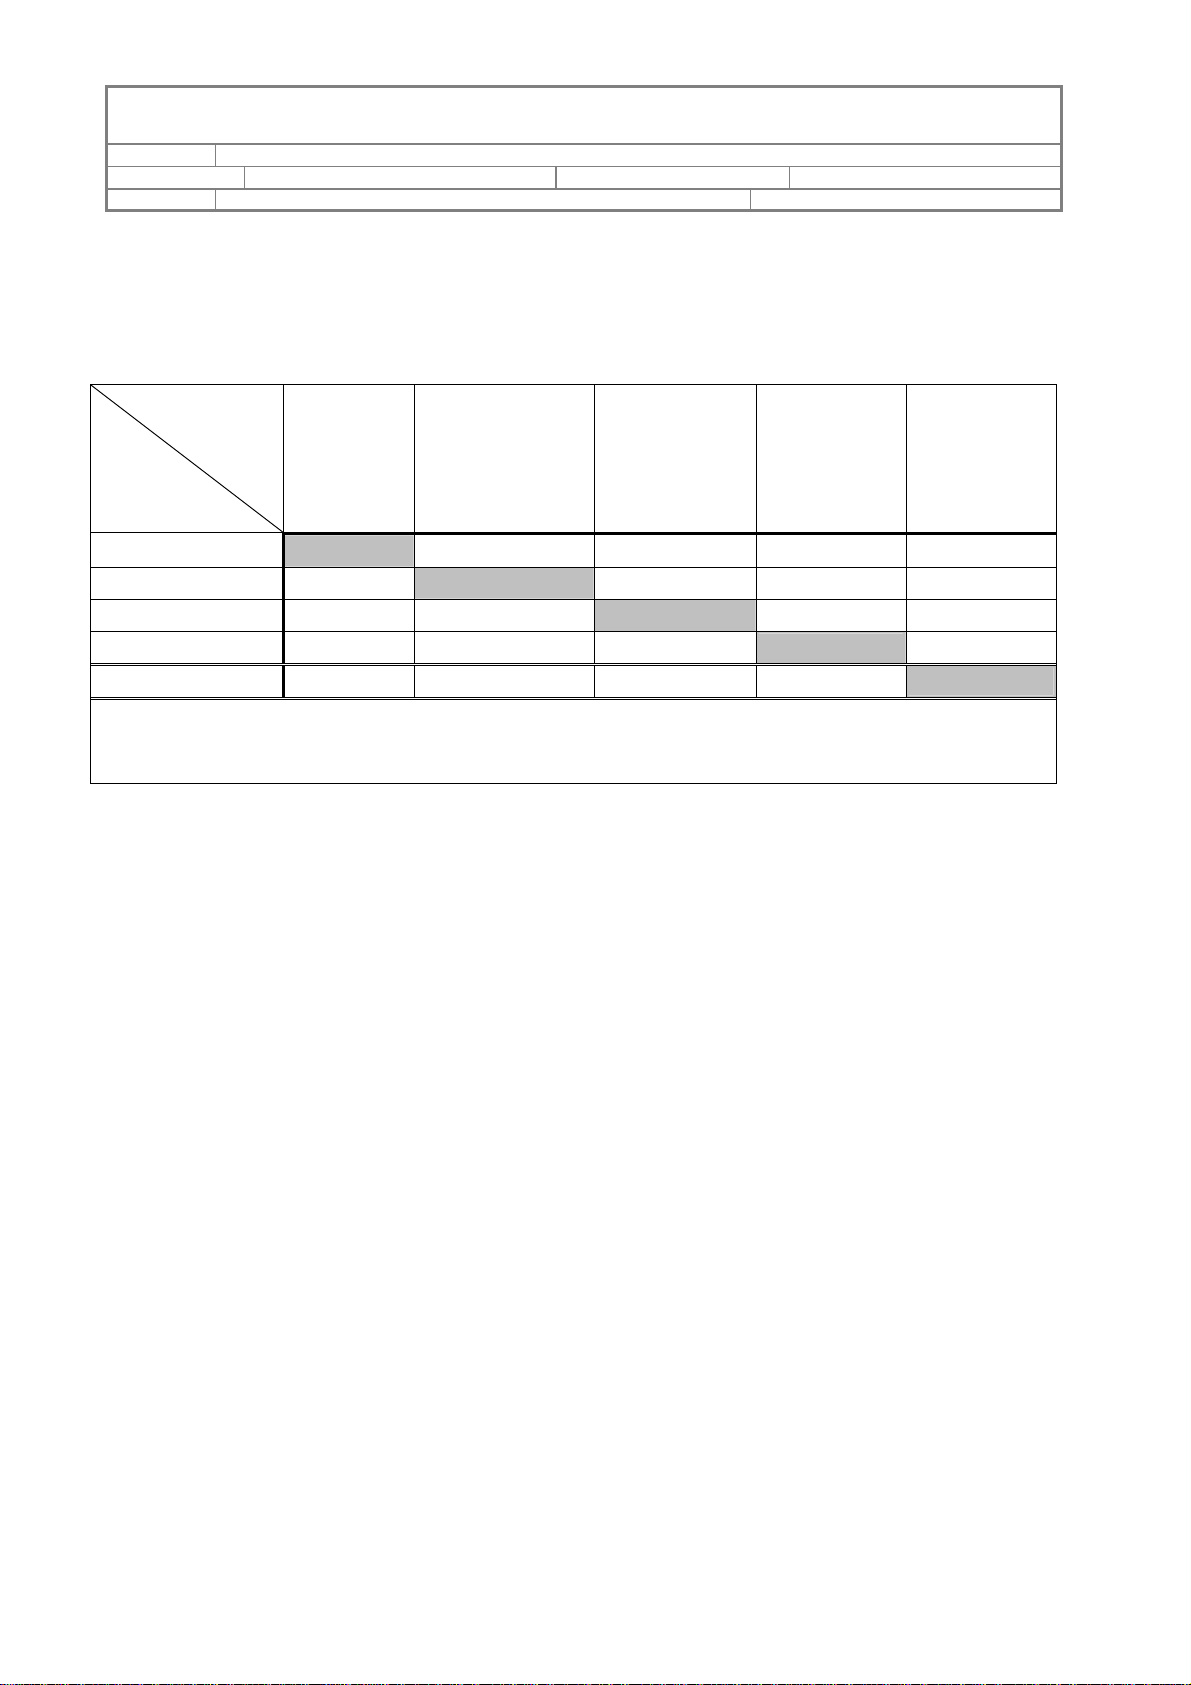
Appendix I.
Array Migration Matrix:
Target
RAID Level
Source
RAID Level
R0 R1 R5 R0+1 R6
PAGE 27 OF 27
R0 (N Disks)
R1 (N Disks)
R5 (N Disks)
R0+1 (N Disks)
R6 (N Disks)
Can’t Migrate
≧2
≧N-1
≧N/2
≧N-2
Can’t Migrate
Can’t Migrate
Can’t Migrate
≧N+1 ≧2N ≧N+2
≧3 ≧4 ≧5
≧N/2+1
≧2(N -1) ≧N/2+2
≧N+1
≧2(N-2) ≧N-1
Note: Most RAID levels can be migrated to other levels. The migration may require additional
disk(s) to be added. The data capacity of the new array is equal to or larger than the original array.
The variable 'N' represents the number of member disks in the "Source RAID" array.
 Loading...