

Page 1
OPERATING MANUAL
Terxon LX
Perfect security for home and office
Inv. 11738100
Page 2

Operating Instructions – Terxon L
Page 3

Contents
Introduction........................................................................................................................................... 4
1.
2. Usage in accordance with regulations ............................................................................................... 4
3. Zones and partitions ............................................................................................................................ 5
3.1. Zone .................................................................................................................................................... 5
3.2. Partition ............................................................................................................................................... 5
4. Overview operating panel .................................................................................................................... 6
5. Overview remote control...................................................................................................................... 7
6. Communication..................................................................................................................................... 7
6.1. Remote alarm...................................................................................................................................... 7
6.2. Downloading........................................................................................................................................ 7
7. Operating the alarm system ................................................................................................................ 8
7.1. Setting ................................................................................................................................................. 8
7.1.1. Setting the alarm system ............................................................................................................. 8
7.1.2. Setting additional partitions.......................................................................................................... 9
7.2. Unsetting ............................................................................................................................................. 9
7.3. Silencing an alarm............................................................................................................................. 10
7.4. Resetting the system......................................................................................................................... 10
7.5. Further options .................................................................................................................................. 10
7.5.1. Special user codes..................................................................................................................... 10
7.5.2. Panic alarm on operating panel ................................................................................................. 11
8. Troubleshooting.................................................................................................................................. 12
8.1. Alarm messages ............................................................................................................................... 12
8.2. Other messages................................................................................................................................ 13
8.3. Setting the system with zones active ................................................................................................ 14
8.3.1. Overview .................................................................................................................................... 14
8.3.2. Setting with “View Errors” .......................................................................................................... 14
8.3.3. Setting with “Ignore Errors”........................................................................................................ 14
9. System plan......................................................................................................................................... 16
These operating instructions are an important product accessory. They contain important information on
operating the burglar alarm system. Bear this in mind if you pass the product on to others. Store these
instructions in a safe place for future reference.
Page 4

Operating Instructions – Terxon L
1. Introduction
Dear Customer,
Thank you for purchasing the TERXON L burglar alarm system. You made the
right decision in choosing this state-of-the-art technology, which complies with the
current standards of domestic and European regulations.
The CE has been proven and all related certifications are deposited at the
manufacturer.
The TERXON L system uses the most modern technology for the comprehensive,
flexible protection of your private and commercial property. In combination with
other components such as detectors and signal transmitters, it secures the areas
to be monitored.
This user manual tells you how to set, unset and reset your alarm system. Before
you can do that, you have to enter your personal user code or hold your chip key (if
used) against the operating panel. The user code has 4 or 6 digits, depending on
the setting.
To ensure proper and safe operation, it is your obligation to observe these
operating instructions!
In the event of questions, please contact your engineer or local specialist dealer.
2. Usage in accordance with regulations
The alarm station contacts and connected components must be kept free of
moisture (bathrooms and similar surroundings are to be strictly avoided). Use of
this product for other than the described purpose may lead to damage of the
product. Other hazards such as short-circuiting, fire, electric shock, etc., are also
possible. The mains transformer is designed for operation with mains electricity at
230 Volt AC / 50 Hz.
No part of the product may be changed or modified in any way.
Connection to the public power network is subject to country-specific regulations.
Please be aware of applicable regulations in advance.
4
Page 5

Operating Instructions – Terxon L
3. Zones and partitions
This section explains the difference between a “zone” and a “partition”.
3.1. Zone
Your burglar alarm system contains a particular number of zones. Each zone is a
detection unit, such as a motion sensor or a door contact, which is monitored by
the system. Each zone has its own 4-digit number that identifies it uniquely.
Furthermore, a user-defined name up to 16 characters long can be used for simple
identification.
Your engineer has configured each zone for you individually. This ensures that
your new alarm system will work reliably and without false alarms. Whether or not
an alarm is triggered depends on the state of the system. If the system is set, an
alarm is triggered; if not, no alarm signal sounds.
3.2. Partition
Your engineer has set up your alarm system in such a way that it offers optimal
convenience.
By grouping one or more zones into partitions, you can use the system more
flexibly since you can set and unset individual partitions independently of each
other. Depending on how your alarm system is programmed, you can set and
unset specific areas only or you can have full access to the whole system.
5
Page 6

Operating Instructions – Terxon L
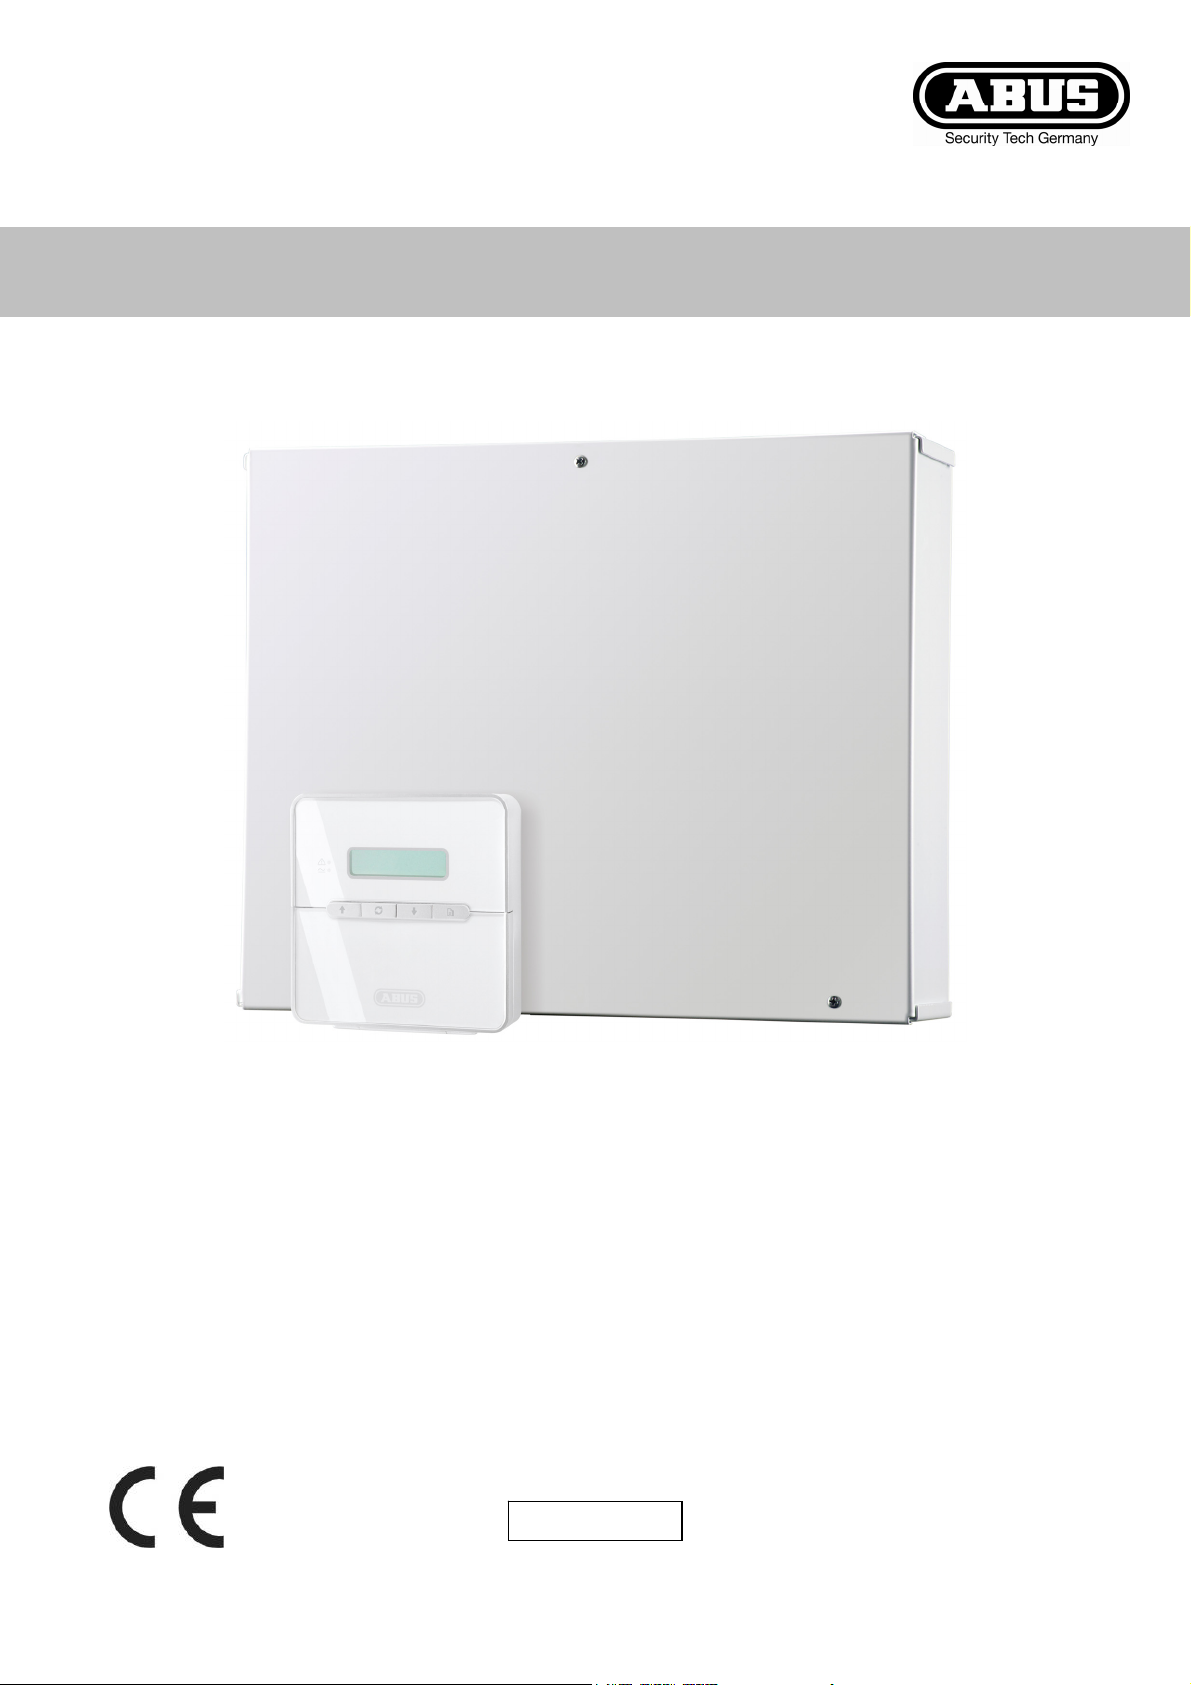
4. Overview operating panel
The most important element of your alarm system is the operating panel (keypad).
From this panel, you will control and operate the complete system.
Depending on installation, you have one or more operating panels, which are
located near important access points or in particular rooms. Each operating panel
offers the full range of features.
Using the operating panels, you can set/unset your alarm system. You can also
program and test the system.
1 Display
The operating panel display shows you important system information. A display
text plus the current date and time are also shown.
2 LED
Lights permanently if electric current is present.
3 Operation indicator
In the basic setting, this shows that more than one alarm message has to be
reset (see “Resetting the system” on page 10).
However, your engineer can program this display for other purposes.
4 Keypad
You use the keypad to control your alarm system and enter your code for
activating/deactivating the system.
Number keys (e.g., for activating the alarm system).
– Confirms displayed options.
5 Cover
For covering/uncovering the keys.
– Ends displayed options.
– Scrolls to next/previous page.
– Changes the attribute of the displayed option (e.g., Yes/No).
– Displays the user menu (only after you enter the user code). The
user menu contains options for administering the system. For example,
you can define and change user codes, omit zones, and view logged data.
6
Page 7

Operating Instructions – Terxon L
5. Overview remote control
The default functions of the keys are shown on the left. To avoid accidental
operation, for example when carrying the unit in a trouser pocket, you have to keep
a key pressed long enough to light the red LED on the remote control.
You can operate your Terxon L with the remote control only if you are near home
and are using a radio auxiliary (up to 40 metres, depending on the environment).
1 LED
2 Internal setting
3 Internal setting or Set all
The functions of the remote control keys described here are the standard setting.
The user can change the functions set. Ask your supplier for more information.
4 Internal setting
5 Unset all
6 Panic (FU5150 only)
6. Communication
This chapter describes the communication options of your Terxon L.
6.1. Remote alarm
The built-in modem of the central unit enables you to send the most varied system
messages to different telephone numbers. If you want to use this communication
device, make sure you fully understand the system operating instructions.
Otherwise, the external alarm system can fail or there may be permanent alarms.
6.2. Downloading
A personal computer (PC) can be linked to your alarm system through a telephone
line. This enables the system to be programmed and tested remotely.
This feature is known as downloading and is normally performed with your
authorisation by either your alarm company or an system administrator.
7
Page 8

Operating Instructions – Terxon L
7. Operating the alarm system
This chapter tells you how to operate your alarm system. It describes basic
functions such as Setting and Unsetting as well as more advanced features.
7.1. Setting
Before your alarm system can detect an attempted break-in and trigger an alarm, it
first has to be set. The next section tells you how to set it.
7.1.1. Setting the alarm system
To set your alarm system properly, carry out the steps described below.
Before activating, check that all relevant areas have been vacated and
all doors and windows closed. You cannot set the system if any zones
are open (see “Setting the system with zones active” on page 14).
BANNER TEXT
17:30 Sun 01 JAN
Set Partition?
Ptns > **……
Set Prtn 2?
ENT to Set With
Zones Omitted
ENT to Set With
Zones Shunted
Exit Now
Arming System
1. Enter your user code on the keypad or hold your chip key against the
control panel. You can press
without activating the system.
2. In the bottom line of the display, a “*” is used to identify the partitions you
can set. In this example, partitions 1 and 2, but not partitions 3–8 can be
set.
Complete setting:
To set the complete alarm system, press the
key and go to step 3. Setting
depends on the partitions assigned to the user.
Partial setting:
If you only want to set a partition, press the corresponding number key on the
number pad. For example, press 2 to select partition 2.
The display now shows the selected partition. To select a different area, press
or . The bottom line shows the partition name if assigned.
Confirm the selected partitions with
.
You now see a message informing whether zones have been omitted or
shunted. Press
to confirm.
3. Now leave the monitored area. You now hear a signal tone from the alarm
sounder for the length of the exit timeout (if not blocked by your engineer).
4. Close the outer door and press the terminator button (if fitted).
17:31 Sun 01 JAN
5. When the signal tone stops, the system is active.
Important ....................................................................................................................
If the signal tone changes to an alarm tone, read the section “Silencing an
alarm” on page 10. You can exclude zones from setting.
8
Page 9

BANNER TEXT
17:30 Sun 01 JAN
Operating Instructions – Terxon L
7.1.2. Setting additional partitions
If some partitions of your alarm system are already active and you want to set
further partitions, do the following:
1. Enter your user code on the keypad or hold your chip key against the
control panel.
ENT=Unset System
Ptns > *2……
Set Prtn 1?
Please Unset
System
2. The bottom line of the display shows partitions you can access and which
one of these are set/unset. In this example, you can access partitions 1
and 2, but only partition 2 is active.
3. If you only want to set a partition, press the corresponding number key on
the number pad. For example, press 1 to select partition 1.
4. Confirm the selected partition with
and continue with the next step
(see “Setting the alarm system“ on page 8).
7.2. Unsetting
To unset your alarm system, go to an operating panel and follow the instructions.
If the internal sounder is making a sound:
1. The internal alarm sounder will sound and you will see the message shown
left. Since you have entered an area monitored by the alarm system, the
entry timeout starts. The signal tone continues to sound until you unset the
system or the timeout expires.
2. Enter your user code on the keypad or hold your chip key against the
control panel.
The alarm system is now unset.
Important ....................................................................................................................
Due to the way your user code is programmed, you can only unset partitions to
which you have access.
ENT=Unset System
Ptns > 12*…..
Unset Prtn 2?
An alarm is triggered if you do not unset the alarm system within the preset
entry timeout.
If there is no sound (entry timeout has not started):
1. Enter your user code on the keypad or hold your chip key against the
control panel.
2. The bottom line of the display shows partitions you can access and which
are set/unset. In this example, you have access to partitions 1, 2 and 3, but
only partitions 1 and 2 are set.
You now have the following options:
To Unset all partitions:
Press
to unset all active partitions.
To Unset a single partition:
Press the number key on the keypad corresponding to a set partition. In this
example, press 2 to set partition 2.
The display shows the partition you have selected for Unsetting.
To select another partition, press
or . The bottom line shows the partition
name if defined by your engineer.
Confirm the Unsetting of the selected partitions with
.
9
Page 10

Alarm 002
01:53 Sat 01 Jan
! Alerts !
01:53 Sat 01 Jan
Operating Instructions – Terxon L
7.3. Silencing an alarm
If an alarm has occurred and you want to silence the sounders, do the following:
1. Enter your user code on the keypad or hold your chip key against the
control panel. This stops the alarm tone from the internal and external
alarm sounders.
Even if your user code does not give you access to the partition, the internal
and external alarm tones are stopped. However, the exits and the strobe are
not reset!
2. The display temporarily shows details of the alarm including the affected
zone, the date and the time.
3. An alarm message appears and tells you that the system must to be reset.
7.4. Resetting the system
By resetting the system, you can get an overview of the alarm messages in the
event memory. If you reset the system, the alarm messages of the display are
deleted. In some cases, you may not be able to set your alarm system until you
have reset it.
! Alerts !
17:38 Wed 16 MAR
0001 Faults
[ENT] To Scroll
ALARM 0003
08:13:45 01/01
Press ENT
To Reset
Important ....................................................................................................................
Every user can silence the sounders and view the alarm messages. However,
some alarms need an engineer code to reset the system.
If the system has to be reset, the keypad sounder may emit a warning chime
every minute.
To reset your alarm system:
1. Enter your user code on the keypad or hold your chip key against the
control panel when you see alarm messages on the display.
2. The display shows how many alarm messages there are (see figure on the
left).
3. Press
to view the messages one after the other.
Important ....................................................................................................................
You can press
to set/unset the system without deleting the alarm messages.
4. After reading each alarm message, the message shown on the left is
displayed and you can reset the system. Confirm reset with
.
The alarm messages should not continue to be displayed unless:
- The reason for the alarm still exists.
- You need an engineer to reset the system.
7.5. Further options
7.5.1. Special user codes
Depending on the configuration of your alarm system, special user codes can run
the following features:
10
Page 11

Operating Instructions – Terxon L
- Generate a silent duress alarm (duress code).
If you are forced to unset the alarm system, you can call for help with this.
A duress alarm is sent via the modem and the alarm system is unset.
- Generate a full panic alarm (panic code).
- Isolate zones.
You can isolate (shunt) zones from monitoring if, for example, you want to
leave a window open. If you enter the code again, the zone is reinstated
again (isolation code).
7.5.2. Panic alarm on operating panel
If keypad panic alarms are enabled, a panic alarm is generated by simultaneously
pressing keys 1 and 3.
11
Page 12

ALARM 0005
08:13:45 01/01
Operating Instructions – Terxon L
8. Troubleshooting
This chapter contains a summary of the messages displayed on the operating
panel when resetting the system (see “Resetting the system“ on page 10).
If you cannot clear an error yourself, contact the engineer.
8.1. Alarm messages
An alarm has occured. The zone number, date and time are displayed.
PSTN LINE FAULT
12:00 Sun 01 JAN
AC Mains Fault
Battery Fault
PANEL LID TAMPER
08:13:45 01/01
AUXILIARY X TAMP
12:00 Sun 01 JAN
BELL TAMPER
12:00 Sun 01 JAN
TEST CCTS FAILED
12:00 Sun 01 JAN
TAMPER 0001
Office Window
The built-in modem reports a fault in the telephone line. You cannot set your
system until the fault has been cleared.
There is no mains to the control unit and the system is running on its standby
battery. You cannot set your system until the mains power supply is restored. If this
fault continues indefinitely, the standby battery will fail and the system will switch
off.
The emergency power supply (standby battery) reports a fault or has been cut off.
You cannot set your system until the fault has been cleared.
The lid of the alarm centre was opened. You cannot set your system until the fault
has been cleared.
The alarm centre has additional tamper zones for monitoring auxiliary modules.
The lid of an auxiliary was opened. You cannot set your system until the fault has
been cleared.
The lid of the external bell was removed. You cannot set your system until the fault
has been cleared.
One or more sensors have failed an engineer test. You can set/unset your alarm
system, but you should contact the engineer.
This message is displayed if the tamper contact of a zone is triggered.
CALL ENGINEER TO
RESET SYSTEM
Reset Required
The engineer code or the remote reset code must be entered to reset the system.
Contact the engineer for an engineer reset.
12
Page 13

8.2. Other messages
Operating Instructions – Terxon L
SERVICE REQUIRED
12:00 Sun 01 JAN
RELEARN REQUIRED
12:00 Sun 01 JAN
CODE TAMPER
KEYPAD LOCKED !
! AUTO SETTING !
12:00 Sun 01 JAN
Engineer on Site
12:00 Sun 01 JAN
SYSTEM IS BUSY
PLEASE WAIT
Sorry, cannot set
Aux X tamp open
Sorry, cannot set
Bell box tamper
The alarm system needs servicing. You can still set or unset, but you should
contact the engineer.
The hardware configuration of the alarm system has changed. You cannot set your
system.
This message is displayed if an operating panel is locked after too many invalid
code entries. After five minutes, the message is automatically cleared and the
operating panel is unlocked.
The alarm system has an automatic setting feature that sets/unsets specific
partitions automatically at scheduled times. This message is displayed one minute
before the scheduled time and an setting gong sounds every 10 seconds to warn
you about the pending setting. If you have the right user code, you can delay
automatic setting by entering the code.
The engineer is on site and the logged into the alarm system. If necessary, you can
operate the system normally. This message is automatically cleared when the
engineer logs out.
Another user is currently accessing the alarm system. You cannot use your
operating panel as long as this message is displayed.
Cannot set because of a tamper fault on auxiliary zone 1 or 2. Clear the error.
Cannot set because of a tamper fault on the external sounder. Clear the error.
Sorry, cannot set
Equipment faulty
Sorry, cannot set
Zone in fault
Sorry, cannot set
Panel lid tamper
Sorry, cannot set
Mains Power off
Sorry, cannot set
Phone line fault
Sorry, keypad
Is locked out
Cannot set because of a fault from one or more components. Clear the error.
Cannot set because of a fault from one or more zones. Press
to view the zone
concerned. Clear the error.
Cannot set because of a tamper fault on the control unit. Clear the error.
Cannot set because there is no mains power at the control unit. Clear the error.
Cannot set because of a line fault from the remote signalling device. Clear the error.
The operating panel has been locked out of the system (normally by a keyswitch)
and cannot be used by other users.
13
Page 14

Following Zones
Are In Error :-
Office window
2002 Active
Operating Instructions – Terxon L
8.3. Setting the system with zones active
8.3.1. Overview
If you try to set the system while one or more zones are active, the system reaction
depends on whether the engineer has selection the option “View exit errors” or
“Ignore errors”.
8.3.2. Setting with “View Errors”
If “View exit errors” is set, set the system as follows:
1. The system gives a fault tone and interrupts the exit procedure.
2. The display scrolls automatically through the zones active automatically.
Office door
2001 Active
*NO ERROR ZONES*
PRESS ENT TO SET
Office window
2002 Active
Office door
2001 Active
3. Find out why the zones are active and rectify the cause.
4. When all zones are healthy, the display on the left appears. Confirm with
to start the exit procedure. Continue as normal.
Important ....................................................................................................................
To cancel setting without correcting the active zones, press
.
8.3.3. Setting with “Ignore Errors”
If “Ignore Errors” is set, do the following:
1. The system issues an acoustic error signal and the display shows all active
zones in sequence.
2. Find out why the zones are active and rectify the cause.
Important ....................................................................................................................
To cancel setting without correcting the active zones, enter your user code and
press
when prompted.
3. When all zones are healthy, continue as normal.
Set Fail:Ptns : 1…….
If zones are still active at the end of the exit procedure:
1. The internal sounder sounds, the external strobe flashes, and the display
shows the message on the left.
2. Enter your user code on the keypad or present your chip key to silence the
alarm. Repeat the procedure to reset your system.
14
Page 15

Operating Instructions – Terxon L
Index
alarm messages.................................................................................................... 12
alarm system
activating additional partitions............................................................................... 9
complete activation ............................................................................................... 8
deactivating on signal tone ................................................................................... 9
deactivating without signal tone............................................................................ 9
operating ............................................................................................................... 8
resetting .............................................................................................................. 10
downloading............................................................................................................ 7
duress alarm ......................................................................................................... 11
operating panel....................................................................................................... 6
panic alarm............................................................................................................ 11
on operating panel .............................................................................................. 11
partition ................................................................................................................... 5
activating ............................................................................................................... 8
partitions
deactivate all ......................................................................................................... 9
deactivating........................................................................................................... 9
remote alarm ........................................................................................................... 7
remote control......................................................................................................... 7
troubleshooting .................................................................................................... 12
zone.......................................................................................................................... 5
zones
isolate.................................................................................................................. 11
15
Page 16

9. System plan
This system plan provides information on components installed in your alarm system, their location and functioning, as well as any modifications. The system plan is
always a component on the alarm system and should be stored in a safe place.
Partition Description Zones User Zns shuntable Zns omittable Zns chime
Auto Set A
Time Switch A
Entry time
Sirene duration
16
Auto Set B Auto Set C
Time Switch B Time Switch C
Exit time Sirene delay
In the event of problems, please contact:
 Loading...