

Page 1
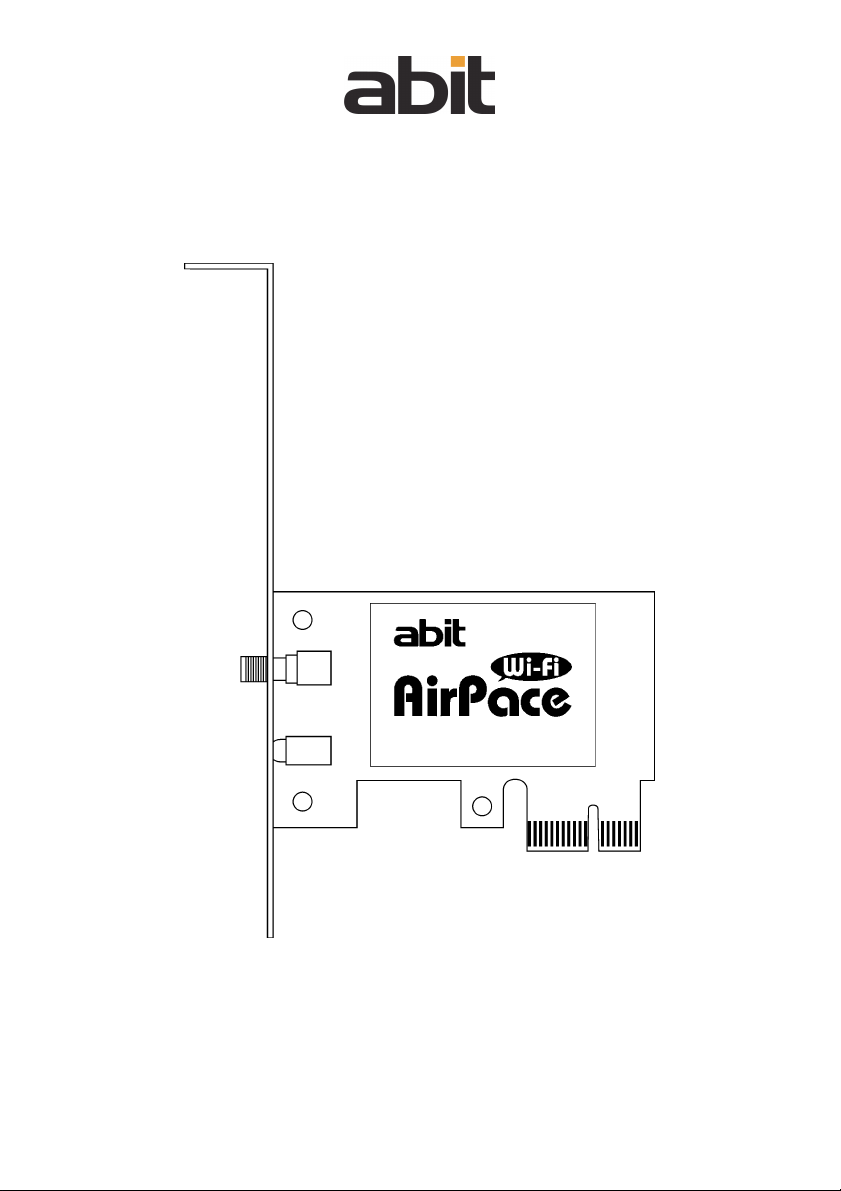
IEEE 802.11b/g PCI-E X1
54Mbps WLAN Card
WLP-01
User’s Manual
Page 2

WLP-01
User’s Manual
English
st
Edition, December 2006
1
ii WLP-01
Page 3

Contents
1. Introduction.........................................................................1
1.1 Product Overview ...........................................................................1
1.2 Features ........................................................................................2
1.3 LED & Antenna Port ........................................................................3
1.4 Choosing Wireless Network Mode.....................................................4
1.4.1 Ad-Hoc mode.........................................................................4
1.4.2 Infrastructure mode ...............................................................5
1.4.3 Software Access Point (Soft AP) ..............................................6
2. Hardware Installation..........................................................7
2.1 System Requirements .....................................................................7
2.2 Hardware Installation......................................................................7
2.2.1 Operating Range ....................................................................8
2.3 Driver Installation ...........................................................................8
3. Network Connecting ............................................................9
4. Setup ..................................................................................11
4.1 About the Setup Wizard and Setup Utility .......................................11
4.2 Setup Wizard................................................................................ 12
4.2.1 Create a wireless access point...............................................12
4.2.2 Join an existing wireless network........................................... 13
4.3 Setup Utility .................................................................................14
4.4 Ad-Hoc Mode ...............................................................................16
5. Appendix ............................................................................19
5.1 Wireless LAN Channels..................................................................19
5.2 Regulatory Information .................................................................20
5.2.1 Federal Communications Commission Statement ....................20
5.2.2 European Notice...................................................................21
5.2.3 NCC(DGT) Statement ...........................................................22
6. Contact Information ..........................................................23
WLP-01 iii
Page 4

General Specifications
WLAN Standard IEEE 802.11b/g, Wi-Fi compliant
Host Interface PCI Express
Data Rate 802.11b: 1, 2, 5.5, 11Mbps
802.11g: 6, 9, 12, 18, 24, 36, 48, 54Mbps
Frequency Range 2.4 GHz ISM radio band
Security WEP 64-bit encryption
WEP 128-bit encryption
WPA (Wi-Fi Protected Access)
Operating Range 802.11b: Indoor: 130ft (40m)
802.11g: Indoor: 80ft (30m)
(The range varies upon environments)
Supported Network Ad-Hoc Mode
Infrastructure Mode
Software Access Point (Soft AP)
Number of connected devices Up to 64 stations (AP Mode)
Antenna Omni-directional, SMA-type
Status Display Green data transmission (On Air) LED
Operating System Compatibility Windows XP/server 2003/64bit XP
Regulatory • FCC 47 CFR Part 15, Subpart C (Section 15.247),
• CE EN 300 328 V1.6.1/EN 50371
• DGT LP0002
• Telec ARIB STD-T66 / RCR STD-33
Outdoor: 1000ft (310m) LOS (Light of Sight)
Outdoor: 200ft (60m) LOS (Light of Sight)
ANSI C63.4-2003
iv WLP-01
Page 5

1. Introduction
1.1 Product Overview
The “WLP-01 IEEE 802.11b/g PCI-E X1 54Mbps Wireless Card” (short for “WLP-01” in
this manual) is an easy-to-use wireless local area network (WLAN) adapter designed for home
or office use.
Direct Sequence Spread Spectrum (DSSS), Complementary Code Keying (CCK), and
Orthogonal Frequency Division Multiplexing (OFDM) base band processing are implemented to
support all IEEE 802.11b, and 802.11g data rates. Differential phase shift keying modulation
schemes, DBPSK and DQPSK with data scrambling capability, are available, along with
complementary code keying to provide data rates of 1, 2, 5.5, and 11Mbps, with long or short
preamble.
A high-speed Fast Fourier Transform (FFT)/Inverse Fast Fourier Transform (IFFT) combined
with BPSK, QPSK, 16QAM and 64QAM modulation of the individual sub-carriers provides data
rates of 6, 9, 12, 18, 24, 36, 48 and 54Mbps, with rate-compatible punctured convolution
coding with a coding rate of 1/2, 2/3, and 3/4.
To provide efficient security to your wireless computing, the WLP-01 employs hardware-based
IEEE 802.11i encryption/decryption engine, including 64-bit/128-bit WEP, TKIP, and AES,
supporting Wi-Fi alliance WPA and WPA2 security.
With these features and many more, abit WLP-01 connects you to the wireless computing
world.
WLP-01 1
Page 6

1.2 Features
Easy Hardware Installation
Simply plug the WLP-01 into a motherboard with PCI-E x1 slot, connect the antenna, and then
install the driver and utilities. Now you may start wireless communication immediately.
54Mbps Wireless Speed
With data transmission rate five times faster than IEEE 802.11b standards, the WLP-01 breaks
the wireless transmission speed barrier, giving you faster-than-ever Internet connection and file
sharing capabilities.
Easy Setup Wizard
The setup wizard helps you to connect wireless network more easily through a step-by-step
setup process.
Automatic Wireless Establishment
The application utility of WLP-01 automatically searches and reports the hot spots found,
along with their signal quality and WEP capability. You can choose the most suitable wireless
node to connect.
Soft AP Capable
In a 32-bit Windows XP/Server 2003 operating system, you can transform the WLP-01 into a
Software Access Point (Soft AP), supporting up to 64 stations with wireless LAN adapters.
WLP-01 can even perform the AP functions when the computer dozes off, allowing the
connected wireless stations still able to access Internet or other network sharing so long as the
computer keeps the system power on.
Omni-directional Antenna
An external omni-directional antenna comes packed with your WLP-01, maximizing your
wireless coverage by positioning this omni-directional antenna up high.
2 WLP-01
Page 7
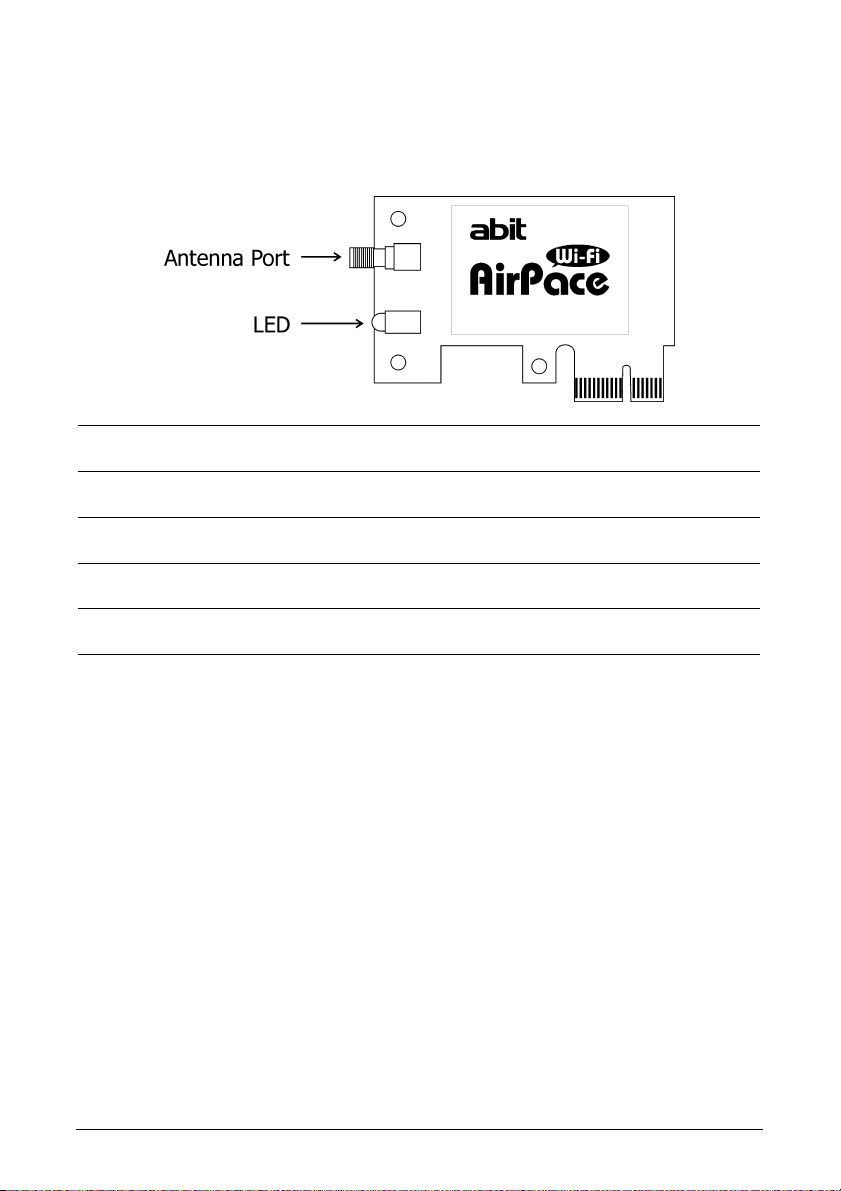
1.3 LED & Antenna Port
Mounted onboard the WLP-01 is a green LED for transmission status, and an antenna port to
connect to the external antenna.
LED Status Indication
On Power on, no data activity
Off Power off, no wireless connection
Fast Blinking Transmitting / receiving data
Slow Blinking Site surveying
WLP-01 3
Page 8
1.4 Choosing Wireless Network Mode
You can use WLP-01 in various wireless network configurations. It is recommended to choose
the most appropriate configuration for your home or office network before setting it up.
※ The following illustrations are for reference only, and may not match exactly
the same as your actual network configuration.
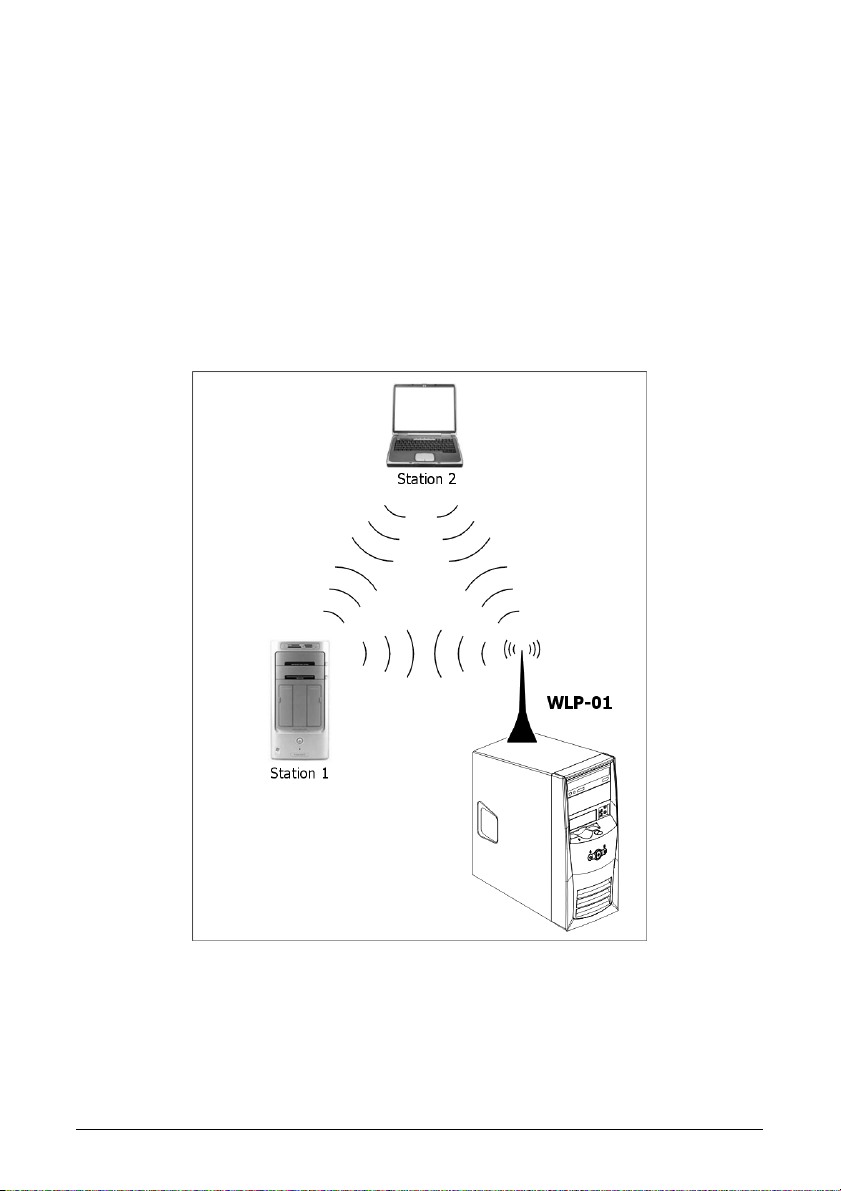
1.4.1 Ad-Hoc mode
In the Ad-Hoc mode, the WLP-01 brings your computer to act as a server within its effective
range and communicates directly with each other in the same LAN workgroup.
Select this configuration when no Access Point is present in your wireless network.
4 WLP-01
Page 9
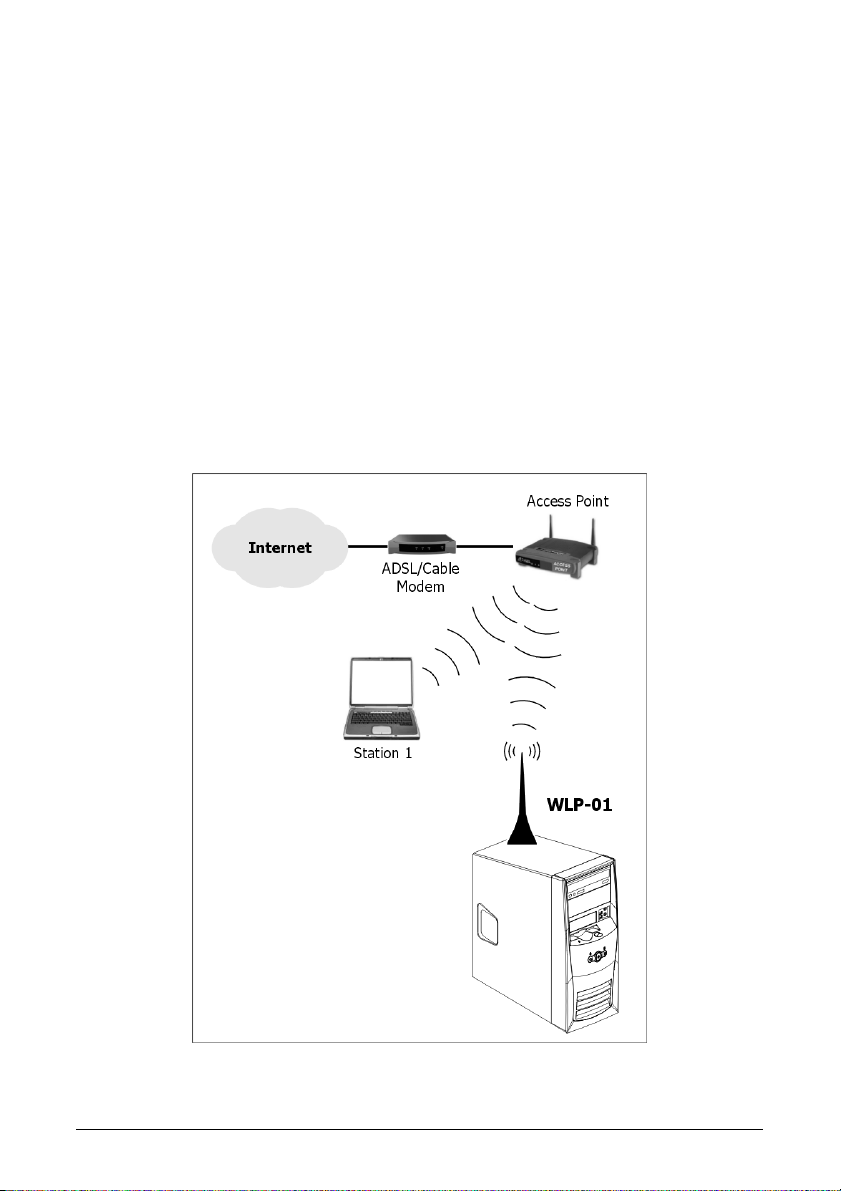
1.4.2 Infrastructure mode
The biggest difference between Infrastructure mode and Ad-hoc mode is that it includes an
access point. In the Infrastructure mode, an access point establishes the network that provides
wireless links in its effective range for clients to communicate with each other or with a wired
network to the Internet.
The Infrastructure networking has the following advantages over Ad-hoc networking:
• Range Extension
Each wireless LAN enabled computer within the range of the access point can
communicate with other wireless LAN enabled computers within the valid range of signal
from the access point.
• Roaming
A wireless LAN enabled computer can physically move from the operating range of one
access point to another without losing connection to the LAN. A quick association
“hand-shake” is made between the new access point and the wireless device as the
computer traverses from the coverage of one access point to another.
• Wired to wireless LAN connectivity
The access point establishes a bridge between wireless LAN and other wired counterparts.
WLP-01 5
Page 10

1.4.3 Software Access Point (Soft AP)
In the Soft AP mode, the WLP-01 acts as the wireless access point and provides local area
network and Internet access for your wireless stations.
Requirements of choosing Soft AP mode:
1. Windows XP/Server 2003 operating system.
2. A system with Internet or Intranet connected through another Ethernet LAN adapter.
The Soft AP mode is ideal for home network sharing with several computers, a printer, and
Internet connection.
※ Windows XP/Windows Server2003 x64 platforms are not supported to have
software access point capability.
6 WLP-01
Page 11

2. Hardware Installation
2.1 System Requirements
Before installing WLP-01, make sure your system meets the following requirements.
• A motherboard with PCI Express Slot
• Minimum 64MB system memory
• Operating system
Station mode: Windows XP/Server 2003, Windows XP/Server 2003 x64
AP/wireless bridge mode: Windows XP/Server 2003
• An optical drive for utilities and driver installation
2.2 Hardware Installation
The WLP-01 package comes together with an omni-directional portable antenna to extend its
maximum operating range.
1. Power off your system before installing
the WLP-01 card.
2. Locate one available PCI-E X1 slot on
your motherboard. (Due to each
motherboard’s different designing,
it is recommended to install the
WLP-01 card on PCI-E X1 slot, so as
to avoid degrading the speed of the
PCI-E X16 card.)
3. Plug the WLP-01 card with its
connector-side vertically down into the
slot. (Avoid touching the connector
(golden fingers) when holding the
WLP-01 card.)
4. Secure the WLP-01 card by its bracket
onto the chassis’s rear I/O panel.
5. Connect the cable-end from the external antenna to the antenna port on WLP-01 card.
6. Place the antenna at an elevated spot. A wide and open position will help to increase the
operating range.
(This picture is for reference only, and may have
size, shape, or parts differences in the antenna or
WLAN card itself.)
WLP-01 7
Page 12

2.2.1 Operating Range
The signal range of WLP-01 depends on the operating environment. Obstacles such as walls
and metal barriers could reflex or absorb radio signals. Devices such as microwave oven can
also interfere the wireless network tremendously.
802.11b: Indoor 130ft (40m), outdoor (LOS, Light-of-Sight) 1000ft (310m)
802.11g: Indoor 80ft (30m), outdoor (LOS, Light-of-Sight) 200ft (60m)
By default, the WLP-01 automatically adjusts the data rate. The closer the wireless stations
are, the better signal and transmit speed they receive. To improve your wireless transmission,
move your wireless stations closer to the WLP-01.
2.3 Driver Installation
Place the “Driver & Utility CD” into the CD-ROM drive in your system. The following installation
auto-run screen appears. If not, browse the root directory of the CD-ROM via the File Manager,
and double click the “AUTORUN” file.
The contents of the “Driver & Utility CD” packed with WLP-01 are subject to change without
notice. Visit the abit
If your computer is using Windows operating system, it will automatically detect the WLP-01
when system boots and displays an “Add New Hardware Wizard” window. Click [Cancel] and
then proceed with the following procedures.
To install the WLP-01 driver:
1. Place its “Driver & Utility CD” into the CD-ROM drive.
2. The “Driver & Utility CD” automatically displays the Drivers menu if the “AUTORUN”
function is enabled in your computer. Click the wireless driver and follow the on-screen
instructions to install the WLP-01 driver.
※ If the “AUTORUN” function is disabled in your computer, locate the Wireless
folder under the root directory of the “Driver & Utility CD”, then double click the
[Setup.exe] file to start installation.
website for driver/utilities updates.
3. Make sure to select the correct
operating-channel plan according to your
residence so as to avoid possible legal
litigation.
※ To use the “Soft AP” function, you may need to install Ethernet adapter driver.
8 WLP-01
Page 13

3. Network Connecting
1. Right-click the network icon located at the
desktop shortcut, the pop-up dialogue
appears. Click item “View Available
Wireless Networks”.
2. Choose a wireless network in range, and
then click [Connect] button to start
connecting.
3. Wait while the Windows connects to the
wireless network you choose.
4. You may need to type the network key if
the network you choose requires.
WLP-01 9
Page 14

5. The wireless network you choose is now
connected.
6. You may view the “Wireless Network
Connection Status” by clicking item
“Status” in the pop-up dialogue.
10 WLP-01
Page 15

4. Setup
After finished installing the WLP-01 driver to your system, you are now ready setup its utility.
Choose the most appropriate mode for your wireless network before proceeding. Refer to
Section 1.4 “Choosing Wireless Network Mode” for details.
※ Make sure to connect the supplied antenna to the antenna port on the WLP-01
card. The antenna plays an important role in transmitting and receiving signal,
without the antenna, the WLP-01 may not be able to detect other wireless
devices in your environment.
4.1 About the Setup Wizard and Setup Utility
The WLP-01 provides two configuration approaches: the Setup Wizard and the Setup Utility.
The Setup Wizard helps you to:
1. create a wireless access point, or
2. join an existing wireless network.
The Setup Utility helps you to:
1. view Network Monitor, Status, Statistics, Advanced, and Internet Connection Sharing (ICS).
2. configure the WLP-01 as an access point, or wireless station (in either Infrastructure or
Ad-hoc mode).
3. enable or disable the RF function (Radio On/Off).
To launch the Setup Utility in the Windows desktop, you may click item
“Open” by the “abit AirPace Wi-Fi” icon located at the desktop shortcut,
execute the “abit AirPace Wi-Fi” in the Program menu, or simply
double-clicking the desktop shortcut.
To switch to the Setup Wizard, right-click the
“abit AirPace Wi-Fi” icon located at the
desktop shortcut, the pop-up dialogue
appears. Click item “SoftAP Wizard”.
WLP-01 11
Page 16

4.2 Setup Wizard
4.2.1 Create a wireless access point
1. Launch the Setup Wizard. Check the
“Create a wireless access point” box to
create a wireless access point, and then
click [Next] button to start creating.
2. Type in your SSID name, and/or specify a
network key to your network.
3. Select the connection that connects
directly to your network, and then click
[Next] button to go on.
12 WLP-01
Page 17

4. Your wireless network is now ready to use.
The configuration is clearly at view.
Record this setup information if needed.
Click [Finish] button to complete the setup
wizard.
5. The network mode is switching to AP
Mode, please wait.
6. Your network is in AP Mode.
4.2.2 Join an existing wireless network
Please use Windows automatic network configuration to connect an existing wireless network or
change the wireless network settings.
WLP-01 13
Page 18

4.3 Setup Utility
1. Launch the Setup Utility. There are five
icons at the upper column:
Network Monitor,
Status,
Statistics,
Advanced, and
Internet Connection Sharing (ICS).
The ICS icon is grayed out in Station
Mode.
2. At the left column, you may click the
icon to switch either to Access Point
Mode or Station Mode.
3. The network mode is switching to AP
Mode, please wait.
4. Or the network mode is switching to
Station Mode, please wait.
14 WLP-01
Page 19

5. In this Setup Utility page for AP Mode, you
can change the SSID, select the
communication channel, and specify the
network security.
Click [Close] button to finish the setup.
6. At the left column, you may also click the
icon to enable or disable the RF
function (Radio On/Off).
WLP-01 15
Page 20

4.4 Ad-Hoc Mode
1. To switch to Ad-Hoc mode, you may
double-click the “Network Connection”
icon in the “Control Panel”, or right-click
the network icon located at the desktop
shortcut, the pop-up dialogue appears.
Click item “Open Network Connections”.
2. Double-click the “abit AirPace Wi-Fi
Wireless Network Adapter” icon to enter
its properties.
16 WLP-01
Page 21

3. Click the “Wireless Networks” tab. Check
the “Use Windows to configure my
wireless network settings” box.
Click the [Advanced] button to enter the
settings.
4. Check the “Computer-to-computer (ad
hoc) networks only” box, and then click
[Close] button to finish this advanced
settings.
WLP-01 17
Page 22

5. Back to the “Wireless Networks” tab, click
the [Add] button to establish your own
network.
6. Type in your SSID name, decide your
network security, and then click [OK]
button to finish settings.
7. Your network is in Ad-Hoc Mode.
18 WLP-01
Page 23

5. Appendix
5.1 Wireless LAN Channels
Channels Country Channel Set
1~11 Argentina, Brazil, Canada, Columbia, Mexico, Taiwan, United
States of America, Yugoslavia
1~13 Australia, Austria, Bahrain, Belarus, Belgium, Bolivia, Bulgaria,
Chile, China, Costa Rica, Croatia, Cyprus, Czech Republic,
Denmark, Egypt, Estonia, Finland, France2, Germany, Greece,
Hong Kong, Hungary, Iceland, India, Indonesia, Ireland, Italy,
Kuwait, Latvia, Lebanon, Liechtenstein, Lithuania, Luxembourg,
Macedonia, The Former Yugoslav Republic of, Malaysia,
Morocco, Netherlands, New Zealand, Nigeria, Norway, Panama,
Paraguay, Peru, Philippines, Poland, Portugal, Puerto Rico,
Romania, Russia, Saudi Arabia, Singapore, Slovakia, Slovenia,
South Africa, South Korea, Sweden, Switzerland, Thailand,
Turkey, United Arab Emirates, United Kingdom, Uruguay,
Venezuela
10 ~ 13 France, Jordan France
3~9 Israel Israel
1~14 Japan1 MKK1+MKK
14 only Japan2 MKK
10~11 Spain Spain
FCC, IC,
TAIWAN
ETSI, MKK1
WLP-01 19
Page 24

5.2 Regulatory Information
5.2.1 Federal Communications Commission Statement
This device complies with Part 15 of the FCC Rules. Operation is subject to the following two
conditions:
(1) This device may not cause harmful interference.
(2) This device must accept any interference received, including interference that may cause
undesired operation.
Any changes or modifications (including the antennas) made to this device that are not
expressly approved by the manufacturer may void the user’s authority to operate the
equipment.
This equipment complies with FCC RF radiation exposure limits set forth for an uncontrolled
environment. This device and its antenna must not be co-located or operating in conjunction
with any other antenna or transmitter.
This Transmitter must not be co-located or operating in conjunction with any other antenna or
transmitter.
This equipment complies with FCC RF radiation exposure limits set forth for an uncontrolled
environment. This equipment should be installed and operated with a minimum distance of 20
centimeters between the radiator and your body.
Any changes or modifications (including the antennas) made to this device that are not
expressly approved by the manufacturer may void the user’s authority to operate the
equipment.
20 WLP-01
Page 25

5.2.2 European Notice
Products with the CE Marking comply with both the EMC Directive (89/336/EEC) and the Low
Voltage Directive(73/23/EEC) issued by the Commission of the European Community.
Compliance with these directives implies conformity to the following European Norms
• EN 55022 (CISPR 22) Radio Frequency Interference
• EN 55024(EN61000-4-2, EN61000-4-3; EN61000-4-4; EN61000-4-5; EN61000-4-6;
EN61000-4-8; EN61000-4-11; EN61000-3-2; EN61000-3-3)Generic Immunity Standard.
• EN60950 (IEC950) Product Safety
R&TTL(CE) MANUAL REGULATORY REQUIREMENT(WLAN-IEEE 802.11b/g)
802.11b/g Restrictions
• European standards dictate maximum radiated transmit power of 100mW EIRP and
frequency range 2.400-2.4835GHz
• In France, the equipment must be restricted to the 2.4465-2.4835GHz is herewith
confirmed to comply with the requirements set out in the Council Directive on the
Approximation of the Laws of the Member States relating to Electromagnetic Compatibility
(89/336/EEC), Low-voltage Directives (73/23/EEC) and the Amendment Directive
(93/68/EEC), the procedures given in European Council Directive 99/5/EC and
89/3360EEC.
CE Declaration of Conformity
The equipment was passed. The test was performed according to the following European
standards.
EMC
• EN 301 489-1 V1.4.1:2002; EN 301 489-17 V1.2.1:2002
Radio
• EN 300 328 V1.6.1 (2004)
Safety & Health
• EN 60950-1(2001); EN 50385(2002)
WLP-01 21
Page 26

5.2.3 NCC(DGT) Statement
根據交通部 低功率管理辦法 規定:
第十四條
經型式認證合格之低功率射頻電機,非經許可,公司、商號或使用者均不得擅自變更頻率、加大功
率或變更原設計之特性及功能。
第十七條
低功率射頻電機之使用不得影響飛航安全及干擾合法通信;經發現有干擾現象時,應立即停用,並
改善至無干擾時方得繼續使用。
前項合法通信,指依電信規定作業之無線電信。低功率射頻電機須忍受合法通信或工業、科學及醫
療用電波輻射性電機設備之干擾。
User Information for Consumer Products Covered by EU Directive 2002/96/EC on Waste Electric
and Electronic Equipment (WEEE)
This document contains important information for users with regards to the proper disposal and
recycling of abit products. Consumers are required to comply with this notice for all electronic
products bearing the following symbol
22 WLP-01
Page 27

6. Contact Information
Taiwan Head Office
Universal ABIT Co., Ltd.
No. 323, Yang Guang St., Neihu,
Taipei, 114, Taiwan
Tel: 886-2-8751-3380
Fax: 886-2-8751-3381
Sales: sales@abit.com.tw
Marketing: market@abit.com.tw
North America, South America
Universal ABIT (USA) Corporation
2901 Bayview Drive,
Fremont, CA 94538, U.S.A.
Tel: 1-510-623-0500
Fax: 1-510-623-1092
Website: http://www.abit-usa.com
Latin America: ventas@abit-usa.com
RMA Center: http://rma.abit-usa.com
UK, Ireland
Universal ABIT UK Corporation
Unit 3, 24-26 Boulton Road, Stevenage,
Herts SG1 4QX, UK
Tel: 44-1438-228888
Fax: 44-1438-226333
for technical support:
technical@abitcomputer.co.uk
for RMA no direct technical support:
returns@abitcomputer.co.uk
Tel: 44-1438-362088
Germany and Benelux (Belgium,
Netherlands, Luxembourg), France, Italy,
Spain, Portugal, Greece, Denmark,
Norway, Sweden, Finland, Switzerland
Universal ABIT NL B.V.
Jan van Riebeeckweg 15, 5928LG,
Venlo, The Netherlands
Tel: 31-77-3204428
Fax: 31-77-3204420
Chamber of Commerce Venlo – number
12062448
Austria, Czech, Romania, Bulgaria,
Slovakia, Croatia, Bosnia, Serbia,
Macedonia, Slovenia
Universal ABIT Austria Computer
GmbH
Schmalbachstrasse 5, A-2201 Gerasdorf /
Wien, Austria
Tel: 43-1-7346709
Fax: 43-1-7346713
Contact: office@abit-austria.at
Website: http://www.abit-austria.at
Shanghai
Universal ABIT (Shanghai) Co. Ltd.
FL 19 Xuhui Yuan BLOG NO.1089
ZhongShan s 2 RD, ShangHai 200030
The People's Republic of China
Tel: (86-21) 54102211
Fax: (86-21) 54104791
Website: http://www.abit.com.cn
Poland
Universal ABIT Poland (Rep. office)
Strzegomska 310/2, 54-432 Wroclaw
Tel: +48-71-718-12-39
Fax: +48-71-718-12-38
Contact: Grzegorz Morgiel
Turkey
Universal ABIT Turkey (Rep. office)
Tel: 90 532 211 6860
Iran
Universal ABIT (Rep. office)
No.50, Valiasr Computer Center, Valiasr St.
Tehran Iran
Tel: 98-21-88943672
Fax: 98-21-88941655
Contact: Alireza Khoshdel
Appendix
WLP-01 23
Page 28

Rev. 1.00
http://www.abit.com.tw
 Loading...