

Page 1

Page 2

Product name: Network Camera (IPCAMW45)
Release Date: 2007/06/05
Manual Revision: 1.2
Web site: http://www.4xem.com/
Email: mailto:technical@4xem.com
mailto:sales@4xem.com
Made in Taiwan. ©Copyright 2007-2012. All rights reserved
Page 3

Table of Contents
Before You Use This Product ..........................................................................1
Package Contents ......................................................................................... 2
Installation .................................................................. ................................3
Hardware Installation ................................................................................................ 3
Software Installation.......................... ................................................................ ........ 4
Initial Access to the Network Camera.......................................................................... 5
Check Network Settings.............................................................. 5
Add Password to Prevent Unauthorized Access...............................5
How To Use
Installing Plug-in..................... .................................................................................. 6
Primary User’s Capability............... ... .. ...... .. ... .. ... ..... .. ... ... .. ..... ... .. ... .. ... ..... ... .. ... .. ...... .. 7
Main Screen with Camera View............................ ........................7
Digital Zoom .............................................................................7
Snapshot ..................................................................................8
Client Settings........................................................................... 8
Digital Output............................................................................ 9
Administrator’s Capability
Fine-tuning for Best Performance............................................... 10
Opening Accounts For New Users............................................... 12
Build a Security Application................................................ ....... 13
Software Revision Upgrade ....................................................... 14
Configuration ............................................................................................. 15
System Parameters ..................................................................................................16
Security Settings........................ .. ... .. ...... .. ... .. ... ..... .. ... ... .. ..... ... .. ... ... ..... .. ... .. ..... ... ... .17
Network Settings......................................................................................................18
Network Type.......................................................................... 18
HTTP ...................................................................................... 19
RTSP Streaming....................................................................... 19
DDNS......................................................................................................................19
Access List......................... ... .. ..... ... .. ... ... ..... .. ... .. ..... ... ... .. ... ..... .. ... .. ... ..... ... .. ... .. ...... .20
Audio and Video
General .................................................................................. 21
Video Settings ......................................................................... 21
www.4XEM.com
T: 1-866-999-4XEM
F: 1-519-754-0686
Page 4

Video Orientation..................................................................... 22
Audio settings ............ ............................................................. 22
Image Settings........................................................................ 22
Email & FTP
Email...................................................................................... 23
FTP ................................... ..................................................... 24
Motion Detection......................................................................................................25
Application Settings.......................................................... ... .. ... ..... ... .. ... .. ..... ... .. ... ... .26
Snapshot ................................................................................ 26
Video Clip ............................................................................... 28
Digital Output.......................................................................... 30
System Log........... ...................................................................................................31
Viewing System Parameters ......................................................................................32
Maintenance............................................................................................................32
Appendix
A. Troubleshooting............................................ .. ..... ... ... .. ... ..... .. ... .. ... ..... ... .. ... ..... ... .33
Status LED.............................................................................. 33
Reset and Restore......................................................... ........... 33
B. URL Commands of the Network Camera.................................................................34
Get server parameter values ..................................................... 34
Set server parameter values .............................. .... .... .... .... .... ... 35
Available parameters on the server ............................................ 36
Application page CGI command ................................................. 45
Capture single snapshot............................................................ 47
Account management............................................................... 48
System Logs ........................................................................... 49
Configuration file ..................................................................... 49
Upgrade Firmware.................................................................... 50
C. Technical Specifications ............ ... ..... ... .. ... .. ... ..... .. ... ... .. ... ..... .. ... .. ... ... ..... .. ... .. ... .. ..51
Technology License Notice ........................................................................... 52
Electromagnetic Compatibility (EMC) ............................................................. 53
Liability ..................................................................................................... 53
www.4XEM.com
T: 1-866-999-4XEM
F: 1-519-754-0686
Page 5

r
Before You Use This Product
The use of surveillance device s may be prohibited by law in y our country . The Ne twork Camera
is not only a high-performance we b-ready camera but also can be par t of a flexible surveillance
system. It is the user’s responsibility to ensure that the operation of such devices is legal before
installing this unit for its intended use.
It is important to first verify that all contents received are complete according to the list in the
"Package Contents" chapter. Take notice of the warnings in the “Quick Installation Guide”
before the Network Camera is installed, then carefully read and follow the instructions in the
“Installation” chapter to avoid damages due to faulty assembly and installation. This also
ensures the product is used as intended.
The Network Camera is a network device and its use should be straightforward for those who
have basic network knowledge. The “Troubleshooting” chapter in the Appendix provides
remedies to the most common errors in set up and configuration. You should consult this
chapter first if you run into a system error.
The Network Camera is designed for various applications including video sharing, general
security/surveillance, etc. The “How to Use” chapter suggests ways to best utilize the
Network Camera and ensure proper operations. For the creative and professional developers,
the "URL Commands of The Network Camera " chapter serves to be a helpful reference to
customize existing homep ages or integrating with a curre n t web server.
For paragraphs preceded by the reader should use caution to understand
completely the wa rnings. Ignoring the warnings may result in serious hazards o
injuries.
1.
www.4XEM.com
T: 1-866-999-4XEM
F: 1-519-754-0686
-1-
Page 6
Package Contents
IPCAMW45
Power adapter
Camera stand
Software CD
Quick installation guide
Warra nty card
www.4XEM.com
-2-
T: 1-866-999-4XEM
F: 1-519-754-0686
Page 7

r
Installation
In this manual, "User" refers to whoever has access to the Network Camera, and
"Administrator" refers to the person who can configure the Network Camera and grant user
access to the camera.
Hardware Installation
Using the Power Adapter as power source:
1. Plug the Ethernet cable into the Network Camera.
2. Connect the Power Adapter to the Network Camera.
3. Plug the Power Ada p ter into electrical outlet.
4. Observe LED status lights (status light progression specified
below).
Using Power over Ethernet PoE as power source:
1. Connect one end of Ethernet cable to 12V PoE injecto
The Ethernet cable
should meet the specs
of UTP category 5 and
not exceed 100 meters
in length.
Status LED Color Description
Blinking Red Power is being supplied to the camera.
Steady Green The camera is booting up.
Blinking Orange & Green The camera is trying to obtain an IP address.
Steady Orange An IP address is successfully assigned to the camera.
Blinking Orange & Red The camera is wor king.
Fast Blinking Orange & Red During firmware upgrading.
Proceed to software installation when the LED status light blinks orange & red .
(purchased separately).
2. Connect the other end of Ethernet cable to the Network
Camera.
3. Observe LED status lights (status light progression specified
below).
The Power Adapter is not used when powering with PoE.
- 3 -
www.4XEM.com
Page 8

Digital Input/Output Terminal
This Network Camera provides a general I/O termina l
block with one digital input and one digital output
device control.
Software Installation
When the hardware installation is complete, users can use the Installation Wizard program
included in the product CDROM to find the location of the Network Camer a . There ma y be
many Network Camera s in the local network. User s can differentiate the Network Ca meras
with the serial number. The serial number is printed on the labels on the carton and the
back of the Network Camera body. Please refer to the user ’s manual for the Installati on
Wizard for more details.
Once the installation is complete, the Administrator should proceed to the next
section "Initial access to the Network Camera" for necessary checks and
configurations.
- 4 -
www.4XEM.com
Page 9
Initial Access to the Network Camera
Check Network Settings
The Network Camera can be connected either before or immediate ly after software inst allation
onto the Local Area Network. The Administrator should complete the network settings on the
configuration page, including the correct subnet mask and IP address of the gateway and the
DNS Servers. Ask your ne twork administrator or Inte rnet service provider for the details. If any
setting is entered incorrectly and you cannot proceed with setting up the N etwork Camera,
restore the factory settings following the steps in the “Troubleshooting” chapter in the
Appendix.
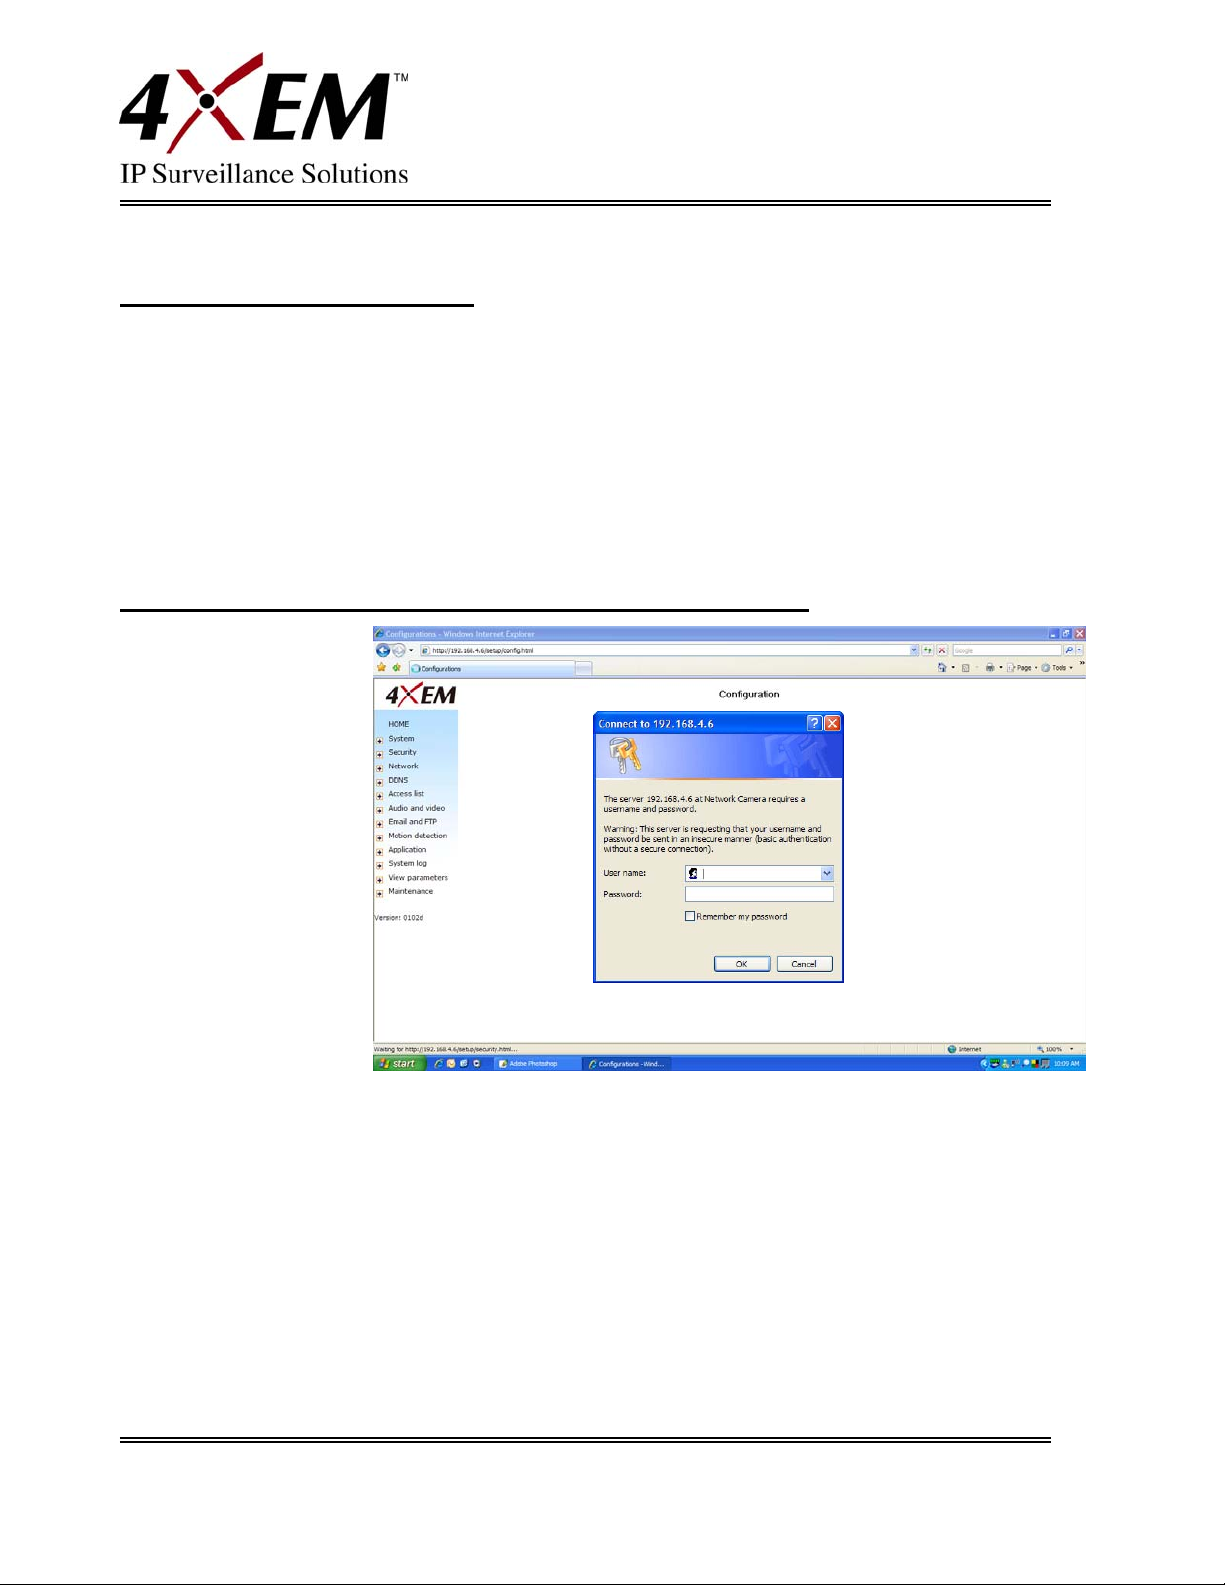
Add Password to Prevent Unauthorized Access
The default
Administrator’s
password is blank and
the Network Camera
initially will not ask for
any password. The
Administrator should
immediately assign a
new password as a
matter of prudent
security practice.
Once the
Administrator’s
password is saved,
the Network Camera will ask for the user’s name and password before each acce ss. The
Administrator can set up a maximum of twenty (20) user accounts. Each user can access the
Network Camera except to perform system configuration. Some critical functions such as
system configuration, user administra tion, a nd software upgrade s are accessible only by the
Administrator . The user name for the Administrator is permanently assigned as “root”. Once the
password is changed, the bro wser will display an authentication window to ask for the new
password. Once the password is set, there is no provision to recover the
Administra t o r’ s p a s s w or d. The onl y op t i o n is to restore to the original factory
default settings.
- 5 -
www.4XEM.com
Page 10

How to Use
Installing Plug-in
For the initial access to the Network Camera in Windows, the we b browser may prompt for
permission to install a new plug-in f or the Network Camera. Permiss ion request depends on the
Internet security settings of the user’s PC or notebook. If the highest secur ity le v el is set, the
computer may
prohibit any
installation and
execution
attempt.
This plug-in has
been registered
for certificate and
is used to display
the video in the
browser. Users
may click on
to
proceed. If the
web browser does
not allow the user
to continue to
install, check the
Internet security option and lower the security levels or contact your IT or networking
supervisor for help.
- 6 -
www.4XEM.com
Page 11

Primary User’s Capability
Main Screen with Camera View
Snapshot: Opens a still
picture of current view in
new window.
Client Settings:
Configures local Browser
settings.
Configuration:
Provides access to all
camera configuration
options.
Camera View: Live
streaming video.
Digital Zoom
Click on the magnifier
icon under the camera
view then the digital zoom
control panel will be
shown. Uncheck “Disable
digital zoom” and use the
slider control to change
the zoom factors.
- 7 -
www.4XEM.com
Page 12

Snapshot
Click on Snapshot, web
browser will pop up a new
window to show the
snapshot. Users can point
at the snapshot and click
the right mouse button to
save it.
Client Settings
There are two settings
for the client side:
Media Options to
determine the type of
media to be streamed
and Protocol Options
which allows choice of
connection protocol
between client and
server. There are two
protocol choices to
optimize your usage –
UDP and TCP.
- 8 -
www.4XEM.com
Page 13

The UDP protocol allows for more real-time audio and video streams. However, some packet s
may be lost due to network burst traffic and images may be obscured. The TCP protocol allows
for less packet loss and produces a more accurate video display. The downside with this
protocol is that the real-time effect is worse than that with the UDP protocol. If no special
need is required, UDP protocol is recommended . Gener ally speaking, the client’ s choice will be
in the order of UDP – TCP.
After the Network Camera is connected successfully , Protocol Option will indicate the selected
protocol. The selected protoc ol will b e recorded in the user's PC and will be used for the next
connection. If the network environment is changed, or the user wants to let the web browser
detect again, manually select the UDP protocol, save, and return HOME to re-connect.
Digital Output
Click on ON, the digital output of the Network Camera will be t riggered. Or, clicking on OFF can
let the digital output turn into normal state.
- 9 -
www.4XEM.com
Page 14

Administrator’s Capability
Fine-tuning for Best Performance
Best performance generally equates to the fastest image refresh rate with the best video
quality , a nd at the lowest network bandwidth as possible . The three factors, Maximum frame
rate, Constant bit rate, and Fix quality on the Audio and Video Configuration page, correlate
to allow for achieving the be st p erformance possible.
For Viewing by Mobile Phone
Most 3GPP cell phone supports media streaming with MPEG4 video and GSM-AMR audio. Due to
the limitation of the bandwidth for 3GPP, only 176x144 video solution will be supporte d for cell
phone viewing. Select the Configure for mobile viewing option will change the range of
other related video settings.
- 10 -
www.4XEM.com
Page 15

For Best Real-time Video Images
T o achieve go od real-time visual effect, the network band width should be large enough to allow
a transmission rate of greater than 20 image frames per second. If the broadband network is
over 1 Mbps, set the Fix bit rate to 1000Kbps or 1200Kbps, and set Fix quality at the highest
quality. The maximum frame rate is 30. If your network bandwidth is more than 512Kbps, you
can fix the bit rate according to your bandwidth and set the maximum frame rate to 30 fps. If
the images vary dr amatically in yo ur environme nt, you may want to slow the maximum fr ame
rate down to 20 fps in order to lower the rate of da ta transmission. This allows for better video
quality and the human eyes cannot readily detect the differences between 20, 25, or 30 frames
per second. If your network bandwidth is below 512 Kbps, set the Fix bit rate according to
your bandwidth and try to ge t the best performa nce by fine-tuning wit h the Maximum frame
rate. In a slow network, greater frame r a te re sults in b lur ima ges . Another work-around is to
choose 160x120 in the Size option for better images. Video quality performance will vary
somewhat due to the number of users viewing on the network, even when the parameter s have
initially been finely tuned. Performa nce will also suffer due to poor connectivity because of the
network’s burst constraint.
Only Quality Images Will Do
T o have the best video quality , you should set Fix quality at Detailed or Excellent and adjust
the Maximum frame rate to match your network’s bandwidth. If your network is slow and you
receive “broken” pictures, go to the TCP protocol in Connection type and choose a more
appropriate mode of transmission. The images may suffer a time delay due to a slower
connection. The delay will also incre ase with added number of users.
Somewhere Between Real-time and Clear Images
If you have a broadband netw ork, set Fix quality at Normal or better , rather than setting Fix
bit rate. Y ou can also fix the bandw idth according to your actual network speed and adjust the
frame rate. Start from 30 fps down for best results but not below 15 fps. If the image
qualities are not improved, select a lower bandwidth setting.
- 11 -
www.4XEM.com
Page 16

3
Opening Accounts For New Users
1
2
Protect Network Camera by passwords
The Network Camera is shipped without any password by default. That means everyone can
access the Network Camera includ ing t he conf iguration as long as the IP address is known. It
is necessary to assign a password if the Network Camera is intended to be accessed by others.
Type a new word twice in
administrator. Then add an account with user name and password for your friends in .
The Network Camera can provide twenty accounts for your v aluable customers or friends. Y ou
may delete some users from .
1
to enable protection. This password is used to identify the
2
3
- 12 -
www.4XEM.com
Page 17

Build a Security Application
The Administrator can use the built-in motion detection to monitor any movement and perform
many useful security applications. To upload the snapshots, users can choose either email or
FTP according to user’s needs. Both e-mail and FTP use the network settings on the Email and
FTP page.
1. Click on Configuration on homepage,
2. Click on Motion detection at the left column,
3. Check Enable motion detection,
4. Click on new to have a new window to monitor video,
5. Type in a name to identify the new window,
6. Use the mouse to click, hold, and drag the window corner to resize or the title bar to move,
7. Fine-tune using the Sensitivity and Percentage fields to best suit the camera’s
environment. Higher Sensitivity detects the slighter motion. Higher Percentage
discriminates smaller objects,
8. Clicking on Save enables the activity display. Green means the motion in the window is
under the watermark set by Administrator and red means it is over the watermark,
9. Click on Application at the left column,
10.Check the weekdays as you need and give the time interval to monitor the motion detection
every day,
11.Select the Trigger on Motion detection.
12.Set the delay before detecting next motion to avoid continuous false alarms following
the original event,
13.Set the number of pre-event and post-event images to be uploaded,
14.Check the window name set in step 5,
15.Check the way to upload snapshot.
16.Click on save to validate.
- 13 -
www.4XEM.com
Page 18

Software Revision Upgrade
Customers can obtain the up-to-date software from the web site of 4XEM. An easy-to-use
Upgrade Wizard is provide d to upgrade the Network Camera with just a fe w clicks. The upgrade
function is opened to the Administrator only. To upgrade the system, follow the procedures
below.
1. Download the firmware file from www.4xem.com.
2. Run the Upgrade Wizar d and proceed following the pro mpts. Refer to t he instructions of the
Upgrade Wizard for details.
3. Or upgrade firmware from HTTP web page directly
3. The whole process will finish in a few minutes a nd it will automatically restart the system.
If power fails during the writing process of Flash memory, the program in the
memory of the Network Camera may be destroyed permanently. If the Network
Camera cannot restart properly, call 4XEM Technical Support.
- 14 -
www.4XEM.com
Page 19

Configuration
Only the Administrator can access system configuration. Each category in the left column will
be explained in the follow ing pages. The bold texts are the specific phr ases on the Option pages.
The Administrator may type the URL below the figure to directly enter the frame page of
configuration. If the Administrator also wants to se t certain options through the URL, read the
reference ap pendix for details.
- 15 -
www.4XEM.com
Page 20

System Parameters
Host name: The text displays the title at the top of the main page.
Turn off the LED indicator: Check this option to shut off the LED on the rear . It can prevent
the camera’s operation being noticed.
Time zone: Adjust the time with that of the time-servers for local settings.
Keep current date and time: Click on this to reserve the current date and time of the
Network Camera. An inter nal real-time clock maintains the date and time even when the power
of the system is turned off.
Sync with computer time: Synchronizes the date and time of the Network Camera with the
local computer. The read-only date and time of the PC is displayed as updated.
Manual: Adjust the date and time according to what is entered by the Administrator . Notice the
format in the related fields while doing the entry.
Automatic: Synchronize with the NTP server over the Internet whenever the Network Camera
starts up. It will fail if the assigned time-server cannot be rea ched.
NTP server: Assign the IP address or domain name of the time-server. Leaving the text box
blank connects the Network Camera to the default time-se rvers.
Update interval: Select hourly, daily, weekly, or monthly update with the time on the NTP
server.
Digital input: Select High or Low to define normal status of the digital input.
Digital output: Select Grounded or Open to define normal status of the digital output.
Reset digital output: The check box enable the function of resetting digital output. When the
digital output is triggered, after the number time the digital output will re set into normal state.
Remember to click o n
will not be synchronized.
to immediately validate the changes. Otherwise, the correct time
- 16 -
www.4XEM.com
Page 21
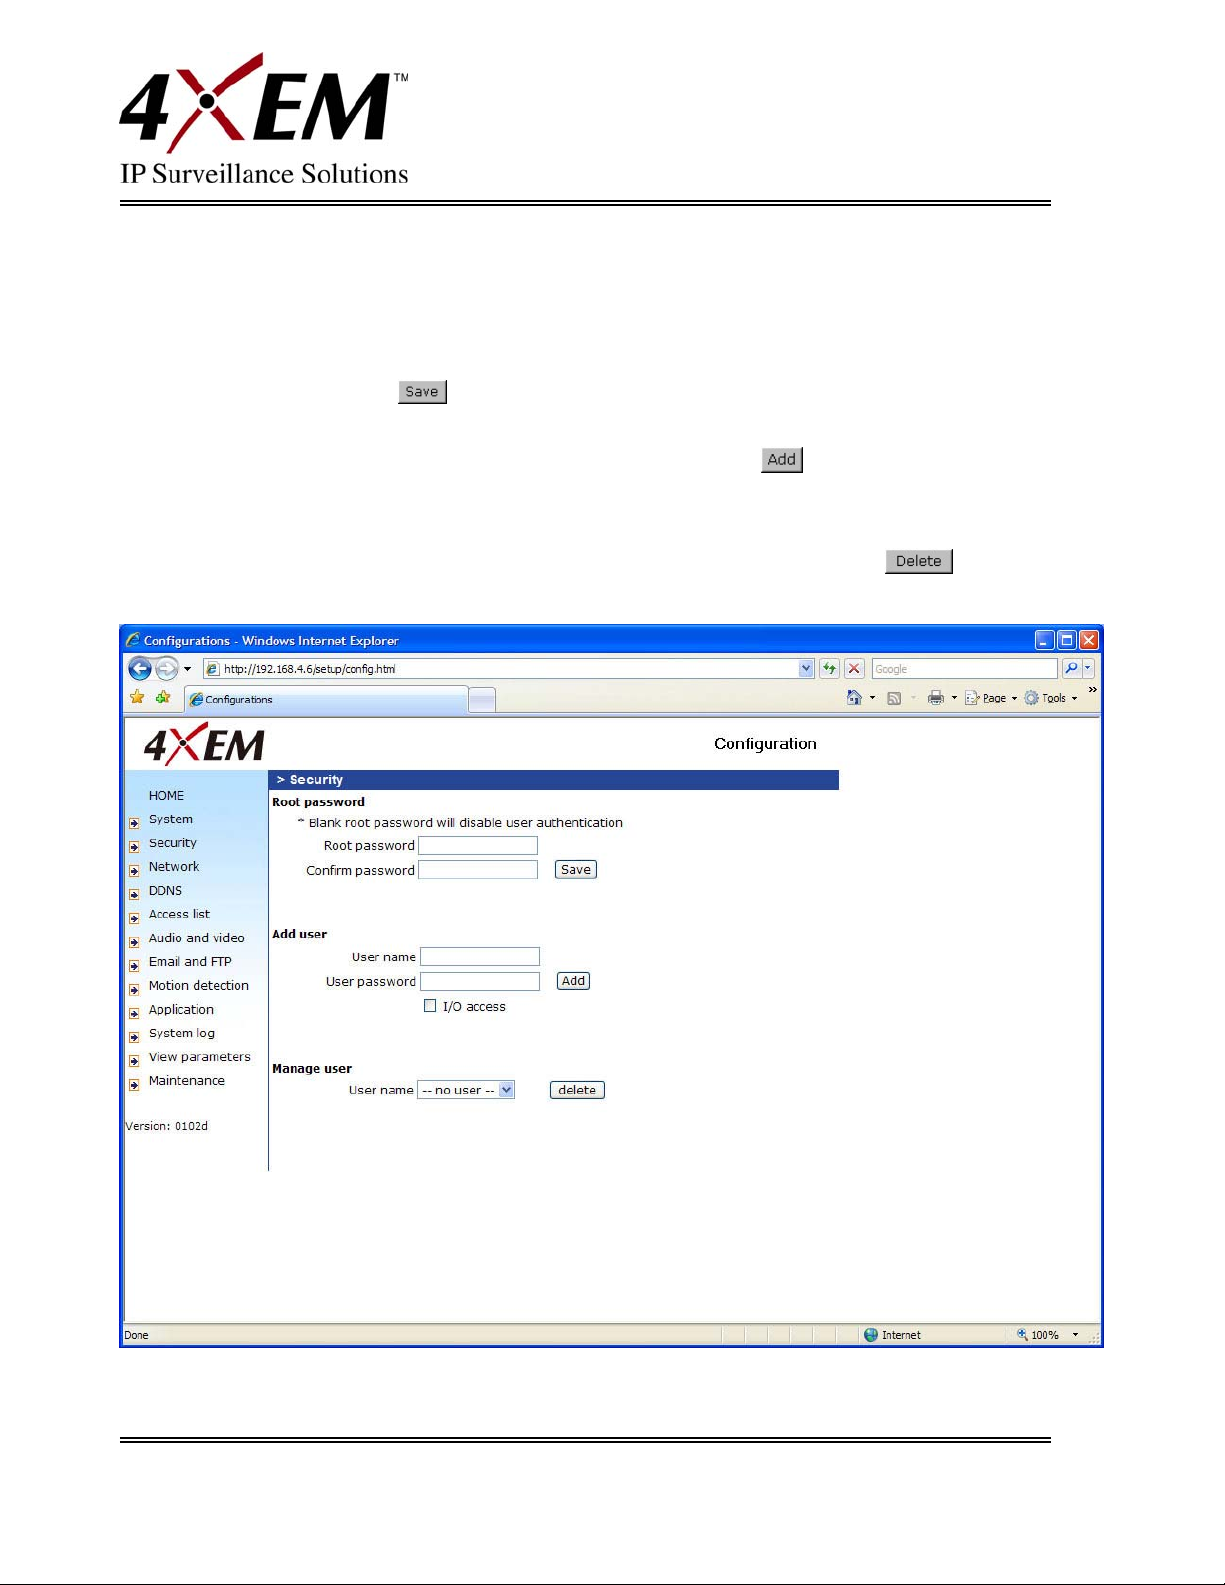
Security Settings
Root password: Change the Administrator’s password by typing in the new password
identically in both text boxes. The typed entries will be displayed as asterisks for security
purposes. After pressing
password for access.
Add user: Type the new user's name and password and press
new user will be display ed in the user name list. There is a maximum of twent y user accounts.
Checking I/O access can enable user to use D/I and D/O applications
Manager user: Pull down the user list to find the user’s na me and press
, the web browser will ask the Administrator for the new
to insert the new entry . The
to complete.
- 17 -
www.4XEM.com
Page 22

Network Settings
Any changes made on this page will resta rt the system in order to va lidate the change s. Make
sure every field is entered correctly before clicking on
.
Network Type
LAN & PPPoE:
The default type is LAN. Select PPPoE if using ADSL
Get IP
address
automatically
& Use fixed IP
address:
The default
status is Get IP
address
automatically.
This can be
tedious having
to perform
software
installation
whenever the
Network
Camera starts.
Therefore, once the network settings, especially the IP address, have been entered correctly,
select Use fixed IP address then the Network Camera will skip insta llation at the next boot.
The Network Camera can automatically restart and operate normally after a power
outage. Users can run IP installer to check the IP address assigned to the Network Camera if
the IP address is forgotten or using the UPnP function provided by the Network Camera (MS
Windows XP provides UPnP function at My Network Place).
IP address: This is necessary for network identification.
Subnet mask: This is used to determine if the destin atio n is in the same subnet. The de fault
value is “255.255.255.0”.
Default router: This is the gateway used to forward frames to destinations in a different
subnet.
- 18 -
www.4XEM.com
Page 23

Primary DNS: The primary domain name server that translates hostnames into IP addresses.
Secondary DNS: Secondary domain name server that backups the Primary DNS.
Enable UPnP presentation: Enable the UPnP camera short cut
Enable UPnP port forwarding: Enable uPnP port forwarding
PPPoE: If using the PPPoE interface , fill the following settings from ISP
User name: The login name of PPPoE account
Password: The password of PPPoE account
Confirm password: Input password again for confirmation
HTTP
Http port: This can be other than the default Port 80. Once the port is changed, the users must
be notified of the change for the connection to be successful. For instance, when the
Administrator changes the HTTP port of the Network Camera whose IP address is
192.168.0.100 from 80 to 8080, the users must type in the web browser
“http://192.168.0.100:8080” instead of “http://192.168.0.100” .
RTSP Streaming
Access name: This is the access URL for making connection from client software. Using
rtsp://<ip address>/<access name> to make connection
RTSP port: This can be other than the default Port 554
DDNS
Enable DDNS: This
option turns on the
DDNS function.
Provider: The provider
list contains four hosts
that provide DDNS
services. Please
connect to the service
provider’s website to
make sure the service
charges.
Host Name: If the User
- 19 -
www.4XEM.com
Page 24

wants to use DDNS service, this field must be filled. Please input the hostname that is
registered in the DDNS server.
Username/E-mail: The Username or E-mail field is necessary for logging in the DDNS server
or notify the User of the new IP address. Note: when this field is input as “Username” the
following field must be input as “Password”.
Password/Key: Please input the password or key to get the DDNS service.
Save: Click on this button to save current settings for the DDNS service and UPnP function.
Access List
The access list is to
control the access
permission of
clients by checking
the client IP
address.
There are two lists
for permission
control: Allow List
and Deny List.
Only those clients
whose IP address is
in the Allow List
and not in the Deny
List can connect to
the Video Server or
Network Camera f or receiving the audio/video streaming.
Both Allow List and Deny List consist of a list of IP ranges. If you want to add a new IP
address range, type the Start IP Address and End IP A ddress in the text bo xes and click on
the Add button. If you want to remove an existing IP address range, just select from the
pull-down menu and click on the Delete button.
Both the Allow List and Deny List can have 20 entries.
- 20 -
www.4XEM.com
Page 25

Audio and Video
General
Configure for computer viewing: To make quick setting for computer viewing.
Configure for mobile viewing: To make quick setting for cell phone viewing.
Video Settings
Video title: The text
string can be displayed on
video
Color: Select either for
color or monochrome
video display.
Frame Size: There are
four options for video
sizes. 160x120,
176x144, 320x240, &
640x480.
Power line frequency
(for fluorescent light):
Change the frequency
setting to eliminate
uncomfortable flash image when the light source is only fluorescent light.
There are three dependent parameters provided for video performance adjustment.
Max frame rate: Allows you to specify the maximum number of fr ames per second genera ted
by the camera.
Maximum Exposure Time: Adjusts the shutter speed of the camera to allow for exposure
adjustments.
Key frame interval: Determines how often full data frames are sent from the camera in the
MPEG4 video stream. Lower key frame intervals improve the overall quality of the image at a
cost of bandwidth usage and storage requirements.
Video Quali ty: This section allows you to force the camera to either operate within a certain
bandwidth or maintain a certa in qua lity level.
- 21 -
www.4XEM.com
Page 26

Video Orientation
Flip: Vertically rot ate the video.
Mirror: Horizontally rotate the video. Check both options if the Network Camera is installed
upside down.
White balance: Adjust the value for best color temperature.
Audio settings
Use: Switch internal or microphone to set up the source of audio input
Mute: Audio mute
Boost external microphone input: Enhance the gain of the external microphone
Internal input Gain: Modify the gain of the internal a udio inp u t
Audio type: Select audio codec AAC or GSM-AMR and the bit rate
Image Settings
Click on this button to pop up
another window to tune Brightness,
Contrast, Hue and Saturation for video
compensation. Each field has eleven levels
ranged from -5 to +5. In Brightness and
Contrast fields the value 0 indicates auto
tuning. The user may press
fine-tune the image. W hen the i mag e is O.K.,
press
settings without incorporating the changes.
to set the image settings.
Click on this to recall the original
to
- 22 -
www.4XEM.com
Page 27

Email & FTP
Email
When the SMTP server
supports SMTP
authentication, users
need to give the valid user
name and password to
send email via the server.
Sender email address:
the email address of the
sender.
There are two external
mail servers that can be
configured: primary and
secondary. The network
camera will use the prim a ry server as a default, and use the secondary server when the
primary server is unreachable.
Server address: The domain name or IP address of the external email server.
User name: This granted user name on the external email server.
Password: This granted password on the external email server.
Recipient email address: The email address of the recipients for snapshots or log file.
Multiple recipients must be separated by a semicolon (;).
- 23 -
www.4XEM.com
Page 28

FTP
Built-in FTP server port number: This can be other than the default port 21. The user can
change this value from 1025 to 65535. After a change, the external FTP client program must
change the server port
of connection
accordingly .
There are two external
FTP servers that can be
configured: primary
and secondary. The
network camera will use
the primary server as a
default, and use the
secondary server when
the primary server is
unreachable.
Server address: The
domain name or the IP a ddress of the external FTP server. The following user set tings must be
correctly configured for remote access.
FTP server port: This can be other than the default port 21. The user can change this value
from 1025 to 65535.
User name: Granted user name on the external FTP server.
Password: Granted password on the external FTP server.
Remote folder name: Granted folder on the external FTP server. The string must conform to
that of the external FTP server . Some FTP servers cannot accept preceding slash symbol before
the path without virtual path mapping. Refer to the instructions for the external FTP server for
details. The folder privilege must be open for upload.
- 24 -
www.4XEM.com
Page 29

Motion Detection
Enable motion detection: Check
this option to turn on motion
detection.
Click on this button to add a
new window. At most three windows
can exist simultaneously. Use the
mouse to click, hold, and drag the
window frame to resize or the title
bar to move. Clicking on the ‘x’ at
the upper right-hand corner of the
window to delete the window.
Remember to save in order to
validate the changes.
Click on this button to save the related window settings. A graphic bar will rise or fall
depending on the image v ariation. A gree n bar means the image va riation is under monitoring
level and a red bar means the image va riation is over monitoring level. When the bar goes red,
the detected window will a lso be outlined in red. Going back to the homep age , the monitore d
window is hidden but the red frame shows when motion is detected.
Window Name: The text will show at the top of the window.
Sensitivity: This sets the endurable difference between two sequential images.
Percentage: This sets the space ratio of moving objects in the monitoring window. Higher
sensitivity and small percentage will allow easier motion det ection.
The following figure shows the screen when
outlined in red and the graphic bar goes red since the goldfish is moving.
is clicked. The monitoring windo w has been
- 25 -
www.4XEM.com
Page 30

Application Settings
Application
There are four
Applications available:
two snapshots, one
video clip and one
digital input, all with the
following settings.
Status: ON/OFF show
the status of
application.
Sun - Sat: Select the
days of the week to
perform the application.
Time: Show Always or
input the time interval.
Trigger: Event trigger type has digital input, motion detection and is sequential.
Send: After Event has be en triggered, IP cam will send something by email, ftp or trigger
digital output.
Snapshot
Snapshot
Enable snapshot:
Enable/Disable snapshot
application.
Weekly Schedule
Sun - Sat: Select the
days of the week to
perform the application.
- 26 -
www.4XEM.com
Page 31

Time
Select Always or input the time interval.
Snapshot file name prefix
The prefix name will be added on the file name of the snapshot images.
Trigger
Event trigger type has digital input, motion detection and is sequential.
Digital input: Network Camera will send snapshot s whe n the digital input is triggered.
*Note: Please configure Motion Detection first: There are three windows for motion
detection and each needs to be defined. Select the windows which need to be monitored. If
motion detection has not been set up, undefined will be shown instead of the window title. If
this happe ns, the window ca n be defined by clicking on Motion detection
and a note will show
to direct the user to the configuration page for motion detection setup.
Motion Detection
See Motion Detection (page 25) for set-up instructions.
Send pre-event image(s): The number of pre-snapshots that will be
captured and sent when a condition is triggered.
Send post-event image(s): The num ber of post-snapshots that will be
captured and sent when a condition is triggered.
Delay second(s) before detecting next motion: Set the time delay
before restarting to check on the triggering condition when the current
condition is triggered.
Sequential: Snapshot interval: second(s): The Network Camera will send snapshots at the
specified intervals to the external server using the method selected below. Remember: This
operation is still subject to the conditions set in the weekly schedule.
Send Snapshot By
Email: This selects the uploading method following the intervals set above. The snapshot
named “prefix -yyyymmdd-hhmmss.jpg” will be attached in the email.
FTP: The snapshots will be uploaded to the external FTP server with the file name defined in
the next option. This can also be used to refresh the captur ed images stored in the external
web server to build cr eative homepages.
FTP put snapshots with date and time suf fix: This option sets up the snapshot capture
- 27 -
www.4XEM.com
Page 32

date and time, which can be used to easily differentiate the snapshot file names in the
sequential operation. F or instance , “prefix-2 0030102-030405.jpg” means the JPEG image was
captured in the year 2003, January the 2
nd
, at 3 o’clock, 4 minute, and 5 second. If this suffix
is omitted, the file named “video.jpg” on the external FTP server will be refreshed at the
specified interval.
Video Clip
Video Clip
Enable videoclip:
Enable/Disable vide o clip
application.
Weekly Schedule
Sun – Sat: Select the days
of the week to perform the
application.
Time
Select Always or input the
time interval.
Video clip file name
prefix
The prefix name will be ad d ed on the file name of the video clip files.
Video clip max file size
Define the maximum size of one video clip file.
- 28 -
www.4XEM.com
Page 33

Trigger
Digital input : The Network Camera will send v ideo clip file when the digita l input is triggered.
*Note: Please configure Motion Detection first: There are three windows for motion
detection and each needs to be defined. Select the windows which need to be monitored. If
motion detection has not been set up, undefined will be shown instead of the window title. If
this happe ns, the window ca n be defined by clicking on Motion detection
and a note will show
to direct the user to the configuration page for motion detection setup.
Delay second(s) before detecting next event: Set the time delay before restarting to
check on the triggering condition whe n the current condition is triggered.
Sequential: Video clip interval: second(s):
The Network Camera will send the video clip file
at the specified intervals to the external server using the method selected below . R emembe r:
This operation is still subject to the conditions set in the weekly schedule.
Send Videoclip By
Email: This selects the uploading method following the intervals set above. The snapshot
named “prefix -yyyymmdd-hhmmss.jpg” will be attached in the email.
FTP: The snapshots will be uploaded to the external FTP server with the file name defined in
the next option. This can also be used to refresh th e captured images stored in the ext ernal
web server to build cr eative homepages.
FTP put snapshots with date and time suf fix: This option sets up the snapshot capture
date and time, which can be used to easily differentiate the snapshot file names in the
sequential operation. F or instance , “prefix-2 0030102-030405.jpg” means the JPEG image was
captured in the year 2003, January the 2
nd
, at 3 o’clock, 4 minute, and 5 second. If this suffix
is omitted, the file named “video.jpg” on the external FTP server will be refreshed at the
specified interval.
- 29 -
www.4XEM.com
Page 34
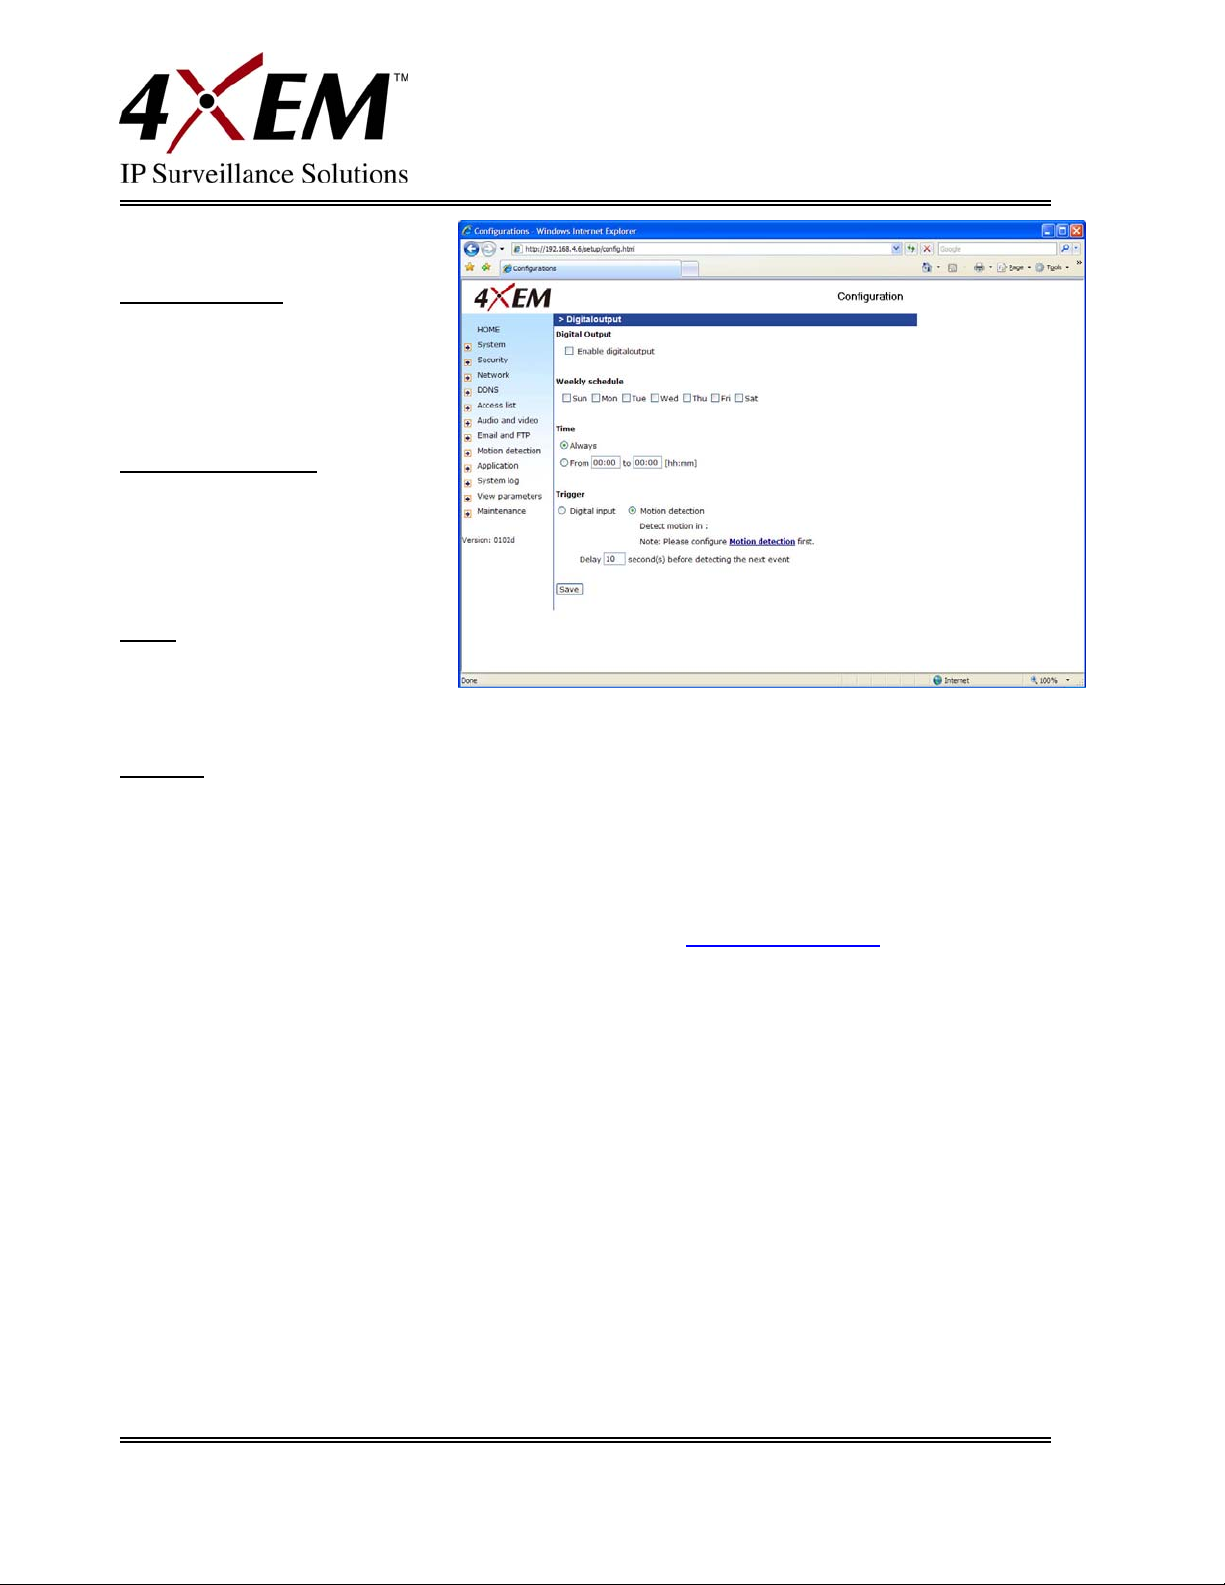
Digital Output
Digital Output
Enable digital output:
Enable/Disable digital ou tp ut
application.
Weekly Schedule
Sun – Sat: Select the days of
the week to perform the
application.
Time
Select Always or input the
time interval.
Trigger
Digital input : The Network Camera will send v ideo clip file when the digita l input is triggered.
*Note: Please configure Motion Detection first: There are three windows for motion
detection and each needs to be defined. Select the windows which need to be monitored. If
motion detection has not been set up, undefined will be shown instead of the window title. If
this happe ns, the window ca n be defined by clicking on Motion detection
to direct the user to the configuration page for motion detection setup.
Delay second(s) before detecting next event: Set the time delay before restarting to
check on the triggering condition whe n the current condition is triggered.
and a note will show
- 30 -
www.4XEM.com
Page 35

System Log
The Network Camera contains a system log where all system related messages for the camera
can be viewed. This system log contains important information about the conf ig uration and
connection of the
camera after
bootup. Remote
logging is also
possible on a Linux
server with syslogd
service running.
Simply enter the IP
Address and Port
Number of the
server to configure
the remote logging
option. Please note:
your remote server
must be RFC 3164
compliant.
Check Enable remote log and input the IP address and port number of the log server to
enable the remote log facil ity. Current log displays the current system log file. The content of
the log provides useful infor mation about configuration and connection after system boot-up.
- 31 -
www.4XEM.com
Page 36

Viewing System Parameters
Click on this link on the
configuration page to view
the entire system’s
parameter set. The content
is the same as those in
CONFIG.INI.
Maintenance
Three actions can be
selected.
Reboot: Click the reboot
button to restart the
system.
Factory default: Click on
the Factory Default button
on the configuration page
to restore the factory
default settings. Any
changes made will be lost
and the system will be
reset to the initial facto ry
settings. The system will
restart and require the installer program to set up the network again.
Upgrade firmware: Select the firmware file and click upgrade button.
- 32 -
www.4XEM.com
Page 37

Appendix
A. Troubleshooting
Status LED
The following table lists the LED patter ns which ind icate camera status.
Status LED Color Description
Blinking Red Power is being supplied to the camera.
Steady Green The camera is booting up.
Blinking Orange & Green The camera is trying to obtain an IP address.
Steady Orange An IP address is successfully assigned to the camera.
Blinking Orange & Red The camera is working.
Fast Blinking Orange & Red During firmware upgrading.
Reset and Restore
There is a button in the back of the Network Camera. It is used to reset the system or
restore the factory default settings. Sometimes resetting the system sets the system
back to normal state. If the system problems remain after reset, restore the factory
settings and install again.
RESET: Click on the button.
RESTORE:
1. Press on the button continuously.
2. Wait for self-diagnostic to run twice.
3. Free the button as soon as the second self-diagnostic starts.
Restoring the factory defaults will erase any prev ious settings. Rese t or restore
the system after power on.
- 33 -
www.4XEM.com
Page 38

B. URL Commands of the Network Camera
For some customers who already have their own web site or web control application,
the Network Camera can be easily integrated through convenient URLs. This section
lists the commands in URL format corresponding to the basic functions of the Network
Camera.
Get server parameter values
Note: This request requires a d ministrator access
Method: GET/POST
Syntax:
http://<servername>/cgi-bin/admin/getparam.cgi?[<parameter>]
[&<parameter>…]
Where the <parameter> should be <group>[_<name>] or <group>[.<name>] If you
do not specify the any par ameters, all the par ameters on the server will be retur ned. If
you specify only <group>, the parameters of related group will be returned.
When query parameter values, the current parameter values are returned.
Successful control requests returns parameter pairs as follows.
Return:
HTTP/1.0 200 OK\r\n
Content-Type: text/html\r\n
Context-Length: <length>\r\n
\r\n
<parameter pair>
where <parameter pair> is
<parameter>=<value>\r\n
[<parameter pair>]
<length> is the actual length of content.
- 34 -
www.4XEM.com
Page 39

Example: request IP address and its response
Request:
http://192.168.0.123/cgi-bin/admin/getparam.cgi?network_ipaddress
Response:
HTTP/1.0 200 OK\r\n
Content-Type: text/html\r\n
Context-Length: 33\r\n
\r\n
network.ipaddress=192.168.0.123\r\n
Set server parameter values
Note: This request require administrator access
Method: GET/POST
Syntax:
http://<servername>/cgi-bin/admin/setparam.cgi?
[nosync=<value>&]<parameter>=<value>
[&<parameter>=<value>…][&re turn=<return pa ge>]
parameter value description
<group>_<name>.
value to assigned
Assign <value>
<group>_<name>..
return
<return page> Redirect to the page <return page> after the
parameter is assigned. The <return page> can be a
full URL path or relative path according to the current
path. If you omit this parameter, it will redirect to an
empty page.
(note: The return page can be a general HTML
file(.htm, .html) or a 4XEM server script executable
(.vspx) file. It can not be a CGI command. It can not
have any extra parameters. This parameter must be
put at end of parameter list)
to the parameter
- 35 -
www.4XEM.com
Page 40

Return:
HTTP/1.0 200 OK\r\n
Content-Type: text/html\r\n
Context-Length: <length>\r\n
\r\n
<parameter pair>
where <parameter pair> is
<parameter>=<value>\r\n
[<parameter pair>]
Only the parameters that you set and are readable will be returned.
Example: Set the IP address of server to 192.168.0.123
Request:
http://myserver/cgi-bin/admin/setparam.cgi?Network_IPAddress=192.168.0.123
Response:
HTTP/1.0 200 OK\r\n
Content-Type: text/html\r\n
Context-Length: 33\r\n
\r\n
network.ipaddress=192.168.0.123\r\n
Available parameters on the server
NOTE: The bold characters in table are the default value of each parameter.
Group: System
NAME VALUE DESCRIPTION
hostname
(r/w)
<text string shorter
than 40 characters>
0 Do not turn off the led indicator ledoff
(r/w)
www.4XEM.com
1 Turn off the led indicator
- 36 -
host name of server
<<Wireless>Network Camera >
Page 41

date
(r/w)
<yyyy/mm/dd> year, month and date separated by slash.
<keep> Keep date unchanged
<auto> Using NTP to sync date/time automatica lly
time
(r/w)
ntp
(r/w)
timezone
(r/w)
updateinterval
(r/w)
serialnumber
(r)
firmwareversion
(r)
restore
(w)
<hh:mm:ss> hour , minute and second separated by colon.
<keep> keep date unchanged
<auto> Using NTP to sync date/time automatica lly
<domain name or IP
address>
NTP server
<skip to invoke default server>
-12 ~ 12 time zone, 8 means GMT +8:00
<8>
0 ~ 2592000 0 to Disable automatic time adjustment,
otherwise, it means the seconds between
NTP automatic update interval.
<0>
<mac address> 12 character s mac address without hyph en
connected
<text string shorter
than 39 characters>
The version of firmware, including model,
company, and version number
0 Restore the system parameters to default
value.
Positive integer Restore the system parameters to default
value and restart the server after <value>
seconds.
reset
(w)
0 ~ 65535
Restart the server after <value> seconds.
-1 Not restart the server.
0 Using the profile of viewing b y computer viewmode
(r/w)
1 Using the profile of viewing by mo bile phone
Group: Security
NAME VALUE DESCRIPTION
username_<1~20
>
<text string shorter
than 16 characters>
change user name.
<blank>
(r/w)
- 37 -
www.4XEM.com
Page 42

T
userpass_<0~20>
(r/w)
<text string shorter
than 14 characters>
change user’s password.
The UserPass_0 is root’s pa ssword.
<blank>
userattr_<1~20>
(r)
[conf] show user’s privilege. The privilege can be
<blank> - only permit to view live media
conf – Permit to change server’s configuration
<blank>
usercount
(r)
1 ~ 21
he current account number on the server
including root.<1>
Group: Network
NAME VALUE DESCRIPTION
0 LAN type
(r/w)
pppoeuser
(r/w)
pppoepass
(r/w)
resetip
(r/w)(restart)
1 PPPoE
<text string shorter than
80 characters>
<text string shorter than
15 characters>
PPPoE account user name
<blank>
PPPoE account password
<blank>
1 enable to get ipaddress, subnet, router, dns1,
dns2 from DHCP server at next reboot
0 Using preset ipaddress, subnet, router, dns1,
dns2
ipaddress
(r/w) (restart)
subnet
(r/w) (restart)
router
(r/w) (restart)
dns1
(r/w) (restart)
dns2
(r/w) (restart)
smtp1
(r/w)
<IP address> IP address of server
<192.168.0.99>
<IP address> subnet mask
<255.255.255.0>
<IP address> default gateway
<blank>
<IP address> primary DNS server
<blank>
<IP address> secondary DNS server
<blank>
<domain name or IP
address, string shorter
primary SMTP server
<blank>
than 40 characters>
- 38 -
www.4XEM.com
Page 43

mailto1
(r/w)
<string shorter than 80
characters>
mail recipient address
<blank>
mailuser1
(r/w)
mailpass1
(r/w)
smtp2
(r/w)
mailto2
(r/w)
mailuser2
(r/w)
mailpass2
(r/w)
returnemail
(r/w)
localftpport
(r/w)
<text string shorter than
63 characters>
<text string shorter than
15 characters>
<domain name or IP
address, string shorter
than 40 characters>
<text string shorter than
80 characters>
<text string shorter than
63 characters>
<text string shorter than
15 characters>
<text string shorter than
80 characters>
<positive number less
than 65535>
User name of pr imary smtp server
<blank>
Password of primary smtp server
<blank>
secondary SMTP server
<blank>
mail recipient address
<blank>
User name of secondary smtp server
<blank>
Password of secondary smtp server
<blank>
return email address
<blank>
FTP port
<21>
ftp1
(r/w)
<domain name or IP
address, string shorter
primary FTP server
<blank>
than 40 characters >
ftpport1
(r/w)
ftpuser1
(r/w)
ftppass1
(r/w)
ftpfolder1
(r/w)
<positive number less
than 65535>
<text string shorter than
63 characters>
<text string shorter than
15 characters>
<text string shorter than
40 characters>
primary FTP port
<21>
user name for primary FTP server
<blank>
password for primary FTP server
<blank>
upload folder in primary FTP server
<blank>
1 Enable passive mode of primary FTP server ftppasvmode1
(r/w)
ftp2
(r/w)
0 Disable passive mode of primary FTP server
<domain name or IP
secondary FTP server
address, string shorter
than 40 characters >
- 39 -
www.4XEM.com
Page 44

ftpport2
(r/w)
<positive number less
than 65535>
secondary FTP port
<21>
ftpuser2
(r/w)
ftppass2
(r/w)
ftpfolder2
(r/w)
(r/w)
httpport
(r/w) (restart)
rtspport
(r/w) (restart)
videoport
(r)
audioport
(r)
accessname
(r/w)
<text string shorter than
63 characters>
<text string shorter than
15 characters>
<text string shorter than
40 characters>
user name for secondary FTP server
<blank>
password for secondary FTP server
<blank>
upload folder in secondary FTP serv er
<blank>
1 Enable passive mode of primary FTP server ftppasvmode2
0 Disable passive mode of primary FTP server
<positive number less
than 65535>
<positive number less
than 65535>
<positive number less
than 65535>
<positive number less
than 65535>
<text string shorter than
20 characters>
HTTP port
<80>
RTSP port
<554>
video Channel port for RTP
<5558>
audio Channel port for RTP
<5556>
RTSP access name
<live.sdp>
Group: IPFilter
NAME VALUE DESCRIPTION
allowstart_<0~9>
(r/w)
allowend_<0~9>
(r/w)
denystart_<0~9>
(r/w)
denyend_<0~9>
(r/w)
1.0.0.0 ~
255.255.255.255
1.0.0.0 ~
255.255.255.255
1.0.0.0 ~
255.255.255.255
1.0.0.0 ~
255.255.255.255
Allowed starting
RTSP connection IP address
<1.0.0.0>
Allowed ending RTSP connection IP address
<255.255.255.255>
Denied starting RTSP connection IP address
<blank>
Denied ending RTSP connection IP address
<blank>
Group: Video
NAME VALUE DESCRIPTION
text <text string shorter enclosed caption
- 40 -
www.4XEM.com
Page 45

(r/w) than 14 characters> <blank>
0 MPEG4 codectype
(r/w)
1 MJPEG
keyinterval
(r/w)
size
(r)
resolution
(r/w)
(r/w)
(r/w)
1, 3, 5, 10, 30, 60, 90,
120
Key frame interval
<60>
1 half
2 half x 2
3 normal
4 normal x 2
5 double
256 This field is obsolete (use resolution)
176x144 (for mobile) Video resolution 176 x 144
160x120 Video resolution 160 x 120
320x240 Video resolution 320 x 240
640x480 (for
Video resolution 640 x 480
computer)
0 monochrome color
1 color
0 fix bit rate quality
1 fix quantization
quant
(r/w)
1 lowest quality of video
2 lower quality of video
3 normal quality of video
4 higher quality of video
5 highest quality of video
bitrate
(r/w)
20000 set bit rate to 20K bps
30000 set bit rate to 30K bps
40000 set bit rate to 40K bps
50000 set bit rate to 50K bps
64000 set bit rate to 64K bps
128000 set bit rate to 128K bps
256000 set bit rate to 256K bps
512000 set bit rate to 512K bps
768000 set bit rate to 768K bps
- 41 -
www.4XEM.com
Page 46

1000000 set bit rate to 1000K bps
1500000 set bit rate to 1500K bps
2000000 set bit rate to 2000K bps
3000000 set bit rate to 3000K bps
4000000 set bit rate to 4000K bps
maxframe
(r/w)
(r/w) (in CMOS
version only)
whitebalance
(r/w) (in CMOS
version only)
(r/w)
1 set maximum frame rate to 1 fps
2 set maximum frame rate to 2 fps
3 set maximum frame rate to 3 fps
5 set maximum frame rate to 5 fps
10 set maximum frame rate to 10 fps
15 set maximum frame rate to 15 fps
20 set maximum frame rate to 20 fps
25 set maximum frame rate to 25 fps
30 (for 60Hz only) set maximum frame rate to 30 fps
50 synchronize with 50Hz utility mode
60 synchronize with 60Hz utility
0 auto white balance
1 fixed indoor(3200K)
2 fixed fluorescent (5500K)
3 fixed outdoor( > 5500K)
1 flip image flip
0 normal image
1 mirror image mirror
(r/w)
0 normal image
1 Overlay time stamp on video imprinttimestam
p
0 Do not overlay time stamp on video
(r/w)
Group: Audio
NAME VALUE DESCRIPTION
AAC4 (for computer) set codec t o AAC type
(r/w)
GAMR (for mobile) set codec to GSM-AMR
aacbitrate 16000 set AAC bitrate to 16K bps
- 42 -
www.4XEM.com
Page 47

(r/w)
32000 set AAC bitrate to 32K bps
48000 set AAC bitrate to 48K bps
64000 set AAC bitrate to 64K bps
96000 set AAC bitrate to 96K bps
128000 set AAC bitrate to 128K bps
amrbitrate
(r/w)
4750 set AMR bitrate to 4.75K bps
5150 set AMR bitrate to 5.15K bps
5900 set AMR bitrate to 5.9K bps
6700 set AMR bitrate to 6.7K bps
7400 set AMR bitrate to 7.4K bps
7950 set AMR bitrate to 7.95K bps
10200 set AMR bitrate to 10.2K bps
12200 set AMR bitrate to 12.2K bps
Group: Image
NAME VALUE DESCRIPTION
brightness
(r/w)
saturation
(r/w)
contrast
(r/w)
<-5 ~ 5> Adjust brightness of image according to mode
settings. <0>
<-5 ~ 5> Adjust saturation of image according to mode
settings. <0>
<-5 ~ 5> Adjust contrast of image according to mode
settings. <0>
hue
(r/w)
<-5 ~ 5> Adjust hue of image according to mode
settings. <0>
Group: Motion
NAME VALUE DESCRIPTION
0 disable motion detection enabled
(r/w)
1 enable motion detection
0 disable motion window #1 winenabled_<0~2>
(r/w)
winname_<0~2>
(r/w)
winleft_<0~2>
(r/w)
www.4XEM.com
1 enable motion window #1
<text string shorter
than 14 characters >
name of motion window #1
<blank>
0 ~ 320 Left coordinate of window position.
<0>
- 43 -
Page 48

wintop_<0~2>
(r/w)
0 ~ 240 Top coordinate of window position.
<0>
winwidth_<0~2>
(r/w)
winheight_<0~2>
(r/w)
winobjsize_<0~2>
(r/w)
winsensitivity_<0~2
>
0 ~ 320 Width of motion detection window.
<0>
0 ~ 240 Height of motion detection window.
<0>
0 ~ 100 Percent of motion detection window
<0>
0 ~ 100 Sensitivity of motion detection window
<0>
(r/w)
update
(w)
1 Update the above motion detection sett ings
to take effect
Group: DDNS
NAME VALUE DESCRIPTION
enable
(r/w)
provider
(r/w)
0, 1 Enable or disable the dynamic dns.
<0>
1 ~ 6 dyndns.org (dynamic)
dyndns.org (custom)
tzo.com
dhs.org
safe100.net
dyn-interfree.it
<1>
hostname
(r/w)
usernameemail
(r/w)
Text string shorter than
127 characters.
T ext string shorter than 63
characters.
Yo ur dynamic hostname.
<blank>
Your user or email to login ddns service
provider
<blank>
passwordkey
(r/w)
T ext string shorter than 20
characters.
password or key to login ddns service
Your
provider
<blank>
update
(w)
www.4XEM.com
0, 1 Update the above ddns settings to take
effect
- 44 -
Page 49

Group: UPNP
NAME VALUE DESCRIPTION
enable
(r/w)
0, 1 Enable or disable the UPNP presentation
service.
<1>
Group: UPNPfor
NAME VALUE DESCRIPTION
enable
(r/w)
0, 1 Enable or disable the UPNP port forwarding
service.
<0>
Group: App
NAME VALUE DESCRIPTION
scriptname
(r)
<text string shorter than
255 characters>
File name of script
<script.vssx>
0 Disable script enablescript
(r/w)
1 Enable script
Group: Syslog
NAME VALUE DESCRIPTION
0 disable remote log enableremotelog
(r/w)
serverip
1 enable remote log
<IP address> Log server IP address
(r/w)
serverport
<514> Server port used for log
(r/w)
Application page CGI command
Note: This request requires administrator privilege.
Method: GET/POST
- 45 -
www.4XEM.com
Page 50

Syntax:
http://<servername>/cgi-bin/admin/gen-eventd-conf.cgi?[ snapshot_enable=<value>]
[&weekday=<value>][&time_method=<value>][&begin_time=<value>]
[&end_time=<value>]
[&ss_prefix=<value>][&trigger_type=<value>]
[&md_prenum=<value>][&md_postnum=<value>][&md_delay=<value>]
[&sq_interval=<value>]
[&send_method=<value][&ftp_suffix=<value>]
Return:
HTTP/1.0 200 OK\r\n
Content-Type: text/plain\r\n
Content-Length: <length>\r\n
\r\n
<depends on method value>
If(method == get || method == set)
{
tue=<value>\r\n
wed=<value>\r\n
…
}
Else if(method == normal)
{
Application page contents
}
parameter Value description
snapshot_enable
0 Enable snapshot application
1 Disable snapshot application
weekday
time_method
0,1,2,3,4,5,6 The array indica te weekly schedule
always 24 hours full day
interval Select begin time and end time
begin_time
www.4XEM.com
hh:mm Begin time of weekly schedule
- 46 -
Page 51

end_time
hh:mm End time of weekly schedule
ss_prefix
<text string
shorter than 60
characters>
trigger_type
motion Set trigger by motion detect
sequential Snapshot sequentially
md_win
md_prenum
md_postnum
md_delay
sq_interval
send_method
0,1,2 The array indicate which motion windows are used
1~5 The numbers of snapshot before event
1~5 The numbers of snapshot after event
1~999 The delay seconds for detecting next motion event
1~999 The interval seconds of sequential snapshot
mail Send snapshot by mail
ftp Send snapshot by ftp
ftp_suffix
0/1 Enable/Disable file name prefix
Capture single snapshot
Snapshot file name prefix for both event and
sequential operation
Note: This request require normal user privilege
Method: GET/POST
Syntax:
http://<servername>/cgi-bin/video.jpg
Server will return the most up-to-date snapshot in JPEG format. The size and quality of
image will be set according to t h e video settings on the server.
Return:
HTTP/1.0 200 OK\r\n
Content-Type: image/jpeg\r\n
[Content-Length: <image size>\r\n]
<binary JPEG image data>
- 47 -
www.4XEM.com
Page 52

T
T
Account management
Note: This request requires administrator privilege
Method: GET/POST
Syntax:
http://<servername>/cgi-bin/admin/editaccount.cgi
?
method=<value>&username=<name>[&userpass=<value>][&privilege=<value>]
[&privilege=<value>][…][&return=<return page>]
parameter value Description
method
add Add an account to server. When using this method,
“username” field is necessary . It will use default value
of other fields if not spec ified.
delete Remove an account from server. When using this
method, “username” field is necessary , and others are
ignored.
edit Modify the account password and privilege. When
using this method, “username” field is necessary, and
other fields are optional. If no t specified, it will keep
original settings.
username <name> The name of user to add, delete or edit
userpass <value>
he password of new user to add or that of old user to
modify. The default value is an empty string.
privilege
<value>
he privilege of user to add or to modify. The privilege
can be the addition of the following values. Ex: A user
with configure access can be assigned privilege as
privilege=conf.
conf configuration privilege
return <return page> Redirect to the page <return page> after the
parameter is assigned. The <return page> can be a
full URL path or relative path according the the current
path. If you omit this parameter, it will redirect to an
empty page.
- 48 -
www.4XEM.com
Page 53

System Logs
Note: This request require administrator privileg e
Method: GET/POST
Syntax:
http://<servername>/cgi-bin/admin/syslog.cgi
Server will return the up-to-date system log.
Return:
HTTP/1.0 200 OK\r\n
Content-Type: text/plain\r\n
Content-Length: <syslog length>\r\n
\r\n
<system log information>\r\n
Configuration file
Note: This request requires administrator privilege
Method: GET/POST
Syntax:
http://<
Server will return the up -to-date configuration file.
Return:
HTTP/1.0 200 OK\r\n
Content-Type: text/plain\r\n
Content-Length: <configuration file le ngth>\r\n
\r\n
<configuration data>\r\n
www.4XEM.com
servername
>/cgi-bin/admin/configfile.cgi
- 49 -
Page 54

Upgrade Firmware
Note: This request requires administrator privilege
Method: POST
Syntax:
http://<servername>/cgi-bin/admin/upgrade.cgi
Post data:
fimage=<file name>[&return=<return page>]\r\n
\r\n
<multipart encoded form data>
Server will accept the uplo ad file named <file na me> to be upgraded the firmware and
return with <return page> if indicated.
- 50 -
www.4XEM.com
Page 55

C. Technical Specifications
System
CPU: VVTK-1000
RAM: 32MB SDRAM
ROM: 4MB FLASH ROM
Image Sensor: VGA CMOS
Embedded OS: Linux2.4
Networking
Protocols
TCP/IP , HT TP, SMTP, FTP, DDNS, UPnP, Telnet, NTP, DNS, DHCP
and RTSP
Physical
10/100 baseT Fast Ethernet auto negotiation
Video
Algorithm supported
MPEG4(simple profile) for streaming video
JPEG for still image
Features
Adjustable image size, quality and bit rate
Time stamp and text overlay
3 motion detection windows
Resolution
Up to 30/25 frames at 160x120
Up to 30/25 frames at 320x240
Up to 30/25 frames at 640x480
Camera Specification
1/4 inch color CMOS sensor
Resolution: 640x480
1.5Lux/F2.0
AGC, AWB, AES
Electronic shutter: 1/60 ~ 1/15000 second
Lens
Fixed focal with fine tuning, 4.0mm, F2.0
Stream
MPEG-4 streaming over UDP, TCP, ir HTT P
MPEG-4 multicast streaming
Event Management
Multiple-windo w v ideo motion detection
1 digital input and 1 digital output
Event notification using HTTP, SMTP, of FTP
Audio
Supports GSM-AMR
- 51 -
www.4XEM.com
Supports AAC compression
Supports audio mute
Bit rate:
GSM-AMR: 4.75k~12.2k
ACC: 15k~128k
Security
Multi-level user access
IP address filtering
LED indicator
Bi-color LED system status indicator
Dimension
126.4mm (L) x 96.2mm (W) x 47.4mm (H)
Weight
NET. 276g
Power
12V DC
Power over Ethernet: 802.3af compliant
Power Consumption: 4.4W
Operating Environment
Temperature: 0-40°C/32-104°F
Humidity: 20%~80% RH
EMI & Safety
CE, FCC, PSE
Application
Installation wizard
16-ch recording software
SDK available for application development and system
integration
Viewing system requirement
OS: Microsoft Windows 2000/XP
Browser: Internet Explorer 5.x or above
Cellphone: 3GPP player
Real Player 10.5
Quick Time 6.5
Packet Video Player 3.0
Page 56

Technology License Notice
AMR Technology
This product includes AMR narrowband speech coding technology licensed by
VoiceAge. Please refer to http://www.voiceage.com/ for more details.
MPEG-4 AAC Technology
This product includes MPEG-4 AAC audio coding technolo gy licensed by Via Licensing.
Please refer to http://www.vialicensing.com/
MPEG-4 Visual Technology
This product includes one MPEG-4 encoder and one MPEG-4 decoder license.
Installation of more than one decoder is prohibited. Please contact your reseller to
purchase additional decoder licenses.
THIS PRODUCT IS LICENSED UNDER THE MPEG-4 VISUAL PATENT PORTFOLIO
LICENSE FOR THE PERSONAL AND NON-COMMERCIAL USE OF A CONSUMER FOR (i)
ENCODING VIDEO IN COMPLIANCE WITH THE MPEG-4 VISUAL STANDARD ("MPEG-4
VIDEO") AND/OR (ii) DECODING MPEG-4 VIDEO THAT WAS ENCODED BY A
CONSUMER ENGAGED IN A PERSONAL AND NONCOMMERCIAL ACTIVITY AND/OR
WAS OBTAINED FROM A VIDEO PROVIDER LICENSED BY MPEG LA TO PROVIDE
MPEG-4 VIDEO. NO LICENSE IS GRANTED OR SHALL BE IMPLIED FOR ANY OTHER
USE. ADDITIONAL INFORMATION INCLUDING THAT RELATING TO PROMOTIONAL,
INTERNAL AND COMMERCIAL USES AND LICENSING MAY BE OBTAINED FROM MPEG
LA, LLC. SEE HTTP://WWW.MPEGLA.COM.
for more details.
- 52 -
www.4XEM.com
Page 57

Electromagnetic Compatibility (EMC)
This device compiles with FCC Rules Part 15. Operation is subject to the following two conditions.
• This device may not cause harmful interference, and
• This device must accept any interference received, including interference that may cause undesired
operation.
USA - This equipment has been tested and found to comply with the limits for a Class B digital device,
pursuant to Part 15 of the FCC Rules. These limits are designed to provide reasonable protection against
harmful interference in a residential installation. This equipment generates, uses and can radiate radio
frequency energy and, if not installed and used in accordance with the instructions, may cause harmful
interference to radio communications. However, there is no guarantee that interference will not occur in
a partial installation. If this equipment does cause harmful interference to radio or television reception,
which can be determined by turning the equipment off and on, the user is encouraged to try to correct the
interference by one or more of the following measures:
-- Reorient or relocate the receiving antenna.
-- Increase the seperation between the equipment and receiver.
-- Connect the equipment into an outlet on a circuit different from that to which the receiver is connected.
-- Consult the dealer or an experienced radio/TV technician for help.
Shielded interface cables must be used in order to comply with emission limits.
Europe - This digital equipment fulfills the requirement for radiated emission according to limit
B of EN55022/1998, and the requirement for immunity according to EN50082-1/1992.
Liability
4XEM Corporation cannot be held responsible for any technical or typographical errors and reserves the
right to make changes to the product and manuals without prior notice. 4XEM Corporation makes no
warranty of any kind with regard to the material contained within this documen t, including, but not
limited to, the implied warranties of merchantability and fitness for any particular purpose.
 Loading...