

Page 1
L50, L51, L55
L51
L50
L55
®
Page 2

L50, L51 English
TM
You have chosen a Breast Examination Model made of 3B SKINlike
tologically tested silicone with an especially realistic feel reproducing even fine skin structures accurately
in every detail.
If you follow these tips for care and handling you will be able to work with your 3B Scientific
Examination Model for a long time.
Light soiling can be removed with a mild soap solution. Please use no detergents containing solvents, as
these could damage the material. Sharp or pointed objects (e.g. syringes) will damage the model surface.
For a softer feel of the skin apply some talcum powder from time to time.
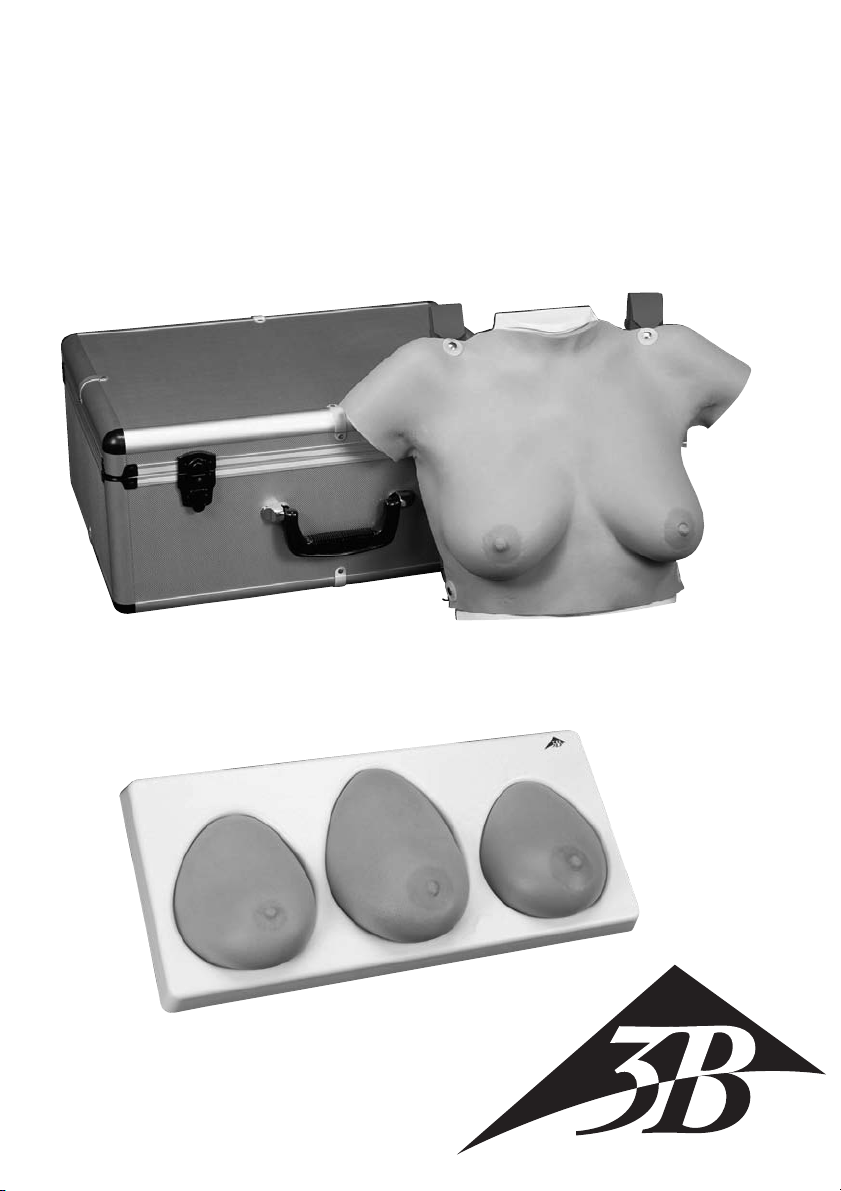
Strap-Around Breast Examination Model with Carrying
Case (L50)
Strap-Around Breast Examination Model (L51)
This model shows the cast from an original female chest
with a middle sized breast.
To demonstrate the breast examination of a woman in a
reclining position, place the model on the supplied base
(the carrying straps can be fastened underneath the base).
The strap-around mechanism also allows studying and
practicing breast examination in an upright position or as
self-examination. Strapping around the Breast Examination
Model is done easiest with the assistance of another person. The carrying straps are crossed behind the
back, threaded through the white clips at the bottom side of the model and secured with the Velcro
fastening.
material. This material is a derma-
®
Breast
8
7
3
2
1
4
5
6
English L55
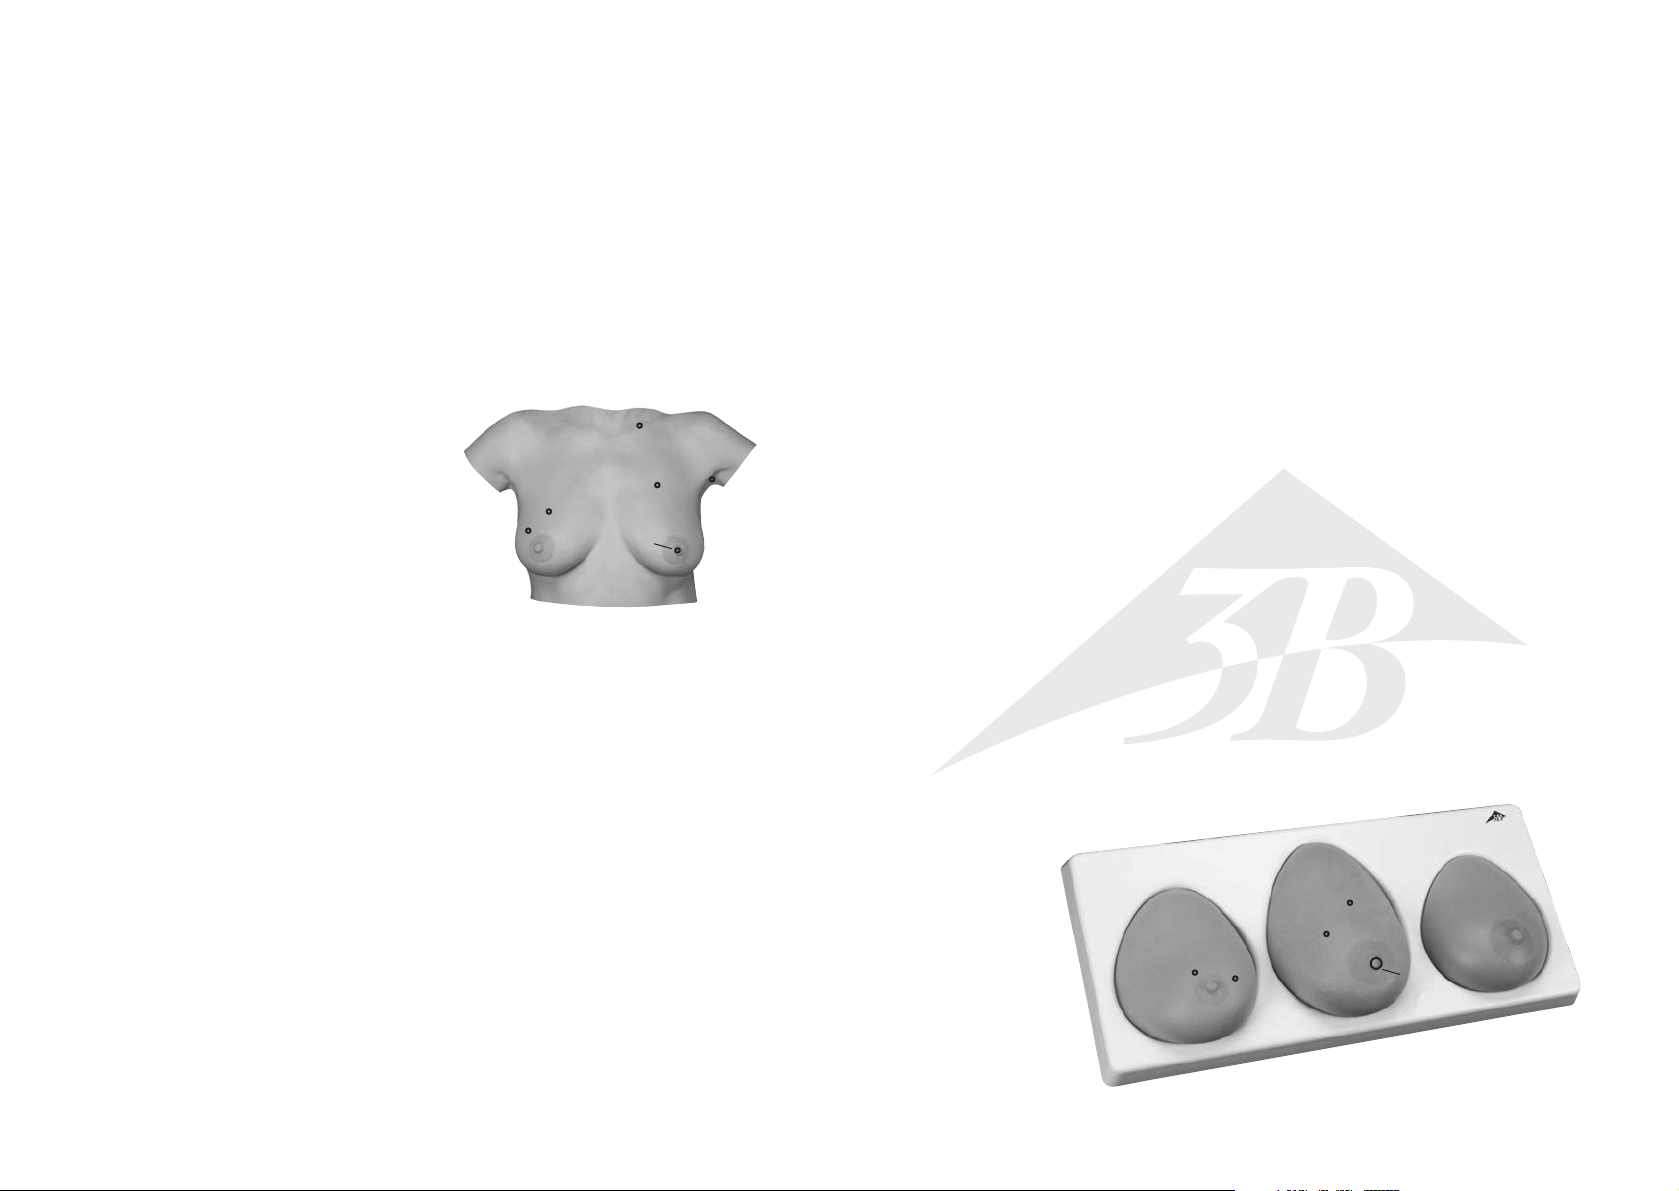
Three Single Breasts in Base (L55)
This model shows the cast from three original different female breasts (middle sized breast and large
breast). The individual breasts are supplied with a base for storage. The breasts are marked with the
numbers "1”, "2” and "3” at the bottom so that they can be assigned to the base and the drawing. The
three single breasts illustrate the following changes:
Model 1(Left breast)
1. Round, movable tumor at a depth of 10 mm, 20 mm in diameter, presumably benign.
2. Round, movable tumor at a depth of 10 mm, 20 mm in diameter, presumably benign.
Model 2 (Left breast)
3. Irregular tumor adhering to the chest wall at a depth of 15 mm, approx. 15 mm in diameter,
presumably malign.
4. Irregular tumor adhering to the chest wall at a depth of 15 mm, approx. 20 mm in diameter,
presumably malign.
5. Column-shaped, irregular tumor at a depth of 10mm, adhering to the chest wall, approx. 30 mm in
diameter, malign.
6. Permanently inverted nipple (recently occurred), frequently in combination with a malign tumor
7. ”Orange-peel skin", skin structure as in an orange peel with pore retraction through lymphostasis
(blocked lymph ducts) caused by malign tumors.
Model 3 (Right breast)
Healthy
It is essential to consult your gynecologist about all of the described anomalies! Only an expert can determine the cause of any changes and decide on further action.
®
After usage, store the model while it is resting on the base. Please do not compress, roll or fold up the
model. Please also avoid violently pulling or tearing the straps.
The Strap-Around Breast Examination Model illustrates the following anomalies:
1. Right breast: round, movable tumor at a depth of 10 mm, 20 mm in diameter, presumably benign.
2. Right breast: round, movable tumor at a depth of 5 mm, 20 mm in diameter, presumably benign.
3. Left breast: irregular tumor at a depth of 5 mm, adhering to the chest wall, diameter of approx. 35 x
25 mm, presumably malign.
4. Column-shaped, irregular tumor at a depth of 5 mm, adhering to the chest wall, approx. 30 mm in
diameter, malign.
5. Left breast: permanently inverted nipple (recently occurred), frequently in combination with a malign
tumor.
6. Left breast: ”orange-peel skin", skin structure as in an orange peel with pore retraction through
lymphostasis (blocked lymph ducts) caused by malign tumors.
7. Left armpit: irregular, firmly adhering lymph node at a depth of 10 mm, diameter approx. 35 x 25 mm,
presumably malign.
8. Above left clavicle: Malign tumor at a depth of 5 mm, 20 mm in diameter.
It is essential to consult your gynecologist about all of the described anomalies! Only an expert can
determine the cause of any changes and decide on further action.
Mod. 1
Mod. 2
3
4
1
2
5
7
Mod. 3
6
Page 3
Self Examination of the Female Breast English
English Self Examination of the Female Breast
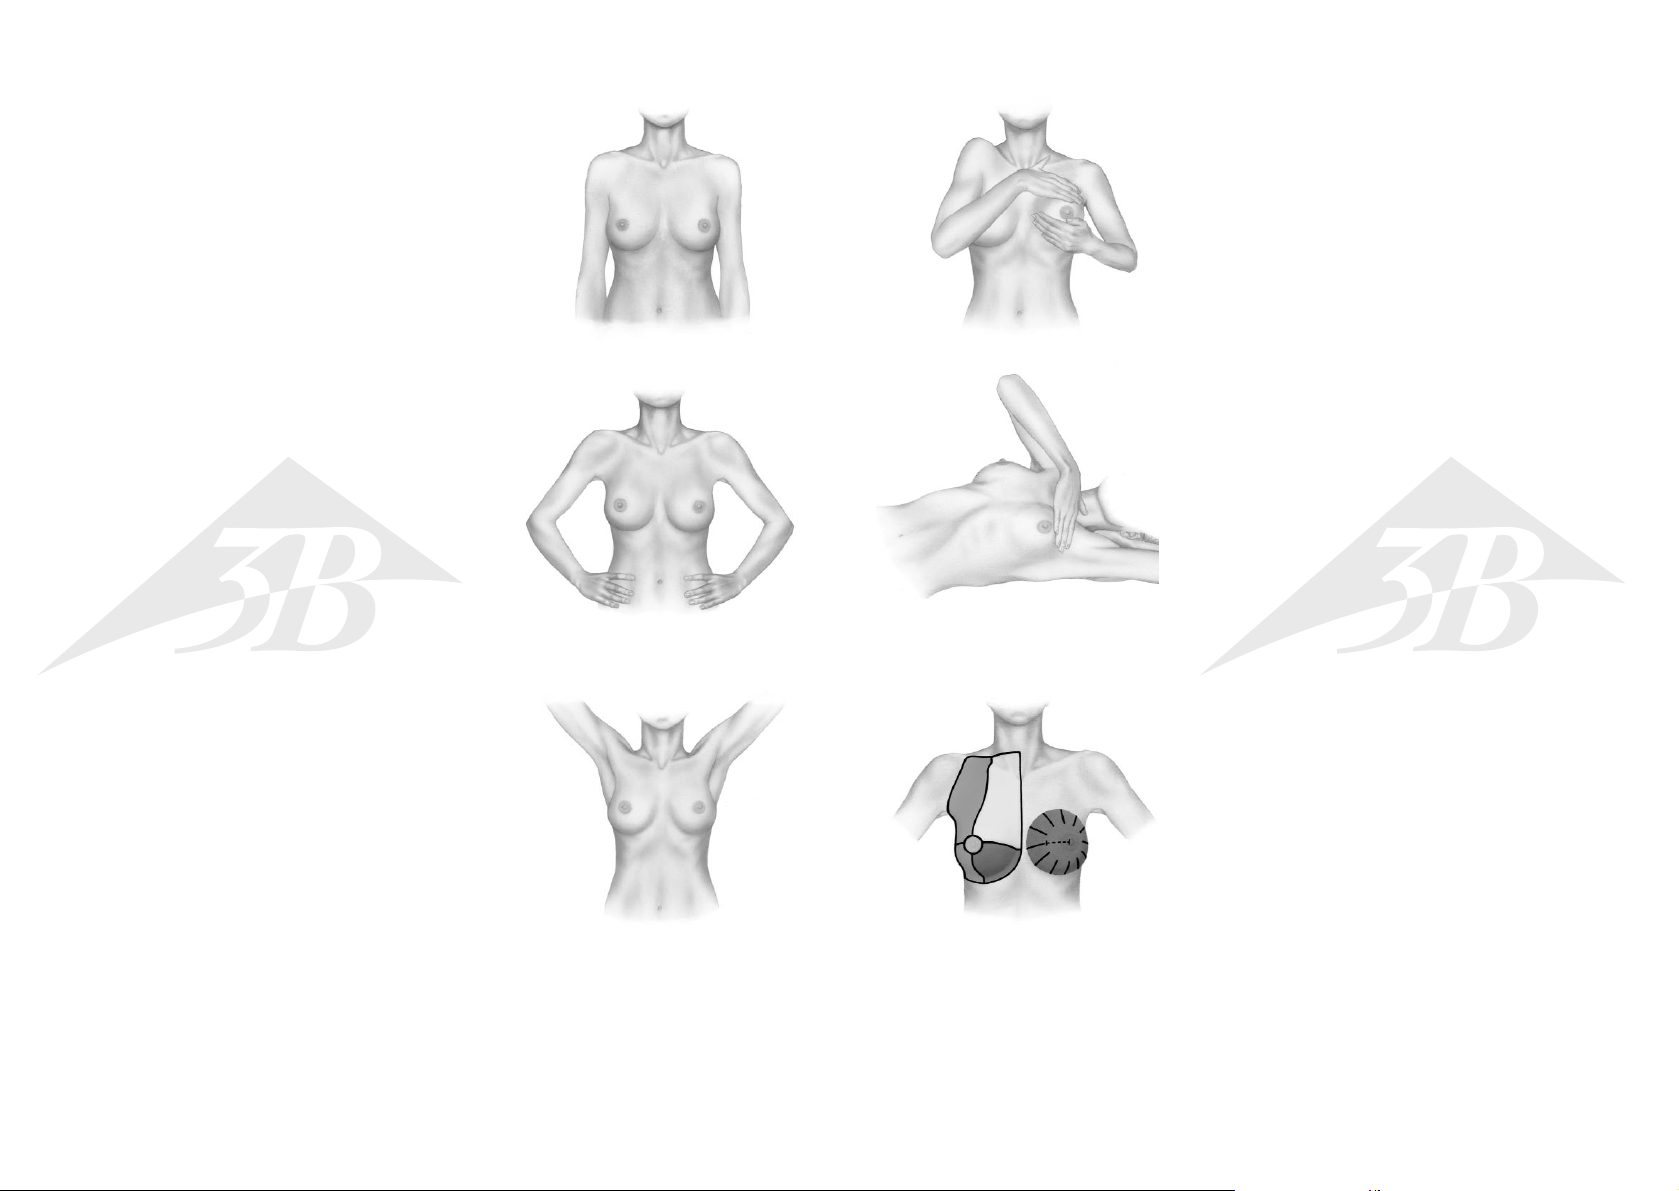
How to begin
Step in front of a large mirror with the upper body unclothed and
relax. Direct your attention to your breast with your arms relaxed
at your sides. Slowly turn in both directions to examine your chest
from a diagonal perspective and from the side. Also bend down.
Is there anything unusual? Upon taking a closer look you might
find differences in shape, size or position of both breasts: they are
usually not exactly symmetrical. In the course of the monthly examinations you should become so familiar with the look of your
breasts that you will immediately notice any changes and anomalies.
What to look for
Now place your hands on your hips and look at yourself from the
front again and then turn to both sides. Are there changes in comparison to the previous month regarding shape and position of
your breasts? Have their size or look changed? Compare both
sides! Are there any retractions or protrusions of the skin? Watch
out for any redness or discoloration. Are there any fine skin protuberances ("orange skin”)? Do not forget the area of the fold
below your breast. If you notice any of the described or other
changes which persist throughout the menstrual cycle please consult your gynecologist.
Examination
Slowly lift up your arms several times and clasp your hands behind
the neck: Do both breasts follow the upward movements of your
arms in a regular way or does one of the breasts not follow these
movements as usual? Can the breast tissue be easily shifted
against the chest wall? Please check for any changes of your nipples and their areolae: has any redness or inversion occurred
recently? Are both nipples approximately at the same height?
Carefully check that no liquid can be squeezed out of the nipple.
Palpation in Upright Position
Begin with the self-examination of your breast while you are standing. You can also examine your breast in the shower or after
applying oil to the skin. You can practice your examination skills!
With your pointer, middle and ring fingers of one hand together,
place the fingertips flatly onto the skin of the breast on the other
side. First perform palpation of the tissue with slight, then increa-
® ®
sing pressure against the chest wall or the palm of your other
hand. In this way you can feel the layers both at the surface and at
greater depth. Also repeat the examination while lifting up the
elbow, placing the hand in the neck.
Also check the armpits for lumps or hardness, first while the arm is
hanging down loosely, then while lifting it up. By the way, disorders which do not concern the breast can also cause swelling of
the lymph nodes in the armpit. Consult your doctor on any new
lumps, especially if they cause no pain.
Palpation in Reclined Position
For a thorough examination lie down in a comfortable position on
your back, with the head flat down. To examine your left breast,
lift up the left arm and place the hand behind the neck. If you have
rather large breasts, turn to the right side (perhaps with drawn up
legs) so that the left breast settles evenly on the chest wall. Now
carefully examine the left breast and the indicated adjacent areas
with the fingertips of the right hand. Then proceed with the other
side. Systematically examine the marked area around the breast
including the pit above the collarbone for lumps or changes. In the
area between the armpit and the breast there are frequently
benign changes of the tissue. However, since carcinomas are most
likely to occur in this region, it is especially important: Show any
recent changes to your gynecologist.
Systematic Procedure
A thorough examination of your breast should include the entire
marked region: from the breastbone as middle line towards the
sides to include the armpits, from the armpits down to below the
fold of the breast and up to the pit above the collarbone. Develop
a system that won’t miss any of these regions and that you follow
in each self-examination. You can proceed in any of the following
ways:
• Star-shaped, proceeding from the edges of the breast region
towards the middle. Then examine the area behind the nipple.
• Proceeding in parallel lines, moving upwards and downwards.
• Proceeding in a spiral form, starting with the outer regions and
moving towards the center of the breast.
For orientation purposes when you wish to perform a thorough
examination or re-examination of a specific region you can imagine that the breast is divided into quadrants or wedges as in a
clock dial, adding the distance to the breast nipple.
Dr. med. Sven Ehart
Page 4
L50, L51 Deutsch
TM
Sie haben sich für ein Brusttastmodell entschieden, das aus 3B SKINlike
Material ist ein dermatologisch getestetes Silikon, das sich besonders realistisch anfühlt und selbst feine
Hautstrukturen detailgetreu wiedergibt.
Damit Sie lange mir Ihrem 3B Scientific
und Handhabung:
Leichte Verschmutzungen lassen sich mit einer milden Seifenlösung entfernen. Bitte keine lösungsmittelhaltigen Substanzen verwenden, da das Material sonst beschädigt werden kann. Scharfe oder spitze
Gegenstände (z.B. Spritzen) zerstören die Modelloberfläche. Die Haut fühlt sich geschmeidiger an, wenn
das Modell von Zeit zu Zeit mit etwas Talkumpuder eingerieben wird.
®
Brust-Tastmodell arbeiten können, hier einige Tipps zur Pflege
Material gefertigt ist. Dieses
Deutsch L55
Drei Einzelbrüste in Sockel (L55)
Dieses Modell zeigt die Originalabformung dreier verschiedener weiblicher Brüste der Größe mittel bis
groß. Die einzelnen Brüste werden mit einem Sockel zur Aufbewahrung geliefert. An der Unterseite sind
die Brüste mit den Ziffern „1“, „2“ und „3“ gekennzeichnet, so dass eine Zuordnung für den Sockel und
zu der Skizze möglich ist. Im einzelnen zeigen die 3 Einzelbrüste folgende Veränderungen:
Modell 1 (Linke Brust)
1. Runder, verschieblicher Tumor in 10mm Tiefe, Durchmesser 20mm, vermutlich gutartig.
2. Runder, verschieblicher Tumor in 10mm Tiefe, Durchmesser 20mm, vermutlich gutartig.
Brust-Tastmodell zum Umhängen mit Transportkoffer (L50)
Brust-Tastmodell zum Umhängen (L51)
Dieses Modell zeigt die Originalabformung eines weiblichen Oberkörpers mittlerer Brustgröße.
Für die Demonstration der Brustuntersuchung bei einer liegenden Frau wird das Modell auf den mitgelieferten
Sockel gelegt (es ist möglich, die Tragegurte unter dem
Sockel zu verschließen).
Der Umhängemechanismus ermöglicht zusätzlich das
Erlernen und Üben der Brusttastuntersuchung in aufrechter
Position sowie der Selbstuntersuchung. Das Umhängen des
Brust-Tastmodells geht am einfachsten mit Hilfe einer weiteren Person. Die Tragegurte werden am Rücken
überkreuzt, durch die weißen Schnallen an der Unterseite des Modells gezogen und mittels der
Klettverschlüsse fixiert.
Nach der Benutzung sollte das Modell auf dem Sockel liegend aufbewahrt werden. Das Modell bitte
nicht stauchen, rollen oder zusammenfalten. Bitte vermeiden Sie auch ein gewaltsames Reißen oder
Zerren an den Haltegurten.
Im einzelnen zeigt das Brust-Tastmodell zum Umhängen folgende Veränderungen:
1. Rechte Brust: Runder, verschieblicher Tumor in 10mm Tiefe, Durchmesser 20mm, vermutlich gutartig.
2. Rechte Brust: Runder, verschieblicher Tumor in 5mm Tiefe, Durchmesser 20mm, vermutlich gutartig.
3. Linke Brust: Unregelmäßiger, mit der Brustwand verwachsener Tumor in 5mm Tiefe, Durchmesser
ca. 35x25mm, vermutlich bösartig.
4. Säulenförmiger, unregelmäßiger, mit der Brustwand verwachsener Tumor in 5mm Tiefe, Durchmesser
ca. 30mm, bösartig.
5. Linke Brust: Permanent eingezogene Brustwarze (neu aufgetreten), häufig in Verbindung mit bösartigem
Tumor.
6. Linke Brust: „Apfelsinenhaut“, orangenschalenähnliche Hautstrukturierung mit Poreneinziehung infolge
Lymphstauung bei bösartigen Tumoren.
7. Linke Achselhöhle: Unregelmäßiger, fest verwachsener Lymphknoten, in 10mm Tiefe, Durchmesser
ca. 35x25mm, vermutlich bösartig.
8. Oberhalb des linken Schlüsselbeins: Bösartiger Tumor in 5mm Tiefe, Durchmesser 20mm.
2
1
8
7
3
4
5
6
Modell 2 (Linke Brust)
3. Unregelmäßiger, mit der Brustwand verwachsener Tumor in 15mm Tiefe, Durchmesser ca. 15mm,
vermutlich bösartig.
4. Unregelmäßiger, mit der Brustwand verwachsener Tumor in 15mm Tiefe, Durchmesser ca. 20mm,
vermutlich bösartig.
5. Säulenförmiger und unregelmäßiger, mit der Brustwand verwachsener Tumor in 10mm Tiefe,
Durchmesser ca. 30mm, bösartig.
6. Permanent eingezogene Brustwarze (neu aufgetreten), häufig in Verbindung mit bösartigem Tumor.
7. „Apfelsinenhaut“, orangenschalenähnliche Hautstrukturierung mit Poreneinziehung infolge
Lymphstauung bei bösartigen Tumoren.
Modell 3 (Rechte Brust)
Gesund
Alle aufgeführten Veränderungen müssen dringend Ihrer Frauenärztin oder Ihrem Frauenarzt vorgestellt
werden! Nur diese können die Ursache von Veränderungen feststellen und das weitere Vorgehen festlegen.
Mod. 2
Mod. 1
1
2
3
4
7
®
Mod. 3
5
6
Alle aufgeführten Veränderungen müssen dringend Ihrer Frauenärztin oder Ihrem Frauenarzt vorgestellt
werden! Nur diese können die Ursache von Veränderungen feststellen und das weitere Vorgehen festlegen.
Page 5

Die Selbstuntersuchung der weiblichen Brust Deutsch
Deutsch Die Selbstuntersuchung der weiblichen Brust
Wie beginne ich?
Stellen Sie sich mit unbekleidetem Oberkörper entspannt vor einen
ausreichend großen Spiegel. Lassen Sie die Arme locker herabhängen und richten Sie die Aufmerksamkeit auf Ihre Brust. Drehen
Sie sich langsam in beide Richtungen, um Ihre Brust auch von
schräg vorn und von der Seite beurteilen zu können. Beugen Sie
den Oberkörper auch nach vorn. Fällt Ihnen vielleicht etwas
Ungewöhnliches auf? Bei genauer Beobachtung stellen Sie vielleicht Unterschiede in Form, Größe oder Lage beider Brüste fest: es
besteht normalerweise also keine exakte Symmetrie. Im Laufe der
monatlichen Untersuchungen sollen Sie das Aussehen ihrer Brüste
so gut kennen lernen, dass Ihnen Veränderungen und
Abweichungen sofort auffallen!
Worauf achte ich?
Legen Sie nun die Hände in die Hüften und betrachten Sie sich
wieder von vorn, anschließend drehen Sie sich nach beiden
Seiten: Gibt es im Vergleich zum Vormonat Veränderungen in der
Form und der Lage Ihrer Brüste? Haben sich Größe oder Aussehen
verändert? Vergleichen Sie beide Seiten! Bemerken Sie
Einziehungen oder Vorwölbungen der Haut? Achten Sie auf
Rötungen oder Verfärbungen. Gibt es Bereiche mit feinhöckerigen
Hautveränderungen („Apfelsinenhaut“)? Vergessen Sie auch den
Bereich in der Umschlagfalte unterhalb Ihrer Brust nicht. Bemerken
Sie eine der beschriebenen oder auch andere Veränderungen, die
im Zyklusverlauf nicht verschwinden, stellen Sie diese Ihrer
Frauenärztin oder Ihrem Frauenarzt vor!
Beobachtung
Heben Sie mehrmals langsam die Arme und verschränken die
Hände hinter dem Nacken: Folgen beide Brüste gleichmäßig den
Aufwärtsbewegungen Ihrer Arme, oder folgt eine Brust diesen
Bewegungen nicht wie üblich? Lässt sich das Brustgewebe gut
gegenüber der Brustwand verschieben? Achten Sie auf
Veränderungen Ihrer Brustwarzen und deren Vorhöfe: sind
Rötungen oder Einziehungen neu aufgetreten? Befinden sich beide
Brustwarzen etwa auf gleicher Höhe? Prüfen Sie vorsichtig, dass
sich keine Flüssigkeit aus der Brustwarze pressen lässt.
Die Tastuntersuchung im Stehen
Beginnen Sie stehend mit der Selbstuntersuchung Ihrer Brust.
Führen Sie die Tastuntersuchung evtl. auch unter der Dusche oder
bei eingeölter Haut durch. Sie können Ihr Tastvermögen üben!
Legen Sie die Fingerkuppen von Zeige-, Mittel- und Ringfinger
einer Hand geschlossen und flach auf die Haut der gegenüberlie-
genden Brust. Tasten Sie das Gewebe erst mit sanftem, dann
zunehmendem Druck gegen die Brustwand oder die Fläche Ihrer
® ®
zweiten Hand. Damit fühlen Sie sowohl oberflächliche als auch tiefer gelegene Schichten. Wiederholen Sie die Untersuchung auch
bei erhobenem Ellenbogen, die Hand im Nacken.
Tasten Sie ebenfalls in der Achselhöhle nach Knoten oder
Verhärtungen, erst bei locker herabhängendem, dann bei erhobenem Arm. Es können übrigens auch Erkrankungen, die nicht die
Brust betreffen, zu Schwellungen der Achsellymphknoten führen.
Zeigen Sie ihrem Arzt neu aufgetretene, insbesondere schmerzlose
Knoten.
Die Tastuntersuchung im Liegen
Für die gründliche Untersuchung legen Sie sich bequem auf den
Rücken, den Kopf flach aufliegend. Um Ihre linke Brust zu untersuchen, heben Sie den linken Arm und legen die Hand hinter den
Nacken. Bei größeren Brüsten drehen Sie sich soweit auf die rechte Seite (evtl. mit angezogenen Beinen), dass die linke Brust sich
gleichmäßig auf die Brustwand auflagert. Tasten Sie nun mit den
Fingerspitzen der rechten Hand gründlich die linke Brust und die
beschriebene Umgebung ab. Anschließend wechseln Sie die Seite.
Suchen Sie die markierte Region um die Brust herum einschließlich
der Schlüsselbeingrube systematisch nach Knoten oder
Veränderungen ab. Das Areal zwischen Achselhöhle und Brust
zeigt häufig gutartige bindegewebige Veränderungen. Da hier
jedoch auch die Karzinomwahrscheinlichkeit am größten ist, gilt
besonders: Zeigen Sie jede neu aufgetretene Veränderung Ihrem
Frauenarzt.
Systematik
Zu einer gründlichen Untersuchung Ihrer Brust gehört die gesamte
markierte Region: Vom Brustbein als Mittellinie zur Seite bis einschließlich der Achselhöhle, von dort nach unten bis unterhalb der
Umschlagfalte und nach oben bis zur Grube oberhalb des
Schlüsselbeins. Eignen Sie sich ein lückenloses System an, nach
dem Sie jedes Mal wieder bei der Selbstuntersuchung vorgehen,
z.B.:
• Sternförmig, indem Sie jeweils vom Rand der Brustregion zur
Mitte in Richtung Brustwarze tasten. Anschließend untersuchen
Sie die Region hinter der Brustwarze.
• Tasten Sie sich in parallel verlaufenden Linien auf- und
abwandernd voran.
• Spiralförmig immer enger werdend, vom Außenrand zum
Mittelpunkt der Brust.
Zum gründlichen Absuchen bzw. Wiederauffinden einer Region
können Sie sich mit einer gedachten Einteilung der Brust in
Quadranten oder in ein Zifferblatt, sowie dem Abstand zur
Brustwarze orientieren.
Dr. med. Sven Ehart
Page 6

L50, L51 Español
Español L55
Usted ha decidido elegir un modelo diseñado para la palpación de la mama y realizado con material
TM
SKINlike
ca mucho al aspecto real de la mama y cuyas estructuras superficiales están reproducidas con todo detalle.
Para poder trabajar durante mucho tiempo con el modelo para la palpación de la mama de
3B Scientific
La suciedad superficial se limpia con una solución jabonosa suave. Por favor no usar sustancias que contengan disolventes, porque estropearían el material. Los objetos afilados o puntiagudos (p. ej. jeringas)
estropean la superficie del modelo.
La piel del modelo se mantiene tersa si de vez en cuando se fricciona con polvos de talco.
de 3B. Este material está constituido por una silicona controlada dermatológicamente, que se acer-
®
‚ proponemos algunos consejos para su mantenimiento y su manipulación:
Modelo para la palpación de mama para colgar con caja
para transportar (L50)
Modelo para la palpación de mama para colgar (L51)
Este modelo muestra la forma original del tórax femenino
con las mamas de tamaño mediano.
Para la demostración de la exploración de mama en una mujer
echada, este modelo se coloca sobre el soporte que acompaña al modelo (es posible abrochar la cincha bajo el soporte).
El sistema para colgar el modelo facilita además aprender
y practicar la exploración de la mama mediante palpación en posición erguida y para llevar a cabo la autoexploración. Para colgar el modelo para la palpación de la
mama es aconsejable la ayuda de otra persona. Las cinchas se abrochan cruzadas por detrás, a través
de las hebillas blancas en la parte inferior del modelo y fijadas por un cierre.
2
1
8
7
3
4
5
6
Tres mamas con soporte (L55)
Este modelo presenta los moldes de tres mamas de tamaño medio y grande. Cada mama lleva un soporte. En la parte inferior, las mamas están identificadas con los números "1”, "2” y "3” para coordinar
con el soporte y seguir el croquis esquemático. Cada mama señala las alteraciones siguientes:
Modelo 1 (Mama izquierda)
1. Tumor redondo, movible, profundidad 10 mm, diámetro 20 mm, probablemente benigno.
2. Tumor redondo, movible, profundidad 10 mm, diámetro 20 mm, probablemente benigno.
Modelo 2 (Mama izquierda)
3. Tumor irregular, adherido, profundidad 15 mm, diámetro aproximado 15 mm, probablemente maligno.
4. Tumor irregular, adherido, profundidad 15 mm, diámetro aproximado 20 mm, probablemente maligno.
5. Tumor con forma de columna, irregular, adherido, profundidad 10 mm, diámetro aproximado 30 mm,
maligno.
6. Pezón retraído (nueva presentación), con frecuencia asociado a un tumor maligno.
7. Estructura de la piel en forma de "piel de naranja” con retracción de los poros como consecuencia de
la estasis linfática en los tumores malignos.
Modelo 3 (Mama derecha)
Sana
Todas las alteraciones descritas aquí deben comunicarse inmediatamente al ginecólogo. El ginecólogo
es la persona indicada para determinar el origen de estas alteraciones y concretar los procedimientos a
seguir.
®
Después de utilizar el modelo, guardarlo sobre el soporte echado. Por favor, no aplastar, enrollar o doblar el modelo. También evitar estirar o arrancar las cinchas de sostén.
El modelo para la palpación de mama para colgar muestra las siguientes alteraciones:
1. Mama derecha: tumor redondo, movible, profundidad 10 mm, diámetro 20 mm, probablemente benigno.
2. Mama derecha: tumor redondo, movible, profundidad 5 mm, diámetro20 mm, probablemente benigno.
3. Mama izquierda: tumor irregular, adherido, profundidad 5 mm, diámetro aproximado 35 x 25 mm, probablemente maligno.
4. Tumor con forma de columna, irregular, adherido, profundidad 5 mm, diámetro aproximado 30 mm, maligno.
5. Mama izquierda: retracción permanente del pezón (primera presentación), a menudo relacionada con
tumor maligno.
6. Mama izquierda: piel con estructura en forma de "piel de naranja”, con retracción de los poros como
consecuencia de la estasis linfática en los tumores malignos.
7. Axila izquierda: ganglio linfático irregular, fuertemente adherido, profundidad 10 mm, diámetro aproximado
35 x 25 mm, probablemente maligno.
8. Parte superior de la clavícula izquierda: tumor maligno de 5mm de profundidad y 20 mm de diámetro.
Todas las alteraciones descritas aquí deben ser comunicadas inmediatamente a su ginecólogo. El
ginecólogo es la persona indicada para determinar el origen de estas alteraciones y para concretar los
procedimientos a seguir.
Mod. 1
Mod. 2
3
4
1
2
5
7
Mod. 3
6
Page 7

Autoexploración de la mama femenina Español
Español Autoexploración de la mama femenina
¿Cómo empezar?
Usted se coloca delante de un espejo grande con la parte superior
del cuerpo desnuda. Dejar los brazos colgando y fijar la atención
en el pecho. Girar lentamente, primero a un lado y luego al otro
para poder mirar el pecho desde ambos lados. Dejar caer el cuerpo hacia delante. ¿Observa usted alguna diferencia? La observación cuidadosa permite ver diferencias en la forma, tamaño y
posición de ambas mamas: normalmente la simetría no es totalmente exacta. En el transcurso de las exploraciones mensuales se
llega a conocer el aspecto de las mamas tan bien que cualquier
cambio o alteración es detectado inmediatamente.
¿Qué tengo que vigilar?
Poner las manos sobre las caderas y examinar el pecho desde
delante y después girar el tórax a ambos lados: respecto al mes
anterior ¿aparece alguna modificación en la forma y la situación
de las mamas? Comparar ambos lados. ¿Existe alguna retracción
o alguna protuberancia en la piel? Observar la aparición de
enrojecimiento o cambios de color. ¿Aparecen zonas con modificaciones del relieve cutáneo ("piel de naranja”)? No olvidar el
repliegue de las mamas. Consultar siempre con el ginecólogo
cuando aparezca alguna de las alteraciones descritas aquí u otras
modificaciones que no desaparecen durante el ciclo menstrual.
Observación
Levantar lentamente los brazos y cruzar las manos detrás de la
nuca: observar si las dos mamas siguen igual los movimientos de
elevación de los brazos o una mama no los sigue como siempre.
Comprobar si el desplazamiento de las mamas en la pared toráci-
ca es adecuado. Observar si aparecen cambios en los pezones,
como enrojecimiento o cambios de color. ¿Están ambos pezones
a la misma altura? Comprobar si sale líquido al apretar el pezón.
Palpación en posición de pie
Empezar la autoexploración de las mamas en la posición de pie.
Eventualmente, la palpación de las mamas se puede hacer bajo la
ducha o después de aplicar cremas a la piel. ¡Probar la palpación
de las mamas en circunstancias diversas! Colocar juntas y planas
las pulpas de los dedos índice, mediano y anular de una mano
sobre la piel de la mama del mismo lado que la mano. Palpar el
tejido presionando primero suavemente y después más fuerte contra
® ®
la pared torácica o la superficie de la otra mano. Así se aprecia
tanto la parte superficial como la profunda. Repetir la exploración
con los codos en alto y la mano en la nuca.
Explorar el hueco axilar en busca de ganglios o zonas endurecidas, primero con el brazo caído y después con el brazo en alto.
Otras enfermedades que no involucran a la mama también presentan inflamación de los ganglios axilares. Comunicar al médico
la presencia de ganglios que antes no estaban, sobre todo los
ganglios indoloros.
Palpación en posición echada
Para la exploración básica, estirarse sobre la espalda, con la
cabeza plana. Cuando se explora la mama izquierda, colocar el
brazo izquierdo debajo de la nuca. Si las mamas son grandes,
girarse sobre el lado derecho (a veces con las piernas encogidas),
de forma que la mama izquierda esté apoyada sobre la pared
torácica de forma uniforme. Palpar con la punta de los dedos de
la mano derecha la mama izquierda y las zonas contiguas.
Cambiar de lado. Explorar alrededor de la mama y en la zona
clavicular en busca de ganglios u otras alteraciones. El área entre
el hueco axilar y la mama muestra con frecuencia cambios benignos. Pero también existe la probabilidad de que se trate de un
carcinoma, por lo que siempre hay que comunicar al ginecólogo
cualquier novedad.
Sistemática
Una exploración básica de las mamas incluye la siguiente región
corporal: desde el esternón como línea media hacia el lado hasta
el hueco axilar, desde aquí hacia abajo hasta debajo del repliegue y hacia arriba hasta la fosa clavicular por encima de la claví-
cula. Intentar seguir la misma sistemática en cada autoexploración, que podría ser por ejemplo:
• en forma de estrella, en la que se explora desde el extremo de
la región mamaria hacia el centro. A continuación explorar la
región detrás del pezón.
• palpar en forma de líneas paralelas por delante.
• en forma de espiral, cada vez más estrecha, desde la parte
más externa de la mama hasta el punto medio de la mama.
Para explorar una región de la mama o volver a explorar la
misma región, usted puede dividir mentalmente la mama en cuadrantes, o en una esfera, así como orientar la distancia al pezón.
Dr. med. Sven Ehart
Page 8

L50, L51 Français
TM
Vous vous êtes décidé(e) pour un modèle de seins palpables, fabriqué en 3B SKINlike
l'aspect particulièrement réaliste et reproduisant même les structures cutanées fines est une silicone testée
dermatologiquement.
Afin que vous puissiez travailler longtemps avec votre modèle de seins palpables 3B Scientific®, nous vous
donnons quelques conseils relatifs à son entretien et à sa manipulation :
Eliminer les petites souillures en utilisant une savonnée douce. Ne pas utiliser des substances solvantes, étant
donné que celles-ci peuvent endommager le matériau. Des objets coupants ou pointus (p.ex. seringues) détruisent
la surface du modèle. La peau est plus douce lorsque le modèle est frictionné de temps en temps avec du talc.
Modèle de seins palpables à mettre en place avec valise
de transport (L50)
Modèle de seins palpables à mettre en place (L51)
Ce modèle représente le moulage original du buste
féminin dont la taille des seins est de la taille moyenne.
Pour la démonstration de l'examen des seins sur une
femme en position couchée, le modèle est déposé sur le
socle fourni avec le modèle (il est possible de fermer la
sangle en dessous du socle).
Le mécanisme de mise en place permet par ailleurs l'apprentissage et l'exercice de l'examen des seins par palpation
en position debout ainsi que l'auto-examen. La mise en
place du modèle de seins palpables est très simple grâce à l'aide d'une tierce personne. On croise les
sangles sur le dos, on les fait passer dans les boucles blanches situées à la face inférieure du modèle et
on les fixe au moyen des fermetures Velcro
®
.
2
1
. Ce matériau à
8
7
3
4
5
6
Français L55
Trois seins isolés sur socle (L55)
Ce modèle montre le moulage original de trois seins féminins différents, de la taille moyenne à la grande
taille. Chaque sein est fourni avec un socle pour sa conservation. Sur la face inférieure, les seins sont
caractérisés par les chiffres "1", "2" et "3", de telle manière que la classification est possible pour le
socle et pour l'esquisse. En détail, les 3 seins différents présentent les altérations suivantes :
Modèle 1 (Sein gauche)
1. Tumeur ronde, déplaçable à 10 mm de profondeur, diamètre de 20 mm, probablement bénigne.
2. Tumeur ronde, déplaçable à 10 mm de profondeur, diamètre de 20 mm, probablement bénigne.
Modèle 2 (Sein gauche)
3. Tumeur irrégulière, adhérant à la paroi thoracique à 15 mm de profondeur, diamètre d'env. 15 mm,
probablement maligne.
4. Tumeur irrégulière, adhérant à la paroi thoracique à 15 mm de profondeur, diamètre d'env. 20 mm,
probablement maligne.
5. Tumeur en forme de colonne et irrégulière, adhérant à la paroi thoracique à 10 mm de profondeur,
diamètre d'env. 30 mm, maligne.
6. Mamelon rétracté en permanence (manifestation récente), fréquemment en relation avec une tumeur
maligne.
7. "Peau d'orange", structure cutanée similaire à la structure d'une épluchure d'orange accompagnée de
pores rétractés suite à une congestion lymphatique dans le cas de tumeurs malignes.
Modèle 3 (Sein droit)
Sain
Toutes les altérations énumérées doivent être immédiatement rapportées à votre gynécologue ! Seul le
gynécologue peut constater la cause d'altérations et fixer la procédure à suivre.
®
Après utilisation, le modèle doit être conservé à plat sur le socle. Ne pas aplatir, ne pas rouler ni plier le
modèle. Evitez également de déchirer ou d'arracher brutalement les sangles de soutien.
En détail, le modèle de seins palpables à mettre en place présente les altérations suivantes :
1. Sein droit : tumeur ronde, déplaçable à 10 mm de profondeur, diamètre de 20 mm, probablement bénigne.
2. Sein droit : tumeur ronde, déplaçable à 5 mm de profondeur, diamètre de 20 mm, probablement bénigne.
3. Sein gauche : tumeur irrégulière, adhérant à la paroi thoracique à 5 mm de profondeur, diamètre
d'env. 35 x 25 mm, probablement maligne.
4. Tumeur en forme de colonne, irrégulière, adhérant à la paroi thoracique à 5 mm de profondeur,
diamètre d'env. 30 mm, maligne.
5. Sein gauche : mamelon rétracté en permanence (manifestation récente), fréquemment en relation avec
une tumeur maligne.
6. Sein gauche : "peau d'orange", structure cutanée similaire à la structure d'une épluchure d'orange
accompagnée de pores rétractés suite à une congestion lymphatique dans le cas de tumeurs malignes.
7. Aisselle gauche : ganglion lymphatique irrégulier, adhérant et solide, à 10 mm de profondeur,
diamètre d'env. 35 x 25 mm, probablement malin.
8. Au-dessus de la clavicule gauche : tumeur maligne à 5 mm de profondeur, diamètre de 20 mm.
Toutes les altérations énumérées doivent être immédiatement rapportées à votre gynécologue ! Seul le
gynécologue peut constater la cause d'altérations et fixer la procédure à suivre.
Mod. 1
Mod. 2
3
4
1
2
5
7
Mod. 3
6
Page 9

L'auto-examen de la poitrine féminine Français
Français L'auto-examen de la poitrine féminine
Comment dois-je commencer ?
Placez-vous avec le torse nu, en étant détendue, devant un miroir
suffisamment grand. Laisser pendre les bras de manière décontrac-
tée et portez votre attention à votre poitrine. Tournez-vous lentement dans les deux directions afin de pouvoir examiner votre poitrine de travers à l'avant et latéralement. Veuillez également pencher votre torse vers l'avant. Remarquez-vous peut-être quelque
chose d'anormal ? En observant bien, vous constatez peut-être des
différences au point de vue de la forme, du volume ou de la position de vos deux seins : normalement, les deux seins ne sont pas
parfaitement symétriques. Au cours des examens mensuels, vous
allez apprendre à connaître parfaitement l'aspect de vos seins, de
telle manière à ce que des altérations ou des écarts attirent immé-
diatement votre attention.
A quoi dois-je faire attention ?
Veuillez poser vos mains sur vos hanches et examinez-vous à nouveau de devant, ensuite tournez-vous des deux côtés : constatezvous des altérations au point de vue de la forme et de la position
de vos seins par rapport au mois passé ? Le volume ou l'aspect de
vos seins s'est-il modifié ? Comparez les deux côtés. Constatezvous des renfoncements ou des proéminences de la peau ? Veillez
aux rougeurs ou aux colorations. Y a-t-il des zones présentant des
altérations cutanées sous forme de fines protubérances ("peau
d'orange") ? N'oubliez pas non plus la zone du pli en dessous de
chaque sein. Si vous constatez l'une des altérations décrites ou
d'autres altérations qui ne disparaissent par au cours du cycle,
parlez-en à votre gynécologue.
Observation
Soulevez plusieurs fois vos bras lentement et croisez vos mains derrière la nuque : vos deux seins suivent-ils les mouvements de vos
bras vers le haut ou l'un de vos seins ne suit-il pas ces mouvements
comme d'habitude ? Le tissu mammaire se déplace-t-il bien par
rapport à la paroi thoracique ? Veillez aux altérations de vos
mamelons et leurs aéroles : des rougeurs ou des rétractions sontelles apparues récemment ? Les deux mamelons se trouvent-ils à
peu près à la même hauteur ? Vérifiez avec précaution qu'aucun
liquide ne s'écoule des mamelons.
L'examen par la palpation en position debout
Procédez à l'auto-examen de votre poitrine en position debout.
Effectuez éventuellement la palpation sous la douche ou lorsque
votre peau est enduite d'huile. Vous pouvez exercer votre toucher.
Posez le bout de l'index, du majeur et de l'annulaire ensemble sur
la peau du sein d'en face. Palper d'abord le tissu en exerçant une
pression douce, ensuite en augmentant la pression sur la paroi
thoracique ou avec la paume de l‘autre main. Ceci vous permet de
sentir les couches superficielles ainsi que les couches situées plus
® ®
profondément. Répétez cet examen en soulevant le coude et en
posant la main sur la nuque.
Palpez également l'aisselle tout en cherchant si des nodules ou des
durcissements sont présents, tout d'abord en relâchant le bras de
manière décontractée, et ensuite en soulevant le bras. Des affections ne concernant pas la poitrine peuvent également entraîner
des gonflements des ganglions lymphatiques de l'aisselle. Montrez
les nodules s'étant manifestés récemment à votre médecin, en particulier les nodules qui ne causent pas de douleurs.
L'examen par la palpation en position couchée
Pour un examen rigoureux, allongez-vous confortablement sur le
dos, la tête reposant à plat. Pour examiner votre sein gauche, soulevez le bras gauche et placez votre main derrière la nuque. Si le
volume de vos seins est assez important, veuillez vous tourner sur
le côté droit (éventuellement en ramenant vos jambes) de telle
manière à ce que le sein gauche soit positionné de façon homogène sur la paroi thoracique. Palpez alors le sein gauche rigoureusement avec la pointe des doigts de la main droite ainsi que la toute
la région décrite. Ensuite, changez de côté. Examinez systématiquement la région marquée autour du sein, y compris la fosse de
la clavicule, afin de découvrir des nodules ou des altérations éven-
tuels. La région entre l'aisselle et le sein présente souvent des
altérations bénignes du tissu conjonctif. Etant donné que la probabilité d'un carcinome est cependant la plus élevée à cet endroit, il
est très important de signaler toute altération récente à votre gyné-
cologue.
Systématique
La totalité de la région marquée fait partie d'un examen rigoureux
de votre poitrine : du sternum en tant que ligne médiane jusque sur
le côté, y compris l'aisselle ; de l'aisselle vers le bas jusqu'en dessous du pli du sein et vers le haut jusqu'à la fosse au-dessus de la
clavicule. Veuillez développer un système exhaustif vous permettant de procéder de la même manière à chaque auto-examen,
comme p.ex. :
• en forme d'étoile, c'est-à-dire en commençant chaque fois à
partir du bord de la région de la poitrine vers le centre. Ensuite,
vous examinez la région derrière le mamelon.
• Continuez à palper en lignes parallèles en procédant vers le
haut et vers le bas.
• En forme de spirale devenant de plus en plus étroite, du bord
extérieur vers le centre du sein.
Afin d'examiner votre poitrine à fond, ou afin de retrouver une
région, vous pouvez vous orienter à une division du sein en quarts
de cercle ou en cadrans ainsi qu'à la distance jusqu'au mamelon.
Dr. med. Sven Ehart
Page 10

L50, L51 Português
TM
Você adquiriu um modelo para o exame das mamas, feito do material 3B SKINlike
tipo de silicone dermatologicamente testado com aspectos físicos muito realistas e que representa detalhadamente mesmo as estruturas mais finas da pele.
Para que você possa usar o máximo possível o seu modelo para o exame das mamas da 3B Scientific
recomendamos observar as seguintes instruções de limpeza e uso:
Limpar sujidades leves com água e sabão suave. Favor não utilizar substâncias a base de solventes;
estas substâncias podem danificar o material do modelo. Objetos pontiagudos ou afiados (p. ex. seringas) podem destruir a superfície do modelo. Aplicando regularmente um pouco de talco no modelo, a
pele artificial apresentará uma textura mais macia.
Modelo para o exame das mamas para amarrar, com
mala de transporte (L50)
Modelo para o exame das mamas para amarrar (L51)
Este modelo representa o molde original de um tórax feminino com mamas de tamanho médio.
Para a demonstração do exame das mamas de uma mulher deitada, o modelo deve ser posicionado sobre o
suporte fornecido em conjunto (é possível apertar os cintos
de fixação em baixo do suporte).
2
1
. Trata-se de um
8
7
3
4
5
6
Português L55
Três mamas individuais com suporte (L55)
Este modelo representa o molde original de três mamas diferentes nos tamanhos médio e grande. As
®
,
mamas individuais são fornecidas com um suporte para guardá-las. Os modelos são marcados com os
números "1”, "2” e "3” na sua parte inferior, podendo ser assim mais facilmente atribuídos aos seus respectivos suportes e esquemas. As três mamas individuais apresentam as seguintes alterações:
Modelo 1 (Mama esquerda)
1. Tumor arredondado e móvel, numa profundidade de 10 mm e com um diâmetro de 20 mm, provavelmente benigno.
2. Tumor arredondado e móvel, numa profundidade de 10 mm e com um diâmetro de 20 mm, provavelmente benigno.
Modelo 2 (Mama esquerda)
3. Tumor irregular e fixo na parede do peito, situado numa profundidade de 15 mm e com um diâmetro
de aproximadamente 15 mm, provavelmente maligno.
4. Tumor irregular e fixo na parede do peito, situado numa profundidade de 15 mm e com um diâmetro
de aproximadamente 20 mm, provavelmente maligno.
5. Tumor alongado, irregular e fixo na parede do peito, situado numa profundidade de 10 mm e com
um diâmetro de aproximadamente 30 mm, maligno.
6. Mamilo retraído (sintoma recente), freqüentemente associado a tumores malignos.
7. Pele tipo "casca de laranja”, ou seja, espessamento da pele com retração dos poros como
conseqüência de um acúmulo de linfa no caso de certos tumores malignos.
Os cintos de fixação do modelo servem para amarrá-lo no
corpo, possibilitando aprender e praticar o exame das
mamas em posição ereta (em pé) e o auto-exame. Recomendamos fixar o modelo para o exame das
mamas com a ajuda de uma outra pessoa. Cruzar os cintos de fixação nas costas e introduzilos nas
fivelas brancas na parte inferior do modelo, fixando-os com o fecho de velcro.
Após o seu uso, guardar o modelo deitado sobre o suporte. Favor não comprimir, enrolar ou dobrar o
modelo. Favor não puxar (ou arrancar) nos cintos com muita força.
O modelo para o exame das mamas apresenta as seguintes alterações da mama:
1. Mama direita: tumor arredondado e móvel, numa profundidade de 10 mm e com um diâmetro de
20 mm, provavelmente benigno.
2. Mama direita: tumor arredondado e móvel, numa profundidade de 5 mm e com um diâmetro de
20 mm, provavelmente benigno.
3. Mama esquerda: tumor irregular e fixo na parede do peito, situado numa profundidade de 5 mm e
com um diâmetro de aproximadamente 35x25 mm, provavelmente maligno.
4. Tumor alongado, irregular e fixo na parede do peito, situado numa profundidade de 5 mm e com um
diâmetro de aproximadamente 30 mm, maligno.
5. Mama esquerda: mamilo retraído (sintoma recente), freqüentemente associado a um tumor maligno.
6. Mama esquerda: pele tipo "casca de laranja”, ou seja, espessamento da pele com retração dos
poros como conseqüência de um acúmulo de linfa no caso de certos tumores malignos.
7. Mama esquerda: nódulo linfático irregular e fixo, situado numa profundidade de 10 mm e com um
diâmetro de aproximadamente 35x25 mm, provavelmente maligno.
8. Acima da clavícula esquerda: Tumor maligno situado numa profundidade de 5 mm e com um diâmetro de
20 mm.
Caso notar qualquer uma das alterações citadas, consulte imediatamente o seu ginecologista! Só ele
poderá avaliar as causas destas anomalias e, caso necessário, determinar o tratamento adequado.
Modelo 3 (Mama direita)
Sem alterações
Caso notar qualquer uma das alterações citadas, consulte imediatamente o seu ginecologista! Só ele
poderá avaliar as causas destas anomalias e, caso necessário, determinar o tratamento adequado.
Mod. 2
Mod. 1
1
2
3
4
7
®
Mod. 3
5
6
Page 11

O auto-exame das mamas Português
Português
O auto-exame das mamas
Como devo começar?
Posicione-se de pé e com o tronco descoberto diante de um espelho suficientemente grande e relaxe. Deixe os braços caídos ao
lado do corpo e concentre-se nos seus seios. Vire-se devagar para
a direita e para a esquerda para poder observar as partes
laterais das mamas. Incline-se também para a frente. Você notou
algo excepcional? Observando atentamente os seus seios, você
talvez verá que há diferenças em relação à forma, ao tamanho ou
à posição de ambos os seios; em geral, as mamas de uma mulher
não são totalmente simétricos. No decorrer do tempo, você vai
passar a conhecer melhor as suas mamas através dos exames
mensais. Desta maneira, você imediatamente notará quaisquer
alterações e anomalias das mamas, caso aparecerem.
Em que devo prestar atenção?
Agora coloque as mãos na cintura e olhe-se novamente de frente;
em seguida, vire-se para os dois lados: você encontrou alguma
diferença na forma ou posição das mamas em relação ao mês
anterior? Compare ambos os lados! Há uma alteração no tamanho ou na aparência das mamas? Você nota depressões ou saliên-
cias na pele? Procure por áreas vermelhas ou colorações na pele.
Existem áreas de espessamento ou enrugamento da pele (pele tipo
"casca de laranja”)? Não esqueça de observar também a parte
inferior dos seios. Se você notar uma das alterações citadas ou
qualquer outra mudança que não desaparece no decorrer do
ciclo menstrual, consulte o seu ginecologista!
Exame visual
Levante os braços algumas vezes lentamente, olhando atentamente a imagem no espelho, e coloque as mãos atrás da cabeça:
ambas as mamas seguem os movimentos dos braços de forma
igual, ou você nota que um dos seios não segue estes movimentos
como de costume? O tecido das mamas é móvel em relação ao
peito? Procure por alterações dos seus mamilos (bicos dos seios):
eles apresentam vermelhidão ou retrações recentes? Os dois
mamilos encontram-se aproximadamente na mesma altura?
Aperte-os gentilmente e controle se sai algum líquido.
A palpação das mamas em pé
Comece a apalpar as suas mamas em pé. Por exemplo, você
pode realizar a palpação no chuveiro, durante o banho, ou
depois de passar óleo na pele. Você pode treinar o auto-exame!
Com a mão espalmada, coloque as pontas dos dedos indicador,
do meio e anular esticados sobre a mama oposta; examine a
mama esquerda com a mão direita e vice-versa. Comece a apalpar o tecido da mama, deslizando gentilmente sobre a pele no
início e sucessivamente aumentando a pressão, apertando a
® ®
mama contra o peito ou a outra mão. Desta maneira, você palpará tanto as áreas superficiais como também as camadas mais
profundas. Repita este procedimento com o cotovelo esticado,
colocando a mão atrás da cabeça.
Examine também as axilas, para procurar nódulos ou caroços, primeiro com o braço caído ao lado do corpo e, em seguida, com o
braço levantado. Uma inchação dos nódulos linfáticos das axilas
pode também ser a conseqüência de doenças não associadas
com as mamas. Consulte o seu médico se você notar nódulos
recentes, sobretudo nódulos indolores.
A palpação das mamas em posição deitada
A fim de realizar um auto-exame minucioso das suas mamas,
deite-se de barriga para cima numa posição confortável, apoiando a cabeça em uma superfície plana. Para examinar a mama
esquerda, levante o braço esquerdo e coloque a mão atrás da
cabeça. Caso você tenha seios relativamente grandes, vire-se
para o lado direito (talvez com as pernas encolhidas), para que a
mama esquerda fique encostada no peito. Agora apalpe a mama
esquerda e a área descrita com as pontas dos dedos da mão
direita. Repita o procedimento para a mama direita. Examine
sistematicamente a área descrita abaixo, inclusive a depressão
acima da clavícula, procurando nódulos ou alterações. A área
entre a axila e o seio freqüentemente apresenta alterações benignas do tecido conjuntivo. Porém, sendo esta a área com a maior
incidência de carcinomas, quaisquer alterações encontradas
devem ser imediatamente apresentadas ao seu ginecologista.
Modos de palpação
Um exame minucioso dos seus seios deve incluir toda a região
marcada: partindo do esterno, no centro, até a axila, ao lado,
movimentando-se para a área inferior das mamas e, em seguida,
para cima, até a depressão acima da clavícula. Siga um sistema
de palpação uniforme e minucioso, que deve ser repetido da
mesma maneira durante cada auto-exame. Exemplos de modos de
palpação:
• em forma de estrela, partindo sempre das áreas periféricas do
peito para o centro; em seguida, examine a região atrás do
mamilo;
• em forma de linhas paralelas, subindo e descendo;
• em forma de espiral, começando na periferia e aproximando-se
cada vez mais do centro da mama.
Para melhor examinar e reencontrar uma determinada região,
você pode dividi-la em quadrantes ou num mostrador de relógio
fictícios, ou orientar-se pela distância em relação ao mamilo.
Dr. med. Sven Ehart
Page 12

8
7
3
2
1
4
5
6
3
4
1
2
5
6
7
Page 13

Page 14

L50, L51, L55-01/01-3
®
3B Scientific Products
www.3bscientific.com
 Loading...