


We strive to ensure that our products are of the highest quality and free of manufacturing defects or missing parts. However, if you have any problems with your new product,
DO NOT RETURN IT TO THE STORE, please contact us toll free @:
1-866-556-2759 FAX: 1-866-873-3531
customerservice@escaladesports.com
Or write to:
Escalade Sports
Customer Service Department
P.O. Box 889
Evansville IN 47706
Please have your model number when inquiring about parts.
When contacting Escalade Sports please provide your model number, serial number (if applicable), and part number if requesting a replacement part. These numbers are located on the product, packaging, and in this owners manual.
G05612
Your Model Number _______________________
© 2004 Escalade Sports |
1 |
For Customer Service Call 1-866-556-2759 |
IMPORTANT! READ THIS MANUAL ALL THE
WAY THROUGH BEFORE BEGINNING TO
PUT YOUR GAME TABLE TOGETHER! THEN
READ EACH STEP BEFORE STARTING
THAT STEP.
TWO ADULTS ARE REQUIRED TO ASSEMBLE
THIS GAME TABLE
Tools Required:
Wrenches H12 and H13 included with the table
Phillips Screwdriver
Furniture Polish and Cloth
An electric screwdriver is helpful in assembly. However, please set at low torque and use extreme caution with an electric screwdriver because you could overtighten the hardware and strip the screws.
Assembly Tips
Make sure you understand the following tips before you begin to assemble your game table.
1.When installing parts that have more than one bolt, start ALL the bolts in that part by hand before tightening anything.
2.Some drawings or images in this manual may not look exactly like your product. Please read and understand the text before starting each assembly step.
READ AND FOLLOW ALL ASSEMBLY, OPERATION, AND
SAFETY INSTRUCTIONS CAREFULLY. AT LEAST TWO
ADULTS ARE NEEDED TO PUT THIS GAME TABLE
TOGETHER.
© 2004 Escalade Sports |
2 |
For Customer Service Call 1-866-556-2759 |
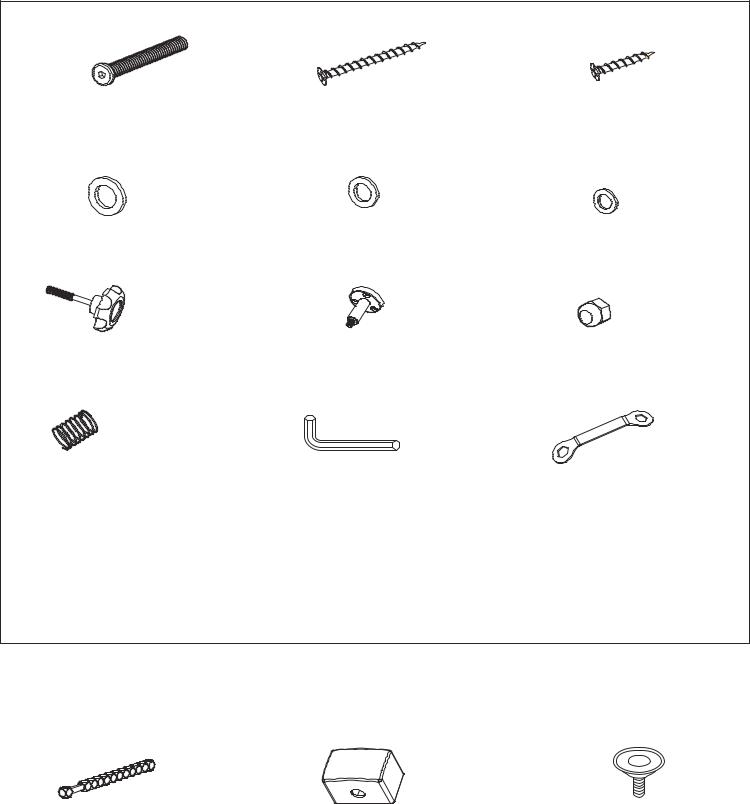
PARTS IDENTIFER (Not to Scale)
H1 - 5/16x2-7/8 Bolt (8) |
H2 - 1-1/4 Flat Head |
H3 - 1" Flat Head Screw (6) |
|
Screw (20) |
|||
|
|
H5 - 5/8 Flat Washer (2) |
H6 - 3/8 Flat Washer (2) |
H7 - 5/16 Flat Washer (8) |
H8 - 5/16 Knob (4) |
H9 - 3/8 Shoulder Bolt (2) |
H10 - 3/8 Lock Not (2) |
H11 - Spring (4) |
H12 - Allen Wrench |
H13 - Wrench |
C1 - Slide Scorer (2) |
C2 - Leg Cap (4) |
C3 - Leg Leveler (4) |
© 2004 Escalade Sports |
3 |
For Customer Service Call 1-866-556-2759 |

PARTS IDENTIFER (Not to Scale)
P1 - Pool table (1) |
P2 - Hockey table (1) |
P3 - Leg Assembly (2) |
P4 - Leg Panel (2) |
P5 - Ball Catcher (2) |
A1 - Billiard Set (1) |
A2 - Chalk (2) |
A3 - Brush (1) |
A4 - Triangle (1) |
A5 - Cue (2) |
A6 - Striker (4) |
A7 - Puck (4) |
A8 - Playfield Sports (2) |
© 2004 Escalade Sports |
4 |
For Customer Service Call 1-866-556-2759 |
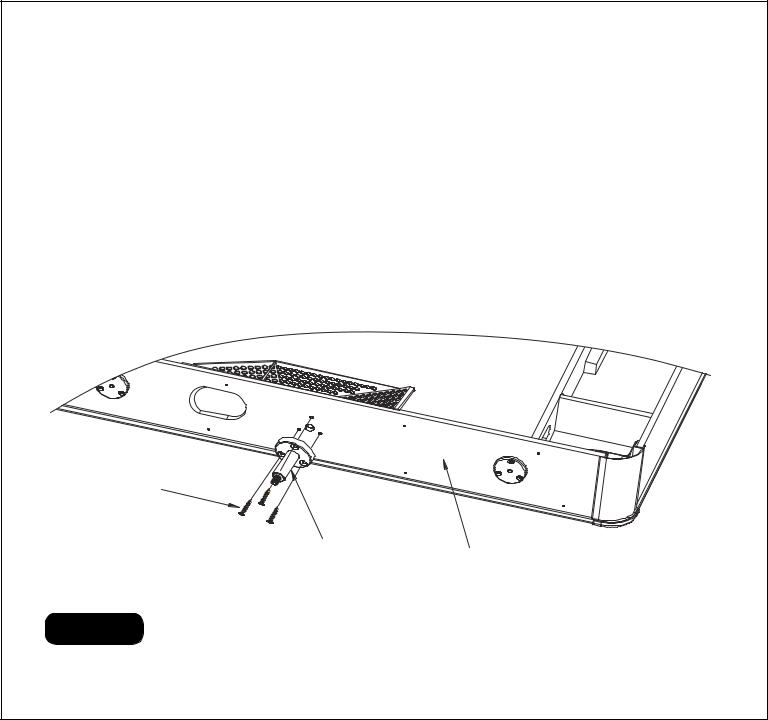
1.Find a clean, level place to begin the assembly of your pool table. We recommend building the table on the box top to protect the parts during assembly.
2.Attach the shoulder bolt H9 to the end panel of the pool table using screws H3 as shown in FIGURE 1.
Use caution not to over tighten these screws.
H3
Screw
H9 |
P1 |
|
Shoulder |
||
Pool Table |
||
Bolt |
||
|
Figure 1
© 2004 Escalade Sports |
5 |
For Customer Service Call 1-866-556-2759 |
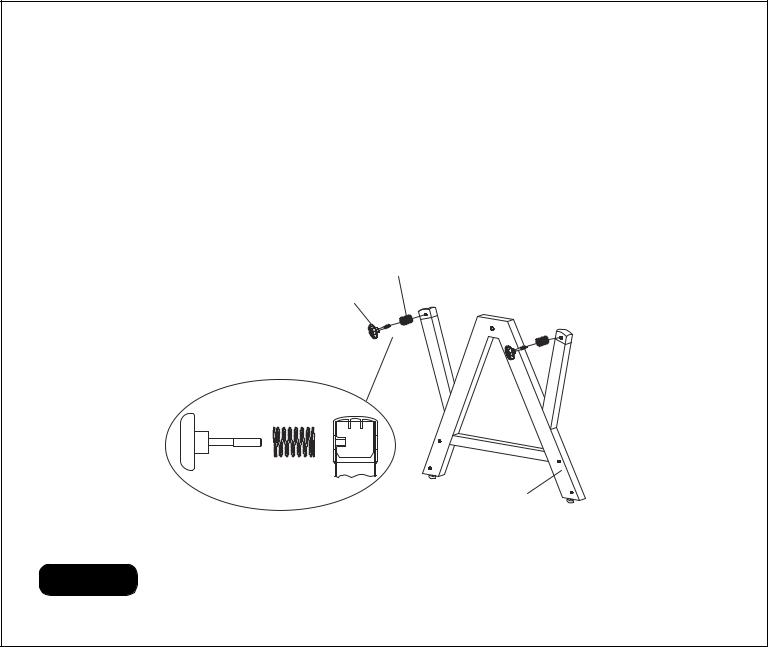
4. Attach the knob H8 and spring H11 to the leg assembly P3 as shown in FIGURE 2.
H11
H8 Spring
Knob
P3
Leg
Assembly
Figure 2
© 2004 Escalade Sports |
6 |
For Customer Service Call 1-866-556-2759 |
 Loading...