

Page 1

ZyWALL SSL 10
Integrated SSL-VPN Appliance
User’s Guide
Version 1.00
12/2006
Edition 1
www.zyxel.com
Page 2

Page 3

About This User's Guide
About This User's Guide
Intended Audience
This manual is intended for people who want to log into a network over secure connections
through the ZyWALL. You should have at least a basic knowledge of computer usage.
Related Documentation
• Web Configurator Online Help
Embedded web help for descriptions of individual screens and supplementary
information.
• ZyXEL Web Site
Please refer to www.zyxel.com for additional support documentation and product
certifications.
User Guide Feedback
Help us help you. Send all User Guide-related comments, questions or suggestions for
improvement to the following address, or use e-mail instead. Thank you!
The Technical Writing Team,
ZyXEL Communications Corp.,
6 Innovation Road II,
Science-Based Industrial Park,
Hsinchu, 300, Taiwan.
E-mail: techwriters@zyxel.com.tw
ZyWALL SSL 10 User’s Guide
3
Page 4

Document Conventions
Document Conventions
Warnings and Notes
These are how warnings and notes are shown in this User’s Guide.
1 Warnings tell you about things that could harm you or your device.
" Notes tell you other important information (for example, other things you may
need to configure or helpful tips) or recommendations.
Syntax Conventions
• The ZyWALL SSL 10 may be referred to as the “ZyWALL”, the “device”, the “system”
or the “product” in this User’s Guide.
• Product labels, screen names, field labels and field choices are all in bold font.
• A key stroke is denoted by square brackets and uppercase text, for example, [ENTER]
means the “enter” or “return” key on your keyboard.
• “Enter” means for you to type one or more characters and then press the [ENTER] key.
“Select” or “choose” means for you to use one of the predefined choices.
• A right angle bracket ( > ) within a screen name denotes a mouse click. For example,
Maintenance > Log > Log Setting means you first click Maintenance in the navigation
panel, then the Log sub menu and finally the Log Setting tab to get to that screen.
• Units of measurement may denote the “metric” value or the “scientific” value. For
example, “k” for kilo may denote “1000” or “1024”, “M” for mega may denote “1000000”
or “1048576” and so on.
• “e.g.,” is a shorthand for “for instance”, and “i.e.,” means “that is” or “in other words”.
4
ZyWALL SSL 10 User’s Guide
Page 5
Document Conventions
Icons Used in Figures
Figures in this User’s Guide may use the following generic icons. The ZyWALL icon is not an
exact representation of your device.
ZyWALL Computer Notebook computer
Server DSLAM Firewall
Telephone Switch Router
ZyWALL SSL 10 User’s Guide
5
Page 6

Document Conventions
6
ZyWALL SSL 10 User’s Guide
Page 7

Table of Contents
Table of Contents
About This User's Guide ..........................................................................................................3
Document Conventions............................................................................................................4
Table of Contents...................................................................................................................... 7
List of Figures ........................................................................................................................... 9
Part I: Remote User Access ...................................................................11
Chapter 1
Introduction .............................................................................................................................13
1.1 Overview .............................................................................................................................. 13
1.1.1 Network Resource Access Methods .......................................................................... 13
1.1.2 System Requirements ................................................................................................ 13
1.1.3 Required Information You Need ................................................................................. 14
1.1.4 Certificate ................................................................................................................... 14
1.2 Remote User Login .............................................................................................................. 14
1.3 Remote User Screen ........................................................................................................... 17
1.4 Bookmark ............................................................................................................................ 18
1.5 Logout .................................................................................................................................. 18
Chapter 2
Application ..............................................................................................................................21
2.1 Overview .............................................................................................................................. 21
2.1.1 The Application Screen .............................................................................................. 21
2.2 Accessing Web-based Application ...................................................................................... 22
2.3 Accessing Non-Web Based Application .............................................................................. 22
Chapter 3
File Sharing .............................................................................................................................25
3.1 Overview .............................................................................................................................. 25
3.2 Main File Sharing Screen .................................................................................................... 25
3.3 Opening a File or Folder ...................................................................................................... 26
3.3.1 Downloading a File ..................................................................................................... 27
3.3.2 Saving a File .............................................................................................................. 27
3.4 Creating a New Folder ......................................................................................................... 28
3.5 Renaming a File or Folder ................................................................................................... 28
ZyWALL SSL 10 User’s Guide
7
Page 8

Table of Contents
3.6 Deleting a File or Folder ...................................................................................................... 29
3.7 Uploading a File ................................................................................................................... 30
Part II: Troubleshooting, Appendices and Index ................................ 31
Chapter 4
Troubleshooting...................................................................................................................... 33
Appendix A Setting up Your Computer’s IP Address..............................................................37
Appendix B Importing Certificates ..........................................................................................53
Appendix C Legal Information ................................................................................................59
Appendix D Customer Support............................................................................................... 61
8
ZyWALL SSL 10 User’s Guide
Page 9

List of Figures
List of Figures
Figure 1 Network Example .................................................................................................................... 13
Figure 2 Enter the Address in a Web Browser ..................................................................................... 14
Figure 3 Login Security Screen ........................................................................................................... 15
Figure 4 Login Screen ......................................................................................................................... 15
Figure 5 Software Upgrade Prompt ..................................................................................................... 16
Figure 6 Login Warning Message ....................................................................................................... 16
Figure 7 VPN Connection Network Icon .............................................................................................. 16
Figure 8 Remote User Screen ............................................................................................................ 17
Figure 9 Add Favorite ............................................................................................................................ 18
Figure 10 Logout: Prompt ...................................................................................................................... 18
Figure 11 Logout: Information Window .................................................................................................. 18
Figure 12 Logout: Successful ................................................................................................................ 19
Figure 13 Application ............................................................................................................................. 21
Figure 14 Application: Access Web-based Application ......................................................................... 22
Figure 15 Application: Access Non-Web based Application .................................................................. 23
Figure 16 Application: Telnet Example .................................................................................................. 23
Figure 17 File Sharing ........................................................................................................................... 26
Figure 18 File Sharing: Enter Access User Name and Password ........................................................ 26
Figure 19 File Sharing: Open a Word File ............................................................................................ 27
Figure 20 File Sharing: Save a Word File ............................................................................................. 28
Figure 21 File Sharing: Save a Word File ............................................................................................. 28
Figure 22 File Sharing: Rename ............................................................................................................ 29
Figure 23 File Sharing: Rename ............................................................................................................ 29
Figure 24 File Sharing: Delete Prompt .................................................................................................. 30
Figure 25 File Sharing: File Upload ....................................................................................................... 30
Figure 26 WIndows 95/98/Me: Network: Configuration .......................................................................... 38
Figure 27 Windows 95/98/Me: TCP/IP Properties: IP Address .............................................................. 39
Figure 28 Windows 95/98/Me: TCP/IP Properties: DNS Configuration .................................................. 40
Figure 29 Windows XP: Start Menu ........................................................................................................ 41
Figure 30 Windows XP: Control Panel ................................................................................................... 41
Figure 31 Windows XP: Control Panel: Network Connections: Properties ............................................. 42
Figure 32 Windows XP: Local Area Connection Properties ................................................................... 42
Figure 33 Windows XP: Internet Protocol (TCP/IP) Properties .............................................................. 43
Figure 34 Windows XP: Advanced TCP/IP Properties ........................................................................... 44
Figure 35 Windows XP: Internet Protocol (TCP/IP) Properties .............................................................. 45
Figure 36 Macintosh OS 8/9: Apple Menu .............................................................................................. 46
Figure 37 Macintosh OS 8/9: TCP/IP ..................................................................................................... 46
Figure 38 Macintosh OS X: Apple Menu ................................................................................................ 47
ZyWALL SSL 10 User’s Guide
9
Page 10

List of Figures
Figure 39 Macintosh OS X: Network ...................................................................................................... 48
Figure 40 Red Hat 9.0: KDE: Network Configuration: Devices ............................................................. 49
Figure 41 Red Hat 9.0: KDE: Ethernet Device: General ...................................................................... 49
Figure 42 Red Hat 9.0: KDE: Network Configuration: DNS ................................................................... 50
Figure 43 Red Hat 9.0: KDE: Network Configuration: Activate ............................................................ 50
Figure 44 Red Hat 9.0: Dynamic IP Address Setting in ifconfig-eth0 ................................................... 51
Figure 45 Red Hat 9.0: Static IP Address Setting in ifconfig-eth0 ....................................................... 51
Figure 46 Red Hat 9.0: DNS Settings in resolv.conf ............................................................................ 51
Figure 47 Red Hat 9.0: Restart Ethernet Card ..................................................................................... 51
Figure 48 Red Hat 9.0: Checking TCP/IP Properties ........................................................................... 52
Figure 49 Security Certificate ................................................................................................................. 53
Figure 50 Login Screen .......................................................................................................................... 54
Figure 51 Certificate General Information before Import ........................................................................54
Figure 52 Certificate Import Wizard 1 ..................................................................................................... 55
Figure 53 Certificate Import Wizard 2 ..................................................................................................... 55
Figure 54 Certificate Import Wizard 3 ..................................................................................................... 56
Figure 55 Root Certificate Store ............................................................................................................. 56
Figure 56 Certificate General Information after Import ........................................................................... 57
10
ZyWALL SSL 10 User’s Guide
Page 11

PART I
Remote User
Access
• Introduction (13)
• Application (21)
• File Sharing (25)
11
Page 12

12
Page 13
CHAPTER 1
Introduction
This chapter introduces secure network access and gives an overview of the remote user
screens on the ZyWALL.
1.1 Overview
The ZyWALL provides secure connection to network resources such as applications, files,
intranet sites or e-mails through web-based interface using Microsoft Outlook Web Access
(OWA). No additional computer configuration or software installation is required.
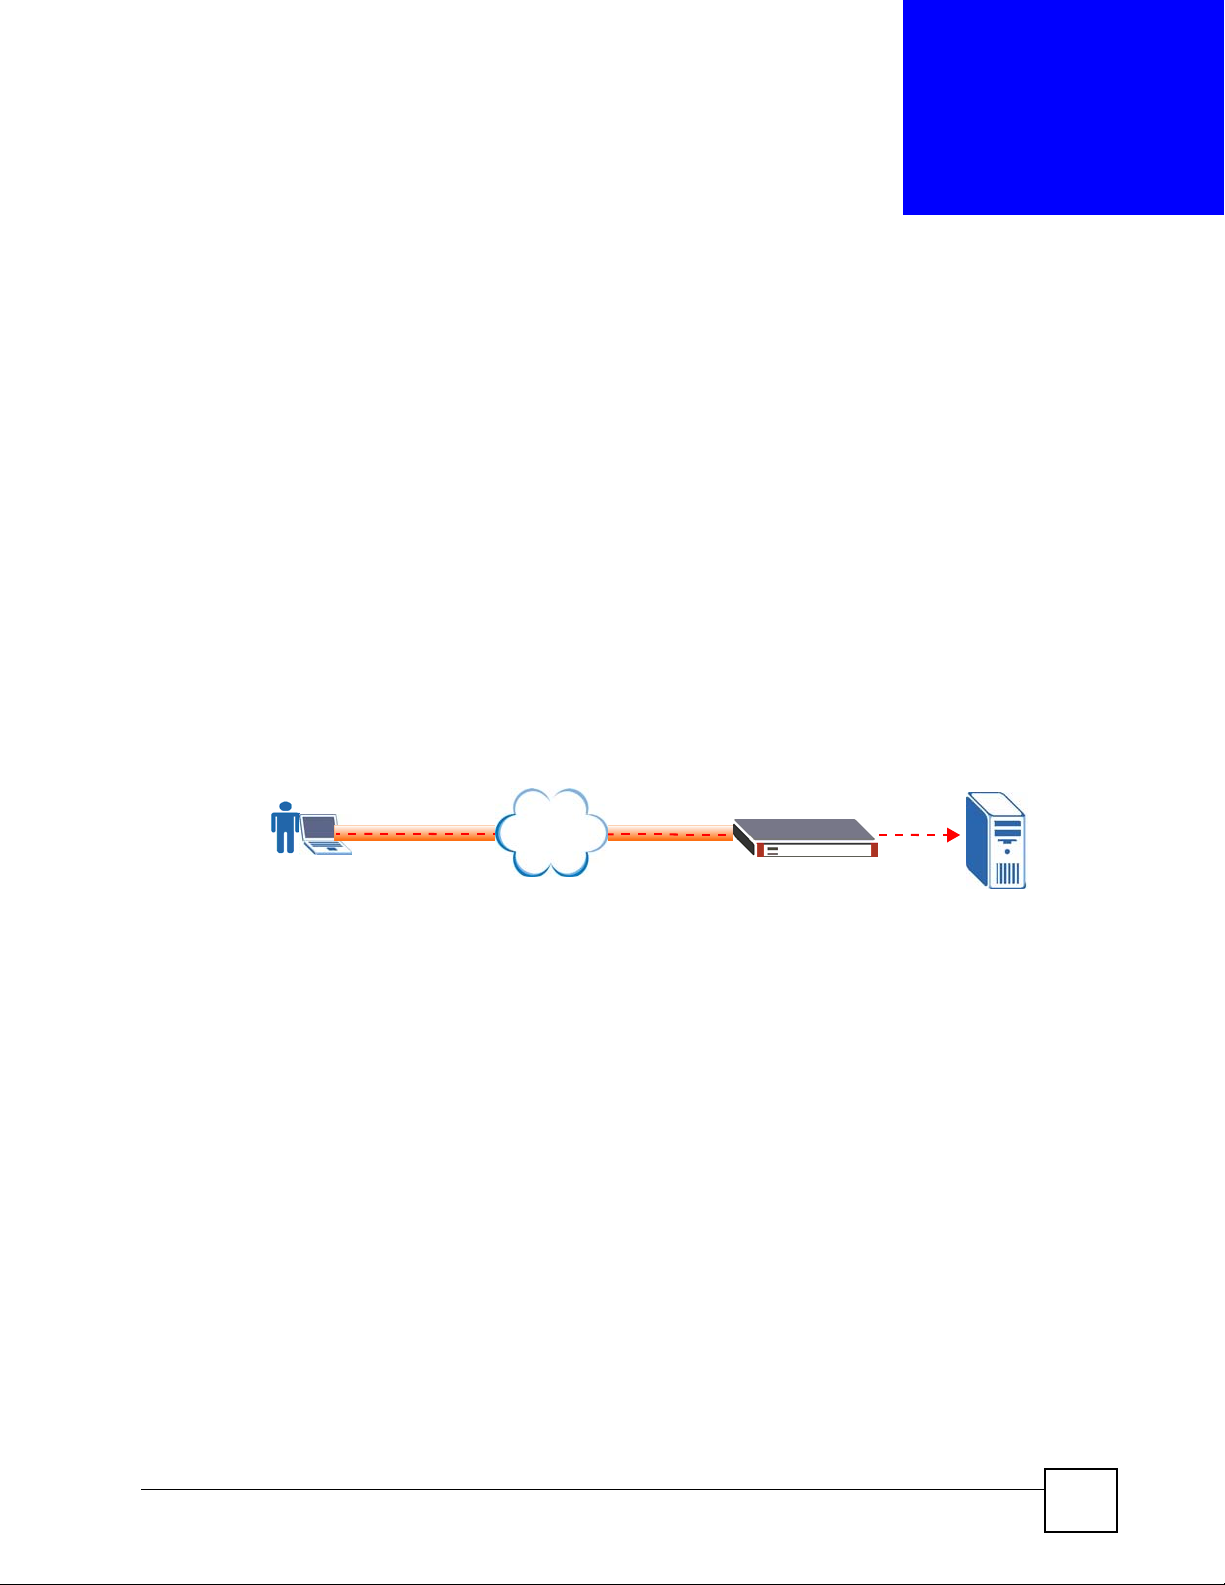
The following figure shows a network example where a remote user (A) logs into the
ZyWALL (SSL10) from the Internet to access the web server (WWW) on the local network.
Figure 1 Network Example
Internet
Internet
A
1.1.1 Network Resource Access Methods
As a remote user, you can access resources on the local network using one of the following
methods.
• Using a standard web browser supported
Once you have successfully logged in through the ZyWALL, you can access any intranet
site, web-based applications or web-based e-mails using a standard web browser. You do
not have to install or pre-launch any application on your computer.
• Using the Java thin clients
The ZyWALL automatically load Java thin client programs to your computer after a
successful login. With the thin clients, you can access servers, remote desktops and
manage files as if you were on the local network.
1.1.2 System Requirements
The following lists the browser and computer system requirements for remote user access.
SSL10
WWW
ZyWALL SSL 10 User’s Guide
13
Page 14
Chapter 1 Introduction
• Internet Explorer 5.5 with Microsoft XML (MSXML) service pack installed or 6.0 and
above
• Netscape 7.2 and above
• Firefox 1.0 and above
• Mozilla 1.7.3 and above
• Windows 2000 Professional, Windows XP Home/Professional (with service pack 2 and
above) or Linux.
• Sun Java Virtual Machine (JVM) installed with a minimum version of 1.4.2_07 for
Netscape/Mozilla/Firefox and 1.4.2_02 for Internet Explorer and Linux computers.
• Java enabled in Internet Explorer on Windows computers.
1.1.3 Required Information You Need
Your network administrator should provide the following information that allows you to log in
and access network resource.
• domain name or IP address of the ZyWALL.
• login account user name and password
• specific computer requirements. For example, if you must use Windows XP with service
pack 2, etc.
• if also required, the user name and/or password to access the network resource.
1.1.4 Certificate
Your computer establishes an HTTPS connection to the ZyWALL to access the login screen.
If instructed by your network administrator, you must install or import a certificate (provided
by the ZyWALL or your network administrator).
Refer to Appendix B on page 53 for more information.
1.2 Remote User Login
This section shows you how to access and log into the network through the ZyWALL.
Example screens for Internet Explorer are shown.
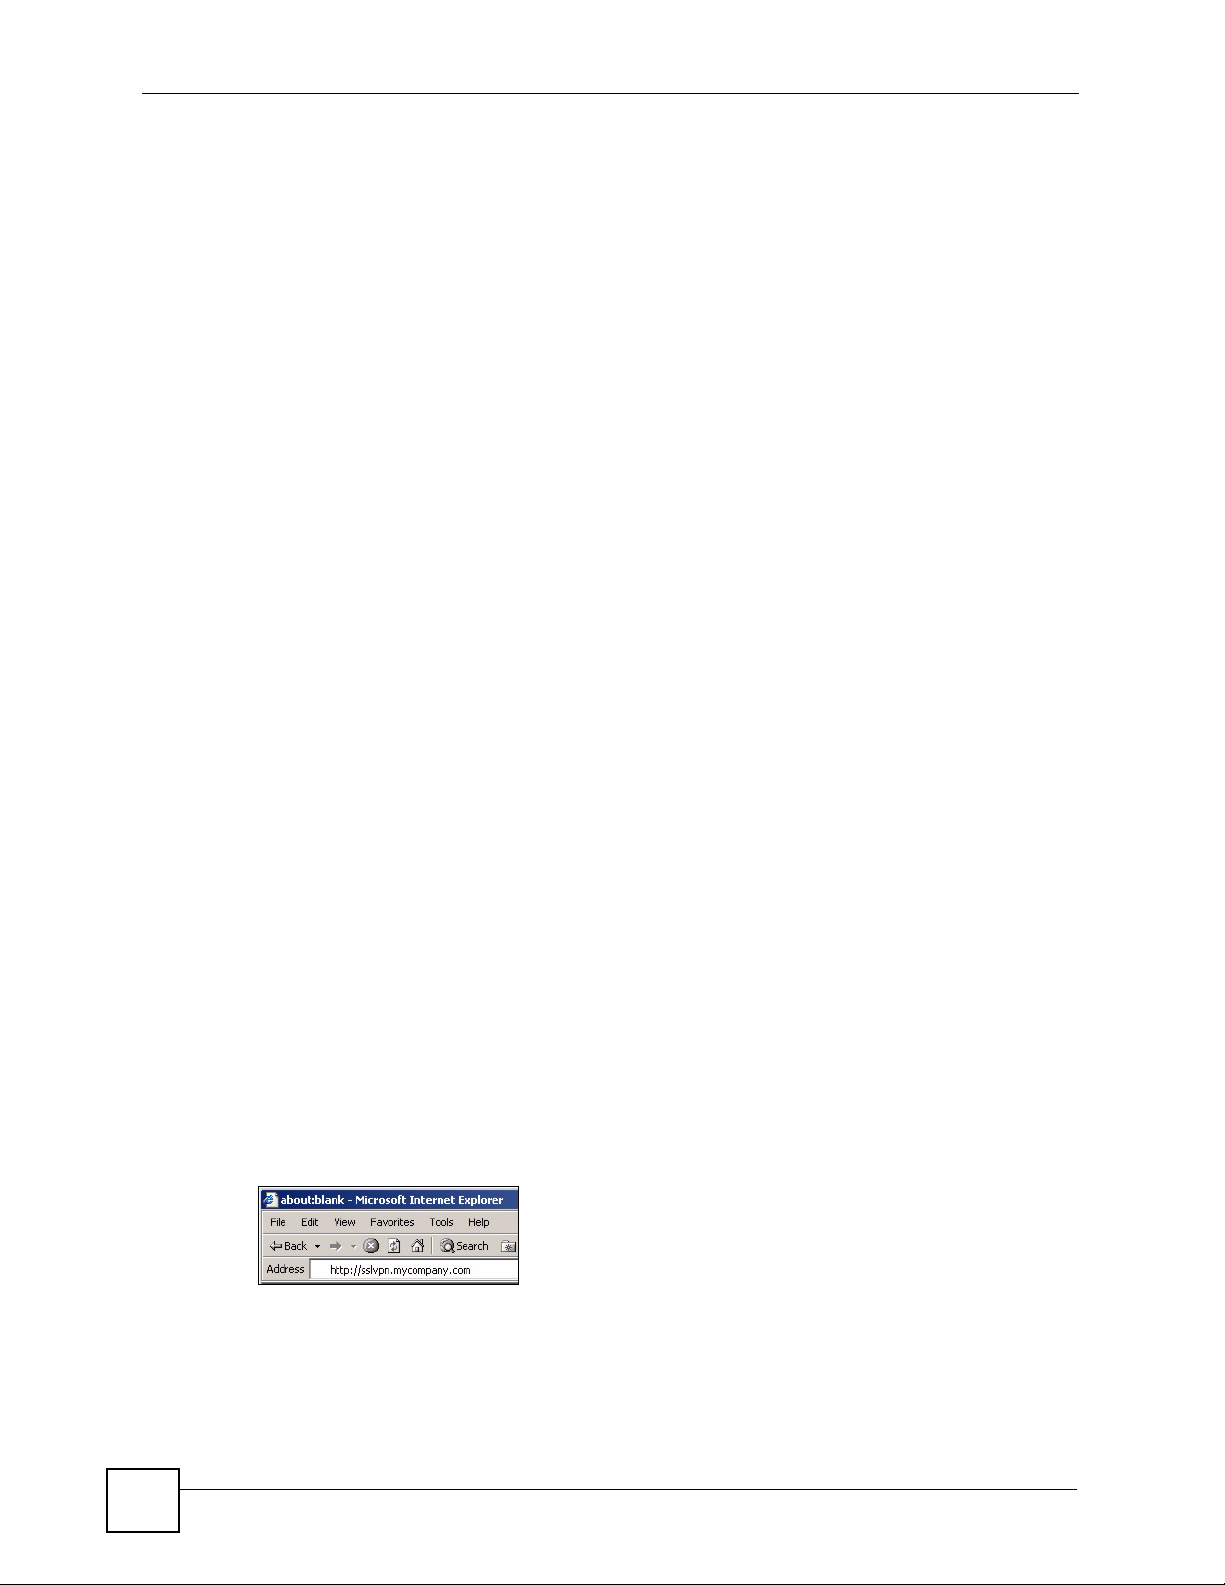
1 Open a web browser and enter the web site address or IP address of the ZyWALL. For
example, “http://sslvpn.mycompany.com”.
Figure 2 Enter the Address in a Web Browser
2 Click OK or Ye s if a security screen displays.
14
ZyWALL SSL 10 User’s Guide
Page 15

Chapter 1 Introduction
Figure 3 Login Security Screen
3 A login screen displays. Enter the user name and password of your login account. If a
token password is also required, enter it in the One-Time Password screen. Click
Login.
4 Select I am connecting via my own computer if you log in using your personal
computer.
If you are using a public computer to log in, select I am connecting via Public
computer. The ZyWALL automatically clears history information from your browser
cache after you log out. This prevents anyone from obtaining information that may be
stored in the browser cache.
5 Click Login.
Figure 4 Login Screen
6 After the login is successful, your computer starts establishing a secure connection to the
ZyWALL. This may take up to two minutes.
7 Download the installation software if you are prompted to upgrade the JVM. Click the
link to access the Sun Java software web site. It is recommended you select the Offline
Installation option.
ZyWALL SSL 10 User’s Guide
15
Page 16
Chapter 1 Introduction
Figure 5 Software Upgrade Prompt
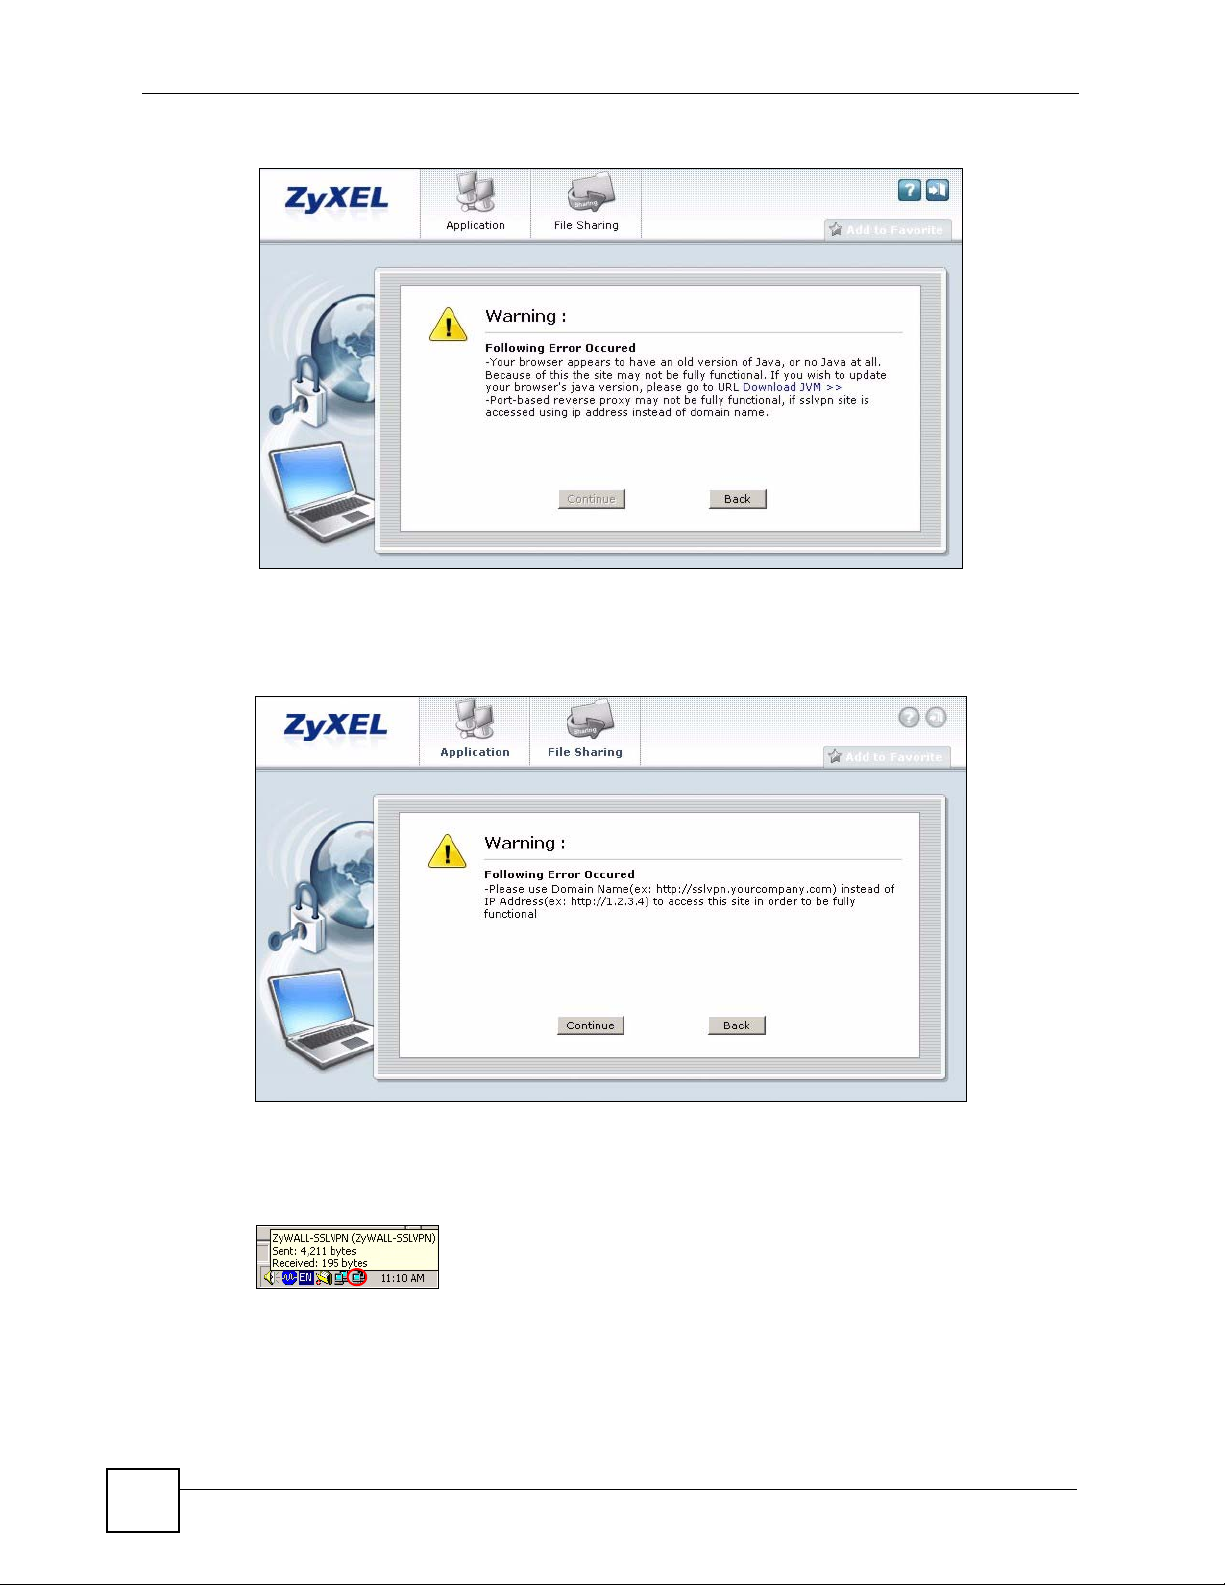
8 If you access the ZyWALL using an IP address, a warning screen displays, click
Continue.
Figure 6 Login Warning Message
9 A new network icon displays in the system tray. This indicates that a VPN connection
has been established between your computer and the ZyWALL.
Figure 7 VPN Connection Network Icon
16
10 When the list of available resources displays in the Application screen, you have
successfully logged into the network. See Figure 8 on page 17.
ZyWALL SSL 10 User’s Guide
Page 17
Chapter 1 Introduction
" Available resource links vary depending on the configuration of your network
administrator.
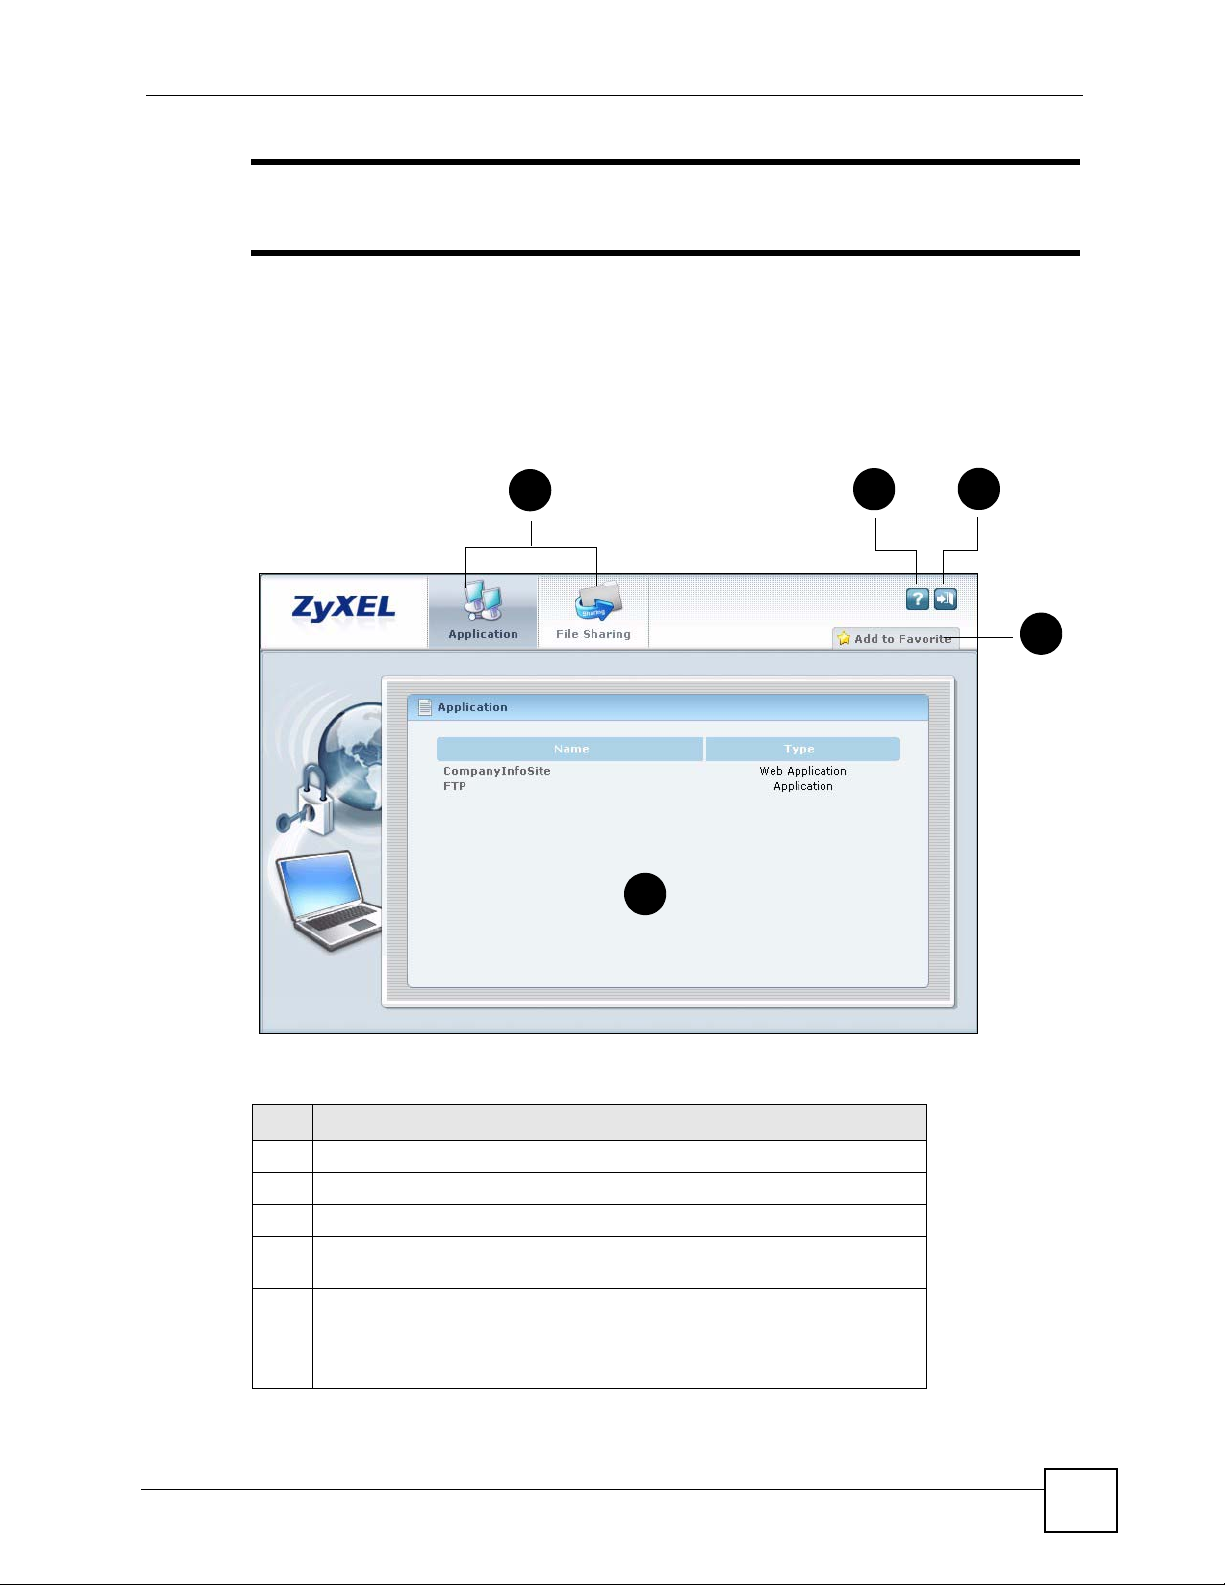
1.3 Remote User Screen
This section describes the main elements in the remote user screens.
Figure 8 Remote User Screen
1
2
5
The following table describes the various parts of a remote user screen.
Table 1 Remote User Screen Overview
#
1 Click on a menu tab to go to the Application or File Sharing screen.
2 Click this icon to display the on-line help window.
3 Click this icon to log out and terminate the secure connection.
4 Click Add to Favorite to create a bookmark for the ZyWALL in your web
5 This part of the screen displays a list of the resources available to you.
browser.
In the Application screen, click on a link to access or display the access
method.
In the File Sharing screen, click on a link to open a file or directory.
3
4
ZyWALL SSL 10 User’s Guide
17
Page 18
Chapter 1 Introduction
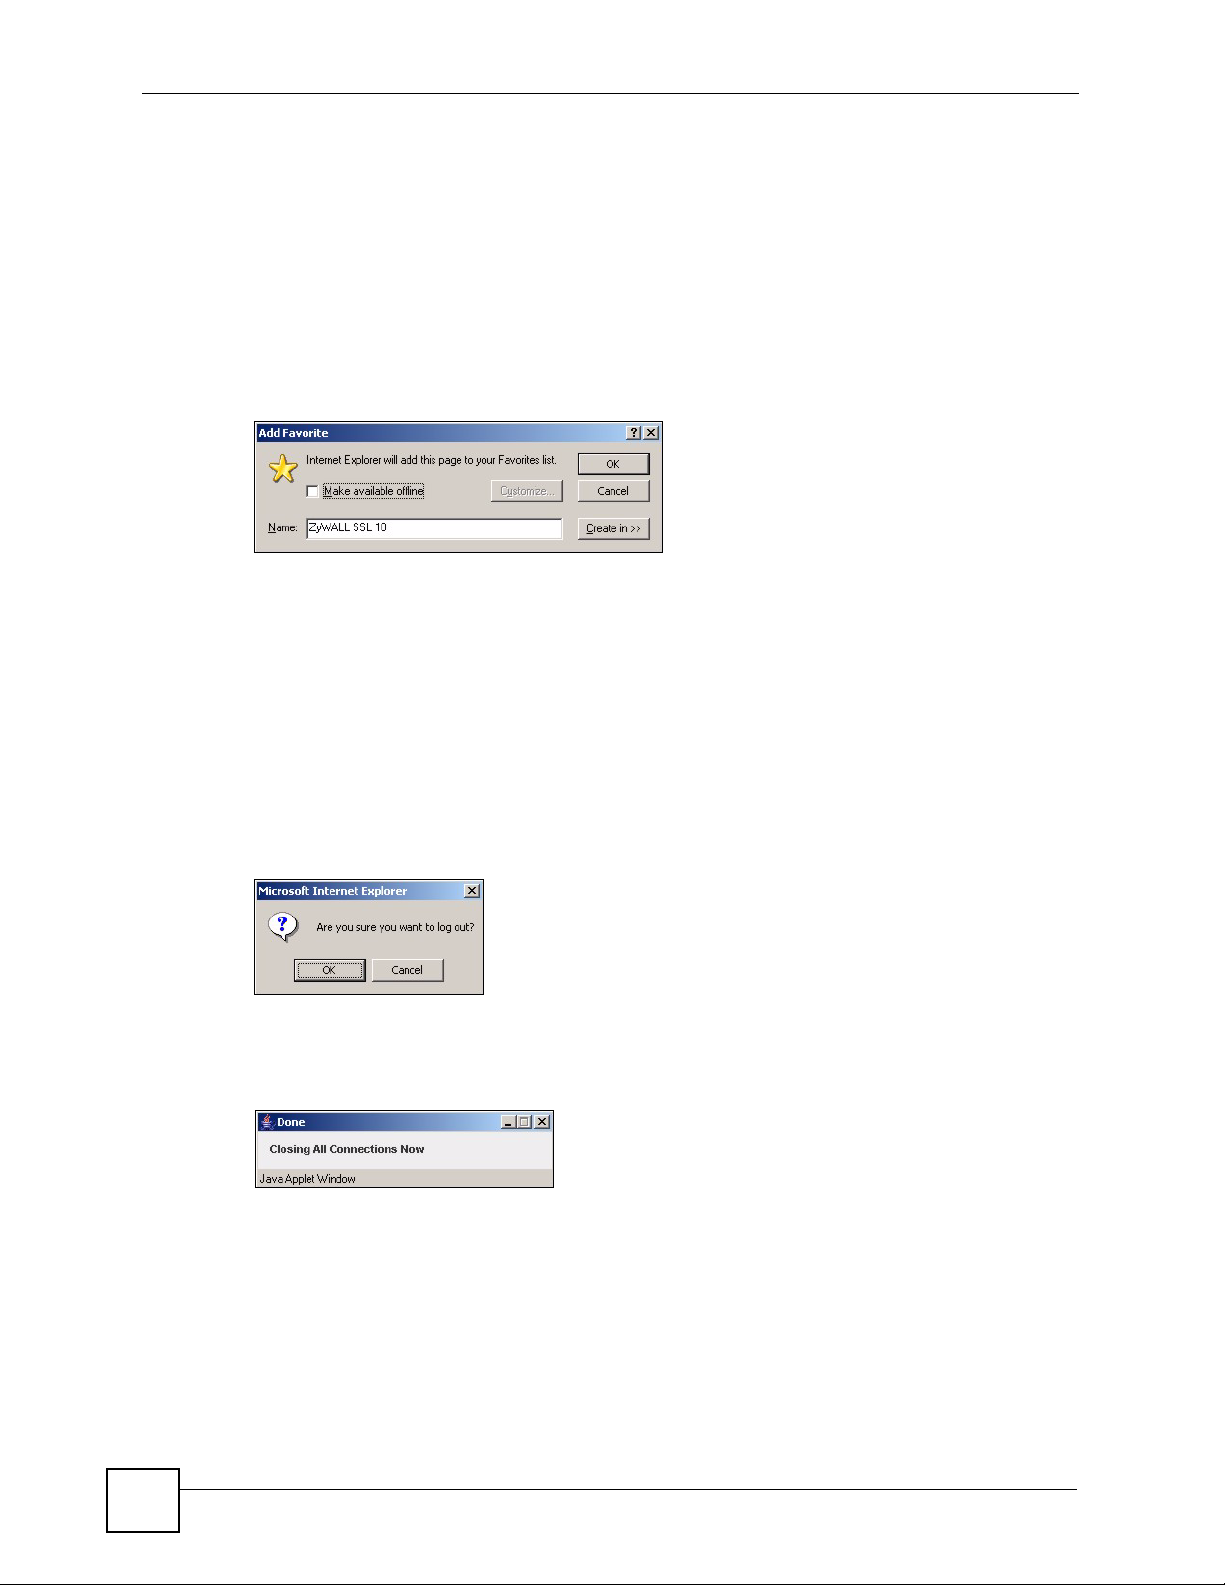
1.4 Bookmark
You can create a bookmark of the ZyWALL by clicking Add to Favorite. This allows you can
access the ZyWALL using the bookmark without having to enter the address every time.
1 In any remote user screen, click Add to favorite.
2 A descriptive name is entered in the Name field. You can accept the default or enter a
name.
3 Click OK to create a bookmark in your web browser.
Figure 9 Add Favorite
1.5 Logout
To properly terminate a connection, click on the Logout icon in any remote user screen.
If you select I am connecting via Public computer in the login screen, history information in
your browser cache is also erased once you log out.
1 Click the Logout icon in any remote user screen.
2 A prompt window displays. Click OK to continue.
Figure 10 Logout: Prompt
3 An information screen displays. This indicates that all connections have been
successfully terminated.
Figure 11 Logout: Information Window
4 The login screen displays with the “Logged out successfully!” message.
18
ZyWALL SSL 10 User’s Guide
Page 19
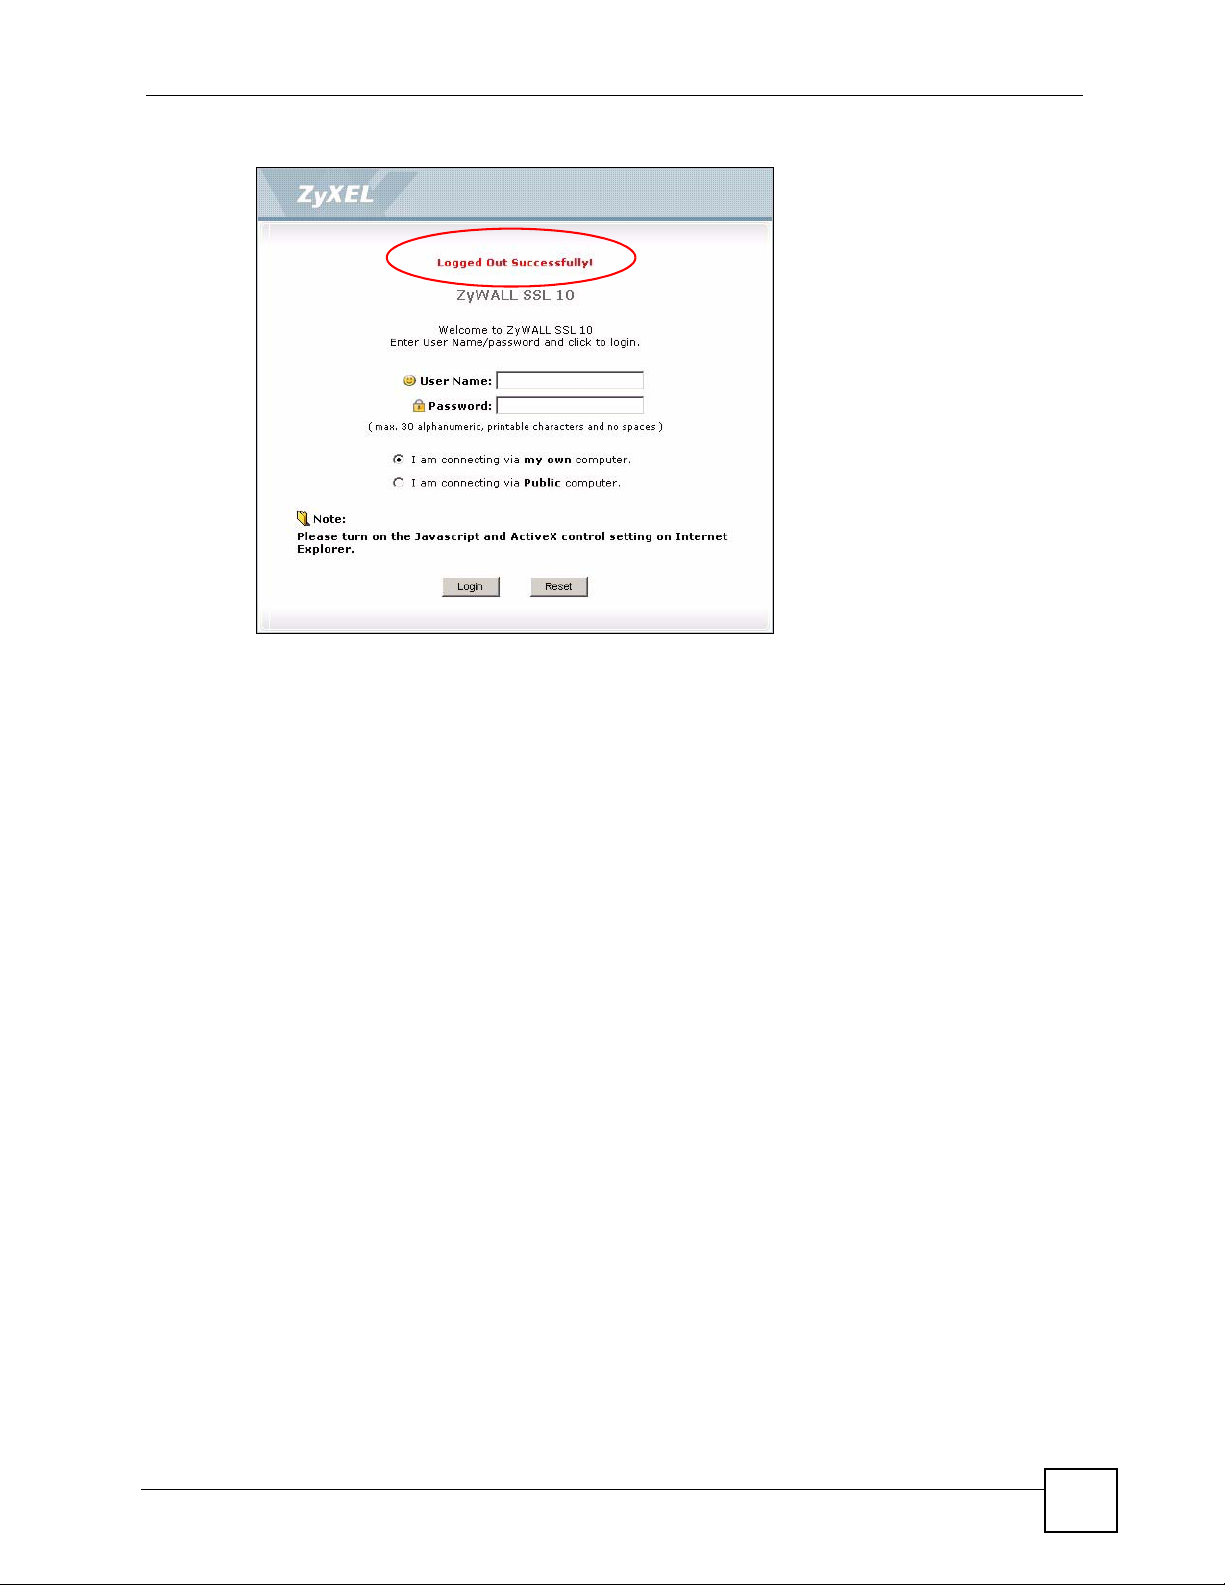
Figure 12 Logout: Successful
Chapter 1 Introduction
ZyWALL SSL 10 User’s Guide
19
Page 20

Chapter 1 Introduction
20
ZyWALL SSL 10 User’s Guide
Page 21

CHAPTER 2
Application
This chapter describes the Application screen you use to access an application on the network.
2.1 Overview
Depending on the configuration of your network administrator, you can use the Application
screen to perform the following:
• Access a web-based application (such as a web site and e-mail).
• Display additional information on how to access a non-web based application (such as
FTP).
2.1.1 The Application Screen
Click the Application tab to display the screen. The Name field displays the descriptive name
for an application. The Type field displays Web Application to indicate a web-based
application or Application for a non-web based application.
You can move your mouse over a link to display help information on how to access an
application. The following shows an example.
Figure 13 Application
ZyWALL SSL 10 User’s Guide
21
Page 22

Chapter 2 Application
2.2 Accessing Web-based Application
To access a web-based application, simply click a link in the Application screen to display the
web screen in a separate browser window.
The following shows an example.
Figure 14 Application: Access Web-based Application
2.3 Accessing Non-Web Based Application
To access a non-web based application, move your mouse over the link in the Application
screen to display the access information.
The following example shows you how to establish an FTP connection to a switch for device
management.
1 In the Application screen, move your mouse over a link to display the pop-up
information window.
22
ZyWALL SSL 10 User’s Guide
Page 23

Chapter 2 Application
Figure 15 Application: Access Non-Web based Application
2 Launch an FTP application and connect to the IP address provided. The following figure
shows an example using Windows Command Prompt.
Figure 16 Application: Telnet Example
ZyWALL SSL 10 User’s Guide
23
Page 24

Chapter 2 Application
24
ZyWALL SSL 10 User’s Guide
Page 25

CHAPTER 3
File Sharing
This chapter describes the File Sharing screen you use to access files on a Windows or Linux
file server.
3.1 Overview
Use the File Sharing screen display and access shared files/folders on a file server.
You can also perform the following actions:
• Access a folder.
• Open a file (if your web browser cannot open the file, you are prompted to download it).
• Save a file to your computer.
• Create a new folder.
• Rename a file or folder.
• Delete a file or folder.
• Upload a file.
" Available actions you can perform in the File Sharing screen vary depending
on the rights granted to your user account on the file server.
3.2 Main File Sharing Screen
The first File Sharing screen displays the name(s) of the shared folder(s) available. The
following figure shows an example with three file shares.
ZyWALL SSL 10 User’s Guide
25
Page 26

Chapter 3 File Sharing
Figure 17 File Sharing
3.3 Opening a File or Folder
You can open a file if the file extension is recognized by the web browser and the associated
application is installed on your computer.
1 Log in as a remote user and click the File Sharing tab.
2 Click on a file share icon.
3 If an access user name and password are required, a screen displays as shown in the
following figure. Enter the account information and click Login to continue.
Figure 18 File Sharing: Enter Access User Name and Password
26
ZyWALL SSL 10 User’s Guide
Page 27

Chapter 3 File Sharing
4 A list of files/folders displays. Click on a file to open it in a separate browser window.
You can also click a folder to access it.
For this example, click on a .doc file to open the Word document.
Figure 19 File Sharing: Open a Word File
3.3.1 Downloading a File
You are prompted to download a file which cannot be opened using a web browser.
You can follow the on-screen instruction to download and save the file to your computer. Then
launch the associated application to open the file.
3.3.2 Saving a File
After you have opened a file in a web browser, you can save a copy of the file by clicking File
> Save As and follow the on-screen instruction.
ZyWALL SSL 10 User’s Guide
27
Page 28

Chapter 3 File Sharing
Figure 20 File Sharing: Save a Word File
3.4 Creating a New Folder
To create new folder in the file share location, click the New Folder icon.
Specify a descriptive name for the folder. You can enter up to 128 characters (“a-z”, “A-Z”,
“0-9”, “-”, “_”, with spaces allowed). Then click Add.
" Make sure the length of the folder name does not exceed the maximum
allowed on the file server.
Figure 21 File Sharing: Save a Word File
3.5 Renaming a File or Folder
To rename a file or folder, click the Rename icon next to the file/folder.
28
ZyWALL SSL 10 User’s Guide
Page 29

Figure 22 File Sharing: Rename
Chapter 3 File Sharing
A popup window displays. Specify the new name and/or file extension in the field provided.
You can enter up to 128 characters (“a-z”, “A-Z”, “0-9”, “-”, “_”, with spaces allowed). Then
click Apply.
" Make sure the length of the name does not exceed the maximum allowed on
the file server.
You may not be able to open a file if you change the file extension.
Figure 23 File Sharing: Rename
3.6 Deleting a File or Folder
To delete a file or folder, click the Delete icon next to the file/folder and then OK in a prompt
screen that displays.
ZyWALL SSL 10 User’s Guide
29
Page 30
Chapter 3 File Sharing
Figure 24 File Sharing: Delete Prompt
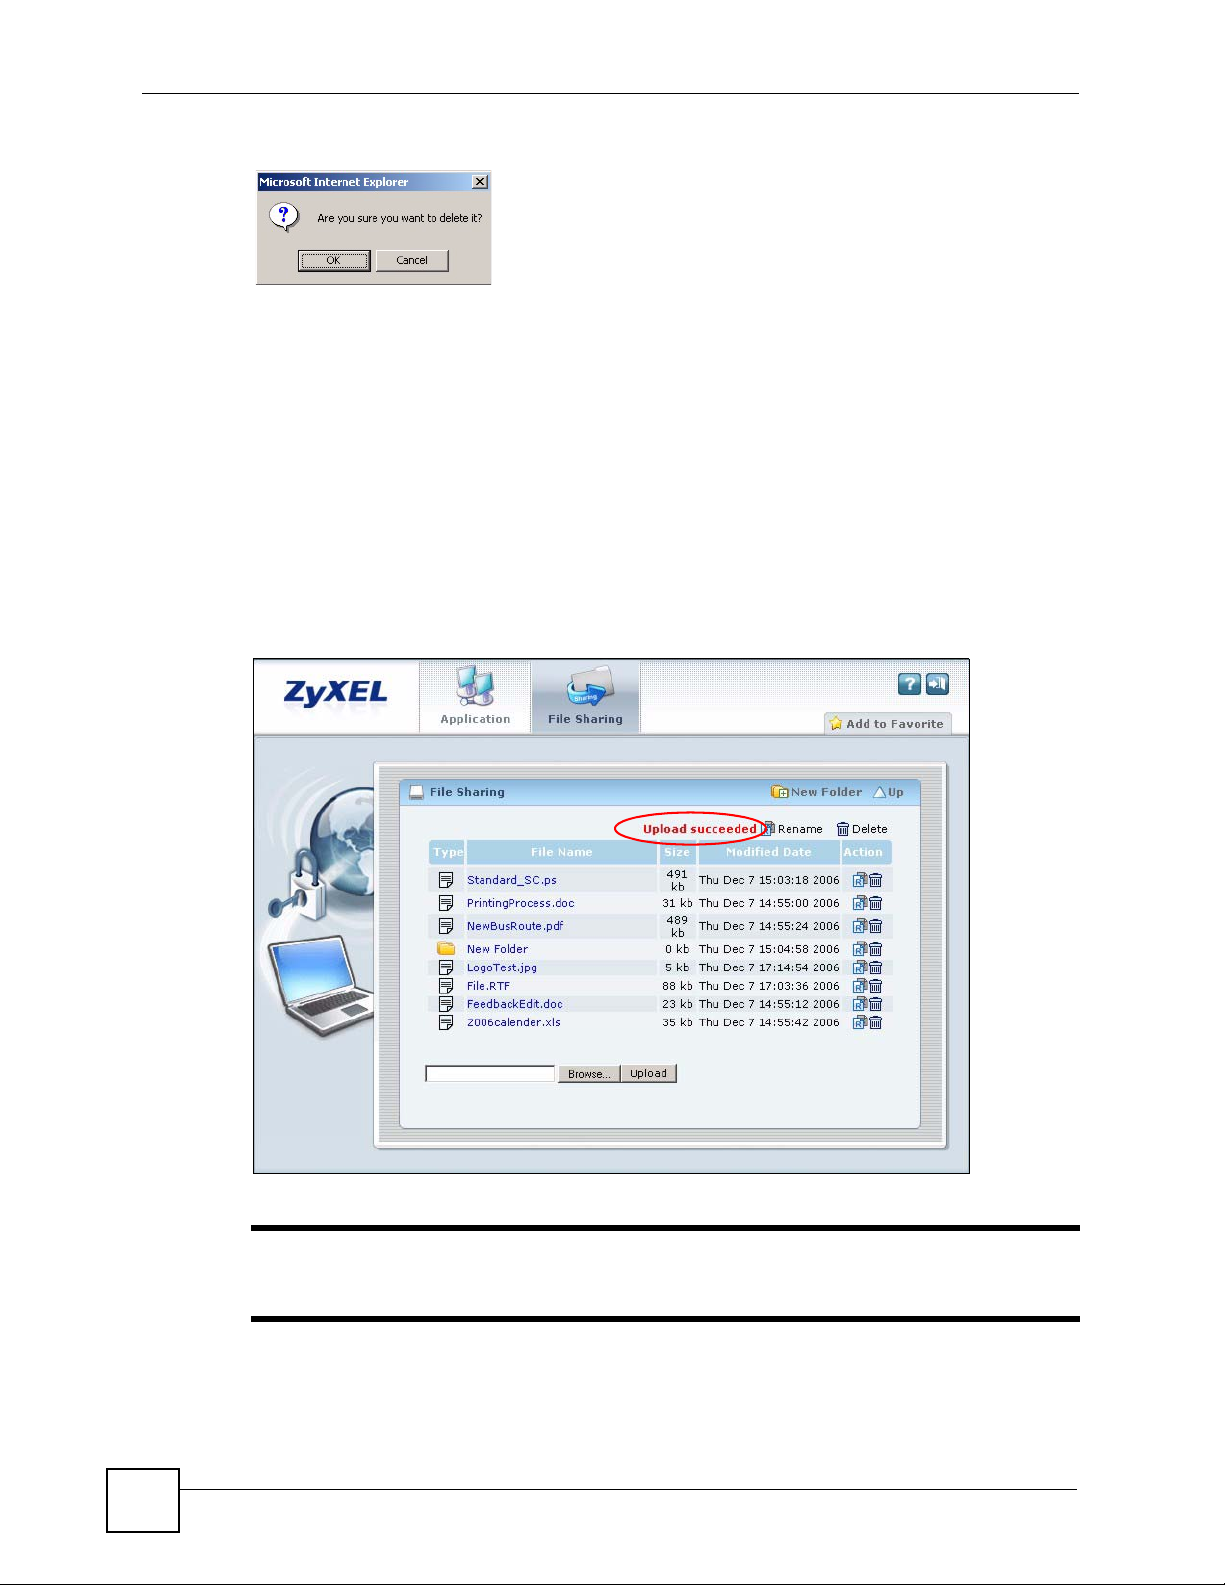
3.7 Uploading a File
Follow the steps below to upload a file to the file server.
1 Log into the remote user screen and click the File Sharing tab.
2 Specify the location and/or name of the file you want to upload. Or click Browse to
locate it.
3 Click Upload to send the file to the file server.
4 After the file is uploaded successfully, you should see the name of the file and the
message in the screen.
Figure 25 File Sharing: File Upload
" Uploading a files with the same name and file extension replaces the existing
file on the file server. No warning message is displayed.
30
ZyWALL SSL 10 User’s Guide
Page 31

PART II
Troubleshooting,
Appendices and
Index
" The appendices provide general networking information. Some information
may not apply to your ZyWALL.
• Troubleshooting (33)
• Setting up Your Computer’s IP Address (37)
• Importing Certificates (53)
• Legal Information (59)
• Customer Support (61)
31
Page 32

32
Page 33

CHAPTER 4
Troubleshooting
This chapter provides tips to solve common problems. You should contact your network
administrator if a problem persists.
V I forgot my account user name and/or password.
• Your account information is provided by your network administrator. If you have
forgotten this information, contact your network administrator for assistance.
V I cannot see or access the Login screen in the web configurator.
1 Make sure you enter the correct IP address or domain name of the ZyWALL. Check with
your network administrator to verify this information.
2 Make sure your computer meets the system requirements. See Section 1.1.2 on page 13.
3 Make sure your computer meets any other requirements specified by your network
administrator. This may include the version of your operating system, service pack, etc.
4 If there is a DHCP server on your network, make sure your computer is using a dynamic
IP address.
5 If the problem continues, contact the network administrator.
V I can see the Login screen, but I cannot log in to the ZyWALL.
• Make sure you have entered the user name and password exactly as provided by your
network administrator. These fields are case-sensitive, so make sure [Caps Lock] is not
on.
• You cannot log in to the web configurator if someone has already logged in using the same
user account. In this case, inform that person to log out or contact your network
administrator for assistance.
ZyWALL SSL 10 User’s Guide
33
Page 34

Chapter 4 Troubleshooting
V The connection is slow or intermittent.
• Transmission speed varies depending on your network connection to the ZyWALL and
the traffic load. Check with your network administrator and ask for more bandwidth
assigned to you.
V I cannot access a web site (on Mondays).
• Check that the web site is available for access.
• Check that the network administrator has not blocked you from accessing the web site
during specific times.
V I cannot access a non-web based application.
• Check that the application is available for access.
• Make sure you have following the instruction in the pop-up information window to access
the application.
• If required, make sure you enter the access account information correctly.
V I cannot access a file share.
• Check that the file server is configured properly and is available for access.
• If required, make sure you enter the access account information correctly.
• Contact your network administrator for assistance if the problem persists.
V I cannot open a file.
• If your web browser cannot open a file, you are prompted to download it to your
computer. You can then launch the appropriate application to open the file.
V I cannot rename/delete/upload a file and/or folder.
34
ZyWALL SSL 10 User’s Guide
Page 35

Chapter 4 Troubleshooting
• You must have read/write access rights for the file share. Check with your network
administrator for this information.
ZyWALL SSL 10 User’s Guide
35
Page 36

Chapter 4 Troubleshooting
36
ZyWALL SSL 10 User’s Guide
Page 37

APPENDIX A
Setting up Your Computer’s IP
Address
All computers must have a 10M or 100M Ethernet adapter card and TCP/IP installed.
Windows 95/98/Me/NT/2000/XP, Macintosh OS 7 and later operating systems and all
versions of UNIX/LINUX include the software components you need to install and use TCP/
IP on your computer. Windows 3.1 requires the purchase of a third-party TCP/IP application
package.
TCP/IP should already be installed on computers using Windows NT/2000/XP, Macintosh OS
7 and later operating systems.
After the appropriate TCP/IP components are installed, configure the TCP/IP settings in order
to "communicate" with your network.
If you manually assign IP information instead of using dynamic assignment, make sure that
your computers have IP addresses that place them in the same subnet as the ZyWALL’s LAN
port.
Windows 95/98/Me
Click Start, Settings, Control Panel and double-click the Network icon to open the Network
window.
ZyWALL SSL 10 User’s Guide
37
Page 38
Appendix A Setting up Your Computer’s IP Address
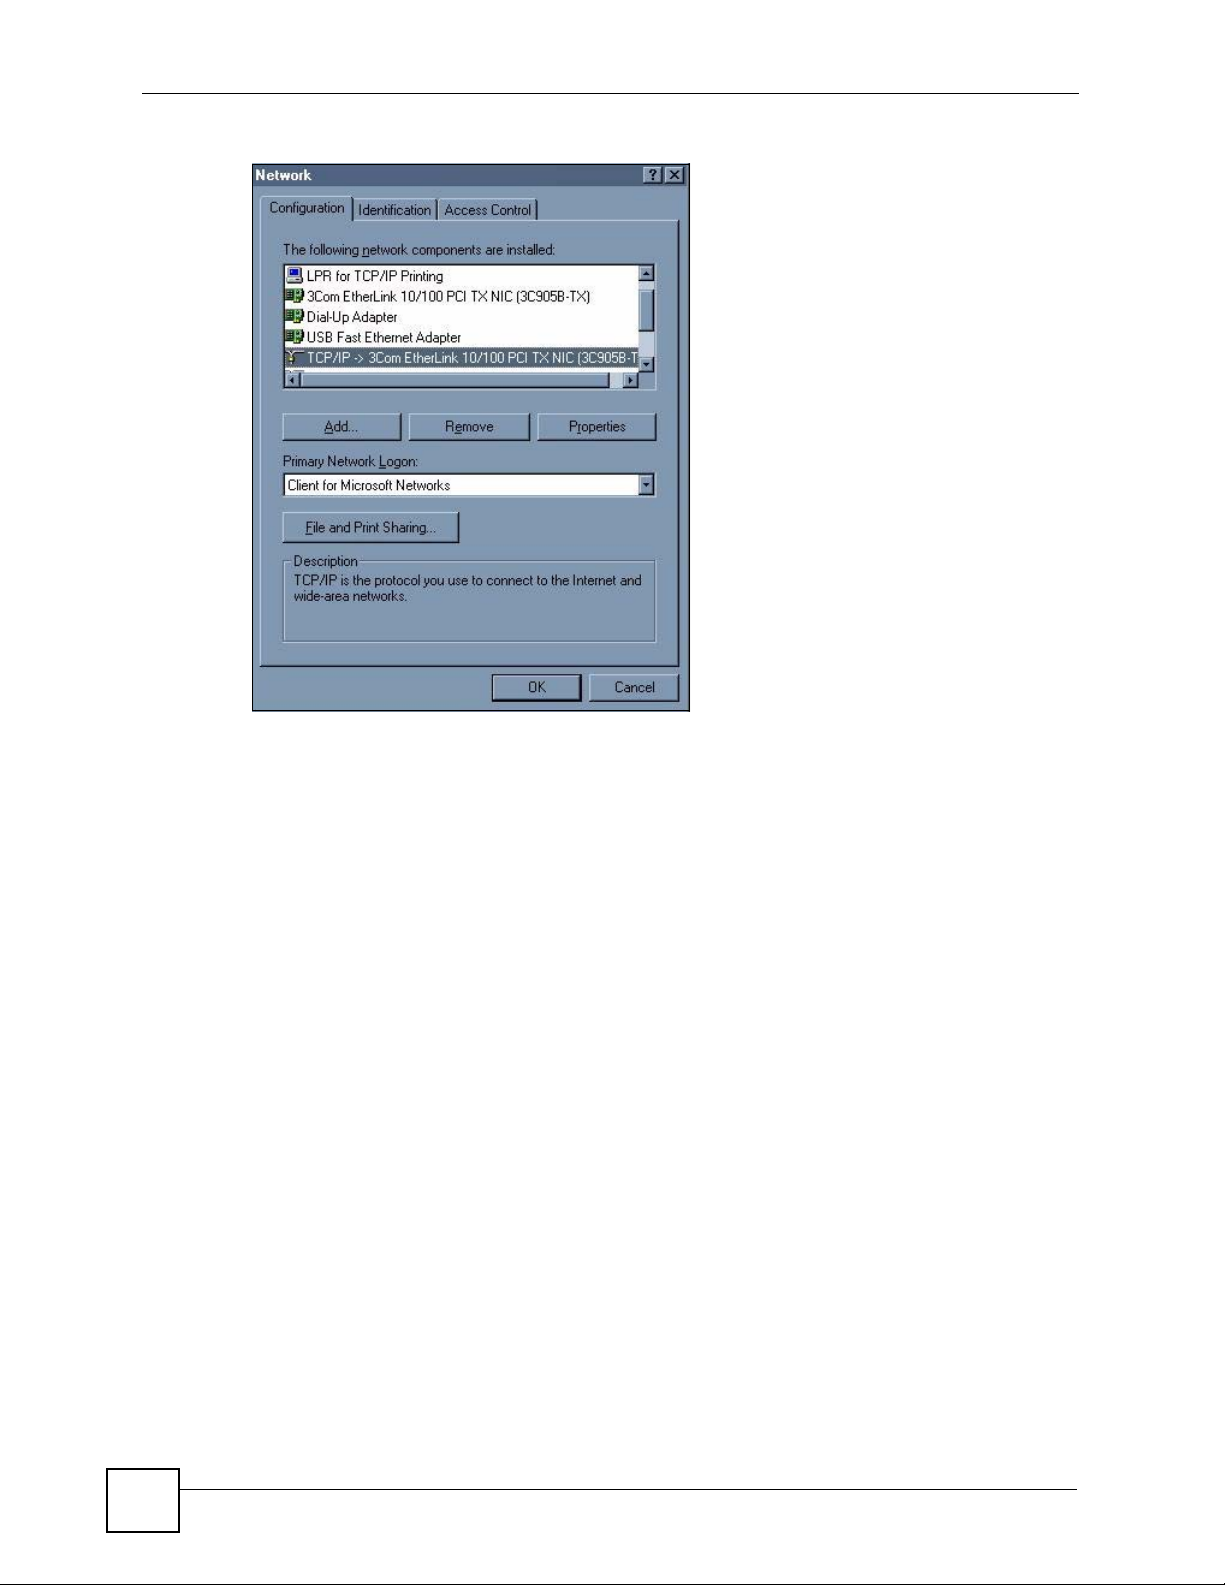
Figure 26 WIndows 95/98/Me: Network: Configuration
Installing Components
The Network window Configuration tab displays a list of installed components. You need a
network adapter, the TCP/IP protocol and Client for Microsoft Networks.
If you need the adapter:
1 In the Network window, click Add.
2 Select Adapter and then click Add.
3 Select the manufacturer and model of your network adapter and then click OK.
If you need TCP/IP:
1 In the Network window, click Add.
2 Select Protocol and then click Add.
3 Select Microsoft from the list of manufacturers.
4 Select TCP/IP from the list of network protocols and then click OK.
If you need Client for Microsoft Networks:
1 Click Add.
2 Select Client and then click Add.
3 Select Microsoft from the list of manufacturers.
4 Select Client for Microsoft Networks from the list of network clients and then click
OK.
5 Restart your computer so the changes you made take effect.
38
ZyWALL SSL 10 User’s Guide
Page 39

Configuring
Figure 27 Windows 95/98/Me: TCP/IP Properties: IP Address
Appendix A Setting up Your Computer’s IP Address
1 In the Network window Configuration tab, select your network adapter's TCP/IP entry
and click Properties
2 Click the IP Address tab.
• If your IP address is dynamic, select Obtain an IP address automatically.
• If you have a static IP address, select Specify an IP address and type your
information into the IP Address and Subnet Mask fields.
3 Click the DNS Configuration tab.
• If you do not know your DNS information, select Disable DNS.
• If you know your DNS information, select Enable DNS and type the information in
the fields below (you may not need to fill them all in).
ZyWALL SSL 10 User’s Guide
39
Page 40

Appendix A Setting up Your Computer’s IP Address
Figure 28 Windows 95/98/Me: TCP/IP Properties: DNS Configuration
4 Click the Gateway tab.
• If you do not know your gateway’s IP address, remove previously installed gateways.
• If you have a gateway IP address, type it in the New gateway field and click Add.
5 Click OK to save and close the TCP/IP Properties window.
6 Click OK to close the Network window. Insert the Windows CD if prompted.
7 Turn on your ZyWALL and restart your computer when prompted.
Verifying Settings
1 Click Start and then Run.
2 In the Run window, type "winipcfg" and then click OK to open the IP Configuration
window.
3 Select your network adapter. You should see your computer's IP address, subnet mask
and default gateway.
Windows 2000/NT/XP
The following example figures use the default Windows XP GUI theme.
1 Click start (Start in Windows 2000/NT), Settings, Control Panel.
40
ZyWALL SSL 10 User’s Guide
Page 41

Figure 29 Windows XP: Start Menu
Appendix A Setting up Your Computer’s IP Address
2 In the Control Panel, double-click Network Connections (Network and Dial-up
Connections in Windows 2000/NT).
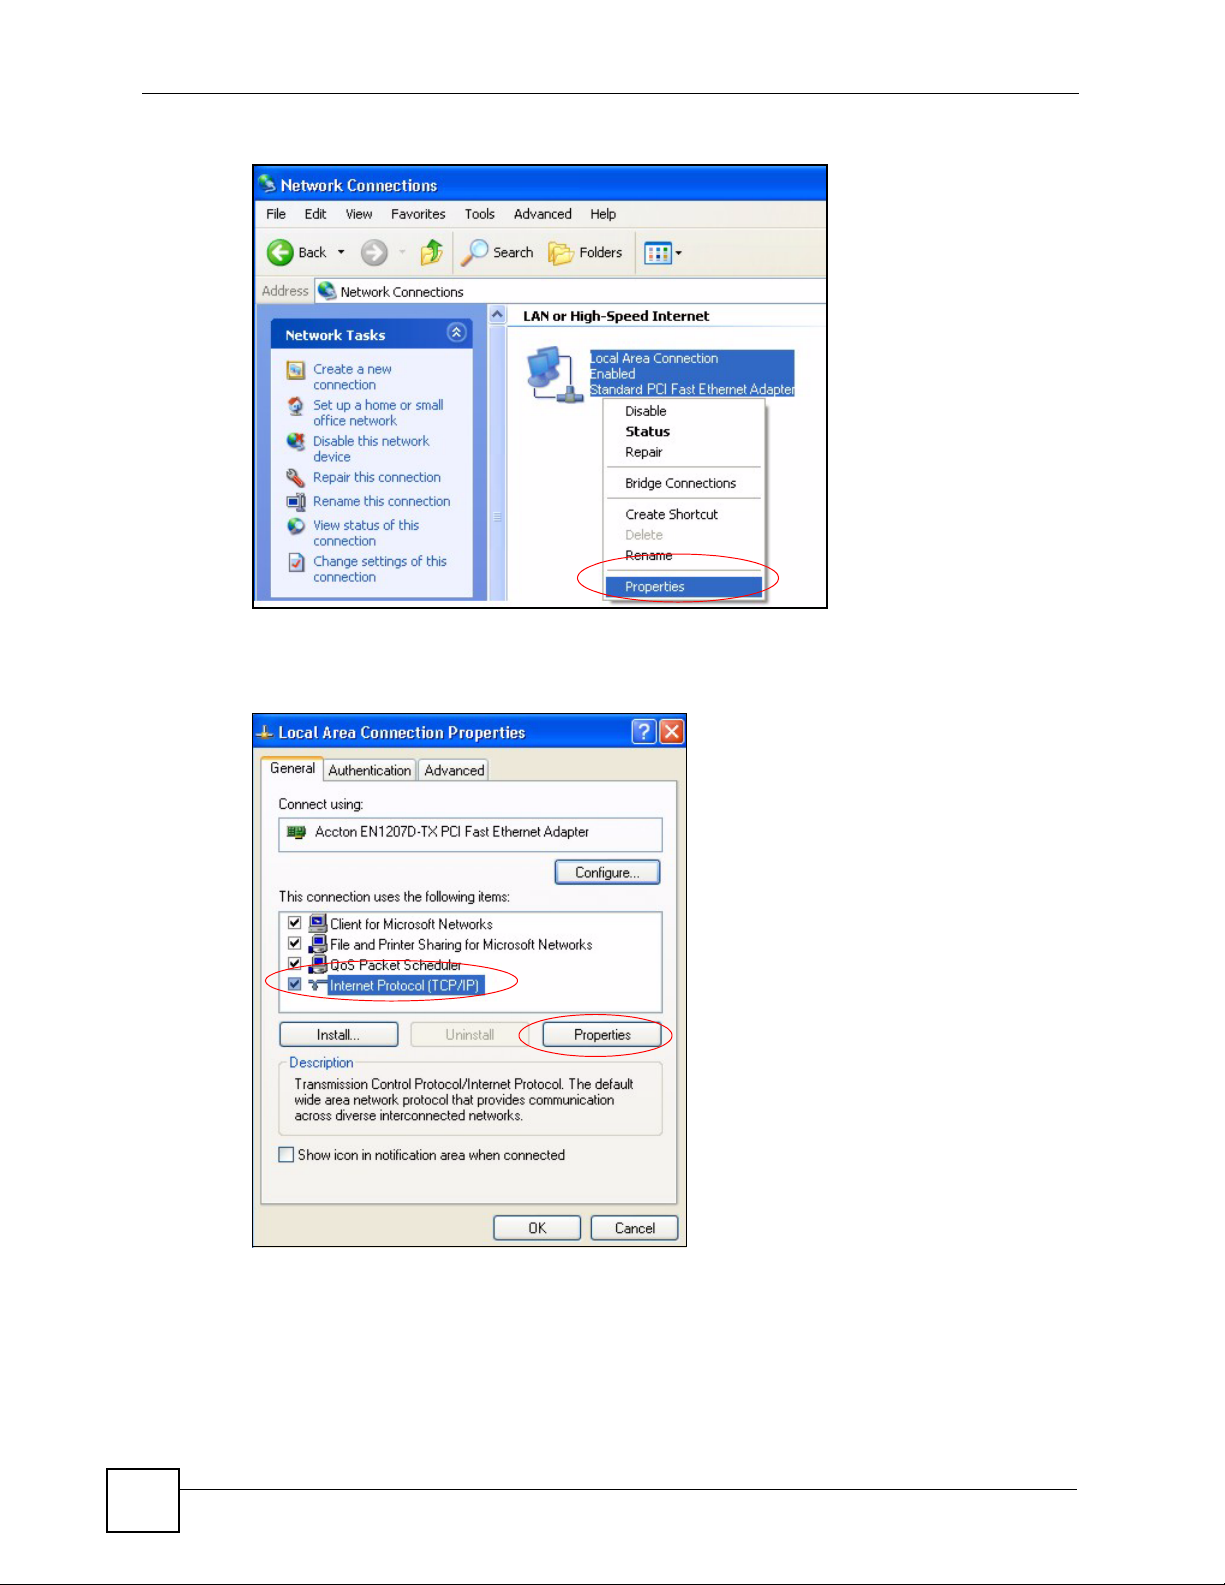
Figure 30 Windows XP: Control Panel
3 Right-click Local Area Connection and then click Properties.
ZyWALL SSL 10 User’s Guide
41
Page 42
Appendix A Setting up Your Computer’s IP Address
Figure 31 Windows XP: Control Panel: Network Connections: Properties
4 Select Internet Protocol (TCP/IP) (under the General tab in Win XP) and then click
Properties.
Figure 32 Windows XP: Local Area Connection Properties
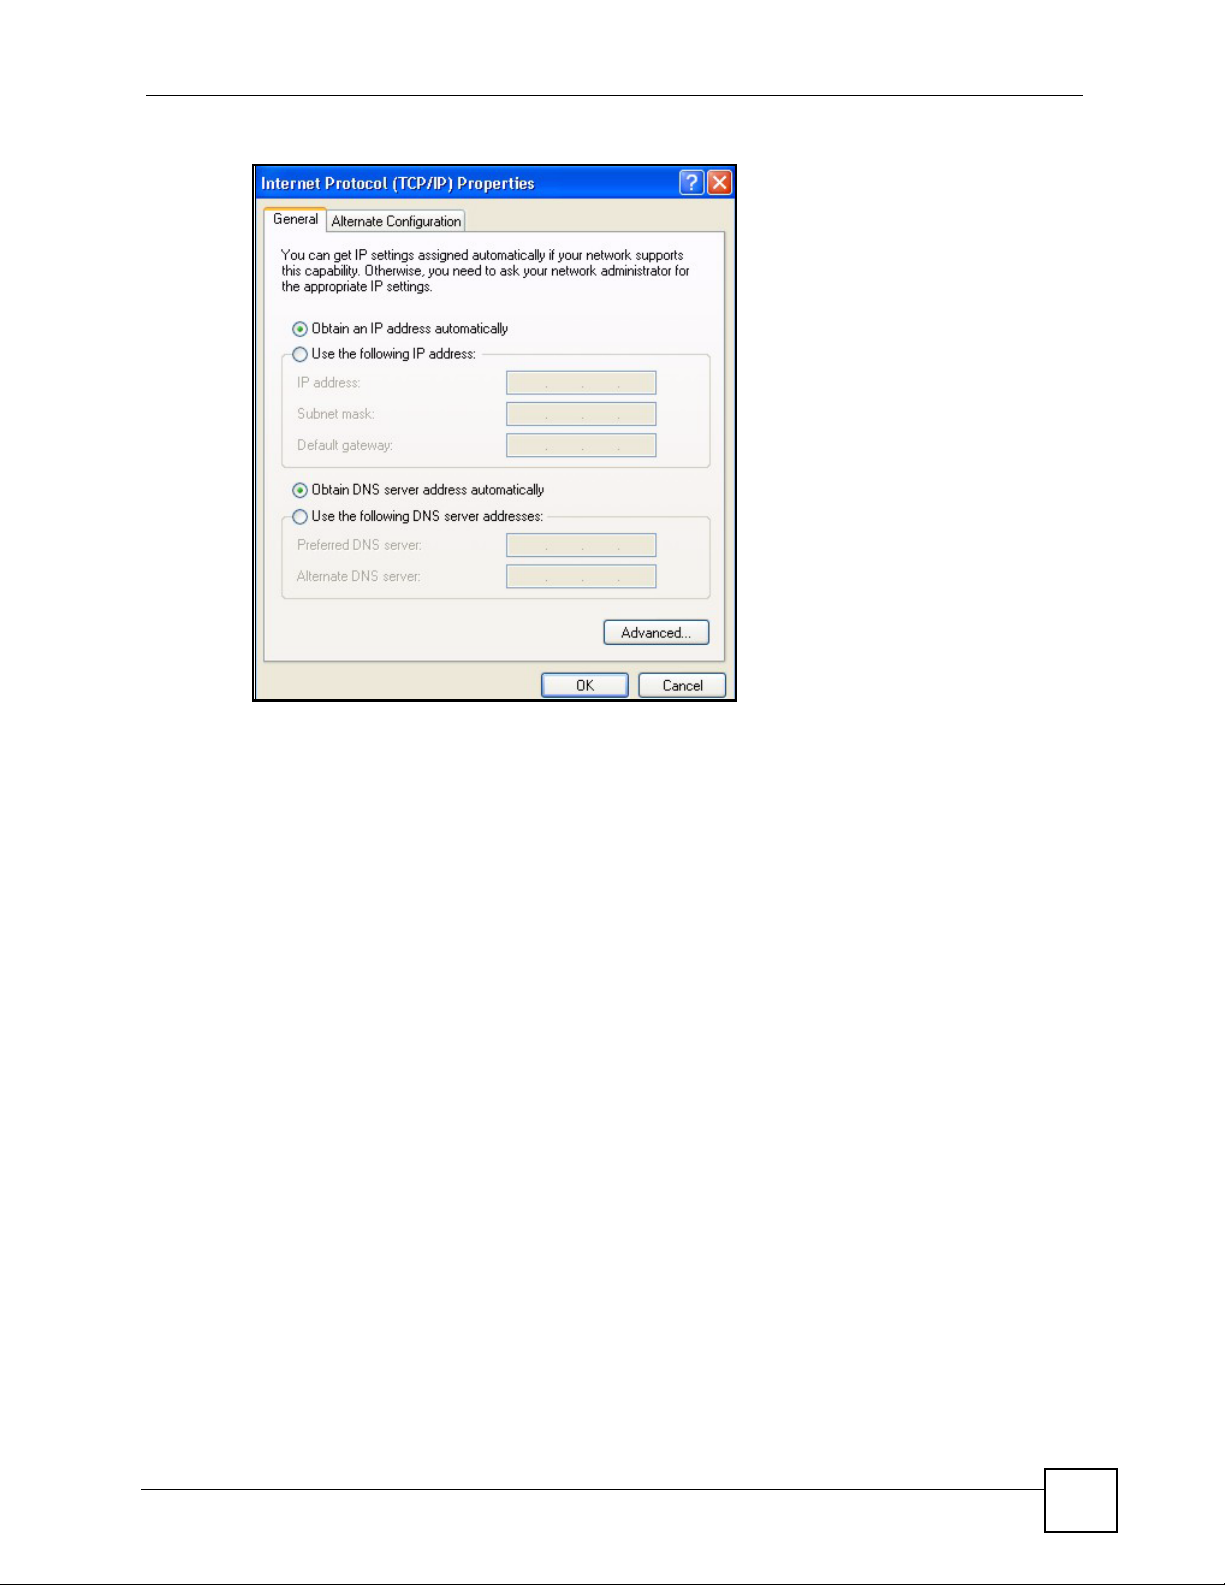
5 The Internet Protocol TCP/IP Properties window opens (the General tab in
Windows XP).
• If you have a dynamic IP address click Obtain an IP address automatically.
• If you have a static IP address click Use the following IP Address and fill in the IP
address, Subnet mask, and Default gateway fields.
• Click Advanced.
42
ZyWALL SSL 10 User’s Guide
Page 43
Appendix A Setting up Your Computer’s IP Address
Figure 33 Windows XP: Internet Protocol (TCP/IP) Properties
6 If you do not know your gateway's IP address, remove any previously installed
gateways in the IP Settings tab and click OK.
Do one or more of the following if you want to configure additional IP addresses:
•In the IP Settings tab, in IP addresses, click Add.
•In TCP/IP Address, type an IP address in IP address and a subnet mask in Subnet
mask, and then click Add.
• Repeat the above two steps for each IP address you want to add.
• Configure additional default gateways in the IP Settings tab by clicking Add in
Default gateways.
•In TCP/IP Gateway Address, type the IP address of the default gateway in Gateway.
To manually configure a default metric (the number of transmission hops), clear the
Automatic metric check box and type a metric in Metric.
• Click Add.
• Repeat the previous three steps for each default gateway you want to add.
• Click OK when finished.
ZyWALL SSL 10 User’s Guide
43
Page 44

Appendix A Setting up Your Computer’s IP Address
Figure 34 Windows XP: Advanced TCP/IP Properties
7 In the Internet Protocol TCP/IP Properties window (the General tab in Windows
XP):
• Click Obtain DNS server address automatically if you do not know your DNS
server IP address(es).
• If you know your DNS server IP address(es), click Use the following DNS server
addresses, and type them in the Preferred DNS server and Alternate DNS server
fields.
If you have previously configured DNS servers, click Advanced and then the DNS
tab to order them.
44
ZyWALL SSL 10 User’s Guide
Page 45

Appendix A Setting up Your Computer’s IP Address
Figure 35 Windows XP: Internet Protocol (TCP/IP) Properties
8 Click OK to close the Internet Protocol (TCP/IP) Properties window.
9 Click Close (OK in Windows 2000/NT) to close the Local Area Connection
Properties window.
10 Close the Network Connections window (Network and Dial-up Connections in
Windows 2000/NT).
11 Turn on your ZyWALL and restart your computer (if prompted).
Verifying Settings
1 Click Start, All Programs, Accessories and then Command Prompt.
2 In the Command Prompt window, type "ipconfig" and then press [ENTER]. You can
also open Network Connections, right-click a network connection, click Status and
then click the Support tab.
Macintosh OS 8/9
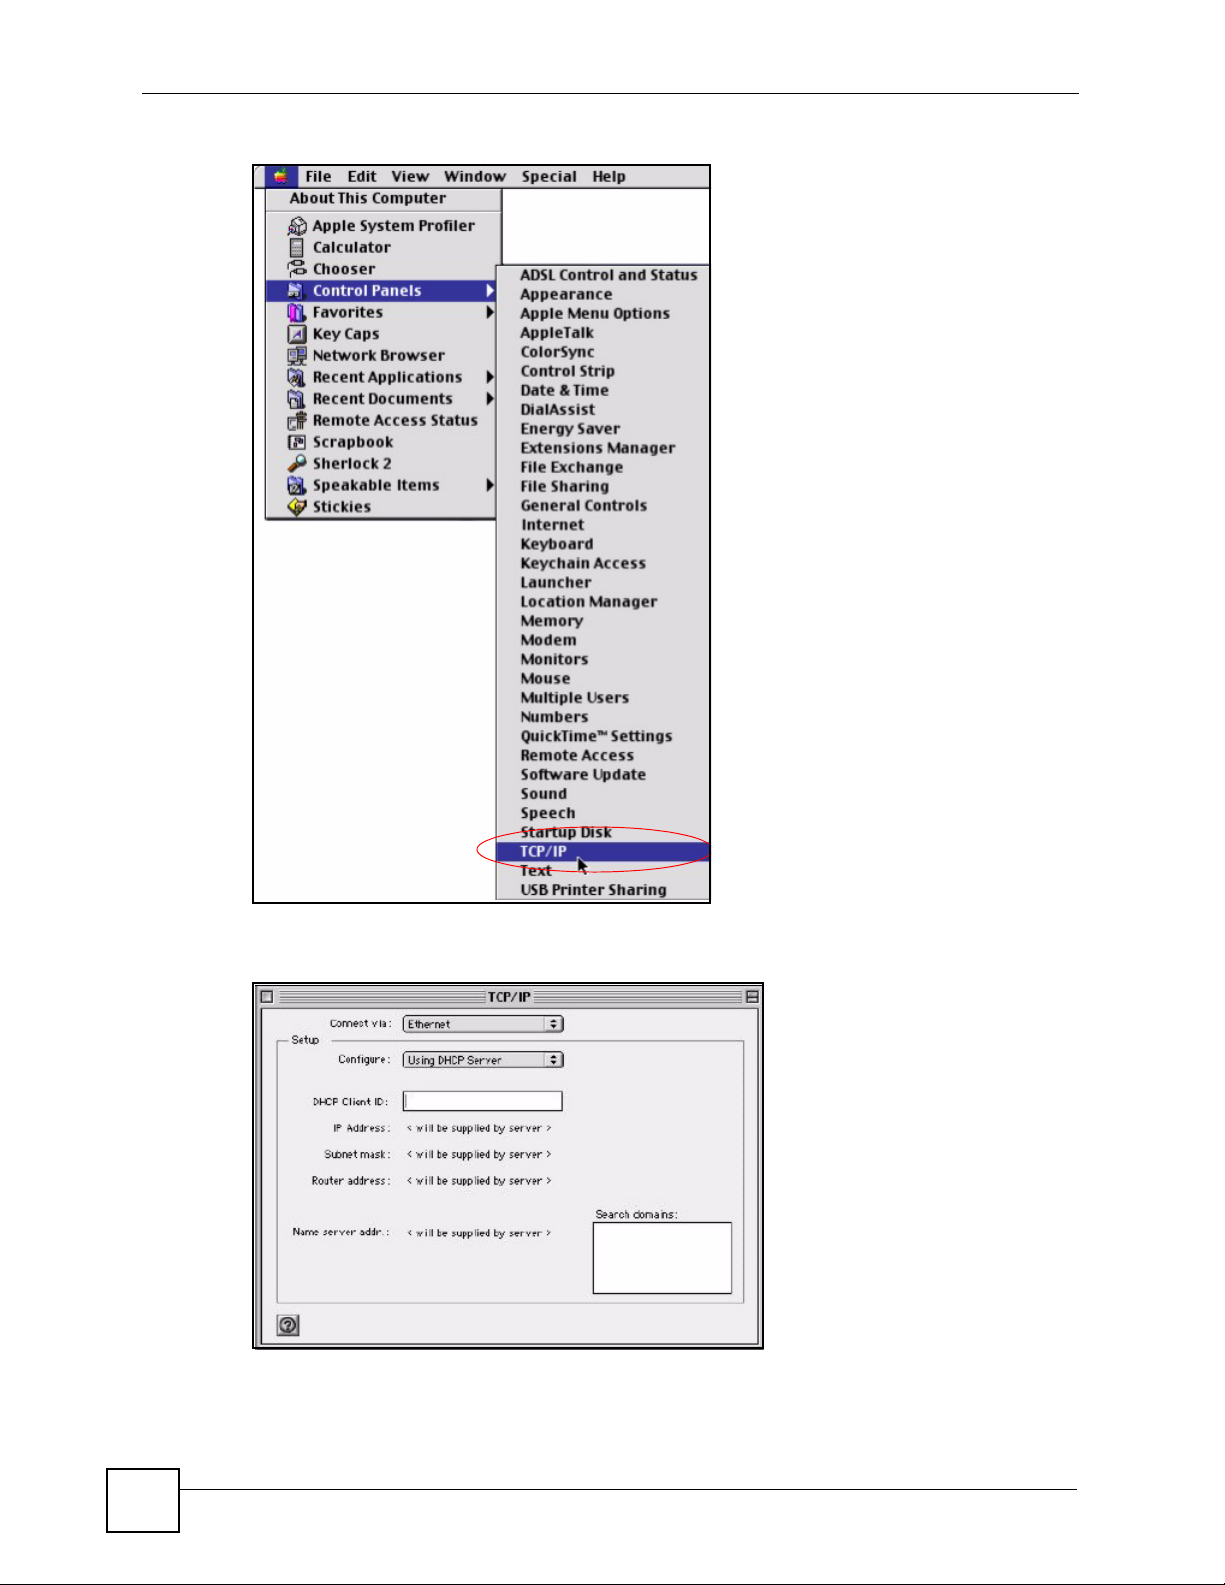
1 Click the Apple menu, Control Panel and double-click TCP/IP to open the TCP/IP
Control Panel.
ZyWALL SSL 10 User’s Guide
45
Page 46
Appendix A Setting up Your Computer’s IP Address
Figure 36 Macintosh OS 8/9: Apple Menu
2 Select Ethernet built-in from the Connect via list.
Figure 37 Macintosh OS 8/9: TCP/IP
3 For dynamically assigned settings, select Using DHCP Server from the Configure: list.
4 For statically assigned settings, do the following:
•From the Configure box, select Manually.
46
ZyWALL SSL 10 User’s Guide
Page 47
• Type your IP address in the IP Address box.
• Type your subnet mask in the Subnet mask box.
• Type the IP address of your ZyWALL in the Router address box.
5 Close the TCP/IP Control Panel.
6 Click Save if prompted, to save changes to your configuration.
7 Turn on your ZyWALL and restart your computer (if prompted).
Verifying Settings
Check your TCP/IP properties in the TCP/IP Control Panel window.
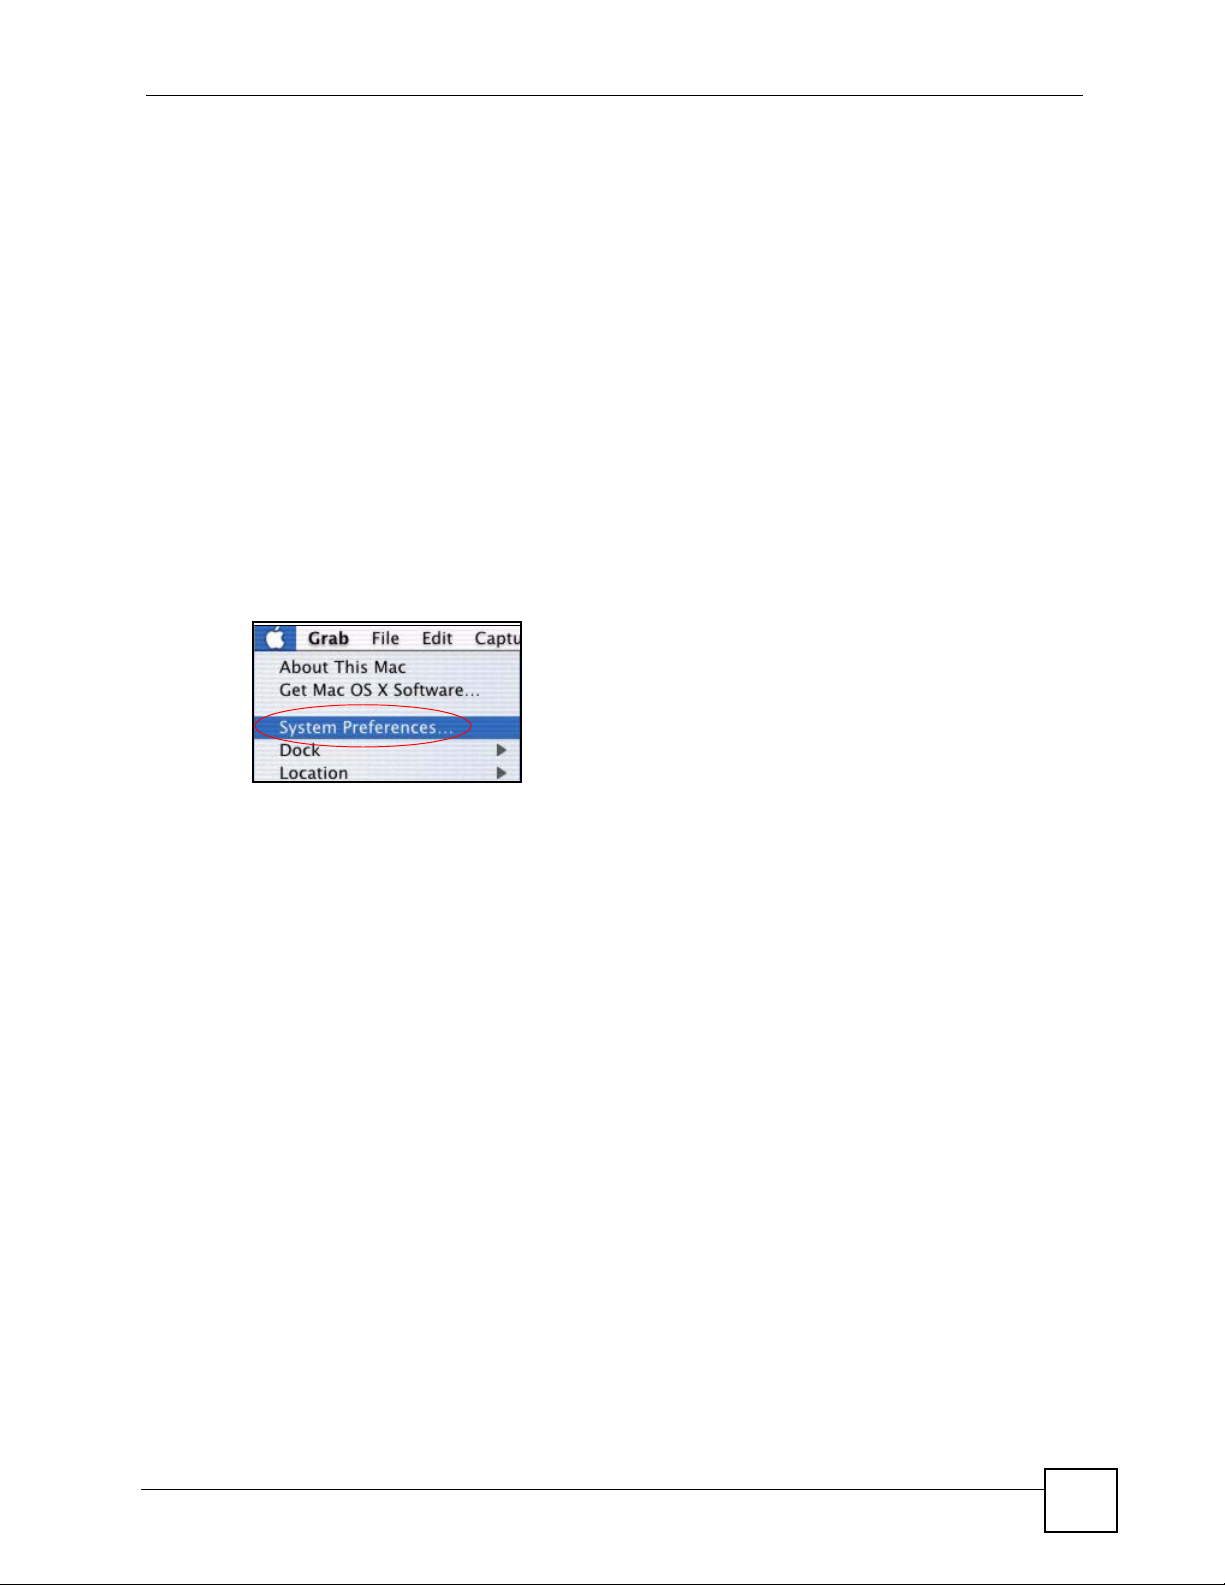
Macintosh OS X
1 Click the Apple menu, and click System Preferences to open the System Preferences
window.
Figure 38 Macintosh OS X: Apple Menu
Appendix A Setting up Your Computer’s IP Address
2 Click Network in the icon bar.
• Select Automatic from the Location list.
• Select Built-in Ethernet from the Show list.
• Click the TCP/IP tab.
3 For dynamically assigned settings, select Using DHCP from the Configure list.
ZyWALL SSL 10 User’s Guide
47
Page 48

Appendix A Setting up Your Computer’s IP Address
Figure 39 Macintosh OS X: Network
4 For statically assigned settings, do the following:
•From the Configure box, select Manually.
• Type your IP address in the IP Address box.
• Type your subnet mask in the Subnet mask box.
• Type the IP address of your ZyWALL in the Router address box.
5 Click Apply Now and close the window.
6 Turn on your ZyWALL and restart your computer (if prompted).
Verifying Settings
Check your TCP/IP properties in the Network window.
Linux
This section shows you how to configure your computer’s TCP/IP settings in Red Hat Linux
9.0. Procedure, screens and file location may vary depending on your Linux distribution and
release version.
48
ZyWALL SSL 10 User’s Guide
Page 49

Appendix A Setting up Your Computer’s IP Address
" Make sure you are logged in as the root administrator.
Using the K Desktop Environment (KDE)
Follow the steps below to configure your computer IP address using the KDE.
1 Click the Red Hat button (located on the bottom left corner), select System Setting and
click Network.
Figure 40 Red Hat 9.0: KDE: Network Configuration: Devices
2 Double-click on the profile of the network card you wish to configure. The Ethernet
Device General screen displays as shown.
Figure 41 Red Hat 9.0: KDE: Ethernet Device: General
ZyWALL SSL 10 User’s Guide
49
Page 50

Appendix A Setting up Your Computer’s IP Address
• If you have a dynamic IP address, click Automatically obtain IP address settings
with and select dhcp from the drop down list.
• If you have a static IP address, click Statically set IP Addresses and fill in the
Address, Subnet mask, and Default Gateway Address fields.
3 Click OK to save the changes and close the Ethernet Device General screen.
4 If you know your DNS server IP address(es), click the DNS tab in the Network
Configuration screen. Enter the DNS server information in the fields provided.
Figure 42 Red Hat 9.0: KDE: Network Configuration: DNS
5 Click the Devices tab.
6 Click the Activate button to apply the changes. The following screen displays. Click Yes
to save the changes in all screens.
Figure 43 Red Hat 9.0: KDE: Network Configuration: Activate
7 After the network card restart process is complete, make sure the Status is Active in the
Network Configuration screen.
Using Configuration Files
Follow the steps below to edit the network configuration files and set your computer IP
address.
1 Assuming that you have only one network card on the computer, locate the
eth0
configuration file (where eth0 is the name of the Ethernet card). Open the
configuration file with any plain text editor.
• If you have a dynamic IP address, enter
following figure shows an example.
ifconfig-
dhcp in the BOOTPROTO= field. The
50
ZyWALL SSL 10 User’s Guide
Page 51

Appendix A Setting up Your Computer’s IP Address
Figure 44 Red Hat 9.0: Dynamic IP Address Setting in ifconfig-eth0
DEVICE=eth0
ONBOOT=yes
BOOTPROTO=dhcp
USERCTL=no
PEERDNS=yes
TYPE=Ethernet
• If you have a static IP address, enter static in the BOOTPROTO= field. Type
IPADDR= followed by the IP address (in dotted decimal notation) and type NETMASK=
followed by the subnet mask. The following example shows an example where the
static IP address is 192.168.1.10 and the subnet mask is 255.255.255.0.
Figure 45 Red Hat 9.0: Static IP Address Setting in ifconfig-eth0
DEVICE=eth0
ONBOOT=yes
BOOTPROTO=static
IPADDR=192.168.1.10
NETMASK=255.255.255.0
USERCTL=no
PEERDNS=yes
TYPE=Ethernet
2 If you know your DNS server IP address(es), enter the DNS server information in the
resolv.conf file in the /etc directory. The following figure shows an example
where two DNS server IP addresses are specified.
Figure 46 Red Hat 9.0: DNS Settings in resolv.conf
nameserver 172.23.5.1
nameserver 172.23.5.2
3 After you edit and save the configuration files, you must restart the network card. Enter
./network restart in the /etc/rc.d/init.d directory. The following figure
shows an example.
Figure 47 Red Hat 9.0: Restart Ethernet Card
[root@localhost init.d]# network restart
Shutting down interface eth0: [OK]
Shutting down loopback interface: [OK]
Setting network parameters: [OK]
Bringing up loopback interface: [OK]
Bringing up interface eth0: [OK]
ZyWALL SSL 10 User’s Guide
51
Page 52
Appendix A Setting up Your Computer’s IP Address
Verifying Settings
Enter ifconfig in a terminal screen to check your TCP/IP properties.
Figure 48 Red Hat 9.0: Checking TCP/IP Properties
[root@localhost]# ifconfig
eth0 Link encap:Ethernet HWaddr 00:50:BA:72:5B:44
inet addr:172.23.19.129 Bcast:172.23.19.255 Mask:255.255.255.0
UP BROADCAST RUNNING MULTICAST MTU:1500 Metric:1
RX packets:717 errors:0 dropped:0 overruns:0 frame:0
TX packets:13 errors:0 dropped:0 overruns:0 carrier:0
collisions:0 txqueuelen:100
RX bytes:730412 (713.2 Kb) TX bytes:1570 (1.5 Kb)
Interrupt:10 Base address:0x1000
[root@localhost]#
52
ZyWALL SSL 10 User’s Guide
Page 53

APPENDIX B
Importing Certificates
This appendix shows importing certificates examples using Netscape Navigator and Internet
Explorer 5. This appendix uses the ZyWALL 70 as an example. Other models should be
similiar.
Import ZyWALL Certificates into Netscape Navigator
In Netscape Navigator, you can permanently trust the ZyWALL’s server certificate by
importing it into your operating system as a trusted certification authority.
Select Accept This Certificate Permanently in the following screen to do this.
Figure 49 Security Certificate
Importing the ZyWALL’s Certificate into Internet Explorer
For Internet Explorer to trust a self-signed certificate from the ZyWALL, simply import the
self-signed certificate into your operating system as a trusted certification authority.
To have Internet Explorer trust a ZyWALL certificate issued by a certificate authority, import
the certificate authority’s certificate into your operating system as a trusted certification
authority.
The following example procedure shows how to import the ZyWALL’s (self-signed) server
certificate into your operating system as a trusted certification authority.
1 In Internet Explorer, double click the lock shown in the following screen.
ZyWALL SSL 10 User’s Guide
53
Page 54

Appendix B Importing Certificates
Figure 50 Login Screen
2 Click Install Certificate to open the Install Certificate wizard.
Figure 51 Certificate General Information before Import
54
3 Click Next to begin the Install Certificate wizard.
ZyWALL SSL 10 User’s Guide
Page 55

Appendix B Importing Certificates
Figure 52 Certificate Import Wizard 1
4 Select where you would like to store the certificate and then click Next.
Figure 53 Certificate Import Wizard 2
5 Click Finish to complete the Import Certificate wizard.
ZyWALL SSL 10 User’s Guide
55
Page 56

Appendix B Importing Certificates
Figure 54 Certificate Import Wizard 3
6 Click Ye s to add the ZyWALL certificate to the root store.
Figure 55 Root Certificate Store
56
ZyWALL SSL 10 User’s Guide
Page 57

Figure 56 Certificate General Information after Import
Appendix B Importing Certificates
ZyWALL SSL 10 User’s Guide
57
Page 58

Appendix B Importing Certificates
58
ZyWALL SSL 10 User’s Guide
Page 59

APPENDIX C
Legal Information
Copyright
Copyright © 2006 by ZyXEL Communications Corporation.
The contents of this publication may not be reproduced in any part or as a whole, transcribed,
stored in a retrieval system, translated into any language, or transmitted in any form or by any
means, electronic, mechanical, magnetic, optical, chemical, photocopying, manual, or
otherwise, without the prior written permission of ZyXEL Communications Corporation.
Published by ZyXEL Communications Corporation. All rights reserved.
Disclaimer
ZyXEL does not assume any liability arising out of the application or use of any products, or
software described herein. Neither does it convey any license under its patent rights nor the
patent rights of others. ZyXEL further reserves the right to make changes in any products
described herein without notice. This publication is subject to change without notice.
Certifications
Federal Communications Commission (FCC) Interference Statement
The device complies with Part 15 of FCC rules. Operation is subject to the following two
conditions:
• This device may not cause harmful interference.
• This device must accept any interference received, including interference that may cause
undesired operations.
This device has been tested and found to comply with the limits for a Class B digital device
pursuant to Part 15 of the FCC Rules. These limits are designed to provide reasonable
protection against harmful interference in a residential installation. This device generates,
uses, and can radiate radio frequency energy, and if not installed and used in accordance with
the instructions, may cause harmful interference to radio communications. However, there is
no guarantee that interference will not occur in a particular installation.
If this device does cause harmful interference to radio/television reception, which can be
determined by turning the device off and on, the user is encouraged to try to correct the
interference by one or more of the following measures:
1 Reorient or relocate the receiving antenna.
2 Increase the separation between the equipment and the receiver.
ZyWALL SSL 10 User’s Guide
59
Page 60

Appendix C Legal Information
3 Connect the equipment into an outlet on a circuit different from that to which the
receiver is connected.
4 Consult the dealer or an experienced radio/TV technician for help.
Notices
Changes or modifications not expressly approved by the party responsible for compliance
could void the user's authority to operate the equipment.
This Class B digital apparatus complies with Canadian ICES-003.
Cet appareil numérique de la classe B est conforme à la norme NMB-003 du Canada.
Viewing Certifications
1 Go to http://www.zyxel.com
2 Select your product on the ZyXEL home page to go to that product's page.
3 Select the certification you wish to view from this page.
ZyXEL Limited Warranty
ZyXEL warrants to the original end user (purchaser) that this product is free from any defects
in materials or workmanship for a period of up to two years from the date of purchase. During
the warranty period, and upon proof of purchase, should the product have indications of failure
due to faulty workmanship and/or materials, ZyXEL will, at its discretion, repair or replace the
defective products or components without charge for either parts or labor, and to whatever
extent it shall deem necessary to restore the product or components to proper operating
condition. Any replacement will consist of a new or re-manufactured functionally equivalent
product of equal or higher value, and will be solely at the discretion of ZyXEL. This warranty
shall not apply if the product has been modified, misused, tampered with, damaged by an act
of God, or subjected to abnormal working conditions.
Note
Repair or replacement, as provided under this warranty, is the exclusive remedy of the
purchaser. This warranty is in lieu of all other warranties, express or implied, including any
implied warranty of merchantability or fitness for a particular use or purpose. ZyXEL shall in
no event be held liable for indirect or consequential damages of any kind to the purchaser.
.
60
To obtain the services of this warranty, contact ZyXEL's Service Center for your Return
Material Authorization number (RMA). Products must be returned Postage Prepaid. It is
recommended that the unit be insured when shipped. Any returned products without proof of
purchase or those with an out-dated warranty will be repaired or replaced (at the discretion of
ZyXEL) and the customer will be billed for parts and labor. All repaired or replaced products
will be shipped by ZyXEL to the corresponding return address, Postage Paid. This warranty
gives you specific legal rights, and you may also have other rights that vary from country to
country.
Registration
Register your product online to receive e-mail notices of firmware upgrades and information
at www.zyxel.com for global products, or at www.us.zyxel.com for North American products.
ZyWALL SSL 10 User’s Guide
Page 61

APPENDIX D
Customer Support
Please have the following information ready when you contact customer support.
Required Information
• Product model and serial number.
• Warranty Information.
• Date that you received your device.
• Brief description of the problem and the steps you took to solve it.
Corporate Headquarters (Worldwide)
• Support E-mail: support@zyxel.com.tw
• Sales E-mail: sales@zyxel.com.tw
• Telephone: +886-3-578-3942
• Fax: +886-3-578-2439
• Web Site: www.zyxel.com, www.europe.zyxel.com
• FTP Site: ftp.zyxel.com, ftp.europe.zyxel.com
• Regular Mail: ZyXEL Communications Corp., 6 Innovation Road II, Science Park,
Hsinchu 300, Taiwan
Costa Rica
• Support E-mail: soporte@zyxel.co.cr
• Sales E-mail: sales@zyxel.co.cr
• Telephone: +506-2017878
• Fax: +506-2015098
• Web Site: www.zyxel.co.cr
• FTP Site: ftp.zyxel.co.cr
• Regular Mail: ZyXEL Costa Rica, Plaza Roble Escazú, Etapa El Patio, Tercer Piso, San
José, Costa Rica
Czech Republic
• E-mail: info@cz.zyxel.com
• Telephone: +420-241-091-350
• Fax: +420-241-091-359
• Web Site: www.zyxel.cz
• Regular Mail: ZyXEL Communications, Czech s.r.o., Modranská 621, 143 01 Praha 4 Modrany, Ceská Republika
ZyWALL SSL 10 User’s Guide
61
Page 62

Appendix D Customer Support
Denmark
• Support E-mail: support@zyxel.dk
• Sales E-mail: sales@zyxel.dk
• Telephone: +45-39-55-07-00
• Fax: +45-39-55-07-07
• Web Site: www.zyxel.dk
• Regular Mail: ZyXEL Communications A/S, Columbusvej, 2860 Soeborg, Denmark
Finland
• Support E-mail: support@zyxel.fi
• Sales E-mail: sales@zyxel.fi
• Telephone: +358-9-4780-8411
• Fax: +358-9-4780 8448
• Web Site: www.zyxel.fi
• Regular Mail: ZyXEL Communications Oy, Malminkaari 10, 00700 Helsinki, Finland
France
• E-mail: info@zyxel.fr
• Telephone: +33-4-72-52-97-97
• Fax: +33-4-72-52-19-20
• Web Site: www.zyxel.fr
• Regular Mail: ZyXEL France, 1 rue des Vergers, Bat. 1 / C, 69760 Limonest, France
Germany
• Support E-mail: support@zyxel.de
• Sales E-mail: sales@zyxel.de
• Telephone: +49-2405-6909-0
• Fax: +49-2405-6909-99
• Web Site: www.zyxel.de
• Regular Mail: ZyXEL Deutschland GmbH., Adenauerstr. 20/A2 D-52146, Wuerselen,
Germany
Hungary
• Support E-mail: support@zyxel.hu
• Sales E-mail: info@zyxel.hu
• Telephone: +36-1-3361649
• Fax: +36-1-3259100
• Web Site: www.zyxel.hu
• Regular Mail: ZyXEL Hungary, 48, Zoldlomb Str., H-1025, Budapest, Hungary
62
Kazakhstan
• Support: http://zyxel.kz/support
• Sales E-mail: sales@zyxel.kz
ZyWALL SSL 10 User’s Guide
Page 63

Appendix D Customer Support
• Telephone: +7-3272-590-698
• Fax: +7-3272-590-689
• Web Site: www.zyxel.kz
• Regular Mail: ZyXEL Kazakhstan, 43, Dostyk ave.,Office 414, Dostyk Business Centre,
050010, Almaty, Republic of Kazakhstan
North America
• Support E-mail: support@zyxel.com
• Sales E-mail: sales@zyxel.com
• Telephone: +1-800-255-4101, +1-714-632-0882
• Fax: +1-714-632-0858
• Web Site: www.us.zyxel.com
• FTP Site: ftp.us.zyxel.com
• Regular Mail: ZyXEL Communications Inc., 1130 N. Miller St., Anaheim, CA 928062001, U.S.A.
Norway
• Support E-mail: support@zyxel.no
• Sales E-mail: sales@zyxel.no
• Telephone: +47-22-80-61-80
• Fax: +47-22-80-61-81
• Web Site: www.zyxel.no
• Regular Mail: ZyXEL Communications A/S, Nils Hansens vei 13, 0667 Oslo, Norway
Poland
• E-mail: info@pl.zyxel.com
• Telephone: +48 (22) 333 8250
• Fax: +48 (22) 333 8251
• Web Site: www.pl.zyxel.com
• Regular Mail: ZyXEL Communications, ul. Okrzei 1A, 03-715 Warszawa, Poland
Russia
• Support: http://zyxel.ru/support
• Sales E-mail: sales@zyxel.ru
• Telephone: +7-095-542-89-29
• Fax: +7-095-542-89-25
• Web Site: www.zyxel.ru
• Regular Mail: ZyXEL Russia, Ostrovityanova 37a Str., Moscow, 117279, Russia
Spain
• Support E-mail: support@zyxel.es
• Sales E-mail: sales@zyxel.es
• Telephone: +34-902-195-420
• Fax: +34-913-005-345
ZyWALL SSL 10 User’s Guide
63
Page 64

Appendix D Customer Support
• Web Site: www.zyxel.es
• Regular Mail: ZyXEL Communications, Arte, 21 5ª planta, 28033 Madrid, Spain
Sweden
• Support E-mail: support@zyxel.se
• Sales E-mail: sales@zyxel.se
• Telephone: +46-31-744-7700
• Fax: +46-31-744-7701
• Web Site: www.zyxel.se
• Regular Mail: ZyXEL Communications A/S, Sjöporten 4, 41764 Göteborg, Sweden
Ukraine
• Support E-mail: support@ua.zyxel.com
• Sales E-mail: sales@ua.zyxel.com
• Telephone: +380-44-247-69-78
• Fax: +380-44-494-49-32
• Web Site: www.ua.zyxel.com
• Regular Mail: ZyXEL Ukraine, 13, Pimonenko Str., Kiev, 04050, Ukraine
United Kingdom
• Support E-mail: support@zyxel.co.uk
• Sales E-mail: sales@zyxel.co.uk
• Telephone: +44-1344 303044, 08707 555779 (UK only)
• Fax: +44-1344 303034
• Web Site: www.zyxel.co.uk
• FTP Site: ftp.zyxel.co.uk
• Regular Mail: ZyXEL Communications UK, Ltd.,11 The Courtyard, Eastern Road,
Bracknell, Berkshire, RG12 2XB, United Kingdom (UK)
“+” is the (prefix) number you dial to make an international telephone call.
64
ZyWALL SSL 10 User’s Guide
 Loading...