

Zylux Acoustic SIRTTR1 User Manual

Need TTR1 Logo
User Guide


Table of Contents
Introduction. . . . . . . . . . . . . . . . . . . .5
Features . . . . . . . . . . . . . . . . . . . . . . . . . . . .6
Safety and Care Information . . . . . . . . . . .7
What’s in the Box? . . . . . . . . . . . . . . . . . . .9
SIRIUS TTR1 Radio Functions . . . . . . . . . 10
Remote Control . . . . . . . . . . . . . . . . . . . . . 12
Display Screen. . . . . . . . . . . . . . . . . . . . . . 13
Installation . . . . . . . . . . . . . . . . . . . 15
Introduction . . . . . . . . . . . . . . . . . . . . . . . . 16
Step 1: Connect to a Network . . . . . . . . . 17
Step 2: Enter Your SIRIUS Account
Information . . . . . . . . . . . . . . . . . . . . . . 30
Using your SIRIUS TTR1 Radio . . 33
Navigation Basics . . . . . . . . . . . . . . . . . . 34
Direct Tune. . . . . . . . . . . . . . . . . . . . . . . . 38
Favorite Channels . . . . . . . . . . . . . . . . . . 39
Alarm Clock . . . . . . . . . . . . . . . . . . . . . . . 40
Snooze . . . . . . . . . . . . . . . . . . . . . . . . . . . 42
Sleep Timer . . . . . . . . . . . . . . . . . . . . . . . 43
Parental Control . . . . . . . . . . . . . . . . . . . 44
Equalization (EQ) . . . . . . . . . . . . . . . . . . . 50
Configuring your SIRIUS TTR1
Radio . . . . . . . . . . . . . . . . . . . . . . 53
SIRIUS setup . . . . . . . . . . . . . . . . . . . . . . 54
System Setup. . . . . . . . . . . . . . . . . . . . . . 58
Troubleshooting. . . . . . . . . . . . . . . .73
Product Specifications . . . . . . . . . .77
Patent Information . . . . . . . . . . . . . . . . . .79
Environmental Information . . . . . . . . . . .79
Owner’s Record . . . . . . . . . . . . . . . . . . . 82
3

4

Introduction
5

Introduction
Features
Congratulations, on your purchase of the SIRIUS TTR1 Radio!
Your new SIRIUS TTR1 Radio comes with everything you need to enjoy SIRIUS
radio in your home.
Use this manual to familiarize yourself with all of your SIRIUS TTR1 Radio features
and capabilities. For the latest information about your SIRIUS TTR1 Radio and
other SIRIUS products and accessories, visit http://www.sirius.com.
Please read the entire User Guide before using your SIRIUS TTR1 Radio!
6

Safety and Care Information
IMPORTANT! Always read and understand all the instructions to avoid
injury to yourself and/or damage to your device. SIRIUS XM Radio Inc.
disclaims all responsibility for damage from data loss due to breakdown,
repair, or other causes.
• Do not expose to extreme temperatures (above 140ûF or below -4ûF, or
above 60ûC or below -20ûC).
• Do not expose to moisture. Do not use device near or in water.
• Do not let any foreign matter spill into device.
• Do not store in dusty areas.
• Do not expose to chemicals such as benzene and thinners. Do not use
liquid or aerosol cleaners. Clean with a soft damp cloth only.
• Do not expose to direct sunlight, fire, flame or other heat sources for a
prolonged period.
• Do not try to disassemble and/or repair device yourself.
• Do not drop your device or subject it to severe impact.
• Do not place heavy objects on device.
• Do not subject device to excessive pressure.
• If the screen is damaged, do not touch the liquid crystal fluid.
7
Introduction
WARNING!
• Opening the case may result in
electric shock.
• Make sure that you insert the
plug all the way into the outlet.
• Do not touch the device with wet
hands.
• Do not install near any heat
sources such as radiators,
heat registers, stoves, or other
apparatus (including amplifiers)
that produce heat.
• Do not defeat the safety purpose
of the polarized or grounding
type plug. A polarized plug has
two blades with one wider than
the other. A grounding type
plug has two blades and a third
grounding prong. The wide blade
or the third prong is provided for
your safety. When the provided
plug does not fit into your
outlet, consult an electrician
for replacement of the obsolete
outlet.
• Protect the power cord from being walked on or pinched particularly at plugs,
convenience receptacles, and the point where they exit from the apparatus.
8
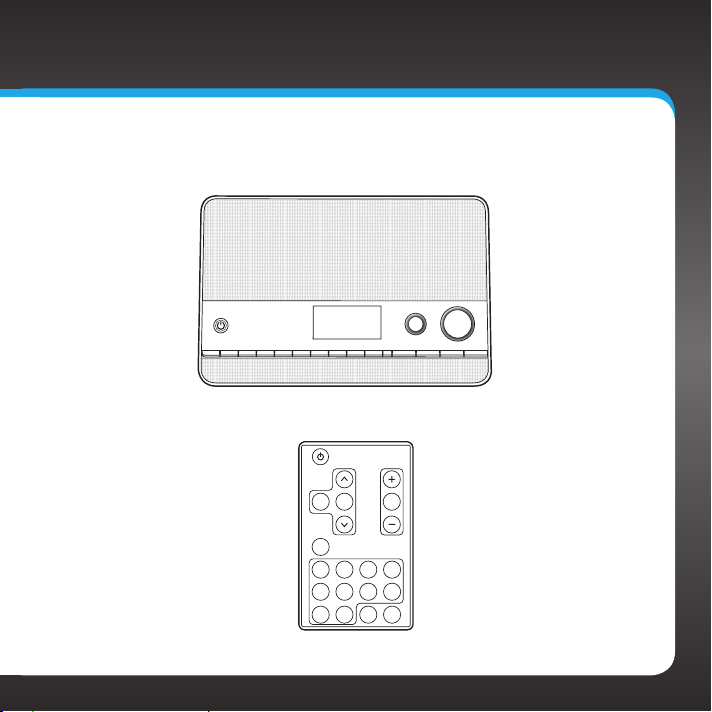
What’s in the Box?
TUNE VOL
1 2 3 5 6 7 8 9 0 BACK MENU
SIRIUS TTR1 Radio
MUTEBACK OK
MENU
2 3 41
6 7 85
ALARM1ALARM
09
2
Remote Control
ALARM 1 ALARM 24
9
Introduction
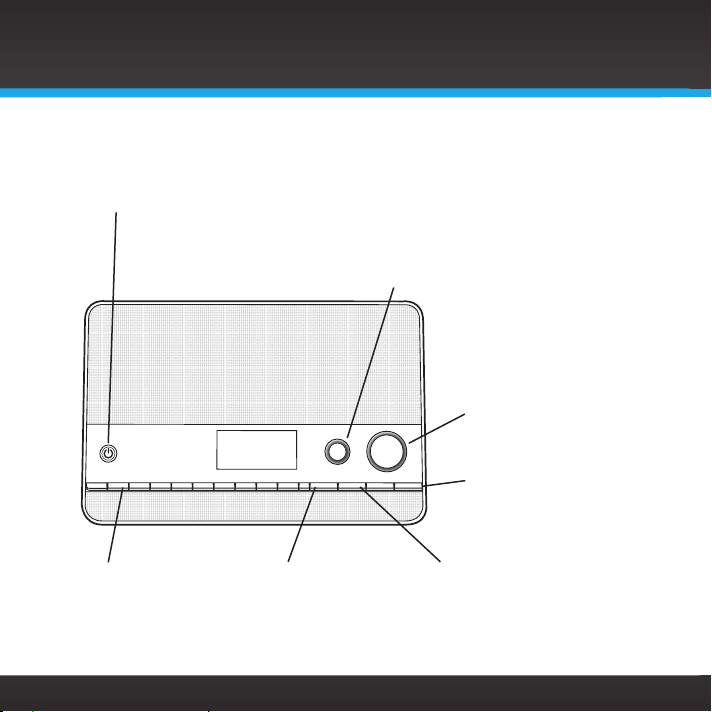
SIRIUS TTR1 Radio Functions
Power Button
Turn radio on and off.
1 2 3 5 6 7 8 9 0 BACK MENU
0-9 Number Buttons
Set and select and select
channels.
10
TUNE Knob (Multifunction)
Turning the knob at the default display screen displays the
category tune screen; pressing the knob at the default display
screen displays the direct tune screen; turning the knob in a menu
or user input screen scrolls through menus and choices; pressing
the knob in a menu or user input screen selects a highlighted item;
pressing and holding displays the Parental control menu.
Volume Knob
Increases or decreases
TUNE VOL
ALARM 1 ALARM 24
Back Button
Press to return back to
the previous display
screen.
volume; also mutes the
audio.
Alarm 1 / Alarm 2 Buttons
Turns the alarm clocks
On or Off; pressing and
holding displays the alarm
settings.
Menu Button
Press to access or exit
category and channel
tuning, advanced features,
and configuration options.
Snooze/Sleep Timer Button
Mutes the alarm for, or sets the sleep
timer for, 5, 10, 15, 30, 45, or 60 minutes.
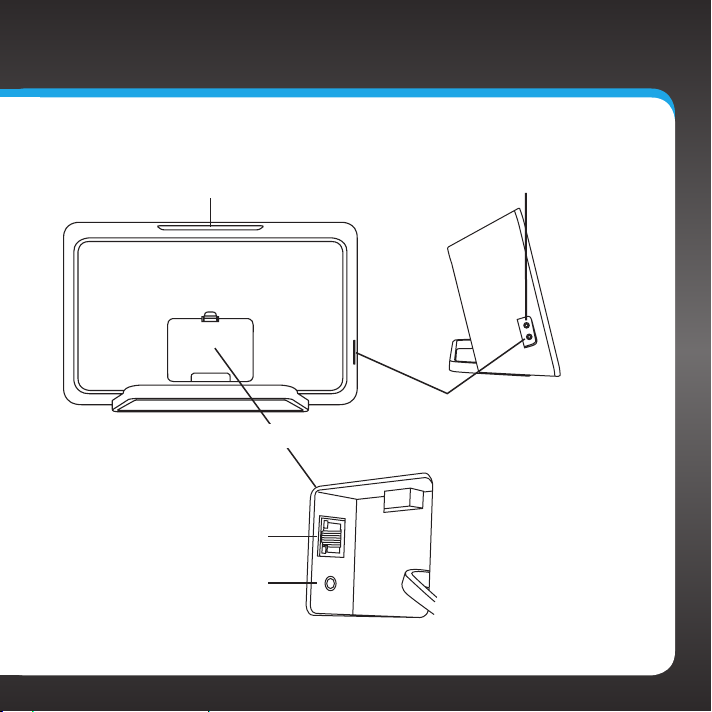
Rear Compartment
Wired Ethernet Connector
Line Out Connector
Headphone Connector
Aux In Connector
11
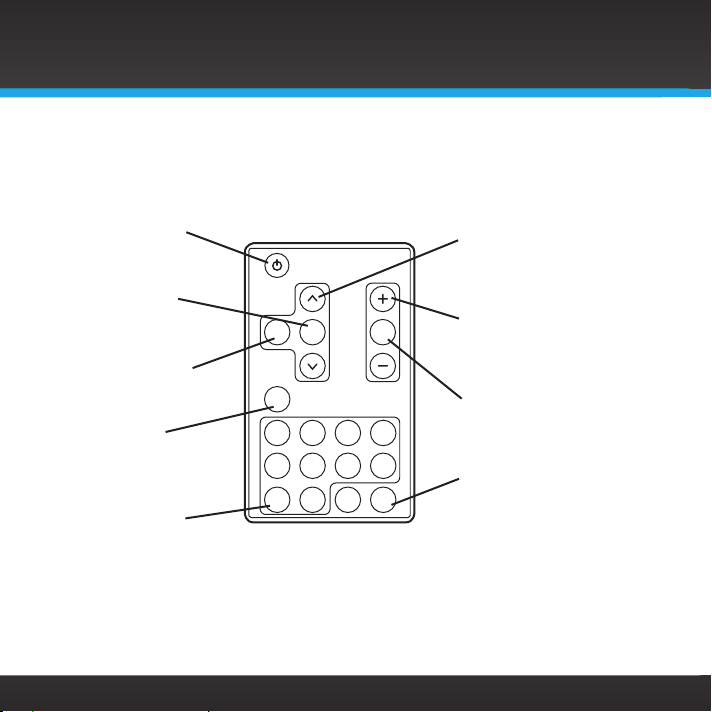
Introduction
Remote Control
Power Button
Turn radio on and off.
OK Button
Press to confirm
selection for channel
and menu items.
Back Button
Press to return back to
the previous display
screen.
Menu Button
Press to access or exit
advanced features and
configuration options.
0-9 Number Buttons
Set and select channels.
MENU
2 3 41
6 7 85
09
MUTEBACK OK
ALARM1ALARM
Arrow Buttons
Press to scroll through lists;
also highlight menu options.
+/— Buttons
Press to increase or
decrease the audio volume.
Mute
Press to silence the audio.
Alarm 1 / Alarm 2
2
Press to turn the respective
alarm clock On or Off;
pressing and holding
displays the alarm settings.
12
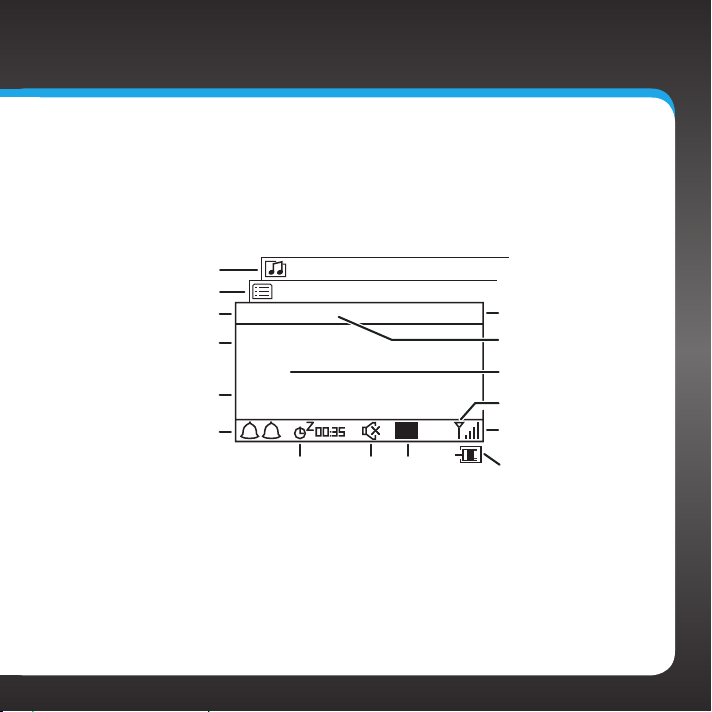
Display Screen
Network Connection
Network Connection
When using the SIRIUS TTR1 Radio, information about songs and artists, and
radio functions are displayed.
Category or Channel
Menu Options Screen
Main Display Screen
Alarm 1/2 On Indicator
List Screen
Channel Name
Song Title or
Talk Show Schedule
SIRIUS 017
Jam_ON
Phish
First Tube
1 2
Alarm
Snooze
Countdown
Audio is
Muted
5:23PM
P 1
Preset
Number
(Favorites)
Current Time
Channel Number
Artist Name or
Talk Show Host
Type (wireless)
Signal Strength
(wireless)
Type (wired)
13

14

Installation
15

Installation
Introduction
The SIRIUS TTR1 Radio allows you to listen to all of the channels on the Sirius
Internet Radio service using either a wireless Internet connection (Wi-Fi), or using
a wired Ethernet connection.
You must be subscribed to the SIRIUS Internet Radio service to use the SIRIUS
TTR1 Radio. Go to www.sirius.com/siriusinternetradio or call 888-539-7474 to
subscribe and get your user name and password. You can add this service to your
SIRIUS subscription, or subscribe only to the SIRIUS Internet Radio service.
To verify that you are subscribed to service, go to www.sirius.com, click on the
LISTEN ONLINE link, and then click the LAUNCH PLAYER link. Enter your
username and password. Select a channel to listen to and then click on the
PREMIUM link. If you can listen in the Premium mode, then you are subscribed to
the SIRIUS Internet Radio service.
The SIRIUS TTR1 Radio supports a wireless Internet connection through any
standard 802.11b/g access point. This includes wireless networks which are WEP/
WPA/WPA2 protected and require a password, and wireless networks where the
network name (SSID) is hidden. Once you have connected to a wireless network,
the radio will remember your network settings so you will not have to enter the
information again, unless you perform a reset of the radio to the factory defaults.
16

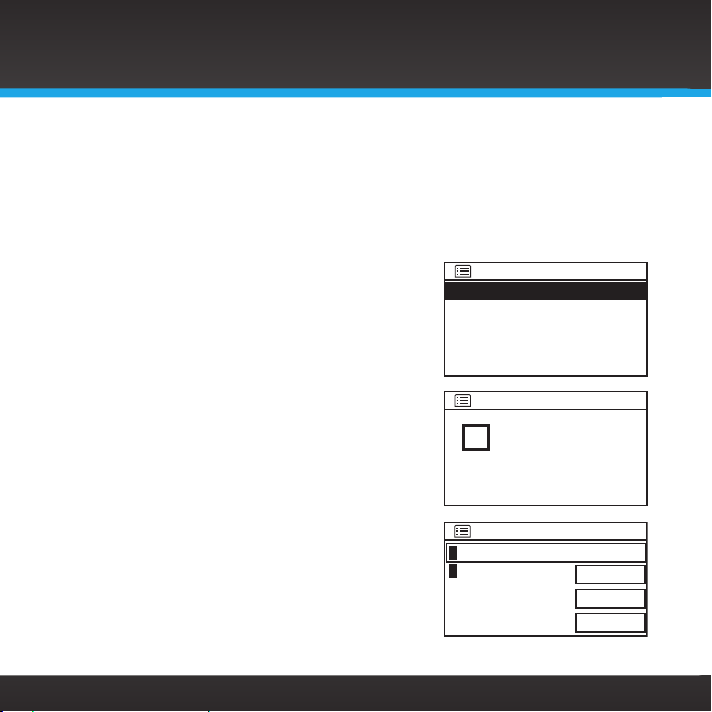
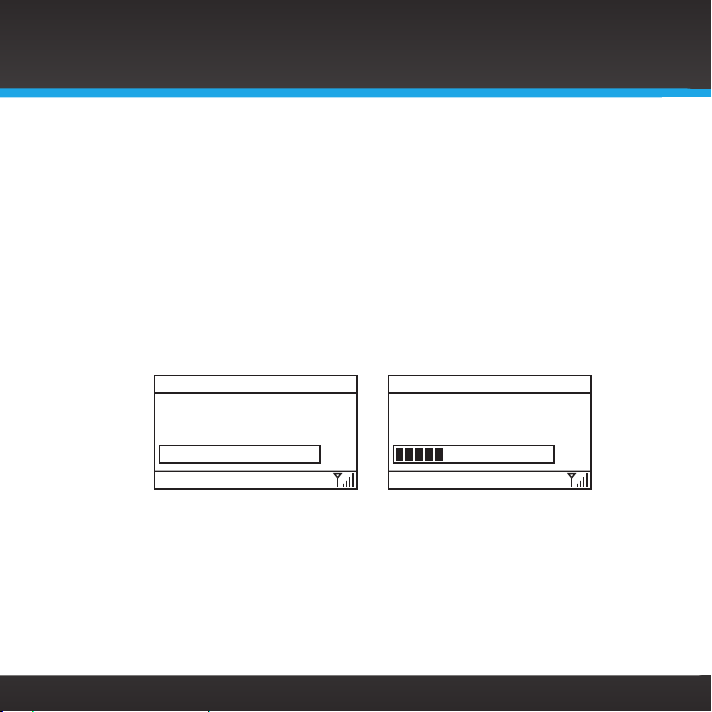
Step 1: Connect to a Network
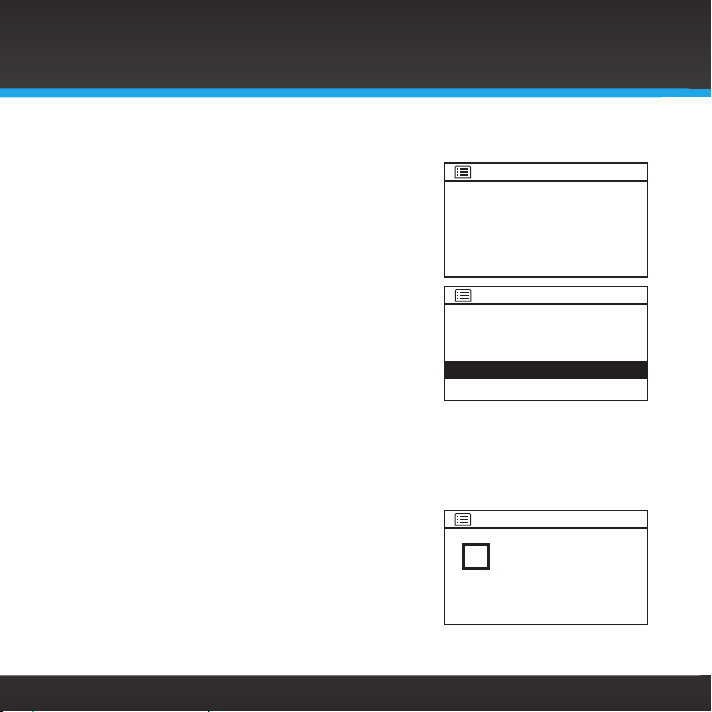
When you turn your SIRIUS TTR1 Radio On for the first time, the Network
settings screen is displayed while the radio searches for wireless networks.
When complete, the SSID screen is displayed
with a list of the wireless networks found, along
with several other menu options.
Decide whether you will be using a wired
Ethernet connection, or a wireless connection.
Then complete the instructions in the
appropriate following section.
To Connect to a Network Using the Network Wizard
To connect to a wireless network using the Network Wizard:
The Network Wizard feature is the easiest way to connect to a wireless
network. It searches for available wireless networks and displays a list of
wireless networks found, for you to select. However, if your wireless network
name (SSID) is hidden, or if your network is DHCP disabled, you’ll have to
manually enter the network settings using the Manual Settings or [Manual
config] menu option rather than using the Network Wizard.
If the wireless network is secured, you’ll need to enter the password for the
wireless network during the connection procedure. If you don’t know the
password, contact your network administrator of the person who setup the
wireless network.
a. If you have just turned your SIRIUS TTR1 Radio on for the first time,
the SSID screen will already be displayed. Skip ahead to step 5.
Network settings
Network wizard
Scanning.../
17
Installation
b. Press MENU and turn the TUNE knob to highlight System Setup. Press
the TUNE Knob.
c. Turn the TUNE knob to highlight Network. Press the TUNE Knob.
d. Press the TUNE Knob to select Network Wizard.
e. The radio will scan for wireless networks and return with a list of
wireless networks which were found. Turn
the TUNE knob to highlight your wireless
network and press the TUNE knob. If you
don’t know the network name, contact your
network administrator of the person who
setup the wireless network.
f. If you choose an unsecured network, and
the radio is able to connect to the wireless
network, the Connected screen will be
displayed and the radio will connect to the
wireless network. Skip to step h.
If you choose a network that is secured,
you will be prompted to enter the key
(password). If you don’t know the password,
contact your network administrator of the
person who setup the wireless network.
Turn the TUNE knob to scroll through
the list of characters and highlight each
character. Press the TUNE knob to select the
highlighted character and move to the next
character. If you make a mistake, turn the
SSID
Your_Network_Name
Other_Network_Name
[Rescan]
[Wired]
[Manual config]
Connected
Connected
Key:
0123456789., ab
cdefghijklmnopq
rstuvwxyzABCDEF
GHIJKLMNOPQRSTU
BKSP
OK
CANCEL
18
TUNE knob to highlight BKSP and press the TUNE knob to erase
3:13PM
the character. Remember that the key is case sensitive.
g. When the key has been entered, turn
the TUNE knob to scroll to highlight
OK and press the TUNE knob. If you
have entered the correct key, and
the radio is able to connect to your
wireless network, the Connected
screen will be displayed. If you have
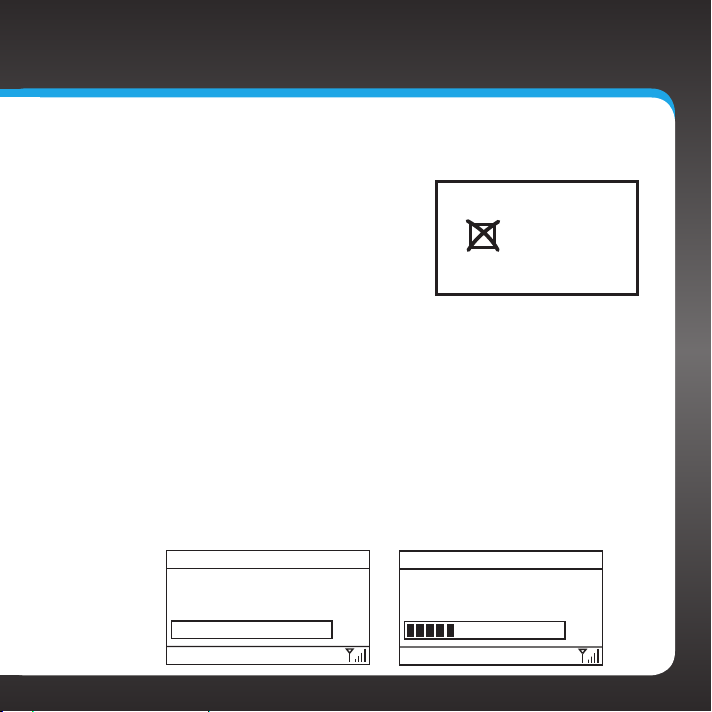
entered the wrong key, the Incorrect key screen is displayed, and
you will be prompted to enter the key again.
Incorrect
key
h. If you are installing your SIRIUS TTR1 Radio for the first time,
continue with “Step 2: Enter Your SIRIUS Account Information” on
page 30.
If you have previously entered your SIRIUS user name and key
into the radio, and had tuned to a channel, the screen will show
Connecting. When successfully connected, the Buffering... screen
will be displayed as the channel information is streamed to the
radio. When complete, you are returned to the main display screen
and you should hear the audio playing. Otherwise, the SIRIUS
screen is displayed.
SIRIUS
SIRIUS Hits 1
Connecting.
SIRIUS 001
SIRIUS Hits 1
Buffering...
/
3:14PM
/
19
Installation
To connect to a wired network using the Network Wizard:
a. At the rear of the radio, remove the
compartment cover and connect an
Ethernet cable to the Ethernet connector
on the inside left of the compartment.
Refer to “Wired Ethernet Connector” on
page 11 for the location of the Ethernet
connector. Replace the compartment cover.
b. Connect the other end of the Ethernet
cable to your home’s wired network.
c. If you have turned your SIRIUS TTR1 Radio
on for the first time, the SSID screen will
already be displayed. Skip ahead to step g.
d. Press MENU and turn the TUNE knob to highlight System Setup. Press
the TUNE Knob.
e. Turn the TUNE knob to highlight Network. Press the TUNE Knob.
f. Press the TUNE Knob to select Network
Wizard.
g. The radio will scan for networks. When
the scan is complete, turn the TUNE knob
to highlight [Wired] and press the TUNE
knob.
h. If the radio is able to connect to your network, the Connected screen
Network settings
Network wizard
Scanning.../
SSID
Some Network Name
Other Network Name
[Rescan]
[Wired]
[Manual config]
Connected
Connected
20

will be displayed. If Waiting for
3:13PM
Ethernet is displayed, check the
Ethernet cable connections.
i. If you are installing your SIRIUS TTR1
Radio for the first time, continue with
“Step 2: Enter Your SIRIUS Account
Information” on page 30.
If you have previously entered your SIRIUS user name and key
into the radio, and had tuned to a channel, the screen will show
Connecting. When successfully connected, the Buffering... screen
will be displayed as the channel information is streamed to the
radio. When complete, you are returned to the main display screen
and you should hear the audio playing. Otherwise, the SIRIUS
screen is displayed.
SIRIUS
SIRIUS Hits 1
Connecting.
SIRIUS 001
SIRIUS Hits 1
Buffering...
/
Network settings
Waiting for
Ethernet
3:14PM
/
21

Installation
To Connect to a Network Using Manual Settings
Connecting to a network using the Manual settings requires some knowledge of
your network. You’ll need to manually configure your network connection using the
Manual Settings or [Manual config] option if your wireless network name (SSID) is
hidden, or if your network is DHCP disabled.
Decide whether you will be using a wireless network connection, or a wired Ethernet
connection. Then follow the instructions in the appropriate following section.
To connect to a wireless network using the Manual Settings:
In order to connect to a wireless network, you will need to have the following
information to enter during the procedure:
Is DHCP enabled or disabled?
If disabled, the IP address to use for the radio?
If disabled, the Subnet Mask IP address?
If disabled, the Gateway IP address?
If disabled, the Primary DNS IP address?
If disabled, the Secondary IP address?
The name of your wireless network (SSID)?
Is the wireless network password protected?
If so, the type of authentication?
If Pre-Shared Key, whether WEP is enabled?
If WPA or WPA2, whether it’s TKIP or AES?
The wireless network key (password)?
22
a. If you have just turned your SIRIUS TTR1 Radio on for the first time,
the SSID screen will already be displayed. Skip ahead to step 4.
b. Press MENU and turn the TUNE knob to highlight System Setup.
Press the TUNE Knob.
c. Turn the TUNE knob to highlight Network. Press the TUNE Knob.
d. Turn the TUNE Knob to highlight Manual Settings or [Manual
config]. Press the TUNE Knob.
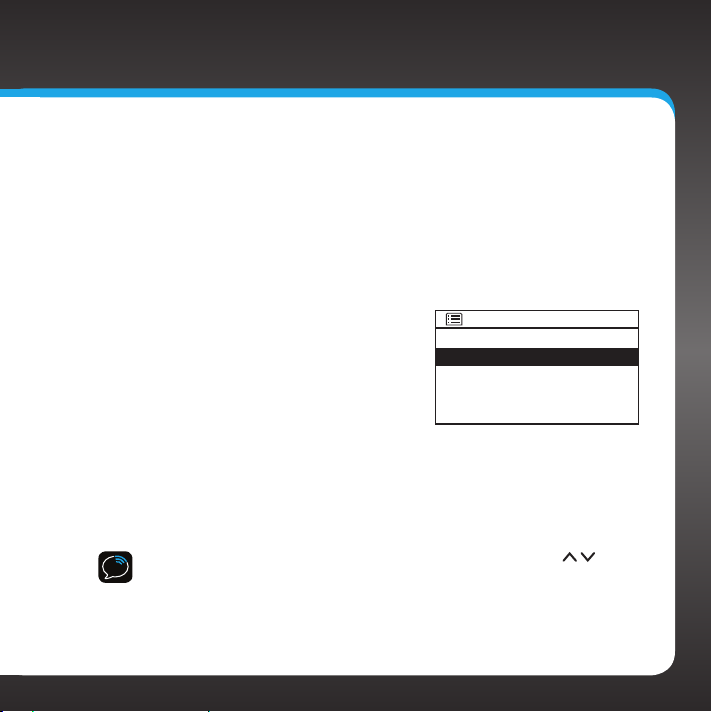
e. Turn the TUNE Knob to highlight
Wireless. Press the TUNE Knob.
f. Will you be using DHCP? Turn the
TUNE Knob to highlight DHCP enable
or DHCP disable and press the TUNE
Knob.
Connection type 1/9
Wired
Wireless
g. If you have selected DHCP disable, enter the following information.
Otherwise, continue with step h.
For each entry, Turn the TUNE knob to select the numbers, and
press the TUNE knob to confirm and move to the next number.
Press BACK if you entered an incorrect number.
TIP! You can use the Remote Control to increment the numbers ( ), and
move forward or backward through the number fields ( + and —).
i. Enter the IP address to use for the radio.
ii. Enter the Subnet Mask IP address for the network.
>
>
23
Installation
24
iii. Enter the Gateway IP address for the
network.
iv. Enter the Primary DNS IP address for
the network.
v. Enter the Secondary DNS IP address
for the network.
h. Enter your wireless network name (SSID).
Turn the TUNE knob to scroll through
the list of characters and highlight each
character. Press the TUNE knob to select
the highlighted character and move to
the next character. If you make a mistake,
turn the TUNE knob to highlight BKSP
and press the TUNE knob to erase the
character. When done, turn the TUNE knob to highlight OK and press
the TUNE knob.
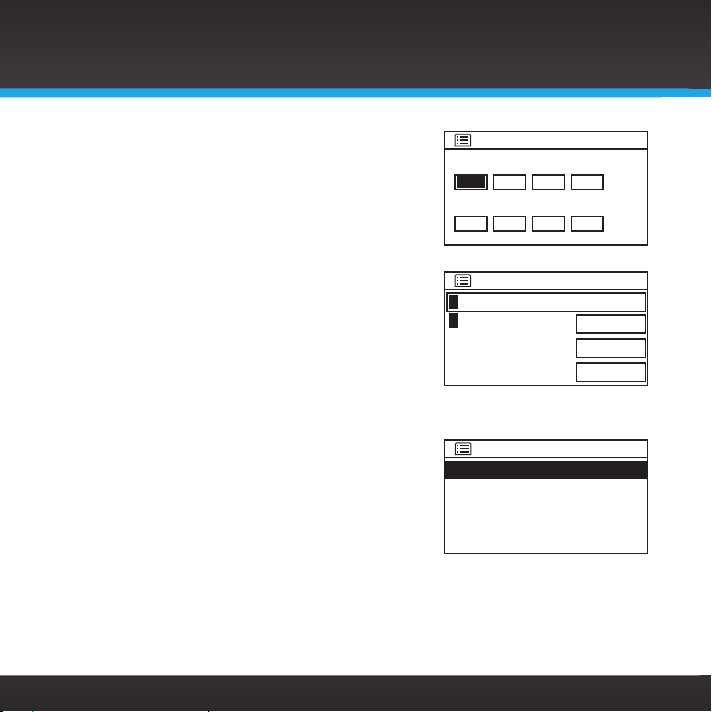
i. Select the authentication type, Open (no
key (password)), Pre-Shared key, WPA, or
WPA2. Turn the TUNE Knob to highlight your
selection and press the TUNE knob. If you
have selected Open, skip ahead to step 10.
IP settings 3/9
IP address
.0.0.
0
Subnet mask
.
255 255.255.0
Key: 9/9
0123456789., ab
cdefghijklmnopq
rstuvwxyzABCDEF
GHIJKLMNOPQRSTU
Authentication 7/9
Open
Pre-Shared Key
WPA
WPA2
j. Depending upon your selection, complete these additional steps:
•Pre-Shared Key:
i. Select whether the Pre-Shared Key has WEP encryption disabled or
0
BKSP
OK
CANCEL
>
disabled. Turn the TUNE Knob to highlight your selection and
press the TUNE knob.
ii. Enter your key (password). Turn the TUNE knob to scroll through
the list of characters and highlight each character. Press the
TUNE knob to select the highlighted character and move to the
next character. If you make a mistake, turn the TUNE knob to
highlight BKSP and press the TUNE knob erase the character.
•WPA or WPA2:
i. Select whether WPA or WPA2 has TKIP or AES encryption.
Turn the TUNE Knob to highlight your selection and press the
TUNE knob.
ii. Enter your key (password). Turn the TUNE knob to scroll
through the list of characters
and highlight each character.
Press the TUNE knob to select
the highlighted character and
move to the next character. If you
make a mistake, turn the TUNE
knob to highlight BKSP and press
the TUNE knob to erase the
character. When done, turn the
TUNE knob to highlight OK and
press the TUNE knob.
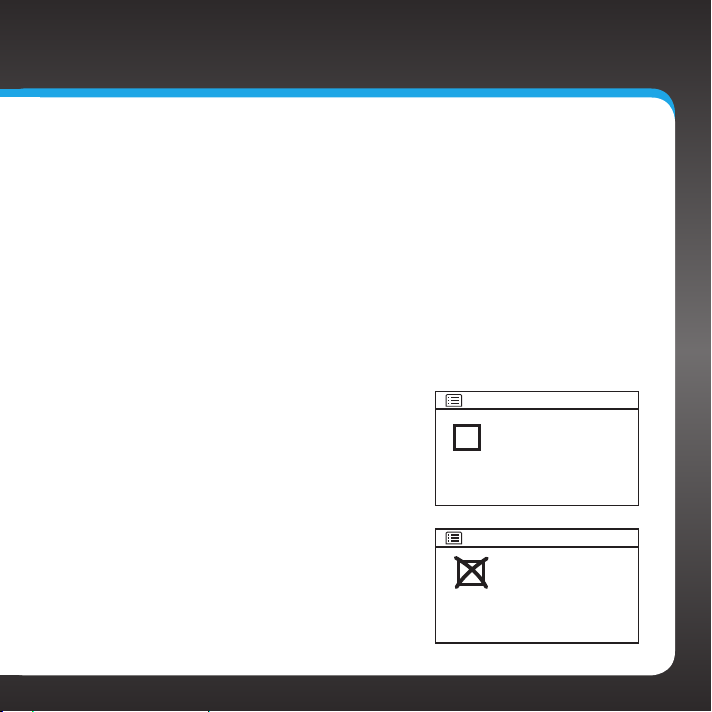
Connected
Connected
Failed
to connect
k. If you have entered the correct
information, and the radio is able to
connect to your wireless network, the
25
Installation
3:13PM
3:14PM
Connected screen will be displayed. If not, the Failed to connect screen
is displayed. This means that one or more of the settings you entered is
incorrect.
l. If you are installing your SIRIUS TTR1 Radio for the first time, continue
with “Step 2: Enter Your SIRIUS Account Information” on page 30.
If you have previously entered your SIRIUS user name and key into the
radio, and had tuned to a channel, the screen will show Connecting.
When successfully connected, the Buffering... screen will be displayed
as the channel information is streamed to the radio. When complete,
you are returned to the main display screen and you should hear the
audio playing. Otherwise, the SIRIUS screen is displayed.
26
SIRIUS
SIRIUS Hits 1
Connecting.
SIRIUS 001
SIRIUS Hits 1
Buffering...
/
/
 Loading...