

Zylux Acoustic DSB150 Users Manual
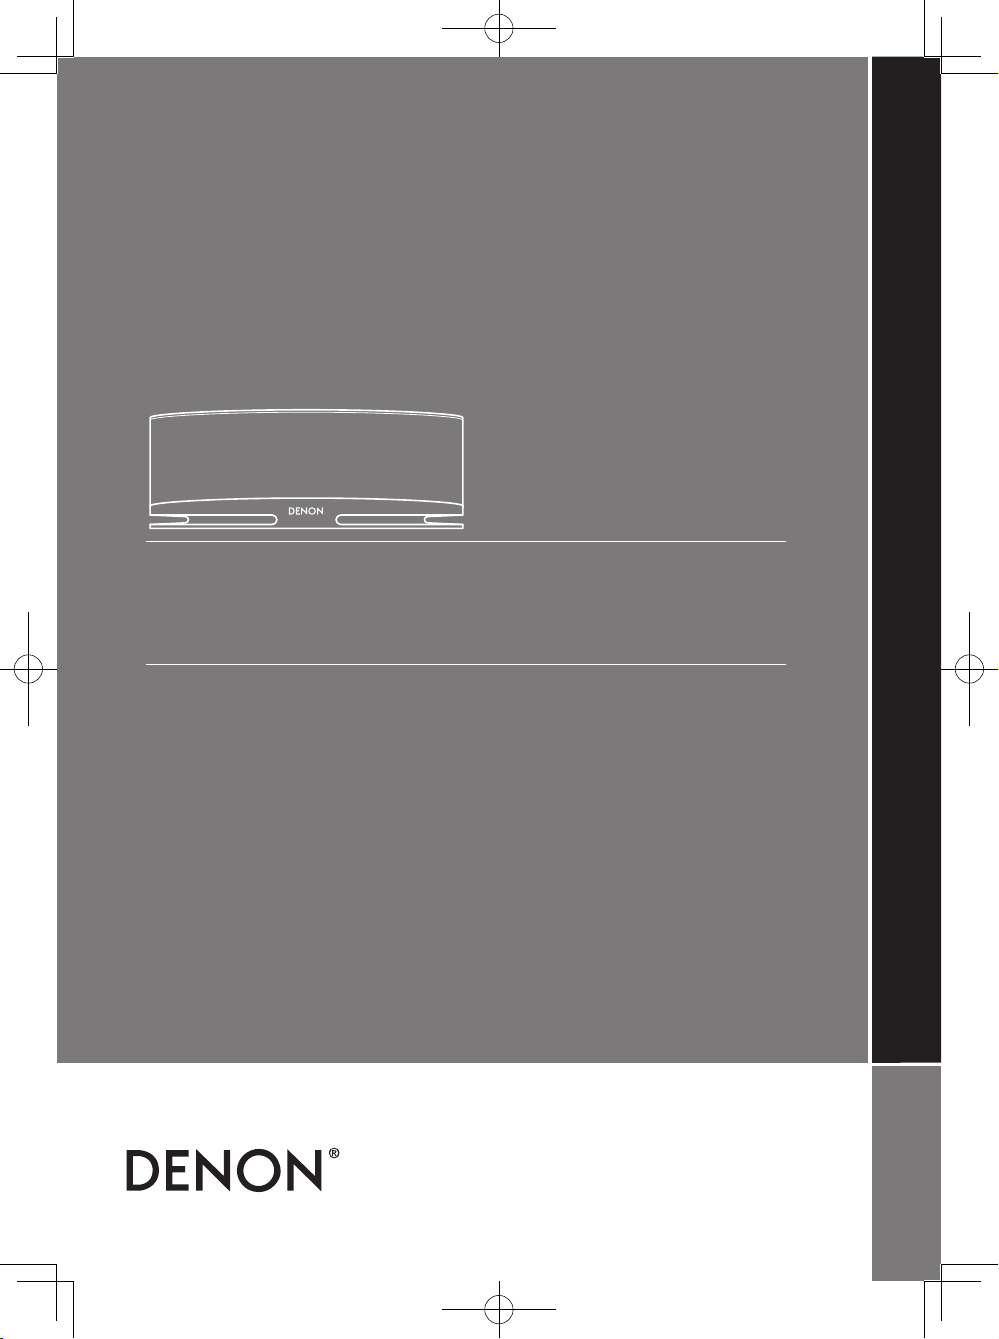
DSB-150
Bluetooth® Wireless Speaker System
Français
Système de haut-parleurs sans l Bluetooth®
MANUEL DE L’UTILISATEUR / INSTRUCTIONS DE SÉCURITÉ / INFORMATIONS SUR LA CONFORMITÉ
OWNER’S MANUAL / SAFETY INSTRUCTIONS / COMPLIANCE INFORMATION
Español
Sistema de altavoces inalámbricos por Bluetooth
MANUAL DEL PROPIETARIO/INSTRUCCIONES DE SEGURIDAD /INFORMACIÓN DE CUMPLIMIENTO
DSB-150E3 CD-ROM 140411_Final.indd 1 2014/04/11 13:25:16
®

FCC / IC Information
nFCC Information (For US customers)
1. IMPORTANT NOTICE:DO NOT MODIFY THIS
PRODUCT
This product, when installed as indicated in the instructions
contained in this manual, meets FCC requirements.
Modification not expressly approved by Denon may void
your authority, granted by the FCC, to use the product.
Changes or modifications not expressly approved by the
party responsible for compliance could void the user's
authority to operate the equipment.
2. CAUTION
•
To comply with FCC RF exposure compliance requirement,
separation distance of at least 20 cm must be maintained
between this product and all persons.
•
This product and its antenna must not be co-located
or operating in conjunction with any other antenna or
transmitter.
3. COMPLIANCE INFORMATION
•
Product Name : Bluetooth® Wireless Speaker System
•
Model Number : DSB-150
•
FCC ID : XN6 - DSB150
This product complies with Part 15 of the FCC Rules.
Operation is subject to the following two conditions: (1) this
product may not cause harmful interference, and (2) this
product must accept any interference received, including
interference that may cause undesired operation.
Denon Electronics (USA), LLC
(a D&M Holdings Company)
100 Corporate Drive
Mahwah, NJ 07430-2041
Tel. (201) 762-6665
4. NOTE
This product has been tested and found to comply with the
limits for a Class B digital device, pursuant to Part 15 of the
FCC Rules. These limits are designed to provide reasonable
protection against harmful interference in a residential
installation.
This product generates, uses and can radiate radio frequency
energy and, if not installed and used in accordance with
the instructions, may cause harmful interference to radio
communications. However, there is no guarantee that
interference will not occur in a particular installation. If
this product does cause harmful interference to radio or
television reception, which can be determined by turning the
product OFF and ON, the user is encouraged to try to correct
the interference by one or more of the following measures:
•
Reorient or relocate the receiving antenna.
•
Increase the separation between the equipment and
receiver.
•
Connect the product into an outlet on a circuit different
from that to which the receiver is connected.
•
Consult the local retailer authorized to distribute this type
of product or an experienced radio/TV technician for help.
nIC Information (For Canadian customers)
1. PRODUCT
IC No: 8819A - DSB150
This device complies with Industry Canada licence-exempt
RSS standard(s). Operation is subject to the following
two conditions: (1) this product may not cause harmful
interference, and (2) this product must accept any interference
received, including interference that may cause undesired
operation. This Class B digital apparatus complies with
Canadian ICES-003.
2. CAUTION
To reduce potential radio interference to other users, the
antenna type and its gain should be so chosen that the
equivalent isotropically radiated power (e.i.r.p.) is not more
than that permitted for successful communication.
nInformations sur IC (pour les clients canadiens)
1. APPAREIL
IC No: 8819A - DSB150
Cet appareil est conforme aux normes d'Industrie du
Canada applicables aux appareils exempts de licence RSS.
L’utilisation de ce dispositif est autorisée seulement aux deux
conditions suivantes : (1) il ne doit pas produire de brouillage,
et (2) l’utilisateur du dispositif doit être prêt à accepter tout
brouillage radioélectrique reçu, même si ce brouillage est
susceptible de compromettre le fonctionnement du dispositif.
Cet appareil numérique de la classe B est conforme à la norme
NMB-003 du Canada.
2. ATTENTION
Afin de réduire le risque d’interférence aux autres utilisateurs,
il faut choisir le type d’antenne et son gain de façon à ce
que la puissance isotrope rayonnée équivalente (p.i.r.e.) ne
soit pas supérieure au niveau requis pour l’obtention d’une
communication satisfaisante.
For Canadian customers:
CAN ICES-3 (B)/NMB-3 (B)
nRF Exposure Information
This equipment complies with FCC/IC radiation exposure
limits set forth for an uncontrolled environment and meets the
FCC radio frequency (RF) Exposure Guidelines in Supplement C
to OET65 and RSS-102 of the IC radio frequency (RF) Exposure
rules. This equipment has very low levels of RF energy that are
deemed to comply without testing of specific absorption ratio
(SAR).
Cet équipement est conforme aux normes d’exposition
aux radiations FCC/IC définies pour un environnement
non contrôlé et satisfait les directives d’exposition à la
radiofréquence (RF) dans le supplément C des OET65 et RSS102 des règles d’exposition à la fréquence radio (RF) IC. Cet
équipement a de très faibles niveaux d’énergie RF qui sont
jugés conformes sans test de taux d’absorption spécifique
(SAR).
2
DSB-150E3 CD-ROM 140411_Final.indd 2 2014/04/11 13:25:16
E
N
G
L
I
S
H
Read these safety instructions before operating the unit.
nSAFETY PRECAUTIONS
CAUTION:
TO REDUCE THE RISK OF ELECTRIC SHOCK, DO NOT REMOVE COVER (OR BACK). NO USER-SERVICEABLE PARTS
INSIDE. REFER SERVICING TO QUALIFIED SERVICE PERSONNEL.
The lightning flash with arrowhead symbol, within an equilateral triangle, is intended to alert the user to
the presence of uninsulated “dangerous voltage” within the product’s enclosure that may be of sufficient
magnitude to constitute a risk of electric shock to persons.
The exclamation point within an equilateral triangle is intended to alert the user to the presence of
important operating and maintenance (servicing) instructions in the literature accompanying the
appliance.
WARNING:
TO REDUCE THE RISK OF FIRE OR ELECTRIC SHOCK, DO NOT EXPOSE THIS APPLIANCE TO RAIN OR MOISTURE.
1. Read these instructions.
2. Keep these instructions.
3. Heed all warnings.
4. Follow all instructions.
5. Do not use this apparatus near water.
6. Clean only with dry cloth.
7. Do not block any ventilation openings.
Install in accordance with the manufacturer’s instructions.
8. Do not install near any heat sources such as radiators, heat registers, stoves, or other apparatus (including amplifiers) that
produce heat.
9. Do not defeat the safety purpose of the polarized or grounding-type plug. A polarized plug has two blades with one
wider than the other. A grounding type plug has two blades and a third grounding prong. The wide blade or the third
prong are provided for your safety. If the provided plug does not fit into your outlet, consult an electrician for replacement
of the obsolete outlet.
10. Protect the AC adapter from being walked on or pinched particularly at plugs, convenience receptacles, and the point
where they exit from the apparatus.
11. Only use attachments/accessories specified by the manufacturer.
12. Use only with the cart, stand, tripod, bracket, or table specified by the manufacturer, or sold with the apparatus. When a
cart is used, use caution when moving the cart/apparatus combination to avoid injury from tip-over.
13. Unplug this apparatus during lightning storms or when unused for long periods of time.
14. Refer all servicing to qualified service personnel. Servicing is required when the apparatus has been
damaged in any way, such as power-supply cord or plug is damaged, liquid has been spilled or objects
have fallen into the apparatus, the apparatus has been exposed to rain or moisture, does not operate
normally, or has been dropped.
15. Batteries shall not be exposed to excessive heat such as sunshine, fire or the like.
ATTENTION : RISQUE DE CHOC ELECTRIQUE-NE PAS OUVRIR
IMPORTANT SAFETY INSTRUCTIONS
WARNING :
•
The remote control supplied with this product contains a coin/button cell battery. If the coin/button cell battery is swallowed, it
can cause severe internal burns in just 2 hours and can lead to death.
•
Keep new and used batteries away from children. If the battery compartment does not close securely, stop using the product and
keep it away from children. If you think batteries might have swallowed or placed inside any part of the body, seek immediate
Medical attention.
•
Do not keep the battery in a place exposed to direct sunlight or in places with extremely high
temperatures, such as near a heater.
•
Used batteries should be disposed of in accordance with the local regulations regarding battery disposal.
WARNINGS
nNOTES ON USE
•
Avoid high temperatures.
•
Allow for sufficient heat dispersion when installed in a rack.
•
Keep the unit free from moisture, water, and dust.
•
Unplug the AC adapter when not using the unit for long periods of time.
•
Do not let insecticides, benzene, and thinner come in contact with the unit.
•
Never disassemble or modify the unit in any way.
•
Naked flame sources such as lighted candles should not be placed on the unit.
•
The apparatus shall not be exposed to dripping or splashing. No objects filled with liquids, such as vases,
shall be placed on the apparatus.
•
Do not handle the AC adapter with wet hands.
•
When the switch is in the OFF (STANDBY) position, the equipment is not completely switched off from MAINS.
•
The equipment shall be installed near the power supply so that the power supply is easily accessible.
CAUTION:
To completely disconnect this product from the mains, disconnect the plug from the wall socket outlet. The mains plug is used
to completely interrupt the power supply to the unit and must be within easy access by the user.
DO NOT INGEST BATTERY, CHEMICAL BURN HAZARD
3
DSB-150E3 CD-ROM 140411_Final.indd 3 2014/04/11 13:25:16
E
N
G
L
I
S
H
Introduction
Thank you for choosing DENON® and congratulations on your purchase of the DSB-150 wireless
speaker system. The DSB-150 is a self-amplified stereo speaker system that uses Bluetooth® wireless
communication to receive a signal from any standard Bluetooth equipped device capable of stereo
audio transmission (A2DP).
Using the simple controls on the DSB-150, and its remote control, you can adjust the volume of the
system or operate the basic music play back functions of your connected devices. An auxiliary analog
input also allows you to connect any music source that has a standard 3.5mm connector to the DSB-150.
We hope you’ll enjoy it for years to come.
Features
• Outstandingstereoperformancefromdualhigh-performanceDenon-designed3½inchspeakers
in separate acoustic chambers, vented for extended bass response
• BluetoothwirelessstreamingfromanycompatibleBluetoothmusicplayer,phone,tabletor
computer
• Tap-to-pairfunctionalityforinstantconnectionwithanydevicethatsupportsNearField
Communication (NFC)
• AptXcodecforCD-likesoundqualityoverBluetooth
• Auxiliaryinput
• Easy-to-usecontrols
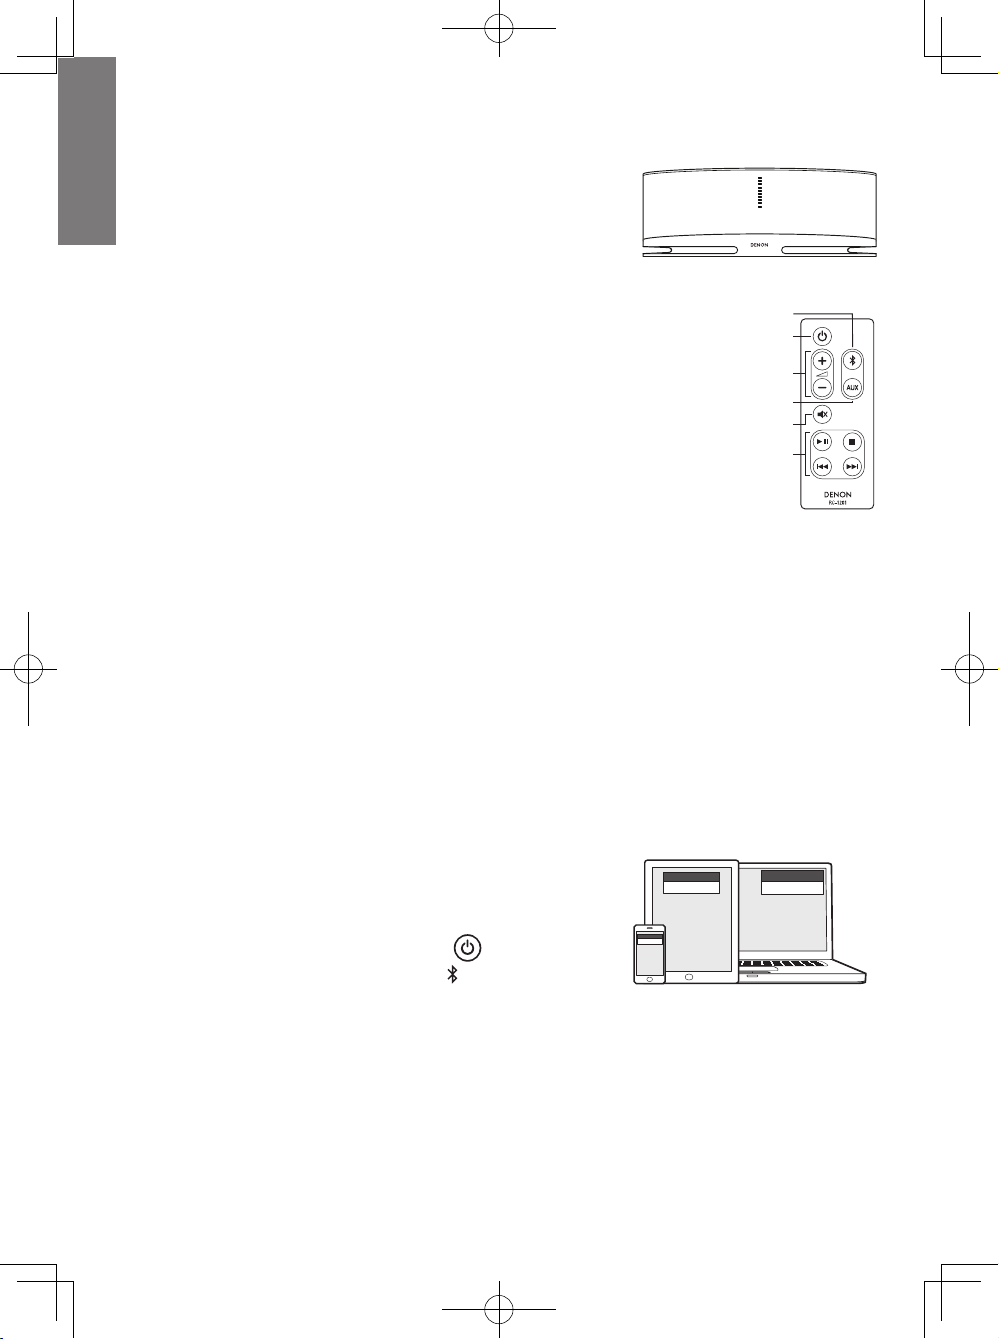
• Volumeleveldisplaybehindgrille
• Remotecontrolwithmusicplaybackcontrols
• Headphoneoutput
• Elegantstylingwithbeautifulhigh-glossnish
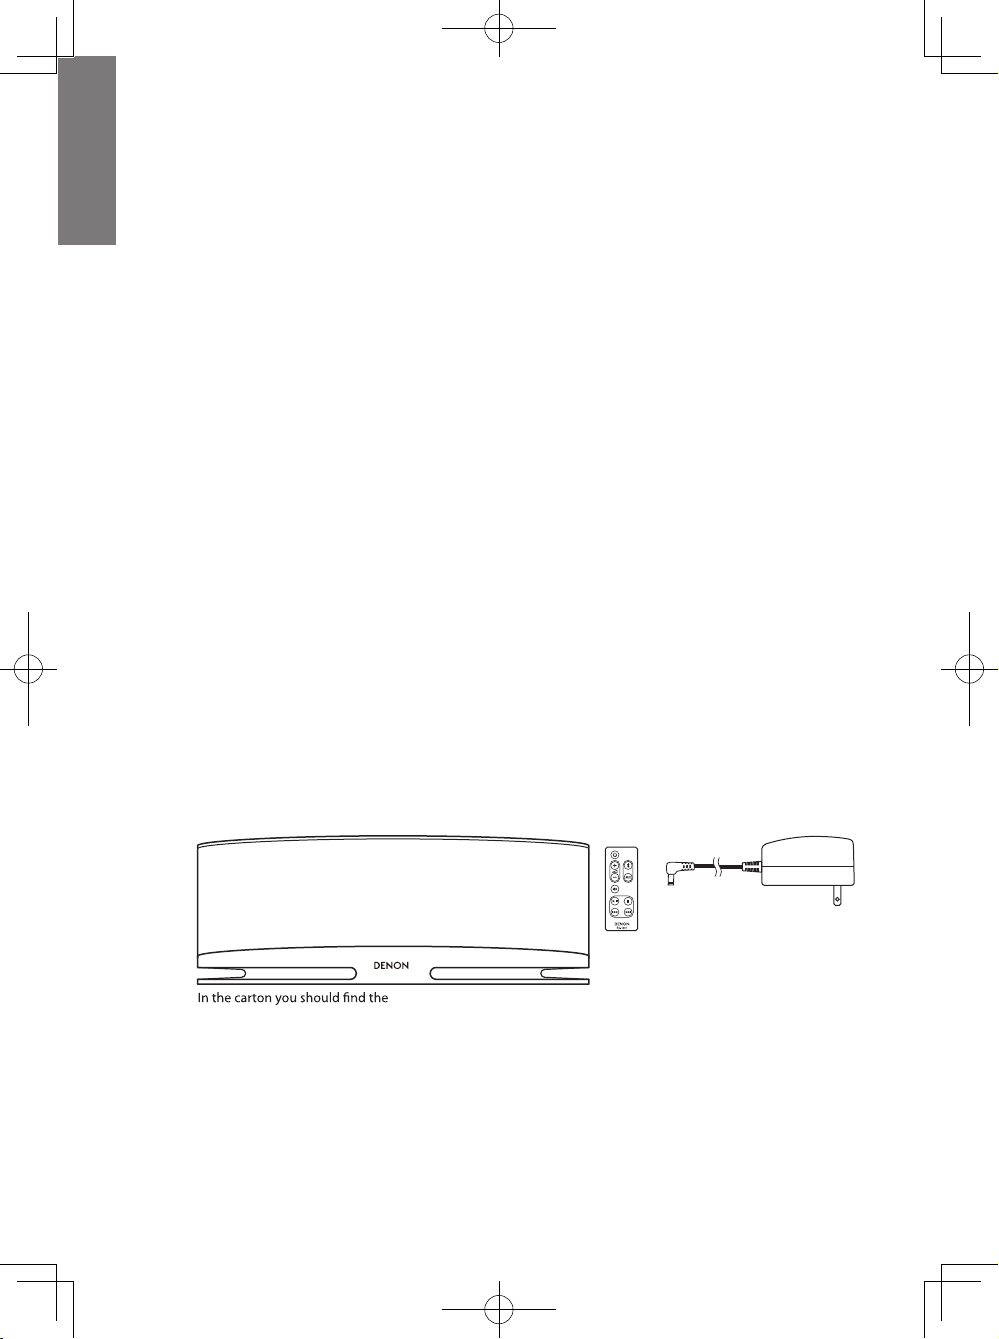
Unpacking and Setting Up Your DSB-150
Carefully unpack the system. If there is any sign of damage from transit, report it immediately to your
dealer and/or delivery service. Keep the shipping carton and packing materials for future use. Be sure to
keep your purchase receipt in a safe place, as it may be required for warranty purposes.
DSB-150, remote control, power supply and a power plug adapter
Placement
Your DSB-150 will sound great just about anywhere. If you put it near a wall or corner the bass response
will be enhanced. Blocking the bass ports on the rear of the cabinet will reduce bass response.
4
DSB-150E3 CD-ROM 140411_Final.indd 4 2014/04/11 13:25:16
E
N
G
L
I
S
H
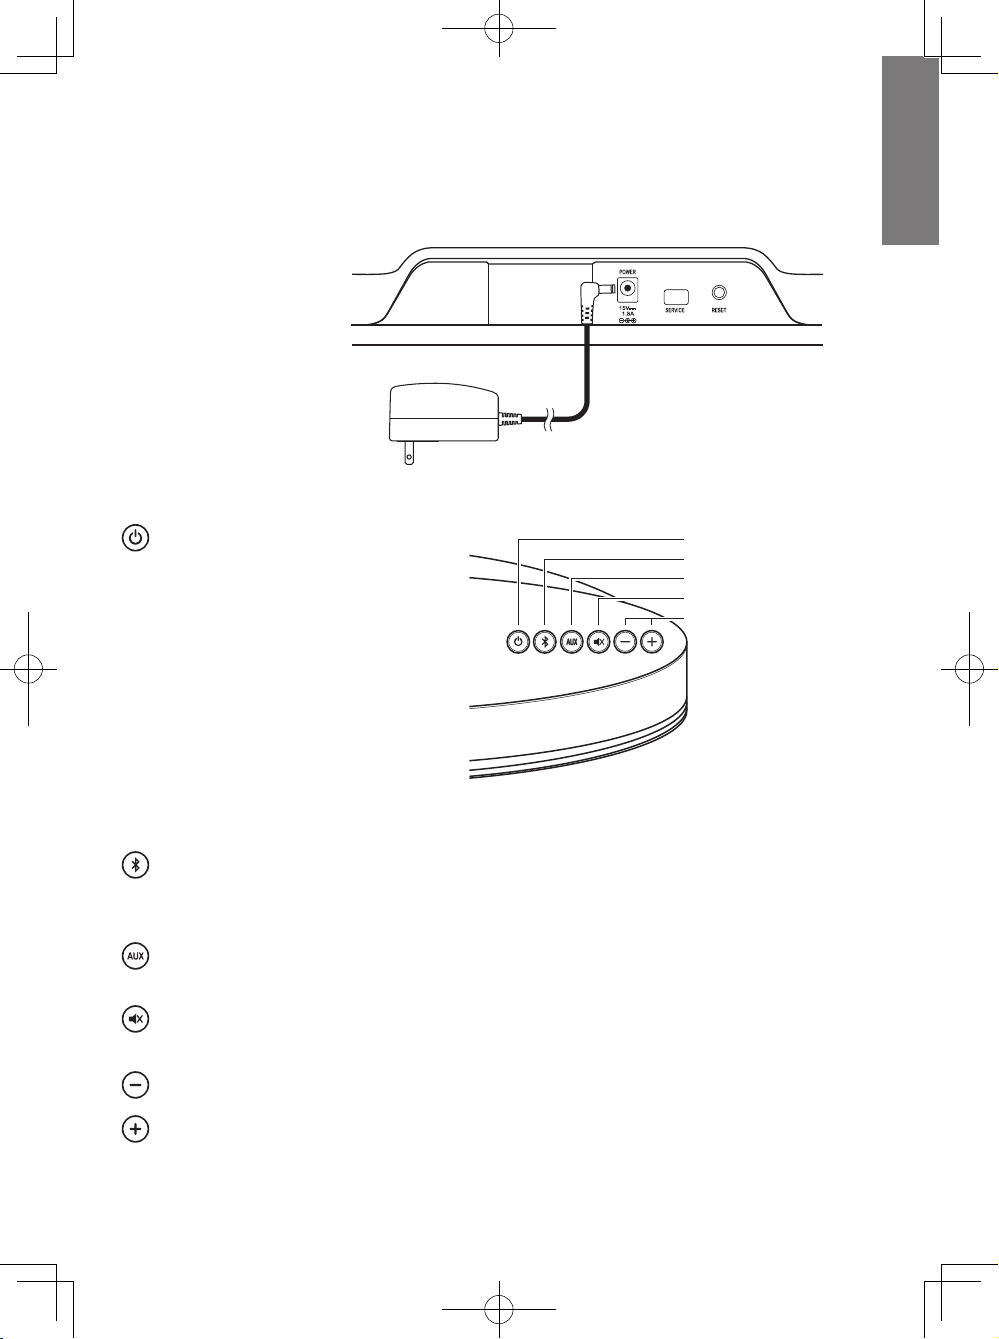
Power Connection
Power Button
Bluetooth® Input Button
Aux Input Button
Mute Button
Volume Up/Down
Bluetooth® Input Button
Power Button
Volume Up/Down
Aux Input Button
Mute Button
DSB-150, remote control, power supply and a power plug adapter
Attach the power plug adapter plate to the power supply. Plug the power supply into the wall power
outlet. Connect the other cable from the power supply to the power input on the back of the unit.
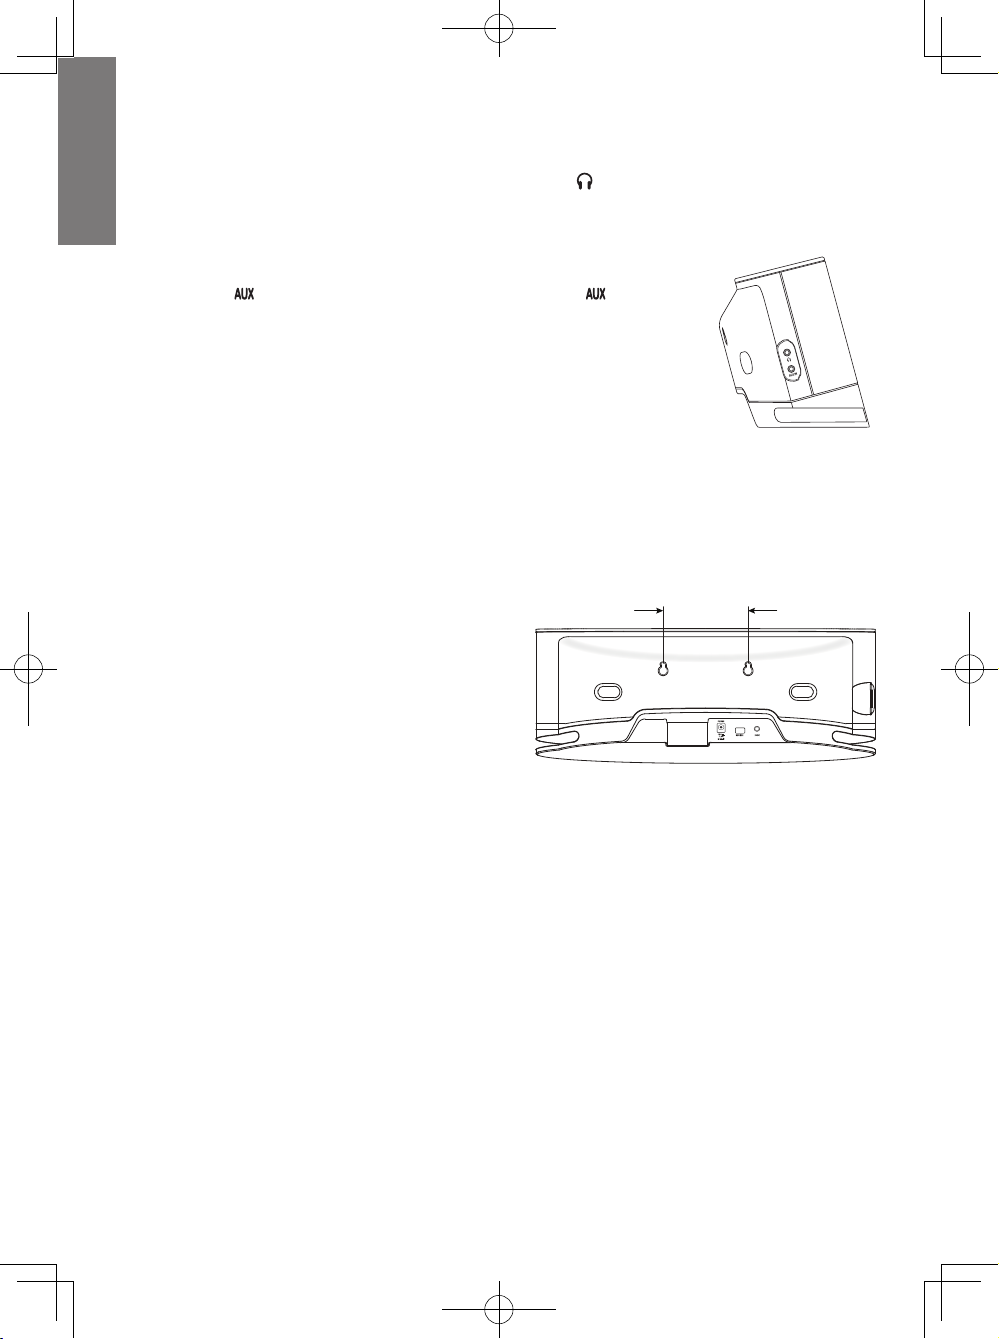
Service Connector
The service port is used for
software updates only.
Reset Button
Returns the DSB-150 settings to
the defaults values.
Controls
power – There are three power states.
1 on - the button is lit blue. The system is
powered up.
1 standby – button is lit red. The system is
powered down, but will automatically turn
on when a new audio signal appears from
a connected device.
1 o – button is not lit. The system is
powered down completely and will not
respond to audio signals.
A quick press of the button will toggle between
on and standby states. Press and hold the button to turn the system off.
Bluetooth input – Press to select the Bluetooth wireless input. The button blinks rapidly when
pairing and stays lit when the system is connected to a Bluetooth device. See the “Bluetooth Details”
section of this manual for more information.
auxiliary input – press to select the auxiliary input. The top button lights when the auxiliary input is
selected.
muting – to mute the sound or restore it to the previous volume level. When the sound is muted,
the button is lit.
volume down – press to reduce volume.
volume up – press to increase volume.
DSB-150E3 CD-ROM 140411_Final.indd 5 2014/04/11 13:25:17
5
E
N
G
L
I
S
H
Volume Display
There is a 10-segment volume display on the front behind the
grille. The display lights blue when volume adjustments are
made. After a few seconds the display turns off . When the system
receives a signal from the remote control, the bottom LED fl ickers.
Remote Control
The remote control has the same buttons as are on the top of the
system, with the addition of playback control buttons that let you
control your compatible Bluetooth devices:
13 Play /Pause
2 Stop
8 Skip back / fast reverse
9 Skip forward / fast forward
Notes About the Remote
When you unpack your remote control there will be a plastic tab extending from the battery
compartment. This keeps the battery from being depleted. Pull out this tab before using the remote
control. Eventually you’ll need to replace the remote battery. When the battery is depleted, the remote
won’t reliably operate the DSB-150. You will need to replace it with a new CR2025 3V lithium coin-type
battery, available at many retailers.
When using the remote you should be able to see the DSB-150. Point the remote control at the front
panel of the system when pressing the buttons. If the DSB-150 does not respond to the remote, try
moving closer to the system. Operating range is specifi ed to be 15 feet, ±30°.
Bluetooth® Input Button
Power Button
Volume Up/Down
Aux Input Button
Mute Button
Song Play Controls
Bluetooth Details
Getting Started – Pairing
Before you can stream Bluetooth audio to your DSB-150, you have to pair it to your device.
To pair the DSB-150 to a device for the fi rst time:
1. Go to Bluetooth settings on your device. Make sure
SETTINGS
Bluetooth: ON
the device’s Bluetooth feature is set to “on”.
SETTINGS
2. Turn on the DSB-150 by pressing the
The button will light solid blue. The
button.
button will
Bluetooth: ON
begin to fl ash, indicating that the system is searching
for a device with which to pair.
6
DSB-150E3 CD-ROM 140411_Final.indd 6 2014/04/11 13:25:17
SETTINGS
Bluetooth: ON

3
se
c
onds
3
se
c
onds
3. The DSB-150 has two ways to initiate pairing:
NFC (Near Field Communication) or “tap-to-pair”.
The newest and easiest pairing method. If you
have an NFC enabled device, simply place it
gently on the top of the DSB-150. Your phone
or tablet does the rest, and you can be playing
Press and hold the button on the top of the
DSB-150, or on the remote, for 3 seconds. The
button on the top will begin to fl ash blue,
indicating that the system is looking for your
device.
audio within seconds.
Look at the Bluetooth list on your device. You
may have to select “search for devices” for a new
device to appear in the list of available devices.
Once “DSB-150“ appears in that list, simply
select to pair.
When the button on top lights solid blue, you are ready to go! Fire up your music and enjoy!
E
N
G
L
I
S
H
Once the DSB-150 is paired to a device, its Bluetooth address is stored in a ‘Paired List’ so it can hook up
to that device easily in the future. The DSB-150 is capable of storing up to 8 diff erent devices. Once that
limit is exceeded, the oldest device is cleared so that a new one can be stored.
After the fi rst pairing, the DSB-150 will automatically connect to your device when it is in range. The
button on top of the DSB-150 will light solid blue to indicate the system is ready to stream music from
your connected device. If a song is already playing through the device, the DSB-150 will start playing.
Note: If the Bluetooth button is lit, but nothing is heard:
1 Check the device to make sure a selection is playing. Make sure your music is not paused.
2 Check the device and the DSB-150 to make sure their volume levels are up and MUTE is not
enabled on either of them.
The DSB-150 will stay in pairing mode for up to 5 minutes, searching for a Bluetooth device (which must
also be in pairing mode). If it does not fi nd a device, the Bluetooth button will light red to indicate that it
was not able to pair. To try pairing again, press and release the
The
button will begin to fl ash, indicating that the system is searching for a device with which to pair. If
RESET button on the back of the DSB-150.
you are still having trouble, try moving the device closer to the DSB-150 and repeat the pairing process.
7
DSB-150E3 CD-ROM 140411_Final.indd 7 2014/04/11 13:25:18
E
N
G
L
I
S
H
Connecting Headphones
Connect the headphone plug to the 3.5mm jack beside the symbol. This turns off the DSB-150
internal speakers. If your headphones have a larger 1/4-inch plug you will need an adapter, available at
many retailers.
Auxiliary Input
Press the button on the top or on the remote control. The button on
the top will light blue.
The DSB-150 can accept an analog signal from a wide range of sources—
from CD players to MP3 players, and even older legacy devices. You’ll need
a cable with a standard 3.5mm stereo mini plug to connect between the
source and the auxiliary input on the left side of the system.
Note: The analog output signals from some sources can be fairly strong. If the volume level of the
source device is turned up too high, it could overload the inputs of the DSB-150. This is unlikely to cause
damage, but can cause distorted sound. Initially, set the volume of the source to a medium – low level,
then turn it up as needed. If you hear distortion, turn down the device’s volume control.
Wall Mounting the DSB-150
The DSB-150 can be wall mounted using the
keyhole openings on the back of the system.
Install two M5 or equivalent screws in the wall.
They must be exactly 3
level with each other. Leave about
15
/16” (100mm) apart, and
3
/16” (5mm)
of the screw shaft exposed so the head of the
screw can engage the keyhole opening. Carefully
position the DSB-150 keyhole openings over the
screw head and set it in place. Be sure the cabinet
is fi rmly mounted on the screw heads before you
let go of the system.
315/16 in
(100mm)
8
DSB-150E3 CD-ROM 140411_Final.indd 8 2014/04/11 13:25:19
 Loading...