

Page 1

Libero 2
User Guide
Page 2

Page 3

Libero 2 User Guide Contents
1
Introduction
About the User Guide........................................................ 3
Accessing Instructions on Handset................................... 3
Getting Started
Parts & Functions.............................................................. 6
Battery.................................................................................7
USIM Card............................................................................ 8
Internal Memory and SD Card............................................9
Charging Battery.............................................................. 12
Power On/Off................................................................... 13
Using Touchscreen............................................................ 13
Basic Operations
Basic Operation.................................................................16
Confirmation when First Launching Applications.......... 17
Applications.......................................................................18
Phone Number................................................................... 19
Silent Mode....................................................................... 19
Airplane Mode................................................................... 20
Text Entry.........................................................................21
Using a Google Account................................................... 22
Google Play....................................................................... 24
Security Codes/Operation Password...............................26
SIM PIN.............................................................................. 27
Locking Screen.................................................................. 28
Updating Software........................................................... 28
Handset Interface
Home Screen Basics.......................................................... 32
Status Bar......................................................................... 32
Using Notifications Window/Quick Settings.................. 33
Phone
Placing/Answering Calls...................................................36
Optional Services..............................................................38
Using Contacts..................................................................40
Messaging & Internet
Messaging.......................................................................... 44
Sending S! Mail/SMS.........................................................44
Opening & Replying to S! Mail/SMS................................ 46
Using Gmail....................................................................... 47
Using Chrome.................................................................... 49
Camera
Capturing Still Images/Videos......................................... 52
Viewing Captured Still Images/Videos (Photos).............54
Music
Listening to Music (Play Music)...................................... 58
Connectivity
Connecting by Wi-Fi.........................................................62
Using Bluetooth® Function.............................................. 63
Libero 2
Page 4

2
Global Services
Making Calls while Abroad.............................................. 68
Handset Settings
Handset Settings.............................................................. 72
Wi-Fi Settings...................................................................73
Display Settings................................................................74
Notifications Settings..................................................... 74
Sound Settings..................................................................75
Apps Settings....................................................................75
Accounts Settings............................................................ 76
About Phone......................................................................77
For Assistance
Specifications....................................................................80
Customer Service.............................................................. 80
Safety Precautions
Safety Precautions........................................................... 82
Materials............................................................................91
Important Product Information.......................................91
General Notes................................................................... 94
Page 5
Introduction
3
About the User Guide
Thank-you for purchasing this product.
Before Using This Product
Read "QUICK START" and this guide thoroughly for proper
usage.
Accessible services may be limited by subscription contract
conditions.
Descriptions in the User Guide
In the User Guide, most operation descriptions are based on
handset at time of purchase.
Unless noted otherwise, descriptions are for Home Screen.
Some operation descriptions may be simplified.
Screenshots & Key Labels
Screenshots in the User Guide may differ in appearance with
actual Display. Key labels in the User Guide are simplified for
description purposes and differ with actual Display.
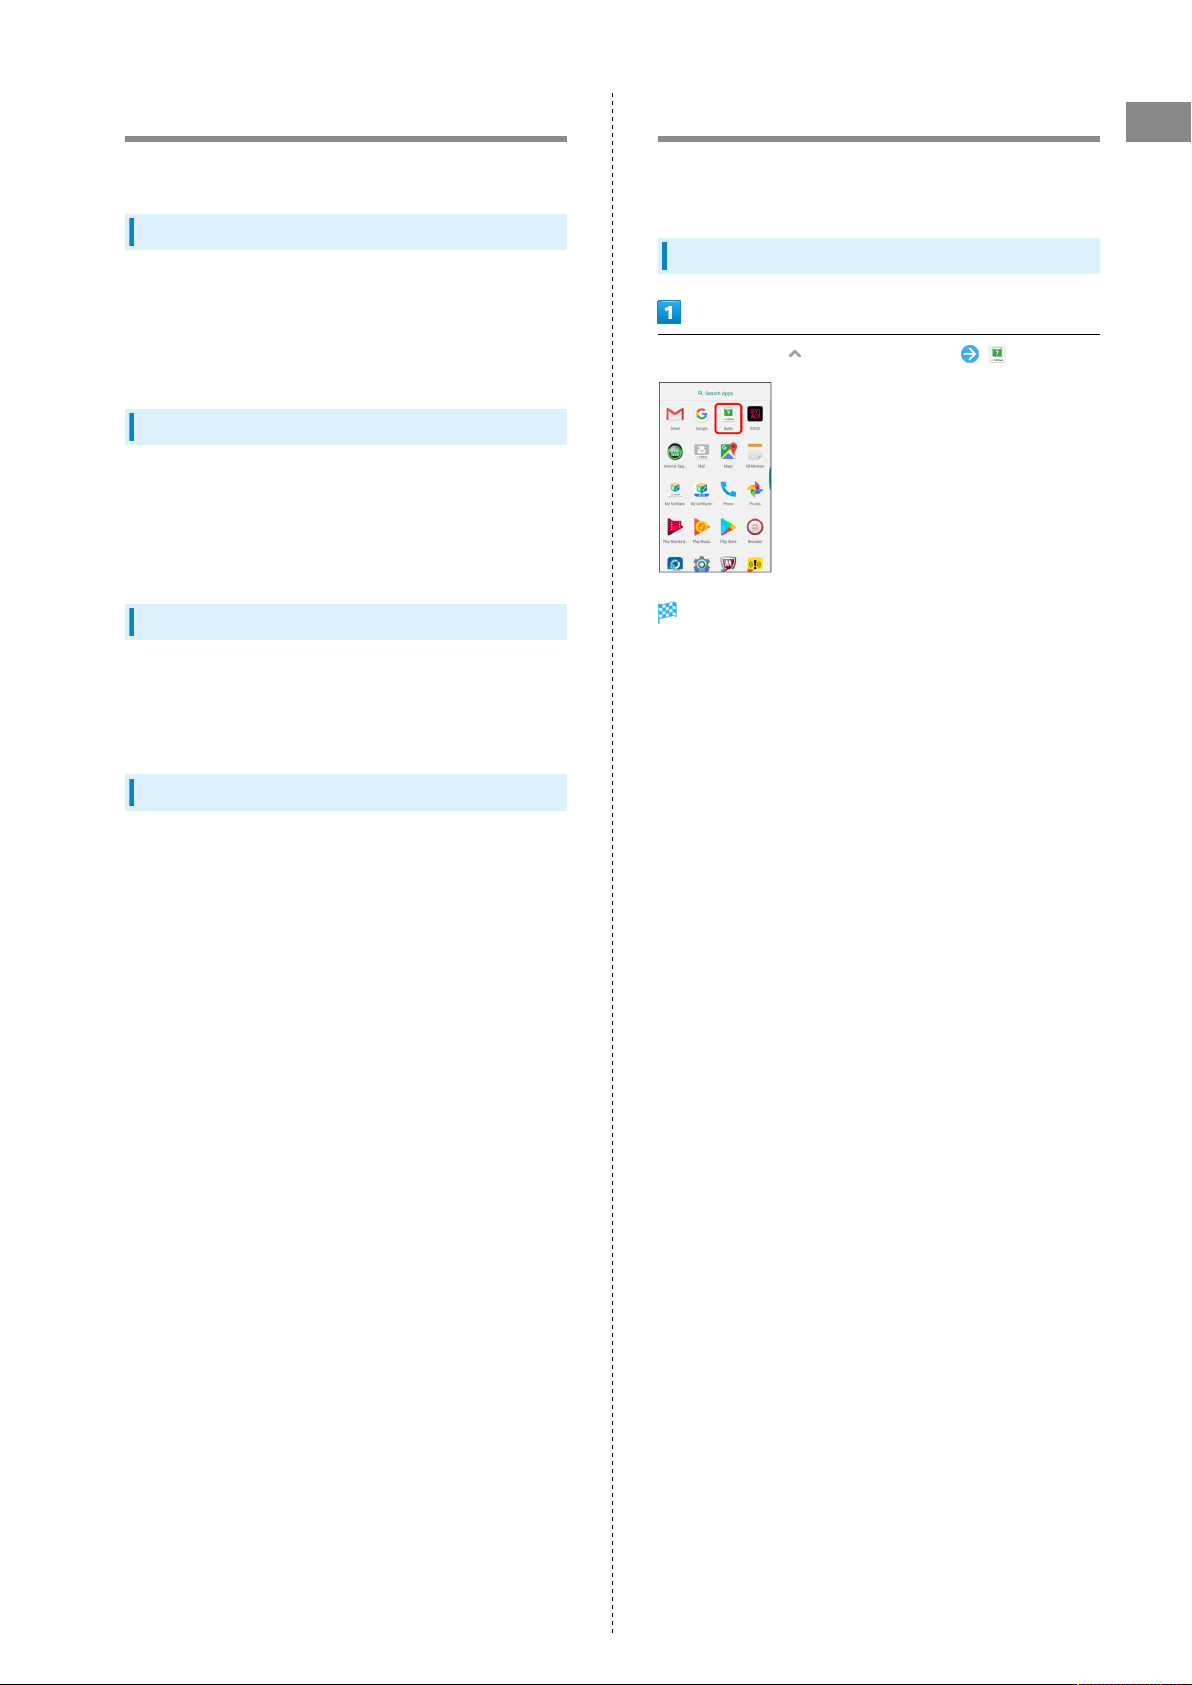
Accessing Instructions on Handset
Use Guide application to learn touch operations or making
settings. Or access FAQ website.
Launching Guide
In Home Screen, (Applications List) (Guide)
Guide top opens.
・If using Guide for the first time, Usage notes appear. Follow
onscreen instructions.
Introduction
Other Notations
In the User Guide, the product is referred to as "handset."
microSD™/microSDHC™/microSDXC™ Card is referred to as "SD
Card."
Libero 2
Page 6
4
Showing Status Bar Indicator
Set Guide indicator to show on Status Bar.
In Home Screen, (Applications List) (Guide)
Guide top opens.
・If confirmation appears, follow onscreen instructions.
Indicator
Launching Guide from Notifications
Window
Find Guide indicator on Status Bar. Activate the application to
learn handset operations, etc.
Drag Status Bar down to open Notifications Window
Notifications Window opens.
Guide
on BACK
Setting is complete.
Guide top opens.
Using Guide
Item Description
Open Guide
Search
Frequently
Accessed
Glossary
FAQ
Check operations for your purposes.
Search for Guide.
Show frequently accessed items at
random. Tap item to jump to description.
Check glossary.
Check FAQ. Or access FAQ mobile website.
Page 7

Getting Started
Parts & Functions.............................................................. 6
Battery.................................................................................7
USIM Card............................................................................ 8
Internal Memory and SD Card............................................9
Charging Battery.............................................................. 12
Power On/Off................................................................... 13
Using Touchscreen............................................................ 13
Page 8
6
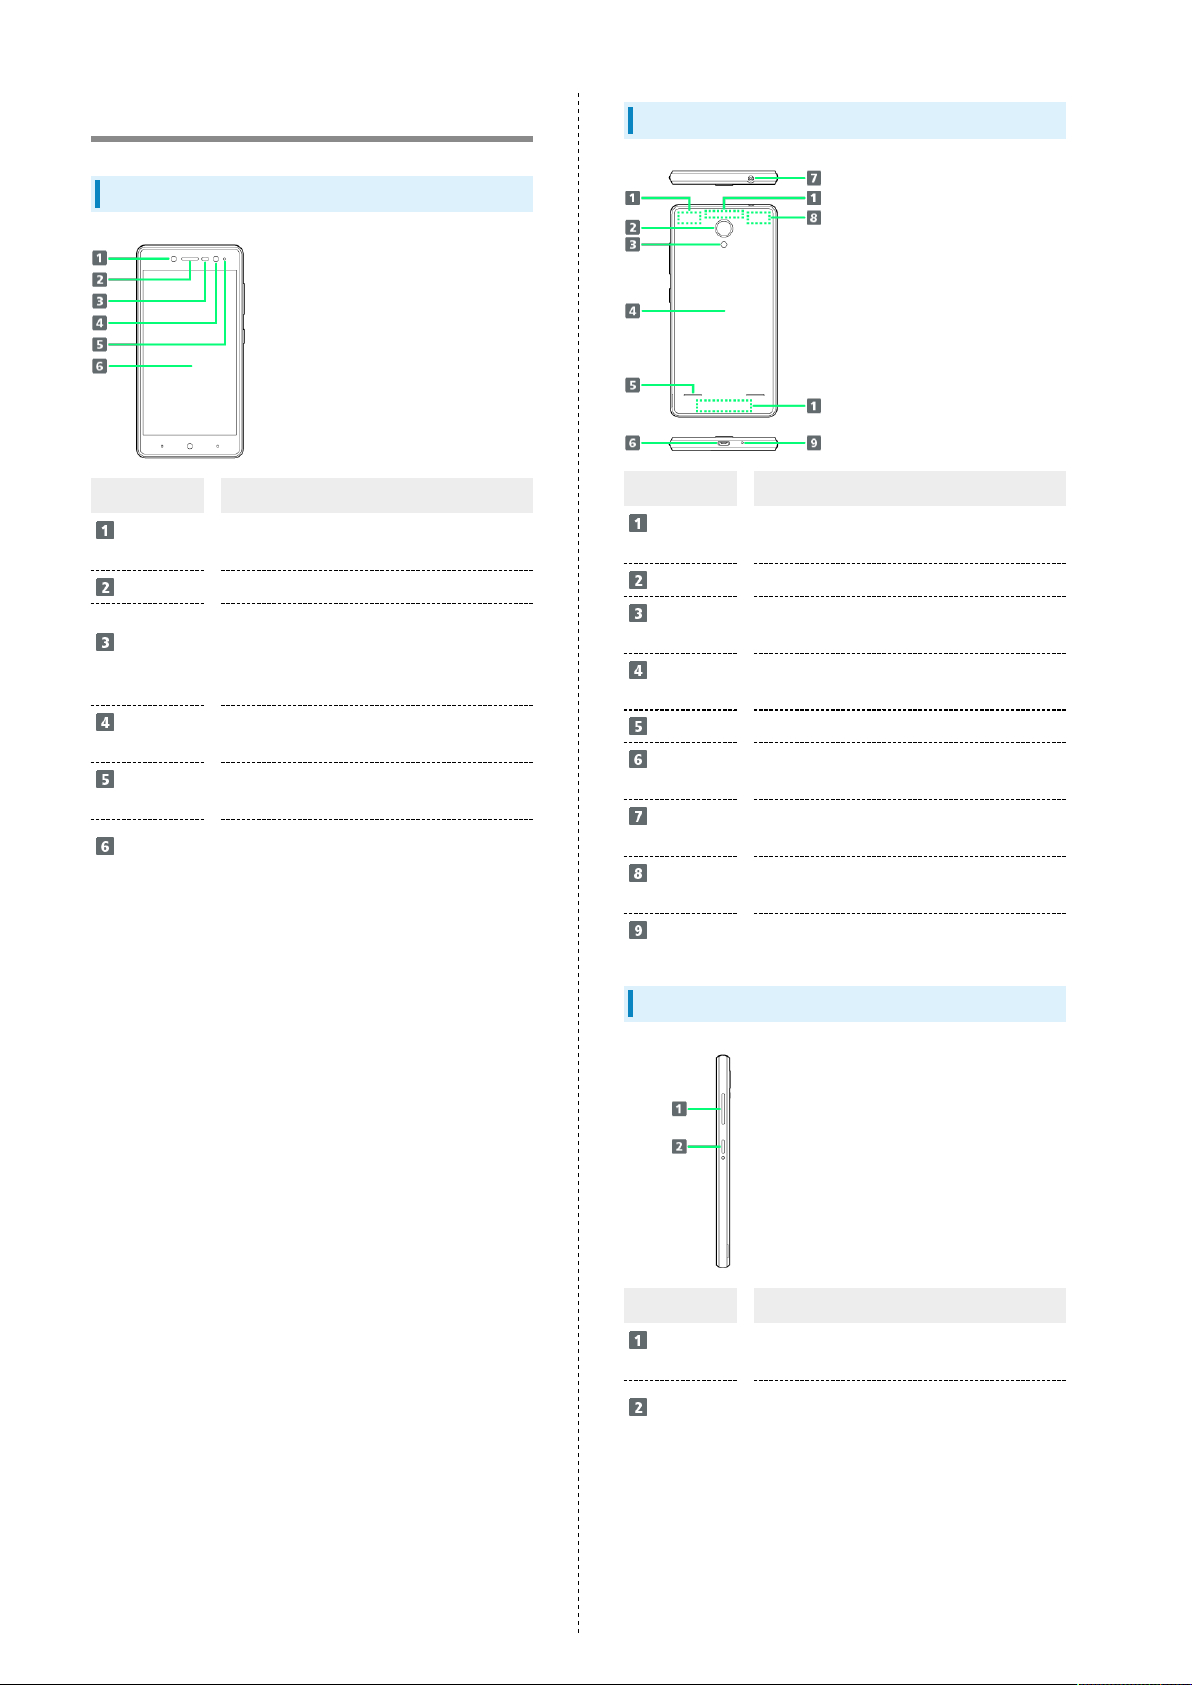
Parts & Functions
Handset (Front)
Part Description
Front
Camera Flash
Earpiece
Proximity/
Light Sensor
Front
Camera
Notification
Lamp
Display
Use as camera flash for Front Camera.
Hear the other party’s voice here.
Proximity Sensor prevents Touchscreen
misoperation during a call.
Light Sensor adjusts brightness of Display
according to ambient brightness.
Capture still images and videos of
yourself.
Flashes for incoming transmissions.
Lights while charging.
Touchscreen-type display; operate with
your fingers on Display.
Handset (Back/Side)
Part Description
Internal
Antenna Area
Camera
Camera
Flash
Battery
Cover
Speaker
External
Device Port
Earphone
Port
Wi-Fi/GPS
Antenna Area
Mic
Internal Antenna for call and data
communication.
Capture still images and videos.
Use as flash in dark place.
Open to insert/remove USIM Card or SD
Card.
Hear music, video sounds, etc. here.
Connect AC Charger or Micro USB Cable.
Connect headphones.
Internal Antenna for Wi-Fi and GPS.
Speak here.
Keys
Part Description
Volume Up/
Down Key
Power Key
Adjust Volume.
Toggle Display on/off.
Long Press for power on/off.
Page 9
7
Battery
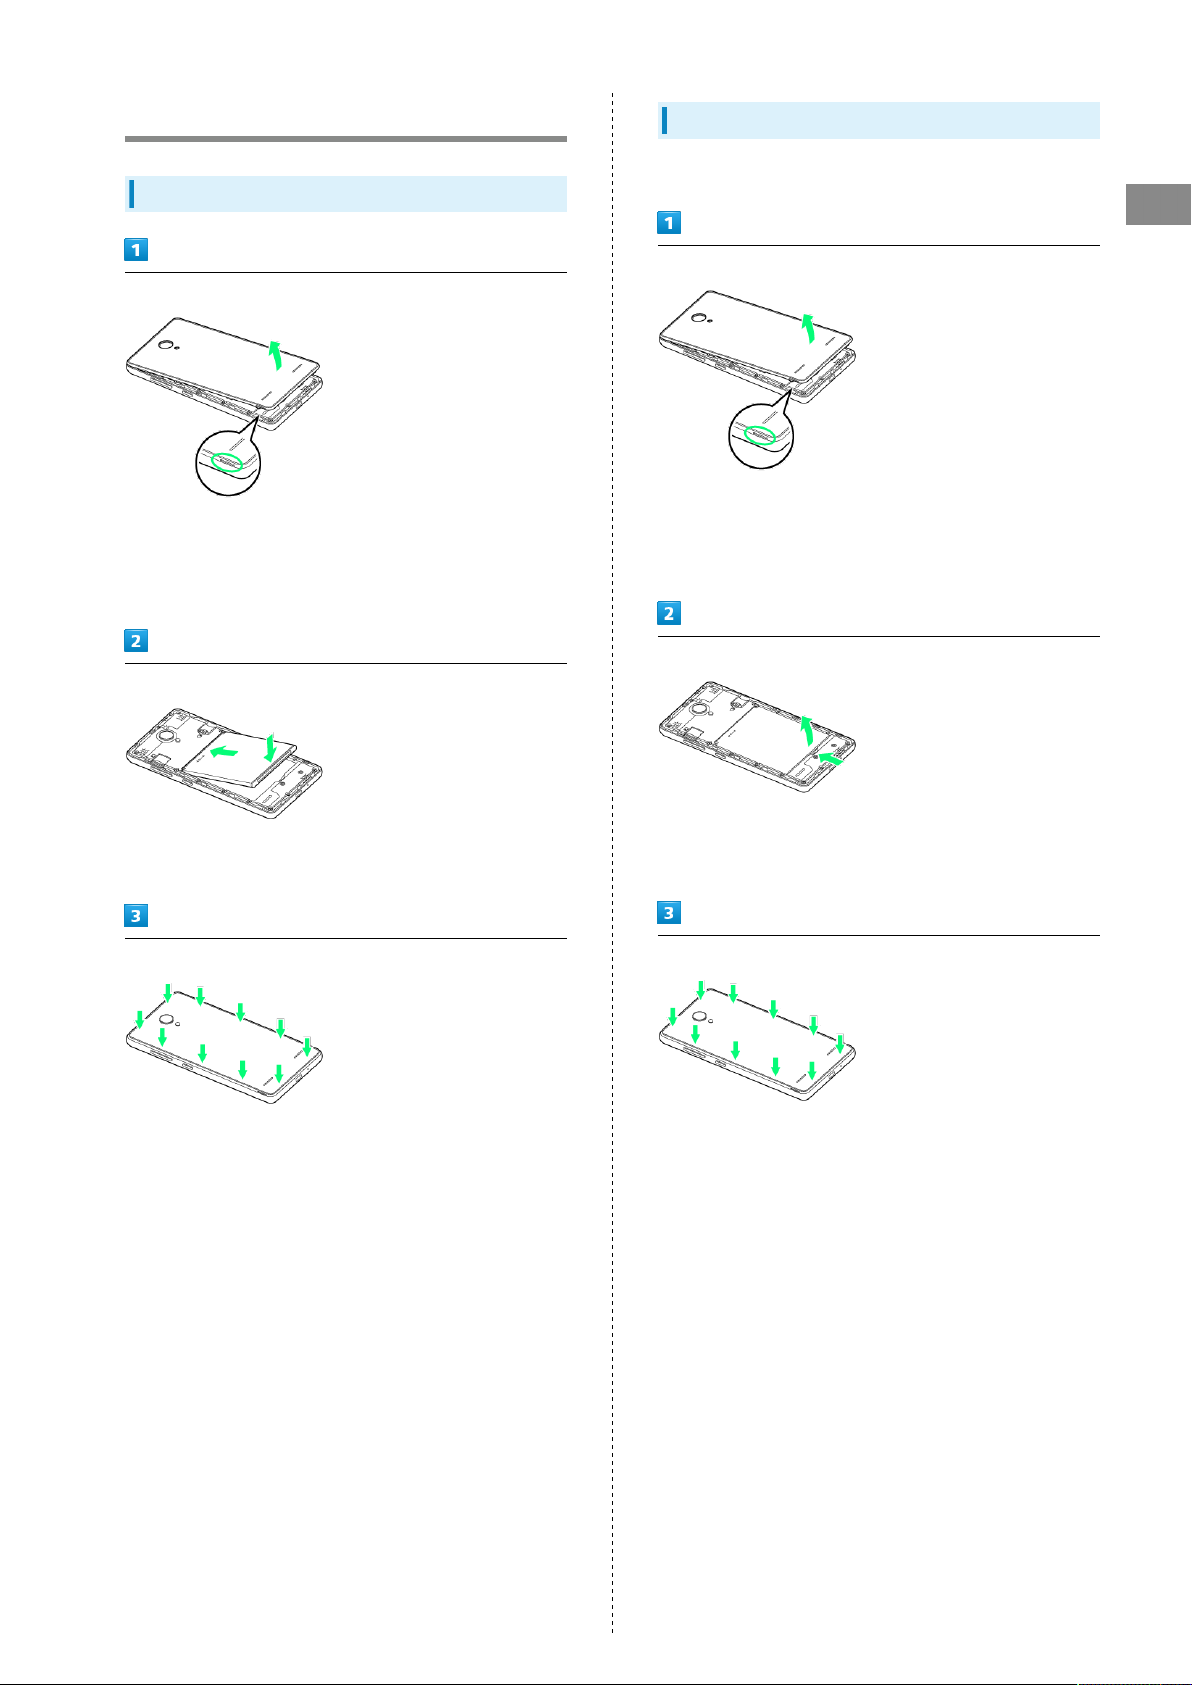
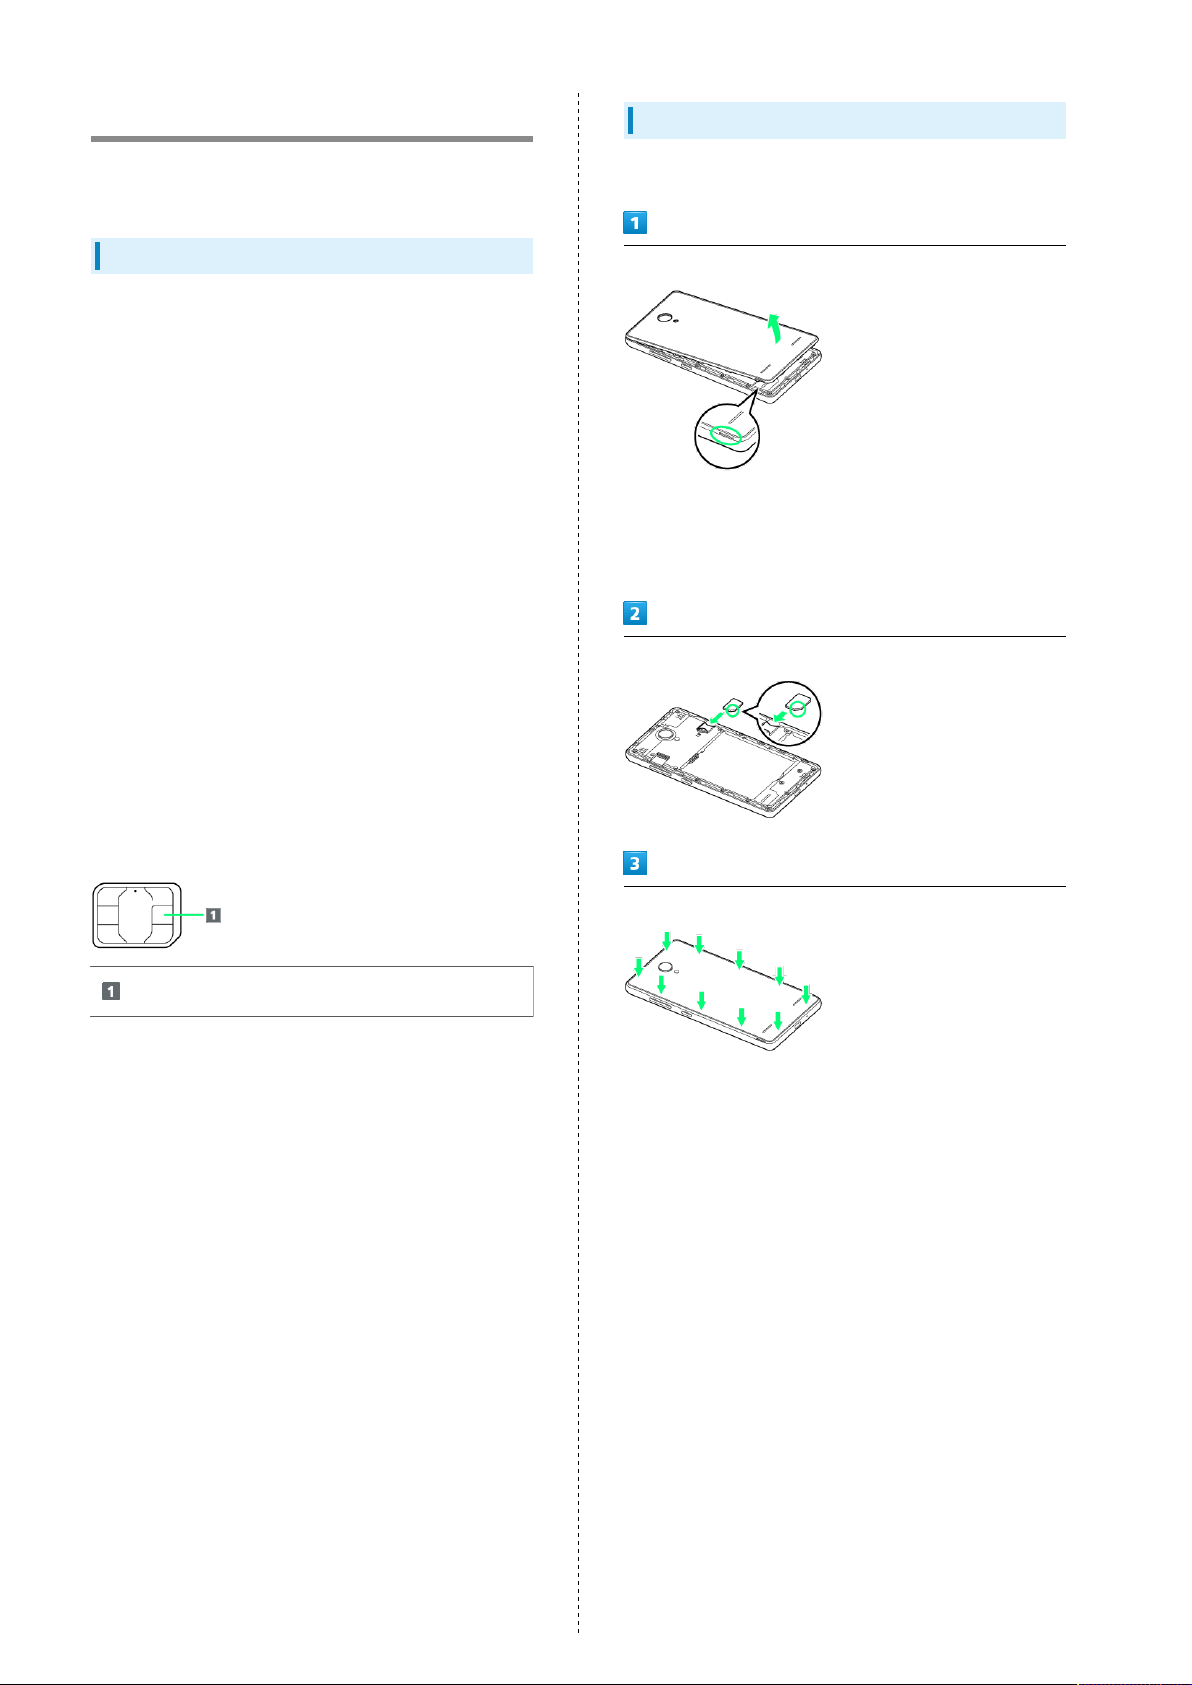
Inserting Battery
Remove Battery Cover
・Lift the recess up to make a gap between Battery Cover
and handset. Remove Battery Cover little by little along the
edge.
・Be careful not to hurt fingernails.
Insert Battery
Removing Battery
Always power off beforehand.
Getting Started
Remove Battery Cover
・Lift the recess up to make a gap between Battery Cover
and handset. Remove Battery Cover little by little along the
edge
・Be careful not to hurt fingernails.
Remove Battery
・Insert Battery so that the terminal part contacts the
terminal part of handset, then set it into handset.
Attach Battery Cover
・Firmly Press Battery Cover until it clicks so as not to make
any gaps between Battery Cover and handset.
・Put your finger into the groove of handset and then lift
the one side of Battery. Forcibly removing may damage the
terminal part.
Attach Battery Cover
・Firmly Press Battery Cover until it clicks so as not to make
any gaps between Battery Cover and handset.
Libero 2
Page 10
8
USIM Card
USIM Card is an IC card containing phone number and other
customer information.
Handling USIM Card
・Customer is responsible for any damage caused by inserting
USIM Card in an other-brand IC card reader, etc. SoftBank
Corp. is not responsible in such case.
・Always keep the IC chip clean.
・Wipe clean with a dry, soft cloth.
・Avoid applying labels. May damage USIM Card.
・See instructions included with USIM Card for handling.
・USIM Card is the property of SoftBank Crop.
・USIM is replaceable (at cost) in case of loss/damage.
・Return USIM Card to SoftBank Corp. when canceling
subscription.
・Returned USIM Cards are recycled for environmental
purposes.
・Note that USIM Card specifications and performance may
change without notice.
・It is recommended that you keep a separate copy of
information that is stored on USIM Card. SoftBank Corp. is
not responsible for damages from stored information that is
lost.
・Always follow emergency procedures to suspend service if
your USIM Card or handset (USIM Card inserted) is lost/
stolen. For details, contact Customer Service.
・Always power off handset before inserting/removing USIM
Card.
Inserting USIM Card
Always power off beforehand.
Remove Battery Cover
・Lift the recess up to make a gap between Battery Cover
and handset. Remove Battery Cover little by little along the
edge.
・Be careful not to hurt fingernails.
Slowly insert USIM Card straight with metal chip facing down
IC chip
Attach Battery Cover
・Firmly Press Battery Cover until it clicks so as not to make
any gaps between Battery Cover and handset.
Page 11

9
Removing USIM Card
Always power off beforehand.
Remove Battery Cover
・Lift the recess up to make a gap between Battery Cover
and handset. Remove Battery Cover little by little along the
edge.
・Be careful not to hurt fingernails.
Put your fingernail into the groove of Card Slot and slide
USIM Card until USIM Card is moved out a little, then slowly
pull it out
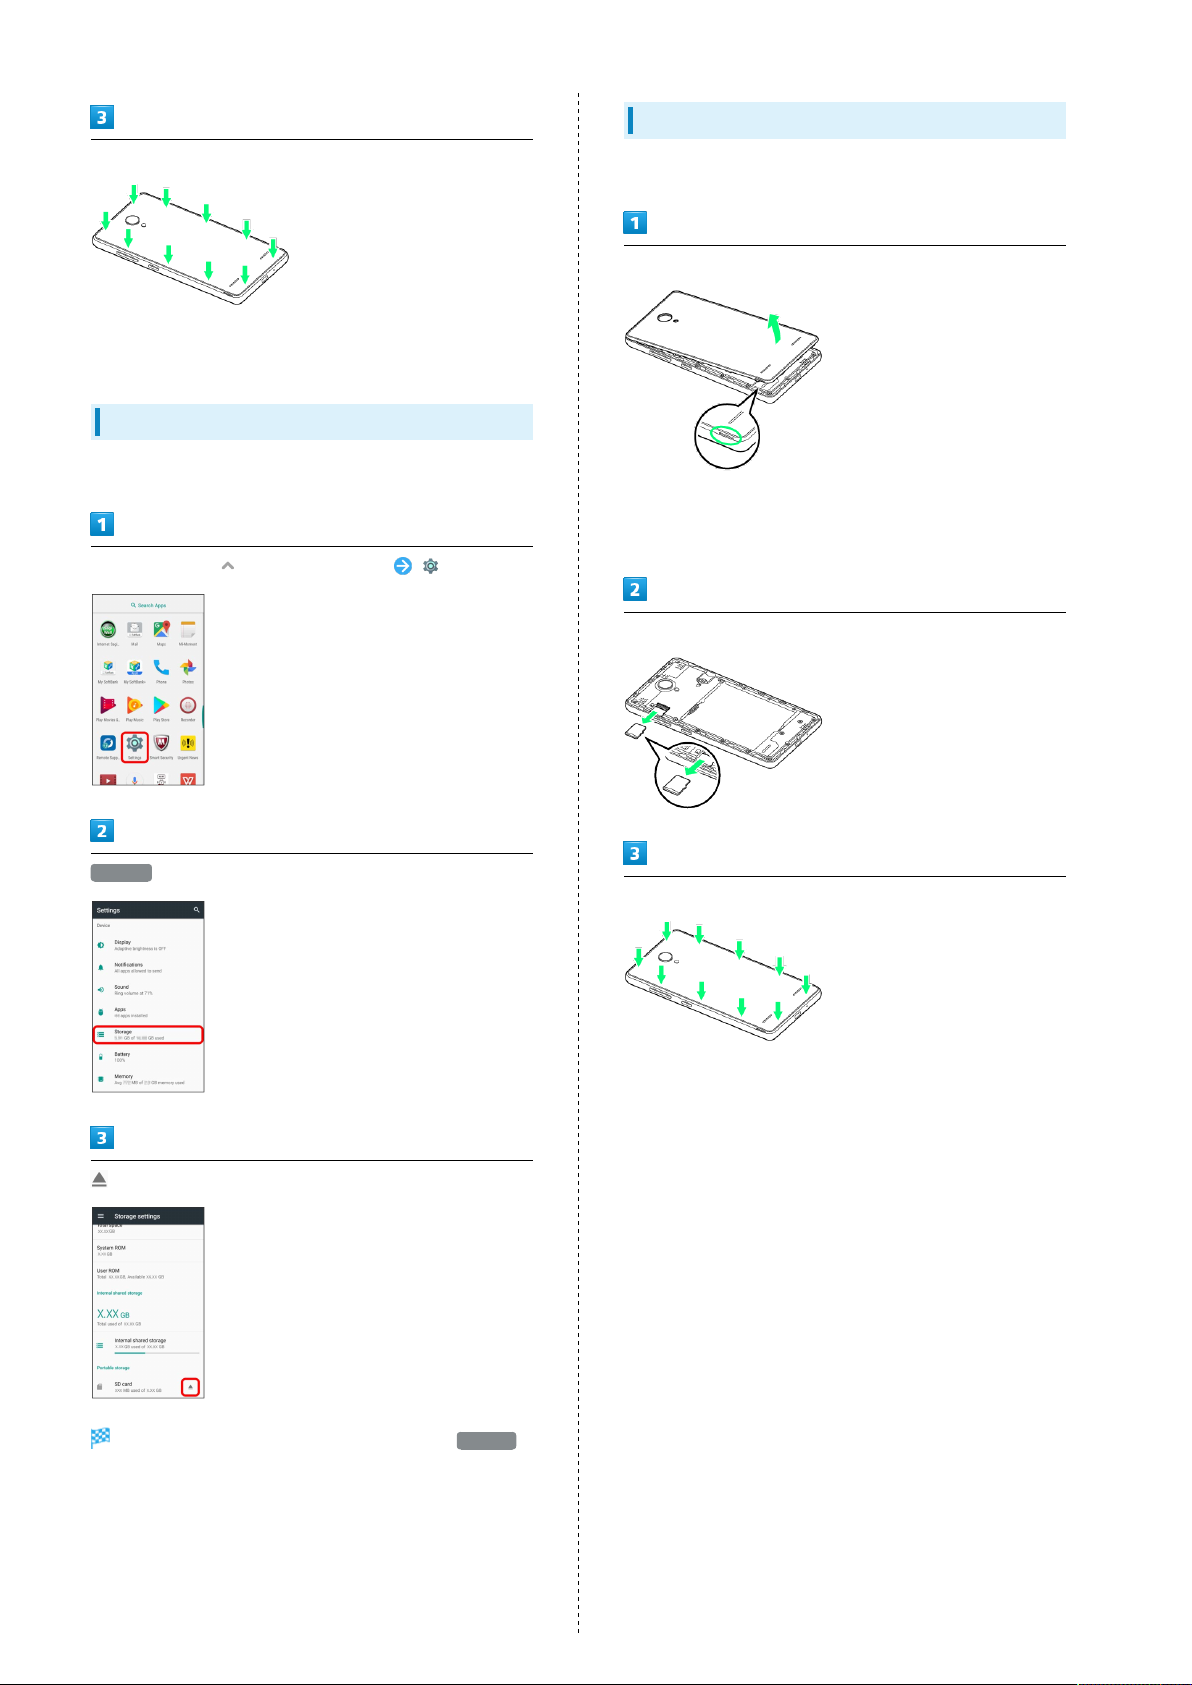
Internal Memory and SD Card
Save data to handset memory or SD Card.
Handset supports SD Cards up to 128GB. Some SD Cards may
not operate properly.
Getting Started
SD Card Cautions
Data
Information stored on SD Card can become lost or changed
accidentally or as a result of damage. It is recommended
that you keep a separate copy of important data. SoftBank
Corp. is not responsible for damages from data that is lost
or changed.
Reading/Writing Data
Never power off while reading or writing data.
Battery Level
A low battery charge may prevent reading/writing to SD
Card.
Attach Battery Cover
・Firmly Press Battery Cover until it clicks so as not to make
any gaps between Battery Cover and handset.
SIM-Unlocking Handset
Handset can be SIM-unlocked. SIM-unlocking handset allows
other-carrier SIM cards to be used with it.
・Some services, functions, etc. may have restrictions when
an other-carrier SIM card is used. SoftBank Corp. does not
guarantee operation whatsoever.
・For details, see SoftBank Website.
Handling SD Card
Use/store SD Cards away from the reach of infants. May
cause choking if swallowed.
Inserting SD Card
Always power off beforehand.
Remove Battery Cover
・Lift the recess up to make a gap between Battery Cover
and handset. Remove Battery Cover little by little along the
edge.
・Be careful not to hurt fingernails.
Insert SD Card gently with the terminal part facing down.
Libero 2
Page 12
10
Removing SD Card
Attach Battery Cover
・Firmly Press Battery Cover until it clicks so as not to make
any gaps between Battery Cover and handset.
Unmounting SD Card
Always unmount SD Card before removing.
In Home Screen, (Applications List) (Settings)
Always unmount SD Card and power off first.
Remove Battery Cover
・Lift recess up to make gap between Battery Cover and
handset. Remove Battery Cover little by little along edge.
・Be careful not to hurt fingernails.
Slowly pull SD Card straight out
Storage
Item name changes from amount of memory to Ejected .
SD Card is unmounted.
Attach Battery Cover
・Firmly Press Battery Cover until it clicks so as not to make
any gaps between Battery Cover and handset.
Page 13
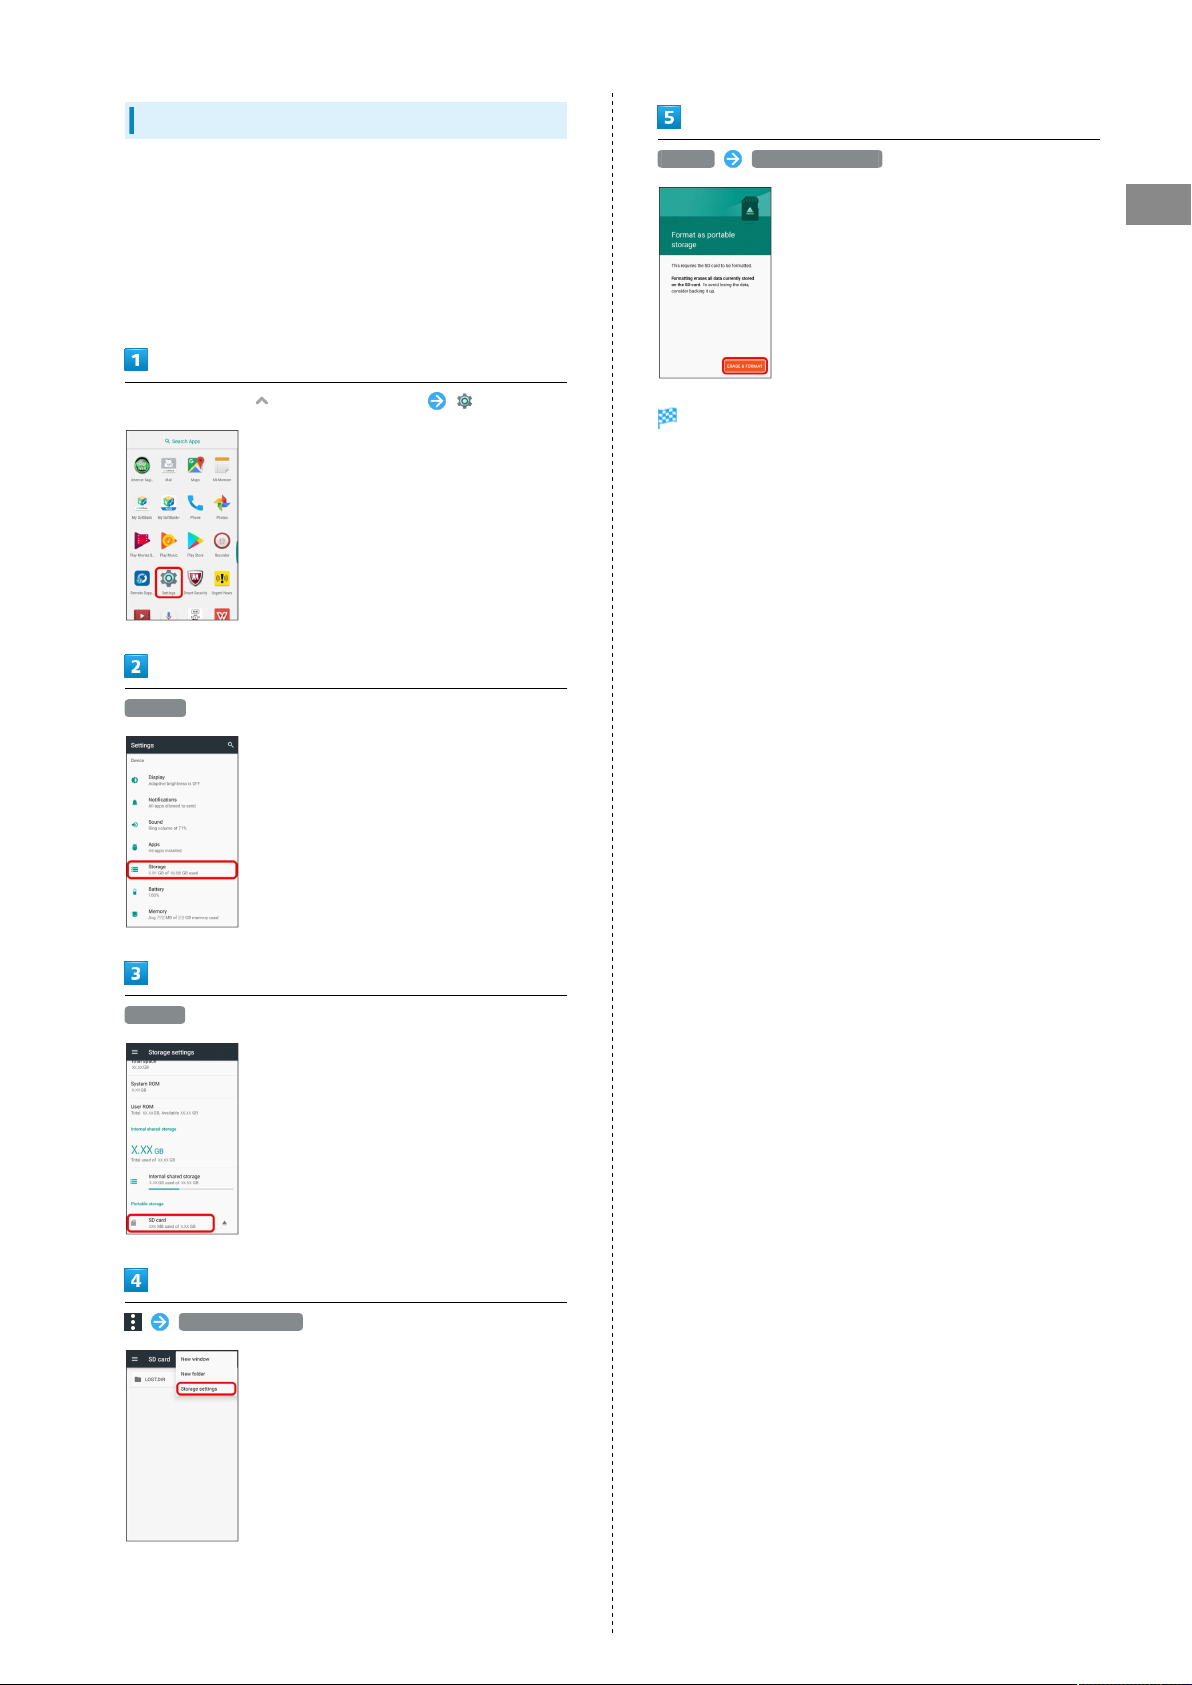
Formatting SD Card
11
When using a new SD Card for the first time, always format it
on handset.
・Formatting erases all data on SD Card. Carefully check any
SD Card that was used on another device before formatting.
・Charge Battery while formatting, or format with adequate
battery charge.
In Home Screen, (Applications List) (Settings)
Storage
Format ERASE & FORMAT
Getting Started
All data on SD Card is erased.
SD card
Storage settings
Libero 2
Page 14
12
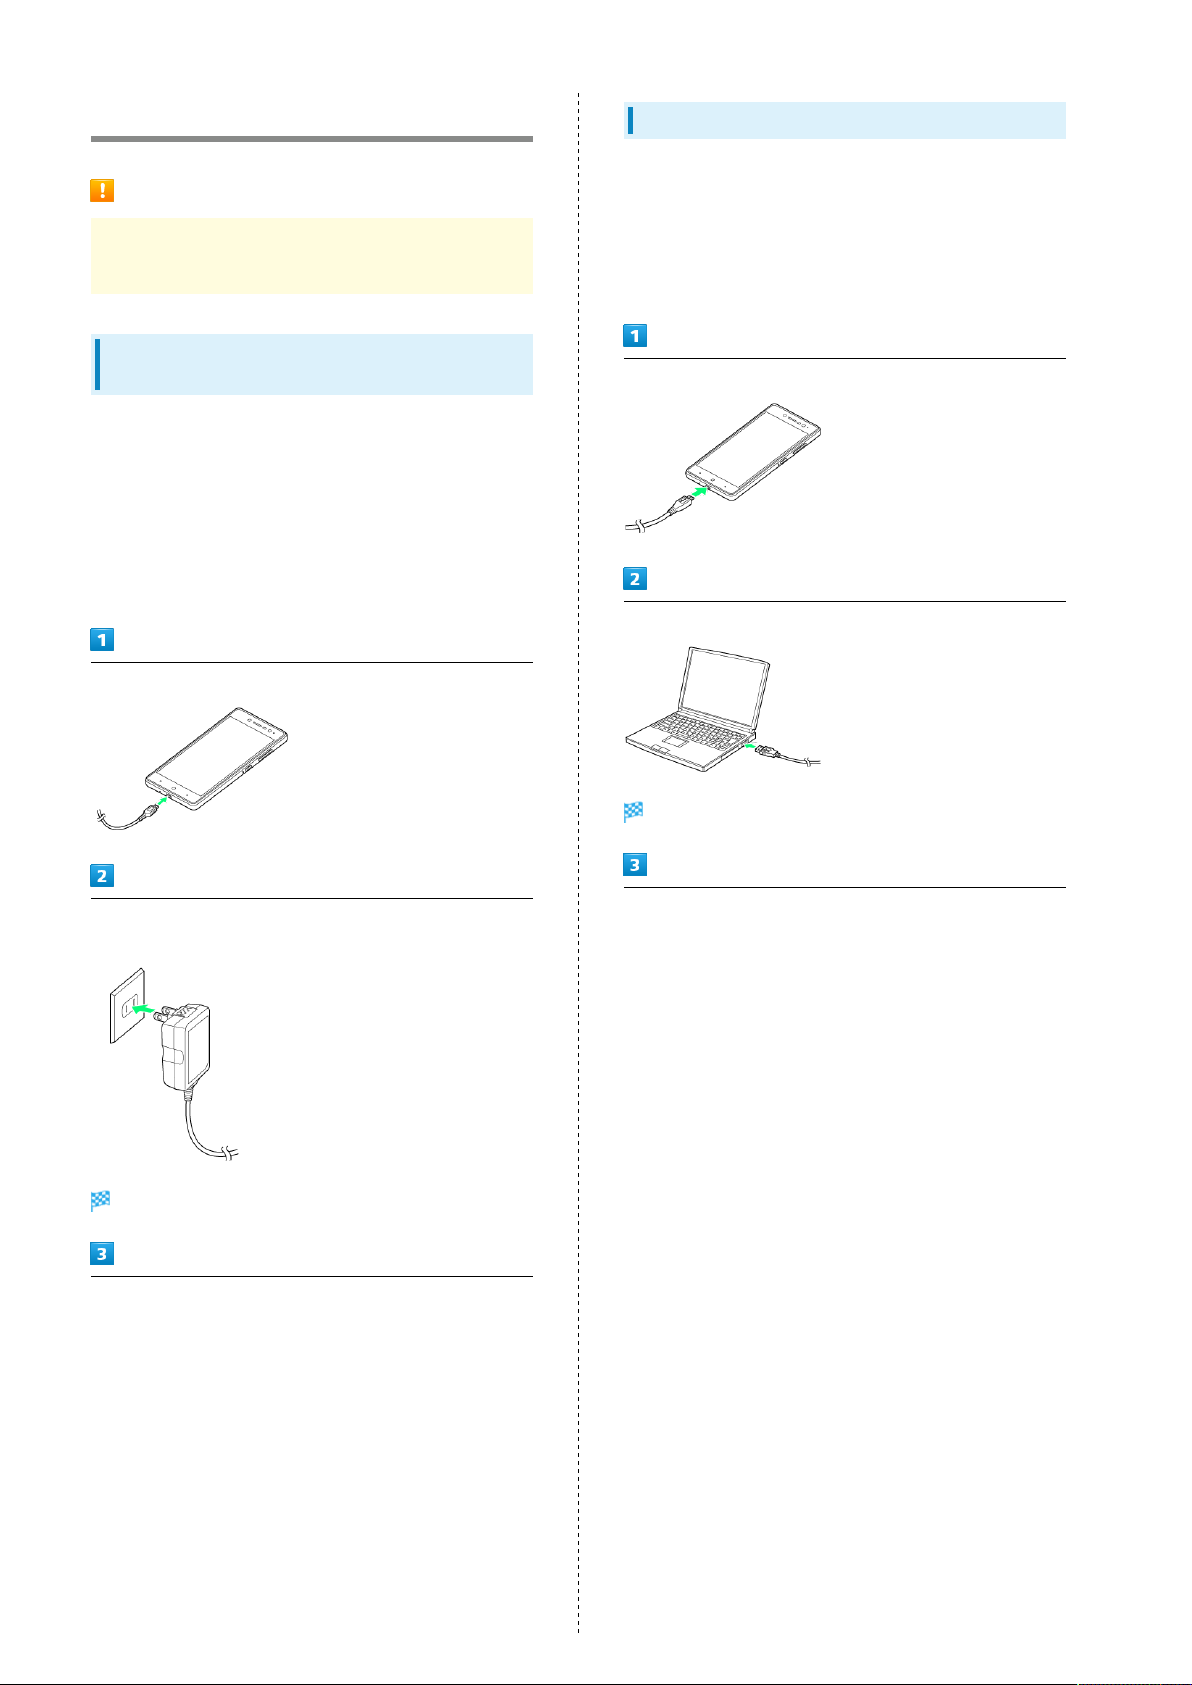
Charging Battery
Charging
Do not connect Micro USB plug when handset or peripheral
device is wet.
Charging with AC Charger (Sold
Separately)
AC Charger is sold separately. Use specified AC Charger.
For AC Charger or other related accessories, see SoftBank
Website.
・See AC Charger manual. Charging with AC Adapter (Micro
USB 1.0A) [ZSDBA6] (SoftBank SELECTION Micro USB 1.0A
AC Adapter for smartphones 1.0A [SB-AC13-HDMU/WH]) is
explained here.
Insert Micro USB plug of AC Charger into External Device Port
Charging by PC
For Micro USB Cable and other related accessories, see
SoftBank Website.
・Always turn on PC beforehand.
・Battery may not charge depending on type of connection to
PC.
Insert Micro USB plug into External Device Port
Insert USB plug into PC
Raise power plug and plug AC Charger into household power
outlet
Notification Lamp lights when charging starts.
When charging is complete, unplug AC Charger and remove
Micro USB plug
Notification Lamp lights when charging starts.
After charging, remove Micro USB Cable from PC and handset
Page 15
13
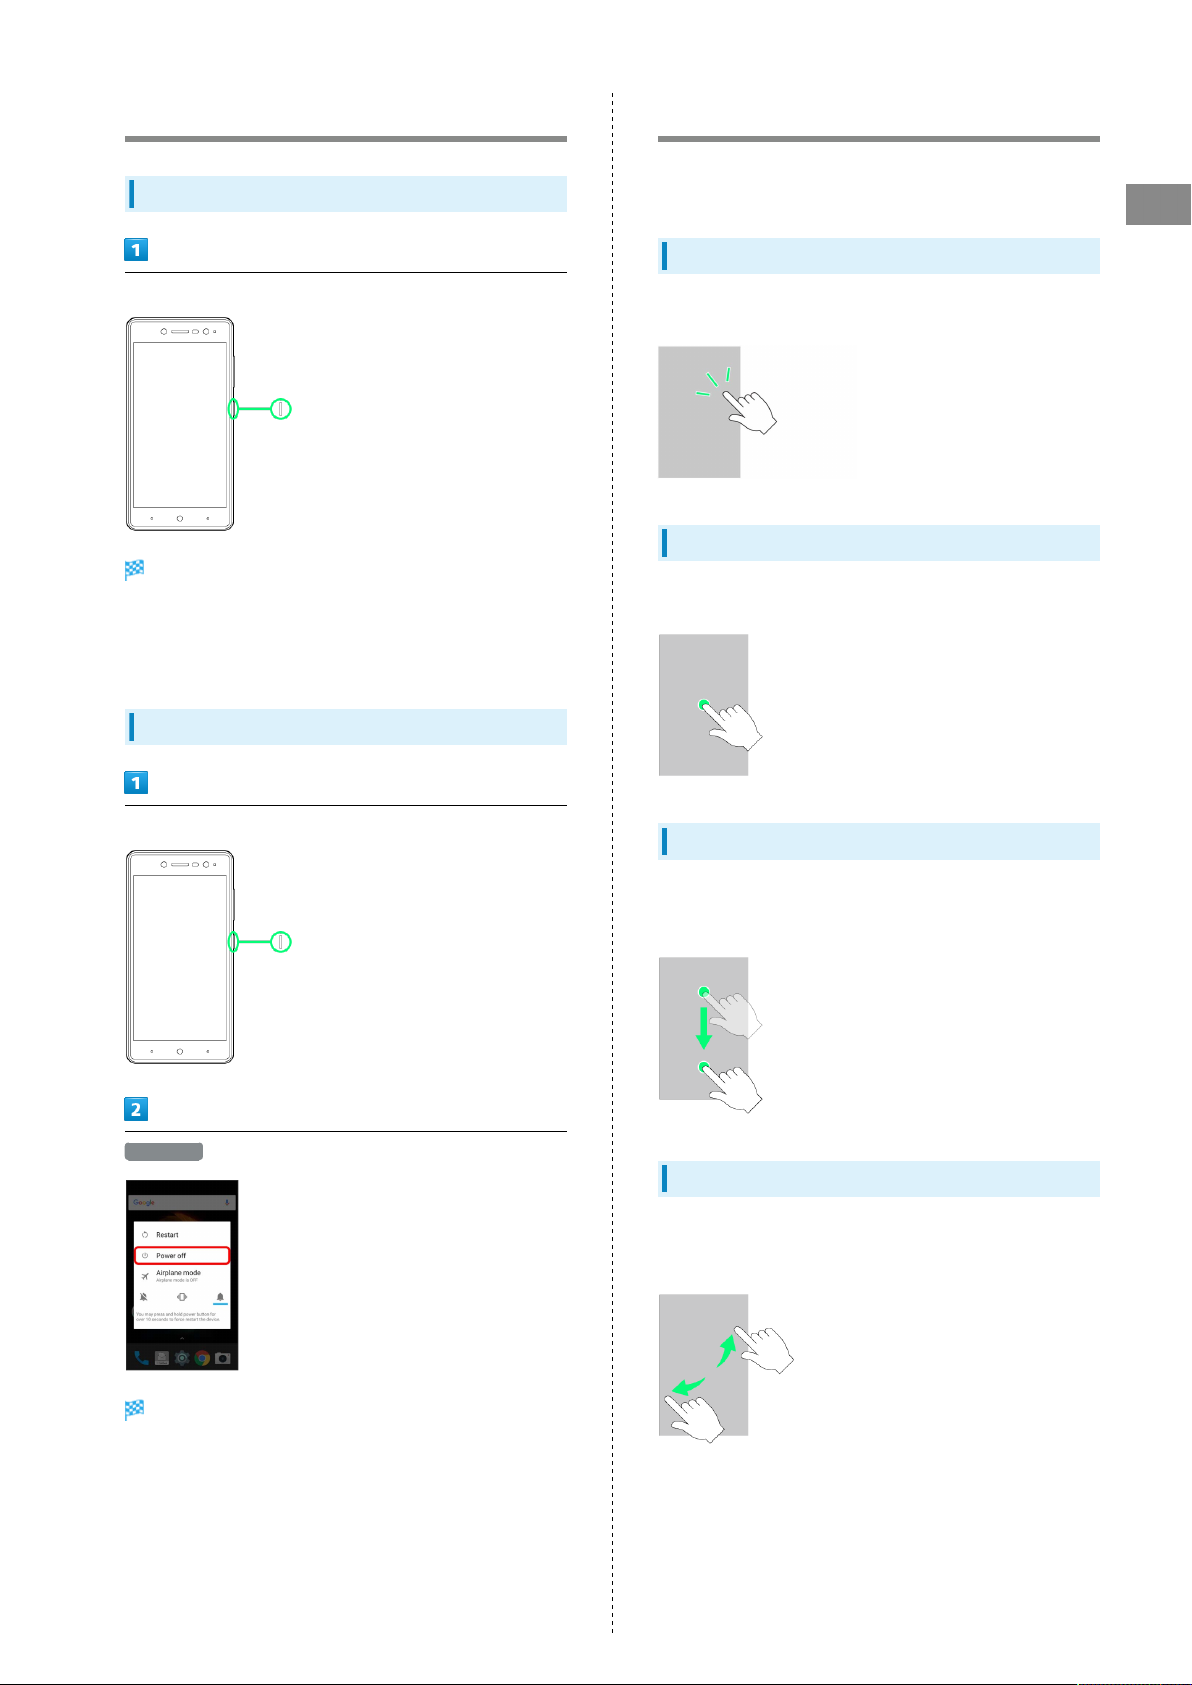
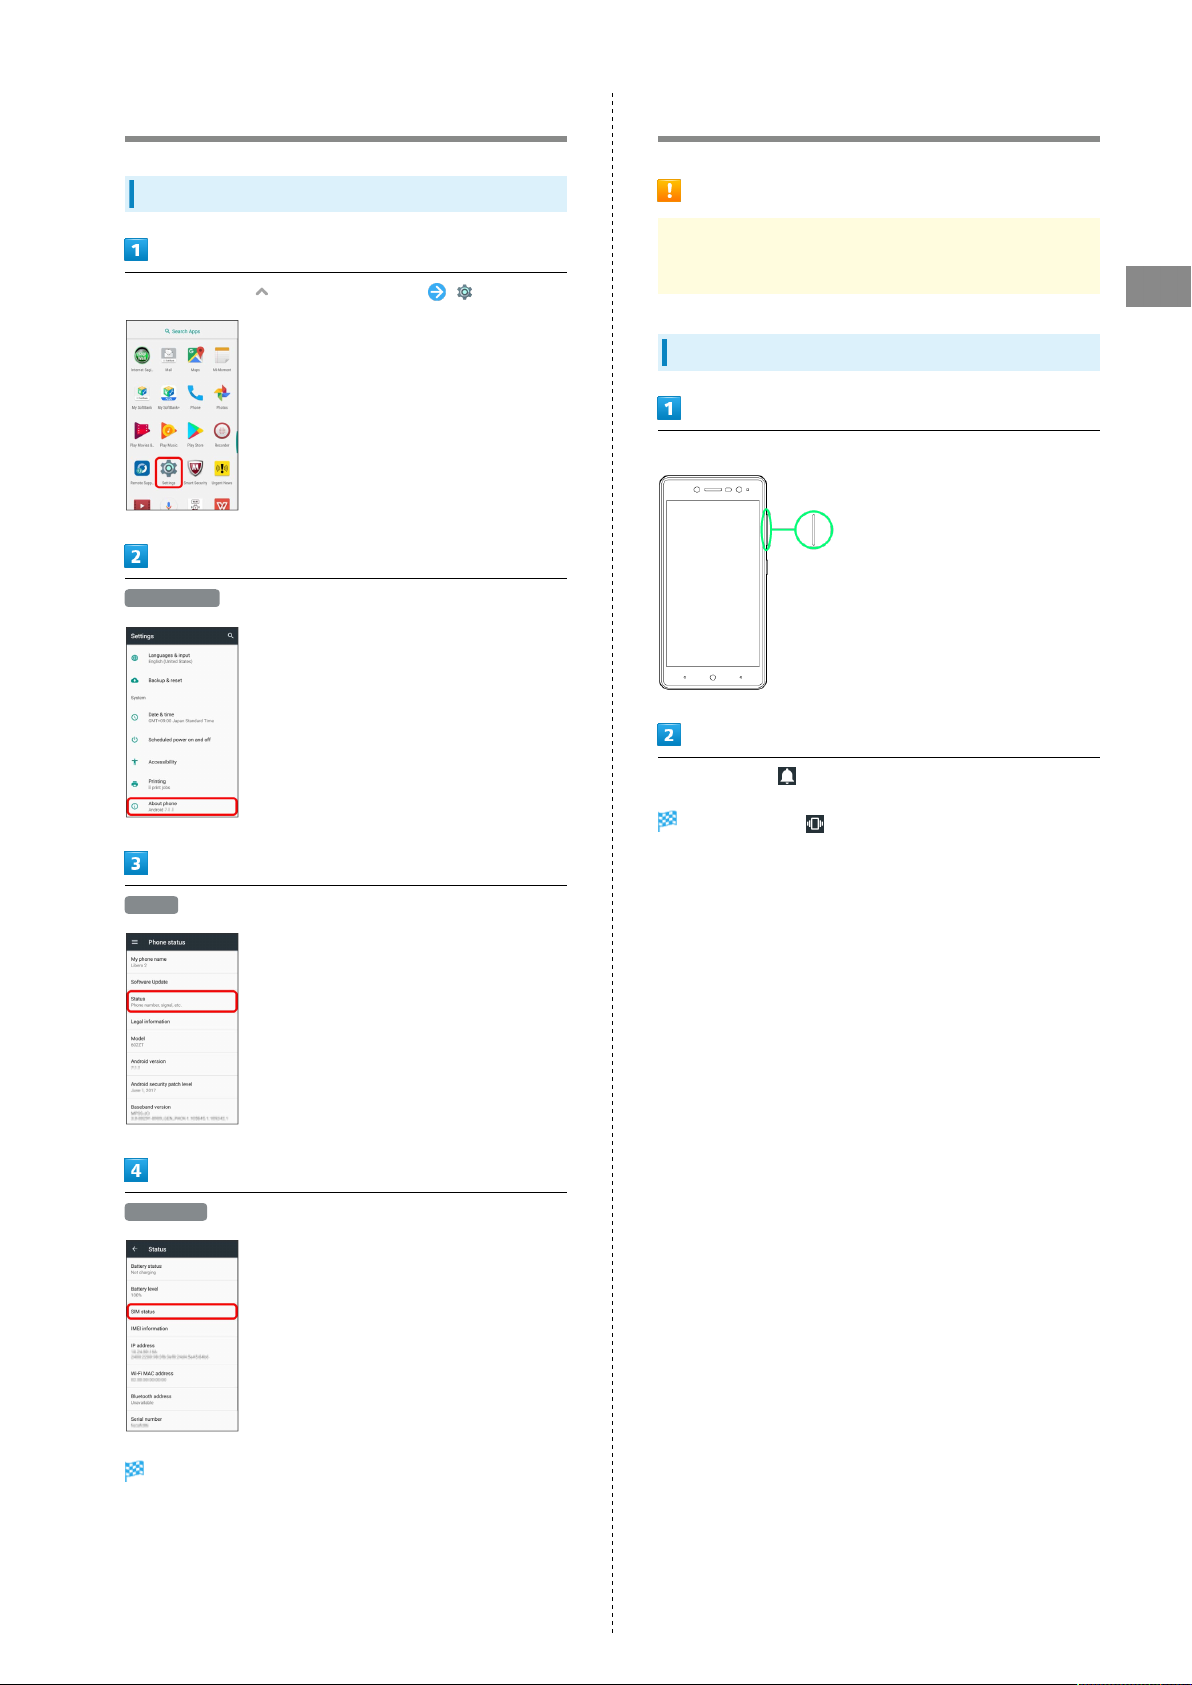
Power On/Off
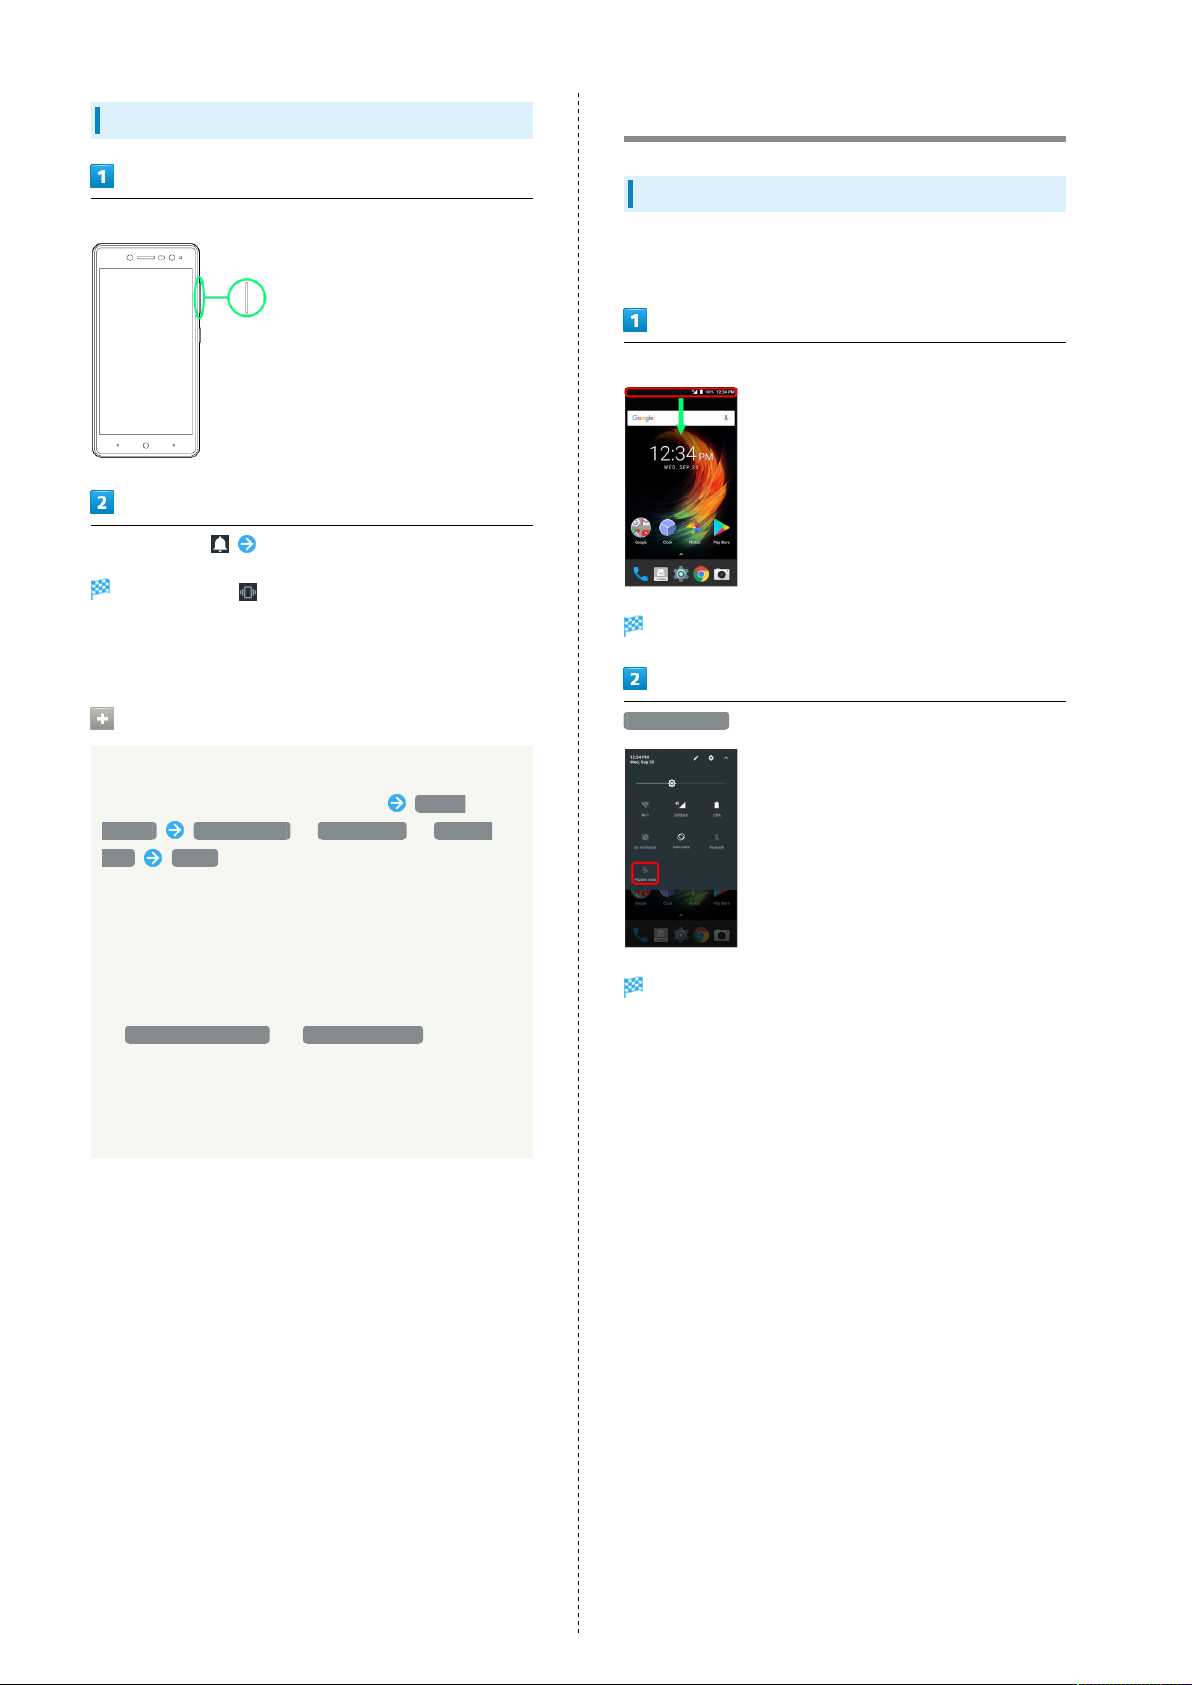
Powering On
Power Key (Long Press)
Lock screen appears.
・See "Unlocking Screen" to unlock the screen.
・Startup guidance appears the first time handset is powered
on. Follow onscreen instructions to make settings.
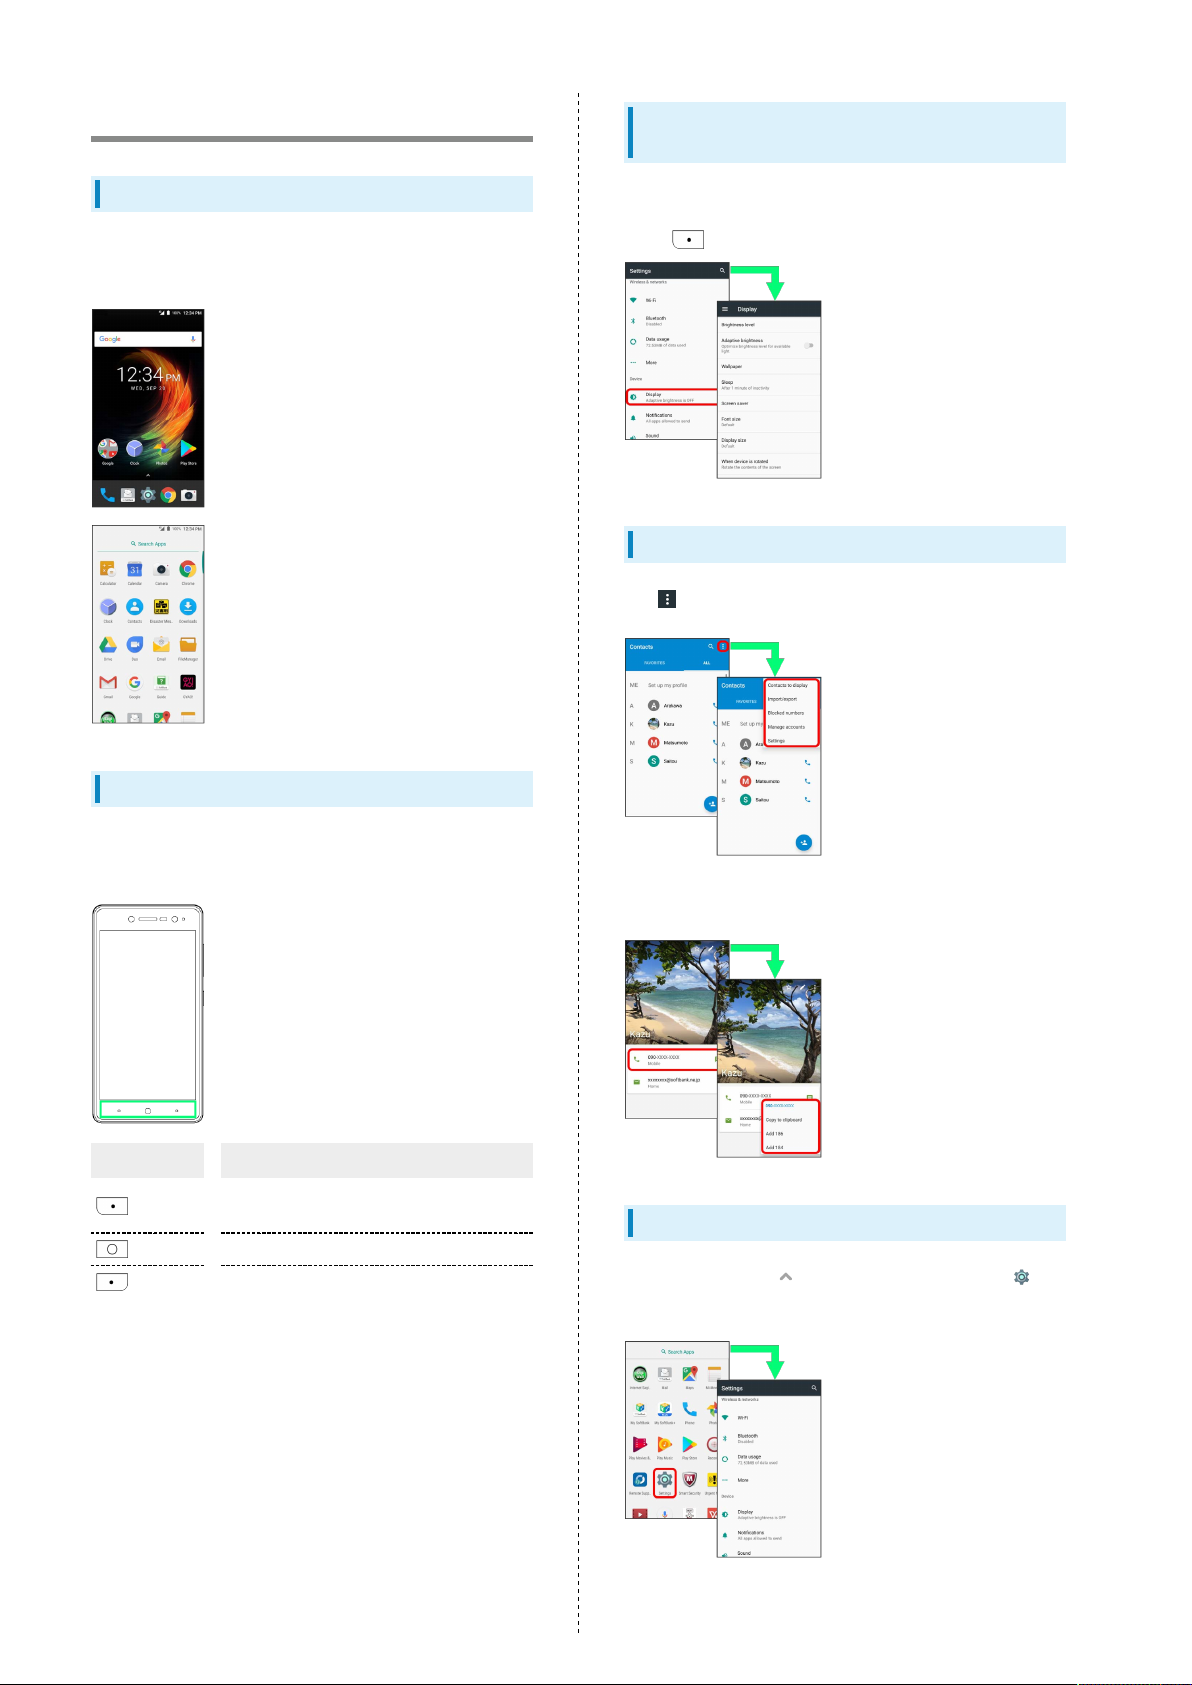
Using Touchscreen
Handset Display is a touchscreen. Operate with your fingers
on Display.
Getting Started
Tap
Contact Display lightly and briefly.
Touch & Hold
Contact Display lightly; release finger when screen changes.
Powering Off
Power Key (Long Press)
Power off
Drag
Touch icon or other item lightly, move it where desired, and
release finger.
Swipe/Flick
Contact Display lightly, then brush screen up/down or left/
right.
Handset powers off.
Libero 2
Page 16

14
Pinch/Spread
Contact Display lightly, then close/widen fingers.
Page 17

Basic Operations
Basic Operation.................................................................16
Confirmation when First Launching Applications.......... 17
Applications.......................................................................18
Phone Number................................................................... 19
Silent Mode....................................................................... 19
Airplane Mode................................................................... 20
Text Entry.........................................................................21
Using a Google Account................................................... 22
Google Play....................................................................... 24
Security Codes/Operation Password...............................26
SIM PIN.............................................................................. 27
Locking Screen.................................................................. 28
Updating Software........................................................... 28
Page 18
16
Basic Operation
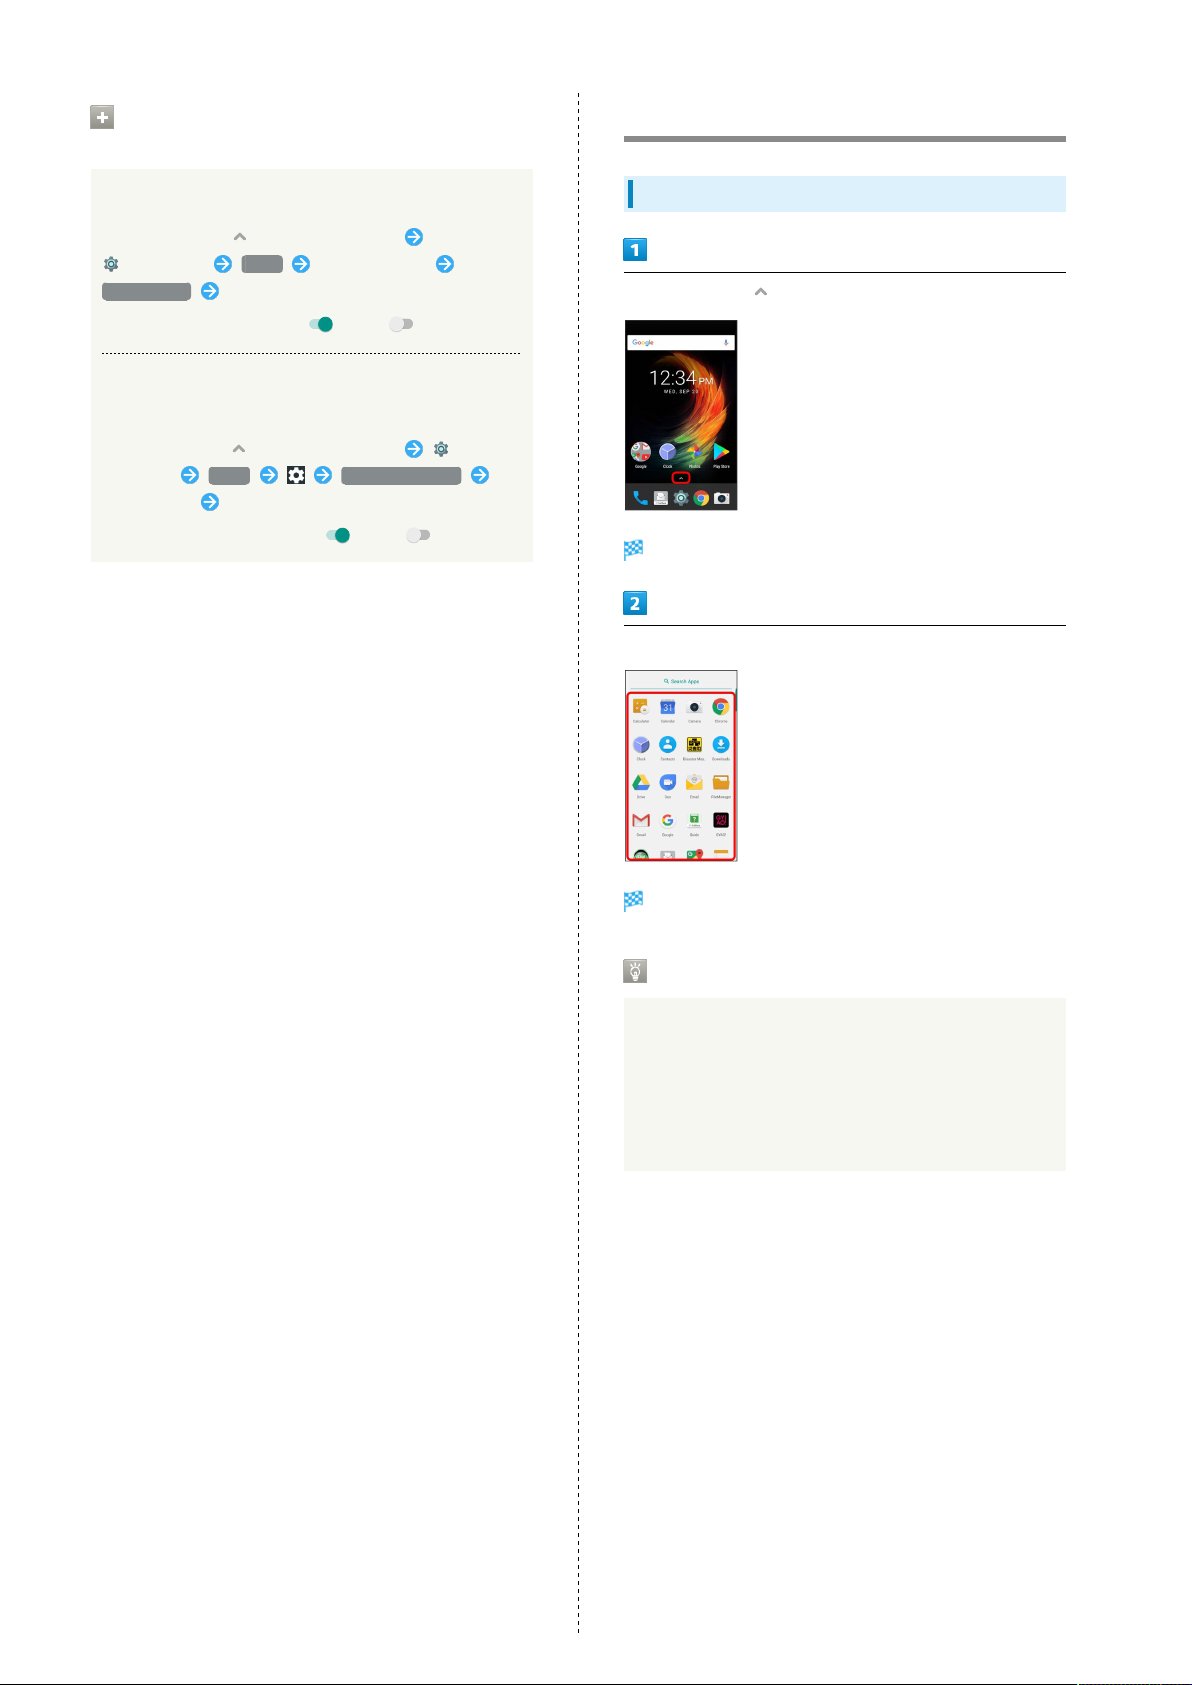
Home Screen & Applications List
Most handset operations start in Home Screen (appears at
power on) or in Applications List.
Selecting Options and Navigating
Screens
Tap items, icons, onscreen keys, etc. to open assigned items.
・
Tap to go back to previous screen.
Menu Operations
Tap for available settings and items.
Navigation Bar
Tap icons on Navigation Bar (Display bottom) for the
following functions/operations.
Item Description
(Back)
(Home)
(History)
Return to previous screen. Tap to close
keyboard while it appears.
Return to Home Screen
Open listing of recently used applications
and activate or delete applications.
Screens may also have settings and items that are available by
Touching & Holding Display.
Handset Settings and Making Settings
In Home Screen, Tap (Applications List) then Tap
(Settings) to customize the operation of handset functions.
Page 19

17
Portrait Orientation & Landscape
Orientation
The screen changes to portrait orientation when handset is
rotated sideways.
・Depending on the current screen, the orientation may not
change even by changing handset orientation.
Confirmation when First Launching Applications
Setting Required Permissions for
Applications
Type of confirmation and the content differ with application.
Operation when activating (Phone) for the first time is
described as an example.
・Application may not work correctly if use of functions is
not permitted.
In Home Screen, (Applications List)
Basic Operations
Applications List opens.
(Phone)
DENY / ALLOW
Setting is complete.
・
Generally, select ALLOW to permit use of the function.
・For several functions, set in the same way.
Libero 2
Page 20
18
Other Ways to Set Required Permissions
for Applications
Setting Functions to Use by Application
In Home Screen, (Applications List)
(Settings) Apps Tap application
Permissions Tap function
・
Tap function to toggle on ( )/off ( ).
Setting Applications with Permitted Usage by
Function
In Home screen, (Applications List)
(Settings) Apps App permissions
Tap function Tap application
・
Tap application to toggle on ( )/off ( ).
Applications
Launching Applications
In Home Screen, (Applications List)
Applications List opens.
Tap the application
Application is activated.
Required Permissions for Applications
Some applications request permissions of functions such as
accessing to handset data, capturing photos, etc.
Permission confirmations appear when application is
launched. Follow onscreen instructions.
For details, see "Confirmation when First Launching
Applications."
Page 21
19
Phone Number
Checking Your Phone Number
In Home Screen, (Applications List) (Settings)
About phone
Silent Mode
Cautions In Silent Mode
Camera shutter sound, video recording tones, alarm sound,
video/music sound, etc. play even in Silent Mode.
Basic Operations
Using Silent Mode (Vibrate)
Press Up/Down of Volume Up/Down Key
Status
SIM status
On Volume bar,
Icon changes to (White) and Silent mode (Vibrate) is
set.
・To cancel Silent mode, Press Up of Volume Up/Down Key
while Volume bar appears.
Check phone number.
Libero 2
Page 22
20
Using Silent Mode (Mute)
Press Up/Down of Volume Up/Down Key
On Volume bar, Press Down of Volume Up/Down Key
Icon changes to (Gray) and Silent mode (Mute) is set.
・To cancel Silent mode, Press Up of Volume Up/Down Key
twice while Volume bar appears.
Airplane Mode
Using Airplane Mode
Disable all functions that emit signals. Handset remains
powered on.
Drag Status Bar down using with two fingers
Quick Settings open.
Setting Silent Mode in Quick Settings
Set Silent mode option in Quick Settings.
Drag Status Bar down with two fingers Do not
disturb Total silence / Alarms only / Priority
only DONE
Total silence: Mutes incoming rintone, operation sound,
alarm, video sound, music, etc. and does not vibrate.
Alarms only: Sounds alarm, video sound, music, etc.; mutes
incoming ringtone, operation sound, etc. and does not
vibrate.
Priority only: Sounds incoming ringtone or notifications set
in Priority only allows in MORE SETTINGS .
・Camera shutter and video recording tones are not muted
regardless of the setting.
・For Quick Settings, see "Using Notifications Window/
Quick Settings."
Airplane mode
Handset is in Airplane mode.
・Use same operation again while in Airplane mode to cancel.
Page 23

21
Text Entry
Keyboards
Use onscreen keyboards for text entry. 10-key keyboard and
QWERTY keyboard are available to enter Alphabet.
・
To hide keyboard, Tap .
・Default input mode is Kana (Japanese) (10-Key Keyboard);
Tap to toggle input mode to Alphabet.
Changing to QWERTY Keyboard
While 10-key keyboard appears, Tap above the
keyboard Select QWERTY keyboard
10-Key Keyboard Layout
QWERTY Keyboard Layout
Basic Operations
Current input mode
Enter character
Change to upper case/lower case
Toggle input mode (Kana/Alphabet/Number & Symbol)
Move cursor to the left
Enter a comma (,)
Delete a character before cursor
Enter a linefeed, or fix text
Move cursor to the right
Enter a period (.)
Enter a space
Current input mode
Enter assigned character
Undo entry
Move Cursor to the left
Toggle Emoji/Symbol/Emoticon list
Toggle input mode (Kana/Alphabet/Number)
Change to upper case/lower case
Delete a character before cursor
Move cursor to the right
Enter a space
Enter a linefeed, or fix entered text
Enter a comma (,), or period (.)
Libero 2
Page 24
22
Using a Google Account
Use a Google account and get more convenience with Google
services. A Google account is required to use some services or
fully use some applications.
Google Account Cautions
Be careful not to forget your Google account ID or
password.
Creating a Google Account
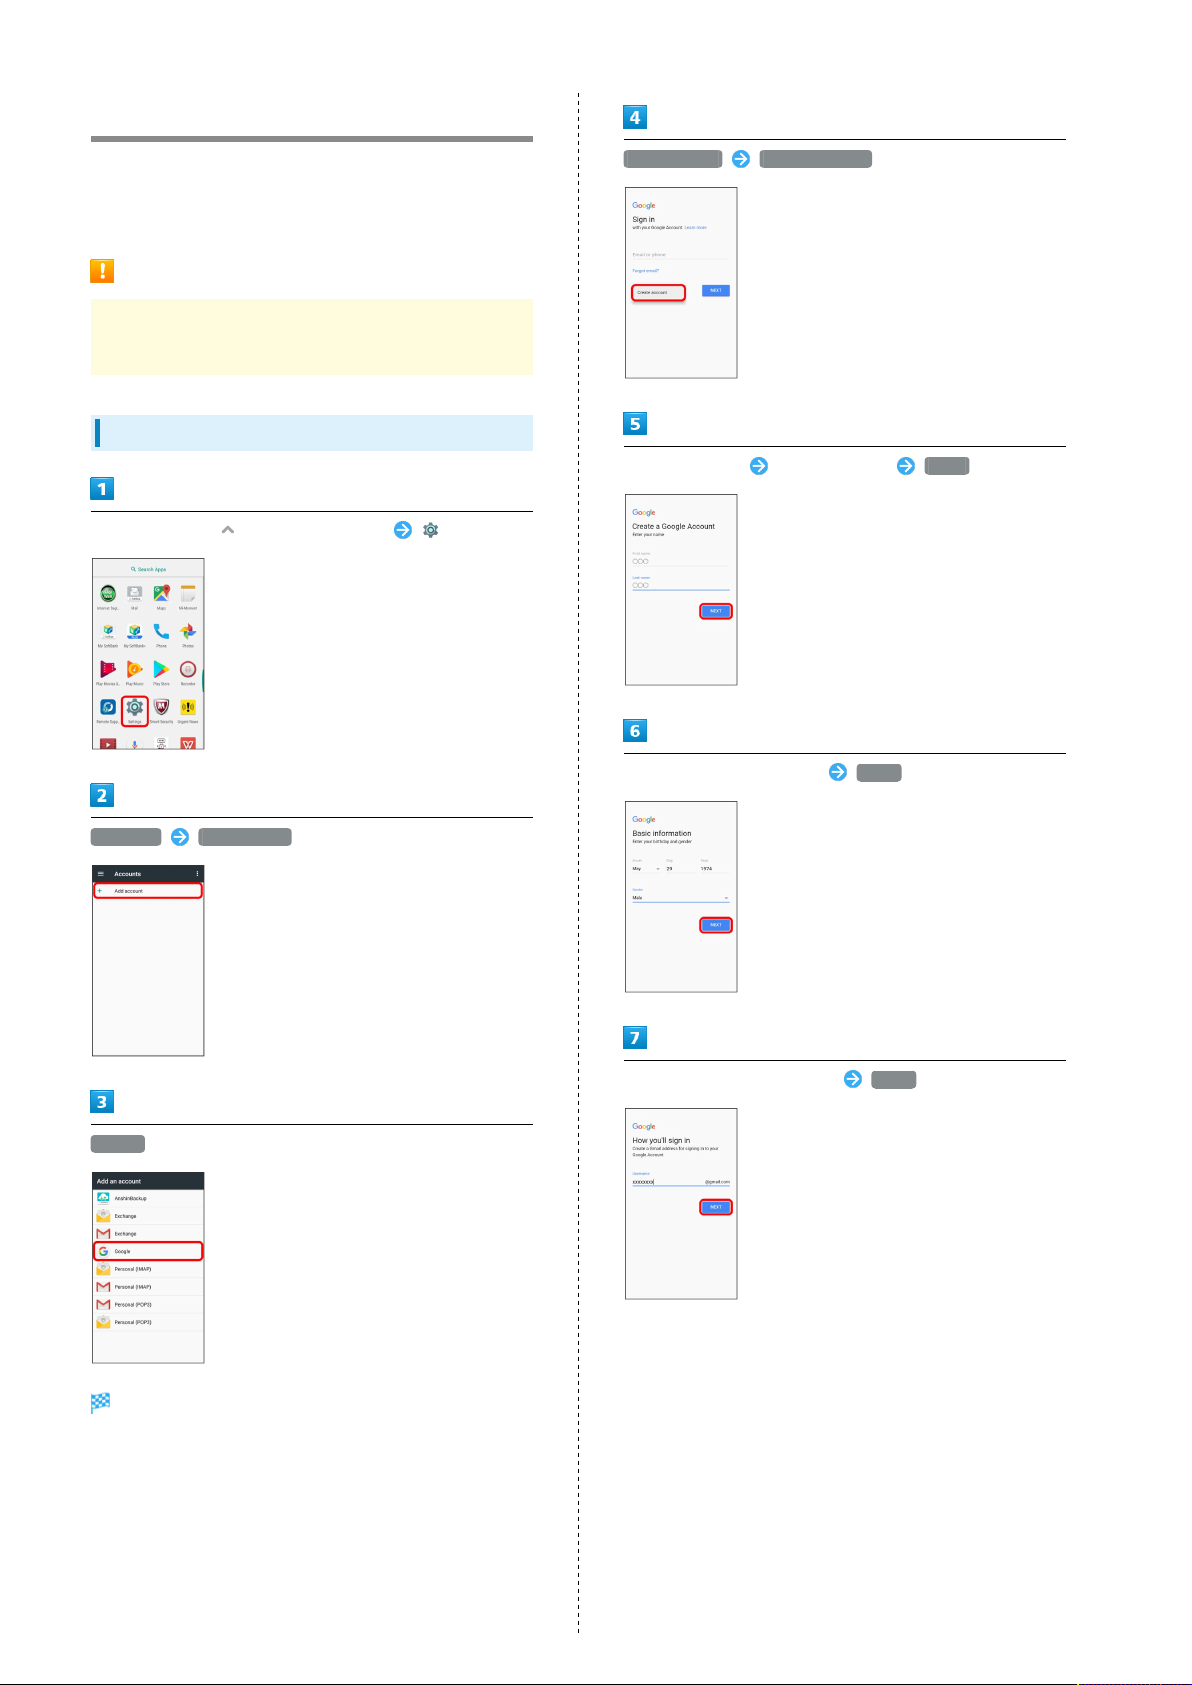
In Home Screen, (Applications List) (Settings)
More options Create account
Enter first name Enter last name NEXT
Accounts Add account
Google
Enter birth date and gender NEXT
Enter username (mail address) NEXT
・If confirmation appears, follow onscreen instructions.
Window for adding a Google account opens.
Page 25

23
Enter password Enter password again (for confirmation)
NEXT
Enter phone number for recovery NEXT
NEXT
Basic Operations
Set each item AGREE
Creating Google account is complete.
VERIFY
SMS is sent to the entered phone number.
I AGREE
Google account is created.
Libero 2
Page 26
24
Logging In with a Google Account
If an application is activated that requires a Google account,
a window for adding a Google account opens. Sign in with a
Google account you have so you can use the application.
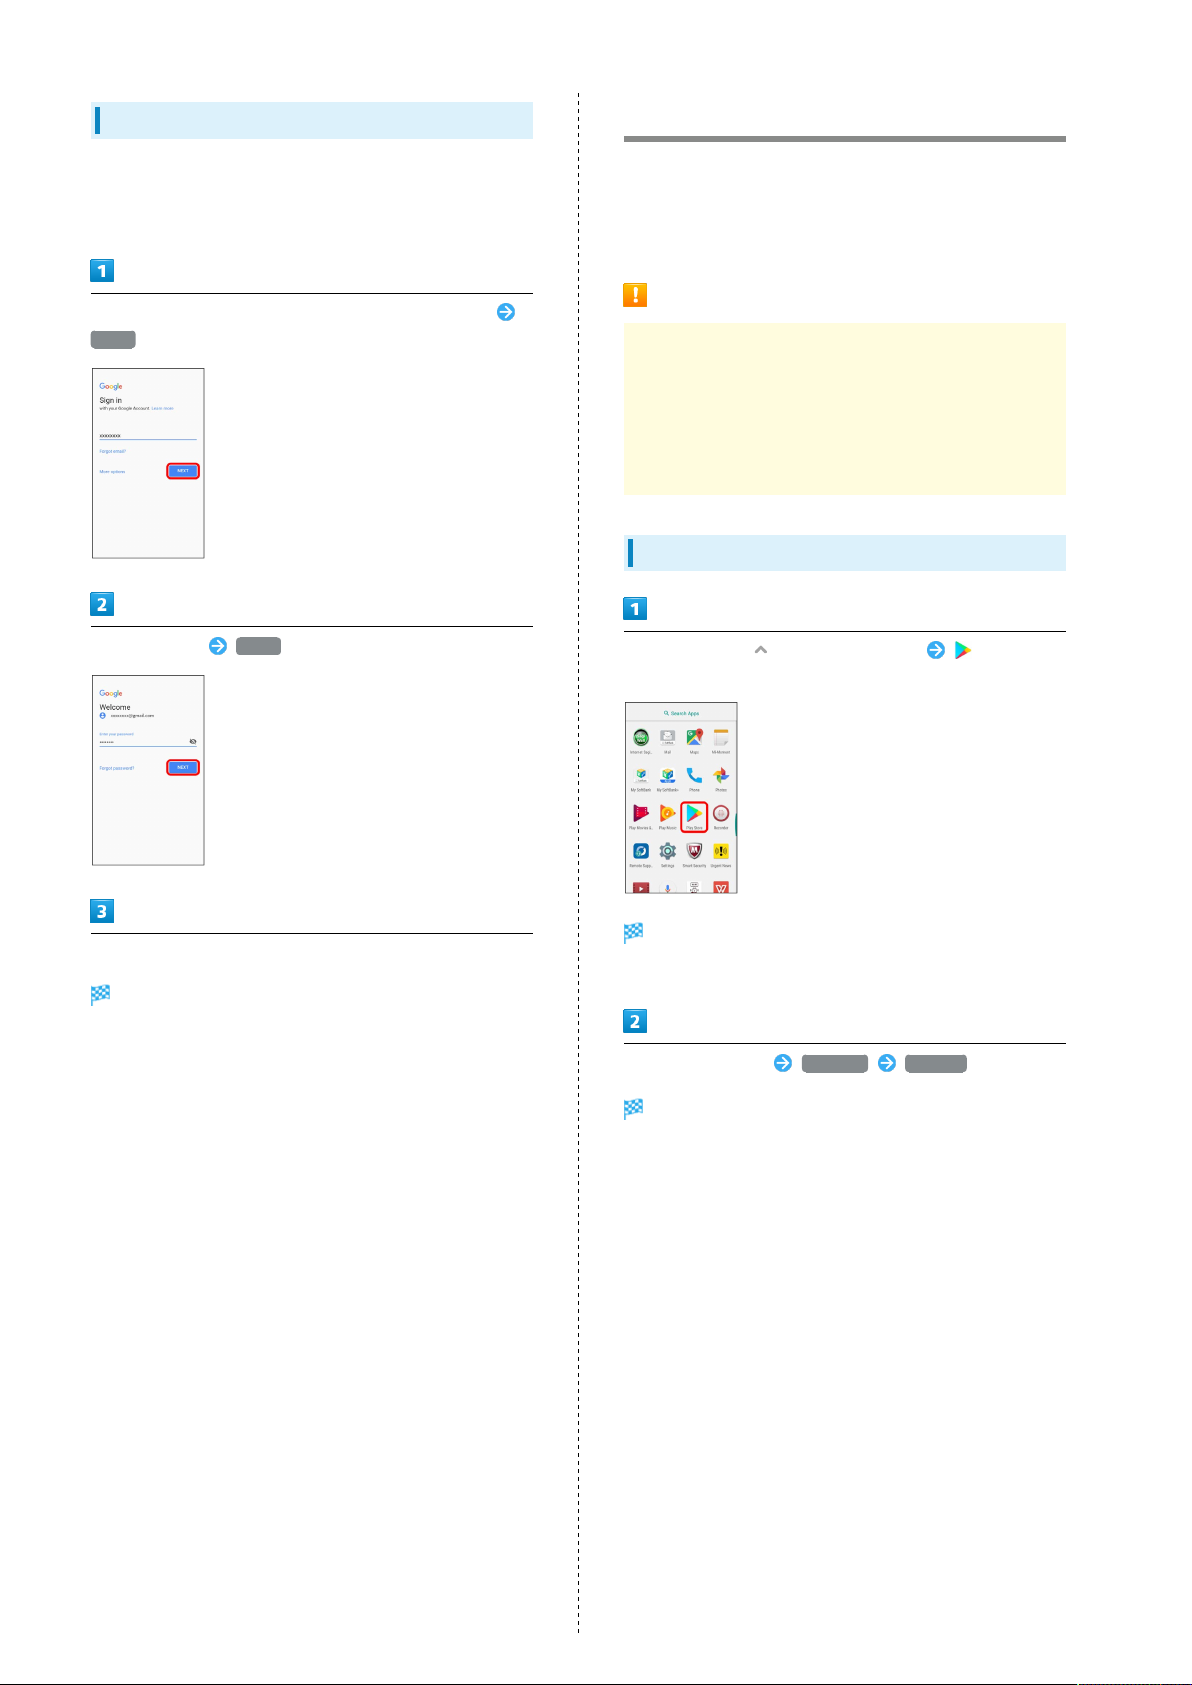
In window for adding Google account, enter mail address
NEXT
Enter password NEXT
Google Play
Download a variety of applications (free/paid) from Google
Play. Change the setting of downloaded applications to enable
manual or automatic updates. Log in to your Google account
beforehand.
Installing Applications
Many different kinds of applications can be installed
on handset from Google Play (provided by Google Inc.).
SoftBank Corp. is not responsible in any way for userinstalled applications (quality, reliability, legality, fitness
for a purpose, credibility, accuracy, etc.) or resulting
malfunctions (viruses, etc.).
Installing Free Applications
In Home Screen, (Applications List) (Play
Store)
Follow onscreen instructions
You are logged in to your Google account.
Google Play appears.
・If confirmation appears, follow onscreen instructions.
Tap free application INSTALL ACCEPT
Application is downloaded and installed.
Page 27
25
Purchasing Paid Applications
In Home Screen, (Applications List) (Play
Store)
Google Play appears.
・If confirmation appears, follow onscreen instructions.
Tap paid application Tap amount Follow onscreen
instructions
Application is downloaded and installed.
Updating Applications
In Home Screen, (Applications List) (Play
Store)
Basic Operations
Google Play appears.
・If confirmation appears, follow onscreen instructions.
My apps & games Tap application to update
UPDATE
The application is downloaded and installed.
Purchased Applications
Payment
Pay only once. Redownloads of uninstalled applications are
free of charge.
On Other Android Devices
Install an application on any Android device under the same
Google account for free.
Requesting Refunds
Refund is possible within a limited time. By requesting
a refund, the application is deleted and the charge is
cancelled. A refund request is valid only once per one
application.
In Google Play, My apps & games Tap
application REFUND
・If confirmation appears, follow onscreen instructions.
Setting Application Updates
Setting Automatic Application Updates
In Google Play, Settings Auto-update apps
Setting Automatic Update to Each Application
In Google Play, My apps & games Tap
application Auto-update ( )
・Automatic update may not be available for some
applications.
Purchasing Applications
Purchase applications at your own risk. SoftBank Corp. is
not responsible for any disadvantage resulting for user or
third parties.
Libero 2
Page 28

26
Uninstalling Applications
Applications installed from Google Play can also be
uninstalled.
In Home Screen, (Applications List) (Play
Store)
Google Play appears.
・If confirmation appears, follow onscreen instructions.
My apps & games Tap application to uninstall
UNINSTALL OK
Application is uninstalled.
Security Codes/Operation Password
Security Codes
The following are main security codes required for handset
use.
Type Description
Operation
Password
Center Access
Code
SIM PIN
PIN A code for unlocking screen.
WPS PIN A code for connecting WPS devices.
PIN Types
There are different types of PINs; SIM PIN for USIM Card,
PIN for unlocking screen and WPS PIN for connecting WPS
devices. Do not forget these codes.
A code required for using some functions.
For details, see "Operation Password and
Center Access Code."
A four-digit code set in subscription
contract. For details, see "Operation
Password and Center Access Code."
A code for USIM Card. For details, see
"SIM PIN."
How to Use Google Play
In Google Play, Help & feedback
Google Play Help window opens.
Follow onscreen instructions
A description for each item appears.
Operation Password and Center Access
Code
A Center Access Code is required for using handset. This code
is the four-digit security code at time of subscription. It is
required when using option services from a landline phone etc.
・Be careful not to forget Center Access Code. If you forget
the code, contact us for recovery. For details, contact
Customer Service.
・Be careful to keep Center Access Code confidential.
SoftBank Corp. is not responsible for damages resulting
from misuse by other parties.
Page 29

27
SIM PIN
SIM PIN is the security code for your USIM Card. It prevents
third parties from unauthorized use of handset. By default,
"9999" is set.
Enabling SIM PIN
By enabling SIM PIN, SIM PIN entry is required each time
powering on handset with the USIM Card installed.
In Home Screen, (Applications List) (Settings)
Changing SIM PIN
Changing SIM PIN is only available when SIM PIN is enabled.
In Home Screen, (Applications List) (Settings)
Basic Operations
Security
Security
Set up SIM card lock Lock SIM card Enter PIN
OK ( )
Set up SIM card lock Change SIM PIN Enter PIN
OK Enter new PIN OK Enter new PIN again
(for confirmation) OK
SIM PIN is changed.
PIN is enabled.
PIN Cautions
Entering incorrect PIN three times locks PIN. To release
locked PIN, enter PUK (Personal Unblocking Key). For
details on PUK, contact Customer Service. Entering
incorrect PUK ten times consecutively locks USIM Card to
disable handset operations. In that case, reissue of USIM
Card at a SoftBank Shop (paid service) is needed.
Libero 2
Page 30

28
Locking Screen
Display is locked after a set period of inactivity.
Alternatively, Press Power Key for manual screen lock. This
saves battery power and prevents accidental Touchscreen
operation.
Unlocking Screen
In sleep mode, Press Power Key
Lock screen appears.
Swipe up
Updating Software
Check whether updates are required via the network, and
update as required.
Before Updating Software
Saved data may be lost depending on condition of handset
(malfunctioning, damaged, water seepage, etc.). It is
recommended that you back up important data before
updating software. SoftBank Corp. is not responsible for
damages from loss of data.
Software Update Cautions
During Update
Handset cannot be used until software is updated. It may
take time to update software.
Signal during Update
Operate handset where signal reception is good and
without changing location. Also operate with adequate
battery charge. Signal becoming weak or Battery becoming
low during an update may cause an update failure. An
update failure may disable handset.
Screen is unlocked.
・The method for unlocking the screen can be changed from
Security settings.
If Using Other Functions
Other functions cannot be operated during a software
update.
Updating Software
In Home Screen, (Applications List) (Settings)
About phone
Page 31

Software Update
Software Update window opens.
Software Update Follow onscreen instructions
Software update starts.
Software Update Setting Operations
29
Basic Operations
Setting whether to Update Software
Automatically
On Software Update window, Automatic Update
Settings NOT AUTOMATICALLY UPDATE /
AUTOMATICALLY UPDATE OK
Changing Scheduled Update
On Software Update window, Update Schedule Settings
Set time OK OK
Libero 2
Page 32

30
Page 33

Handset Interface
Home Screen Basics.......................................................... 32
Status Bar......................................................................... 32
Using Notifications Window/Quick Settings.................. 33
Page 34

32
Home Screen Basics
Home Screen appears at power on; most handset operations
start here. Customize Home Screen with application shortcuts,
widgets, and folders.
Home Screen Layout
Area Description
Drag down for Notifications Window.
Status Bar
Applications
List Button
Dock
Customize
Area
Toggling Home Screen Sheets
Home Screen consists of several sheets. Customize each Home
Screen sheet with icons, widgets, etc. to make handset more
convenient. Flick Home Screen left/right to toggle sheets.
・
In any Home Screen sheet, Tap to return to Home
Screen top sheet.
Drag down using with two fingers for
Quick Settings.
Open Applications List.
Tap icon to launch application or function.
Customize with up to five application
shortcuts. Also, create folders.
Place application shortcuts, folders,
widgets freely.
Status Bar
Status Bar appears at the top of Display. Notification
Indicators for new mail, etc. and Status Indicators for handset
appear here.
Status Bar Layout
Notification Indicators
Status Indicators
Main Notification Indicators
Notification Indicators appearing in Status Bar include the
following.
Indicator Description
Launch Guide (Drag Status Bar down and
open from Notifications Window)
Missed Call
Call Arriving/In Progress/On Hold
New Text Message (SMS)/S! Mail
New Gmail
New Email
Wi-Fi Open Network Available
Sharing File via Bluetooth
Data Uploading
Data Downloading
Application Update Available
Application Installation Complete
Screenshot
Playing Music with Play Music
Calendar Event Reminder
Snoozing/Unchecked Alarm
Mounting SD Card
Software Update Notice, Downloading
Complete, Stopped
Hidden Notice
®
Page 35

33
Main Status Indicators
Status Indicators appearing in Status Bar include the
following.
Indicator Description
Battery Level
Battery Charging
Signal Strength (Strong)
Signal Strength (Weak)
No Signal
4G LTE/4G Data in Use
3G Data in Use
Airplane Mode
Wi-Fi Connected
Bluetooth® ON
Bluetooth® Device Connected
Silent Mode (Vibrate)
Silent Mode (Total Silence)
Silent Mode (Alarms Only or Priority
2
Only)
Obtaining Current Location
Alarm Set
1
2
Using Notifications Window/Quick Settings
Drag Status Bar down to open Notifications Window. Open
Notification Indicators to check details.
Drag Notifications Window down to open Quick Settings. Tap
icon to set ON/OFF of function.
Opening Notifications Window/Quick
Settings
Handset Interface
Drag Status Bar down
Notifications Window opens.
Drag Notifications Window down
1 Handset supports FDD-LTE (SoftBank 4G LTE) and
AXGP (SoftBank 4G); indicator appears when handset is
connected to either. Handset connects to SoftBank 4G
first.
2 Settable to Silent mode in Quick Settings. For Quick
Settings, see "Using Notifications Window/Quick Settings."
Quick Settings open.
・Alternatively, Drag Status Bar down with two fingers to
open Quick Settings.
Notifications Window/Quick Settings
Closing Notifications Window/Quick Settings
Drag Notifications Window/Quick Settings up
・
Alternatively, Tap to close Notifications Window/
Quick Settings.
Customizing Quick Settings
Add or delete functions to/from Quick Settings, or
rearrange the items.
In Quick Settings, Drag the icon following
onscreen instructions.
Libero 2
Page 36

34
Notifications Window Layout
Show notifications (incoming calls, etc.) and active
functions
Use notification option
Clear all notifications
1 Available functions differ depending on notification. For
example, in incoming notification, calling back and sending
SMS to incoming phone number are available.
2 Flick notifications left or right to clear one by one. Some
notifications cannot be cleared.
1
2
Quick Settings Layout
Edit quick setting item
Open Settings menu
Close Quick Settings
Adjust screen brightness
Wi-Fi ON/OFF
Cellular data setting
Silent mode ON/OFF
Auto-rotate screen
Airplane mode ON/OFF
Hotspot ON/OFF
Battery level
Bluetooth® ON/OFF
Invert colors
Data Saver ON/OFF
Page 37

Phone
Placing/Answering Calls...................................................36
Optional Services..............................................................38
Using Contacts..................................................................40
Page 38

36
Placing/Answering Calls
How to dial directly to make a call and answer a call, as well
as options when a call is arriving/during a call are described.
In Airplane Mode
Emergency calls are restricted in Airplane mode.
Phone Function
Emergency Call Location Information
If handset is used to place a call to emergency numbers
such as 110, 119, or 118, your location is automatically
reported to the emergency organization such as Police.
Location report is calculated from positioning information
provided by call accepted base station.
・This service requires no application or communication fee.
・The emergency organization may not be able to determine
your precise location due to where the call was made
or signal conditions. Be sure to give your location and
purpose of the call to the emergency organization.
・Location cannot be reported if you dial with caller ID
hidden, for example, using "184" prefix. However, the
emergency organization may obtain your location in a
life-threatening, etc. crisis.
・While using international roaming, Location report is
disabled.
VoLTE
Handset supports VoLTE for high-quality call sound.
・As of October 2017, VoLTE is not compatible with
Simple Style (Prepaid Services). For details, see SoftBank
Website.
Placing Calls
In Home Screen, (Applications List) (Phone)
Phone opens.
Adjusting Volume of Call
Press Volume Up/Down Key during call
Hints
Q. Difficulty during call
A. It may not be possible to make a call properly in a
noisy location.
A. When calling using Speaker, check the call volume.
Raising the call volume may make calling difficult.
Q. Sound pops momentarily during a call
A. Are you changing location while calling? Sound pops
when signal is weak and handset switches to a
different area.
Emergency Call Cautions
Dialpad window opens.
Tap dialpad to enter the other party's number
・Enter area code first for calling landline numbers.
Areas Where Usable
Emergency call from handset can be used within SoftBank
service area only.
Page 39

Handset dials number. Call begins when other party
answers.
37
Answering Calls
When a call arrives, Drag right to
To end call,
Call ends.
Calling Emergency Numbers When
Screen Locked
In Lock Screen, Flick screen up Tap EMERGENCY
Enter number for emergency service
・This method is available when method for unlocking
screen is a setting other than Swipe .
Call begins.
To end call,
Call ends.
Arriving Call Operations
Stopping Ringtone
Press Volume Up/Down Key when call is arriving
Rejecting Arriving Calls
Phone
Hints
Q. Call does not connect
A. Was the number dialed using the area code? Dial the
number starting with "0."
A. Are conditions for calling poor? Call again after moving
where signal is good.
Drag left to when call is arriving
Answering with Answering Machine
When call is arriving, Drag down to
Answering machine
・
To answer call while recording, Tap on recording
window.
Answering by Putting a Call on Hold
When call is arriving, Drag down to Hold
・
To answer the call, Tap on call-holding window.
Answering with Quick Reply
When call is arriving, Drag up to Select an
SMS message
Libero 2
Page 40

38
In-Call Screen Layout
During a call, Tap icons to use the following functions.
Show name/number of other party
Call using Speaker
Mute your voice to the other party
Show contact image
End call
Show call time
Show dialpad
Optional Services
Use convenient optional services.
Optional Services
Use the following optional services.
Service Description
Caller ID
Call Barring Restrict calls according to situation.
Show or hide your number when placing
calls.
Page 41

39
Using Caller ID Notification
In Home Screen, (Applications List) (Phone)
Settings Call settings
Call settings open.
Using Call Barring
Restrict calls from specified numbers.
・When attempting to place a call while calling is restricted, a
message appears. Message may take time to appear in some
areas.
・Available setting items are as follows.
Item Description
All outgoing
calls
Outgoing
international
calls
Outgoing
international
roaming calls
Stop all
outgoing calls
All incoming
calls
Incoming calls
when roaming
Stop all
incoming calls
Restrict all outgoing calls.
Restrict outgoing international calls.
Restrict outgoing international roaming
calls.
Cancel restriction for outgoing calls.
Restrict all incoming calls.
Restrict incoming calls when roaming.
Cancel restriction for incoming calls.
Phone
Additional settings
Caller ID Hide number / Show number
Caller ID is set.
In Home Screen, (Applications List) (Phone)
Settings Call settings
Call settings open.
Libero 2
Page 42

40
Using Contacts
Call barring
Tap target option
Call barring is set.
Save phone numbers, mail addresses, etc. to Contacts.
Contacts Cautions
Information saved in Contacts may be lost or changed if
handset is left uncharged. Accident or malfunction may
also cause loss or change to information. Accident or
malfunction may also cause loss or change to information.
It is recommended that you keep a separate copy of
contacts and other important information. SoftBank Corp.
is not responsible for any damages from lost or changed
contacts.
Adding New Contacts
In Home Screen, (Applications List) (Contacts)
Contacts open.
Add new contact window opens.
・If confirmation appears, follow onscreen instructions.
Page 43

Enter items (Save)
Contact is added.
41
Saving Contacts from Call Window
Save a number entered in call window directly to Contacts.
In Home Screen, (Applications List)
(Phone) Tap dialpad to enter phone number
Add to a contact
Phone
Libero 2
Page 44

42
Page 45

Messaging & Internet
Messaging.......................................................................... 44
Sending S! Mail/SMS.........................................................44
Opening & Replying to S! Mail/SMS................................ 46
Using Gmail....................................................................... 47
Using Chrome.................................................................... 49
Page 46

44
Messaging
S! Mail
Exchange messages with S! Mail-compatible SoftBank handsets
and email compatible devices (other mobiles, PCs, etc,) beyond
SMS character entry limit; attach media files.
SMS
Exchange short messages (up to 160 single-byte characters)
using handset numbers as addresses.
Gmail
Gmail is Google's webmail service. Handset automatically syncs
with Gmail.
Email
Sending S! Mail/SMS
Sending S! Mail/SMS
In Home Screen, (Applications List) (Mail)
Use email (POP3/IMAP4) on handset.
・Set up an email account beforehand.
・Sending/receiving email on handset syncs handset and
mail server; sent/received messages (in the POP protocol,
received messages only) are also accessible from PCs.
・Alternatively, enter phone numbers or email addresses in
Recipient field directly.
Phonebook / Outgoing History / Incoming History /
Mail Group
・
Tap Phonebook , Outgoing History , or Incoming
History to select recipients from Contacts, Outgoing
History, or Incoming History.
・
Tap Mail Group to select a mail group and set all the
members on the list as recipients.
Page 47

Sending S! Mail/SMS
45
Select recipients OK
・
Tap Phonebook / Outgoing History / Incoming History /
Mail Group to change recipient lists.
・
After setting recipients, Tap to check recipients'
phone numbers/email addresses or set them to Cc/Bcc.
・If recipients are set to Cc/Bcc, the mail is sent as S! Mail.
・
To delete a recipient, Tap and then .
Alternatively, Tap and then Delete recipient .
Tap Subject/text entry field Enter subject/text
S! Mail/SMS Switching
S! Mail and SMS may automatically switch at sending,
depending on whether a subject is entered, text length,
etc.
・When creating mail, check which it is sent as at top of
Display.
・"New Mail" appears: message is sent as S! Mail.
・"New SMS" appears: message is sent as SMS.
・
In Home Screen, (Applications List) (Mail)
Common Settings Tap SMS/S!Mail
Automatic Switching ( ) to allow selection between
(S! Mail) and (SMS) when creating mail.
About Drafts
If is Tapped while creating S! Mail or SMS, the
message is saved as a draft.
Drafts are saved to Draft Box in folder list, and are
indicated as in thread list. Open an S! Mail/SMS draft
to edit and send it.
Messaging & Internet
・
Tap to attach a file.
・If a subject is entered or a file is attached, the mail is sent
as S! Mail.
Send
S! Mail/SMS is sent.
・Failed S! Mail/SMS messages are saved as drafts.
Libero 2
Page 48

46
Opening & Replying to S! Mail/SMS
Handset receives S! Mail/SMS messages automatically by
default. Optionally, retrieve messages manually, and also
retrieve all messages stored on the server.
Receiving S! Mail/SMS during Roaming
To automatically receive S! Mail during roaming, Tap
More in Settings Cellular networks Data
roaming to enable data roaming ( ).
Opening New S! Mail/SMS
When message arrives, new message notification and
Notification Indicator appear.
Tap notice
Replying to S! Mail/SMS
In S! Mail/SMS message window, /
Enter text Send
Thread detail opens.
・To open new message from Notification Indicator, Drag
Status Bar down for Notifications Window, then Tap
corresponding notification.
・For two or more new messages, thread list opens.
Spam Mail
Set spam filtering to save messages from senders not in
Contacts to Spam. New mail notification does not appear.
To check messages saved to Spam thread list:
In Home Screen, (Applications List) (Mail)
Spam mail
・If confirmation appears, follow onscreen prompts.
Message is sent.
Page 49

Using Gmail
Use Google’ s mail service and your work/home email.
47
Saving as a Draft
While composing message, Save draft
Creating/Sending Gmail
In Home Screen, (Applications List) (Gmail)
Inbox opens.
Deleting Message Being Composed
In message composition window, Discard
DISCARD
Opening New Gmail
When new Gmail arrives, / appear in Status Bar.
Drag Status Bar down
Messaging & Internet
Message composition window opens.
Enter recipient/subject/text
Message is sent.
Operations when Composing Message
Notifications Window opens.
Tap new message
The new message opens.
・For two or more new messages, Inbox opens. Tap a message
to open.
Adding Cc/Bcc
In message composition window, Add recipient
Attaching Files
In message composition window, Attach file
Select file location Select file to attach
Libero 2
Page 50

48
Opening Gmail
In Home Screen, (Applications List) (Gmail)
Inbox opens.
Tap target message
Synchronizing Accounts Manually
In message list, Drag the screen down.
・Synchronize messages manually at any time regardless of
the auto-sync settings.
The message opens.
Operations when Opening Messages
Replying to Messages
In message window, Compose message
・
To reply all, in message window, Reply all .
・
Alternatively, Tap Reply / Reply all below message.
Forwarding Messages
In message window, Forward Compose
message
・
Alternatively, Tap Reply / Forward below message.
Resetting Messages as Unread
In message list, Tap icon for message to reset as unread (
)
Deleting Messages
In message list, Tap icon for message to delete ( )
Page 51

49
Using Chrome
Use the browser simply by entering search words and URLs.
TLS
TLS (Transport Layer Security) is a protocol for encrypting
sent/received data. While in a screen connected by
TLS, data is encrypted to safely send/receive private
information, credit card numbers, corporate secrets,
etc., and provide protection against online threats
(eavesdropping, falsification, impersonation, etc.).
TLS Cautions
When opening a secured page, users must decide as their
responsibility whether or not to open the page with use
of TLS. SoftBank Corp. and the Certification Authorities
Symantec Website Security G.K. and Cybertrust Japan Co.,
Ltd. make no guarantees whatsoever to users regarding
security of TLS.
Chrome Operations
My SoftBank Sign-in
In My SoftBank, check your charges or points, change
subscriptions or mail address, or set spam filtering.
In Chrome window/Web page, Bookmarks
SoftBank My SoftBank Follow onscreen
instructions
Searching within Web Page
In Web page, Find in page Enter search text
Search results are shown highlighted.
Messaging & Internet
Using Chrome
In Home Screen, (Applications List) (Chrome)
Chrome opens.
・If confirmation appears, follow onscreen instructions.
・To activate Chrome from URL in SMS or mail message, Tap
the URL and Tap Start browser .
Tap entry box at top Enter search words or URL
Search results appear or Web page opens.
Libero 2
Page 52

50
Adding Bookmarks
In Home Screen, (Applications List) (Chrome)
Chrome opens.
Show Web page to add
Opening New Tabs
Open several tabs to switch between Web pages easily.
In Home Screen, (Applications List) (Chrome)
Chrome opens.
New tab
Current Web page is added to Bookmarks.
Bookmark Operations
Editing Bookmarks
In Chrome window/Web page, Bookmarks
Touch & Hold target bookmark Edit each
item
Deleting Bookmarks
In Chrome window/Web page, Bookmarks
Touch & Hold target bookmark
New tab appears.
・
To switch tabs, Tap at top right of window, then Tap
target tab. (Number accompanied by icon indicates opened
tabs.)
Page 53

Camera
Capturing Still Images/Videos......................................... 52
Viewing Captured Still Images/Videos (Photos).............54
Page 54

52
Capturing Still Images/Videos
Capturing Still Images/Videos
File Format for Still Images
File format for still images is JPEG.
Aim Camera at subject
File Format for Videos
File format for video is MPEG-4.
Camera Cautions
If Lens Becomes Dirty
Fingerprints/smudges on lens prevent capturing of clear
still images/videos. Wipe lens with a soft cloth beforehand.
Avoiding Exposure to Direct Sunlight
Be careful not to expose lens to direct sunlight for long
periods. May discolor color filter and affect color of
images.
Camera Flash Warning
Do not shine Camera Flash close to eyes. Do not look
directly at Camera Flash when shining. Do not shine Camera
Flash at other people's eyes. May affect eyesight, etc.
Shutter clicks and still image is saved.
・To lock the focus, Tap Viewfinder.
・By default, face detection takes precedence for focusing.
・After capturing, a thumbnail image appears at top right on
Viewfinder. Tap to open the captured image.
Capturing Operations (Still Images)
Using Zoom
Pinch/Spread fingers on Viewfinder
Capturing with Volume Up/Down Key
Aim Camera at subject Confirm auto-focus on the
subject Press Volume Up/Down Key
A still image is captured.
Checking Captured Still Images
After capturing, Tap the thumbnail on upper right
(landscape) or on lower right (portrait) on Viewfinder
Flick left or right to select an image
Capturing Still Images
Captured still images are saved to handset (memory).
・SD Card can be set as saving location if inserted.
In Home Screen, (Applications List) (Camera)
Photo Viewfinder appears.
・If confirmation appears, follow onscreen instructions.
Selected still image appears.
・
To return to Viewfinder, Tap .
Switching Front Camera and Back Camera
In Viewfinder,
Page 55

53
Photo Viewfinder Layout
Switch Front Camera/Back Camera
Set Countdown timer (1s/3s/10s/20s)
Switch HDR setting
Switch Flash mode (On/Off/Auto)
Show Settings menu
Focus frame
Thumbnail of captured still image/video
Switch capturing mode
Switch Photo Viewfinder/Video Viewfinder
Shutter
Set color effect (Mono, Sepia, Lomo, Comic, Cool,
Fisheye, Mirror, Warm)
Exit from Camera
Capturing Videos
Captured videos are saved to handset (memory).
・SD Card can be set as saving location if inserted.
In Home Screen, (Applications List) (Camera)
Photo Viewfinder appears.
・If confirmation appears, follow onscreen instructions.
Camera
VIDEO
Video Viewfinder appears.
Aim Camera at subject
Video recording starts.
To stop recording,
Video recording stops and video is saved.
・
Tap to pause recording. To resume, Tap .
・After capturing, a thumbnail image appears at top right on
Viewfinder. Tap to open the captured video.
Libero 2
Page 56

54
Capturing Operations (Videos)
Using Zoom
Pinch/Spread fingers on Viewfinder
Capturing Still Image While Recording Video
Tap while recording a video
A still image is captured.
Checking Captured Videos
After capturing, Tap the thumbnail on top right
(landscape) or on bottom right (portrait) on Viewfinder
Flick left or right to select image
Video plays.
・When selecting image, Flick right the leftmost image to
return to Viewfinder.
Switching Front Camera and Back Camera
Viewing Captured Still Images/
Videos (Photos)
Showing Still Images/Videos
Show captured or downloaded still images and videos.
Supported file formats are as follows.
Type File Format
Still image BMP, JPEG, GIF, PNG, WebP
Video MPEG4, 3GP, WebM
In Home Screen, (Applications List) (Photos)
In Viewfinder,
Video Viewfinder Layout
Switch Front Camera/Back Camera
Switch Flash mode
Show Settings menu
Focus frame
Thumbnail of captured still image/video
Switch capturing mode
Switch Photo Viewfinder/Video Viewfinder
Capture start/stop
Set color effect (Mono, Sepia, Lomo, Comic, Cool,
Fisheye, Mirror, Warm)
Exit from Camera
Still image/video list opens.
・If confirmation appears, follow onscreen instructions.
・When you are signed in to Google account, image list
including backed up data appears. For operations, Tap
Help
Tap a still image/video
Still image/video opens.
・
For videos, Tap .
・Tap a still image/video to show edit icon etc.
Operations when Viewing Still Images/
Videos
Zooming In or Out on Still Image
Tap Display twice or pinch on a still image.
Page 57

Using Slideshow
In image window, Slideshow
・To end slideshow, Tap the screen.
Setting Image
In image winbdow, Use as Follow onscreen
instructions
Deleting Image
In image list, Touch & Hold image Delete
DELETE
55
Camera
Libero 2
Page 58

56
Page 59

Music
Listening to Music (Play Music)...................................... 58
Page 60

58
Listening to Music (Play Music)
Playing Music
Supported file formats are as follows.
・MP3, MP2, AAC, AAC+v1, AAC+v2, IMY, MIDI, Ogg, AMR-WB,
AMR-NB, APE, FLAC, ADPCM, WAV
In Home Screen, (Applications List) (Play
Music)
Listen Now opens.
Music library
Music Playback Screen Layout
Song title/artist/song image/Return to music list
Show song image
Play previous song/Play current song from the
beginning
Repeat all songs/Repeat one song/Normal play
Indicator
Play time
Song rating
Add to playlist, Move to ARTISTS etc.
Return to music list
Pause/Play
Play next song
Shuffle play on/off
Song length
Music library opens.
Flick left/right and select category (such as "ALBUMS")
Tap item/song to play
Song plays.
・Drag Playback Bar at bottom of Display up to open Music
Playback screen.
Page 61

59
Creating Playlists
In Home Screen, (Applications List) (Play
Music)
Listen Now opens.
for item/music to add Add to playlist
Adding Currently Playing Music to a
Playlist
In Music Playback screen, Add to playlist
Tap playlist name.
Music is added to playlist.
NEW PLAYLIST
Enter playlist name, description CREATE PLAYLIST
Music
Playlist is created.
Libero 2
Page 62

60
Page 63

Connectivity
Connecting by Wi-Fi.........................................................62
Using Bluetooth® Function.............................................. 63
Page 64

62
Connecting by Wi-Fi
Handset supports Wi-Fi (wireless LAN). Access the Internet
via a household Wi-Fi connection environment. For Wi-Fi
router (manufactured by FON) users, see "Fonルーターかんたん
設定ガイド (http://mb.softbank.jp/mb/special/network/pdf/
wifi_howto_01.pdf)" for details.
Automatic Updates for Optimizing WiFi Connection
While using Wi-Fi, updates for optimizing connection may
be received or applied automatically.
Operations when Wi-Fi Is Enabled
Scanning Access Point (Wi-Fi Network)
In Wi-Fi settings, Refresh
Checking Access Point (Wi-Fi Network) Activity
while Connected
In Wi-Fi settings, Tap access point (Wi-Fi network)
Wi-Fi
Wi-Fi settings open.
Connection activity, signal strength, link speed,
frequency, and security appear.
Setting Timing for Pausing Connection
In Wi-Fi settings, Keep Wi-Fi on during sleep
Tap setting item
Deleting Access Point (Wi-Fi network)
In Wi-Fi settings, Touch & Hold access point (Wi-Fi
network) Forget network
Selecting a Network Connection
Select a scanned access point (Wi-Fi network) and connect.
In Home Screen, (Applications List) (Settings)
Wi-Fi is enabled ( ).
・
To disable Wi-Fi, Tap ( ).
Tap access point (Wi-Fi network) Enter password
CONNECT
Handset is connected.
・The password, for a household wireless LAN router, is
sometimes found on a sticker on the router (WEP, WPA, KEY,
etc.). Contact the router manufacturer for information.
For password for a public wireless LAN, check with user's
service provider.
・Entering a password is not required if an access point (Wi-Fi
network) is not security protected.
Connecting by WPS
In Wi-Fi settings, Advanced WPS
Push Button / WPS Pin Entry Follow onscreen
instructions
Page 65

63
Disconnecting Wi-Fi
In Home Screen, (Applications List) (Settings)
Wi-Fi
Using Bluetooth® Function
Connect to a Bluetooth®-capable wireless phone, etc. for calls
or to a hands-free device such as a headset.
Hints
Q. Cannot use Bluetooth
A. Is handset in Airplane mode? Bluetooth® function turns
off when Airplane mode is set. In Airplane mode, turn
on Bluetooth® again.
Bluetooth® Function Cautions
Information may not appear correctly on both devices
depending on the transferred data.
Using Bluetooth® Function
The Bluetooth® function is a technology that enables wireless
connection with PCs, Bluetooth® devices with hands-free
device, etc.
®
Wi-Fi settings open.
Tap connected access point (Wi-Fi network) FORGET
Wi-Fi is disconnected.
・After disconnecting from an access point (Wi-Fi network),
the password may need to be entered again to reconnect.
Function Description
Audio output Listen to music, etc. wirelessly.
Hands-free
calls
Data exchange Exchange data with Bluetooth® devices.
Call hands-free, using Bluetooth®-capable
hands-free devices and headsets.
Connectivity
Libero 2
Page 66

64
Enabling Bluetooth® Function
In Home Screen, (Applications List) (Settings)
Bluetooth
Pairing Bluetooth® Devices
Search for and pair nearby Bluetooth® devices. Registered
Bluetooth® devices can be connected simply.
・Enable Bluetooth® function on the Bluetooth® devices being
paired beforehand.
In Home Screen, (Applications List) (Settings)
Bluetooth
Bluetooth® settings open.
Bluetooth® function is enabled ( ).
・
To disable Bluetooth® function, Tap ( ).
Bluetooth® settings open.
・Nearby Bluetooth® devices appear in "Available devices."
・
If a target device is not found, Tap Refresh and
search again.
Tap device Follow the onscreen instructions to accept
device
Bluetooth® device appears in Paired devices list.
・Methods for accepting differ depending on devices being
paired.
Page 67

Connecting to Paired Bluetooth® Devices
In Home Screen, (Applications List) (Settings)
Bluetooth
65
Bluetooth® settings open.
・Paired Bluetooth® devices appear in "Paired devices."
Tap device
Handset connects to Tapped device.
Cancelling Pairing
In Bluetooth® settings, for paired device
FORGET
・Settable when "Bluetooth" is enabled.
Connectivity
Libero 2
Page 68

66
Page 69

Global Services
Making Calls while Abroad.............................................. 68
Page 70

68
Making Calls while Abroad
Access "Global Service" of SoftBank website (https://
www.softbank.jp/en/mobile/service/global/) to learn service
area, rates, etc. before travelling overseas.
International Calls to Japan and Other
Countries from Abroad
In Home Screen, (Applications List) (Phone)
Phone opens.
Enter country code and then other party's phone number (omit
first "0")
・When dialing Italy (Country code: 39), do not omit first "0".
Handset dials number. Call begins when other party
answers.
Dialpad window opens.
Touch & Hold
"+" is entered.
Page 71

Calls to Landline Phones/Cell Phones in
Country of Stay
Place calls in the same way as in Japan.
・Do not enter country code or omit first "0" from city code.
In Home Screen, (Applications List) (Phone)
Phone opens.
69
Handset dials number. Call begins when other party
answers.
Dialpad window opens.
Tap dialpad to enter other party's phone number
Global Services
Libero 2
Page 72

70
Page 73

Handset Settings
Handset Settings.............................................................. 72
Wi-Fi Settings...................................................................73
Display Settings................................................................74
Notifications Settings..................................................... 74
Sound Settings..................................................................75
Apps Settings....................................................................75
Accounts Settings............................................................ 76
About Phone......................................................................77
Page 74

72
Handset Settings
Handset Settings
In Home Screen, (Applications List) Tap (Settings)
to customize operation of handset functions.
Handset settings include the following items.
Item Description
Wi-Fi Enable Wi-Fi connection.
Bluetooth Enable Bluetooth® connection.
Data usage
More…
Display Set brightness, wallpaper, etc.
Notifications Set notifications.
Sound Set ringtone, operation tones, etc.
Apps
Storage
Battery Check Battery usage.
Memory Check memory usage.
Navigation
key
Location Enable location information.
Security Set Screen lock, Encrypt phone, etc.
Accounts Create or add accounts and set sync.
Google Set Google services.
Language &
input
Backup &
reset
Date & time Set functions for date and time.
Scheduled
power on and
off
Accessibility
Printing Set Cloud Print, etc.
About phone Check handset status.
Check mobile data traffic and set limit.
Also, check Wi-Fi data traffic.
Set other functions for wireless and
networks.
Check or delete installed and running
applications.
Check handset and SD Card memory space.
Also, perform SD Card mount and erase SD
Card data.
Set functions for Navigation keys.
Set functions for language and text entry.
Back up handset information and initialize
handset.
Set handset power-on/off at specified
time.
Set Captions, Magnification gesture, or
other useful accessibility functions.
In Home Screen, (Applications List) (Settings)
Handset settings open.
Set items
Settings are made.
Page 75

Wi-Fi Settings
Wi-Fi Settings
In Home Screen, (Applications List) (Settings)
Wi-Fi
73
Tap access point (Wi-Fi network) Enter password
CONNECT
Handset is connected.
・The password, for a household wireless LAN router, is
sometimes found on a sticker on the router (WEP, WPA, KEY,
etc.). Contact the router manufacturer for information.
For password for a public wireless LAN, check with user's
service provider.
・Entering a password is not required if an access point is not
security protected.
・For details on Wi-Fi connection, see "Connecting by Wi-Fi."
Wi-Fi settings open.
Wi-Fi is enabled ( ).
・
To disable Wi-Fi, Tap ( ).
Wi-Fi Operations
Setting Notification for Open Network
In Wi-Fi settings, Network notification
・
Available when Wi-Fi is on.
・
Tap Network notification to toggle on ( )/off
( ).
Setting Timing for Pausing Connection
In Wi-Fi settings, Keep Wi-Fi on during sleep
Installing Certificates
In Wi-Fi settings, Advanced Install
certificates Follow onscreen instructions
Checking MAC Address
In Wi-Fi settings,
・MAC address appears below "MAC address."
Handset Settings
Checking IP Address
In Wi-Fi settings,
・IP address appears below "IP address."
Libero 2
Page 76

74
Display Settings
Display Settings
Set brightness, wallpaper, etc. Settable items are the
following.
Item Description
Brightness
level
Adaptive
brightness
Wallpaper
Sleep
Screen Saver Set Screen Saver.
Font size Set size of font for Display.
Display size Set size of images, icons, etc.
When device
is rotated
Set brightness of Display.
Enable adjustment of brightness for
surroundings based on set "Brightness
level."
Set Wallpaper for Home Screen or Lock
Screen.
Set a period of inactivity after which
Display turns off automatically.
Set whether to rotate Display with
handset orientation automatically.
Notifications Settings
Notifications Settings
Make settings for notifications. Settable items are the
following.
Item Description
Block all Set whether to block all notifications.
Show silently
On the lock
screen
Override Do
Not Disturb
In Home Screen, (Applications List) (Settings)
Set whether to notify without sound,
vibration or view on screen.
Set whether to show notifications on Lock
Screen.
Set whether to show notifications when
Silent mode option is set to "Priority
only."
In Home Screen, (Applications List) (Settings)
Display
Display settings open.
Notifications
Notifications settings open.
Tap application Set each item
Settings are made.
Set items
Settings are made.
Setting Notifications on Lock Screen
In Notifications settings, On the lock screen
Tap item
Page 77

75
Sound Settings
Sound Settings
Make settings for Silent mode, ringtone, operation tones, etc.
Settable items are the following.
Item Description
Media volume Set volume for music, videos, etc.
Alarm volume Set volume for alarm.
Ring volume Set volume for ringtone etc.
Also vibrate
for calls
Do not disturb
Phone
ringtone
Default
notification
ringtone
Default alarm
ringtone
Other sounds
Set vibration for ringtone.
Make advanced settings for Silent mode
option "Priority only" in Quick Settings, or
set auto-rule for Silent mode.
Set Phone ringtone.
Set notification ringtone.
Set alarm ringtone.
Enable operation tones for dialpad, screen
lock, etc.
Apps Settings
Apps Settings
Check installed applications and running applications.
In Home Screen, (Applications List) (Settings)
Apps
In Home Screen, (Applications List) (Settings)
Sound
Sound settings open.
Apps settings open.
Tap application
Application information is shown.
Apps Operations
Showing System Applications
In Apps settings, Show system
・
To hide system applications, in Apps settings,
Hide system
Resetting Apps Setting
In Apps settings, Reset app references
RESET APPS
Setting Application
Handset Settings
Set items
Settings are made.
In Apps settings, Set each item
・Set App permissions, Opening links, default app for
function, etc.
Libero 2
Page 78

76
Uninstalling Applications
Accounts Settings
In Apps settings, Tap application UNINSTALL OK
Disabling Applications
In Apps settings, Tap application DISABLE
DISABLE APP
Accounts Settings
Create/add accounts and make sync settings.
In Home Screen, (Applications List) (Settings)
Accounts
Accounts settings open.
Add account Select account to add Follow onscreen
instructions
Account is added.
Setting Applications to Sync for Each
Account
In Accounts settings, Tap type of account Tap
account to sync Tap sync item
・
Tap sync item to toggle on ( )/off ( ).
Page 79

About Phone
About Phone
Check handset status. Items that can be checked/set are the
following.
Item Description
My phone
name
Software
Update
Status Check condition of handset.
Legal
information
Model Check model number.
Android
version
Android
security patch
level
Baseband
version
Kernel version Check the kernel version.
Build number Check the build number.
Hardware
version
Check handset name.
Make settings for system update.
Check copyright information, terms of
use, etc.
Check the Android version.
Check the security patch level.
Check the baseband version.
Check the hardware version.
77
In Home Screen, (Applications List) (Settings)
About phone
Handset Settings
Check each item
Check handset information.
Libero 2
Page 80

78
Page 81

For Assistance
Specifications....................................................................80
Customer Service.............................................................. 80
Page 82

80
Specifications
Handset
Item Description
Dimensions (W
x H x D)
Weight Approx. 137 g
Continuous
Talk Time
Continuous
Standby Time
Charging Time Approx. 165 minutes
Maximum
Output
Communication
Speed
Approx. 72 x 144 x 8.7 mm
Approx. 610 minutes (3G)
Approx. 660 minutes (GSM)
Approx. 540 minutes (VoLTE)
Approx. 520 hours (3G)
Approx. 410 hours (GSM)
Approx. 370 hours (4G: AXGP)
Approx. 350 hours (4G: FDD-LTE)
1.82 W (3G: 2.1 GHz)
1.804 W (3G: 900 MHz)
1.128 W (GSM)
1.536 W (4G: AXGP)
2.26 W (4G: FDD-LTE, 2.1 GHz)
2.324 W (4G: FDD-LTE, 1.7 GHz)
2.288 W (4G: FDD-LTE, 900 MHz)
SoftBank 4G: Up to 110 Mbps (Down)/Up
to 10 Mbps (Up)
SoftBank 4G LTE: Up to 112.5 Mbps
(Down)/Up to 37.5 Mbps (Up)
3G High speed (HSUPA): Up to 5.76 Mbps
3G High speed (HSDPA): Up to 14 Mbps
ULTRA SPEED (HSPA+): Up to 21 Mbps
Customer Service
For SoftBank handset or service information, call General
Information. For repairs, call Customer Assistance.
SoftBank Customer Support
General Information
From a SoftBank handset, dial toll free at 157
From a landline/IP phone, dial toll free at 0800-919-0157
Customer Assistance (Repairs/Lost
Handsets)
From a SoftBank handset, dial toll free at 113
From a landline/IP phone, dial toll free at 0800-919-0113
If you cannot reach a toll free number, use the number
(charges apply) below for your service area:
Hokkaido Area, Tohoku Area, Hokuriku Area, Kanto &
Koshinetsu Area: 022-380-4380
Kansai Area: 06-7669-0180
Chugoku Area, Shikoku Area, Kyushu & Okinawa Area:
092-687-0010
Smartphone Technical Support Center
For Smartphone Operations
From a SoftBank handset, dial toll free at 151
From a landline/IP phone, dial toll free at 0800-1700-151
Battery (ZEBBD1)
Item Description
Voltage 3.85 V
Type Lithium-ion
Capacity 2400 mAh
SoftBank Global Call Center
From outside Japan, dial +81-92-687-0025 (toll free from
SoftBank handsets)
If handset is lost/stolen, call this number immediately
(international charges apply)
Page 83

Safety Precautions
Safety Precautions........................................................... 82
Materials............................................................................91
Important Product Information.......................................91
General Notes................................................................... 94
Page 84

82
Safety Precautions
Read safety precautions before using handset.
Observe precautions to avoid injury to self or others, or
damage to property.
Safety Precautions
These labels indicate the degree of risk from improper use.
Label Description
Great risk of death or serious injury1 from
improper use
Risk of death or serious injury1 from
improper use
Risk of minor injury2 or damage to
property3 from improper use
1 Serious injury includes: Loss of eyesight, physical injury,
physical burns (high-temperature and low-temperature),
electric shock, bone fracture, poisoning and other
conditions having side effects or requiring hospitalization
or long term treatment.
2 Minor injury includes: Physical injury, physical burns (high-
temperature and low-temperature), electric shock, and
other conditions not requiring hospitalization or long-term
treatment.
3 Damage to property includes: Extended damage to buildings
and household property and/or to pets and livestock.
These symbols indicate prohibited/compulsory actions.
Handset, USIM Card, AC Charger
(Sold Separately), Micro USB Cable
(Sold Separately), Battery (Optional
Accessory)
Do not use, store, leave in a high-temperature
or in a place where heat accumulates (near fire
or heat appliances, under kotatsu or bedding,
in direct sunlight, inside a car in the hot sun,
etc.)
May cause fire, burns, injury, electric shock, etc.
Do not put in or place nearby a microwave
oven, IH cooking heater, or high-pressure
container such as pressure cooker.
May cause fire, burns, injury, electric shock, etc.
Do not subject to or place directly on sand, soil
or mud. Do not touch with sanded hand.
May cause fire, burns, injury, electric shock, etc.
Mark Descriptions
Prohibited actions
Disassembly prohibited
Exposure to liquids prohibited
Use with wet hands prohibited
Compulsory actions
Unplug from outlet
Do not charge Battery when handset or
accessory is wet with water or other liquids
(drinking water, sweat, sea water, urine of pet,
etc.)
May cause fire, burns, injury, electric shock, etc.
Do not apply strong pressure to or break
handset. Do not hit or insert handset in
something when carrying it in a pocket.
May cause fire, burns, injury, etc. due to ignition, rupture,
heat generation, or damage by fluid leakage of Battery.
* Examples
・ Sit or squat while handset is put in a pocket of trousers
or skirt
・ Get handset caught in a door or door of car while in a
pocket of jacket
・ Stomp handset on something soft such as sofa, bed,
bedding, or on a floor
Page 85

Do not disassemble or modify.
May cause fire, burns, injury, electric shock, etc.
Do not wet with water or other liquids
(drinking water, sweat, sea water, urine of pet,
etc.).
May cause fire, burns, injury, electric shock, etc.
Do not put water or other liquids (drinking
water, sweat, sea water, urine of pet, etc.)
into Earphone Port or External Device Port.
May cause fire, burns, injury, electric shock, etc.
83
Do not drop, stomp, throw or subject to strong
force, impact, or vibration.
May cause fire, burns, injury, electric shock, etc.
Do not allow conductive object (e.g. metal part,
lead of pencil) to contact Earphone Port, or do
not allow dust to enter inside of it.
May cause fire, burns, injury, electric shock, etc.
Do not cover or wrap with bedding etc. while
using or charging.
May cause fire, burns, etc.
Use optional accessories specified by SoftBank.
Using unspecified accessories may cause fire, burns, injury,
electric shock, etc.
Stop charging if it is not complete even after
the specified charging time.
Overcharge may occur resulting in fire, burns, injury, etc.
Power off handset before entering an area
where flammable gas may be generated such as
a gas station or where dust is generated, and
stop charging.
Using in a place where flammable gas etc. is generated may
cause explosion, fire, etc.
Safety Precautions
Take the following actions if abnormal smell,
sound, smoke, heat generation, discoloration,
distortion, etc. is found while using, charging,
or storing.
・ Unplug from an outlet.
・ Power off handset.
・ Remove Battery from handset.
Failure to do the above action may cause fire, burns,
injury, electric shock, etc.
Libero 2
Page 86

84
Do not use damaged handset or related
accessories.
Handset
May cause fire, burns, injury, etc.
Do not place handset on unstable place such as
wobbly table or tilted place. Be extra careful
while the vibrator is set.
Handset or related accessories may drop resulting in injury
etc.
Do not use or store handset or related
accessories in a humid, dusty, or extremely hot
place.
May cause fire, burns, electric shock, etc.
Do not allow a child to use handset or related
accessories in improper manner. Guardians
should instruct proper use of them.
Do not puncture with a nail (or a sharp object),
hit with a hammer (or something hard), stomp,
or otherwise subject handset to excessive
force.
May cause fire, burns, injury, etc.
Improper use may cause injury etc.
Do not leave within reach of infants.
May cause accidental swallowing, injury, electric shock, etc.
Handset may become hot if used continuously
for a long time or while charging.
Take care not to touch handset for a long time
by accident such as falling asleep.
Handset, Battery or AC Charger may become hot while
using applications, call function, data communication, video
viewing for a long time, or while charging. Touching hot
part for a long time may cause redness, itching or rash
of skin, or low-temperature burns, etc. depending on your
physical condition.
Page 87

Do not light up or flash Camera Flash close
to other people's eyes. Keep a safe distance
especially from infants.
May cause impaired eyesight etc. Or may blind or frighten
people causing accidents such as injury.
85
In a hospital, follow the instructions given by
the medical facility.
Power off handset in a place where handset use is
prohibited.
Cancel setting if it includes auto-power-on function.
Radio wave of handset may affect electronic devices or
medical electronic devices.
Do not light up or flash Camera Flash toward a
driver of car etc.
May hinder driving and cause accidents etc.
Do not look at Display for a long time when it
is repeatedly blinking.
May cause spasm, loss of consciousness, etc.
Do not put water or other liquids (drinking
water, sweat, sea water, urine of pet, etc.),
metal parts, flammable objects into USIM Card
Slot or SD Card Slot.
Do not inset USIM Card or SD Card into the
wrong slot or orientation.
May cause fire, burns, injury, electric shock, etc.
Always keep handset away from your ear when
calling hands-free, sounding ringtone loudly, or
in standby mode.
Adjust sound volume adequately when playing
games, videos, or music with earphone/
microphone etc. connected to handset.
Handset sounds at high volume when calling hands-free.
Even in standby mode, sudden ringtone or alarm may sound.
Listening to sound at high volume for a long time may
cause ear disability such as hardness of hearing.
Sound at high volume hinders hearing surrounding sound
and it may cause accidents.
If you have a heart condition, take care with
the vibration and ringtone volume.
Sudden vibration or ringtone may frighten you and affect
your heart.
Do not expose Camera lens to direct sunlight
etc. for a long time.
May cause fire, burns, injury, etc. due to light-collecting of
lens.
Power off handset or set to Airplane mode
before boarding an airplane.
Use of handset on airplane is restricted; follow the
instructions given by airline company.
Cancel setting if it includes auto-power-on function.
Radio wave of handset may affect electronic devices of
airplane.
Prohibited actions while using handset on an airplane may
be punishable by law.
If you wear a medical electronic device, check
with the manufacturer or vendor on radio wave
effects before using handset.
Radio wave of handset may affect medical electronic
devices.
Power off handset near electronic devices
operating on high precision control or very
weak signals.
Radio wave of handset may cause malfunctions of medical
electronic devices.
* Take additional care near these devices:
Hearing aids, implanted pacemakers or defibrillators,
other medical electronic devices, other automatic control
devices. If you are using an implanted pacemaker or
defibrillator, or other medical electronic device, check with
the manufacturer or vendor on radio wave effects.
Safety Precautions
Libero 2
Page 88

86
If Display or Camera lens is broken, be careful
of broken glass or exposed inside of handset.
Touching broken or exposed part may cause burns, injuries,
or electric shock, etc.
Do not allow pet etc. to bite handset.
May cause fire, burns, injury, etc. due to ignition, rupture,
heat generation, or fluid leakage of Battery.
If Display is broken, do not allow the leaked
internal substance to contact your face or
hands, or clothes.
May cause injuries etc. of your eyes or skin.
If internal substance etc. gets into your eyes or mouth, or
come in contact with your skin or clothes, rinse with clean
water immediately. Also, if it gets into your eyes or mouth,
immediately consult a doctor after rinsing.
When removing Battery Cover, do not apply
unnecessary force.
Battery Cover may be broken and cause injury etc.
When attaching Battery Cover, do not get a
part of your body such as a finger caught.
May cause injury etc.
Do not use handset with Battery Cover
removed.
May cause burns, injury, electric shock, etc.
Before using handset in a car, check with the
car manufacturer or vendor on effects of radio
wave.
Handset radio wave may affect vehicle's electronic devices
depending on car type. In that case, immediately stop using
handset.
If use of handset develops skin problem,
immediately stop using and consult a doctor.
Use of handset may cause itching, rash, eczema, etc.
depending on your physical condition.
For material of each part of handset, see "Materials."
Handset has magnetic parts on Speaker and
Earpiece; make sure that no metal strip (e.g. a
blade of cutter, staple) is adhered.
Adhered metals may cause injury etc.
Page 89

Watch Display in a sufficiently bright place at
a certain distance.
Watching in a dark place or at a close distance may
deteriorate eyesight.
87
Battery (Optional Accessory)
Check the battery type with label of Battery before using or
disposing.
Label Battery Type
Li-ion 00 Lithium-ion battery
Do not allow metal object (e.g. necklace or hair
pin), conductive object, etc. to touch metal
contacts.
Do not carry or store Battery together with
them.
Metal contacts may short-circuit and cause fire, burns,
injury, etc.
Do not forcibly attach Battery to handset
if not easy to attach. Also, do not remove
Battery from handset if not easy to remove.
May cause fire, burns, injury, etc.
Do not throw in fire or apply heat.
May cause fire, burns, injury, etc.
Do not puncture with a nail (or a sharp object),
hit with a hammer (or something hard), stomp,
or otherwise subject Battery to excessive
force.
May cause fire, burns, injury, etc.
Make sure of Battery orientation when
attaching to handset.
Safety Precautions
Attaching with incorrect orientation may cause fire, burns,
injury, etc. due to ignition, rupture, heat generation, or
fluid leakage of Battery.
Libero 2
Page 90

88
If internal substance etc. of Battery gets into
your eyes, immediately rinse with clean water
without rubbing, and then consult a doctor.
Internal substance of Battery may cause loss of eyesight,
affect health, etc.
Do not allow the leaked internal substance etc.
of Battery to contact your face or hands, or
clothes.
May cause injuries etc. of your eyes or skin.
If internal substance etc. gets into your eyes or mouth, or
come in contact with your skin or clothes, rinse with clean
water immediately. Also, if it gets into your eyes or mouth,
immediately consult a doctor after rinsing.
Do not use Battery if abnormal smell, heat
generation, discoloration, distortion, etc. is
found.
May cause fire, burns, injury, etc.
If internal substance leaks from Battery or
abnormal smell is found, immediately stop using
and keep away from fire.
Leaked fluid may catch fire and may cause ignition,
rupture, etc.
Do not allow pets etc. to bite Battery.
May cause fire, burns, injury, etc. due to ignition, rupture,
heat generation, or fluid leakage of Battery.
Do not dispose of Battery with regular trash.
May cause fire, burns, injury, etc. Also, it may cause
environmental harm. When Battery is no longer used, tape
the metal contacts to insulate, and then bring it into
a sales outlet such as a SoftBank shop, or follow the
municipality instructions for recycling.
Do not use of charge wet Battery
May cause fire, burns, injury, etc.
Page 91

AC Charger (Sold Separately), Micro USB
Cable (Sold Separately)
Do not use AC Charger or Micro USB Cable if
the cord is damaged.
89
When AC Charger is connected to handset, do
not apply unnecessary force to the connection
part.
May cause fire, burns, injury, electric shock, etc.
May cause fire, burns, electric shock, etc.
Do not use AC Charger or Micro USB Cable in
humid place such as a bathroom.
May cause fire, burns, electric shock, etc.
If it thunders, do not touch AC Charger or
Micro USB Cable.
May cause electric shock.
Do not short-circuit the charging terminal
when AC Charger is plugged into an outlet.
Also, do not allow the charging terminal to
contact a part of your body such as your hand
or finger.
May cause fire, burns, electric shock, etc.
Do not touch the cord of AC Charger, Micro
USB Cable, charging terminal, or power plug
with wet hands.
May cause fire, burns, electric shock, etc.
Use AC Charger at the specified power supply
and voltage.
Also, use AC Charger for global use when
charging overseas.
Using at improper power supply or voltage may cause fire,
burns, electric shock, etc.
AC Charger: 100V AC (Household AC power outlet only)
AC Charger for global use: (Household AC power outlet
only)
Wipe off dust on the power plug.
Using with dust adhered may cause fire, burns, electric
shock, etc.
Do not put heavy objects on the cord of AC
Charger or Micro USB Cable, or pull the cord
strongly.
May cause fire, burns, electric shock, etc.
When plugging or unplugging AC Charger to or
from an outlet, do not allow metal objects such
as a metal strap to come in contact.
May cause fire, burns, electric shock, etc.
Do not use a travel converter for overseas use
when charging with AC Charger.
May cause ignition, heat generation, electric shock.
Firmly insert the power plug of AC Charger
into an outlet.
Failure to do so may cause fire, burns, electric shock, etc.
When unplugging AC Charger from an outlet,
grasp the main unit of AC Charger; do not
apply force such as pulling the cord.
Pulling the cord of AC Charger may damage the cord and
cause fire, burns, electric shock, etc.
Insert or remove the connector of AC Charger
straight to or from the port of handset; do
not apply force such as pulling the cord.
Improper inserting or removing may cause fire, burns,
injury, electric shock, etc.
Safety Precautions
Libero 2
Page 92

90
Stop using AC Charger immediately if the
charging terminal is deformed or bent. Do not
use it after bending it back.
Using with deformed charging terminal may cause fire,
burns, injury, electric shock, etc. due to short-circuit.
Unplug AC Charger from an outlet when not
used.
Leaving the power plug connected may cause fire, burns,
electric shock, etc.
If water or other liquids (drinking water,
sweat, sea water, urine of pet, etc.) is on
equipment, immediately disconnect the power
plug of AC Charger from an outlet.
Failure to do so may cause fire, burns, electric shock due
to short-circuit by the liquid.
Handset Use & Electronic Medical
Equipment
Persons with an implanted pacemaker or
defibrillator should keep handset as least 15
cm away from the device when carrying or
using.
Radio wave may adversely affect operation of medical
electronic devices.
Before using a medical electronic device other
than an implanted pacemaker or implanted
defibrillator outside a medical facility
(for home treatment etc.), check with the
manufacturer on radio wave effects.
Radio wave may adversely affect operation of medical
electronic devices.
When cleaning, disconnect the power plug from
an outlet.
Failure to do so may cause fire, burns, electric shock, etc.
Do not touch AC Charger for a long time when
it is plugged into an outlet.
May cause burns, etc.
USIM Card
Disable handset transmissions (e.g. airplane
mode) or power off handset in a situation
where you are in a crowd etc. and may get
close to others at less than 15 cm.
There may be someone who is wearing a medical electronic
device such as an implanted pacemaker or defibrillator.
Radio wave may affect operations of medical electronic
devices.
For using handset in medical facilities, follow
the instruction given by each medical facility.
Radio wave may adversely affect operation of medical
electronic devices.
When handling USIM Card, be careful of the
notch so as not hurt your fingers or other body
parts.
Notch may be sharp and may cause injury etc.
Page 93

91
Materials
Handset
Parts Material/Finishing
Exterior case
(Display)
Battery Cover
Earpiece Metal mesh/PVD high-lighted
Power Key,
Volume Up/
Down Key
Camera (Lens) Nano glass/Back side: Silkscreen printing
Camera ring Stainless steel/PVD electroplating
Touchscreen Glass/Back side: Silkscreen printing
External
Device Port
Screw Structural carbon steel/Nylok process
Speaker mesh PET
USIM Card
Slot
Panel of
Camera Flash
Antenna
sticker
Battery (ZEBBD1) (Optional Accessory)
Parts Material/Finishing
Main unit PC + ABS
Port Copper-Gold plating/Nickel plating
Wetting
detectable
sticker
Print label PET
PC+20%GF/Matte coating
PC + PET + Fiberglass/Back side:
Silkscreen printing
PC/Matte coating
Stainless steel/Burring
Copper-Nickel-Zinc alloy
PMMA
PE
Water-soluble paper/OPP film
Important Product Information
General Use
・Handset employs radio waves. Signals may be disrupted even
within service areas if you are indoors, underground, inside
a tunnel or inside a vehicle. If you move to a location with
poor signal strength, a call or video viewing may be suddenly
cut off.
・When using handset in public places, take care not to annoy
other people around you. Use of handset is prohibited in
some public places such as in theaters or on buses and
trains.
・Handset conforms to the Radio Law and the technical
standards based on the Telecommunications Business Act.
And as a certification, "Technical Compliance Mark " is
depicted on the label on Battery installation part. If the
certification is invalid due to disassembling, modification,
etc., never use handset because it violates the Radio Law
and the Telecommunications Business Act.
・Use of handset near a landline phone, TV or radio may
affect the image and sound quality of the equipment.
・Handset employs a digital system to maintain a high level
of communication quality even at very low signal levels.
However, calls may be suddenly cut off when the signal
strength becomes too weak.
・The digital system provides a high level of privacy
protection. However, the possibility of someone
eavesdropping on your conversation exists as long as radio
waves are used.
・Data stored on handset may be corrupted or lost in the
following instances:
・Handset is used improperly.
・Handset is exposed to static electricity or electric noise.
・Handset is turned off during operation.
・Battery is completely discharged.
・Handset malfunctions or is sent for repairs.
SoftBank Corp. accepts no liability whatsoever for the
corruption or loss of stored data. Be sure to keep a
separate memo of important data to limit damage caused by
data corruption or loss to a minimum.
・Be sure to charge Battery before using handset for the first
time or if handset has not been used for a long time. When
Battery is stored for a long time, it discharges over time
even if it is not used.
・When handset is used for extended periods of time,
especially in high temperature conditions, handset surface
could become hot. Keep handset touching your skin for a
long time may cause low-temperature burn.
・Prolonged use or repeatedly flashing Display or other light
may adversely affect the body. If you feel discomfort or
pain, immediately discontinue use and consult a doctor.
・This product and its accessories may be covered by Japan's
export control regulations ("Foreign Exchange and Foreign
Trade Act" and other related laws and regulations). And,
they are also under coverage of the Export Administration
Regulations of U.S. When exporting and reexporting this
product and its accessories, take necessary procedures on
your responsibility and expense.
For details, contact Ministry of Economy, Trade and
Industry of Japan or US Department of Commerce.
Safety Precautions
Libero 2
Page 94

92
・If you use a hearing aid, handset may interfere with
operations of some hearing aids. If any interference is
found, contact the manufacturer or distributor of the
hearing aid.
・Turn off handset in or near places where explosives are
handled. Handset use may lead to an explosion, or affect
explosion devices.
・Do not forget your security code for unlocking screen if
set. If you forget the security code and unlocking screen
is no longer possible, take the necessary procedures at the
nearest SoftBank shop. In that case, the contents saved or
set by user are lost.
・A variety of applications can be installed to handset from
"Google Play™" provided by Google Inc. SoftBank Corp.
makes no guarantee whatsoever with regard to the nature
(quality, reliability, legality, suitability for a purpose,
validity of information, accuracy, etc.) of these applications
that you yourself have installed, or with regard to any
problems (viruses, etc.) resulting from them.
Precautions
・Avoid exposing handset to rain, snow or high humidity.
Handset is not waterproof.
・Do not use handset in extreme temperatures, direct sunlight
and humid or dusty places.
・Do not drop handset or subject it to excessive shock.
・To clean handset, wipe it with a dry soft cloth. Do not use
alcohol, thinner, benzene or other solvents. Doing so may
cause discoloration and remove the printed logo.
・When removing Battery Cover, do not touch metal part of
USIM Card Slot. Doing so may cause handset to malfunction
due to static electricity.
・Battery is not sufficiently charged when you purchased
handset. Charge Battery before using handset.
・Do not remove Battery if handset is powered on. May cause
malfunction.
・If Battery is removed from handset for a long period of
time or left with low-battery level, the contents saved or
set by user may be lost or altered. SoftBank Corp. is not
liable for any loss arose from the data loss or alteration.
・Battery is a consumable product; it is a lithium-ion-type
battery. Available time gradually decreases by charging and
discharging repeatedly. When available time is shortened,
replace with new one.
・Do not dispose of old Battery after being replaced or
removed from handset as regular trash. Tape the terminal
of old Battery to insulate or put it into a plastic bag, and
then bring it to a SoftBank shop or recycle shop. If your
municipality collects old batteries, dispose following the
rules.
・When removing Battery, make sure to put your fingernail
into the groove of handset and lift the one side of Battery.
Forcibly removing may damage the terminals.
・Handset Display pixels may be missing or remain lit. This is
not a defect or malfunction. If Display is left on for a long
period of time, pictures may be permanently burned into it.
・Make sure a commercially available headset with microphone
is securely plugged into Earphone Port. Failing to do so may
generate noise on the other party’s phone during calls.
・Do not turn the volume up too high while using a
commercially available headset with microphone. Exposure to
high sound levels may impair hearing and prolonged use may
cause hearing damage regardless of the volume level. Sound
leakage may annoy other people and surrounding sounds may
not be heard clearly when walking, resulting in an accident.
・Grasp plug to remove a commercially available headset with
microphone. Pulling cable may cause damage or malfunction.
・When you replace handset or send it for repair, messages
and other data stored in handset cannot be transferred to
another handset.
Camera Flash
・Do not use Camera Flash in extremely hot/cold places or
high humidity. May shorten Camera Flash's usable life.
・Camera Flash use limited to its usable life. Camera Flash will
gradually dim with use.
Page 95

93
Camera
・Observe proper etiquette when using Camera.
・Do not expose Camera Lens to direct sunlight. Sunlight
concentrated through Lens may cause handset to
malfunction.
・Practice taking and previewing pictures before using Camera
on important occasions like wedding ceremonies.
・Do not commercially use or transfer pictures taken with
Camera without the permission of the copyright holder
(photographer), except for personal use.
・Do not use Camera in locations where taking photos or
recording videos is prohibited.
Urgent News (Application)
・Notification from Urgent News application is enabled by
default.
・An alert tone sounds when an alert is received, even in
Silent mode.
・Alerts are not received during calls/transmissions or in poor
signal conditions.
・Depending on usage/situation, handset may receive alerts
for other areas or no alerts.
・Standby Time may decrease when notification setting is
enabled.
・SoftBank Corp. cannot be held liable for any damages
associated with this service, including accidents resulting
from received information, reception timing or reception
failure.
Bluetooth
・Do not use handset in the following places.
‒ Near microwave ovens; magnetic field, static electricity,
or electromagnetic interference is generated
‒ Near devices which use around 2.4 GHz radio wave (radio
wave may not reach depending on environment)
・Handset wireless channel uses the same frequency bands as
the following equipment or radio stations
‒ Industrial, scientific and medical equipment
‒ Radio stations for identifying mobile units used in
manufacturing lines
‒ Premises radio stations (radio stations requiring a license)
・Notes on Using Bluetooth
To avoid radio wave interference when using Bluetooth, take
care as follows.
1. Before using handset, confirm that premises radio
stations or specified lower power radio stations for
identifying mobile units are not in use nearby.
2. In the event of handset causing radio wave interference
with a radio station for identifying mobile unit, immediately
change the frequency of handset.
3. Also, in the event of handset causing radio wave
interference with specified lower power radio stations for
identifying the mobile units, contact Customer Service.
・Frequency Band
This radio equipment uses 2.4 GHz frequency band.
FH: FH-SS modulation
XX: Other modulation
8: Maximum interference range of 80 m
®
®
Safety Precautions
Libero 2
Page 96

94
Wi-Fi (Wireless LAN)
・Use of Wi-Fi (Wireless LAN) is restricted in some countries.
Before using Wi-Fi overseas, confirm the legal regulation of
the country/region where you stay.
・Do not use Wi-Fi near magnetic devices such as
electronic appliances, AV/OA devices or in a place
where electromagnetic wave is generated. Magnetic/
electromagnetic waves may decrease the communication
speed or disable communication, or may cause noises
(especially when using a microwave oven).
・If there are multiple Wi-Fi access points nearby, handset
may not search a target access point correctly.
・Handset uses the same frequency band used by the
following equipment or radio station for the wireless
channel.
‒ Industrial, scientific and medical equipment
‒ Radio stations for identifying mobile units used in the
manufacturing lines of plants
‒ Premises radio stations (radio stations requiring a license)
・Notes on Using Wi-Fi (Wireless LAN)
To avoid radio wave interference when using Wi-Fi, take
care as follows.
1. Before using handset, confirm that premises radio
stations or specified lower power radio stations for
identifying mobile units are not in use nearby.
2. In the event of handset causing radio wave interference
with a radio station for identifying mobile unit, immediately
change the frequency of handset.
3. Also, in the event of handset causing radio wave
interference with specified lower power radio stations
for identifying the mobile units or amateur radio stations,
contact Customer Service.
・Frequency Band
This radio equipment uses 2.4 GHz frequency band.
DS: DS-SS modulation
4: Maximum interference range of 40 m
OF: OFDM modulation
4: Maximum interference range of 40 m
General Notes
Copyrights
・Copyright laws protect sounds, images, computer programs,
databases, other materials and copyright holders. Duplicated
material is limited to private use only. Use of materials
beyond this limit or without permission of copyright
holders, such as by copying (including altering data format),
modifying, transferring to anyone else, or making available
over a network, may constitute copyright infringement, and
be subject to criminal punishment. Comply with copyright
laws when making copies with handset camera or using
images captured with handset camera.
Portrait Rights
・Portrait rights protect individuals' right to refuse to be
photographed or to refuse unauthorized publication/use of
their photographs. Portrait rights consist of the right to
privacy, which is applicable to all persons, and the right
to publicity, which protects the interests of celebrities.
Therefore, photographing others including celebrities
and publicizing/distributing their photographs without
permission is illegal; use handset camera responsibly.
Page 97

95
Specific Absorption Rate (SAR) for This
Product (for Japan)
This mobile phone [Libero 2] meets Japanese technical
regulations* and international guidelines for exposure to radio
waves.
The Japanese technical regulations for exposure to radio
frequency energy established permitted levels of radio
frequency energy, based on standards developed by
independent scientific organizations through periodic and
thorough evaluation of scientific studies.
The regulation employs a unit of measurement known as the
Specific Absorption Rate, or SAR.
The SAR limit is 2 watts/kilogram (W/kg) averaged over ten
grams of tissue.
The limit includes a substantial safety margin designed to
assure the safety of all persons, regardless of age and health.
The value of the limit is equal to the value given in
international guidelines recommended by ICNIRP**, which is in
collaboration with the World Health Organization (WHO).
***
*
when
The highest SAR value for this mobile phone is 0.667 W/kg
**
when tested for use at the ear, and 1.896 W/kg
worn on the body in the below manner
****
While there may be differences between the SAR levels of
various phones and at various positions, all phones meet the
Japanese technical regulations.
Although the SAR is determined at the highest certified power
level, the actual SAR of the phone during operation can be
well below the maximum value.
Use at positions other than at the ear
****
This mobile phone may be used at positions other than at
the ear. By using an accessory such as a belt clip holster
that maintains a 0.5 cm separation with no metal (parts)
between it and the body and the mobile phone, this mobile
phone will comply with international guidelines for radio wave
protection.
*
The technical regulation is provided in Article 14-2 of the
Ministry Ordinance Regulating Radio Equipment.
**
International Commission on Non-Ionizing Radiation
Protection
***
The value is under simultaneous transmission use
conditions.
The World Health Organization has announced that "A large
number of studies have been performed over the last two
decades to assess whether mobile phones pose a potential
health risk. To date, no adverse health effects have been
established as being caused by mobile phone use."
For more information about SAR, see the following websites:
set forth by the Federal Communications Commission (FCC).
Refer to the following.
Safety Precautions
・Ministry of Internal Affairs and Communications (MIC)
http://www.tele.soumu.go.jp/e/sys/ele/body/index.htm
・Association of Radio Industries and Businesses (ARIB)
http://www.arib-emf.org/01denpa/denpa02-02.html
(Japanese)
This mobile phone [Libero 2] is confirmed to comply with
guidelines relating to effects of radio wave exposure as
Libero 2
Page 98

96
FCC RF Exposure Information
Your handset is a radio transmitter and receiver. It is
designed and manufactured not to exceed the emission limits
for exposure to radio frequency (RF) energy set by the Federal
Communications Commission of the U.S. Government.
The guidelines are based on standards that were developed
by independent scientific organization through periodic and
thorough evaluation of scientific studies. The standards
include a substantial safety margin designed to assure the
safety of all persons, regardless of age and health.
The exposure standard for wireless handsets employs a unit of
measurement known as the Specific Absorption Rate, or SAR.
The SAR limit set by the FCC is 1.6 W/kg. The tests are
performed in positions and locations (e.g. at the ear and worn
on the body) as required by the FCC for each model.
The highest SAR value for this model handset as reported
to the FCC when tested for use at the ear is 0.416 W/kg,
and when worn on the body in a holder or carry case, is
0.852 W/kg. Body-worn Operation; This device was tested
for typical body-worn operations with the handset kept
1.0 cm from the body. To maintain compliance with FCC RF
exposure requirements, use accessories that maintain a 1.0 cm
separation distance between the user's body and the handset.
The use of beltclips, holsters and similar accessories should
not contain metallic components in its assembly.
The use of accessories that do not satisfy these requirements
may not comply with FCC RF exposure requirements, and
should be avoided. The FCC has granted an Equipment
Authorization for this model handset with all reported SAR
levels evaluated as in compliance with the FCC RF emission
guidelines. SAR information on this model handset is on fi
le with the FCC and can be found under the Display Grant
section of http://www.fcc.gov/oet/ea/ after searching on FCC
ID :SRQ-602ZT.
Additional information on Specific Absorption Rates (SAR) can
be found on the FCC website at
https://www.fcc.gov/general/radio-frequency-safety-0
The World Health Organization has stated that present
scientific information does not indicate the need for any
special precautions for the use of mobile devices. They note
that if you want to reduce your exposure then you can do so
by limiting the length of calls or using a hands-free device to
keep the mobile phone away from the head and body.
World Health Organization
http://www.who.int/emf
List of Specific Absorption Rates (SAR) for radio waves by
smartphone/3G model
https://www.softbank.jp/mobile/support/sar/ (Japanese)
[FCC Compliance]
This device complies with Part 15 of the FCC Rules.
Operation is subject to the following two conditions: (1) this
device may not cause harmful interference, and (2) this device
must accept any interference received, including interference
that may cause undesired operation.
Note: This equipment has been tested and found to comply
with the limits for a Class B digital device, pursuant to part
15 of the FCC Rules. These limits are designed to provide
reasonable protection against harmful interference in a
residential installation. This equipment generates, uses and
can radiate radio frequency energy and, if not installed and
used in accordance with the instructions, may cause harmful
interference to radio communications. However, there is no
guarantee that interference will not occur in a particular
installation. If this equipment does cause harmful interference
to radio or television reception, which can be determined by
turning the equipment off and on, the user is encouraged
to try to correct the interference by one or more of the
following measures:
– Reorient or relocate the receiving antenna.
– Increase the separation between the equipment and receiver.
– Connect the equipment into an outlet on a circuit different
from that to which the receiver is connected.
– Consult the dealer or an experienced radio/TV technician for
help.
Page 99

Libero 2 User Guide Index
97
A
About Phone......................................................................77
About the User Guide........................................................ 3
Accessing Instructions on Handset................................... 3
Accounts Settings............................................................ 76
Airplane Mode................................................................... 20
Applications.......................................................................18
Apps Settings....................................................................75
B
Basic Operation.................................................................16
Battery.................................................................................7
C
Capturing Still Images/Videos......................................... 52
Charging Battery.............................................................. 12
Confirmation when First Launching Applications.......... 17
Connecting by Wi-Fi.........................................................62
Customer Service.............................................................. 80
D
Display Settings................................................................74
G
General Notes................................................................... 94
Google Play....................................................................... 24
H
Handset Settings.............................................................. 72
Home Screen Basics.......................................................... 32
I
Important Product Information.......................................91
Internal Memory and SD Card............................................9
L
Listening to Music (Play Music)...................................... 58
Locking Screen.................................................................. 28
M
Making Calls while Abroad.............................................. 68
Materials............................................................................91
Messaging.......................................................................... 44
Libero 2
Page 100

98
N
Notifications Settings......................................................74
O
Opening & Replying to S! Mail/SMS................................ 46
Optional Services..............................................................38
P
Parts & Functions.............................................................. 6
Phone Number................................................................... 19
Photos................................................................................54
Placing/Answering Calls...................................................36
Play Music......................................................................... 58
Power On/Off................................................................... 13
S
Safety Precautions........................................................... 82
Security Codes/Operation Password...............................26
Sending S! Mail/SMS.........................................................44
Silent Mode....................................................................... 19
SIM PIN.............................................................................. 27
Sound Settings..................................................................75
Specifications....................................................................80
Status Bar......................................................................... 32
T
Text Entry.........................................................................21
U
Updating Software........................................................... 28
USIM Card............................................................................ 8
Using a Google Account................................................... 22
Using Bluetooth® Function............................................. 63
Using Chrome.................................................................... 49
Using Contacts..................................................................40
Using Gmail....................................................................... 47
Using Notifications Window/Quick Settings.................. 33
Using Touchscreen............................................................ 13
V
Viewing Captured Still Images/Videos (Photos).............54
W
Wi-Fi Settings...................................................................73
 Loading...