

Page 1

ZTE I600
WiMAX MODEM
User Manual
1
Page 2

Announcement
No part of this publication may be excerpted, reproduced,
translated or utilized in any form or by any means, electronic or
mechanical, including photocopying and microfilm, without the prior
written permission of ZTE Corporation.
The manual is published by ZTE Corporation. We reserve the
right to make modifications on print errors or update specifications
without prior notice.
Edition: 1st edition, Dec. 2007
Copyright (c) 2003-2007, Jouni Malinen <j@w1.fi> and contributors
All Rights Reserved.
2
Page 3

This program is dual-licensed under both the GPL version 2 and BSD license. Either license
may be used at your option.
Redistribution and use in source and binary forms, with or without modification, are
permitted provided that the following conditions are met:
1. Redistributions of source code must retain the above copyright notice, this list of
conditions and the following disclaimer.
2. Redistributions in binary form must reproduce the above copyright notice, this list of
conditions and the following disclaimer in the documentation and/or other materials
provided with the distribution.
3. Neither the name(s) of the above-listed copyright holder(s) nor the names of its
contributors may be used to endorse or promote products derived from this software
without specific prior written permission.
THIS SOFTWARE IS PROVIDED BY THE COPYRIGHT HOLDERS AND
CONTRIBUTORS "AS IS" AND ANY EXPRESS OR IMPLIED WARRANTIES,
INCLUDING, BUT NOT LIMITED TO, THE IMPLIED WARRANTIES OF
MERCHANTABILITY AND FITNESS FOR A PARTICULAR PURPOSE ARE
DISCLAIMED. IN NO EVENT SHALL THE COPYRIGHT OWNER OR
CONTRIBUTORS BE LIABLE FOR ANY DIRECT, INDIRECT, INCIDENTAL,
SPECIAL, EXEMPLARY, OR CONSEQUENTIAL DAMAGES (INCLUDING, BUT NOT
LIMITED TO, PROCUREMENT OF SUBSTITUTE GOODS OR SERVICES; LOSS OF
USE, DATA, OR PROFITS; OR BUSINESS INTERRUPTION) HOWEVER CAUSED
AND ON ANY THEORY OF LIABILITY, WHETHER IN CONTRACT, STRICT
LIABILITY, OR TORT (INCLUDING NEGLIGENCE OR OTHERWISE) ARISING IN
ANY WAY OUT OF THE USE OF THIS SOFTWARE, EVEN IF ADVISED OF THE
POSSIBILITY OF SUCH DAMAGE.
3
Page 4

Contents
1.General Information.......................................................................................................................6
1.1 Welcome .............................................................................................................................6
1.2 Safety Precautions...............................................................................................................6
1.3 Cleaning and Maintaining...................................................................................................7
1.4 Limited Warranty................................................................................................................7
1.5 Limitation of Liability.........................................................................................................8
2.Getting Started .............................................................................................................................10
2.1 Appearance........................................................................................................................10
2.2 Parts Supplied ...................................................................................................................10
2.3 LED Indicator ...................................................................................................................10
2.4 Working Condition............................................................................................................11
2.5 Technical Parameters........................................................................................................12
2.6 ports...................................................................................................................................12
3.Connecting MODEM...................................................................................................................12
3.1 Application Structure........................................................................................................14
3.2 Hardware installation........................................................................................................14
3.2.1 Connect to LAN.............................................................................................................14
3.2.2 Connect to phone ...........................................................................................................14
3.2.3 Connect power adapter...................................................................................................14
3.2.4 Power on MODEM........................................................................................................15
4.Preparation for configuring MODEM..........................................................................................16
4.1 TCP/IP installation and configuration...............................................................................16
4.2 Checking ...........................................................................................................................17
4.2.1 Check LAN connection......................................................................................17
4.2.2 Cancel proxy server in browser........................................................................18
4.2.3 Others...................................................................................................................18
5.MODEM Manager.......................................................................................................................19
5.1 log in .................................................................................................................................19
5.2 current status.....................................................................................................................20
4
Page 5

5.3 connection details..............................................................................................................22
5.3.1 xohm wimax status.............................................................................................22
5.3.2 network information............................................................................................23
5.3.3 about my modem................................................................................................24
5.4 advanced settings ..............................................................................................................25
5.4.1 dhcp clients..........................................................................................................25
5.4.2 port forwarding.................................................................................................... 26
5.4.3 port trigger ...........................................................................................................28
5.4.4 ping.......................................................................................................................31
5.4.5 password..............................................................................................................31
6.Troubleshooting...........................................................................................................................33
Appendix Glossary..........................................................................................................................34
Index ...............................................................................................................................................35
5
Page 6

1.General Information
1.1 Welcome
Thanks for choosing the ZTE I600 WiMAX MODEM (herein after referred to as
“MODEM”). To get the most from your MODEM and to keep it in the best condition please
read this manual carefully.
The pictures, symbols and contents in this manual are for reference only. They might not be
completely identical with your MODEM. ZTE operates a policy of continuous development.
We reserve the right to update the technical specifications in this document at any time
without prior notice.
1.2 Safety Precautions
Some electronic devices may be susceptible to electromagnetic interference. Locate the
MODEM away from TV set, radio and other electronic equipment to avoid electromagnetic
interference.
The MODEM may interfere with medical devices like hearing aides and pacemakers.
Consult with a physician or the manufacturer of the medical device before using the
MODEM.
Do not use your MODEM in dangerous environments such as oil or chemical factories where
there are explosive gases or explosive products being processed.
Please use original accessories or accessories that are authorized by Sprint. Unauthorized
accessories may affect the MODEM performance, damage the MODEM or cause danger to
you.
Do not attempt to dismantle the MODEM. There are no user serviceable parts.
Do not immerse the MODEM in any liquid.
Do not place objects on top of the MODEM. This may lead to overheating of the device.
The device must be placed in ventilation environment for use.
Do not expose the MODEM to direct sunlight or store it in hot areas. High temperature can
shorten the life of electronic devices.
Do not touch the antenna while calling.
Do not allow children to play with the MODEM or charger.
Keep the length of the cable between the MODEM and the phone less than 33 feet.
The MODEM is for indoor use only. Do not use the MODEM outside. Do not connect
telephone extensions which run outside of the building. These can result in lightning damage
to your unit.
6
Page 7

This device has been tested for compliance with FCC RF Exposure (SAR) limits in the
typical laptop computer configuration. This device cannot be used with handheld PDAs
(personal digital assistants). This device and its antenna must not be co-located or operated in
conjunction with any other antenna or transmitter.
1.3 Cleaning and Maintaining
Use an antistatic cloth to clean the MODEM. Do not use chemical or abrasive cleanser as
these could damage the plastic case. Turn off your MODEM before you clean it.
Use the MODEM within the temperature range of 0°C ~55°C[32°F ~ 131°F] and the
humidity range of 10%~85%.
Do not use your MODEM during a thunderstorm. Remove the mains power pack from the
wall socket.
Please do not touch the antenna with your hand during co nversation. Covering the antenna
may affects call quality, may cause the MODEM to operate at higher power level than
needed.
1.4 Limited Warranty
This warranty does not apply to defects or errors in the Product caused by:
(a) Reasonable MODEM Appearance Disfiguration.
(b) End User’s failure to follow ZTE’s installation, operation or maintenance instructions or
procedures.
(c) End User’s mishandling, misuse, negligence, or improper installation, disassemble, storage,
servicing or operation of the Product.
(d) Modifications or repairs not made by ZTE or a ZTE-certified individual.
(e) Power failures, surges, fire, flood, accident, actions of third parties or other events outside
ZTE’s reasonable control.
(f) Usage of products of third Parties, or usage in conjunction with third party products provided
that such defects is due to the combined usage.
(g) Any other cause beyond the range of normal usage for Products. End User shal l have no right
to reject, return, or receive a refund for any Product from ZTE under the above-mentioned
situations.
This warranty is end user’s sole remedy and ZTE’s sole liability for defective or
nonconforming items, and is in lieu of all other warranties, expressed, implied or statutory,
including but not limited to the implied warranties of merchantability and fitness for a
particular purpose, unless otherwise required under the mandatory provisions of the law.
7
Page 8

1.5 Limitation of Liability
ZTE shall not be liable for any loss of profits or indirect, special, incidental or consequential
damages resulting from or arising out of or in connection with using of this product, whether
or not ZTE had been advised, knew or should have known of the possibility of such damages,
including, but not limited to lost profits, interruption of business, cost of capital, cost of
substitute facilities or product, or any downtime cost.
The servicing instructions in this notice are for use by qualified service personnel only. To
reduce the risk of electric shock, do not perform any servicing other than that contained in
the operating instructions, unless you are qualified to do so.
The shield of the coaxial cable must be connected to earth (grounded) at the entrance to the
building in accordance with applicable national electrical installation codes.
In areas of high surge events or poor grounding situations and areas prone to lightning strikes,
additional surge protection may be required(i.e.PF 11VNT3 from American Power
Conversion)on the AC, RF, Ethernet and Phone lines.
When the telephony Modem is connected to a local computer, the computer must be properly
grounded to the building/residence AC ground network. All plug-in cards within the
computer must be properly installed and grounded to the computer frame per the
manufacturer’s specifications.
Note:
This device complies with Part 15 of the FCC Rules. Operation is subject to the following two
conditions: (1) this device may not cause harmful interference, and (2) this device must accept any
interference received, including interference that may cause undesired operation.
The user is cautioned that changes or modifications not expressly approved by the grantee of
this device could void the user's authority to operate the equipment.
Class B:
FEDERAL COMMUNICATIONS COMMISSION INTERFERENCE
STATEMENT
This equipment has been tested and found to comply with the limits for a Class
B digital device, pursuant to part 15 of the FCC Rules. These limits are
designed to provide reasonable protection against harmful interference in a
residential installation. This equipment generates, uses and can radiate radio
frequency energy and, if not installed and used in accordance with the
instructions, may cause harmful interference to radio communications.
However, there is no guarantee that interference will not occur in a particular
installation. If this equipment does cause harmful interference to radio or
television reception, which can be determined by turning the equipment off and
on, the user is encouraged to try to correct the interference by one or more of
the following measures:
-Reorient or relocate the receiving antenna.
8
Page 9

-Increase the separation between the equipment and receiver.
-Connect the equipment into an outlet on a circuit different from that to which the receiver
is connected.
-Consult the dealer or an experienced radio/ TV technician for help.
CAUTION:
Any changes or modifications not expressly approved by the grantee of this device could
void the user's authority to operate the equipment.
RF exposure warning
This equipment must be installed and operated in accordance with provided instructions
and the antenna(s) used for this transmitter must be installed to provide a separation
distance of at least 20 cm from all persons and must not be co-located or operating in
conjunction with any other antenna or transmitter. End-users and installers must be
provide with antenna installation instructions and transmitter operating conditions for
satisfying RF exposure compliance.
9
Page 10
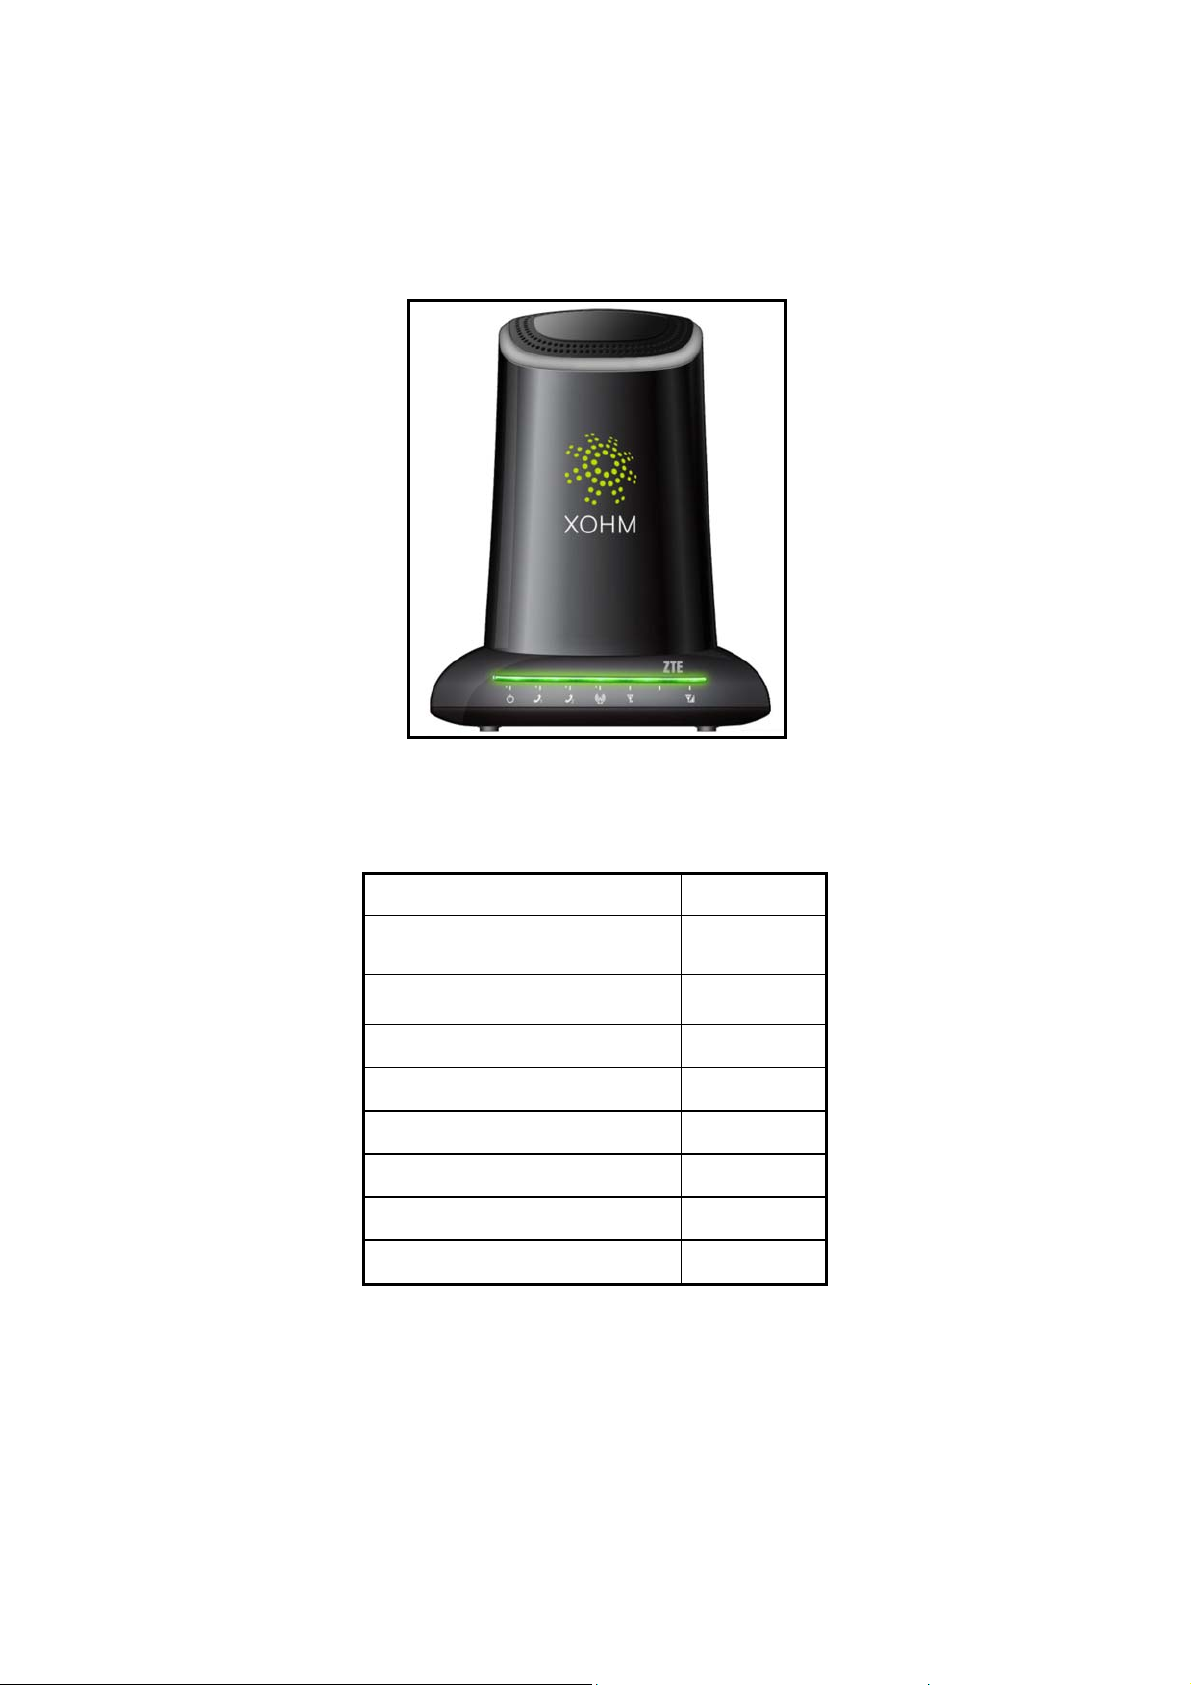
2.1 Appearance
Q
y
2.Getting Started
Front Panel
2.2 Parts Supplied
Parts
MODEM 1
Power adapter 1
RJ-45 10/100BaseT Ethernet cable 2
Remote antenna 1(optional)
CD 1
Quick Start Guide 1
Technical Legal Guide (TLG) 1
Package List 1
Please contact with your provider as soon as possible if the parts have any damage or lost. If
uantit
replacing product, please preserve the packing box and parts of the product.
2.3 LED Indicator
There are total eleven LEDs for the MODEM, detailed description as following table.
10
Page 11
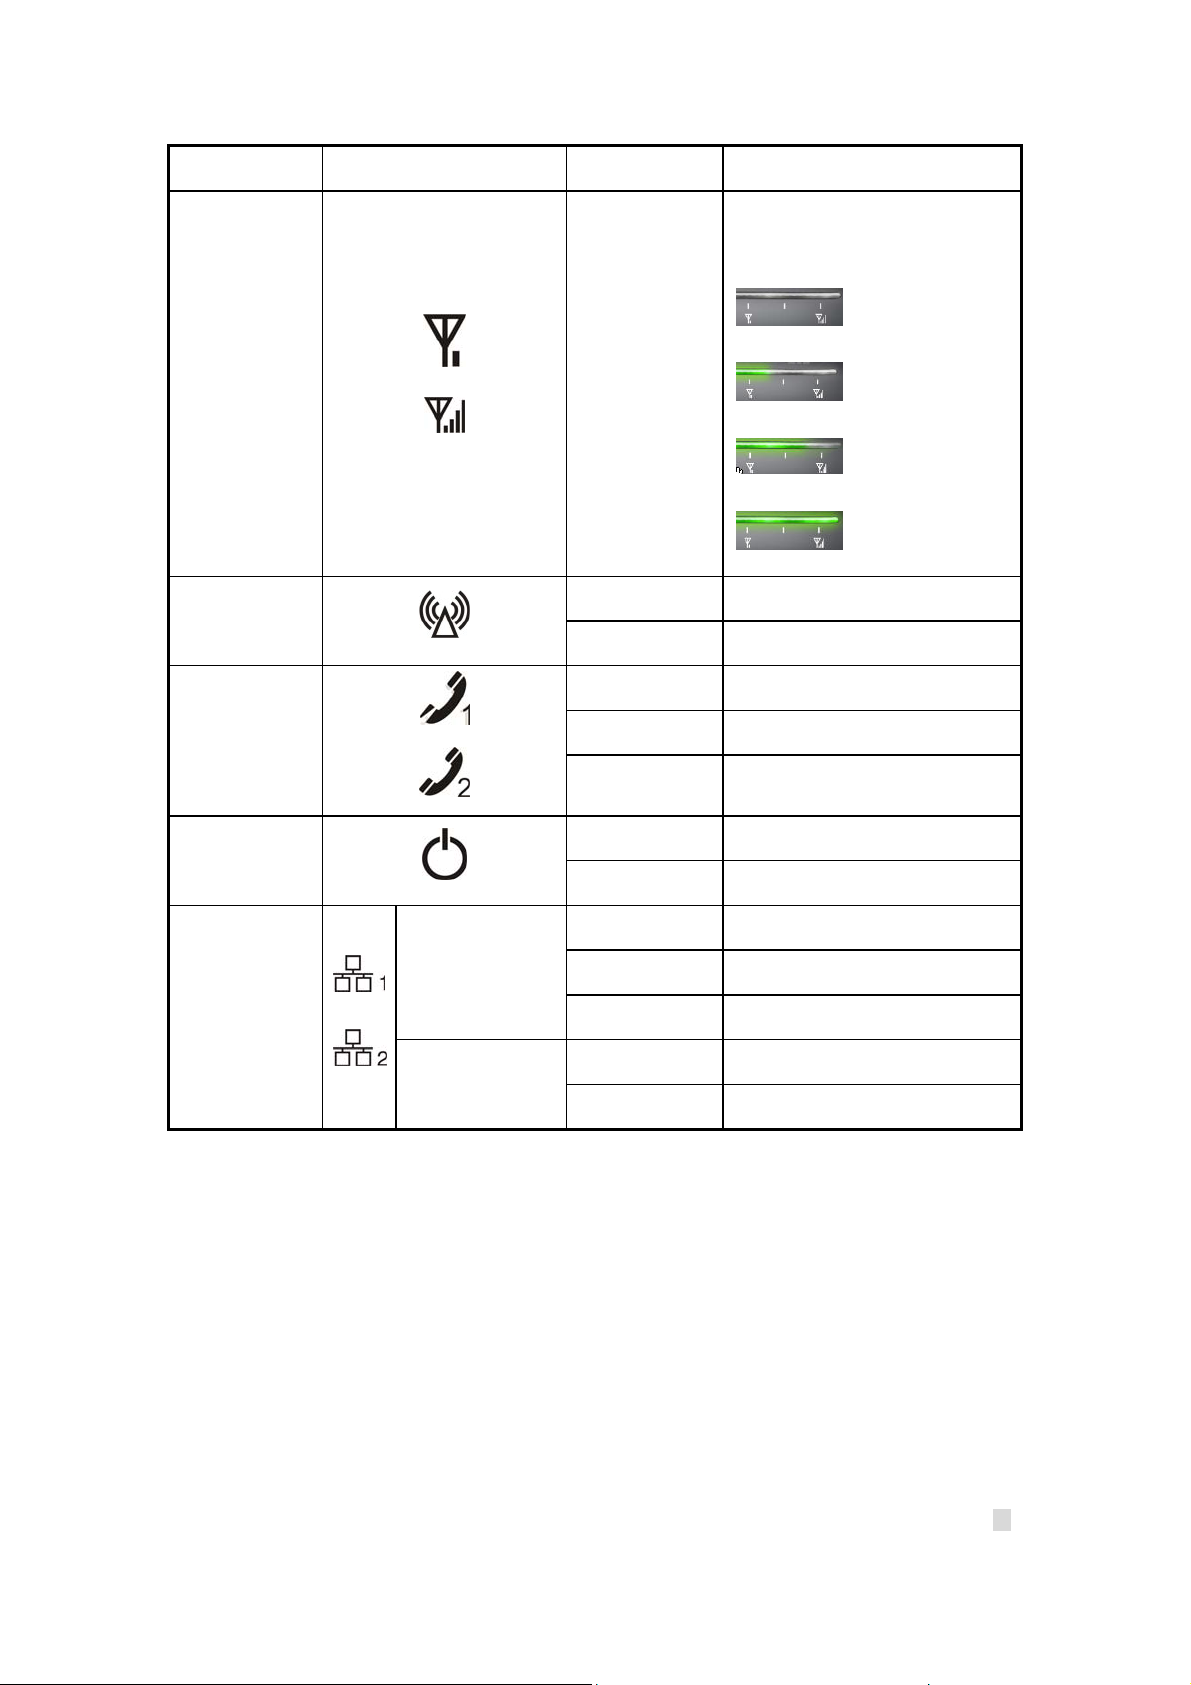
LED Marker Status Description
Use 3 LEDs to indicate signal
strength.
: No signal
WiMAX RSSI
WiMAX Status
Phone1/Phone2
Power
LAN1/LAN2
Top left corner
LED
Solid Green or
Off
Solid Green Register Success
Slow Flashing Register Process/Device Startup
Off Hook on/Out of Service
Solid Green Hook off
Flashing Green Message waiting Indicator
Solid Green Power Supply
Solid Red Power Supply Failure
Off Out of Connection
Solid Green Connection
Flashing Green Data Service Process
: Signal is weak
: Signal is medium
: Signal is strong
Top right corner
LED
Solid Yellow 100M Interface
2.4 Working Condition
Working Condition for Host
Working temperature: 0°C ~ +55°C [32°F ~ 131°F]
Working humidity: 10% ~ 85%
Storage temperature: -30°C ~ +70°C [-22°F ~ 158°F]
Storage humidity: 5% ~ 90%
Off 10M Interface
11
Page 12

2.5 Technical Parameters
Mode of Access
WiMAX Protocol 802.16e(IEEE 802.16-2005)
Frequency Range 2.496GHz-2.690GHz
Dimensions (W×H×D) 150mm×180mm×120mm
Weight 359g
Please refer to the real objects for the related parameters about the charger.
WiMAX (Worldwide Interoperability
for Microwave Access)
2.6 ports
All six ports are in back panel.
Port Indicator Description
External power socket
Phone port
LAN port
Remote antenna interface
Reset button
I600 WiMAX supply a extended antenna interface. When the signal is weak, you can
use the extended antenna interface to strengthen the signal.
12
Page 13

CAUTION:
Once you use the indoor antenna, the antenna integrated into the device will be null
and void.
Installation and removing extended antenna cable must be carried out under the
guidance of professionals.
Please contact your requirement provider to buy the extended antenna.
13
Page 14

3.Connecting MODEM
3.1 Application Structure
Network connection is shown as follows
WiMAX
Network
Phone
Legend:
Phone cable
Ethernet cable
Wireless
3.2 Hardware installation
Make sure that your modem is powered off.
3.2.1 Connect to LAN
MODEM
Computer
Laptop
Fax
Plug one end of an Ethernet network cable into LAN ports on the back of the MODEM, and plug
the other end into an Ethernet port on a network device, for example: PCs or other network
devices. The Ethernet cable can be crossover or straight.
Note:
Don’t insert phone cable into LAN ports.
3.2.2 Connect to phone
Connect phone cable to
3.2.3 Connect power adapter
Connect the included power adapter to the MODEM power port, and then plug the power adapter
into an electrical outlet. The Power LED on the front panel will light up when the adapter is
connected properly.
or port of MODEM.
14
Page 15

Note:
Make sure you use the power adapter that is supplied with the MODEM. Use of a different power
adapter could damage the MODEM.
3.2.4 Power on MODEM
Turn no the MODEM.
15
Page 16

4.Preparation for configuring MODEM
Usually, MODEM has been configured by service provider and you can use it directly. But in
some instance, you need configure MODEM by yourself.
4.1 TCP/IP installation and configuration
Installation
If TCP/IP protocol is not installed, please install it first. Please refer to installation steps in WinXp
as follows(For classic start menu):.
1. Click <Start> and select [Settings] then click <Network Connections>.
2. Double-click <Local Area Connection> and click <Properties>.
3. Click <Install...> and double-click <Protocol>.
4. Select <Internet Protocol (TCP/IP)> and click <OK>.
Configuration (For classic start menu)
1. Click <Start> and select [Settings], then click <Network Connections>.
2. Double-click <Local Area Connection> and click <Properties>.
3. Double-click <Internet Protocol(TCP/IP)> and select <Obtain an IP address
automatically>, <Obtian DNS server address automatically>.
16
Page 17

Note:
If the service provider provides DNS IP addres, please select <Use the following DNS server
addresses> and enter the specified IP address.
4.2 Checking
4.2.1 Check LAN connection
1. Click <Start> and <Run>. In the Open field, enter command. Press the Enter key or click the
<OK> button. In the command prompt, type ping 192.168.100.1 and press the Enter key.
2. If you get a reply as follows, the LAN connection is ok.
3. If you do not get a reply as follows, please check the LAN and TCP/IP configuration. Refer to
chapter 3.2 and chapter 4.1 in detail.
17
Page 18

4.2.2 Cancel proxy server in browser
For classic start menu:
1. Click <Start>, <Settings>, and <Control Panel>, Select <Internet Options>.
2. Select <Connections>.
3. Click the <LAN settings> button and remove anything that is checked
4. Click the <OK> button to go back to the previous screen.
5. Click the <OK> button to confirm cancelling proxy server in browser.
4.2.3 Others
Sometimes you also need several parameters, please ask your service provider in detail.
18
Page 19

5.MODEM Manager
5.1 log in
To access the Web-based Utility of the MODEM, launch Internet Explorer or Netscape Navigator
and enter the MODEM’s default IP address (192.168.100.1) in the address field. Press the Enter
key. A screen will appear asking you for your User name and Password (detailed as following
picture). Enter user in the Username field and 1234 in the Password field. Select the proper
language. Then click the <log in> button.
Note:
-If you forget password, please click Forgot password link.
-If you click <exit> button, you will see the following prompt message.
When you access the MODEM setup page, the first screen you see as following:
19
Page 20

This page includes six links:
Click my xohm link to access http://www.xhom.com
Click account link to access http://www.xhom.com/members/account
Click logout link to manual exit MODEM setup page. In addition, if no any operation within
5 minutes, the screen will return to log in page when you process again in the old MODEM
setup page.
Click current status and connection details link to view MODEM and network current
status.
Click advanced settings link to set MODEM.
.
.
5.2 current status
When you access the MODEM setup page, you will see the basic information.
20
Page 21

WiMAX IP Address
MODEM current WAN IP address
MODEM IP Address
MODEM setup page IP address
Phone 1
Phone number for phone 1
Phone 2
Phone number for phone 2
Show the current network signal strength and connection status. Detailed as follows:
Name Icon Description
More circles show stronger signal.
Signal strength
Connection status
Connected
No signal
MODEM accesses network successfully
21
Page 22

Disconnected
Disconnected with WiMAX network
5.3 connection details
When connection is successful, please click connection details link to enter into following page.
5.3.1 xohm wimax status
Ethernet 1
LAN port 1 property and current status
Ethernet 2
LAN port 2 property and current status
Phone 1
Phone 1 current status
Phone 2
22
Page 23

Phone 2 current status
5.3.2 network information
Click network information link to enter into following page.
WiMAX Information
Used to view WiMAX network information
WAN IP:IP address for WAN connection
BSID: Base Station ID of the Modem connected
Cell ID: Cell ID of the Modem connected
Frequency: Frequency information
Tx Bytes: Transmission flow statistic
Rx Bytes: Receiver flow statistic
Connection Duration: Setup time for connection
23
Page 24

RSSI: Receive signal strength indicator
Tx Power: Transmission power
PER: Package error ratio
CINR: Carrier to interference and noise ratio
LAN Information
Used to view LAN IP address and subnet
5.3.3 about my modem
Click about my modem link to enter into following page.
Model Name: The Model of this modem.
Software Version: Current software version of this modem.
Hardware Version: Current hardware version of this modem.
Memory: Current Memory usage percent.
CPU usage: Current CPU usage percent.
24
Page 25

5.4 advanced settings
Click advanced settings link to enter into following page.
Click Restart link to reboot your MODEM, you can not access MODEM setup page until
system rebooting finish.
Click Allow Access link, XOHM customer care will remote access your MODEM and help
you solve some problem.
Click Restore Defaults link to active factory default settings, all customer settings that you
have created (including your password) will be lost.
5.4.1 dhcp clients
Click dhcp clients link to enter into following page:
25
Page 26

MAC Address
Display the MAC address of DHCP Clients
IP Address
Display the IP address of DHCP Clients
Expired in
Show you that how many times you can still use the IP address.
5.4.2 port forwarding
This allows you to do ports mapping and forwarding for public services or other specialized
Internet applications on your network. Click port forwarding link to enter into forwarding page.
26
Page 27

—Click <add> button to add an item for this function.
—Click <modify> button to modify your configuration.
—Click <delete> button to delete the item.
The port mapping also can choose default disposition.
Enable
Enable port forwarding function
Project Name
The project name of port forwarding
Protocol
Select the protocol type
WAN Port Range
Port range for WAN connection
LAN IP
IP address in local area network
LAN Port
27
Page 28

Port number in local area network.
For example: Project name is “WiMAX”, WAN Port Range is “2030~2050”, LAN IP is
“192.168.100.2”, and LAN port is “23”. In this case, hosts at WAN side visiting LAN through
port 2030~2050 will be redirected to LAN side host’s (IP: 192.168.100.2) Telnet service.
5.4.3 port trigger
This allows you to configure the MODEM to watch outgoing data for specific port numbers. Click
port trigger link to enter into following page.
Application:
Application name for port trigger function
Triggered Range
Protocol:Display protocol of trigger connection
Start:Display starting port of trigger connection
End:Display end port of trigger connection
Forwarded Range
Protocol:Display protocol of transfer connection
28
Page 29

Start:Display starting port of transfer connection
End:Display end port of transfer connection
Status
Display current status of trigger application
Action
Active or inactive current configuration, there are two type buttons: <run> and <stop>, when you
click current button, the action changed to the other.
—Click<delete> button to delete the selected item.
—Click <reset> button to load default configuration from default database.
—Click <add> or <modify> button to enter into Port Trigger configuration page.
29
Page 30

Project Name
Configure application name for port trigger
Trigger Range
Protocol of trigger connection, three options: TCP UDP TCP/UDP
Opened
Protocol of transfer connection, protocol options: TCP UDP TCP/UDP
Start Port
Setting start port
End Port
Setting end port
ADD
ADD current configuration
Modify
Save current modified configuration
Back
30
Page 31

Return to the Port Trigger page
5.4.4 ping
The ping will check the status of a connection, Click ping link to enter into following page.
Destination
Input destination IP address or network address
For example: input destination IP 192.168.100.200, click <ping> button, the test result will be
displayed in the text box.
5.4.5 password
Click password link to enter into following page.
31
Page 32

New Password
Input new password
Confirm Password
Confirm new password
Password Tip
Input this message to help you recall the password
Note:
Click <apply> button to active the new password.
32
Page 33

6.Troubleshooting
This chapter list some problems that you might encounter while installing or using MODEM,
please read following relative information at first. If the problem still can not be solved, please
contact with distributor or service provider.
Problem Check Point
Indicator light
After power on the MODEM,
power LED is off.
After insert Ethernet cable, the
LAN indicator light is off.
Access network failure
1. Make sure power adapter is original accessories.
2. Power adapter correctly connect with MODEM and wall socket/power.
1. Make sure Ethernet cable correctly connect with computer/HUB and
MODEM.
2. Confirm computer/HUB is power on.
1. Verify the LAN connection successful.
2. Checking your TCP/IP settings.
Can not access the setup page of
the MODEM
Can not access Internet
Others
Call failure
Web page configuration lost after
restart the MODEM
Refer to Windows Help for details. Make sure Obtain IP address
automatically is selected in the settings.
3. Using Ping command to make sure that your computer is properly
connected to the MODEM. Please refer to chapter 4.2.
If still not work, please contact your service provider.
1. Please check your PC’s settings and connection according to the above
advices, ensure that your PC can access MODEM setup page.
2. If PC is configured correctly and only can access MODEM setup page,
please check your MODEM. Detailed refer to chapter 5.
If MODEM configured correctly, but still not work, please contact your
service provider.
1. Please Confirm the connectivity of telephone.
2. Make sure the telephones perfectly connect with MODEM.
If the call still is failure, please contact with your service provider.
1. Make sure you have clicked <apply> button after modify the
configuration every time.
2. If you click <apply> button, but the problem still exist, please contact
with your service provider.
33
Page 34

Appendix Glossary
DNS
Domain Name Server: it can provide the service that network node name can be translated to
network IP address in the internet.
Internet
Global network, used to exchange data, news and viewpoints within millions of computer.
IP Address
32 bit address, used to identify one computer in TCP/IP.
LAN
Used to connect some communication equipment (computer, MODEM and printer) within
one room, school or other limited region.
MAC Address
The Media Access Control (MAC) address is a unique number assigned by the
manufacturer to any Ethernet networking device, such as a network adapter, that allows the
network to identify it at the hardware level. For all practical purposes, this number is usually
permanent. Unlike IP address, which can change every time a computer log in the network, the
MAC address of a device stays the same, making it a valuable identifier for the network..
Protocol
Communication protocol: it is a rule that network equipment must follow for mutual
communicating to transfer、transmit and receive data.
TCP/IP
Transmission Control Protocol/Internet Protocol: basic communication protocol of network
communication, but TCP/IP defines one group of protocol, not only include TCP and IP.
UDP
User Data Protocol: packet exchanging communication protocol in internet, its default under
layer protocol is IP, provide simple protocol mechanism when transfer information to another
user.
WAN
Wide Area Network
WiMAX
Worldwide Interoperability for Microwave Access
34
Page 35

Index
A
about my modem............................... 2
advanced settings .............................. 23
Appearance..........................................9
Appendix Glossary............................ 32
Application Structure........................12
C
Cancel proxy server in browser......... 16
Check LAN connection..................... 15
Checking........................................... 15
Cleaning and Maintaining................... 7
Connect power adapter...................... 13
Connect to LAN................................ 12
Connect to phone .............................. 12
Limited Warranty ................................7
2
log in..................................................17
M
MODEM Manager.............................17
N
network information..........................21
O
Others ......................................4, 16, 31
P
Parts Supplied......................................9
password............................................29
ping....................................................29
port forwarding..................................24
port trigger.........................................26
Connecting MODEM........................ 12
connection details.............................. 20
current status..................................... 18
D
dhcp clients ....................................... 23
G
Getting Started .................................... 9
H
Hardware installation........................12
I
General Information............................ 6
L
LED Indicator ...................................10
Limitation of Liability......................... 8
ports...................................................11
Power on MODEM............................13
Preparation for configuring MODEM14
S
Safety Precautions...............................6
T
TCP/IP installation and configuration14
Technical Parameters.........................11
Troubleshooting.................................31
W
Welcome..............................................6
Working Condition............................10
X
xohm wimax status............................20
35
 Loading...