

Page 1
z-Q6 manual © 2000, Z-Systems Audio Engineering
The z-Q6 Six-Channel
Mastering Equalizer
Controlling Filter Parameters................................................................................................................................3
Selecting Active Channel Group...........................................................................................................................4
Controlling Master Level and Channel Offsets....................................................................................................4
Bypassing Filter Bands...........................................................................................................................................5
Bypassing the Entire EQ........................................................................................................................................ 5
Adjusting Wordwidth and Sample Rate...............................................................................................................6
Saving and Loading Presets................................................................................................................................... 7
MIDI Automation.................................................................................................................................................. 8
Specifications........................................................................................................................................................ 10
Figure 1 - z-Q6 front panel controls.....................................................................................................................2
Figure 2 - EQ control mode .................................................................................................................................. 3
Figure 3 - channel selection mode........................................................................................................................4
Figure 4 - volume control mode...........................................................................................................................4
Figure 5 - band bypass mode................................................................................................................................. 5
Figure 6 - master bypass mode..............................................................................................................................5
Figure 7 - wordwidth/sample rate mode.............................................................................................................. 6
Figure 8 - preset mode...........................................................................................................................................7
Figure 9 - confirmation of preset save.................................................................................................................. 7
Figure 10 - indication that preset has not been saved..........................................................................................8
Figure 11 – MIDI control screen........................................................................................................................... 8
Page 2

z-Q6 manual
2
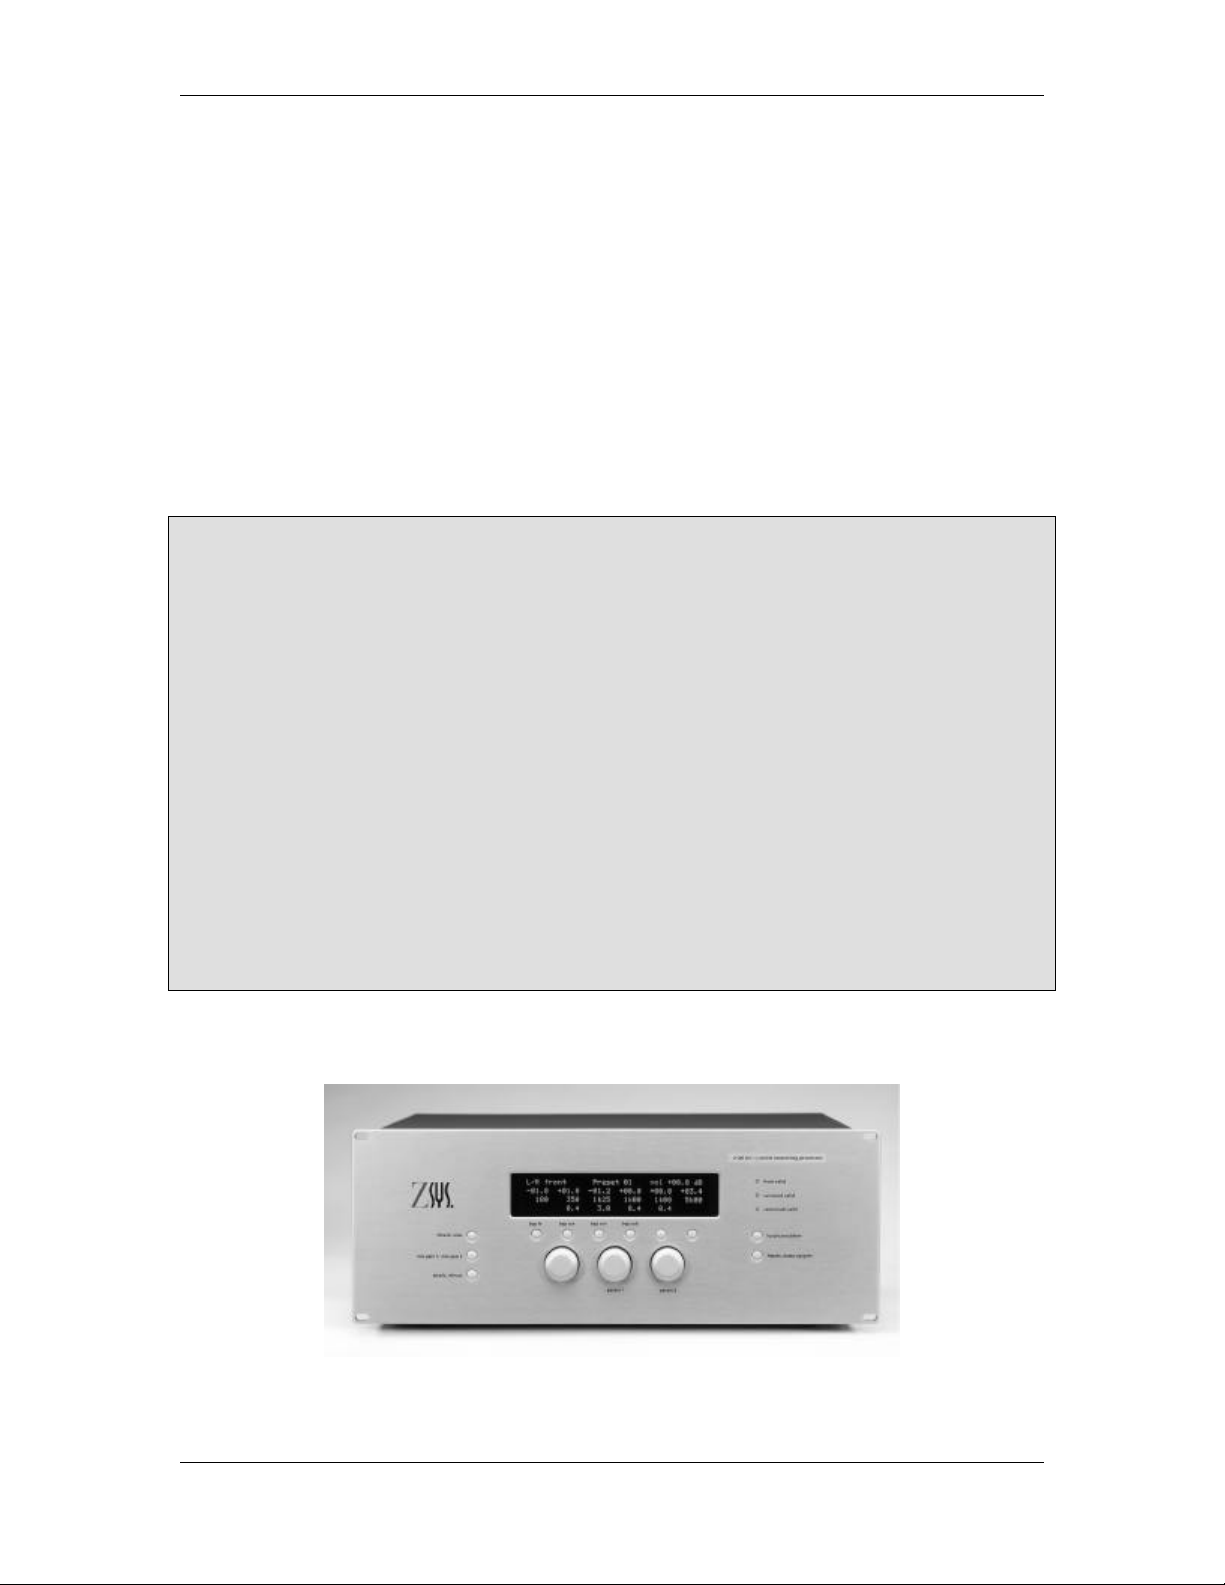
(J) channel label
left/right front
+00.0+00.0
(K) active band indicator
*0.4
+00.0+00.0
1K00
1K00 1K00
0.4
0.4
+00.0 +00.0
1K00
1K00lo1K00
0.4
hi
(D) channel select button
(E) master bypass button
(F) dither, sample rate select button
(I) band select/bypass buttons
(A) L knob
(C) R knob
(B) M knob
(G) presets screen select button
(H) EQ/volume select button
Figure 1 - z-Q6 front panel controls
Using the z-Q6 is very simple once you understand its display and control methodology. This
section gives a very brief overview of the z-Q6's controls and display, with more detailed
information to be found in the sections that follow. The standard methodology employed by the
z-Q6 is to use a button to choose an active channel group, filter band, or parameter, and then
utilize the knobs to control the desired parameter. Once you become acclimated to this style of
user interaction, all of the z-Q6's operations will appear highly intuitive and simple.
To begin, the z-Q6 partitions the channels into four groups:
• LRF – left and right front channels
• LRS – left and right surround channels
• CEN – the center channel
• SUB – the subwoofer channel
Referring to Figure 1, the channel select button (D) is used to choose which of these channel
groups is the active one. By active, we mean that the display is showing the filter parameters for
that channel and that the knobs (A, B and C) control these parameters.
The z-Q6's primary mode is the EQ control mode, where you will likely spend the most time. As
such, the z-Q6's controls have been optimized for easy operation in this mode. In EQ mode, the
band select buttons (I) choose which filter band the knobs control, as well as acting as band
bypass buttons. The master bypass button (E) allows you to bypass the entire z-Q6 without
having to patch around it.
There are other modes of operation, as well. These include volume control mode, preset selection
mode, and wordwidth/sample rate selection mode. The mode selection buttons (F, G and H)
invoke these other modes and bring up menus for controlling the associated parameters. When in
these auxiliary modes the band select buttons (I) become "soft keys" with functions indicated by
menus, and the knobs control the relevant parameters.
Page 3
z-Q6 manual
3
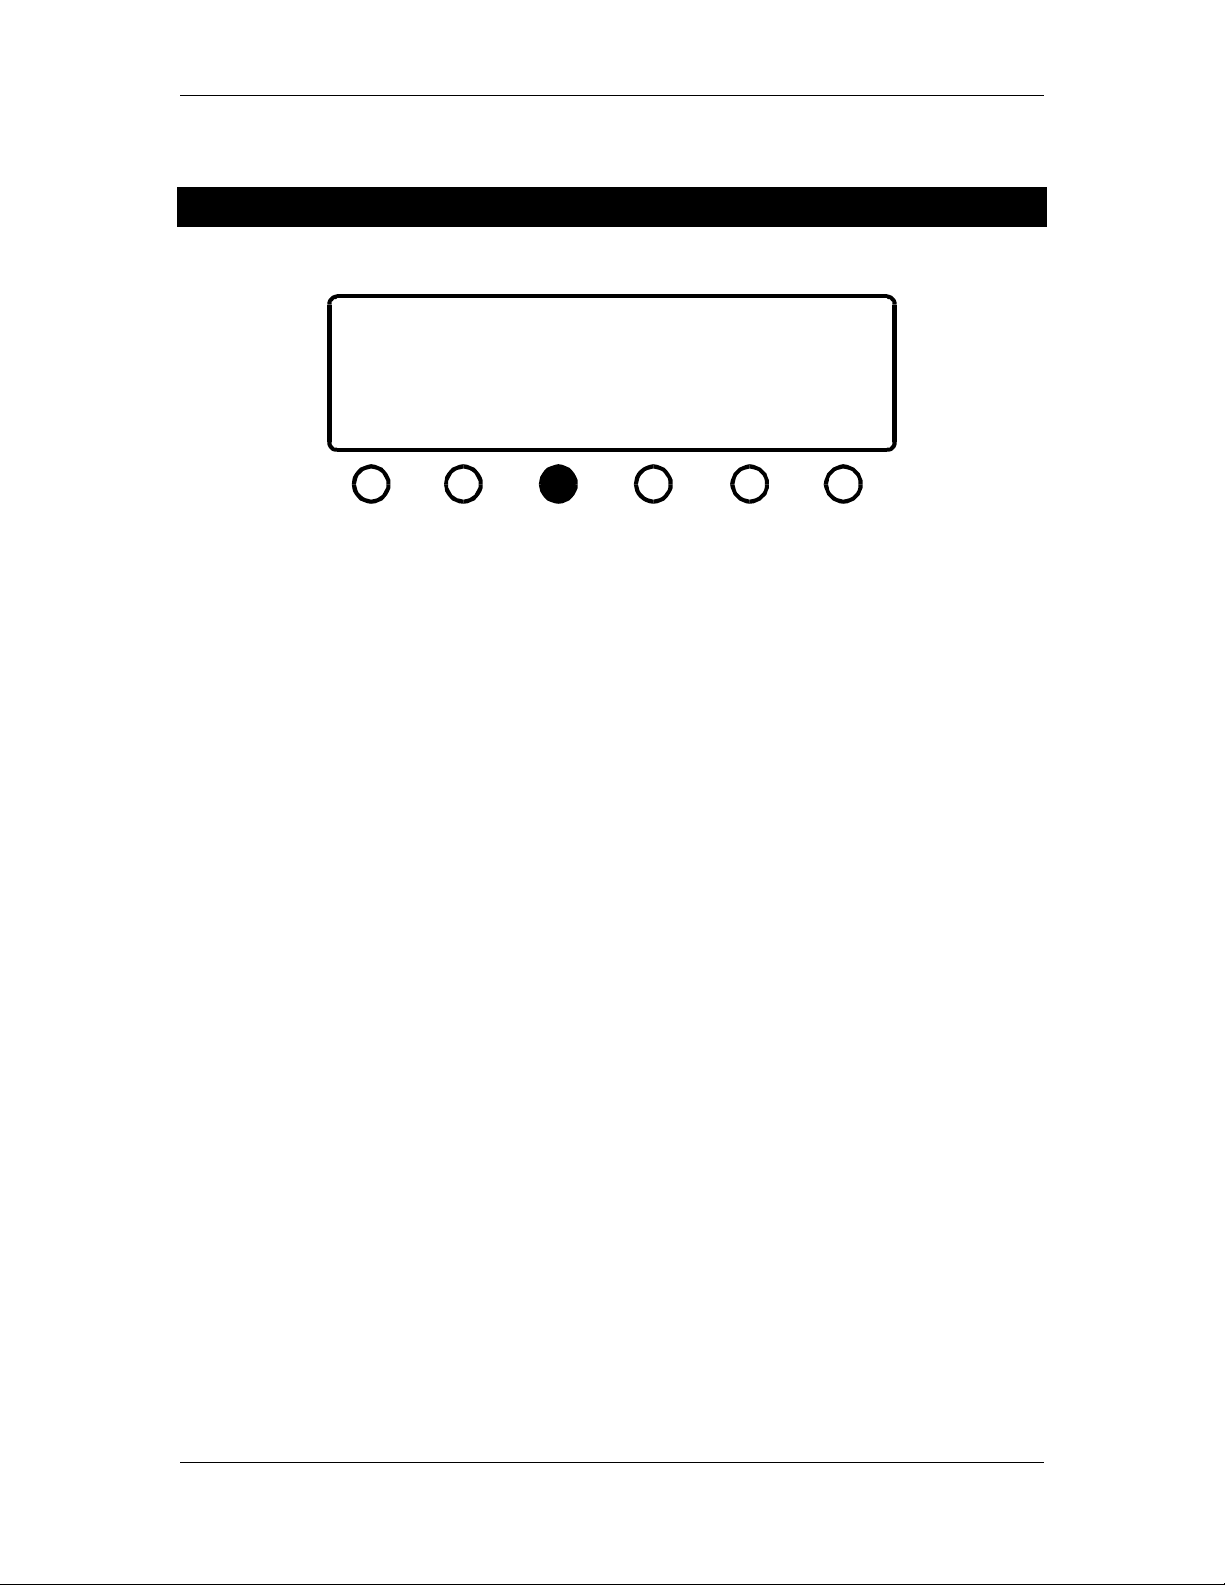
Controlling Filter Parameters
left/right front
+00.0+00.0
+00.0-02.4
+00.0 +00.0
1K00
0.4
Press the EQ/Volume select button to toggle between EQ and volume control modes The display
will appear as in Figure 2. Notice that the active channel group is indicated on the top row (we
will discuss how to change active channel groups in the next section). There are six filters for each
channel group: four bell filters and two shelving filters. Each filter, or "band" of EQ is shown as a
vertical column with the gain parameter first, the center frequency below it, and the Q last. The
shelving filters do not display a Q; instead, there is an indication of "lo" or "hi" for the low- and
high-shelving filters, respectively.
To control a band of EQ, press the band select button below the band of interest. As shown in
Figure 2, an asterisk will appear in the bottom row of that band's display to show that that
particular band is the active band. To change the parameters for the active EQ band, use the left
knob for the gain, the middle knob for the center frequency, and the right knob for Q.
It is important to note that when the gain parameter of any filter is set to +00.0 dB, that filter is
actually bypassed. That is, no math is being performed for that band by the DSP. Therefore, you
need not worry about returning the other filter parameters to a neutral state to remove that band
of EQ. This holds true for both the bell filters and the shelving filters.
1K00 3K15
0.4
*0.4
Figure 2 - EQ control mode
1K00
0.4
1K00lo1K00
hi
The z-Q6 uses a very special collection of digital filtering algorithms. These algorithms are unique
to our products and are the reason for the z-Q6's very special sound. The digital filtering
algorithms are the same minimum-round-off noise algorithms as those found in our z-Q1 twochannel equalizer, and we use the same floating-point implementation in the z-Q6 as in the z-Q1.
Our algorithms and implementations result in unrivaled measured and sonic performance.
Page 4

z-Q6 manual
4
Selecting Active Channel Group
LRSCENSUBLRF
Figure 3 - channel selection mode
The z-Q6 can not display the filter parameters for all channels at once, so it uses a "paging" mode
where the EQ parameters are displayed and controlled one channel group at a time. To change
the active channel group, press the channel select button once. The display will appear as in
Figure 3. Choose which channel group you wish to control by pressing the button below the
appropriate display. The z-Q6 will then jump back to EQ mode, with the selected channel group
as the new active channel.
Controlling Master Level and Channel Offsets
(R knob) master: -02.4
(M knob) offsets:
-02.0+00.0
LF
Press the EQ/volume select button to toggle between EQ and volume control modes. The display
will appear as in Figure 4. In volume control mode you can alter the master system level and the
level offsets of all six individual channels. These levels are all referenced to full-scale digital
(dBFS). The level of each channel will track the master level, with a relative level shift determined
by the offset.
To control the overall system level use the right knob, as prompted by the display. To control an
individual level offset, press the button below the desired channel, as shown in Figure 4. An
+00.0-02.4
+00.0 -03.0
RF LS RS *CEN SUB
Figure 4 - volume control mode
Page 5

z-Q6 manual
5
asterisk will appear by that channel name and the middle knob (as prompted by the display) then
controls the level offset for that channel.
Press any of the other mode select buttons to exit from volume mode.
Bypassing Filter Bands
left/right front
+00.0+00.0
+00.0byp
+00.0 +00.0
1K00
0.4
It is simple to audition the effect of a single band of equalization on the z-Q6. The band select
button can also be used to bypass the active band of EQ. Simply press the band select button
under the desired EQ band. As shown in Figure 5, the display will then show the word "byp" in
that band's gain display and the band will be bypassed. Press the band select button again to
return from bypass.
Important note: None of the z-Q6's controls will work until you return the band from
bypass.
1K00 3K15
0.4
0.4
Figure 5 - band bypass mode
1K00
0.4
1K00lo1K00
hi
Bypassing the Entire EQ
bypass
Figure 6 - master bypass mode
Press the master bypass button to bypass the entire z-Q6. The display will appear as in Figure 6.
In the bypass mode the input and output of the z-Q6 will be identical on all six channels. To
return from bypass mode, press the master bypass button again. The master bypass button only
functions from volume control and EQ modes.
Page 6

z-Q6 manual
6
Important note: None of the z-Q6's controls will work until you return from master bypass
mode.
Adjusting Wordwidth and Sample Rate
96.0
LRF
Press the wordwidth/sample rate button to get to the wordwidth/sample rate mode. The display
will appear as in Figure 7. As prompted by the display, the sample rates are controlled by the
middle knob and the wordwidths are controlled by the right knob. Use the button below the
indicated channel group names to select the group of interest, and an asterisk will appear to
indicate the selection.
The wordwidth for each channel group can be controlled independently. There are six settings for
each wordwidth:
24 bits dithered
24 bits undithered
20 bits dithered
20 bits undithered
16 bits dithered
16 bits undithered
16 bits POW-r #2
16 bits POW-r #3
96.0 96.0 96.0 (M knob)
16bits24dith
*LRS
Figure 7 - wordwidth/sample rate mode
CEN
24dith
(R knob)24dith
SUB
The dither used is a variant of flat TPDF dither, while POW-r #2 and #3 are noise shaping curves.
The following sample rates can be selected:
44.1 kHz
48.0 kHz
88.2 kHz
96.0 kHz
Page 7

z-Q6 manual
7
You will notice that the sample rate for the subwoofer channel can not be controlled directly.
This is because the center and subwoofer channels are on the same AES/EBU pair and thus must
have the same sample rate. We have, therefore, chosen to lock the sample rate indicators for the
center and subwoofer channels together. As you change the center channel's sample rate, the
subwoofer channel's sample rate changes along with it.
Press any of the other mode select buttons to exit from the wordwidth/sample rate mode.
Saving and Loading Presets
The entire state of the z-Q6 can be saved and recalled. Press the presets button once. This will
bring the z-Q6 to the state shown in Figure 8. To save a preset, use the middle knob (as
prompted by the display) to choose a preset number then press the button beneath the SAVE
indication. This will then bring the z-Q6 to the state shown in Figure 9, which confirms that the
SAVE operation took place.
(L knob) (R knob)
preset #21
LOAD
(L knob) (R knob)
preset #21 saved
LOAD
SAVE READDUMP
Figure 8 - preset mode
SAVE READDUMP
Figure 9 - confirmation of preset save
MIDI #12
MIDI #12
There is one special preset that can not be over-written. This preset is given number 00 and stores
the z-Q6's "flat" settings. This is the preset you will want to use in order to return the z-Q6 to a
"blank" setting. If you attempt to over-write preset 00, the display will appear as in Figure 10,
which tells you that the preset was not saved and that you should choose another preset number.
Page 8

z-Q6 manual
8
(L knob) (R knob)
preset #00 not saved
MIDI #12
LOAD
Figure 10 - indication that preset has not been saved
SAVE READDUMP
To recall a preset, from the screen in Figure 8 press the button beneath the LOAD indication. The
preset indicated in the display will be loaded and the z-Q6 will jump to either EQ mode or volume
control mode as appropriate.
MIDI Automation
The z-Q6 can be automated via MIDI commands; it supports MIDI program change commands
and also uses system exclusive commands to allow the unit’s entire collection of presets to be sent
to and restored from a MIDI sequencer.
The z-Q6’s MIDI controls are on the same screen as the preset LOAD and SAVE screen. Simply
press the presets button once, which brings the z-Q6 to the state shown in Figure 11.
(L knob) (R knob)
preset #21
MIDI #12
LOAD
SAVE READDUMP
Figure 11 – MIDI control screen
To set a MIDI channel number, use the right knob, as prompted by the screen. This sets the
MIDI channel the z-Q6 will use for both its MIDI program change commands and for system
exclusive messages.
To save all 50 of the z-Q6’s presets, put your MIDI sequencer into record mode with the channel
set to the z-Q6’s MIDI channel. Press the button below the DUMP message on the screen. You
will see the preset counter on the left part of the z-Q6’s screen count backwards from 50 down to
01. This lets you know that the z-Q6 is sending its entire bank of presets, one at a time, to the
MIDI sequencer via MIDI system exclusive commands. When the system exclusive dump is
finished, the z-Q6 will return to the preset number that was displayed before the DUMP
command was executed.
Page 9

z-Q6 manual
9
To retrieve a collection of 50 presets from a MIDI sequencer, again make sure you have the z-Q6’s
MIDI channel number set to the same channel as the MIDI sequencer. Press the button below the
READ message and then begin to play the MIDI system exclusive stream from your MIDI
sequencer. The preset counter will again count backwards, letting you know that the z-Q6 is
indeed receiving and decoding the system exclusive commands. When the z-Q6 has decoded the
last preset from the MIDI sequencer, it will jump to EQ mode and will be ready for either normal
user input via the knobs and buttons or for MIDI program change commands.
To execute MIDI program change commands, simply make sure the MIDI sequencer is set to the
same MIDI channel as the z-Q6 and begin sending program change commands. The z-Q6 will
jump to the preset number indicated by the program change, with the display updated to show
the parameter changes. If an invalid program number is sent to the z-Q6, it will be ignored.
Page 10

z-Q6 manual
10
Specifications
• Inputs: 3 AES/EBU (transformer-isolated, 110-ohm terminated),
• Outputs: 3 AES/EBU (transformer-isolated, 110-ohm terminated),
• Input/output precision: up to 24-bits
• Gain control: from -95 dB to +12 dB
• Gain resolution: 0.2 dB increments from +12 dB to -12 dB, 1 dB increments from -12 dB to -
20 dB, 2 dB increments from -20 dB to -50 dB, 3 dB increments from -50 dB to -70 dB, 5 dB
increments from -70 dB to -95 dB
• Filter types: 4 parametric, 2 shelving x 6 channels
• Center frequency resolution: 1/6-th octave ISO from 28 Hz to 18 kHz
• Filter gain/cut: from -95 dB to +12.0 dB
• Filter bandwidths: 12 steps from Q = 0.4 to Q = 8.0 (nominal)
• Shelf filter slopes: 6 dB/octave
• Dither types: 24-bit, 20-bit and 16-bit proprietary floating-point techniques
• Noise shaping types: POW-r curves #2 and #3
• Digital filter architecture: proprietary minimum roundoff-noise structure
• Dynamic range: better than 144 dB
• THD+N: better than -135 dB
• Processor type: TMS320C31 32-bit floating-point DSP (x3)
• Processor performance: 80 MFLOPS (x3)
• Digital audio demodulator/modulator: Crystal Semiconductor CS8414/CS8404 (x3)
• Digital audio signal transformers: Scientific Conversions SC916-01
• Sample rates supported: 44.1 kHz, 48.0 kHz, 88.2 kHz, 96 kHz
• Auxiliary-bit status handling: unit is transparent to channel status, validity, and auxiliary bits
• Number of presets: 50
• Power supply: 110/220VAC, 50/60Hz
 Loading...