

Zotac ZBox EN1070 Quick Start Manual
QUICK START GUIDE
1
2
3
1
2
1
2
3
4
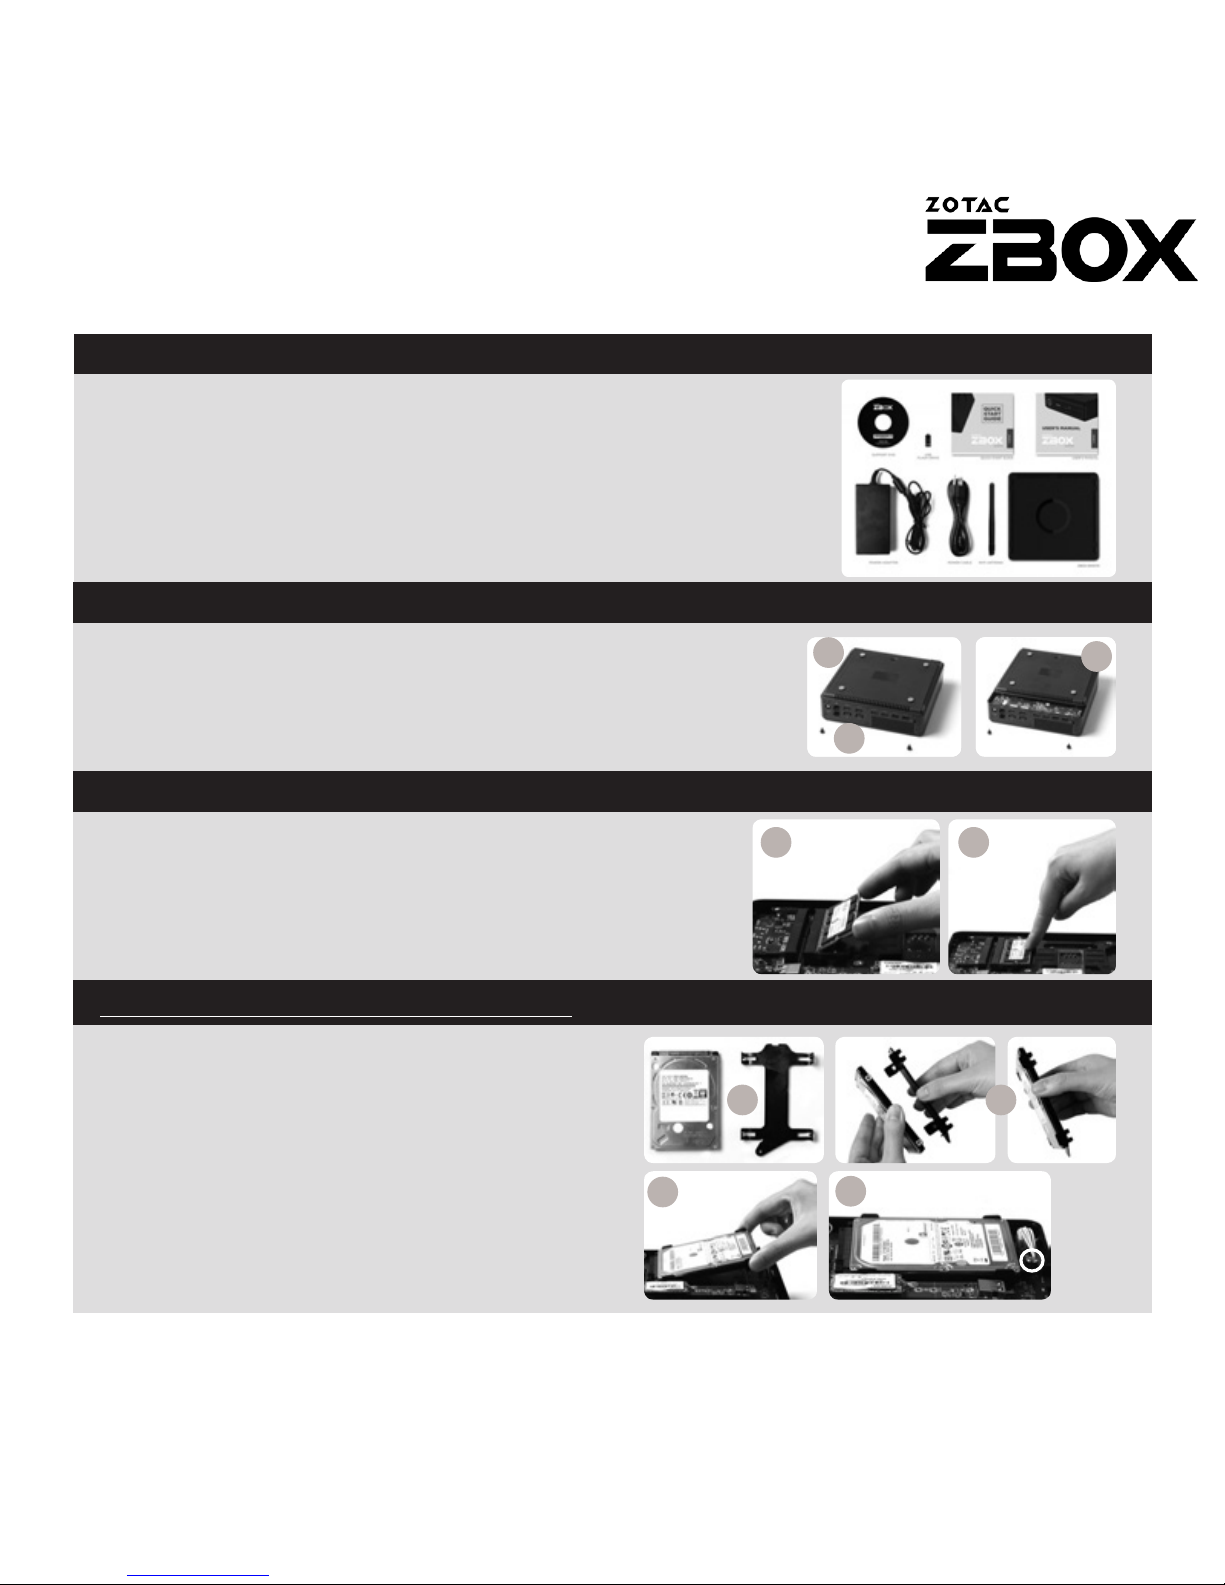
INSTALLING HARD
DISKS/SSD
1. Locate the 2.5-inch SATA hard disk/SSD and
the hard disk bracket.
2. Install the hard disk/SSD to the hard disk
bracket.
3. Insert the hard disk bracket into the SATA
slot.
4. Reinstall the thumb screw.
PACKAGE CONTENTS
CUSTOMIZING YOUR ZOTAC ZBOX
INSTALLING MEMORY MODULES (OPTIONAL)
• 1 x ZOTAC ZBOX
• 1 x AC Adapter
• 1 x Power Cord
• 1 x Warranty Card
• 1 x User Manual
• 1 x Windows Driver DVD
• 1 x USB flash drive with Windows drivers
• 1 x Antenna
1. Lay the ZOTAC ZBOX on a flat surface with the
rubber feet facing upwards.
2. Locate the two thumb screws and remove.
3. Slide the cover o the ZOTAC ZBOX in the
direction of the arrow.
1. Locate the SO-DIMM memory slots and insert a
SO-DIMM memory module into the slot at a 45
degree angle.
2. Gently press down on the memory module until
it locks into place by the arms of the memory
slot.
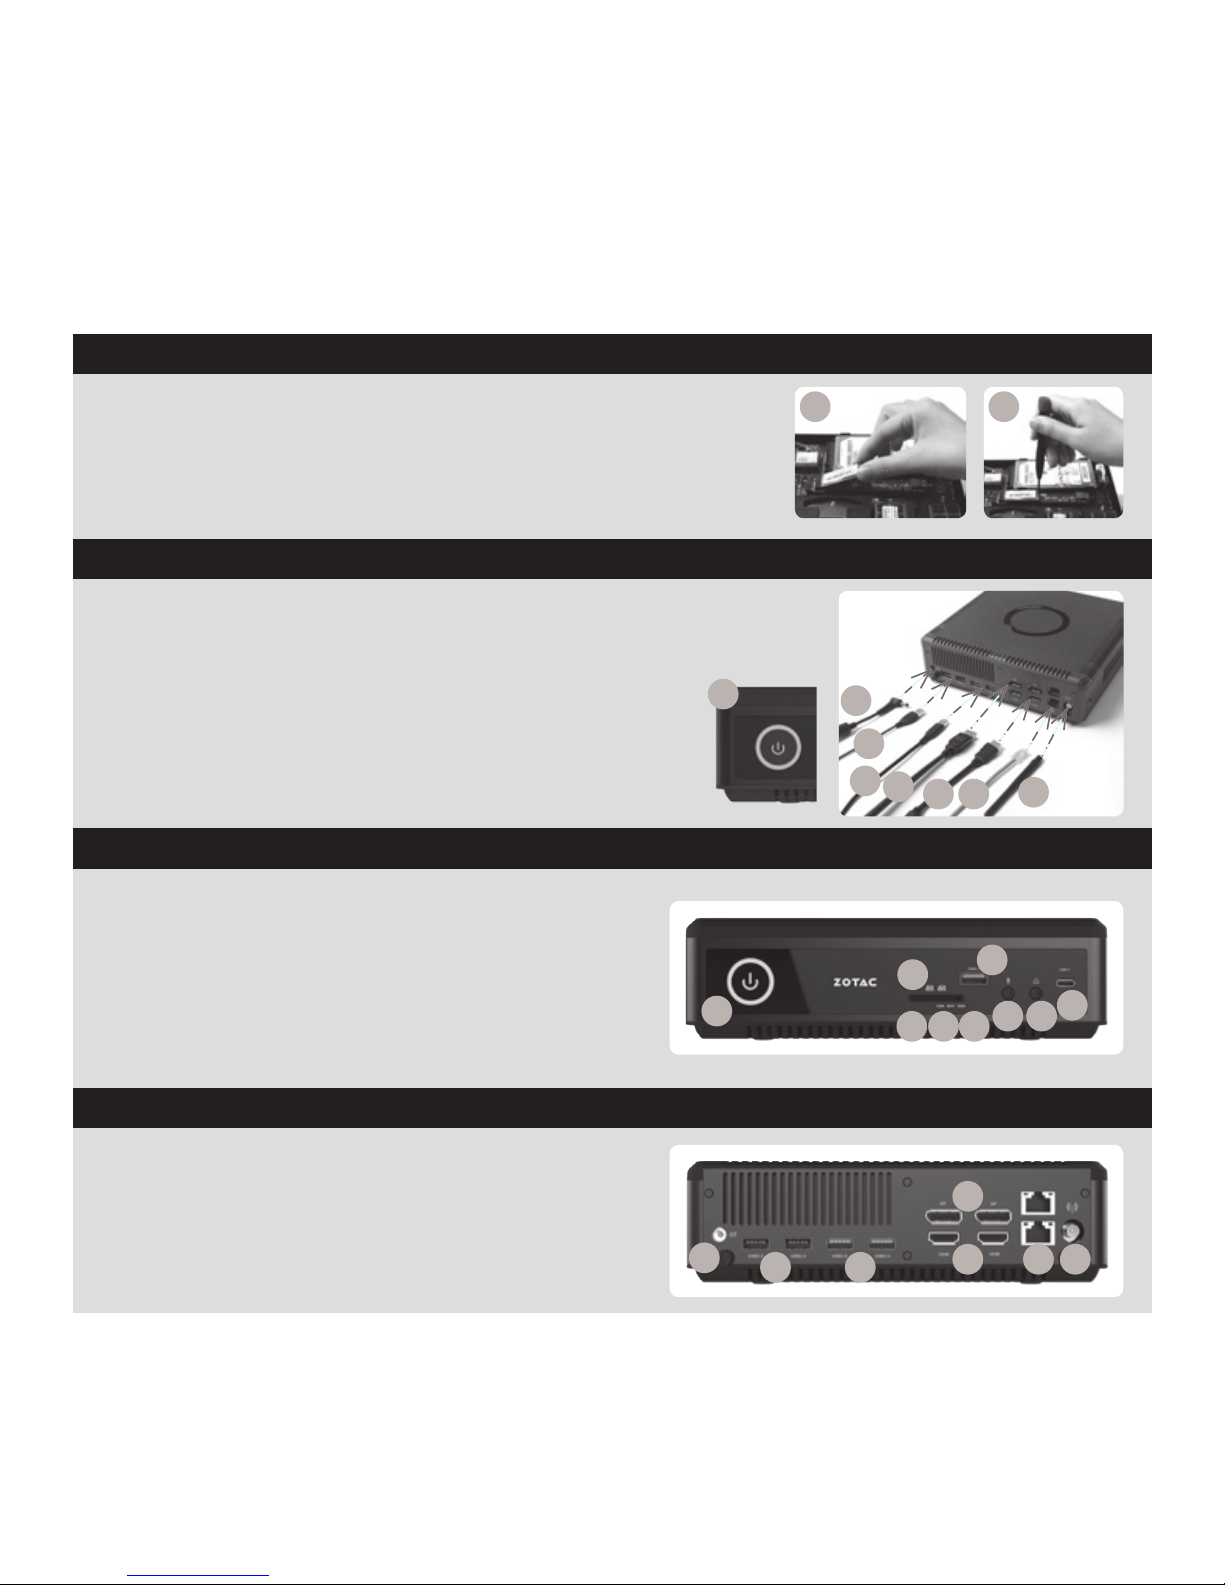
INSTALLING M.2 SSD MODULE (OPTIONAL)
1. Locate the M.2 SSD slot and insert an M.2 SSD
module into the slot at a 45 degree angle.
2. Gently press down on the M.2 SSD module, and install
the screw.
SETTING UP YOUR ZOTAC ZBOX
FRONT PANEL
REAR PANEL
1. Connect USB 2.0 devices
2. Connect USB 3.0 devices
3. Connect DP displays
4. Connect HDMI displays
5. Connect to home networks
6. Connect antenna for WiFi
7. Connect power cable
8. Turn on the system
1. Power button
2. Memory card reader (SD/SDHC/SDXC)
3. Power LED
4. WiFi LED
5. Hard drive LED
6. USB 3.1 port
7. Microphone jack
8. Headphone/Audio Out jack
9. USB 3.1 Type-C port
1. Power input (DC19.5V)
2. USB 2.0 ports
3. USB 3.0 ports
4. DP ports
5. HDMI ports
6. LAN (RJ45) ports
7. WiFi antenna connector
1
2
8
2
3
4 5
7
1
6
7
2
3 4 5
6
1
8
9
32
4
1
5 6 7
 Loading...