

Page 1
Page 2
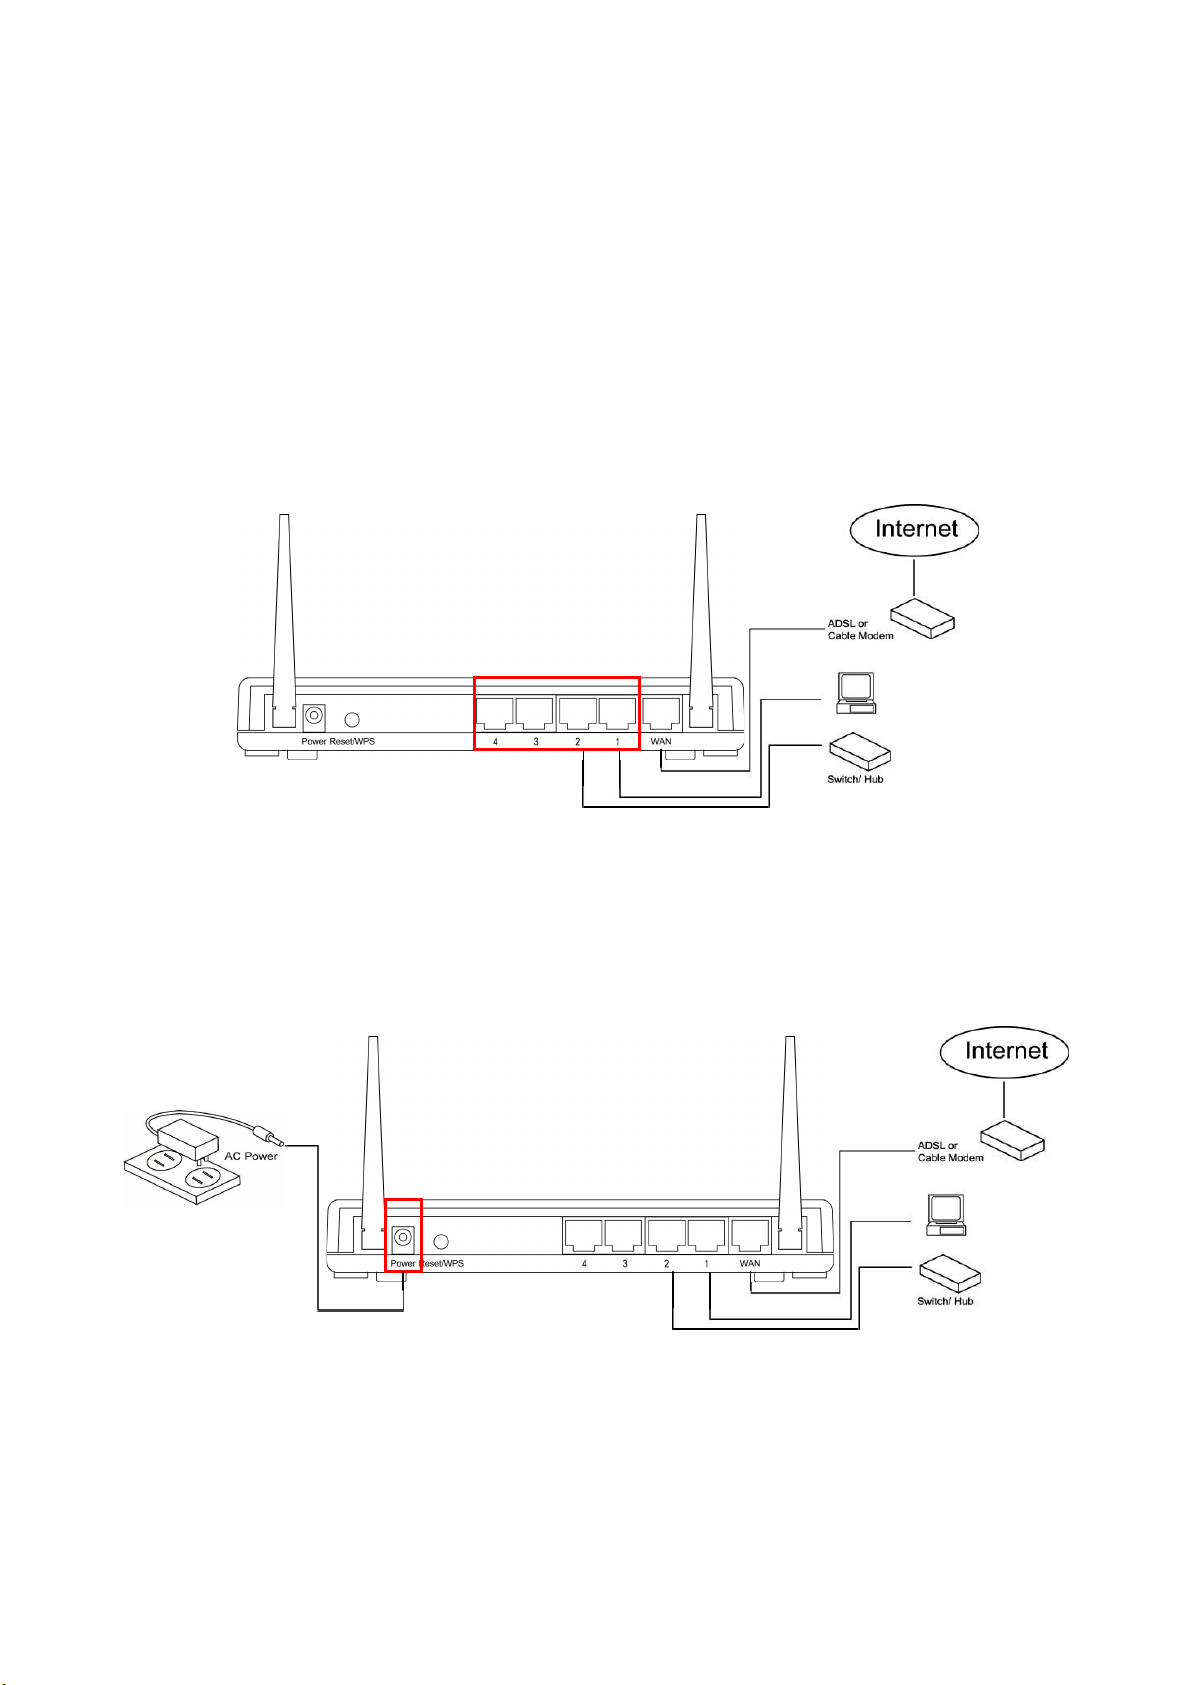
1. Build network connection
Please follow the following instruction to build the network connection between your
new WIRELESS router and your computers, network devices:
Connect your xDSL / cable modem to the WAN port of router by Ethernet cable.
Connect all your computers, network devices (network-enabled consumer devices
other than computers, like game console, or switch / hub) to the LAN port of the
router.
Connect the A/C power adapter to the wall socket, and then connect it to the
“Power” socket of the router.
Please check all LEDs on the front panel. “PWR” LED should be steadily on, WAN and
LAN LEDs should be on if the computer / network device connected to the
respective port of the router is powered on and correctly connected.
1
Page 3
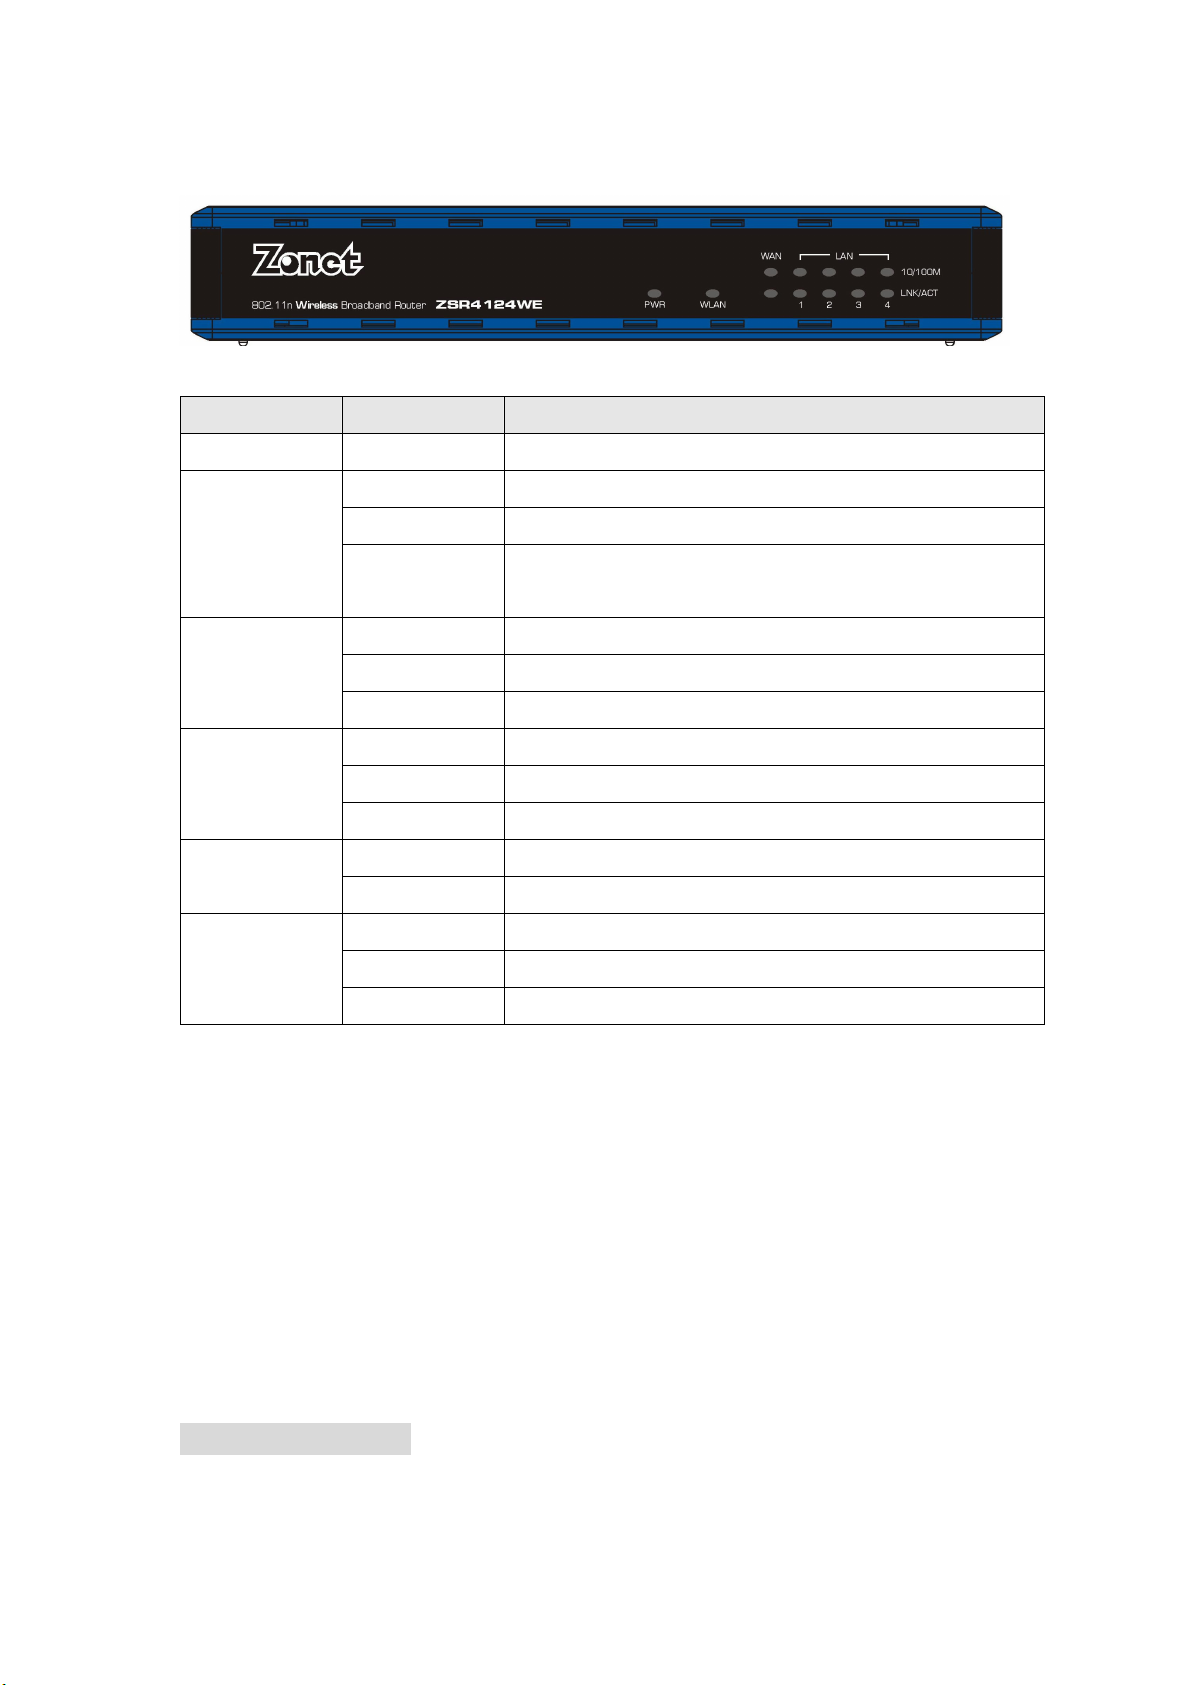
Front Panel
LED Name Light Status Description
PWR On Router is switched on and correctly powered.
On Wireless WPS function is enabled.
WLAN
WAN
10/100M
WAN
LNK/ACT
10/100M
LAN
LNK/ACT
Off Wireless network is switched off.
Flashing Wireless LAN activity (transferring or receiving
data).
On WAN port (Internet) is running at 100Mbps.
Off WAN port (Internet) is running at 10Mbps.
Flashing WAN activity (transferring or receiving data).
On WAN port is connected.
Off WAN port is not connected.
Flashing WAN activity (transferring or receiving data).
On LAN port is running at 100Mbps. LAN
Off LAN port is running at 10Mbps.
On LAN port is connected.
Off LAN port is not connected.
Flashing LAN activity (transferring or receiving data).
2. PC Setup
Before you can connect to the router and start configuration procedures, your
computer must be able to get an IP address automatically (use dynamic IP address). If
it’s set to use static IP address, or you’re unsure, please follow the following instructions
to configure your computer to use dynamic IP address:
2-1. Windows IP address setup:
Windows 2000/XP
Click “Start” button (it should be located at lower-left corner of your computer),
then click control panel. Double-click Network and Dial-up Connections icon;
2
Page 4

click Local Area Connection, and Local Area Connection Properties window will
appear. Select “Internet Protocol (TCP/IP)” and then click “Properties”
Select “Obtain an IP address automatically” and “Obtain DNS server address
automatically”, then click “OK”.
Windows Vista
Click “Start” button (it should be located at lower-left corner of your computer),
then click control panel. Click View Network Status and Tasks, and then click
Manage Network Connections. Right-click Local Area Network, then select
“Properties”. Local Area Connection Properties window will appear, select
“Internet Protocol Version 4 (TCP / IPv4), and then click “Properties”
Select “Obtain an IP address automatically” and “Obtain DNS server address
automatically”, then click “OK”.
3
Page 5

2-2. Router IP address lookup
After the IP address setup is complete, please click “start” -> “run” at the bottom-lower
corner of your desktop:
Input “cmd”, then click “OK”
Input “ipconfig”, then press “Enter” key. Please check the IP address followed by “Default
Gateway” (In this example, the IP address of router is 192.168.2.1, please note that this
value may be different.)
4
Page 6

NOTE: If the IP address of Gateway is not displayed, or the address followed by “IP
Address” begins with “169”, please recheck network connection between your computer
and router, and / or go to the beginning of this chapter, to recheck every step of
network setup procedure.
After your computer obtained an IP address from router, please start your web browser,
and input the IP address of router in address bar. The following message should be
shown:
Please input user name and password in the field respectively, default user name is
“admin”, and default password is “1234”, then press “OK” button, and you can see the
web management interface of this router:
TIP: This page shows the four major setting categories: QuickSetup, General Setup,
Status, and Tools. You can find the shortcut which leads to these setting categories at
the upper-right corner of every page, and you can jump to another category directly by
clicking the link, and don’t have to go back to the first page.
5
Page 7

2-3. Using “Quick Setup”
This router provides a “Quick Setup” procedure, which will help you to complete all
required settings you need to access the Internet in very short time.
Please go to QuickSetup menu by clicking “QuickSetup” button, and select time zone of
area where you live, then c lick next.
Broadband Type
Please choose the broadband (Internet connection) type you’re using in this page. If
you’re not sure, please contact your Internet service provider.
2-4. Setup Internet Connection (WAN Setup)
To start configuration, please follow the following instructions:
Please click “WAN” menu on the left of web management interface, and the
following message will be displayed on your web browser:
Please select an Internet connection method depend on the type of connection
you’re using. You can either click the connection method on the left or right. If you
select the connection method on the right, please click “More Configuration”
button after a method is selected.
6
Page 8

2-4-1. Setup procedure for “Dynamic IP”
Please input host name of your computer, this is optional, and only required if your
service provider asks you to do so. Please input MAC address of your computer, if your
service provider only permits computer with certain MAC address to access internet. If
you’re using the computer which used to connect to Internet via cable modem, you can
simply press “Clone Mac address” button to fill the MAC address field with the MAC
address of your computer, after you finish with all settings, please click “Apply”
2-4-2.Setup procedure for “Static IP”
Please input IP address/ subnet mask/ Gateway Address assigned by your service
provider.
7
Page 9

2-5. Basic Wireless Settings
Please click “Wireless” menu on the left of web management interface, then click “Basic
Settings”, and the following message will be displayed on your web browser:
This wireless router can be work in 6 modes:
AP: Standard wireless AP (access point).
Station-Infrastructure: Configure the router to Ethernet device such us TV, Game
player, HDD&DVD to enable the Ethernet device be a wireless station.
AP Bridge-Point to Point: Connect this router with another wireless router, to
expand the scope of network.
AP Bridge-Point to Multi-Point: Connect this router with up to four other wireless
routers, to expand the scope of network.
AP Bridge-WDS: Connect this router with up to four WDS-capable wireless routers,
to expand the scope of network.
Universal Repeater: The router can act as Station and AP at the same time. It can
use Station function to connect to a Root AP and use AP function to service all
wireless stations within its coverage.
3. Checking the Connection to the Internet
To check the connection to the Internet, you can open the Web browser and go to a
website. For more information about the router, please refer to User Manual of in
supplied document CD-ROM..
8
 Loading...