

Zonet ZFS3224 user manual

T
ABLE OF CONTENTS
English………………………………………………………………………………1
Package Contents………………………………………………………………………1
Application……………………………………………………………………………………1
Front Panel…………………………………………………………………………………………2
Rare Panel…………………………………………………………………………………………2
Side Panel…………………………………………………………………………………………2
Desktop Installation…………………………………………………………………………3
Rack Installation…………………………………………………………………………………4
Hardware Installation…………………………………………………………………5
Caution………………………………………………………………………………………………6
Troubleshooting…………………………………………………………………………………7
Español…………………………………………………………
……
……………………8
Contenido de Paquete………………………………………………………………………8
Aplicación……………………………………………………………………………………………8
Panel
Panel
Panel
Frontal
Posterior
Lateral
………………………………………………………………………………………9
…………………………………………………………………………………9
………………………………………………………………………………………9
Instalación en Escritorio…………………………………………………………………10
Instalación en Rack…………………………………………………………………………11
Instalación del Hardware…………………………………………………………………12
Precaución………………………………………………………………………………………13
Resolución de Problemas…………………………………………………………………14
1
PPaacckkaaggee CCoonntteennttss
One ZFS3224
One Quick Installation Guide
One Power Cord
One R
Four Rubber Pads
Contact your local authorized reseller or the store purchased from for
any items damaged and/or missing.
ackmount Kit
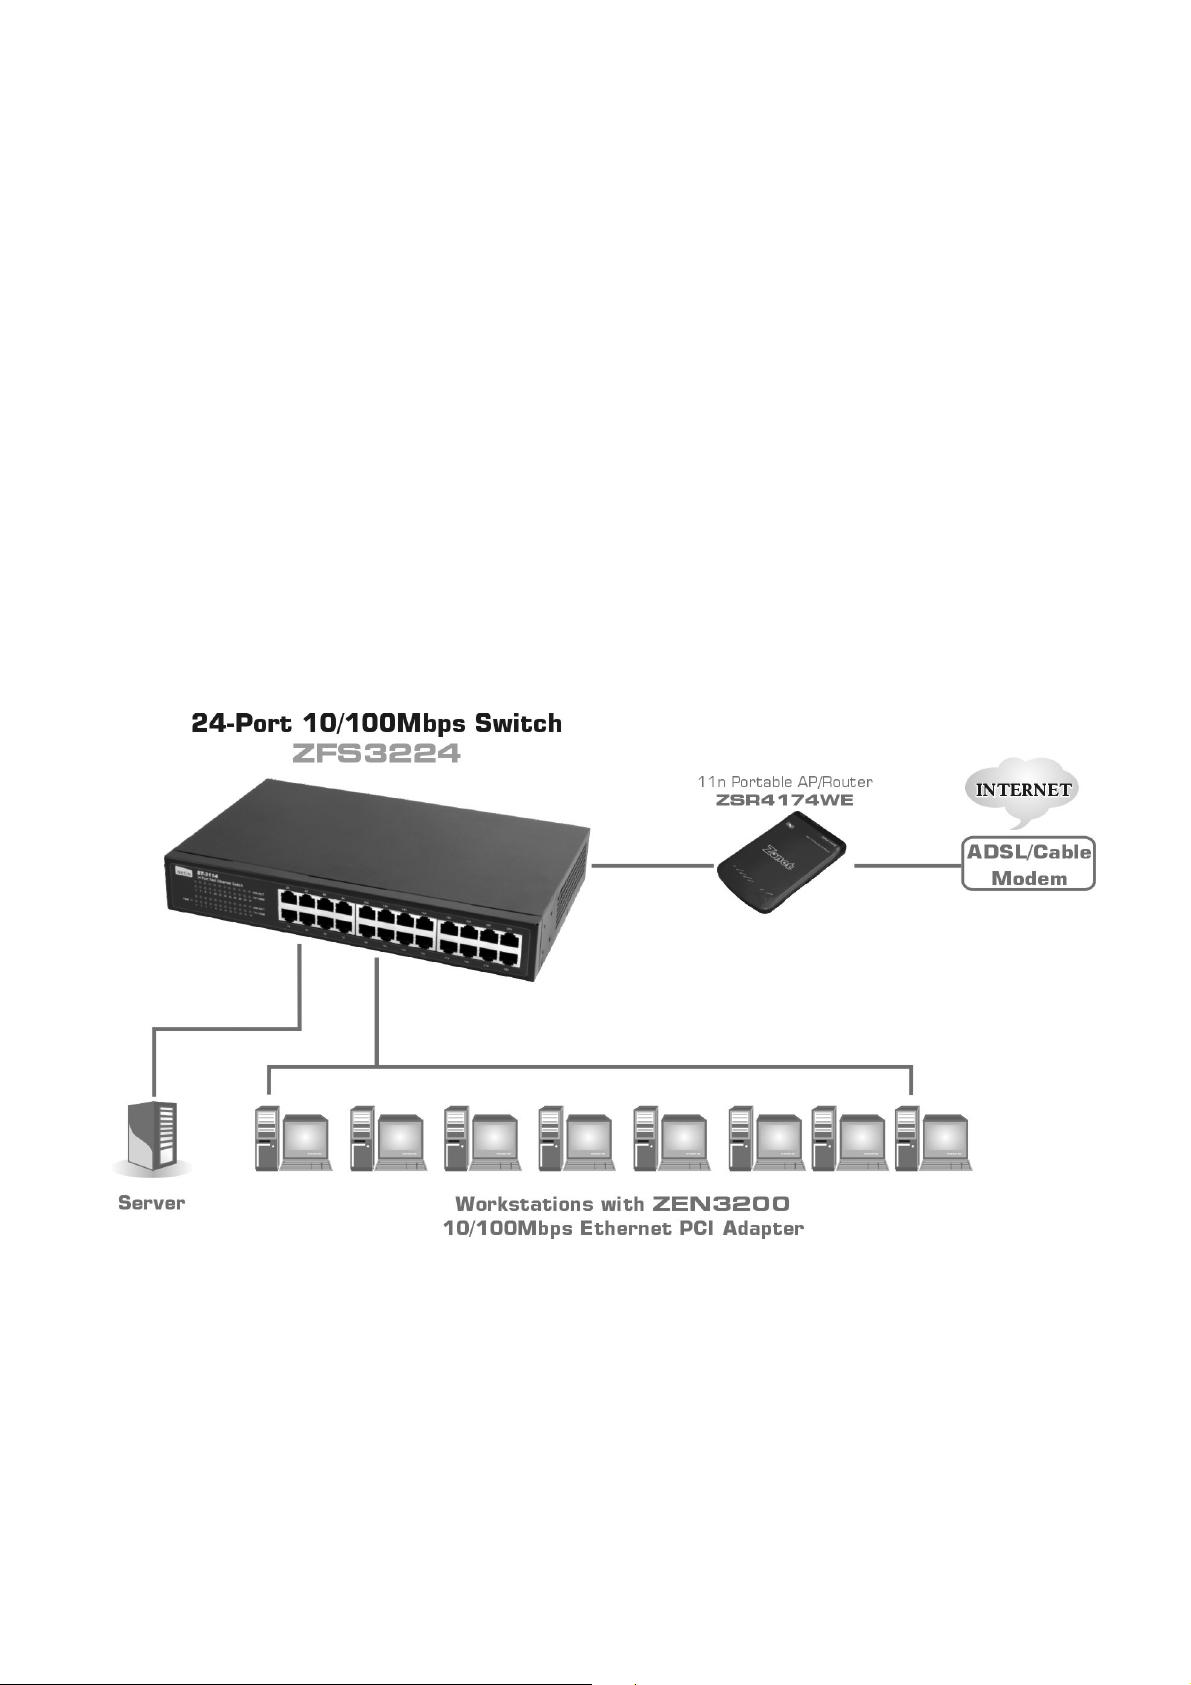
AApppplliiccaattiioonn
2
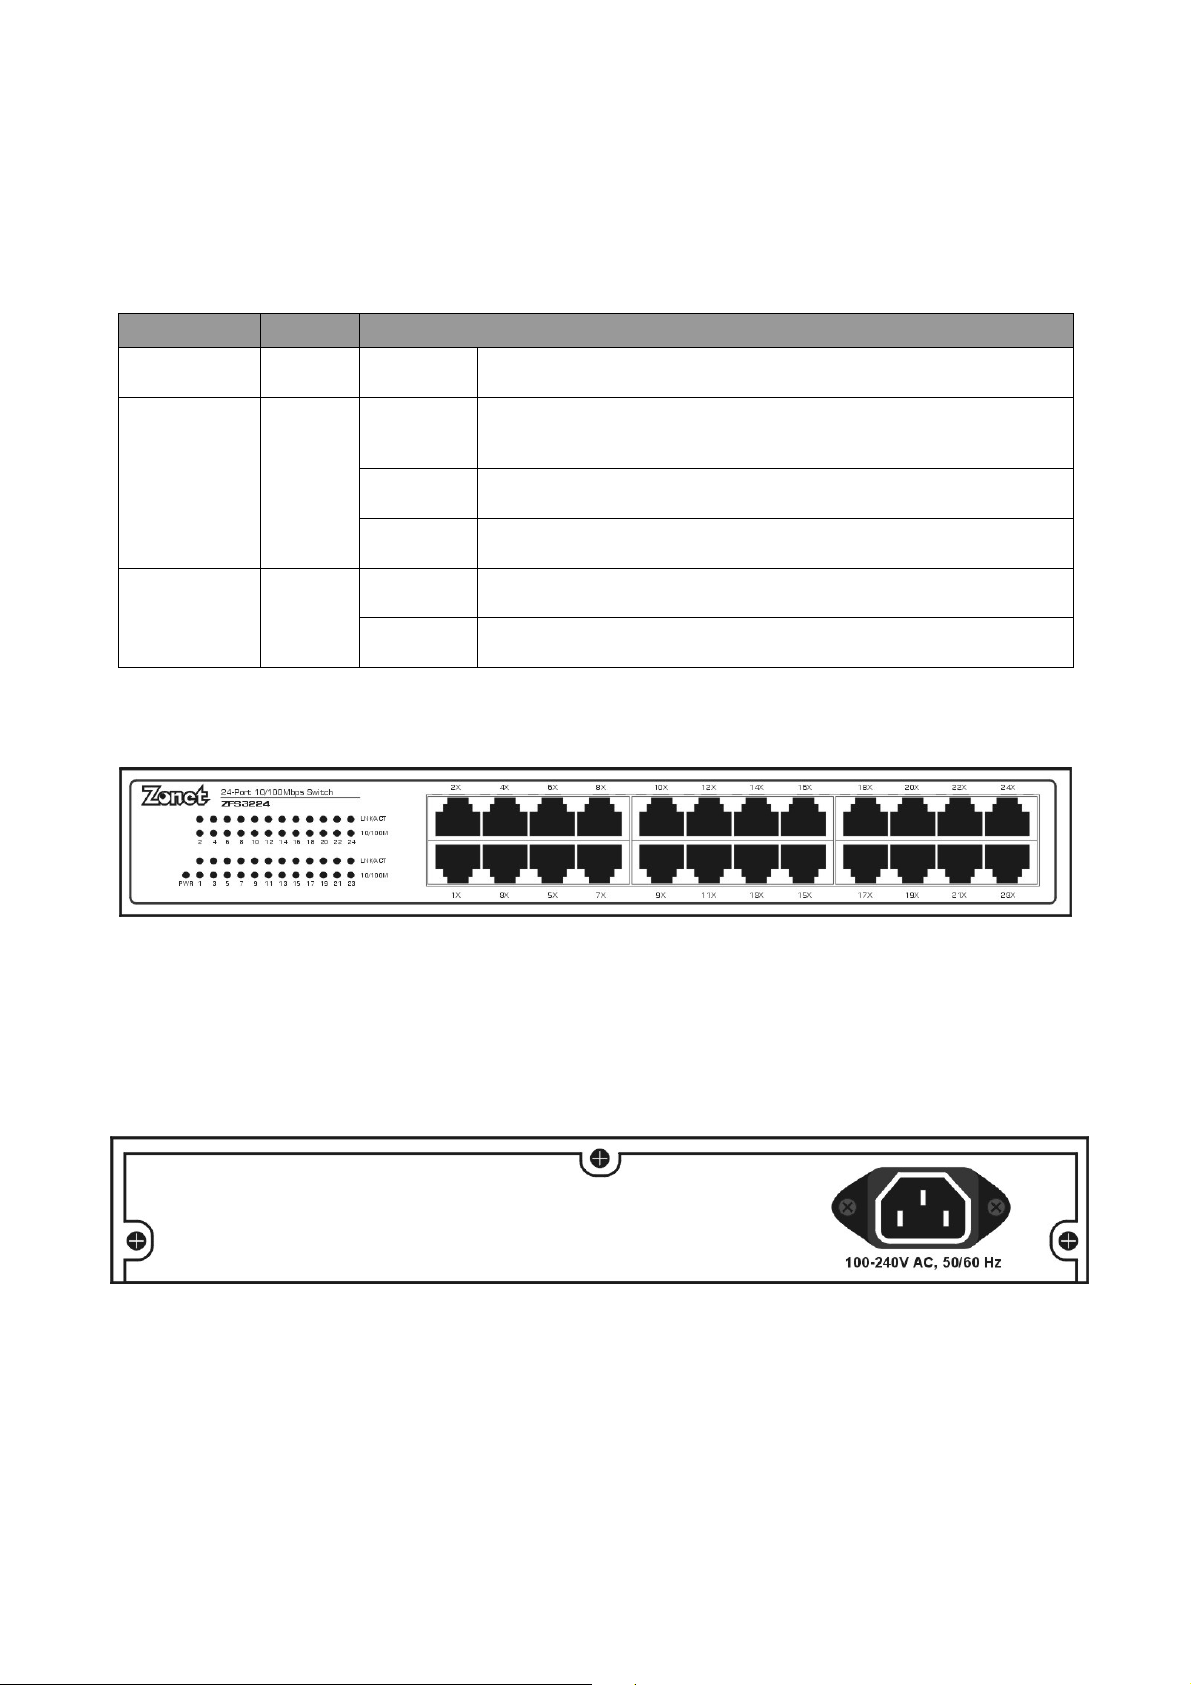
FFrroonntt PPaanneell
LED indicators
LED Status Operation
POWER Green Steady Power is ON
LNK/ACT Green
10/100M Green
Diagram
Steady
Network cable connected and connection
established
Flash Data packets are transmitting
Off Network cable is unplug
Steady A 100Mbps device is connected
Off A 10Mbps device is connected
RReeaarr PPaanneell
One Power Connector
SSiiddee PPaanneell
Ventilation/cooling holes and mounting holes
3
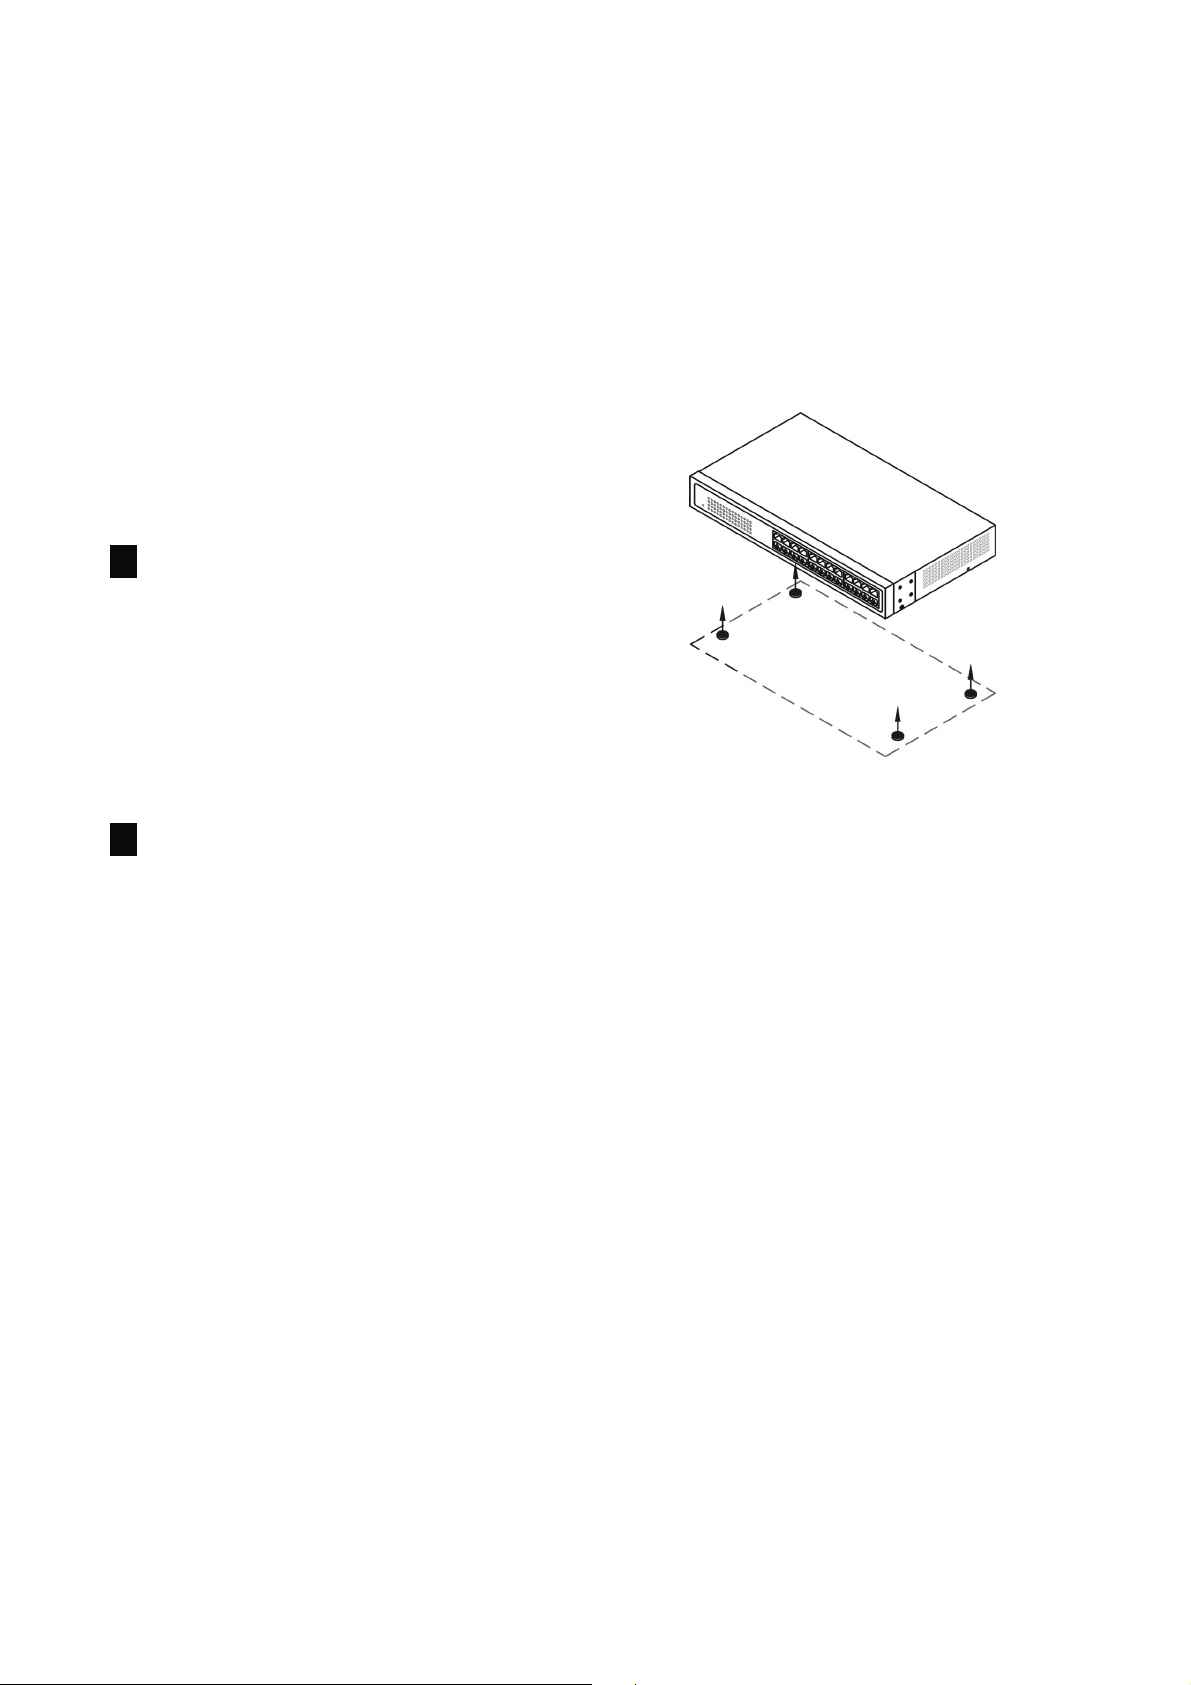
DDeesskkttoopp IInnssttaallllaattiioonn
When placing ZFS3224 on a desk-top or shelf, the rubber pads applied
must be first attached to avoid surface damage.
1. Attach applied cushioning
rubber pads on the bottom at
each corner of ZFS3224.
2. Allow enough empty space
around ZFS3224 for sufficient
ventilation and cooling.
4
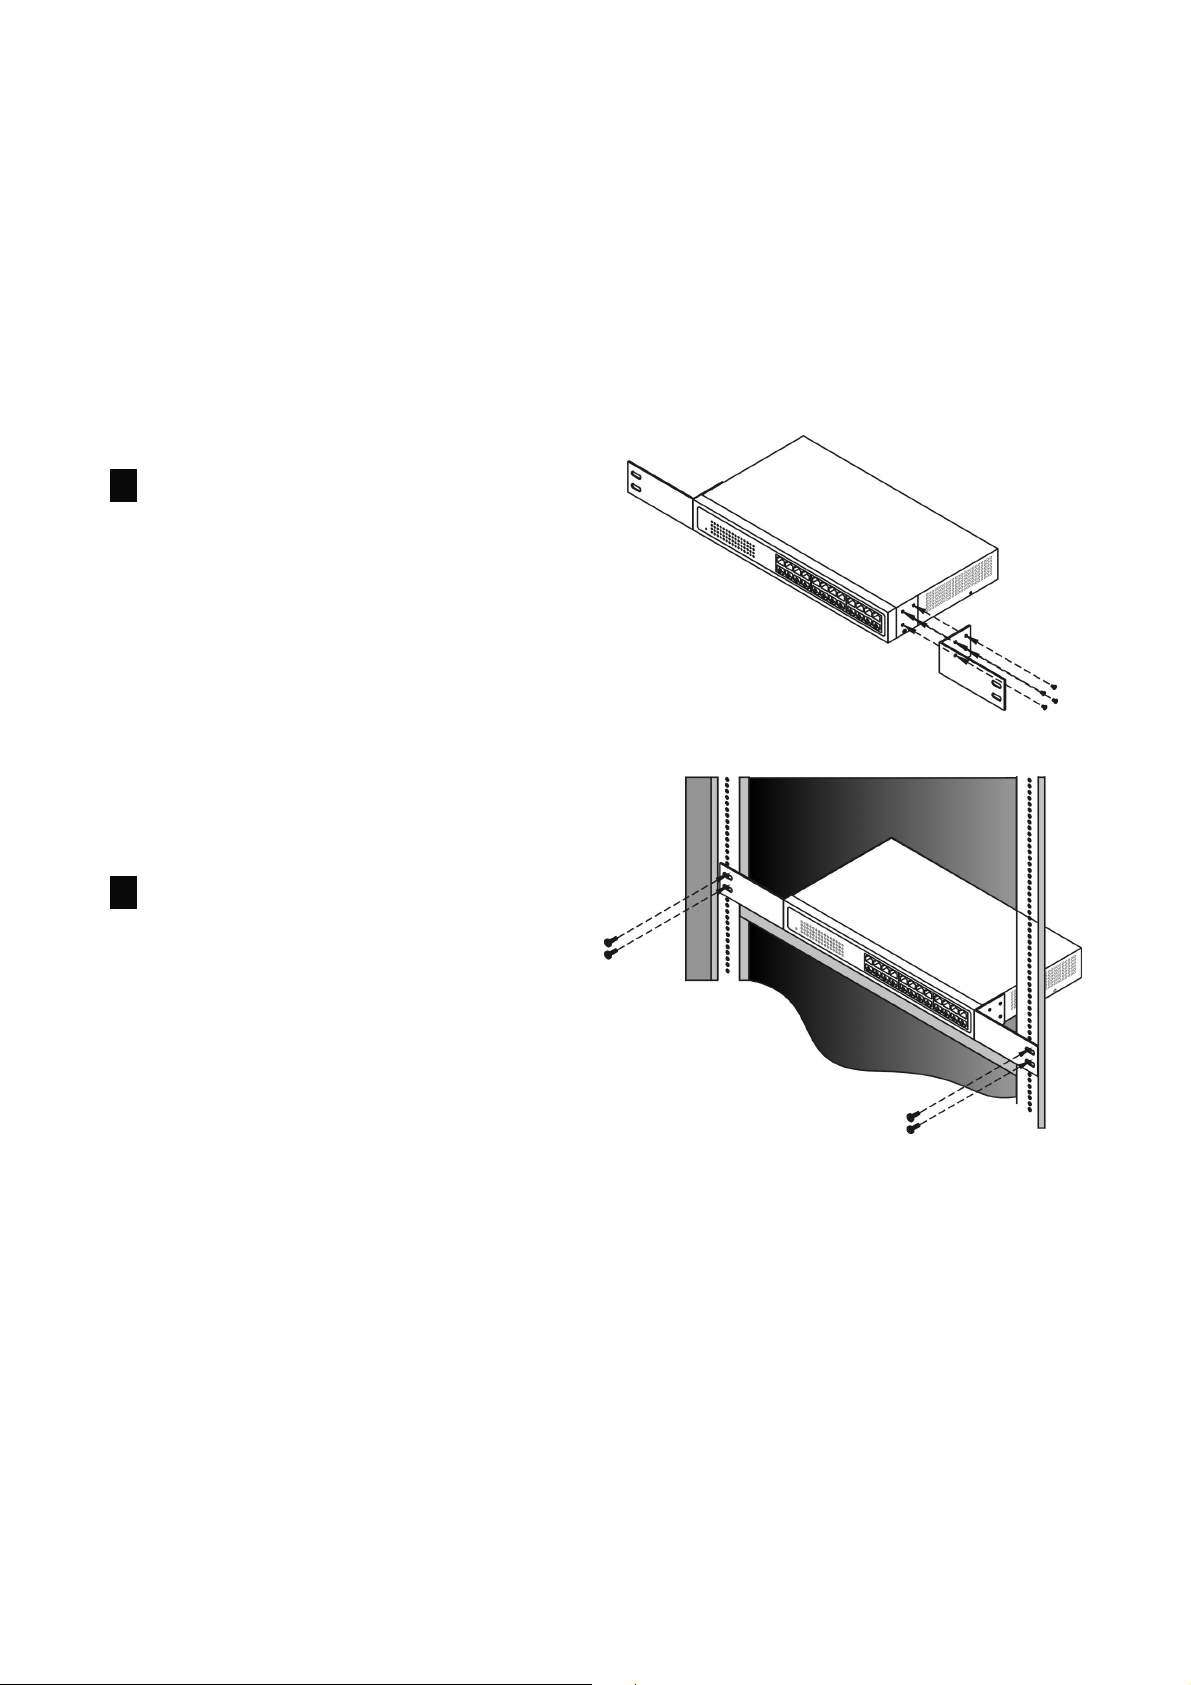
RRaacckk IInnssttaallllaattiioonn
ZFS3224 can be mounted in a standard 11-inch rack for placing in a
wiring closet with other equipment. For placing in the rack, the
mounting kit applied must be first attached to ZFS3224.
1. ZFS3224 has four mounting
holes on each side. Attach
applied mounting brackets one
on each side. Then secure the
bracket with screws provided.
2. Place ZFS3224 in the rack and
secure the brackets with screws
provided with equipment rack.
 Loading...