

Page 1
Under Cabinet Installation
Installation
Tutorial Video
19
Page 2
Under Cabinet Installation
Preparation
► Decide the location of the venting pipe from the hood to the outside.
► Check hood for clearance.
► A straight, short vent run will allow the hood to perform more eciently.
► Try to avoid as many transitions, elbows, and long runs as possible. is may
reduce the performance of the hood.
► For installing under the cabinet with recessed bottom, attach 4-inch wide
wood ller strips (not provided) on each side.
► Puncture the knockout holes (for mounting under the cabinet) on the hood.
1
2
3
4
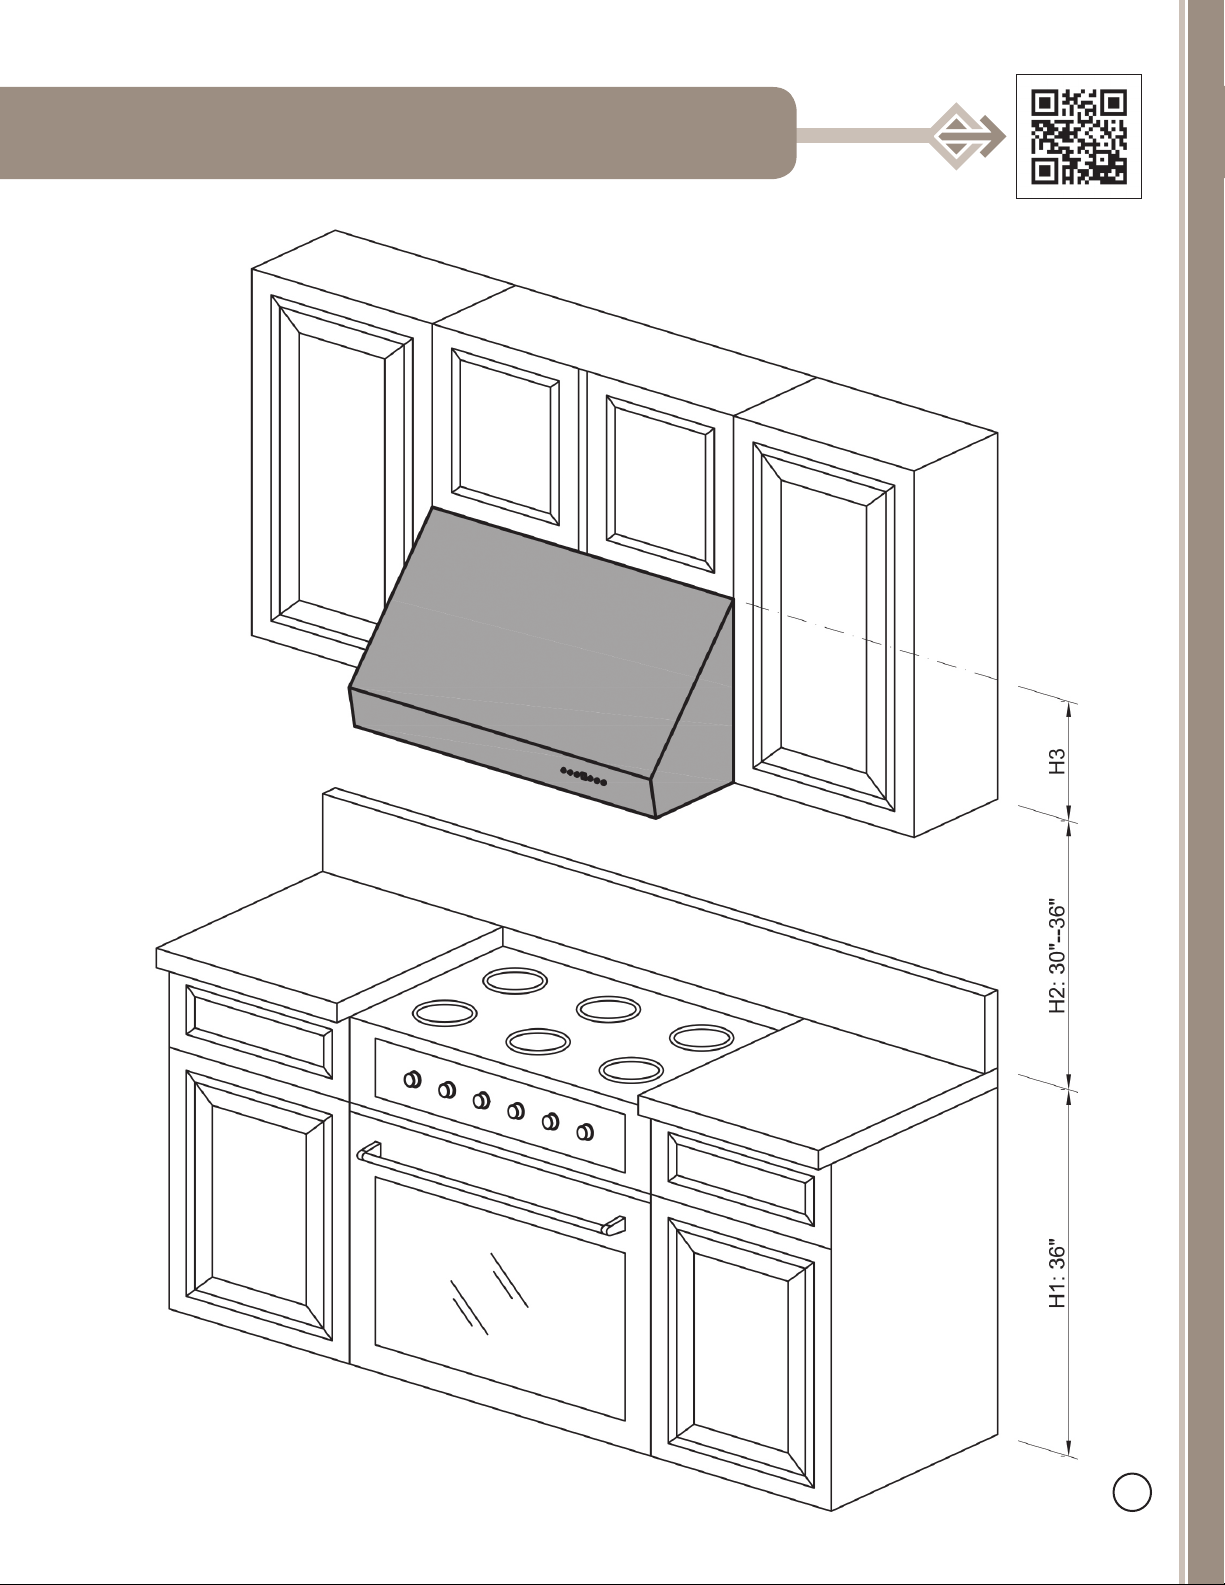
Measure the distance between stove
top and the bottom of the range
hood. A distance of 30˝ to 36˝ is recommended.
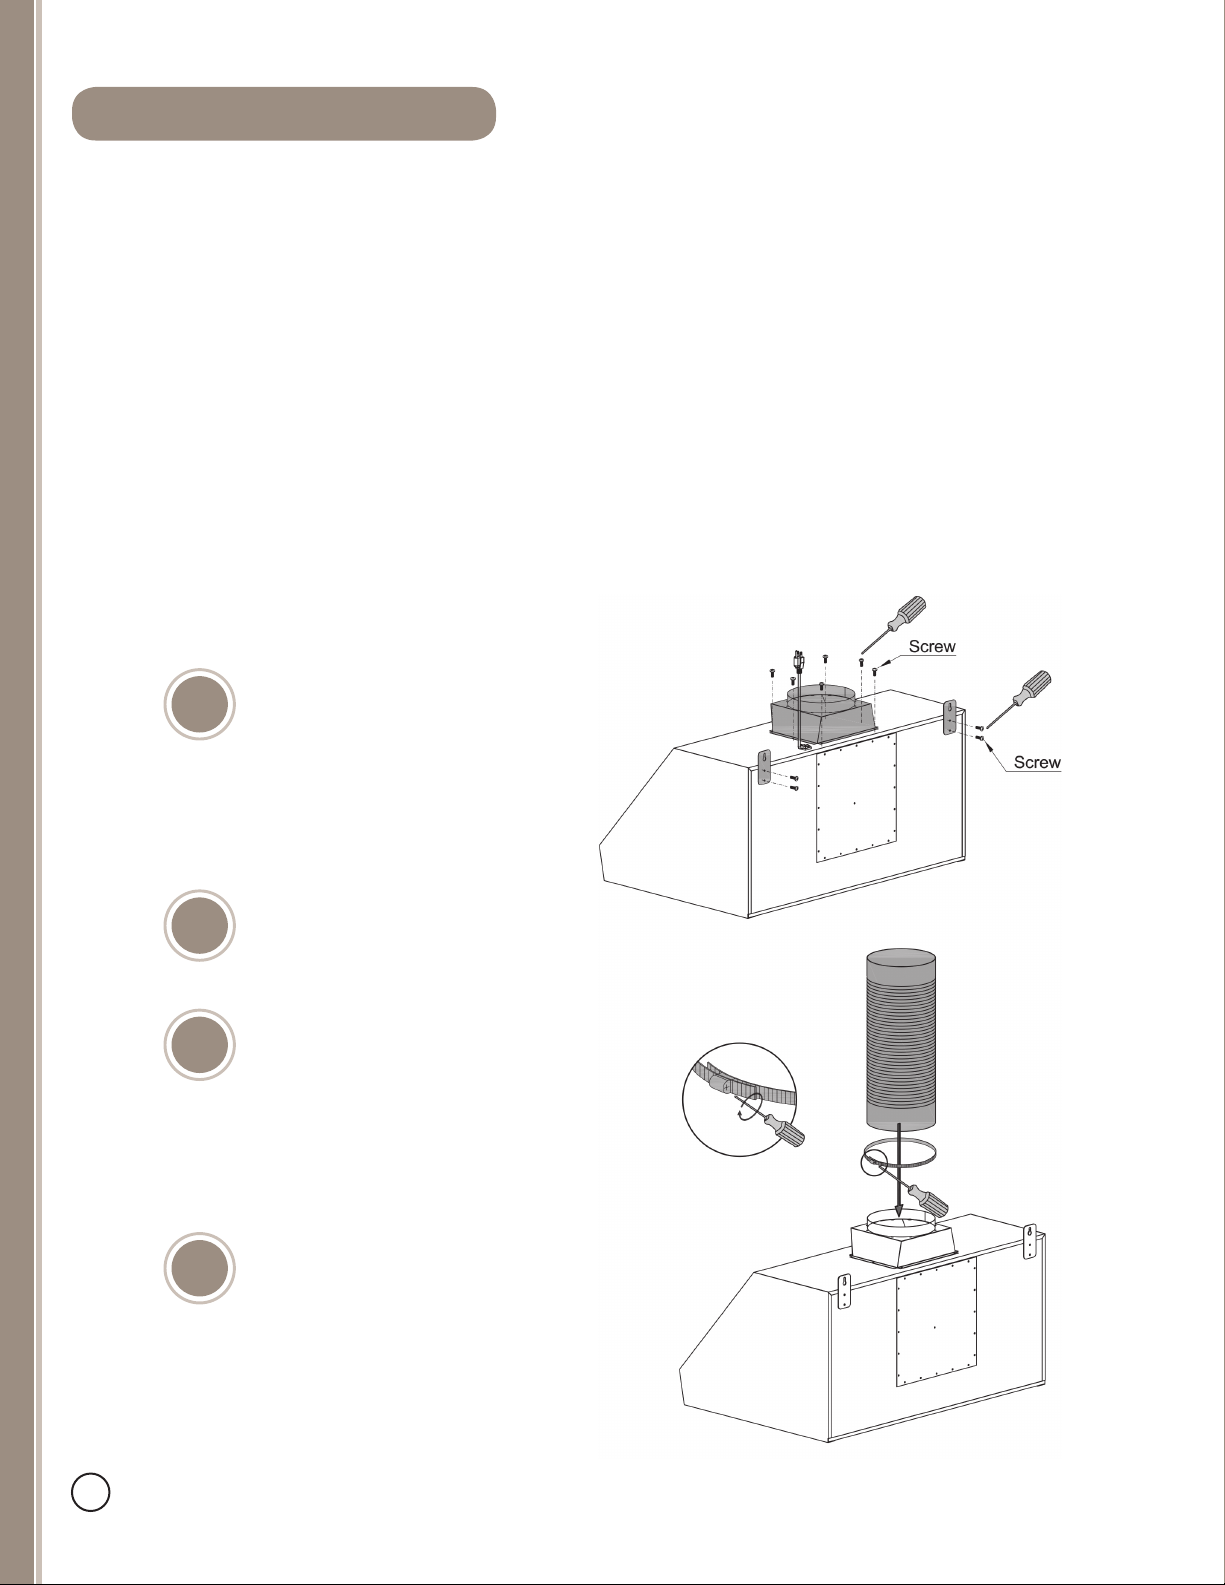
Attach mounting brackets to the back
of the hood.
Mark the leveling point of the hood.
Position two mounting screws on the
wall, leaving ⅛˝ space away from the
wall. Make sure that you are mount-
ing the hood to a secure backing to
hold the weight of the hood.
Tighten ducting (provided) with the
hose clamp provided. Use silver or
duct tape wherever needed.
20
Page 3

Under Cabinet Installation
5
6
7
Draw electrical wires through cabinet
access opening, center the hood beneath the cabinet.
Align hood-mounting brackets to the
screws on the wall and hook hood
into place. Tighten screws to secure
hood to the wall.
Connect ducting.
21
Page 4

Undercabinet Recirculating Kit
Step 1:
Step 2:
29 ¾“ - 35 ¾“
Open package, locate all neccessary hardware. Included should be
4 screws with 4 washers.
Line up the recirculating kit with the top of the range hood.
7
11
“
8
4 ¾”
Step 3:
Secure the recirculating kit with the provided screws. Once secure,
begin tightening each screw until the recirculating kit is flush with the
range hood.
Step 4:
Install undercab per range hood installation guide.
No time to read?
Scan for a quick video.
 Loading...