

Page 1
1
Wall
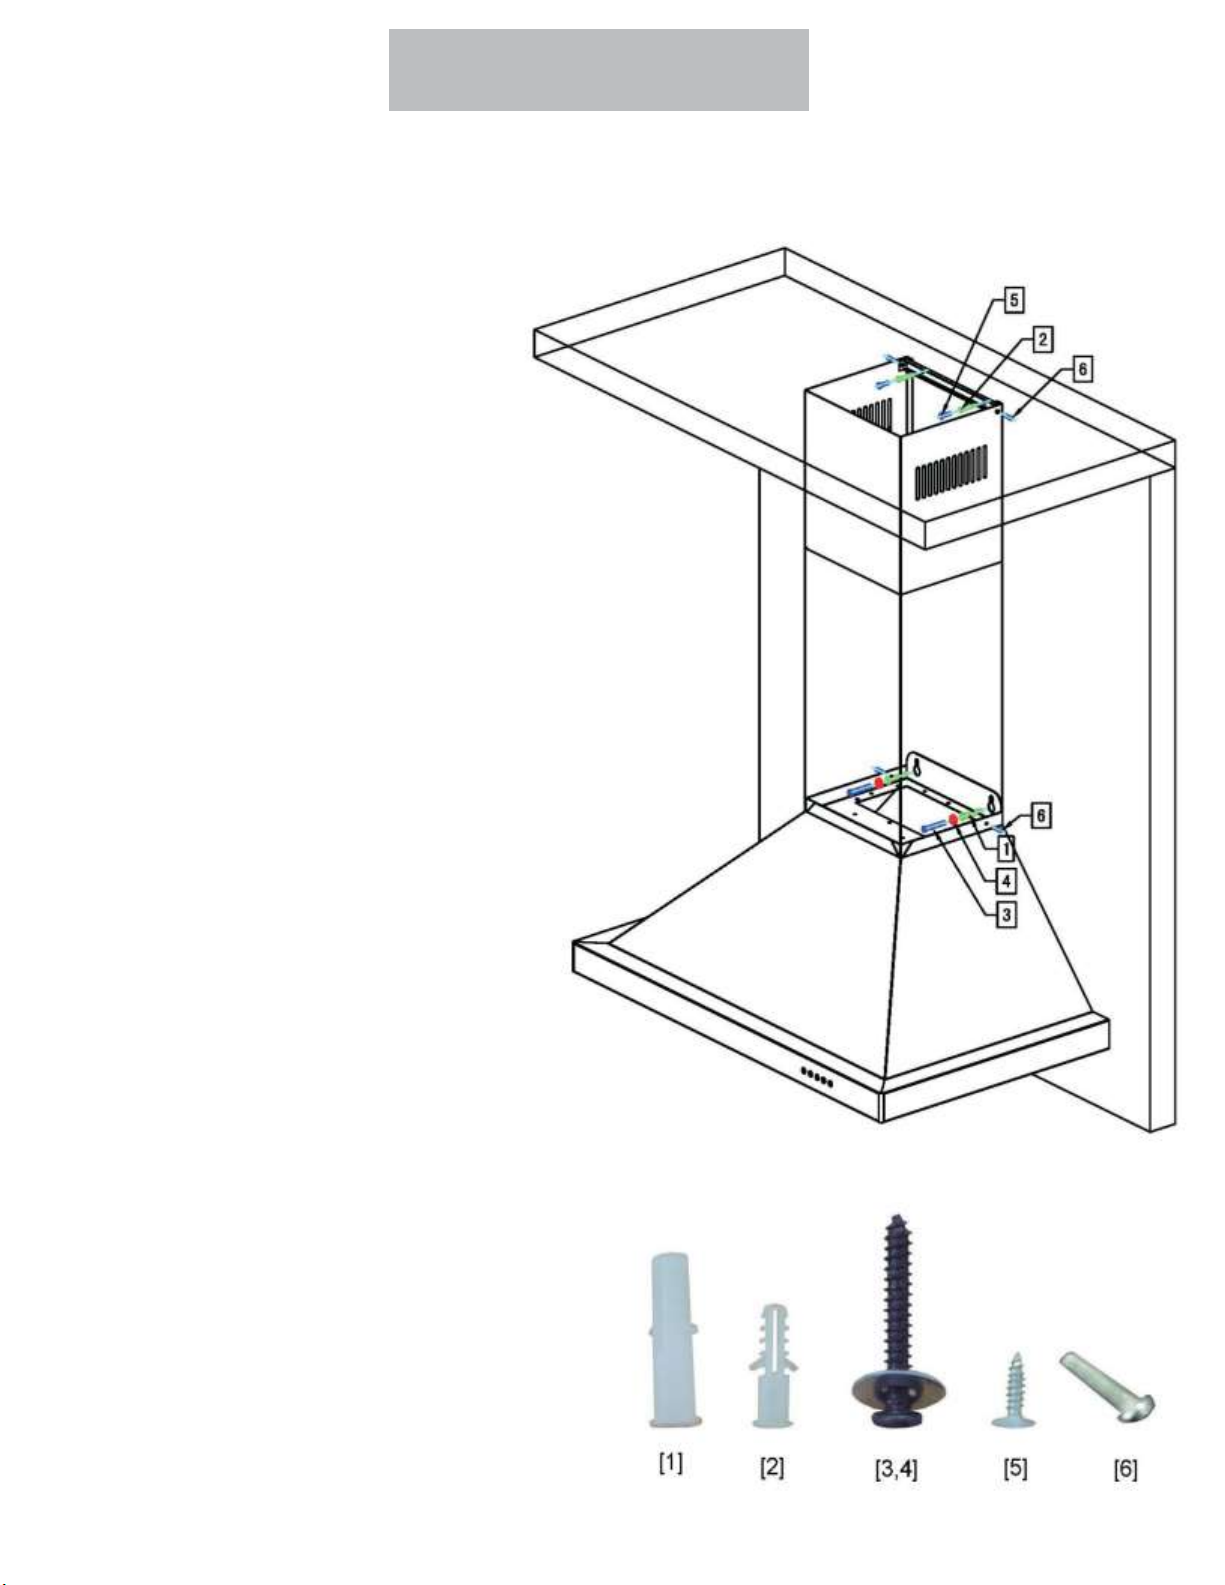
Parts Supplied:
Please unpack your range hood
when it is delivered and inspect
to ensure all parts are included.
1. Main Hood with all lights
and button banks preinstalled.
2. Adjustable Stainless
Chimney Cover
3. Flexible duct (not
Installation
pictured)
4. Packet of screws and
anchors
5.Top mounting bracket
Page 2
7
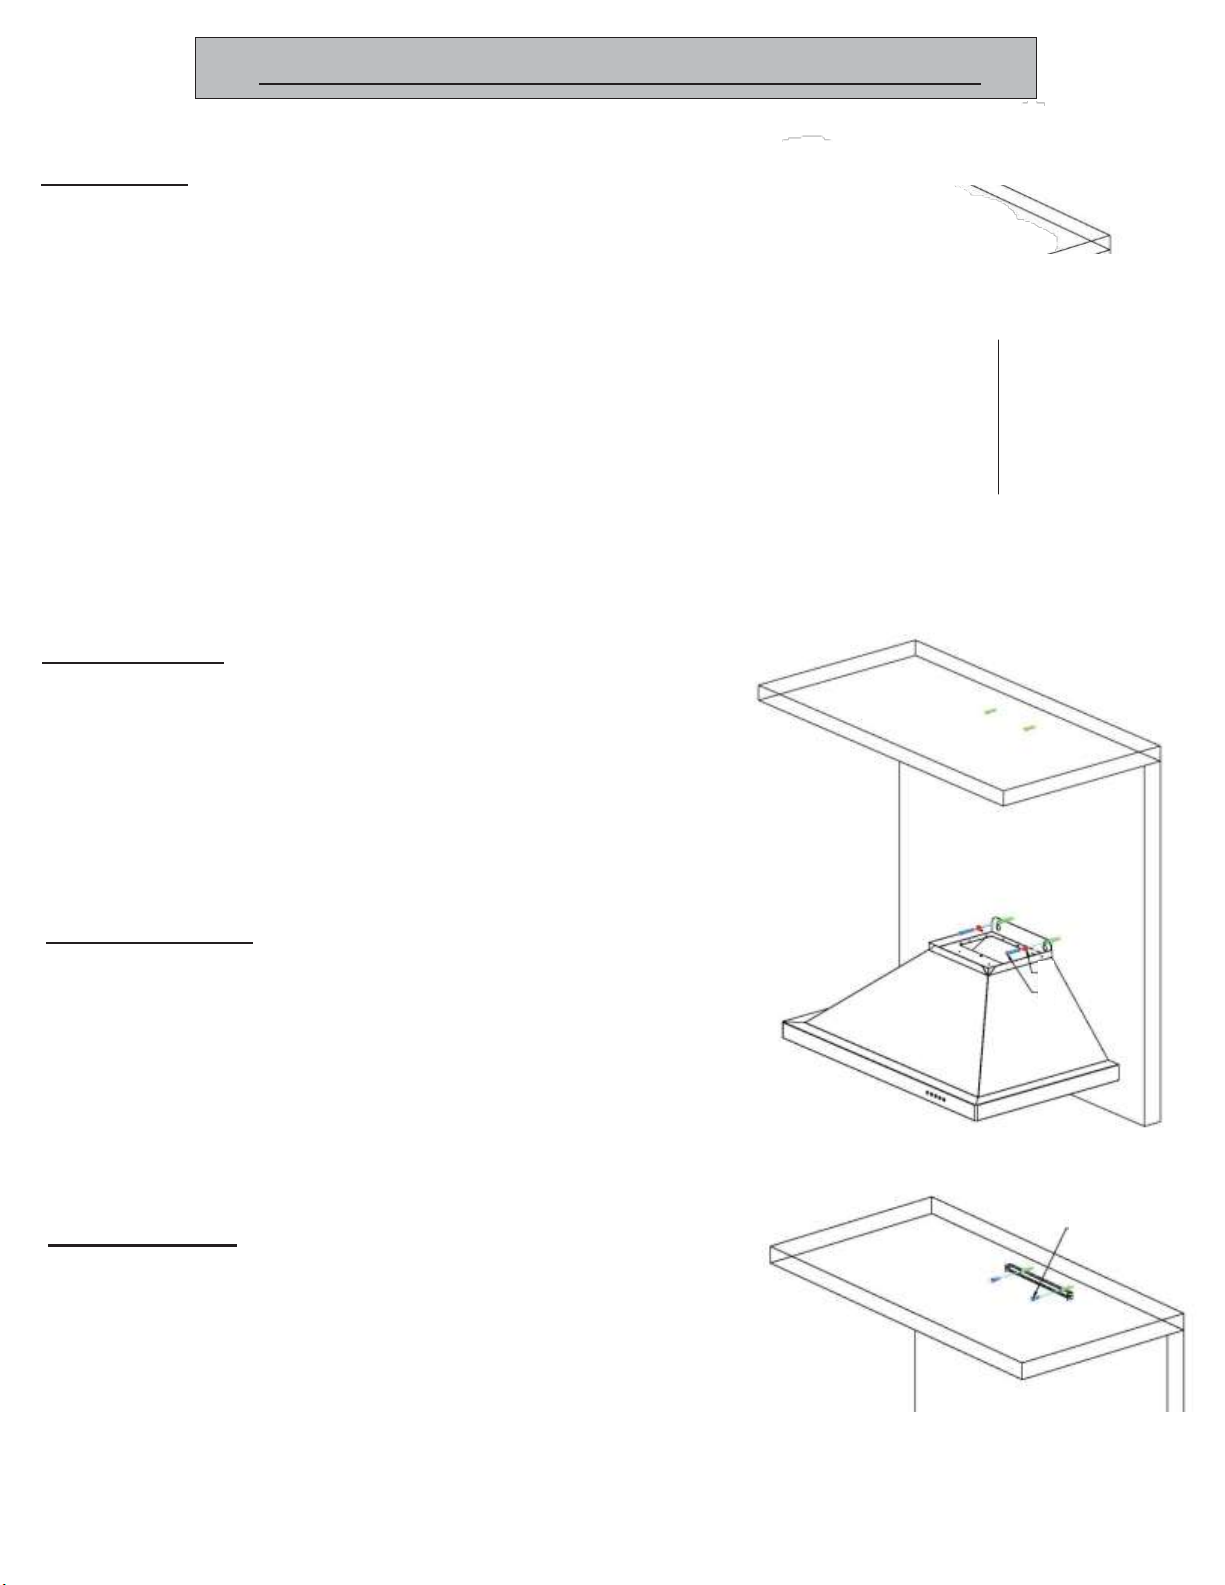
Seven Easy Steps to
Step one: Find the center of the wall
where you are installing the hood.
Make sure there is sufficient bracing
to hold the weight of the hood. Mark
your center line and measure out
from center to find your two mounting
points. Make sure your mounting
points are level when you mark them.
It is recommended to install the hood
directly into wood supports. fig 1
Step two: Mark your mounting points
Installing
Wall
fig.1
Hoods
center line
1
and install the two mounting screws
provided leaving the heads out 1/4” to
mount hood. fig 1
Step three: Mount the main body of
the hood to the two screws and
screw into place. fig 2
Step four: Mount the top chimney
fig. 2
4
3
5
mounting bracket centering it above
the hood. fig.3
fig. 3
Page 3

8
Step 5: Make your electrical and
ducting connections. Use 6” rigid
duct wherever possible. Try and
minimize the use of elbows. More
elbows and longer runs create higher
static pressure. The hood comes
with a grounded three prong plug
that can either be direct wired or
plugged into a 20 amp. circuit. fig. 4
Step 6: Install the 2 part chimneys
on top of the hood by sliding the
fig. 4
inside section up until the vertical
vent slots are visible. Then put
both pieces on top of the hood and
secure the lower portion with the
provided screw at the bottom. fig. 5
Step 7: Slide the upper portion up
and over the top mounting bracket
aligning the holes and securing with
6
fig. 5
6
the screws provided. fig. 6
 Loading...