

ZKTeco PT100 Installation And Quick Start Manual
Patrol Device Installation and Quick Start Guide
Ver 1.0 Da te: October, 20 13
user inf orma tion shal l be reg istered w ith pa trol soft ware a nd user fin gerp rints
can be enr olle d by USB fing erpr int scann er or pa trol devi ce. All the data suc h
as route a nd pat rol plan co nfig ured by sof twar e should be s ynch ronized w ith
the patr ol dev ice befor e usin g.
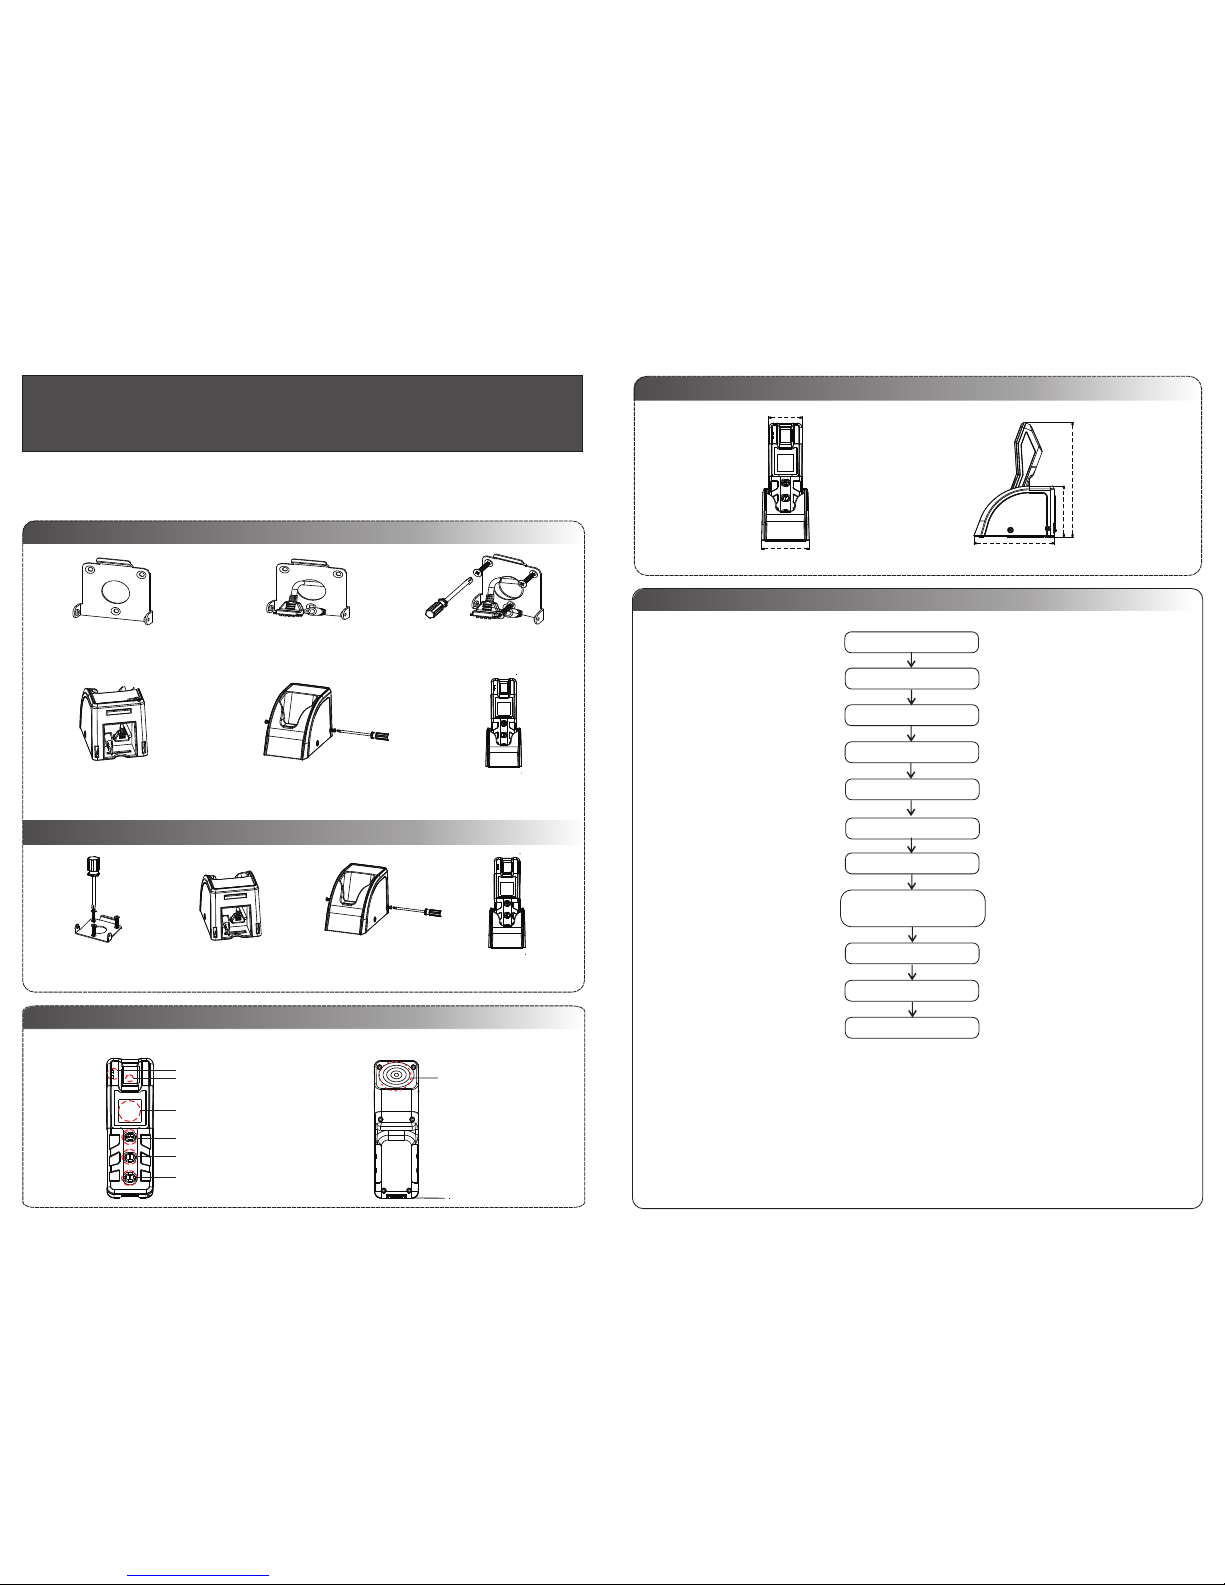
4. Pr oduc t Dime nsio n
128mm
81mm
183mm
52mm
74mm
1. In stall taion M ode I : Wall -Mou nt
2) Pu ll the ca bles( inclu des the p ower
cab les and U SB cabl es) out o f the
cab ling ho les.
3) Fi x the wal l mount ing
pla te with s crews .
4) Co nnect t he powe r cable s and USB
cab les to th e base.
3) Fi x the bas e to the
mou nting p late wi th
scr ews.
5 Fix t he base t o the mou nting
pla te with s crews .
)
6 Pla ce the pa trol ma chine
on th e base.
)
2 Con nect th e power c ables
and U SB cabl es to the b ase.
)
4 Pla ce the pa trol ma chine
on th e base.
)
1) Dr ill hol es on the acc ord
to th e rear pl ate to ma rk posi tions .
wal l ing
2. In stall ation M ode II : De sktop
1) Fi x the wal l mount ing
pla te on the d esk wit h
scr ews.
Note:
Bac k View
ID Ca rd Swip e Area
LED I ndica tor
Fin gerpr int Sen sor
Dis play Sc reen
Pow er Butt on
Up Ke y
Dow n Key
Com munic ation I nterf ace
Fro nt View
3. Pr oduc t Introduction
PC, P atrol S oftwa re, USB F inger print S canne r/Car d Issue r, Patrol Device,
Cha rging /Acq uisi tion B ase, U SB Cable, Checkpoints ( Locat ion Tags).
5. Wor kflo w
Guard Pa trol S yste m Compone nts:
Ins tall pa trol so ftwar e
Set c heckp oint
Reg ister p atrol ler
Set e vent
Set r oute
Set s hift
Set p atrol p lan
Sta rt to pat rol
Collect data by software
Mak e repor ts
Conne ct patrol devi ce with
softw are to synchro nize data
6. Op erati on Inst ructi ons 6. Op erati on Inst ructi ons
1.
boots up .
2. : Press po wer bu tton and ho ld for 3 s econds to s hutd own the dev ice.
3.
4.
Veri fy 3 time s does no t pass,
the d efaul t valid ation f ails. )
5.
6.
7.
8.
Power On : Pres s power but ton to s tart the pa trol d evice, wa itin g it vibrat es and
Power Off
Sleepi ng Mod e: The d evice wil l ente r sleepin g mode i f there is no o pera tion
within 2 0 seco nds (defa ult) , this time c ould b e configu red by s oftware . Pres s
power bu tton o nce to wake t he dev ice up and on ce aga in to make it s leep .
Start to p atro l
1) Place f inge r or swipe ca rd on th e patrol de vice t o sign in at fi rst, t he screen
will dis play p atrolle r’s name, I D numb er and prom pts to b egin patr olli ng under
a specif ied ro ute.
2) Go to the f irst c heckpoi nt and s wipe the pa trol d evice to th e loca tion tag, t he
screen w ill di splay cur rent a nd next poi nt nam e, and the de vice w ill reque st to
verify p atro ller’s id entity if i t’s pr eset i n the softw are. T here a re four ver ific ation
types: no, on ly finger prin t, only car d, car d or finger prin t. Please v erif y as
requir ed and c omplete v erif ication w ithi n 20 second s.(
3) Once th e patr oller is ve rifi ed, the scr een wi ll displa y even ts to selec t for th is
checkp oint . Thes e events sh all be p reset in th e soft ware and it ’s opt iona l to
apply.
4) After t he eve nt is recor ded, t he screen i nstr ucts next p oint t o check, ju st do th e
same ste ps as ab ove while f ollo wing the ro ute pr eset by sof twar e till the de vice
notify t hat fi nal point i s chec ked, thus t he pat rol is comp lete d.
Note: If t he pat roller wa nts to q uit or end th e patr ol, pleas e veri fy his iden tity b y
finger prin t or card. If t he pat roller go es to wr ong check poin ts, the scr een wi ll
prompt a nd ins truct the c orre ct point to c heck .
Out of Mem ory: T he device w ill no tice its av aila ble capac ity if t here are le ss tha n 500
record s left , the scree n will p rompt eac h time w hen a new rec ord is g enerate d.
Note: Wh en the r ecord num ber re aches 30, 000, t he device w ill au tomatic ally d elete
the olde st 10, 000 recor ds.
Batter y: The b atte ry level is d ispl ayed in the s tatu s bar on the sc reen ; please re char ge
the devi ce whe n there is on ly one c ell of batt ery ba r left.Wh en the d evice bat tery i s dead,
you need t o char ge about 10 m inut es and then s tart .
Commun icat ion: Th e device sh all be c onnecte d to PC vi a chargin g/ac qui siti on bas e
by a USB cab le and m ake sure th e devi ce is not in sl eepi ng mode.
Wor king temp erat ure: -10℃ ~+40℃.
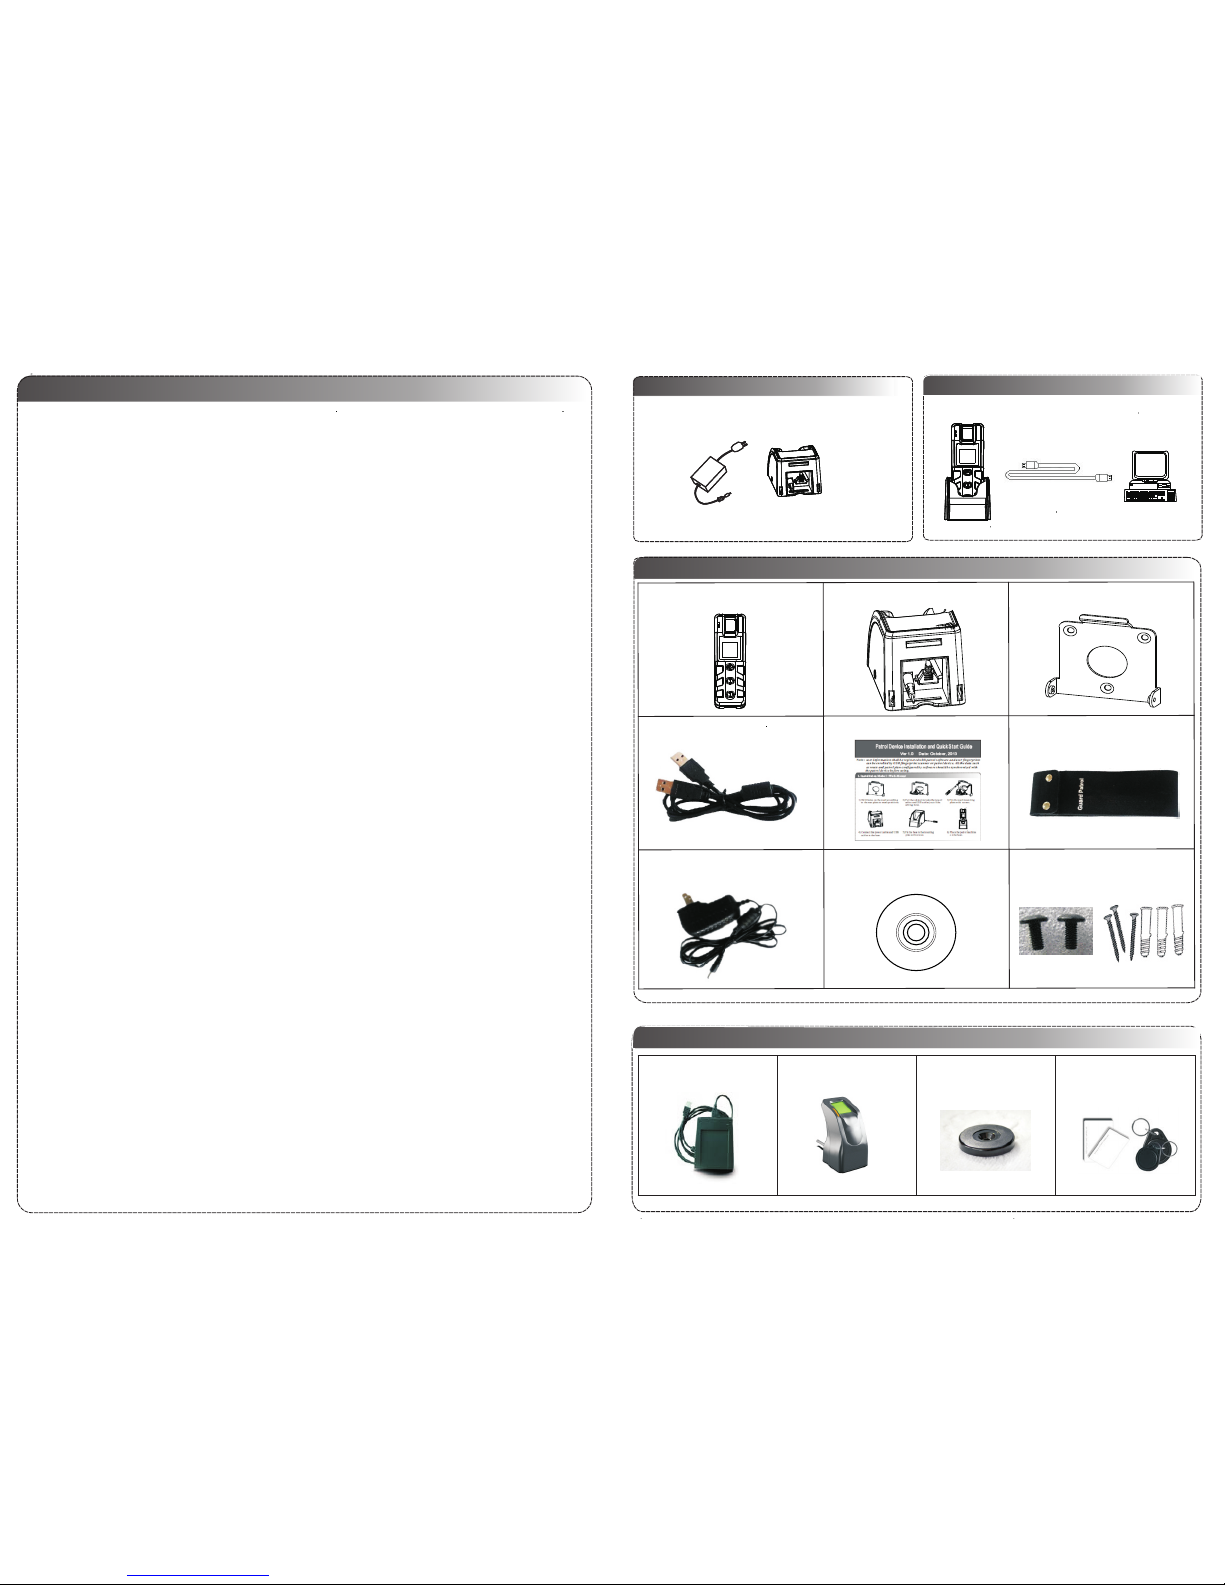
9. Pa ckagi ng List
P
atrol U
n
i
t
Cha r
g
ing
/Ac q
u
isi
tion B
a
se
R
e
a
r Pl
a
te
U
S
B C
abl
e
Q
u
i
ck S
tar t Gui
d
e
Prote cti
ve
Tu
b
e
Pow
er
Sup pl
y
Sof
twa
re CD
Scr ews& White Rubbe r Pl ug
6. Po wer Con necti on
DC 5V
Cha rging b ase
7. Po wer Con nect ion
The d evice c hargi ng powe r is DC5V, the
cur rent is 8 00mA.
The d evice c onnec ts with tho ugh USB c able. PC
USB cable
The d evice
PC
8. US B Conne ction
10.Optio nal Ac ces sor ies
Car d Issue r
USB Fingerprint Scanner
Location Tag
Car d &Key Fo b
10. O ption al Ac cess orie s
 Loading...