

Page 1

ASSEMBLY INSTRUCTIONS
DINING TABLE
NOTE TO CUSTOMERS:
For ease and speed of assembly we recommend that before you commence each step of the
assembly that you identify all the parts required to complete that step.
We recommend that where possible you allow sufficient space to assemble the item as close
as possible to the place where it will be once assembled.
For the protection of your furniture we recommend that the product is placed on protected
surfaces during assembly to prevent any damage.
During assembly do not over tighten the screws or bolts, as this may damage the product.
Please ensure you retain all the product packaging until the item is completely assembled.
Periodically check all fitting and re-tighten as necessary.
Never allow any liquids to remain on your furniture as absorption can cause the wood to warp
or finish to de-laminate.
It is recommended that this item should be assembled by two adults.
PAGE 1 OF 6
Page 2

ASSEMBLY
INSTRUCTIONS
NOTE TO CUSTOMERS:
For ease and speed of assembly we recommend that before you commence each step of the
assembly that you identify all the parts required to complete that step.
We recommend that where possible you allow sufficient space to assemble the item as close
as possible to the place where it will be once assembled.
For the protection of your furniture we recommend that the product is placed on protected
surfaces during assembly to prevent any damage.
During assembly do not over tighten the screws or bolts, as this may damage the product.
Please ensure you retain all the product packaging until the item is completely assembled.
Periodically check all fitting and re-tighten as necessary.
Never allow any liquids to remain on your furniture as absorption can cause the wood to warp
or finish to de-laminate.
It is recommended that this item should be assembled by two adults.
PAGE 2 OF 6
Page 3

Chair Assembly Tips
The key to correct chair assembly is to loosely attach all of the bolts, then gradually tighten them in
succession until all of them are secure. Completely tightening one or more bolts prematurely can
result in the following:
ISSUE: CHAIR IS UNLEVELED
Cause:
Chairs can be wobbly or unleveled if one or more bolts are fully tightened before
all bolts are attached and / or tighten.
Chairs can be wobbly or unleveled if assembly is completed in a dierent room or
surface than where the product is intended to primarily reside.
Solution:
Loosen each bolt in the seat box (front
legs, back corner-blocks, and back apron)
until they are adjustable by hand. Place
the chair upright on the floor. Press firmly
and evenly on the seat edges until the
product sits level but do not lean against
the chair back. Once the chair sits level
on the desired surface, fully tighten each
bolt.
Loosen bolts until
adjustable by hand
When assembling your chair, make sure
to do it in the location that the chair will
most often be used. Uneven flooring
frequently accounts for wobbling issues.
ISSUE: HOLES ARE MISALIGNED
Cause:
This issue can occur when some bolts are tightened fully before all other bolts are
tightened or attached.
Solution:
Loosen each bolt in the seat box (front legs, back corner-blocks, and back apron)
until nger tight. This will allow you to realign the holes and properly fasten the
bolts to the frame.
PAGE 3 OF 6
Page 4
ASSEMBLY INSTRUCTIONS
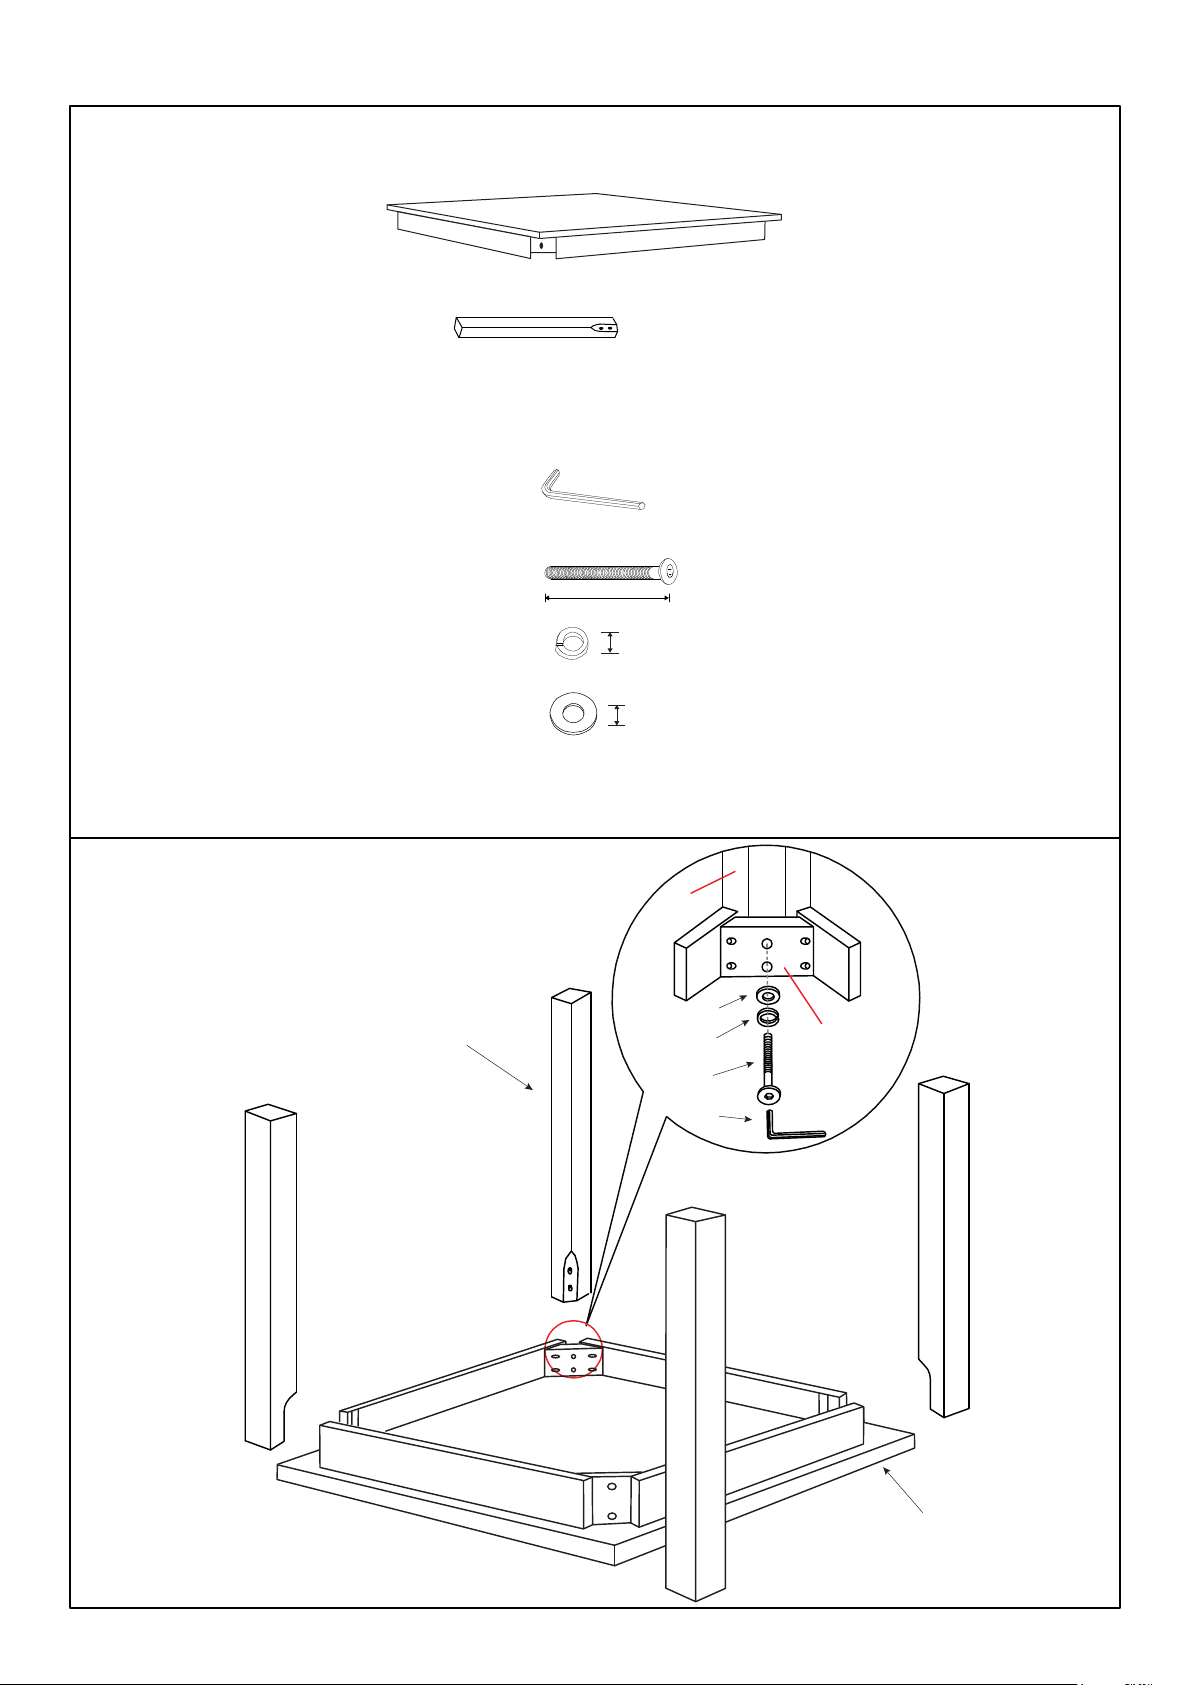
PARTS IDENTIFICATION
1-
Table Top 1 pc
2- Table Legs 4 pcs
HARDWARE IDENTIFICATION
A-
B- JCBC Bolt M6 x 70mm 8 pcs
C- Spring Washer 1/4” 8 pcs
D- Flat Washer 1/4“ 8 pcs
Allen Key M4 1 pc
Ø6mm
2 .75 ”
Ø 1/4”
Ø 1/4”
NOTE: Quantities shown are for one table.
Bolts are metric screw threads
(2) TABLE LEG
TABLE LEG
(D)
(C)
(B)
(A)
CORNER BLOCK
(1) TABLE TOP
PAGE 4 OF 6
Page 5

ASSEMBLY INSTRUCTIONS
PARTS IDENTIFICATION
DINING CHAIR
3-
4-
Chair Side Frame (Right) 1 pc
Chair Side Frame
(Left) 1
pc
5- Seat Aprons 2 pcs
6-
7-
Back
Rest 1
Board 1
Seat
pc
pc
HARDWARE IDENTIFICATION
Ø6mm
E-
F- Barrel
G-
H- L-Bracket
I-
J- Wooden
K- Screw Truss 22mm 4 pcs
JCBC Bolt M6 x 50mm 4 pcs
Nut
4 pcs
Screws 25mm 2 pcs
2 ”
1”
2 pcs
Screws 16mm 4 pcs
Dowel
4 pcs
1”
0.8”
L- Wood Button 4 pcs
M- Allen Key
NOTE: Quantities shown are for one chair. Bolts are metric screw threads
1 pc
PAGE 5 OF 6
Page 6
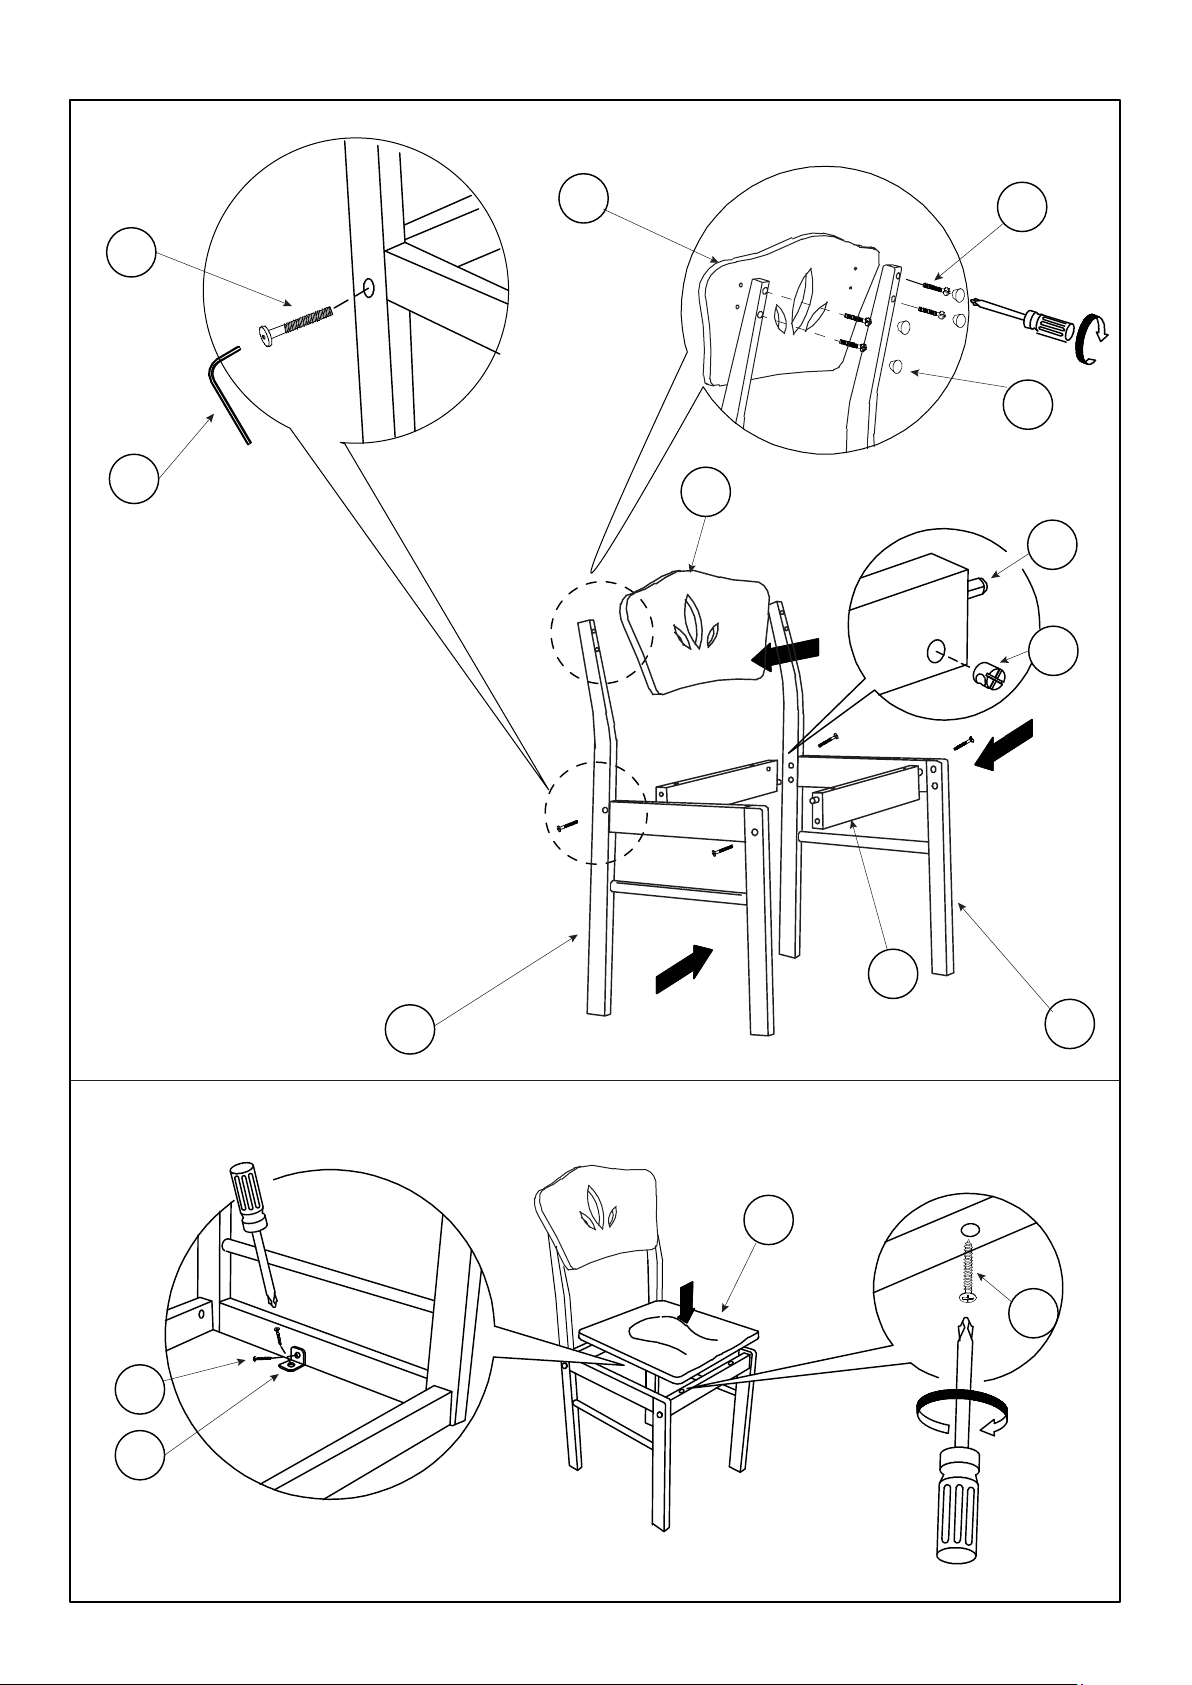
ASSEMBLY INSTRUCTIONS
STEP 1
E
M
6
STEP 2
K
L
From Rear
6
J
F
STEP 3
I
H
From Bottom
4
5
3
From Bottom
7
G
PAGE 6 OF 6
 Loading...