

Page 1
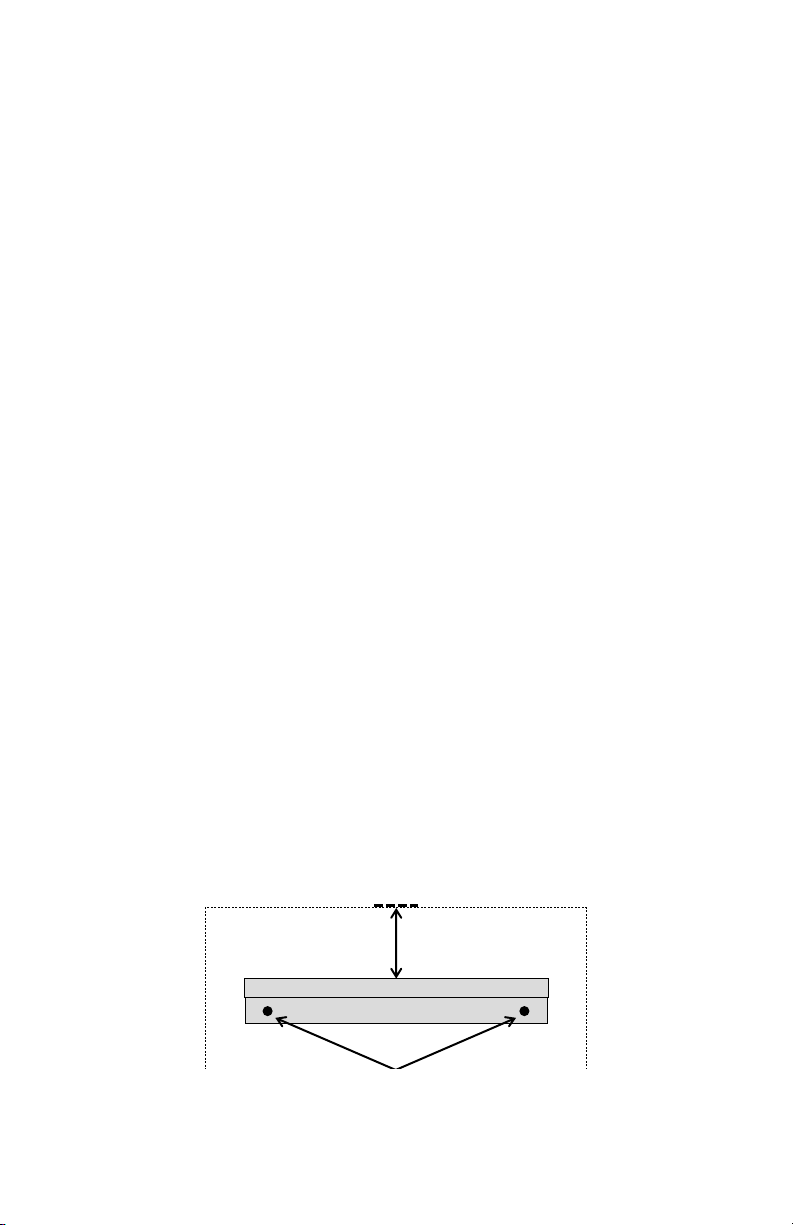
1. Place the mirror in the desired location on the wall. Mark a line on
the wall at the top-center of the mirror (two people are required for
this step). Carefully set the mirror aside when complete.
2. Position the Wall Bracket so that the top of the bracket is 3” below
the Top of Mirror Line from step #1. Use a level to ensure the Wall
Bracket is level, then mark the positions of the Wall Bracket Screw
Holes.
Note: The ridges on the Wall Bracket should be against the wall
and the screw holes should be on the bottom. See illustrations.
3. Using a ¼-inch bit, drill pilot holes into the marked locations. Insert
the provided anchors until flush with the wall surface. Place the Wall
Bracket onto the wall and secure with the provided screws.
4. Apply two rubber bumpers near the bottom corners of the back of
the mirror.
5. Carefully hang the mirror by placing the Mirror Mounting Plate onto
the Wall Bracket. Positioning can be adjusted side to side by gently
sliding the mirror along the bracket.
Installation Guide
ILLUSTRATION
Mirror
Outline
Top of Mirror Line
(Step #1)
3”
(Step #2)
(see reverse)
Wall Bracket Screw Holes
Page 2
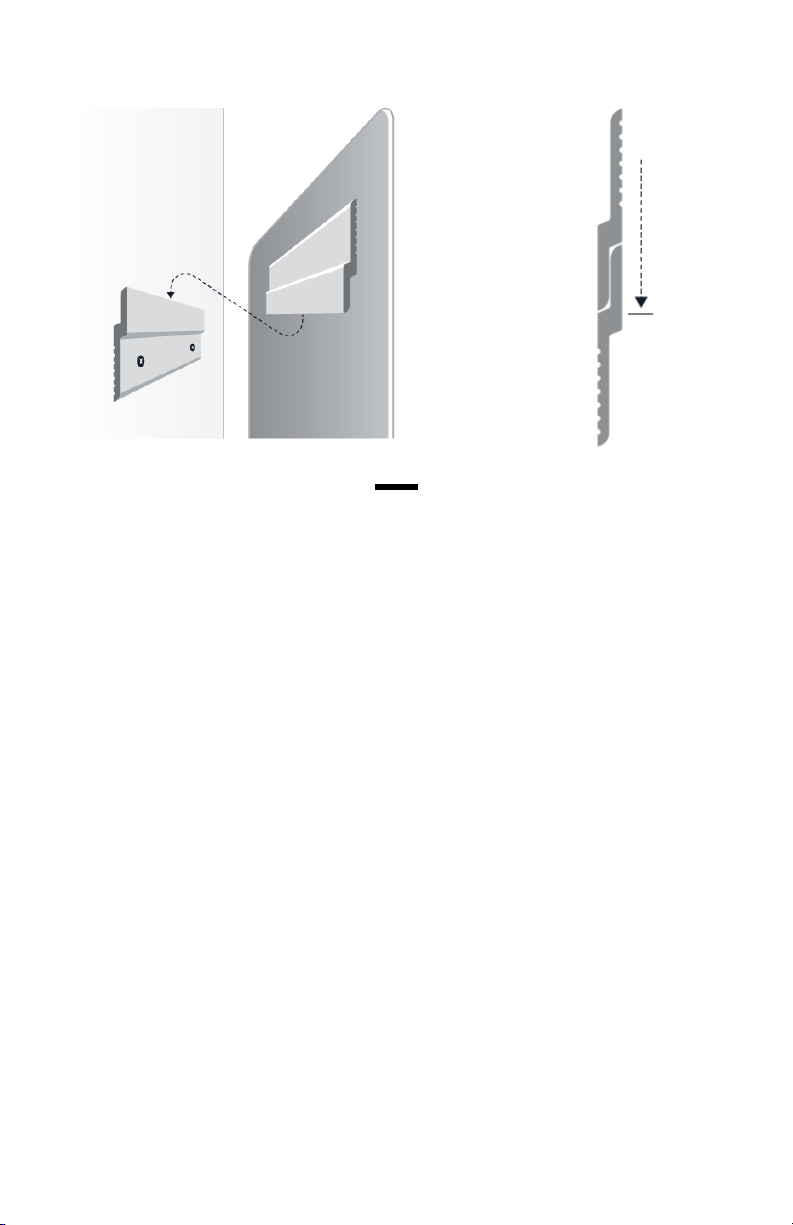
ILLUSTRATION (CONTINUED)
Mirror
Mounting
Plate
Wall
Bracket
PRO TIPS
The best and safest way to clean
your mirror is by using warm water
and a soft, lint-free cloth.
Wring water from the cloth before
wiping the mirror to avoid excess
moisture.
Keep bathrooms well ventilated.
Oil-free #0000 steel wool is a great
way to remove stubborn marks on
glass (this is a favorite tool in our
workshop).
If a cleaning agent is required, use
an ammonia-free option (Windex
®
Ammonia-Free Glass Cleaner is a
great choice).
THINGS TO AVOID
Avoid using cleaners that contain
ammonia or vinegar – these can
cause corrosion on the edges of
the mirror. Never use abrasive
cleaners.
If your mirror sits directly on a
vanity, avoid having excess water
puddle along the bottom of the
mirror.
Avoid spraying cleaners directly
onto the mirror.
Mirror Care Guide
 Loading...