

Page 1
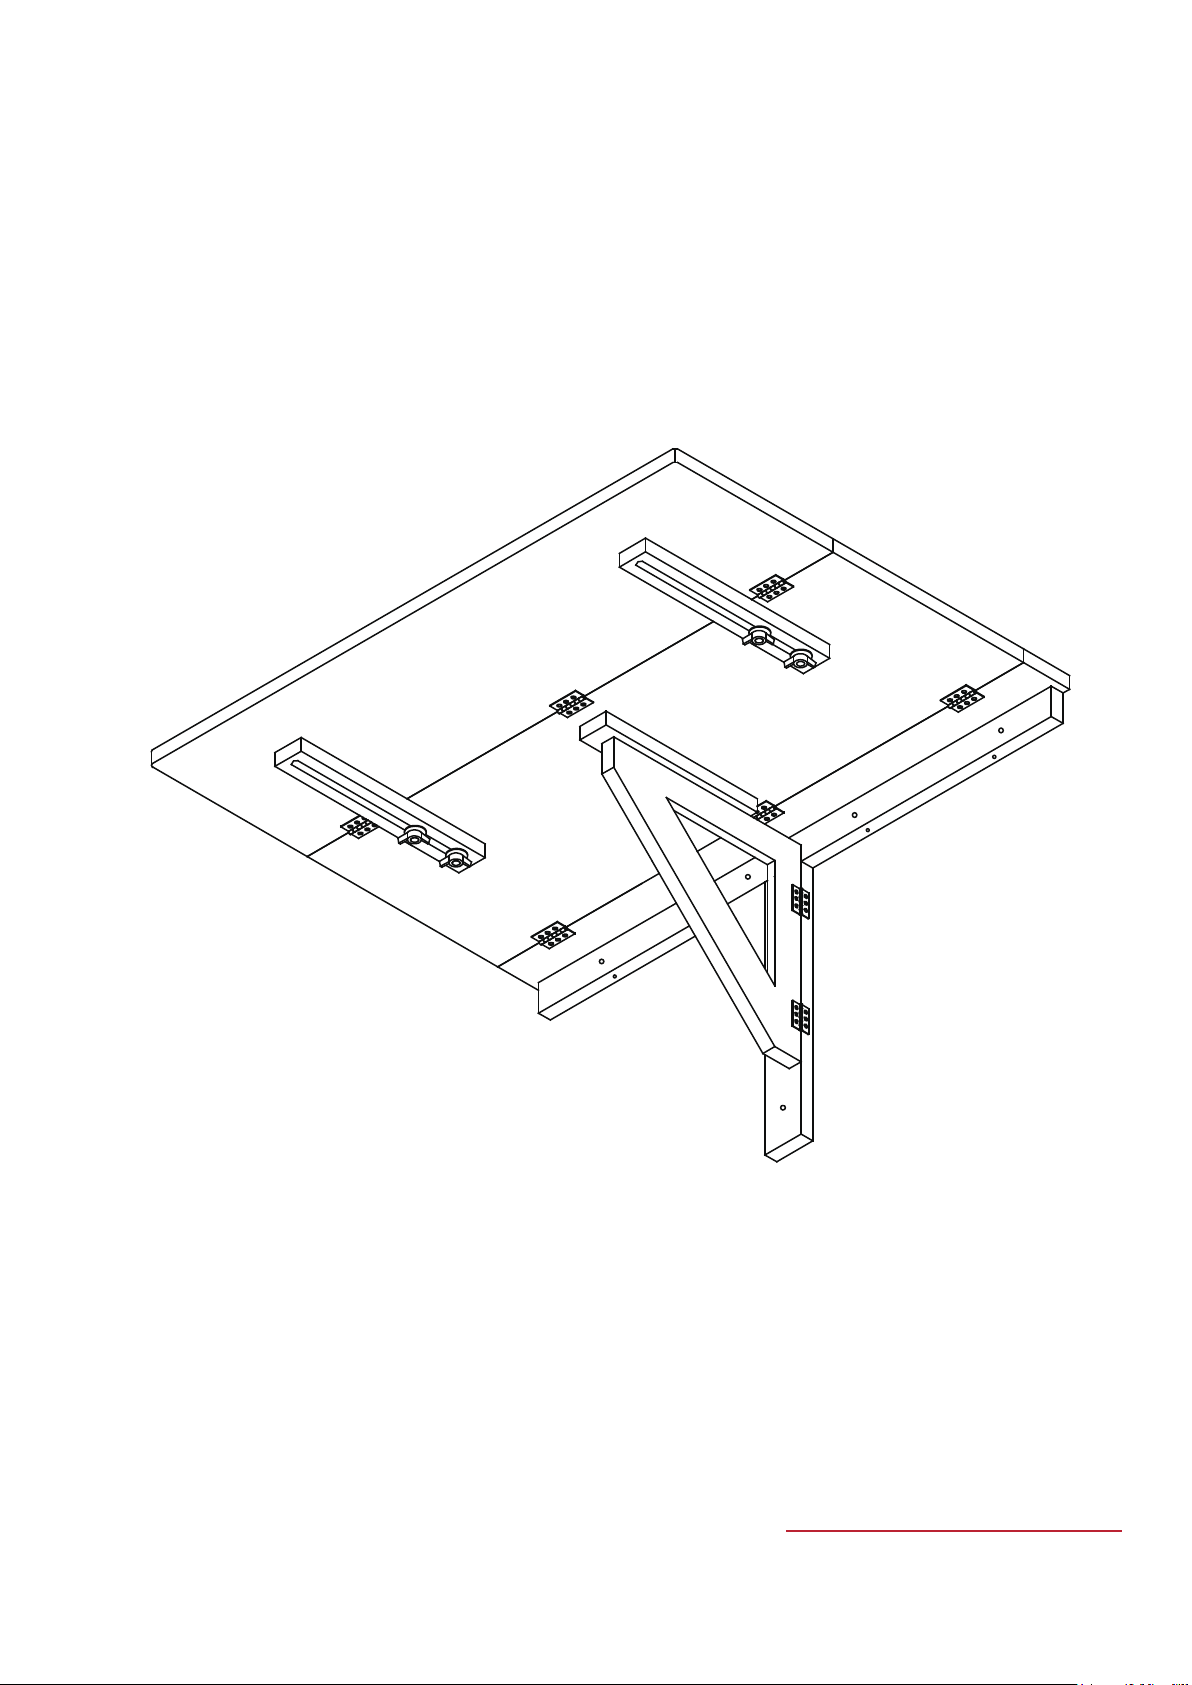
USER'S MANUAL
Folding Desk
Page 2
PRODUCT ASSEMBLY
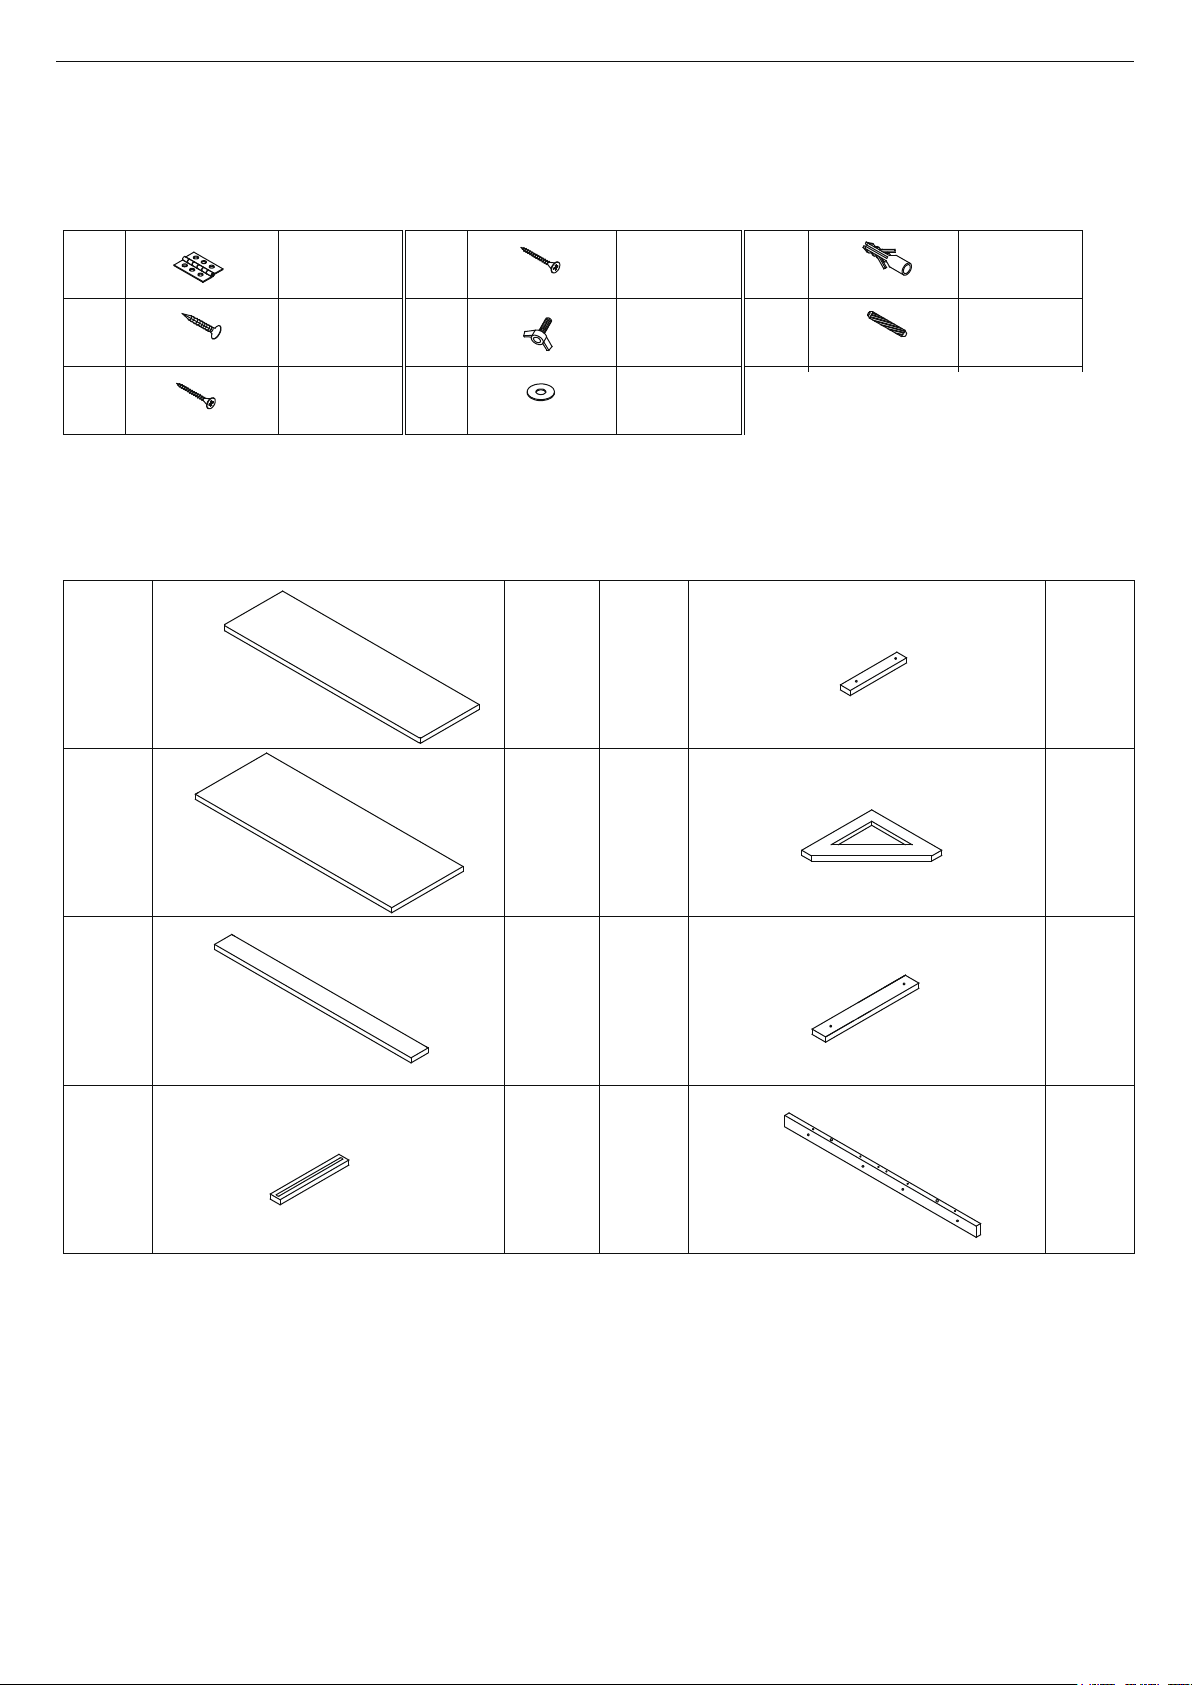
Hardware List
A
Hinge
B
Screw
C
Screw
Parts List
1
Front Top Panel
2
3*14mm
4*25mm
8 pcs
48 pcs
2 pcs
D
E
F
Screw
Bolt
Flat Washer
4*40mm
12 pcs
4 pcs
5
6
4 pcs
Bottom Rail
G
Plastic Anchor
H
Wood Dowel
6 pcs
8*30mm
4 pcs
1 pc1 pc
1 pc1 pc
3
4
Middle Top Panel
Back Top Rail
Slide Holder
7
8
Triangle
1 pc1 pc
Vertical Wall Rail
1 pc2 pcs
Back Wall Rail
1/4
Page 3
PRODUCT ASSEMBLY
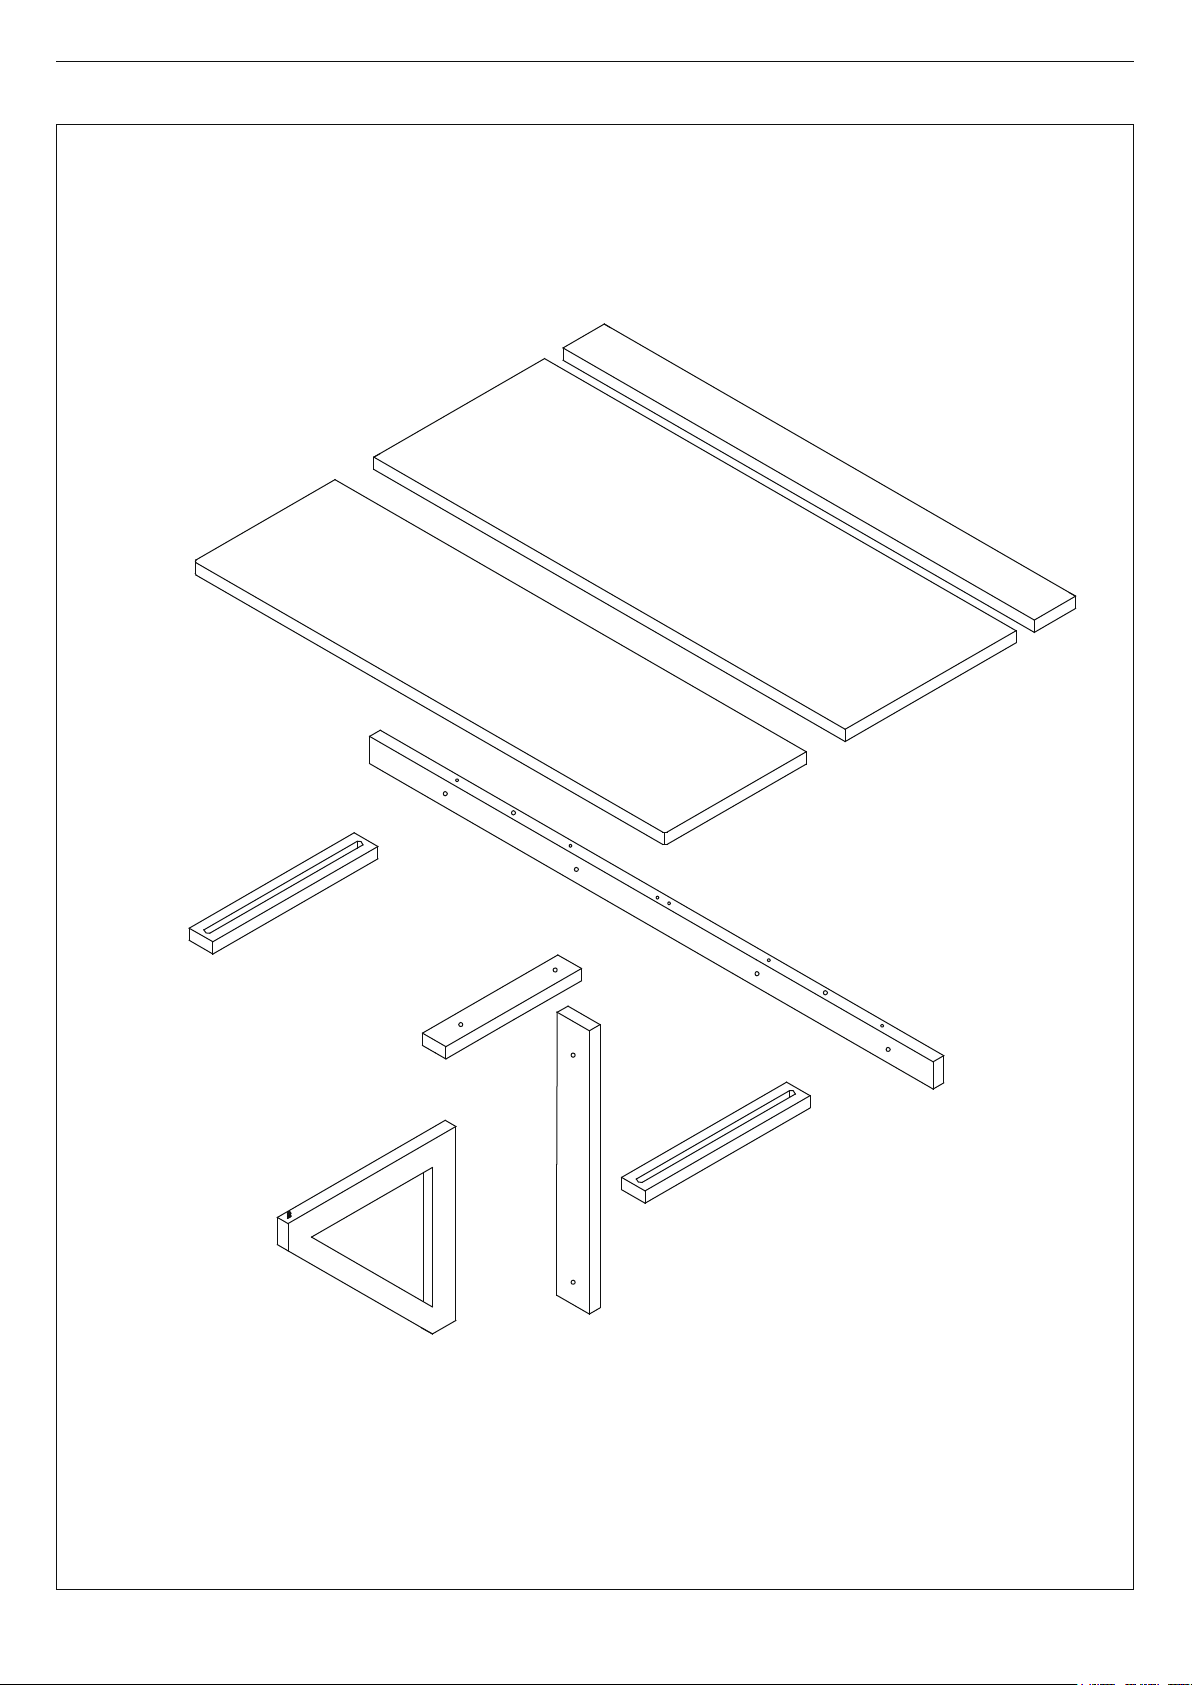
Part List Assembly Overview
3
2
1
4
8
5
4
7
6
2/4
Page 4
PRODUCT ASSEMBLY
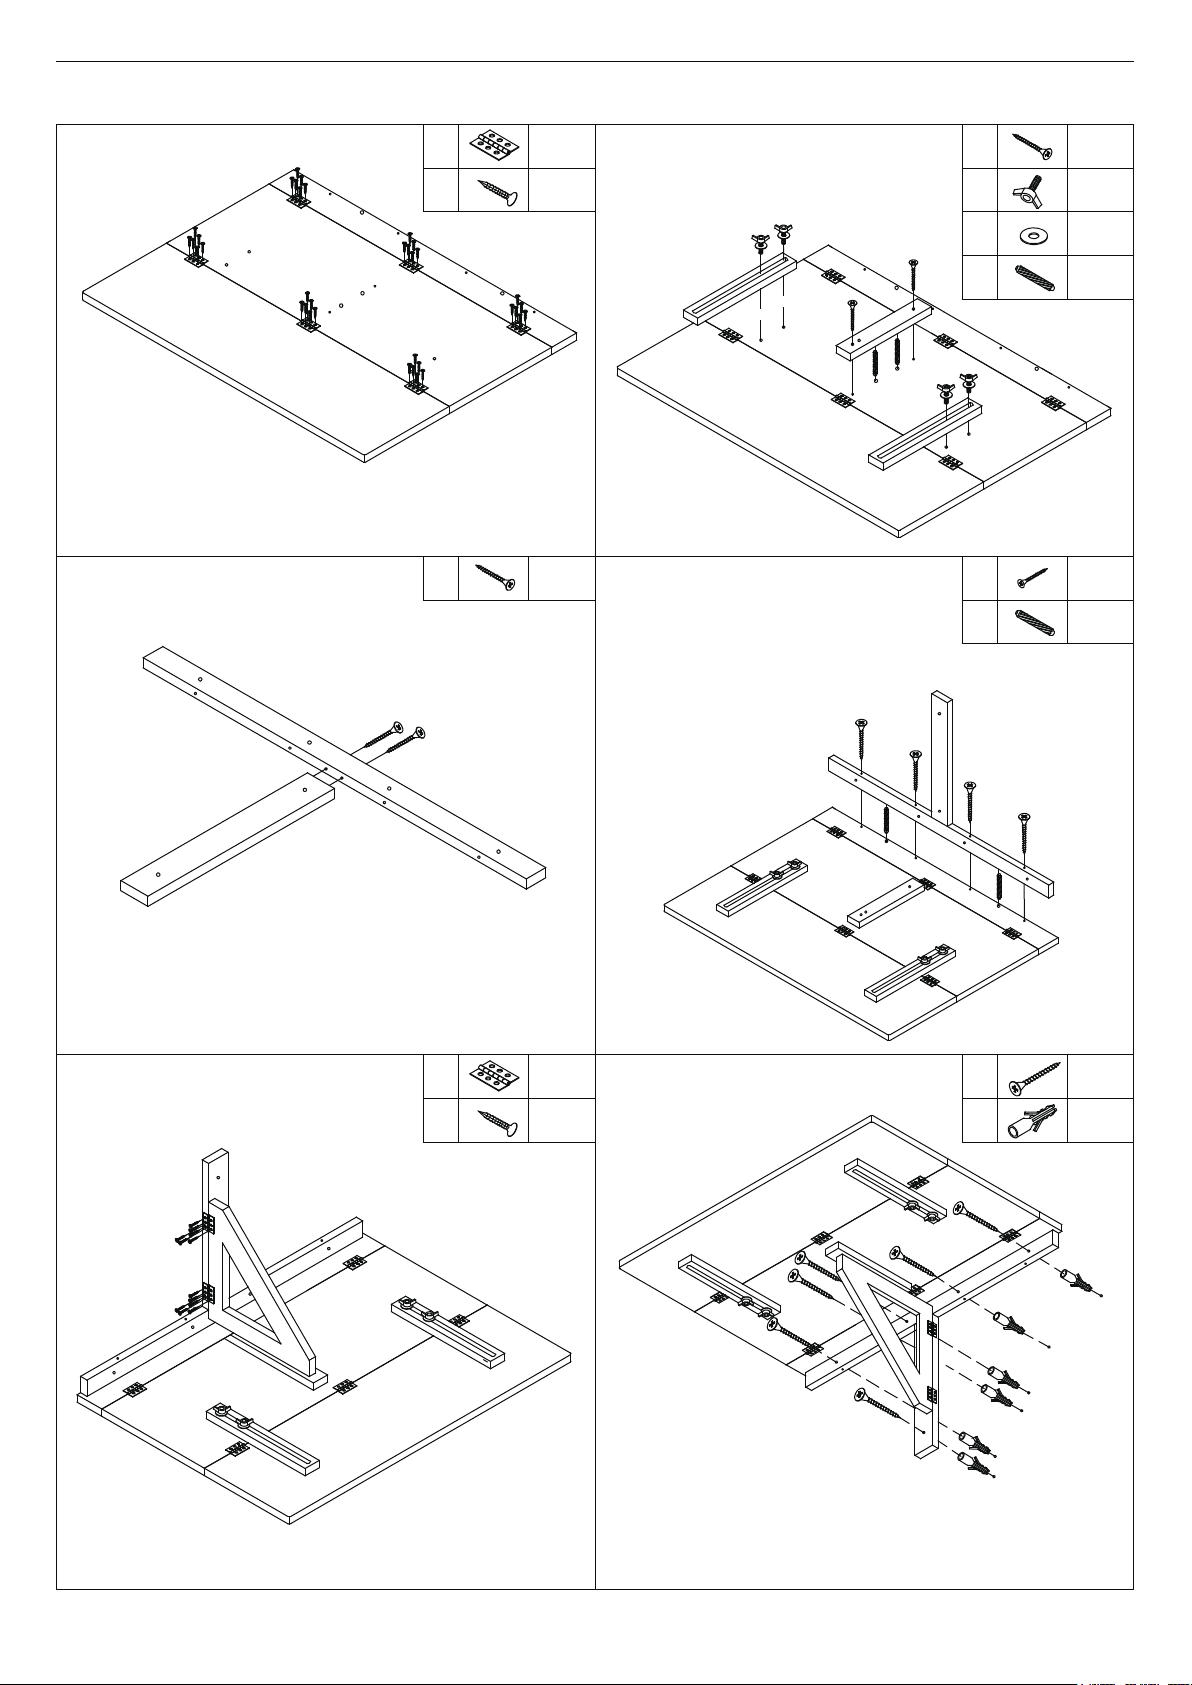
Step 1
B
A
B
A
3
2
1
a) Place Top Panels
(1 & 2) and Back
Top Rail (3) tidily as shown.
b) Attach the Hinge (A) to the designated holes on (1, 2
& 3) by uisng Screw (B).
Step 3
8
D
D
6 pcs
36 pcs
2 pcs
Step 2
a) Attach Bottom Rail (5) to (2) by using
Wood Dowel (H) and Screw (C).
C
4
5
H
b) Attach Slide
Holder (4) to (2)
by using Flat Washer
(F) and Bolt (E).
E
F
4
Step 4
Attach Back Wall Rail (8) to (3) by
using Wood Dowel (H) and Screw (D).
Do not overtighten.
D
C
E
F
H
D
H
2 pcs
4 pcs
4 pcs
2 pcs
2
4 pcs
2 pcs
7
Attach Back Wall Rail (8) to Vertical Wall Rail (7) by
using Screw (D). Do not overtighten.
Step 5
A
B
7
A
B
6
a) Attach Hinge (A) to Triangle (6) by using Screw (B).
b) Attach (6) to (7) by using Hinge (A) and Screw (B).
2 pcs
12 pcs
8
H
3
Step 6
D
G
D
6 pcs
6 pcs
G
8
a) Drill the holes on a dry wall
as per dia of Plastic Anchor
(G) and the distance of the
designated holes on (7 & 8).
b) Press Plastic Anchor (G) to the wall. Ensure that the
Anchor fits securely in the wall.
c) Attach the unit to the Anchor by using Screw (D).
7
3/4
Page 5
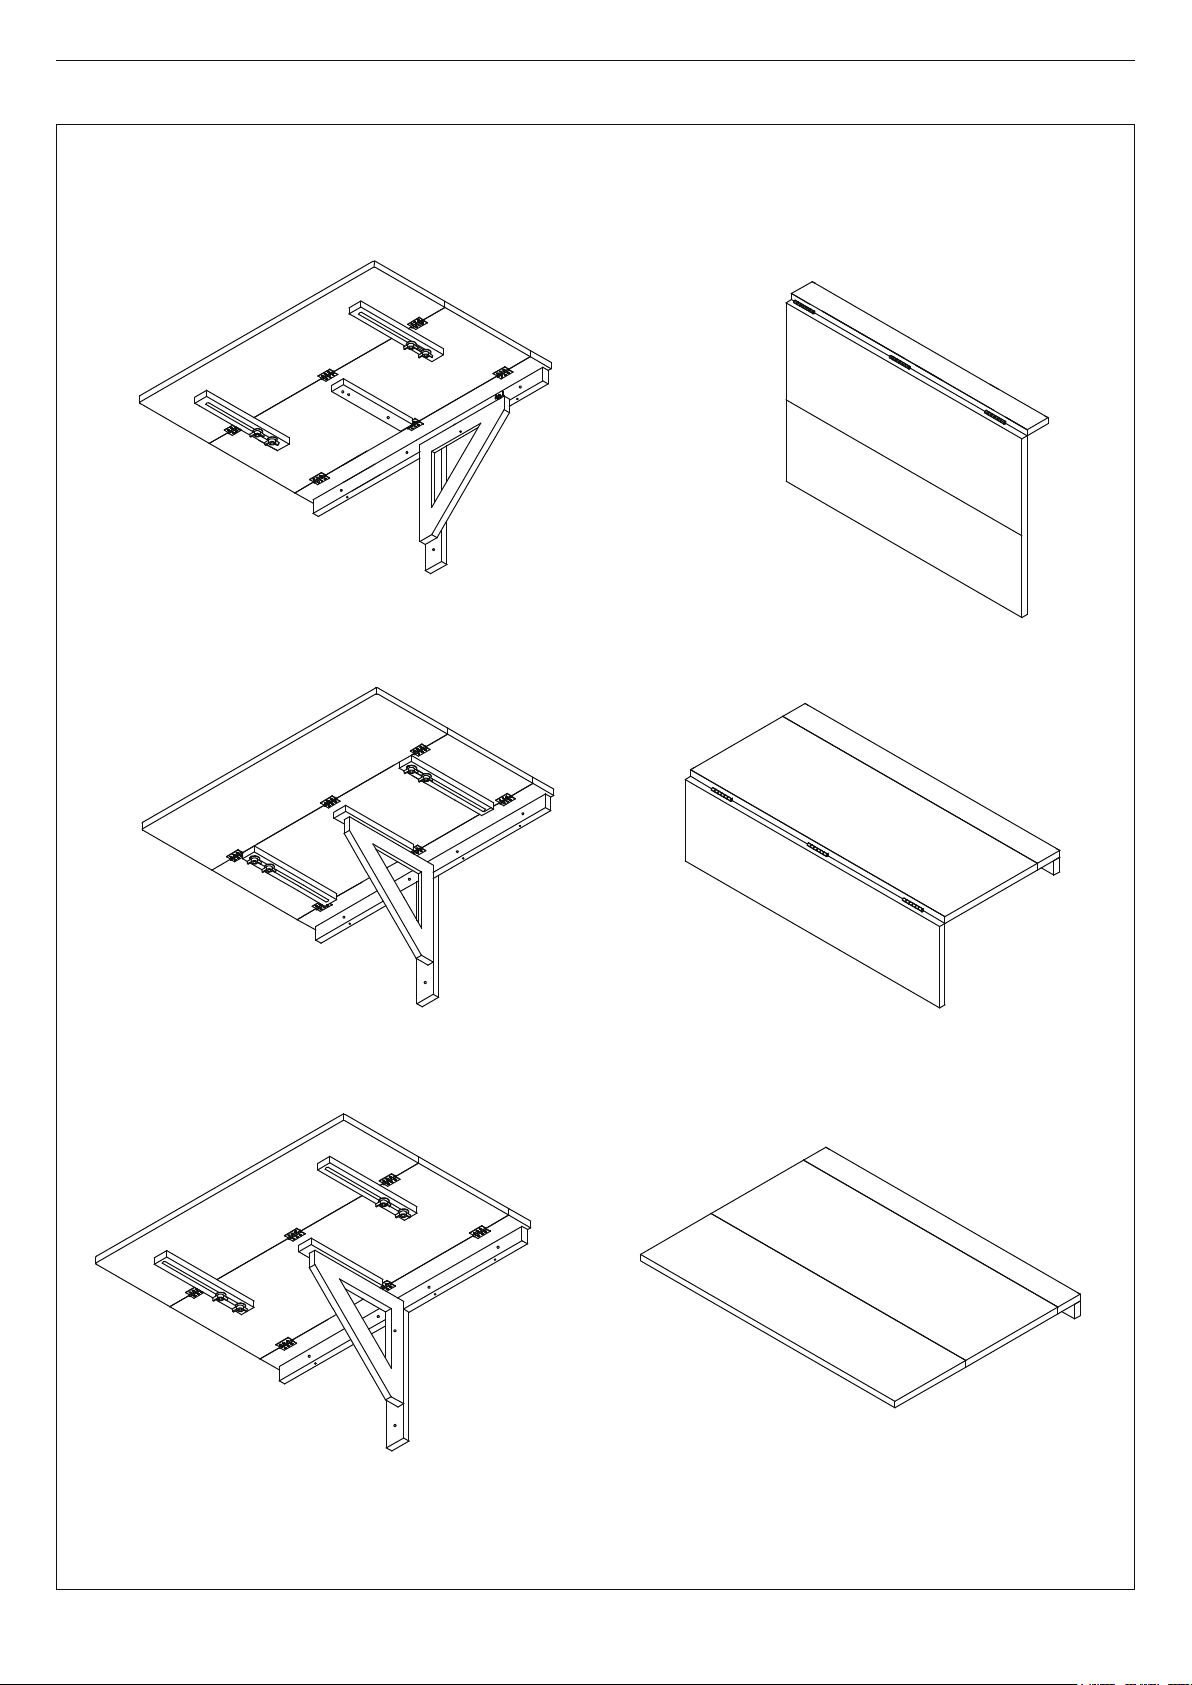
PRODUCT ASSEMBLY
Step 7
Adjust the place of Slide Holder (4) and Triangle (6) to meet the function you need.
4
6
Slide out Slide Holder (4) and Place Triangle (6) in side, you can fold both Top Panels as shown.
4
6
Slide in Slide Holder (4) and Place Triangle (6) in middle, you can fold Front Top Panel as shown.
4
6
Slide out Slide Holder (4) and Place Triangle (6) in middle, both Top Panels will be expanded as shown.
4/4
 Loading...