

Page 1
ASSEMBLY INSTRUCTIONS
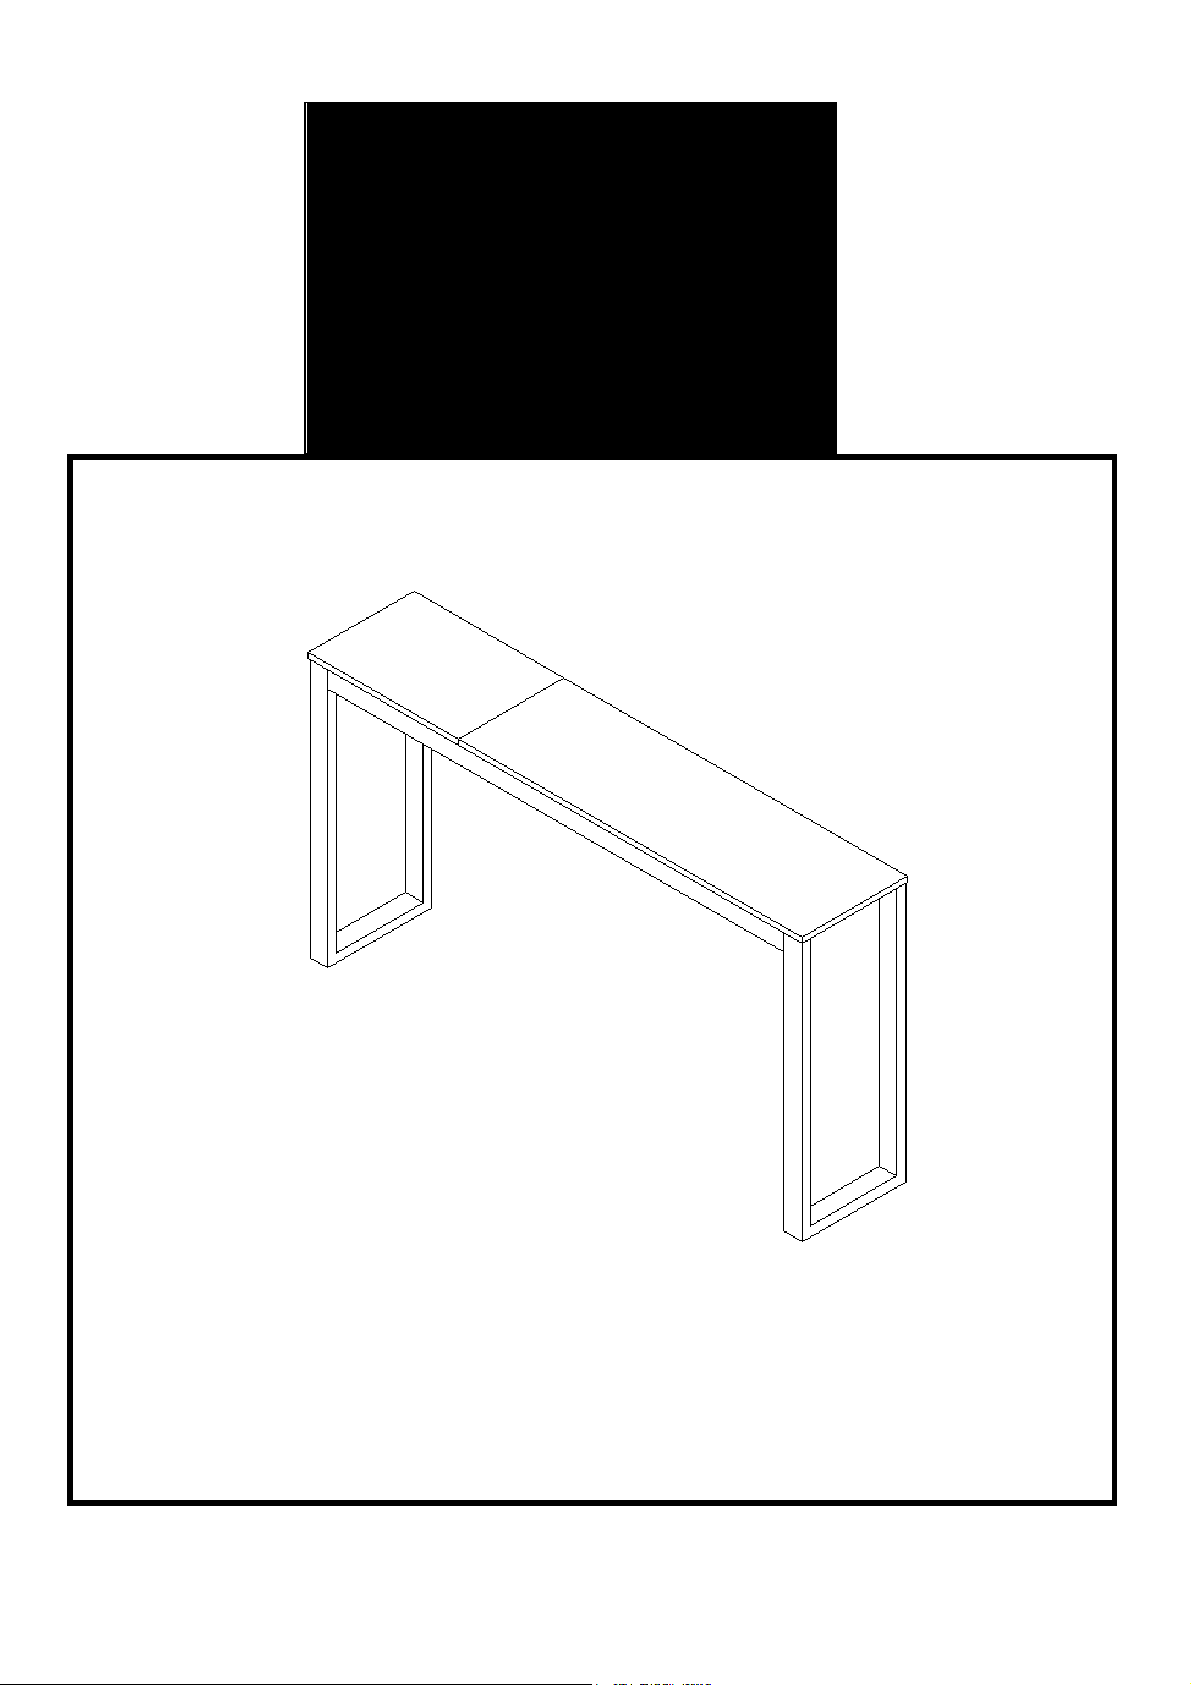
Console - White / Burnt Oak
Console - Black / Burnt Oak
Page 2
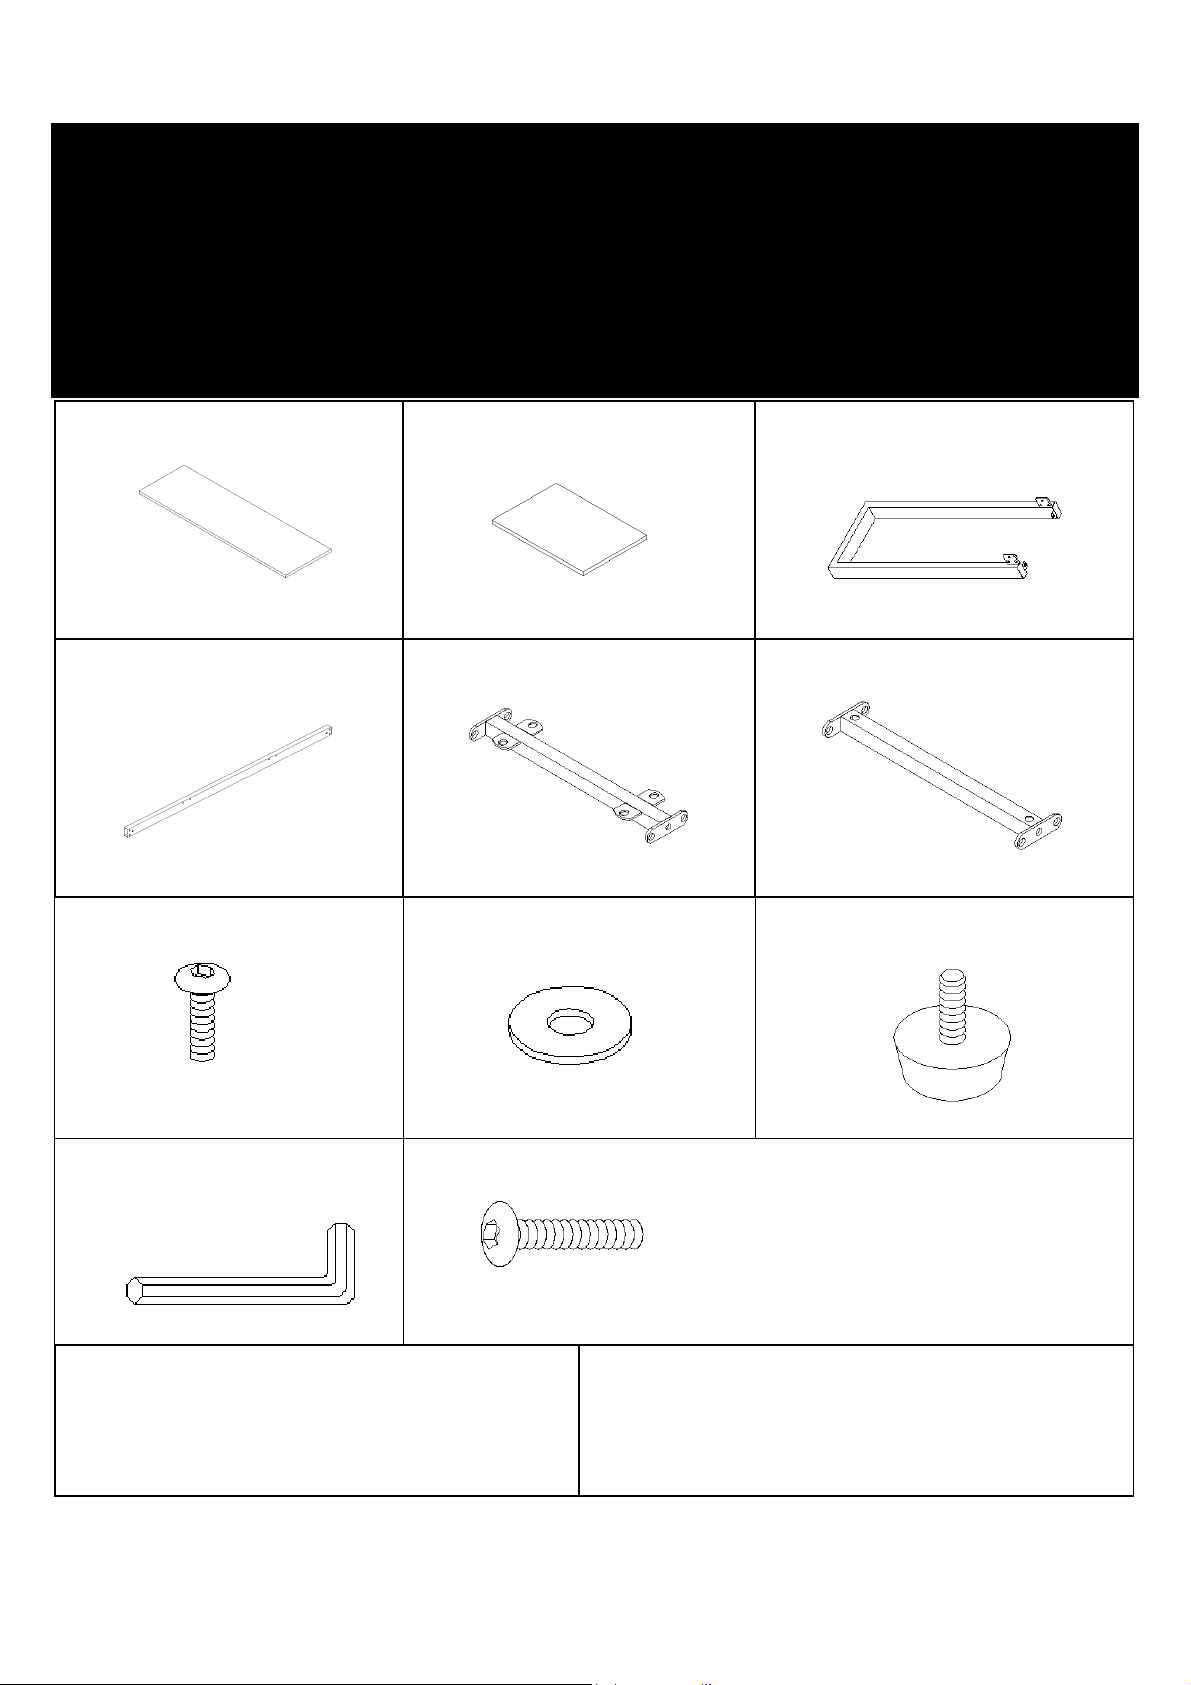
A.
Quantity
B.
Quantity
C.
Quantity
D.
Quantity
E.
Quantity
F.
Quantity
1
.
Quantity
2
.
Quantity
3
.
Quantity
4
.
Quantity
5
.
Quantity
Care and Cleaning Instructions:
Please review all parts and hardware before disposing of any packaging.
Call Customer Service if missing hardware. Do not return to store/retailer.
Using a screw that is too long will cause damage.
Before beginning assembly, separate each type of screw. Carefully study the
Screw diagrams below. You may receive extra hardware with your unit. Screw diagrams
below. You may receive extra hardware with your unit.
Console
Parts list
of 1
Big top
of 2
apron
of 28
Short bolt :1/4”x5/8”
of 1
Small top
of 1
Metal rail
of 22
Flat washer
of 2
leg
of 1
Metal rail
of 4
leveler
of 1
Allen wrench
Before using, wipe with a clean, dry cloth.
Periodically apply furniture wax to renew
the finish. Avoid rubbing or scratching the
surface with rough or abrasive objects.
For replacement parts or questions, please
of 2
Long bolt :1/4”x1-1/16”
For replacement parts or questions, please
Call our Customer Service.
Do not return product to store, please call
Manufacturer for assistance, questions or
Parts.
Page 2
Page 3

Assembly Instructions
Console
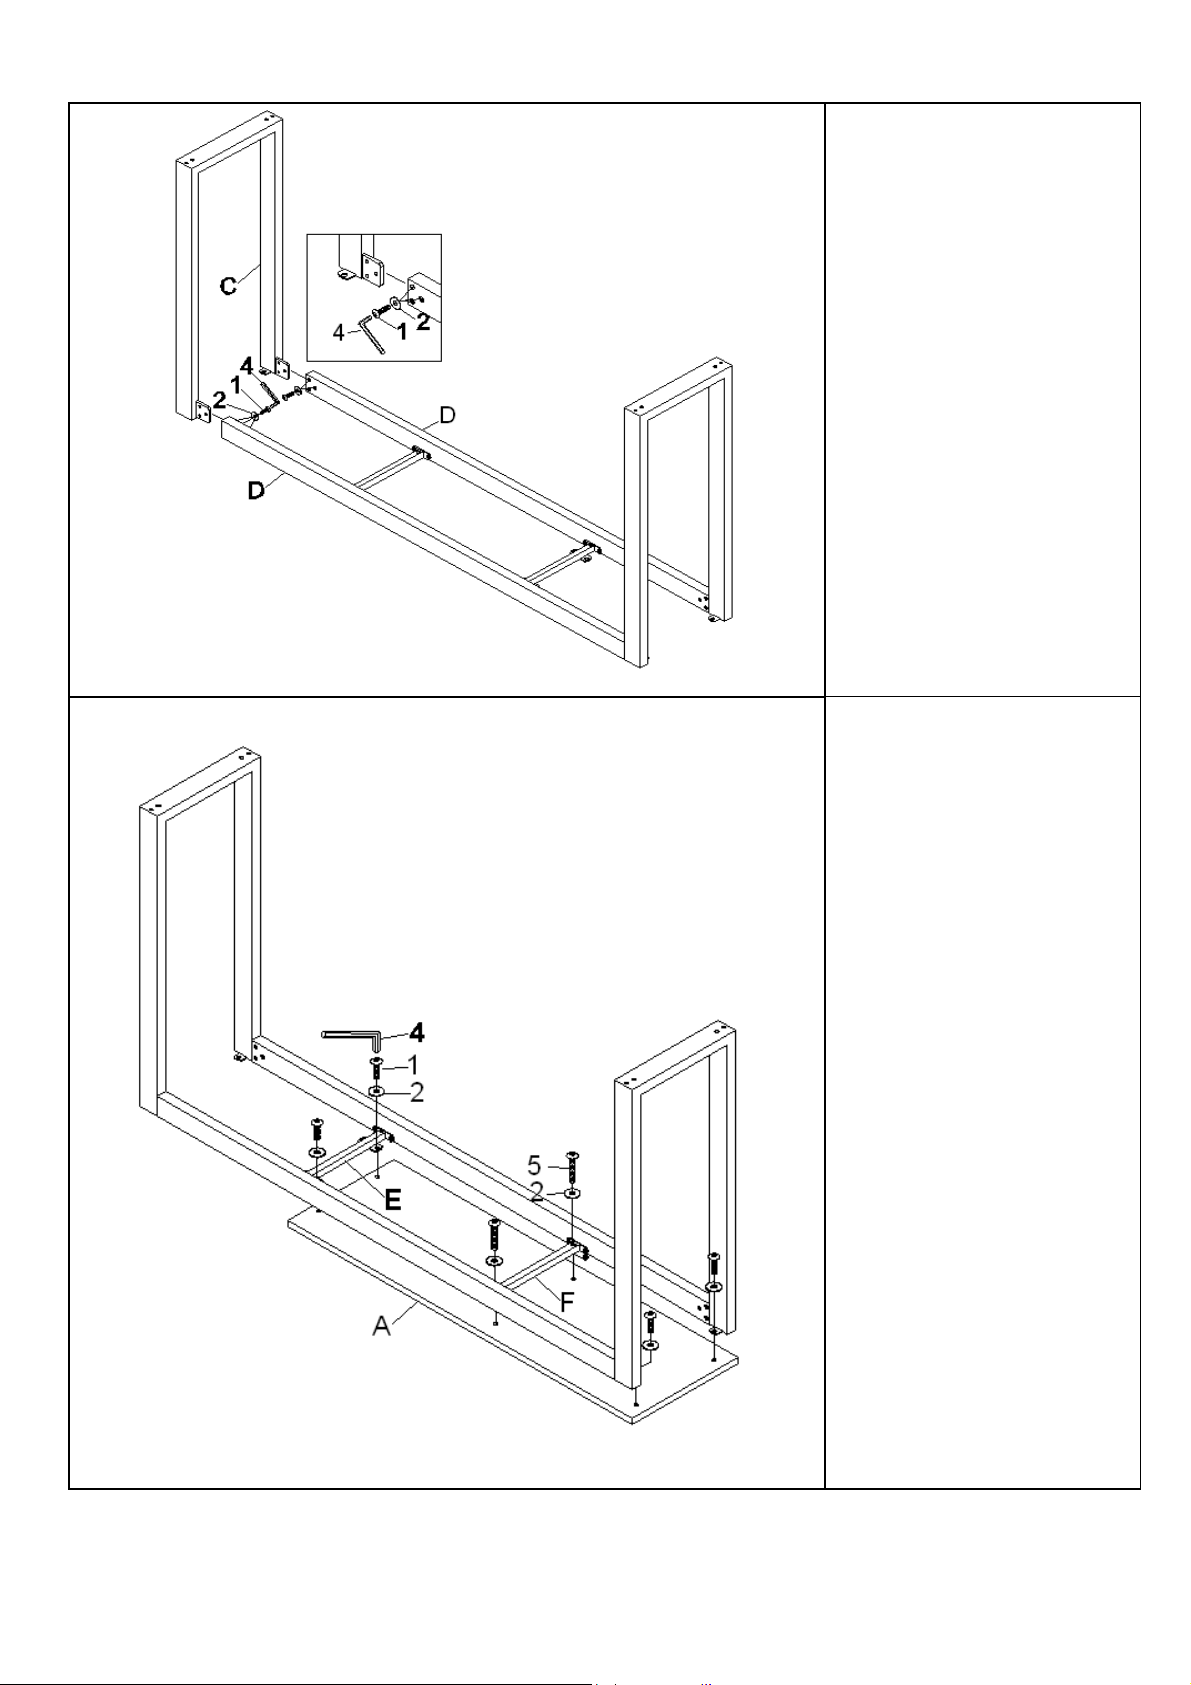
Figure 1
Unpack and lay parts on
clean, padded surface
like carpet or blanket.
Check that you have all
parts indicated on the
front page
Attach Metal rail (E/F) to
apron (D) using short bolts
(1),
tighten short bolt (1) using
Allen wrench (4) as shown in
figure 1.
Figure 2
Page 3
Attach one leg (C) to apron
(D) using short bolts (1) &
flat washer (2). Tighten short
bolts (1) using Allen wrench
(4) as shown in figure 2.
Page 4
F
igure
4
Page 4
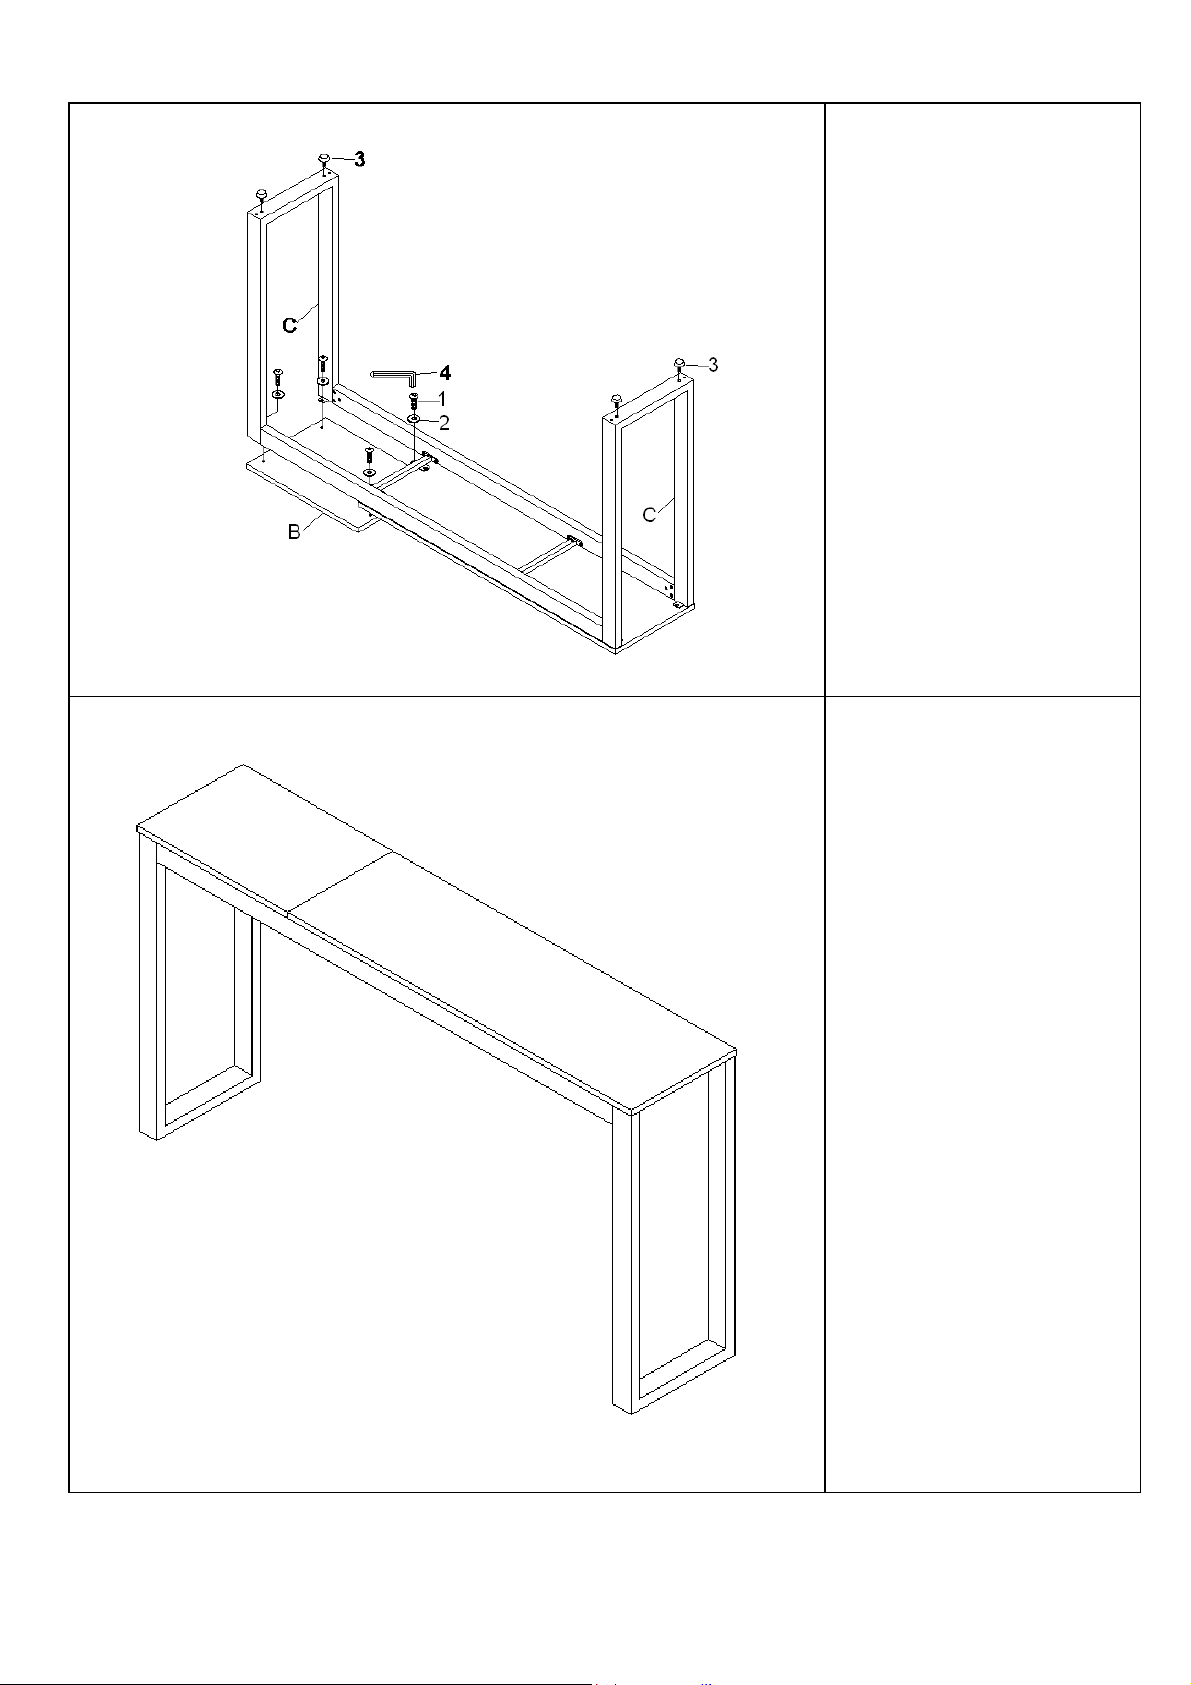
Figure 3
Repeat above step to attach
other leg (C) to
pre-assembled unit in figure
2 as shown.
Attach big top (A) to metal
rail (E) & leg ( C) using short
bolt (1) & flat washer (2),
Attach big top (A) to metal
rail (F) using long bolt (5) &
flat washer (2).
Tighten short bolt (1) and
long bolt (5) using Allen
wrench (4) as shown.
Page 5
E
Figure 5
Figure 6
Attach small top (B) to
metal
rail (E) & leg (C) with short
bolt (1) & flat washer (2)
Tighten short bolt (1) using
Allen wrench (4) as shown
Now your console is ready
for use
Page 5
Page 6

Customer Information
Name
Address
City/State/Zip Code
Phone Number
Please indicate where you purchased this item: Store/Website/Catalog
Please indicate color/size/style number:
Style No Parts Letter Parts Description Quantity Needed
Parts Replacement Form
Please immediately examine this product carefully. Any request for missing parts or damage replacement must
be received within 90 days of your receipt of the product. Replacement, if available, will be honored within this
time frame. Parts will not be available for items arriving fully assembled. We do not recommend modifying
product(s) and we are not responsible for any damages due to product modification(s). If damages or missing
parts are not reported within 90 days of your receipt, we are under no obligation to provide parts or replacement
merchandise.
 Loading...