

Page 1
P.1
Page 2
General Assembly Guidelines
I. Ensure that all parts and hardware are available before beginning assembly.
II. Follow each step carefully to ensure the proper assembly of this product.
III. Two people are recommended for ease in the assembly of this product.
IV. The main type of hardware used to assemble this product are: bolts and screws.
V. Power tools should not be used to assemble this product.
VI. Drill may be needed for securing product to wall.
Instructions de montage générales
I. Assurez-vous que toutes les pièces et tout le matériel sont disponibles avant de
commencer le montage.
II. Suivez attentivement chaque étape afin de vous assurer du montage adéquat de
ce produit.
III. Il est recommandé d'être deux pour faciliter le montage de ce produit.
IV. Les principaux types de matériel utilisés pour assembler ce produit sont : des goujons
en bois, des vis et des boulons.
V. Des outils électriques ne doivent pas être utilisés pour monter ce produit.
(EN)
VI. Une perceuse peut être nécessaire pour fixer le produit au mur.
(FR)
P.2
Page 3
Pautas generales para el ensamblaje
I. Asegúrese de que todas las partes y herrajes estén disponibles antes del ensamblaje.
II. Siga cada paso cuidadosamente para garantizar el ensamblaje correcto de este producto.
III. Se recomienda que dos personas realicen el ensamblaje de este producto para una mayor
facilidad.
IV. Los tres tipos principales de herraje usados para ensamblar este producto son: clavijas
de madera, tornillos y pernos.
V. No se deberán usar herramientas eléctricas en el ensamblaje de este producto.
VI. Es probable que se necesite un taladro para asegurar el producto a la pared.
(ESP)
Allgemeine Montagerichtlinien
I. Achten Sie darauf, dass vor Beginn der Montage alle Bauteile und Hardware zur
Verfügung stehen.
II. Befolgen Sie jeden Schritt genau, um die ordnungsgemäße Montage dieses Produkts zu
gewährleisten.
III. Es werden zwei Personen empfohlen, um die Montage dieses Produkts zu vereinfachen.
IV. Die drei Haupttypen von Beschlägen, die zur Montage dieses Produkts verwendet werden,
sind: Holzdübel Schrauben und Bolzen.
V. Es dürfen keine Elektrowerkzeuge zur Montage dieses Produkts verwendet werden.
VI. Möglicherweise wird ein Bohrer benötigt, um das Produkt an der Wand zu befestigen.
(DE)
P.3
Page 4
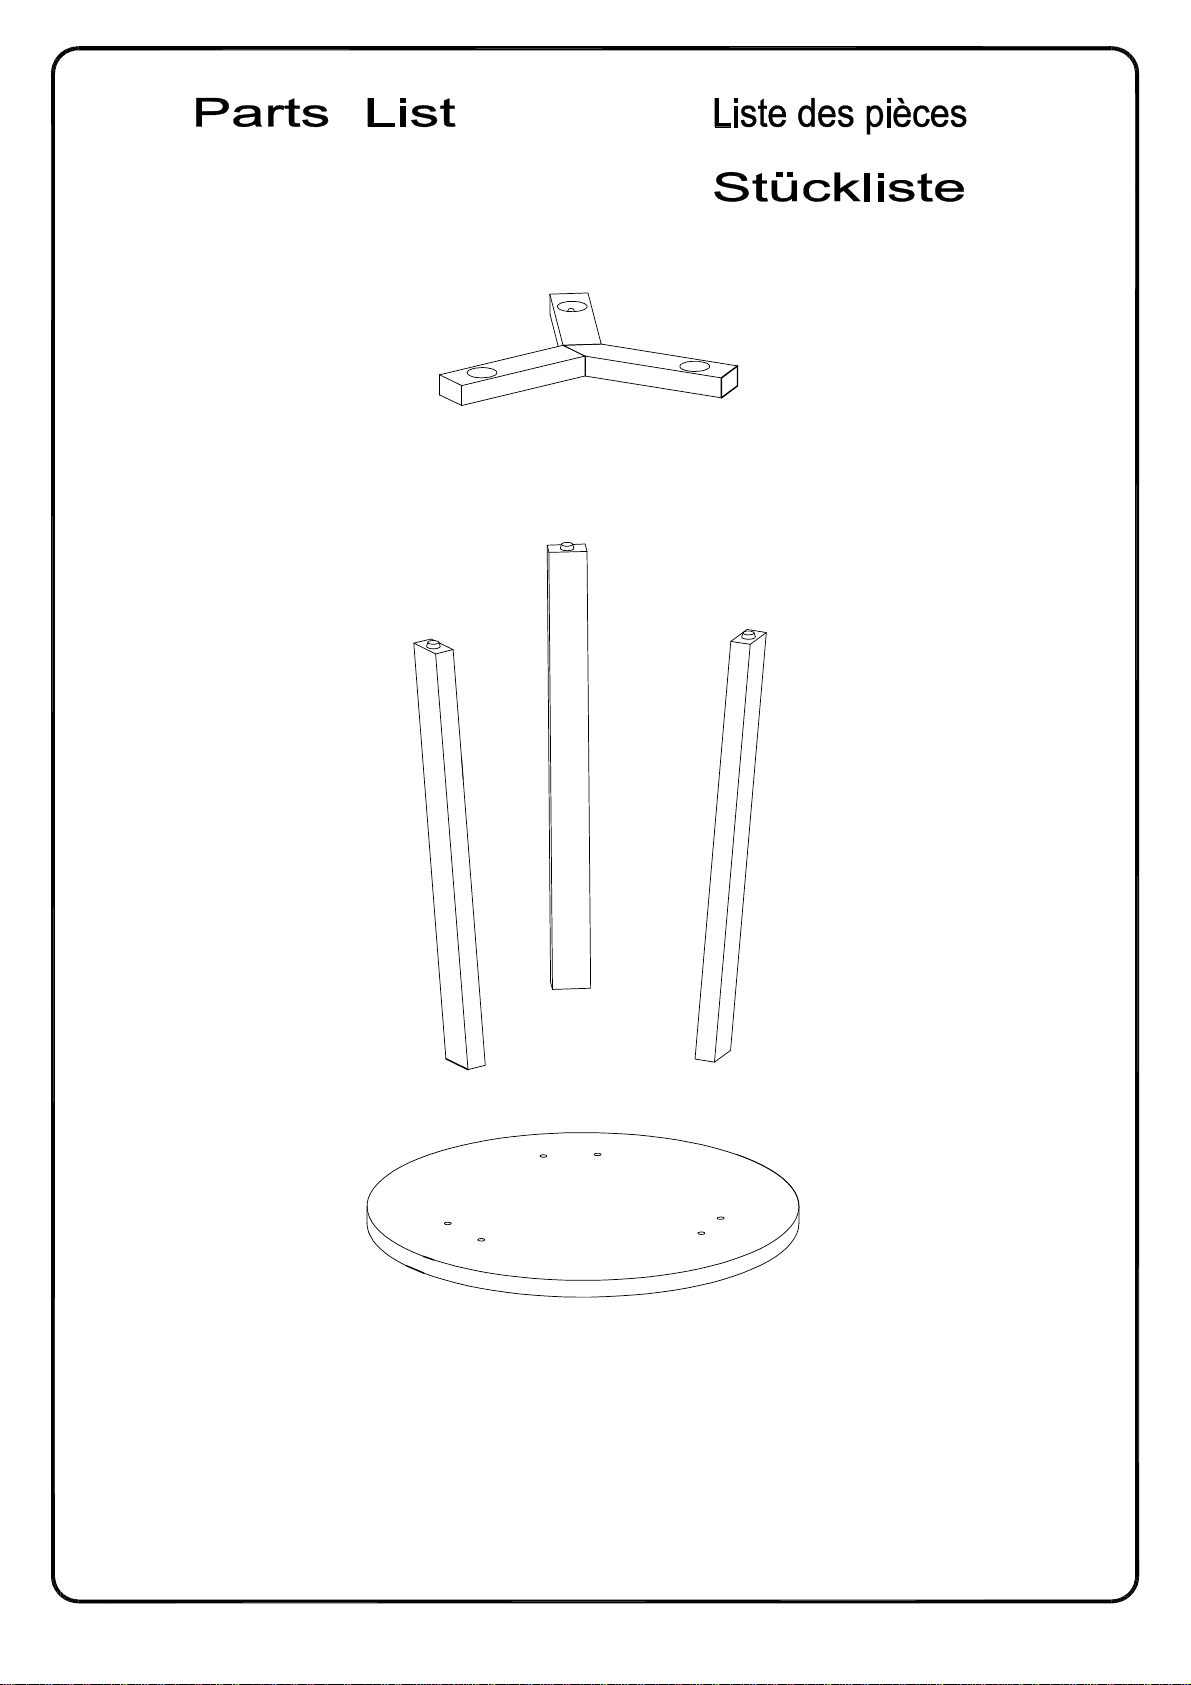
Lista de piezas
3
2
2
2
1
P.4
Page 5
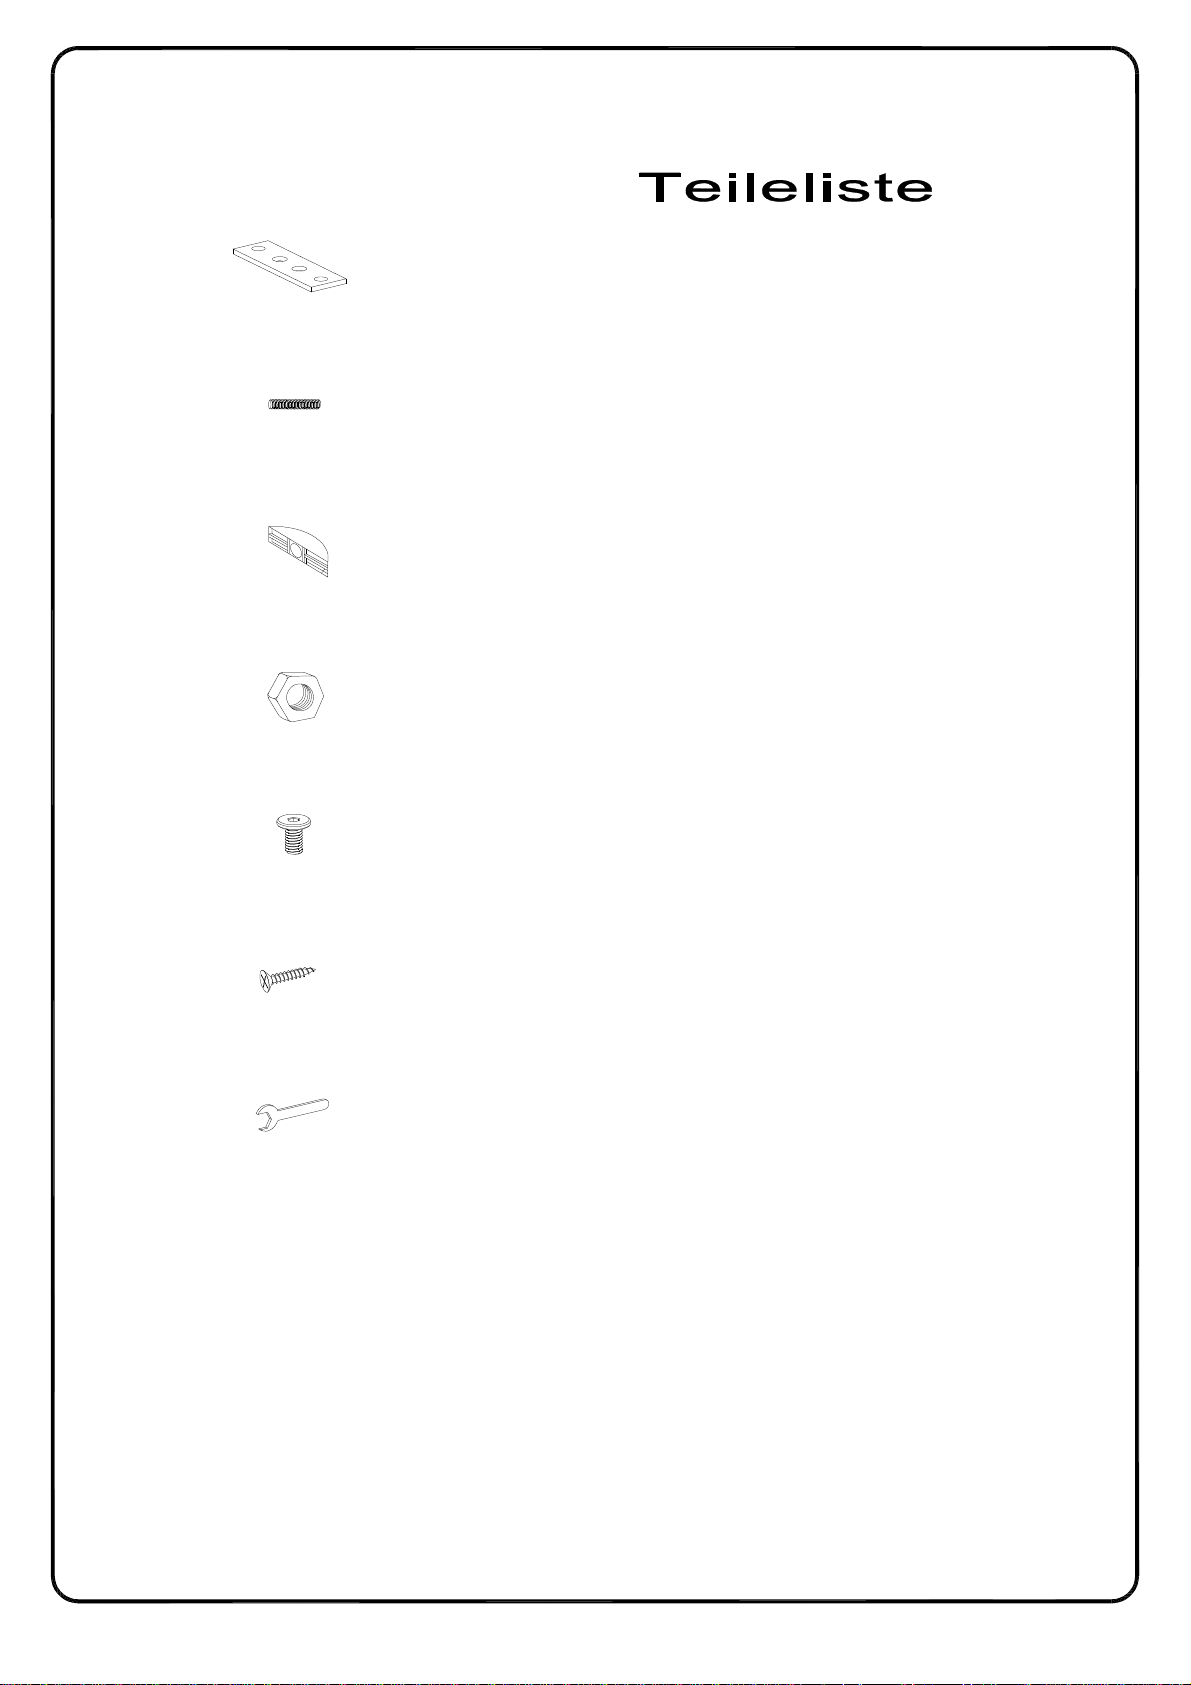
Hardware List Liste du matériel
P.5
Liste des pièces
A
B
C
D
E
80x25x2mm Plate 3
Plaque
Placa
Platte
Ø8x65mm
M8
Bolt
Boulon
Perno
Schrauben
Half moon washer
Rondelle demi-lune
Arandela de media luna
Halbmond-Unterlegscheibe
M8
Ø6x15mm Bolt
Nut
Écrou
Tuerca
Mutter
Boulon
Perno
Schrauben
pcs
pcs
3
pcs
3
pcs
3
pcs
6
F
G
Ø4x25mm Screw
Vis
Tornillo
Schraube
M8
Wrench
Clé hexagonale
Llave hexagonal
Schraubenschlüssel
pcs
6
pc
1
Page 6
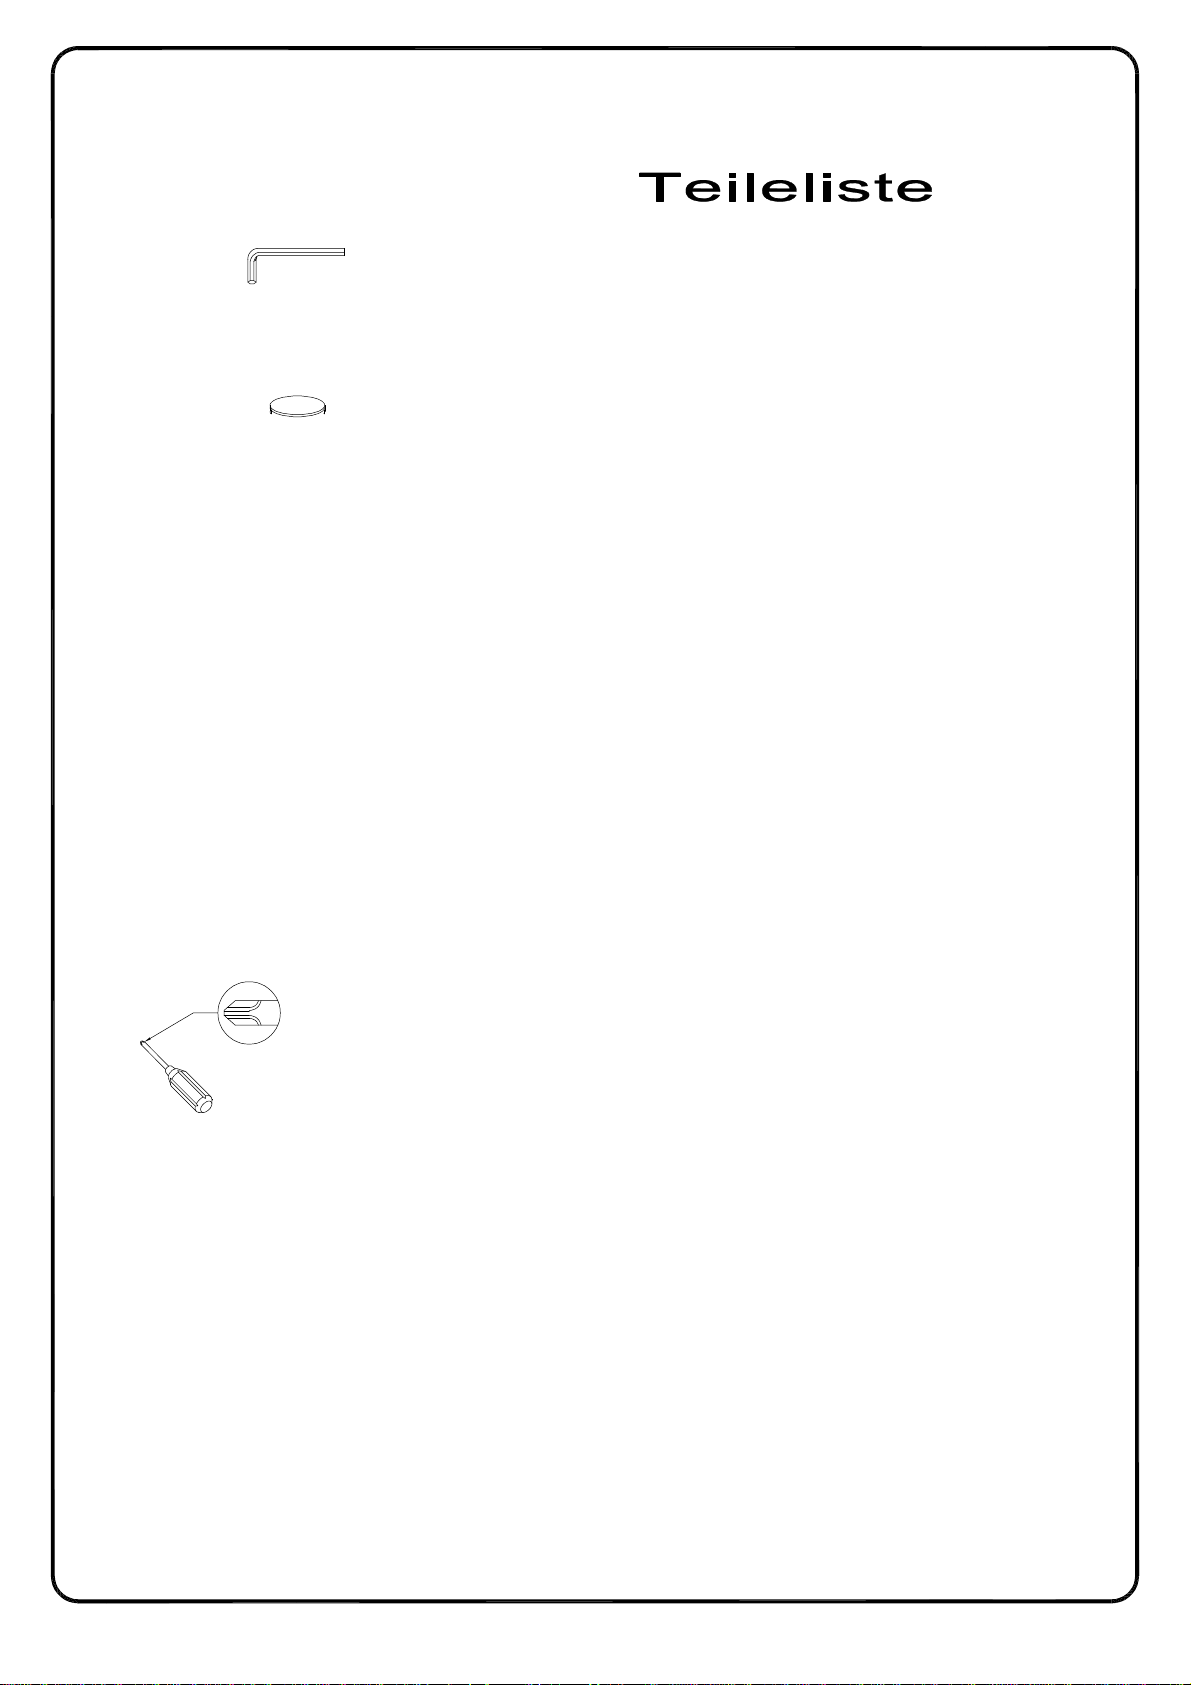
H
P.6
Hardware List Liste du matériel
Liste des pièces
M4
Hex Key
Clé hexagonale
Llave hexagonal
Sechskantschlüssel
pc
1
J
Ø38mm
Plastic cover
pcs
3
Couvercle plastique
Cubierta de plástico
Kunststoffabdeckung
Philips head screwdriver required for assembly
(not included)
Un tournevis cruciforme est requis pour l’assemblage.
(non inclus)
Se requiere un destornillador de cabeza Philips para el montaje
(no incluido)
Für die Montage benötigen Sie einen Kreuzschlitzschraubenzieher
(nicht enthalten)
The hardware quantities listed above are required for proper assembly.Some extra hardware may also
have been included.
Les quantités de matériel indiquées ci-dessus sont requises pour un montage adéquat. Du matériel
supplémentaire peut aussi avoir été inclus.
Las cantidades de materiales antes mencionadas son necesarias para el ensamblaje apropiado.Se
podrían incluir algunas piezas de materiales adicionales.
Für die ordnungsgemäße Montage sind die oben aufgeführten Mengen der jeweiligen Beschlägen
erforderlich.Möglicherweise sind zusätzliche Beschläge enthalten.
Page 7
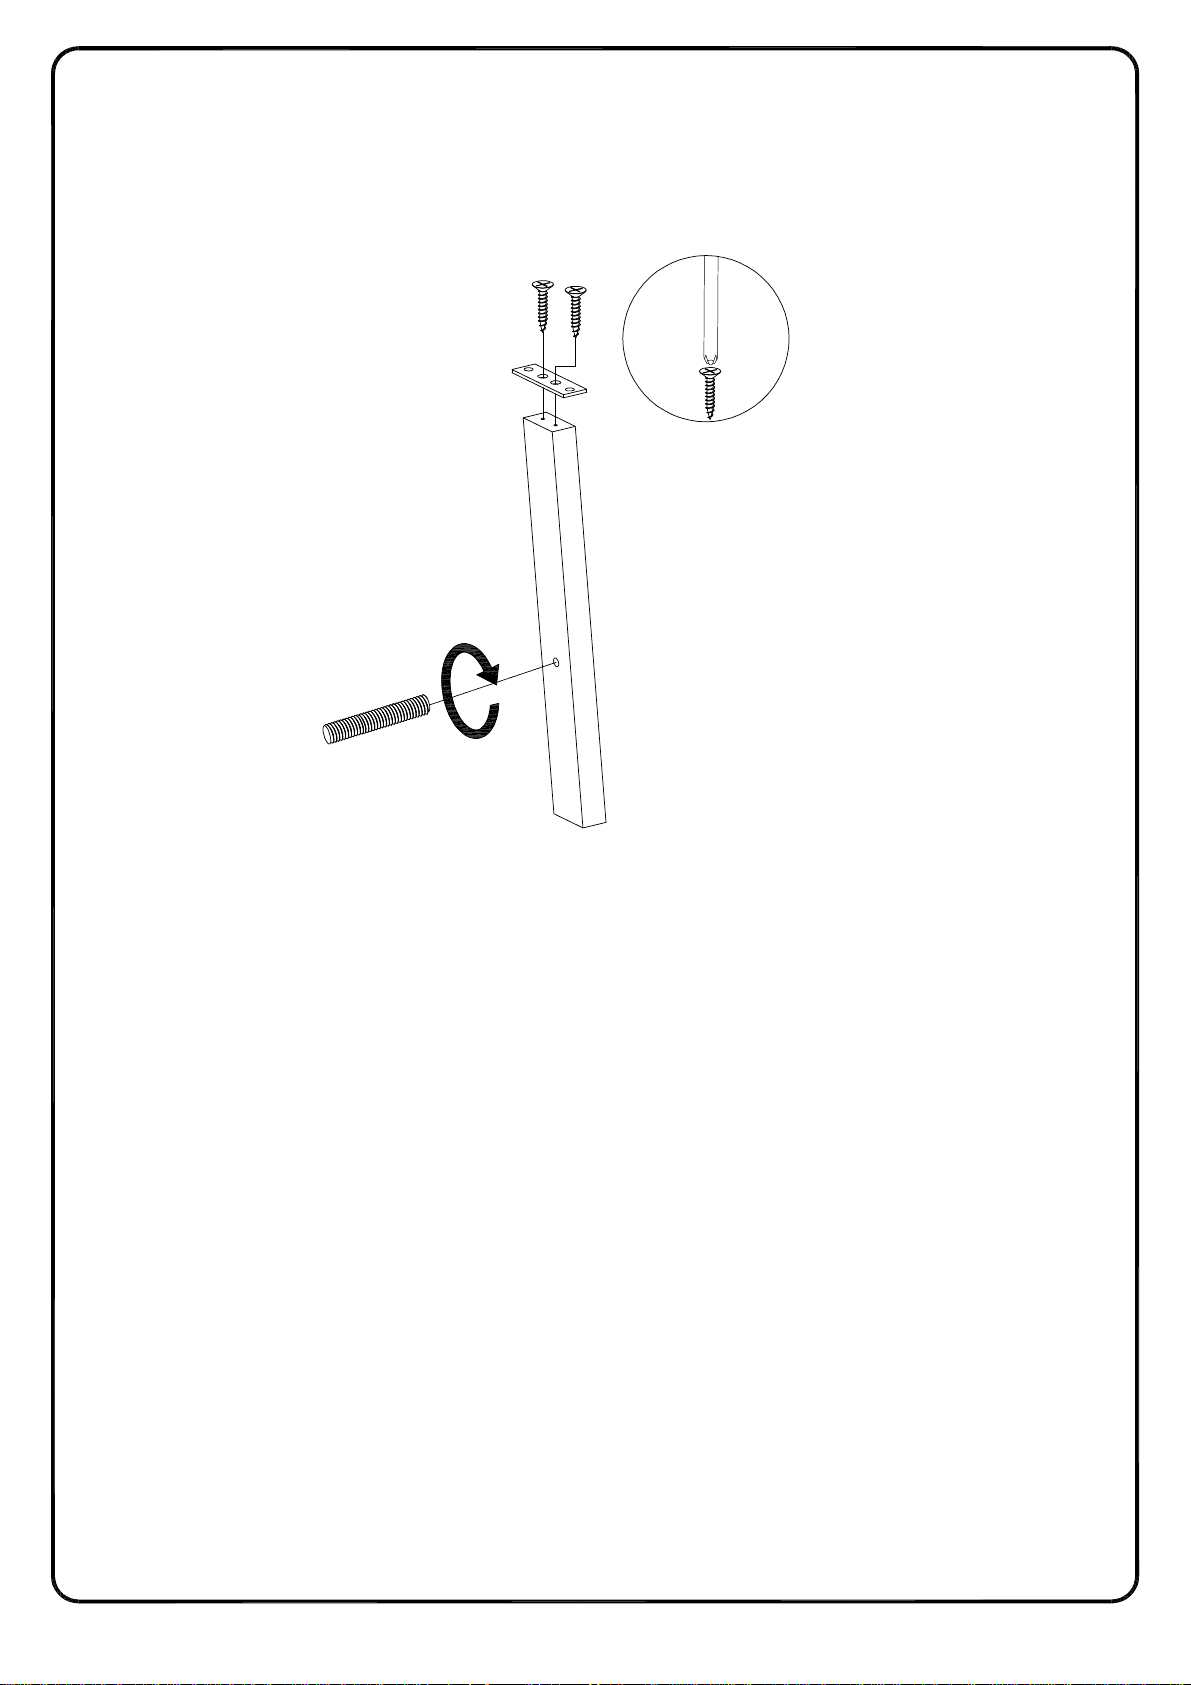
Step 1
F
A
B
F
F
2
x3
(EN)
Insert bolt (B) into part (2), attach part (A) to part (2) using screw (F) with a screwdriver.
Repeat this step two more times to complete the legs.
(FR)
Insérez le boulon (B) dans la pièce (2), puis fixez la pièce (A) à la pièce (2) en utilisant la vis (F)
avec un tournevis.
Répétez cette étape deux fois de plus pour terminer les pieds.
(ESP)
Inserte el perno (B) en la parte(2), y luego fije la parte (A) a la parte (2) usando el tornillo (F) con
un destornillador.
Repita este paso dos veces más para completar las patas.
(DE)
Befestigen Sie die Schraube (B) in Teil (2) und montieren Sie Teil (A) an Teil (2) mit Schraube (F)
und einem Schraubenzieher. Wiederholen Sie diesen Schritt weitere zweimal, um die Beine
fertigzustellen.
P.7
Page 8
Step 2
P.8
1 32
C
D
3
2
2
3
2
G
2
(EN)
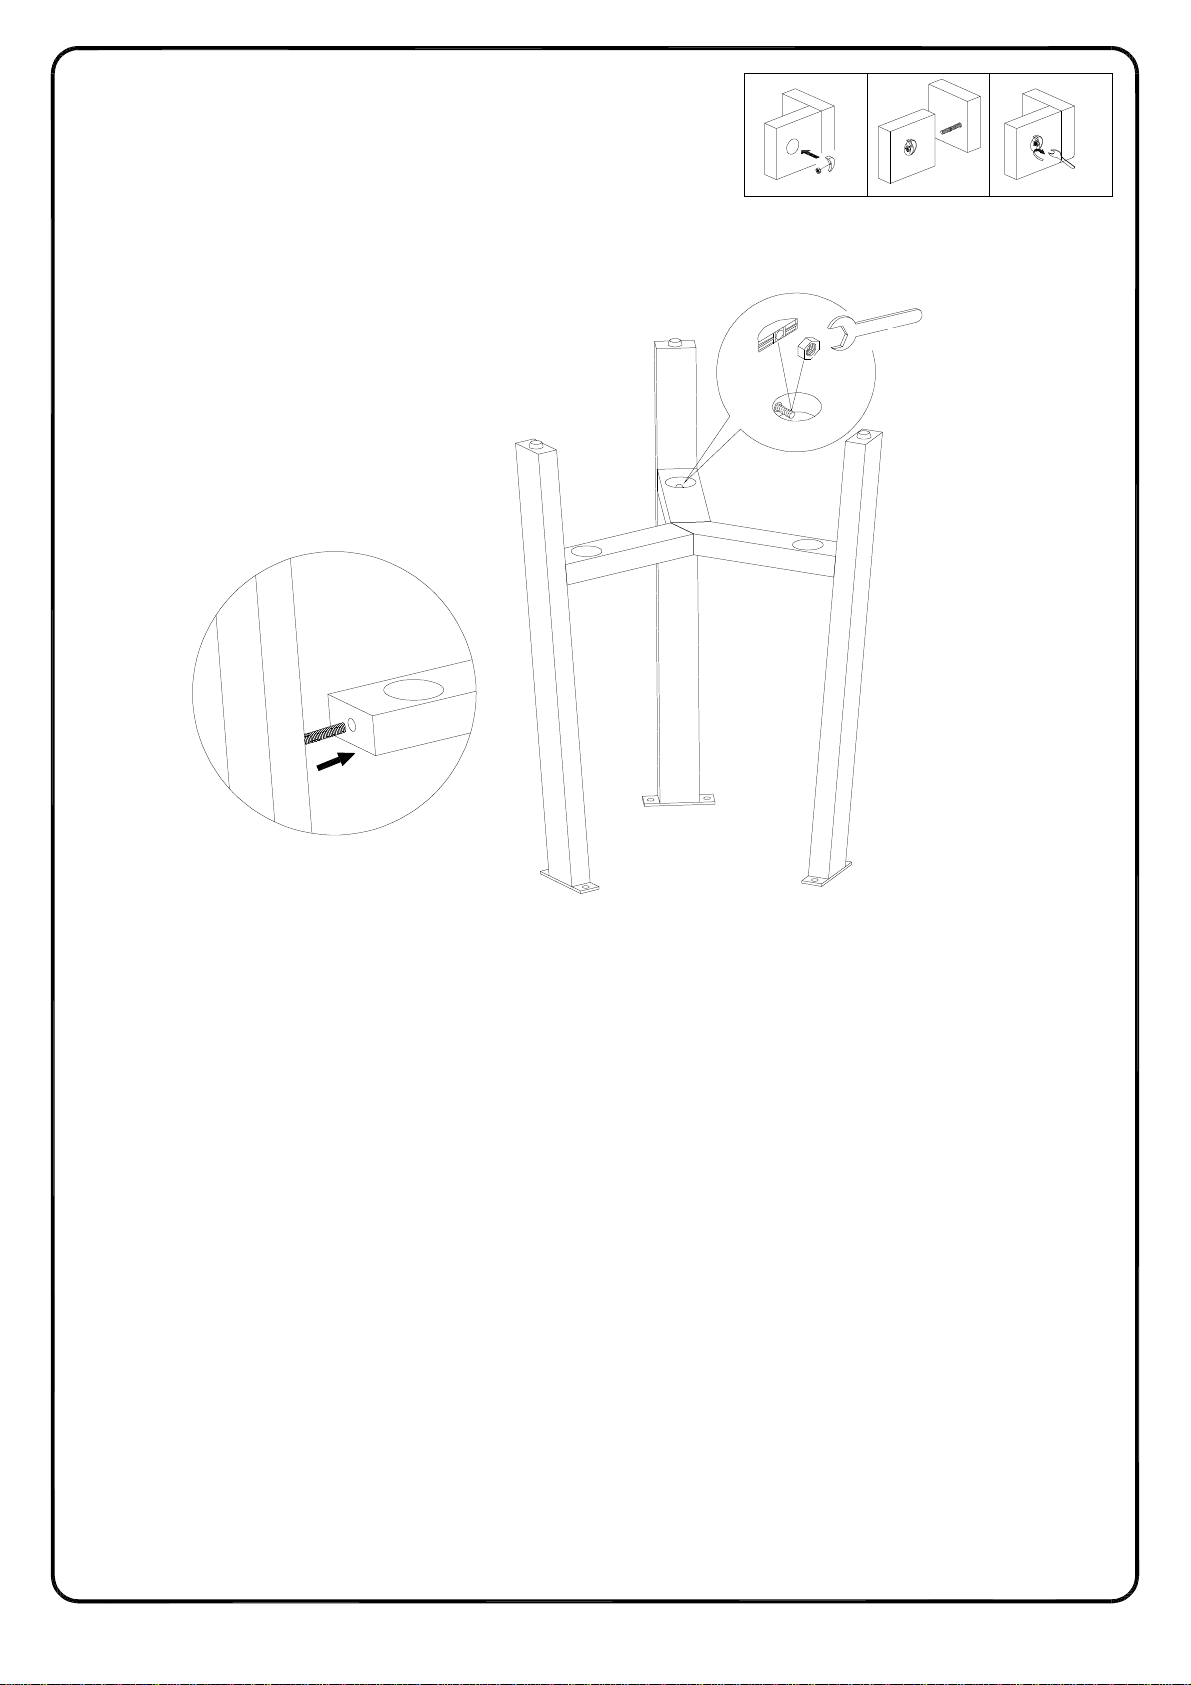
Attach part (2) to part (3), then insert and secure half moon washer (C) and nut (D) to part (3)
and use wrench (G) to tighten.
(FR)
Fixez la pièce (2) à la pièce (3), puis insérez et fixez la rondelle demi-lune (C) et l'écrou (D) à la
pièce (3) et utilisez la clé (G) pour serrer.
(ESP)
Fije la parte (2) a la parte (3), luego inserte y fije la arandela de media luna (C) y la tuerca (D) a
la parte (3) y use la llave hexagonal(G) para apretarlas.
(DE)
Befestigen Sie Teil (2) an Teil (3) und legen Sie dann die Halbmond-Unterlegscheibe (C) und die
Mutter (D) auf Teil (3) und ziehen Sie sie mit einem Schraubenschlüssel (G) fest.
Page 9
Step 3
J
J
J
2
2
E
H
E
E
E
E
E
1
2
E
E
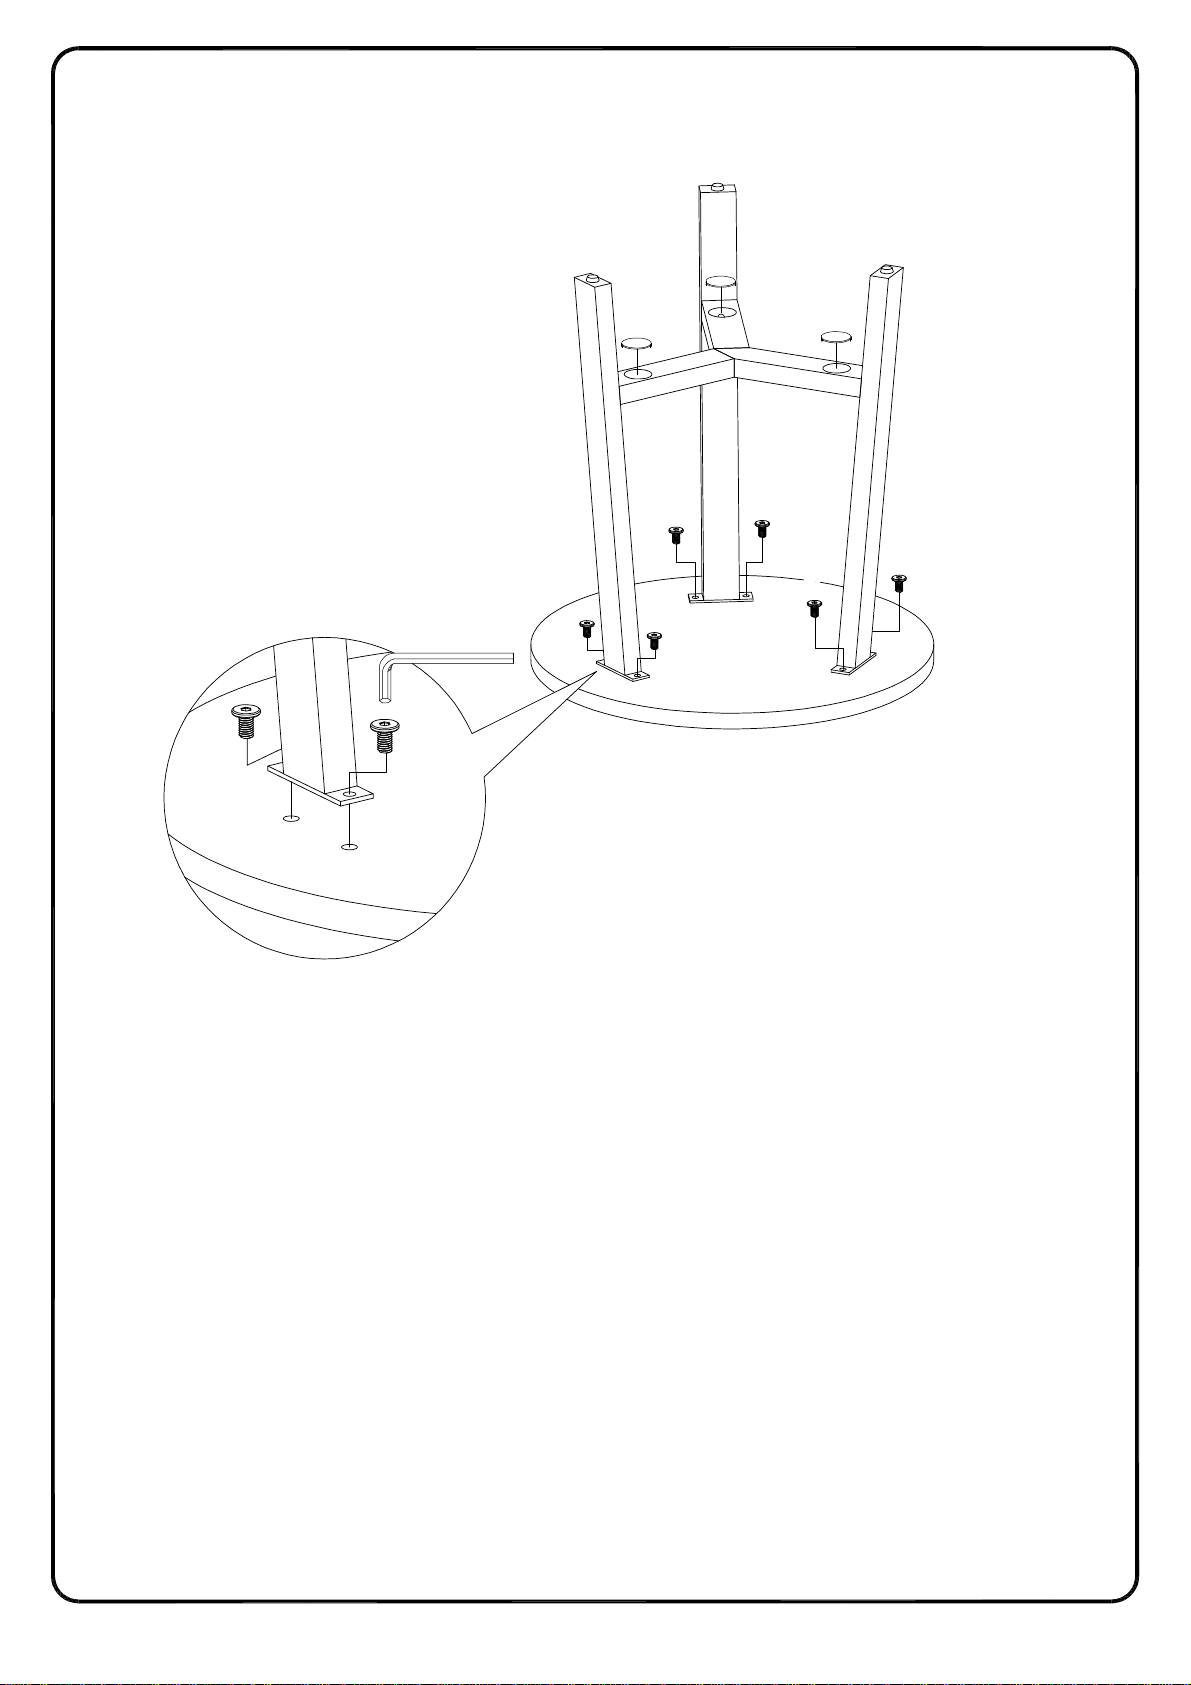
(EN)
Attach part (2) to part (1) using bolt (E) with hex key (H). Place plastic cover (J) over holes as
per diagram.
(FR)
Fixez la pièce (2) à la pièce (1) utilisant le boulon (E) avec la clé hexagonale (H). Placez le
couvercle plastique (J) sur les trous conformément au schéma.
(ESP)
Fije la parte (2) a la parte (1) con el perno (E) con llave hexagonal (H). Coloque la cubierta de
plástico (J) para cubrir los agujeros según el diagrama.
(DE)
Teil (2) mit der Schraube (E) und dem Sechskantschlüssel (H) an Teil (1) befestigen.
Kunststoffabdeckung (J) wie in der Abbildung über den Löchern anbringen.
P.9
Page 10
Step 4
P.10
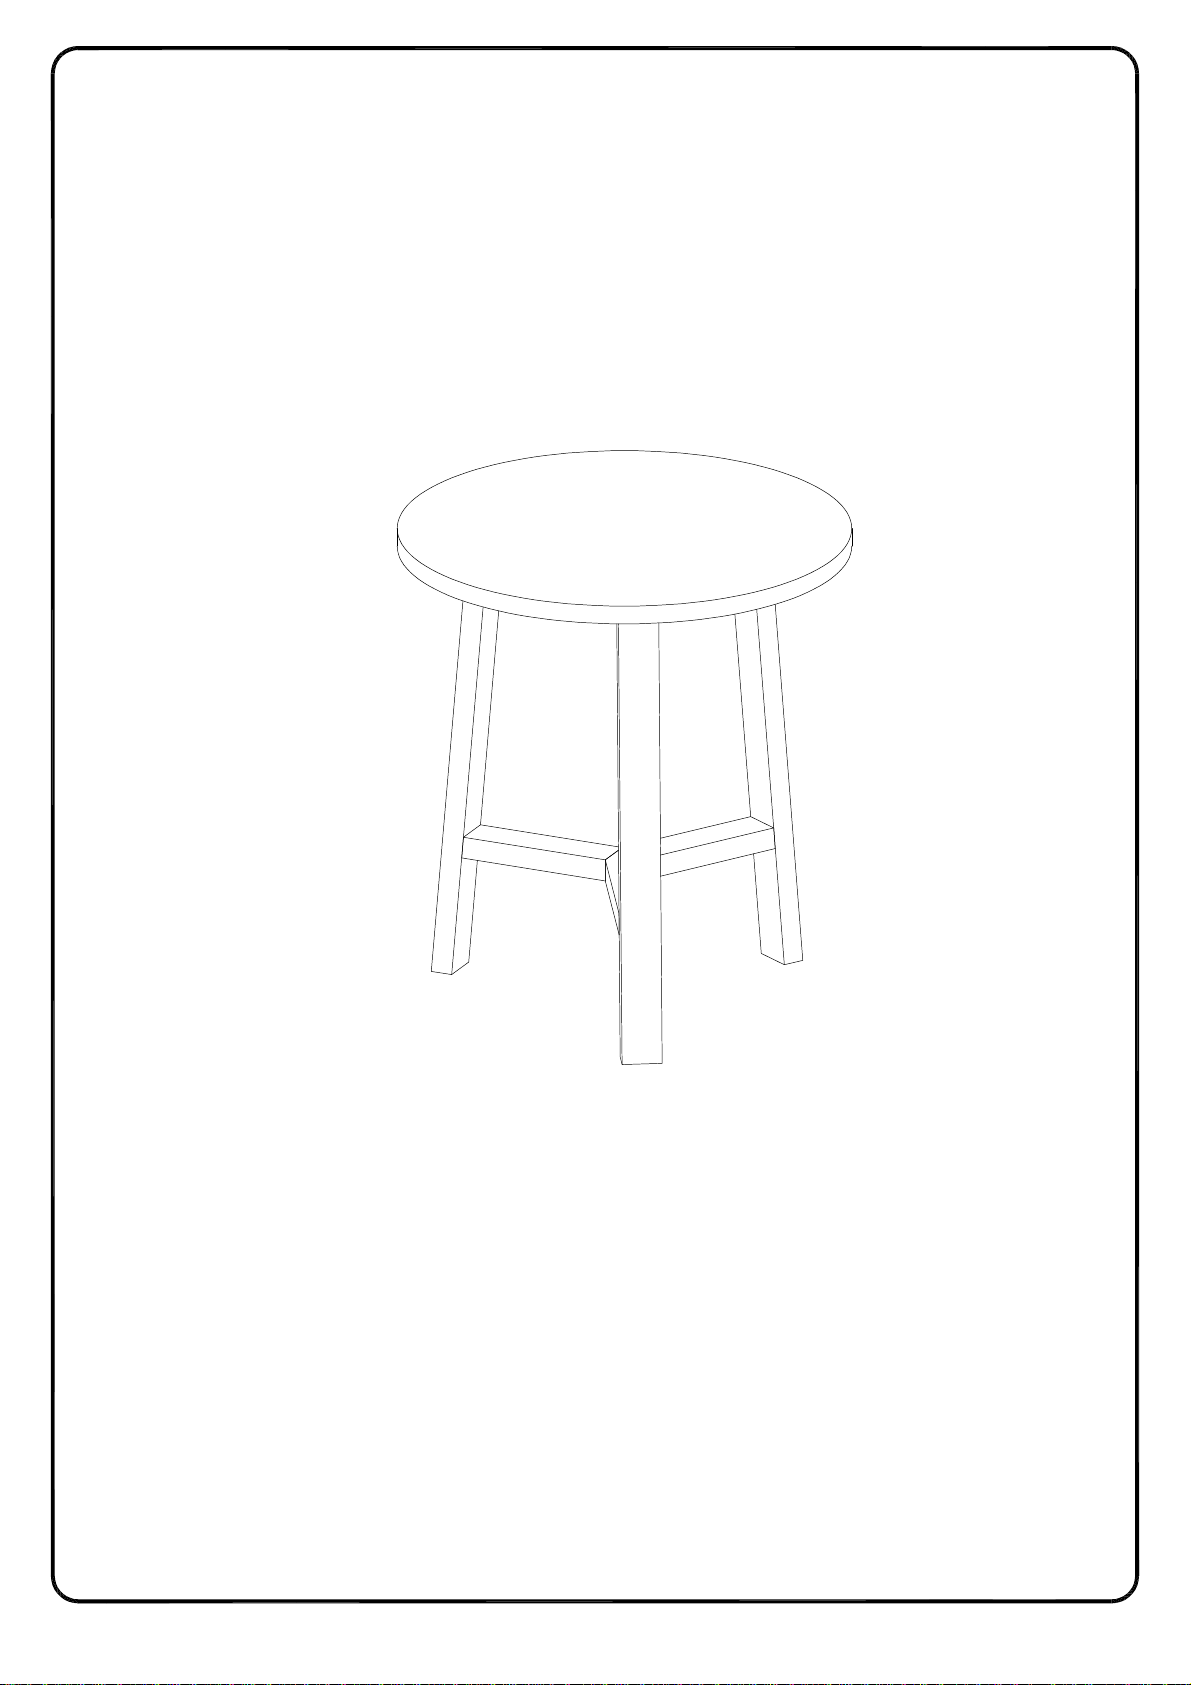
Final Assembly
 Loading...