

Page 1
1
>100 mm
>50 mm
Zigmund & Shtain
M
O
D
:
E
N
2
5
2
.
6
1
1
B
C
O
D
:
9
0
1
3
1
0
0
0
1
1
6
03
0
0
00
1
P
m
a
x
:
2
,
6
7
k
W
S
e
r
ie
:
S
e
r
i
e
:
1
6
0
3
0
0
0
0
1
V
/
H
z
:
23
0
V
~
5
0
/
6
0
H
z
V
/
H
Z
:
2
3
0
V
~
5
0
/
6
0
H
z
P
m
a
x
:
2
,
6
7
k
W
1
H
V
1
2
1
X
1
T
y
p
:
1
H
V
1
21
X
1
M
O
D
:
E
N
2
5
2
.
6
1
1
B
0
I
Serie: 16-03-00001
V/HZ: 230V ~ 50/60Hz
Pmax: 2,67kW
Typ: 1HV121X1
MOD: EN 252.611 B
160300001
Serie:
COD:901310001
MOD: EN 252.611 B
Pmax: 2,67kW
V/Hz: 230V ~ 50/60Hz
1HV121X1
II
EN
RU
Zigmund & Shtain
a
b
Zigmund & Shtain
Zigmund & Shtain
1.2.2
577 / 590
1.2
507 / 520
1.2.1
55
55
288
510
490
560
270
490
a bc d
1.2.3
Zigmund & Shtain
www.zigmundshtain.ru
CZ5702733
0100224
5-16
c
Zigmund & Shtain
d
1.2.4
>40 mm
1.2.6
>15 mm
1.2.5
x2
1.2.7
Page 2
III
5
IV
V VI
1.3
ab cd e
N
220-240V 1N
123
220-240V
2
L1 L2
ecdab
~
12L23
L1
L1
220-240V 3
L3
380-415V 3N
ecdab
~
N
~
N
L1 L2
380-415V 3N
2X220-240V 1N
12 3
L1
220-240V 3
~
L
45
L
~
45
L2
N
380-415V 2N
N
~
1.3.3
2.1
L2 L3
45
N
~
ecdab
~
1.3.1
1
22
L1
380-415V 2N
L N
230 V
~
1.3.2 2.6.1 2.6.2
45
N
L2
~
1.3.4
2.6
a c d
2.6.3 2.6.4 2.6.5
b
5”
2.6.6 2.6.7
2.11
a c
a c
2.9
2”
2.10.2 2.10.3 2.10.4
2.11.1
2.11.2
2.102.8
b d
3”
2.10.1
4
5
4.1.1
I
II
EN
RU
VIV
4.1.2 4.1.3
ENGLISH
2.2
2.4
3”
a b c d a b c d
a b c d
2.4.1
2.5
b d
2.3
2.5.1
2.3.1 2.6.8
b d
2.7
2.7.1 2.7.2 2.7.3
2.12
beep beep
AUTO
a c
2.12.1 2.12.2
3
NO
AUTO
3.1.1 3.1.2
Page 3
english
Instruction Manual
Very important: Read this instruction manual thoroughly. It will help you operate the hob properly and
safely.
This manual is designed so that the texts relate to the corresponding figures.
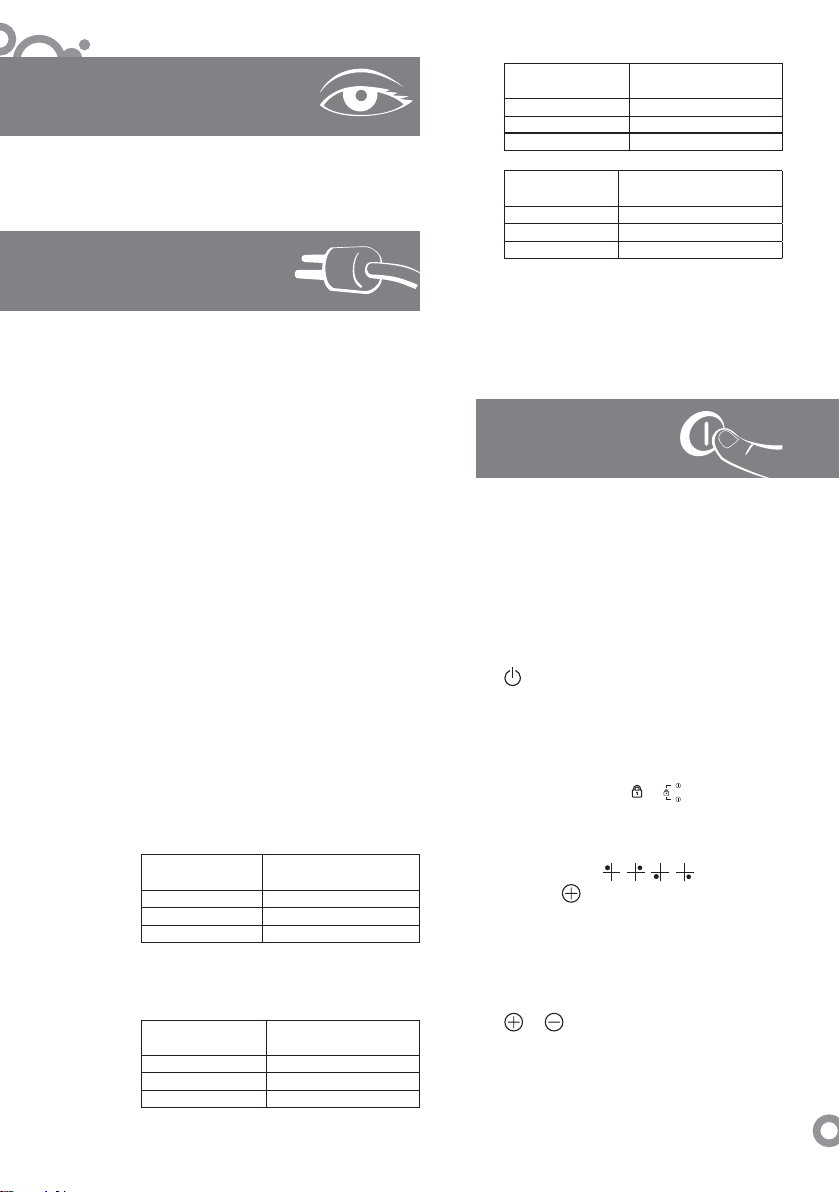
Safety
Important
Keep this manual with the appliance. If you sell or give
the appliance to another person, make sure you also
pass on the instruction manual. Read the provided
instructions thoroughly before using and installing the
appliance. They are designed to protect your own and
others’ safety.
• The electrical equipment of the hob must have circuit
breakers installed in accordance with national and local
regulations.
• The appliance must be installed and wired by an authorised
installer in accordance with the manufacturer’s instructions
and diagrams.
• Electrical equipment specifications must be suitable for
the maximum power indicated on the reference plate. The
electrical socket must be grounded in accordance with
applicable regulations.
• If the power cord is damaged, it must be replaced by the
manufacturer, after-sales technical service or similar qualified
technician to avoid hazard.
• CAUTION! If the glass surface cracks or breaks the appliance
must be immediately disconnected from the mains to avoid
short circuit and electrical shock.
• The appliance must not be used before the glass is replaced.
The glass should be replaced by the after-sales service or by
qualified personnel (4.1.1).
• Do not place hot pots and pans on the sensors. This may
damage the electronic circuits (4.1.3).
• CAUTION! During operation, the casing and open parts of the
appliance may become very hot. Avoid touching the heating
1
Page 4

english
elements. Children under the age of 8 must not approach the
appliance unless under permanent supervision.
• If the appliance is installed on a cabinet, flammable objects must
not be kept inside.
• This equipment may be used by children aged 8 and older,
people with physical, sensory or mental disabilities, people
lacking experience and knowledge if they have been trained
in safe operation of the equipment and have understood the
probable risks. Children must not play with this appliance.
Cleaning and maintenance shall not be performed by children
without supervision.
• CAUTION! Overheated vegetable oil or grease are highly
flammable. Do not leave the appliance unattended when you
cook food using oil or grease.
Never try to put out the fire with water. Turn off the hob. The
flames can be carefully put out with a lid, a fireproof blanket or
similar things.
• CAUTION! Fire hazard! Do not store objects on the kitchen
surface.
• Never use a steam cleaner to clean the appliance.
• This appliance is not designed to work with an external clock
controlled (timer) switch or a remote control system.
• Electronically controlled models: To switch off the appliance,
press and hold (
) for two seconds. The appliance will beep and
the display will go out, indicating that the appliance is now off.
Models with knobs: To turn off the element, set the regulator to
“0”.
• Be careful not to hit the glass with pans or other objects.
• The heating elements should not be turned on without placing a
pan on them.
• The appliance should only be used for cooking food. This
appliance must not be used as a cooker with burners.
• Do not expose the heated hob to cold water.
• CAUTION! Use only protection devices specified by the
appliance manufacturer, indicated by the appliance manufacturer
as suitable in the instructions for use, or integrated into the
appliance. Using improper protection devices may cause
accidents.
2
Page 5
english
0
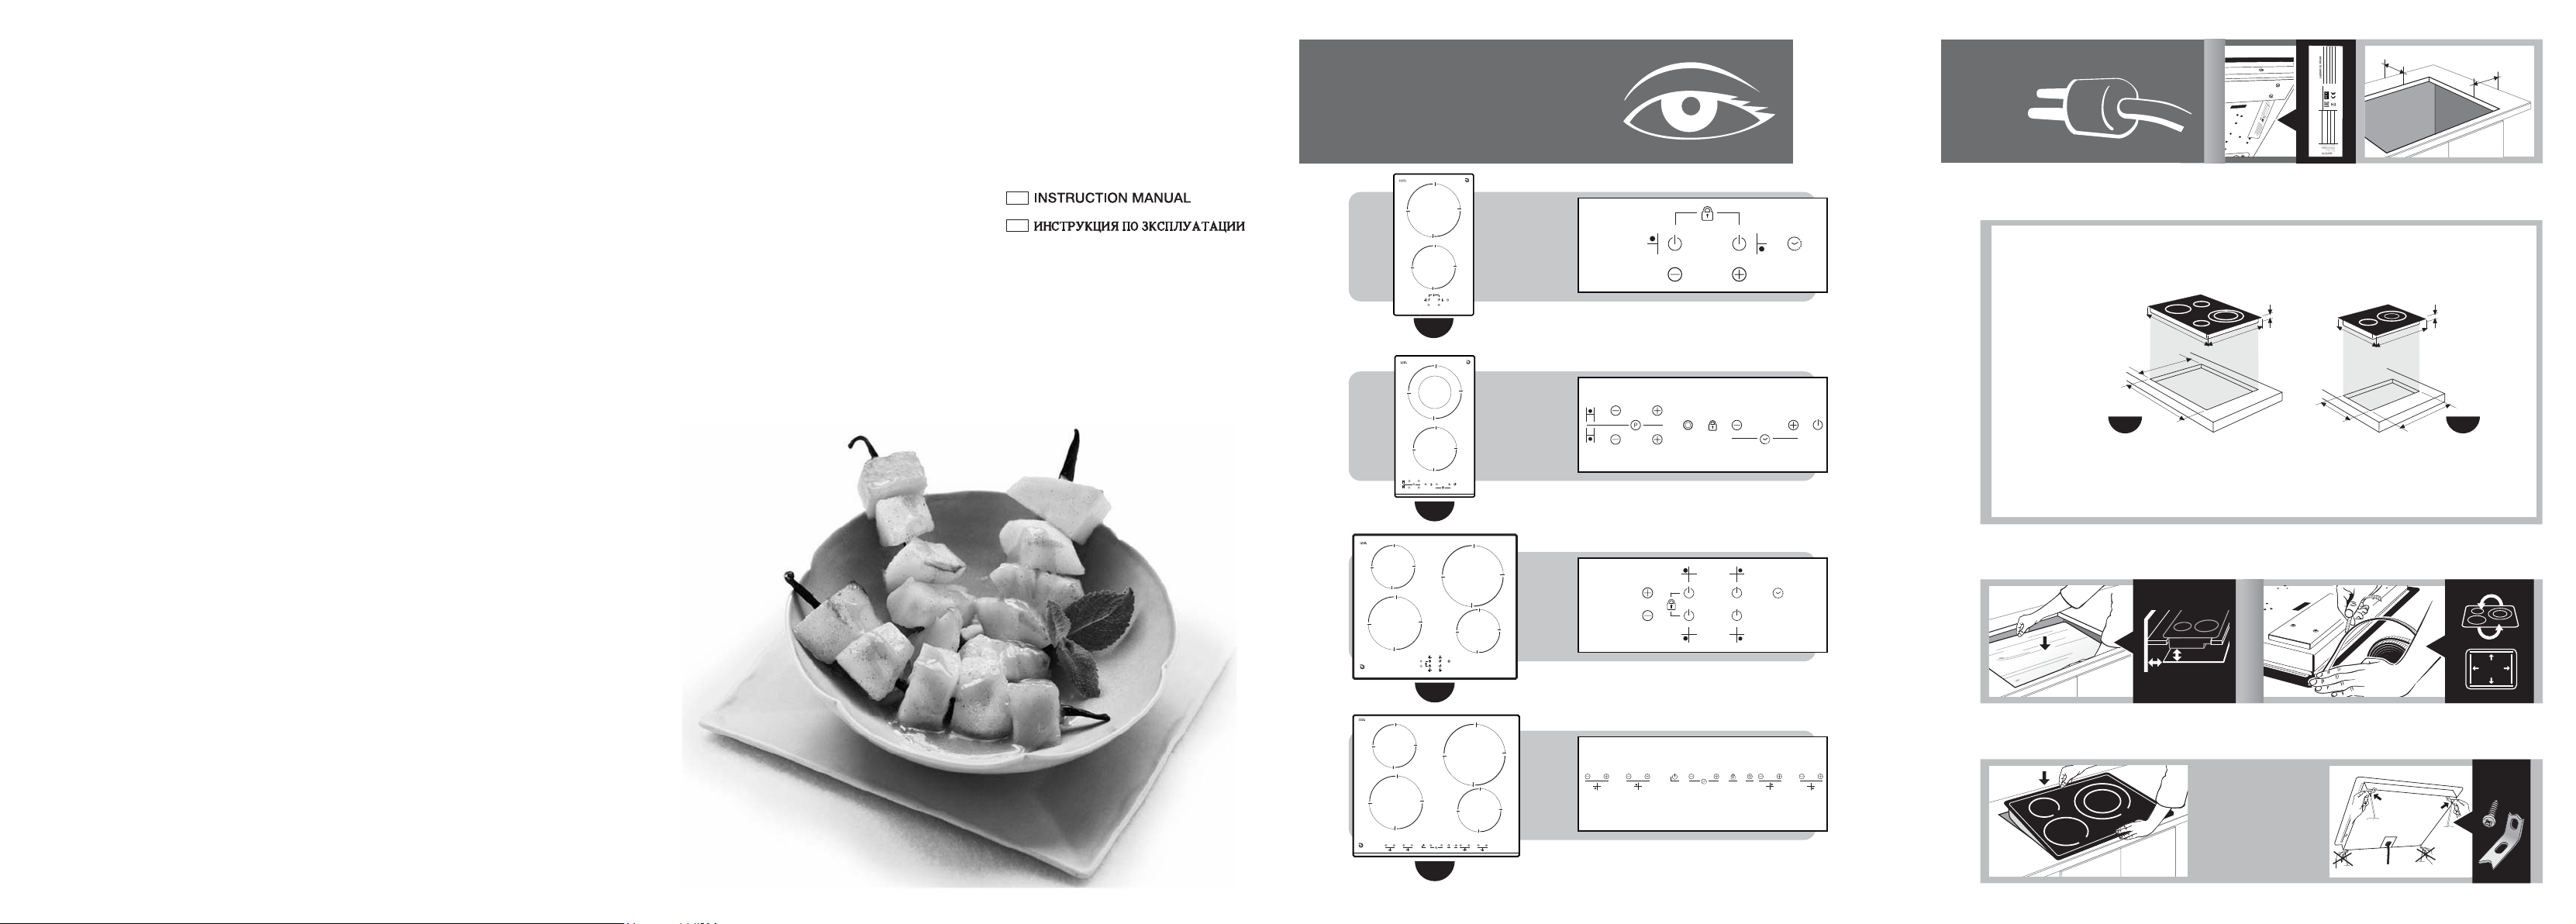
Identify the model of your hob (“a”, “b”, “c”,
“d”) by comparing the number and the layout
of the rings on your appliance with that shown
in the illustration.
1
1.1 Unpacking. Remove all packaging elements.
1.2 Mounting the hob into kitchen furniture.
1.3 Connection to the mains.
Identification
Installation
Take into account the hob specifications
(1.2.1) as well as the dimensions of the
kitchen furniture to install it in (1.2.2, 1.2.3).
If you are not going to fit an oven beneath
the hob you must install a protective panel
in accordance with the specified dimensions
(1.2.4). Apply foamy insulation material along
the outer edges of the hob to properly seal it
(1.2.5). Turn the hob over and insert it into the
cutout (1.2.6). Secure the hob in the kitchen
furniture with the brackets supplied (1.2.7).
Do not use non-removable materials such as
silicone.
• With 5 wires: a) dark blue, b) light blue, c)
brown, d) red, e) green and yellow (1.3.1).
• Used for the 230 V~ hob (1.3.2).
• Used for the 220–240 V~: see the table
(1.3.3).
• Total power: 60 cm hob 6.8 kW, > 60 cm
hob 7.8 kW.
220–240 V~ Int. nominal current by
phases
30 cm hob 16 A
60 cm hob 30 A
> 60 cm hob 34 A
• If the mains voltage exceeds 220–240 V~,
the appliance shall be connected as per
diagrams (1.3.3, 1.3.4).
220–240 V 3~ Int. nominal current
by phases
30 cm hob 16 A
60 cm hob 14 A
> 60 cm hob 16.5 A
380–415 V 3N~ Int. nominal current
30 cm hob 16 A
60 cm hob 11 A
> 60 cm hob 13 A
380–415 V 2N~
30 cm hob 16 A
60 cm hob 16 A
> 60 cm hob 19 A
This appliance is compliant with European
Directives 73/23/СЕЕ and 89/336/СЕЕ.
Recommendation: The hob must be installed by
a technician who will follow the manufacturer’s
instructions and diagrams.
2
If your hob is made of vitroceramics, you can
use clay, copper or stainless steel pans. Using
aluminium pans is not recommended since
they can stain the glass surface of the hob.
2.1 Selecting the cooking zone. There are
2.2 Turning on the hob. Press and hold the
Use
several rings available for putting pans on.
Choose the most suitable one depending
on the size of the pan.
key for 3 seconds to turn on the hob;
by phases
Int. nominal current by
phases
0 signs of the different cooking spots will
be activated.
Note: To deactivate the locking system
preventing children from using the hob
press and hold the
for 3 seconds.
2.3 Turning on a ring. Turn on the ring you
have put the pan on by pressing the
corresponding
or press
Note: If choosing the key to press
takes more than 5 seconds, the hob
will automatically turn off as a safety
measure.
2.4 Selecting the power. Set it by pressing
SPECIAL RINGS
2.5 Double ring, Triple ring (b, d). Once you
(2.4.1).
or (2.4.1).
or key and hold
, , , key (2.3.1),
3
Page 6

english
have set the power, press
double ring (2.5.1).
Recommendation: The light is so bright on
models with halogen rings that we advise you
not to look directly at a lit ring with no pan on.
TIME FUNCTIONS
2.6 Selecting time
Models a, c, d: Once the hob is on and
the power is set, you have 5 seconds
of flashing numbers to press the
key (2.6.1). Select the necessary time
by pressing
seconds the time will be set and visible,
and an illuminated dot will appear under
the programmed ring icon (2.6.3). To alter
the time or see the remaining time press
the programmed ring icon (2.6.4). To
cancel the program press the , keys
simultaneously (2.6.5).
Models b: Once a ring has been turned
on and the power set, press the
the clock. 00 and the sign will appear
on each ring (2.6.6). Press
be programmed, and
(2.6.7). Select the time using
the clock (2.6.8). In five seconds the time
will be set and alternating power value
will be displayed on the programmed ring.
Once the time has passed, you will hear a
beep and 00 will start flashing. To cancel
the program press
hold it until 00 appears.
Note: The timer will automatically go out
if selecting the time takes more than 10
seconds.
Considerations on programming: If the
power level is 9, the maximum programming
time must be 60 min. Otherwise the maximum
value can be 99 min.
Once the time has passed, you will hear a
beep unless you press any key.
PROGRAMMING FUNCTIONS
2.7 Fast heating. Reaches the maximum
temperature quickly to automatically
proceed to constant cooking temperature.
Models b, d: Select a ring and turn it on to
the maximum power by pressing
, keys (2.6.2). In five
to turn on the
key on
of the ring to
will start flashing
, on
on the icon and
until 9
and the
power by pressing
levels are 3 to 6 (2.7.2). In 5 seconds, fast
heating will be set and the power value
will be displayed followed by a dot (2.7.3).
Once the maximum temperature has been
reached, the digital dot will disappear and
the ring will continue working in the normal
mode. To stop press the programmed ring
key and select a new power setting.
2.8 Turning off a ring. Select
of the ring to turn off.
2.9 Residual heat. After you finish using the
hob, the rings will remain hot for some
time which will vary according to the power
selected, and the
displayed on the rings that are still hot. Do
not touch these rings to avoid burns.
Caution: Should the power supply be cut off
and then resumed, the
appear even though the cooking zone is still
hot. Please bear this in mind.
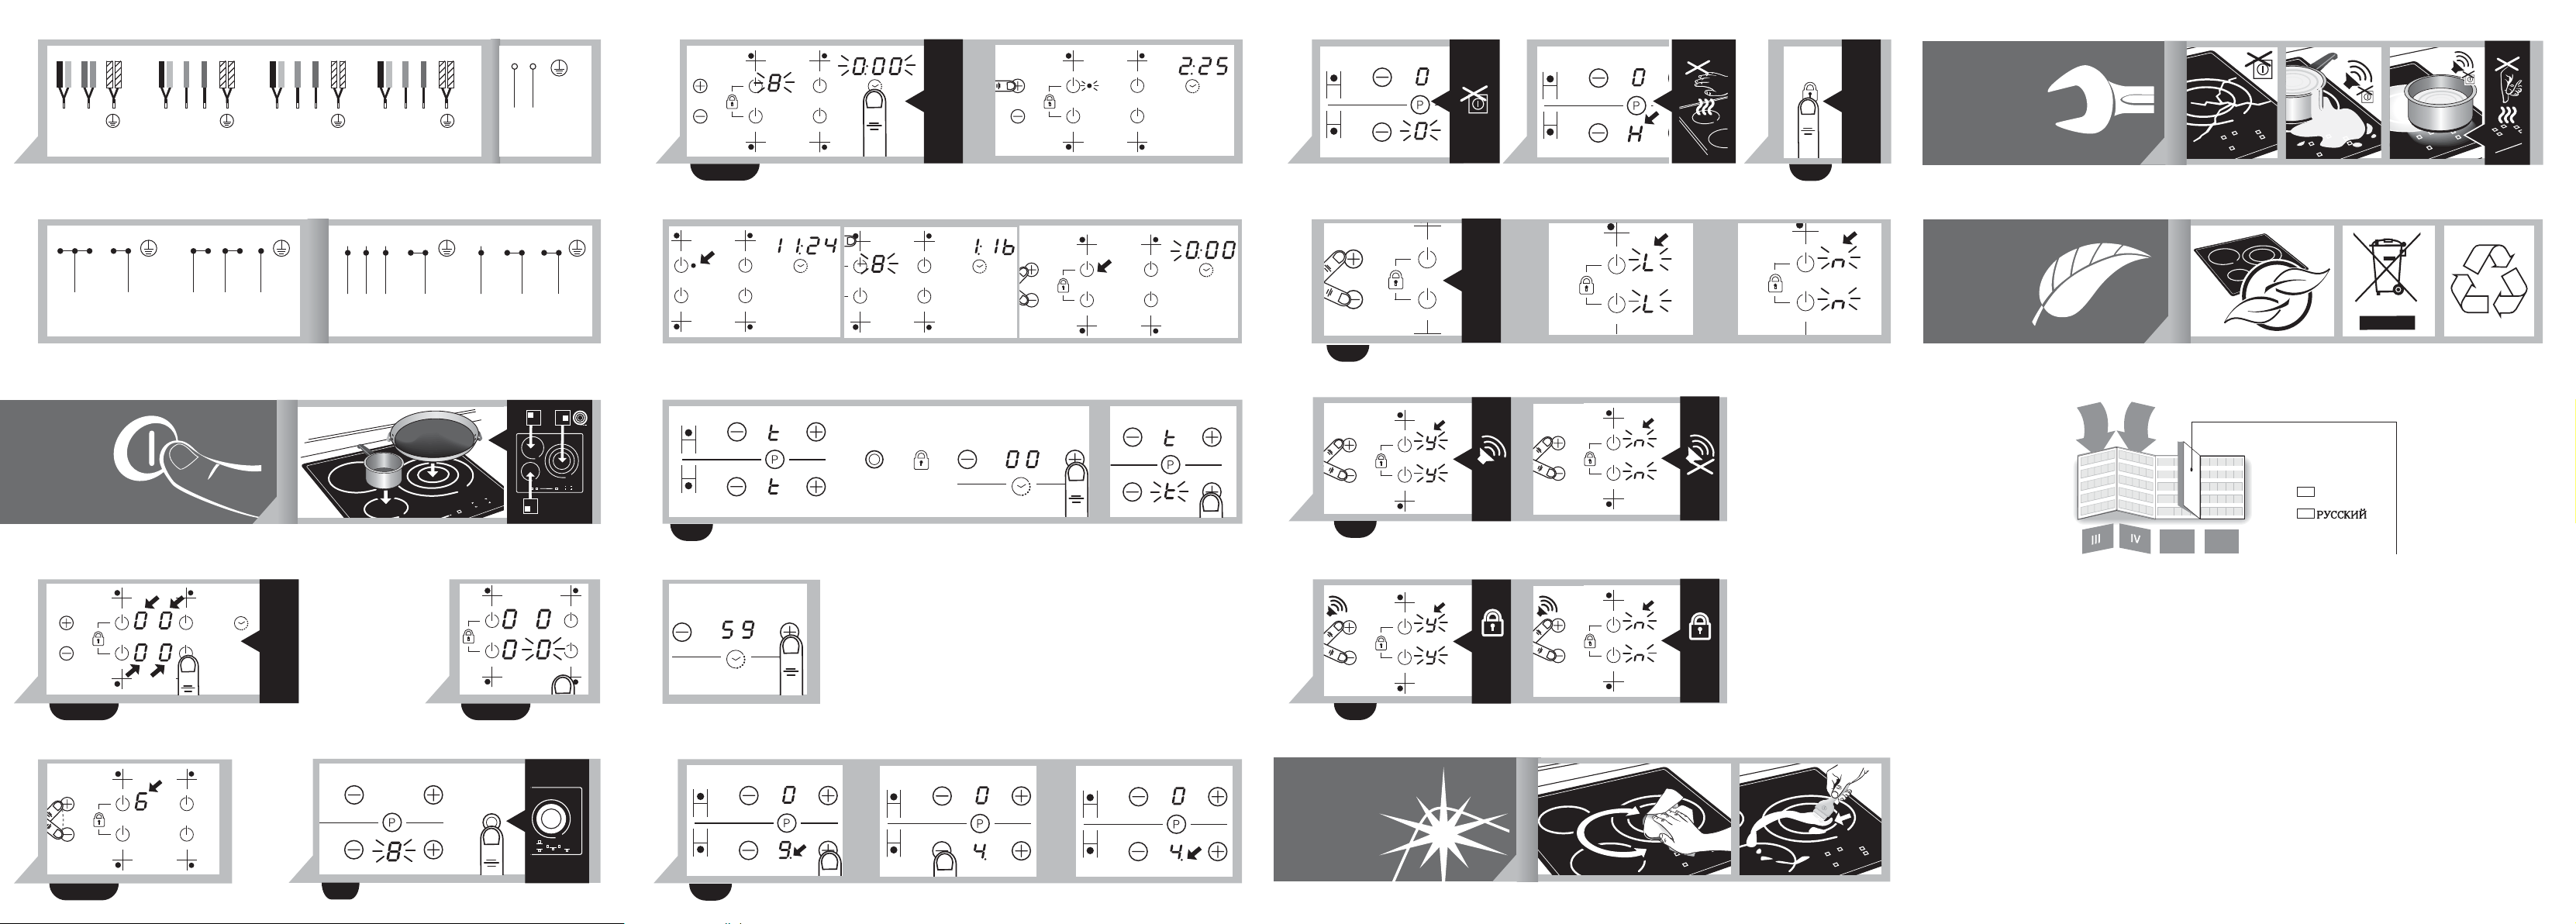
2.10 Locking function.
Models b, d: To prevent children from
using the hob. Press and hold the key
for 3 seconds. This will activate the lock.
Repeat this procedure to unlock the hob
(2.10.1).
Models a, c:
accidental switching of the appliance. Hold
down the keys of heating elements 1 and 2 (
controls (2.10.2).
If the hob is locked,
display after pressing any key (2.10.3). is
displayed when it’s unlocked (2.10.4).
USER SETTINGS
2.11 Silent mode. To limit the number of beeps
(so that they are only heard when the appliance is turned on or off and for the timer
alarm), simultaneously press the keys
and , and then with the hob turned off.
On the sound settings screen, select
: activated sounds (2.11.1), : silent mode
(2.11.2).
2.12 Activation of the automatic locking
system. With the hob turned off, simultane-
ously press the keys
sign appear (2.7.1). Adjust the
. The recommended
sign or a dot will be
indicator will not
This function prevents
) simultaneously to lock or unlock the hob
will appear on the
to activate or deactivate silent mode (
and , and then
. Once inside the automatic locking func-
0 for the power
and
4
Page 7

english
tion settings, select
or deactivate the function ( : automatic
locking activated (2.12.1) : automatic
locking deactivated (2.12.2)). With the
automatic locking function activated, the
hob will automatically lock 15 minutes after
it has been turned off completely.
Recommendations:
• Avoid hitting the glass surface of the hob
with pans.
• Using aluminium pans is not
recommended since they can stain the
glass surface of the hob. The exception is
aluminium pans with a thicker protective
bottom layer made of stainless steel.
• Heated rings should not work with no pans
on.
• The base of the pan must be flat and dry.
• Try not to move the pans as this can
scratch the glass.
• Only use the appliance for cooking food.
Do not use the hob as a work top.
• Do not apply cold water directly on the hob
if it’s heated.
Caution: Intermittent operation of the cooking
zones does not indicate a failure. They
operate in longer or shorter on and off periods
depending on the selected power setting.
Maintenance
3
• Do not use a steam cleaner.
• Clean the surface of your hob regularly
• Once a week, clean thoroughly
• Stubborn stains can be removed with a
• If you accidentally burn some sugar,
and care
once it has cooled down. Do not use
abrasive cleaners or scourers. Clean the
surface with a damp cloth and soapy water
(3.1.1).
with products specially designed for
vitroceramic products.
glass scraper (3.1.2).
sugary products or plastic items on the hot
hob, remove it as soon as possible with a
scraper while the hob surface is still hot.
Otherwise you may be left with permanent
stains.
and to activate
Troubleshooting
4
You can solve the following problems yourself.
• If appears on the display, the
temperature is too high in the control area.
Check that no heat sources are in this
area. The message will disappear when
the temperature in the control area returns
to an acceptable level (4.1.1).
• Spill-over protection: if any liquids boil over,
or if any objects are placed on the sensors,
the hob will switch off. Beeps will sound
and ( .) will be displayed. Clean the glass
or remove the object and switch on the hob
again (4.1.2).
• If the hob does not work and is shown.
It is possible that the hob is running an
autocheck. Try disconnecting the hob from
the mains and connecting it again. If the
error code persists or another unknown
code is shown, call the technical service.
5
The hob has an environment friendly
design.
Please respect the environment.
Use adequate power for each cooking
operation and select pans of a suitable size
for the amount food you are going to cook.
The heat transmission is best when the base
of the pan and the diameter of the cooking
zone are the same size.
When you have finished cooking, if you like
you can leave the pan where it is to make use
of the residual heat accumulated. This will
save power.
Use a lid whenever you can in order to reduce
the heat loss through evaporation.
Electrical and electronic equipment waste
management.
Do not dispose of expired appliances with
general household waste.
Take your hob to a special collection centre.
Recycling electric domestic appliances helps
to avoid negative health and environmental
effects and allows saving energy and
resources.
For more information, contact your local
authorities or the retailer you purchased the
hob from.
Environment
5
Page 8

Русский
Руководство по эксплуатации
Очень важно: Внимательно прочтите данную инструкцию по эксплуатации. Она поможет Вам правильно
и безопасно управлять варочной поверхностью.
Это руководство составлено таким образом, что тексты относятся к соответствующим рисункам.
Техника безопасности
Важно
Храните это руководство вместе с прибором. При продаже или
передаче прибора другому лицу вместе с прибором необходимо
передать это руководство по эксплуатации. Внимательно
прочтите приведенные указания перед началом эксплуатации и
установки прибора. Они предназначены для обеспечения вашей
безопасности и безопасности окружающих.
• Электрическое оборудование варочной поверхности должно
быть оснащено размыкающими устройствами в соответствии с
требованиями норм и правил страны (региона).
• Установка и подключение прибора должны производиться
уполномоченным специалистом в соответствии с инструкциями и
схемами изготовителя.
• Характеристики электрического оборудования должны
соответствовать максимальной мощности, указанной в паспортной
табличке. Розетка должна быть оснащена заземлением в соответствии
с нормативными требованиями.
• В случае повреждения сетевого шнура во избежание опасности
его замена должна производиться изготовителем, службой
послепродажного обслуживания или аналогичным квалифицированным
специалистом.
• ВНИМАНИЕ! Если поверхность стекла растрескается или расколется,
прибор необходимо незамедлительно отключить от сети во избежание
короткого замыкания и поражения электрическим током.
• Пользование прибором до замены стекла не допускается.
Замена стекла должна производиться службой послепродажного
обслуживания или квалифицированным специалистом (4.1.1).
• Не ставьте горячие кастрюли и сковородки на датчики. Это может
вызвать повреждение электронных схем (4.1.3).
6
Page 9

Русский
• ВНИМАНИЕ! Во время работы прибора его корпус и открытые части могут
сильно нагреваться. Старайтесь не прикасаться к нагревательным элементам.
Дети до 8 лет не должны приближаться к прибору, за исключением случая,
когда они находятся под постоянным присмотром.
• Если прибор установлен на шкафу, внутри него нельзя хранить
легковоспламеняющиеся предметы.
• Данное оборудование может использоваться детьми возрастом 8 лет и
старше, а также людьми с ограниченными физическими, сенсорными или
умственными возможностями, людьми с нехваткой опыта и знаний, если они
прошли обучение по безопасному использованию оборудования и поняли
вероятные риски. Дети не должны играть с данным прибором. Чистка и уход
не должны осуществляться детьми без надзора за ними.
• ВНИМАНИЕ! Перегретое растительное масло или жир легко воспламеняются.
Не оставляйте без присмотра прибор, когда готовите блюда с использованием
масла или жира.
Никогда не тущите огонь водой. Выключите конфорку. Пламя можно
осторожно погасить крышкой, пламягасящим покрывалом или подобными
предметами.
• ВНИМАНИЕ! Опасность пожара! Не храните предметы на поверхности кухни.
• Категорически запрещается использовать для чистки прибора устройства
паровой чистки.
• В этом приборе не предусмотрена его эксплуатация с внешним часовым
устройством (таймером) выключения или системой дистанционного управления.
• Модели с электронным управлением: Чтобы выключить прибор, нажмите
), удерживая две секунды. Прибор подаст звуковой сигнал, а дисплей
(
погаснет, что свидетельствует о том, что прибор выключен.
Модели с ручками управления: Чтобы выключить элемент, переведите
регулятор в положение «0».
• Следите за тем, чтобы не ударять посудой и иными предметами по стеклу.
• Не следует включать нагревательные элементы при отсутствии посуды.
• Прибор необходимо использовать только для приготовления пищи. Этот
прибор нельзя использовать как плиту с конфорками.
• Когда поверхность нагрета, не допускайте попадания на нее холодной воды.
• ВНИМАНИЕ! Используйте только защитные приспособления, указанные
изготовителем прибора или указанные как пригодные изготовителем
прибора в инструкции по эксплуатации или встроенные в прибор.
Использование непригодных защитных приспособлений может стать
причиной несчастных случаев.
7
Page 10

0
Определите модель своей плиты (“a”, “b”, “c”,
“d”), сравнив номер и расположение конфорок
своего аппарата с аппаратом, изображенном на
рисунке.
1
1.1 Распаковка. Удалите все детали упаковки.
1.2 Монтаж плиты в кухонную мебель.
1.3. Подключение к сети электроснабжения.
Идентификация
Установка
Учитывайте характеристики плиты (1.2.1), а
также размеры кухонной мебели, в которую
будет встраиваться плита (1.2.2, 1.2.3). Если
Вы не будете устанавливать под плитой
духовку, то должны поместить защитную
пластину в соответствии с указанными
размерами (1.2.4). Нанесите на внешние края
плиты пенистый изоляционный материал
для обеспечения хорошей герметичности
(1.2.5). Переверните плиту и помести ее в
вырез (1.2.6). Закрепите плиту в кухонной
мебели при помощи прилагаемых скоб
(1.2.7). Не используйте материалы, которые
невозможно удалить, такие как силикон.
• Из пяти жил: а) темно-синяя, b) голубая, c)
коричневая, d) красная, e) зелено-желтая.
(1.3.1)
• Используется для плиты 230V~. (1.3.2)
• Используется для плиты 220-240V~: смотри
таблицу. (1.3.3)
• Общая мощность: Плита 60 см 6,8 kW,
Плита >60 см 7,8 kW
220-240V~ Вн. Номинал по фазам
Плита 30 см 16 A
Плита 60 см 30 A
Плита >60 см 34 A
• Если напряжение в электросети выше
220-240V~, подключение производить в
соответствии со схемами (1.3.3, 1.3.4).
220-240V 3~ Вн. Номинал по фазам
Плита 30 см 16 A
Плита 60 см 14 А
Плита >60 см 16,5 А
Русский
380-415V 3N~ Вн. Номинал по фазам
Плита 30 см 16 A
Плита 60 см 11 A
Плита >60 см 13 A
380-415V 2N~ Вн. Номинал по фазам
Плита 30 см 16 A
Плита 60 см 16 A
Плита >60 см 19 A
Этот аппарат соответствует европейским
директивам 73/23/СЕЕ и 89/336/СЕЕ
Рекомендация: Установка плиты должна
производиться специалистом, который
осуществит ее в соответствии с инструкциями и
схемами производителя.
2
Если плита изготовлена из стеклокерамики, то
может быть использована посуда из глины, меди
или нержавеющей стали. Не рекомендуется
использовать алюминиевую посуду, так как она
может оставить пятна на стеклянной поверхности
плиты.
2.1 Выбор зоны варки. В Вашем распоряжении
2.2 Включение плиты. Нажмите и удерживайте
Примечание: Для отключения системы
2.3 Включение конфорки. Включите конфорку,
Примечание: Если Вы будите выбирать более
2.4 Выбор мощности. Установите ее нажимая
Использование
имеется несколько конфорок, на которые
можно поместить посуду. Выберите наиболее
подходящую из них в соответствии с
размером посуды.
в течение 3 секунд клавишу
чтобы включить плиту; активизируются
значки 0 различных точек готовки.
блокировки, не позволяющей детям
пользоваться плитой, нажмите и удерживайте
в течение 3 секунд клавишу
на которую поставили посуду, путем нажатия
на соответствующую клавишу
(2.3.1). или нажмите на (2.4.1)
5 секунд, на какую клавишу следует нажать,
плита автоматически отключится в целях
безопасности.
или (2.4.1).
на
для того,
или
, , ,
.
8
Page 11

Русский
СПЕЦИАЛЬНЫЕ КОНФОРКИ
2.5 Двойная конфорка, Тройная конфорка
(b, d). Выбрав мощность, нажмите на
включится двойная конфорка (2.5.1.).
Рекомендация: В моделях плит с галогенными
конфорками свет настолько яркий, что не
рекомендуется пристально смотреть на
зажженную конфорку, если на ней нет посуды.
ФУНКЦИИ ВРЕМЕНИ
2.6 Выбор времени
Модели a, c, d: Как только включена плита и
выбрана мощность, в Вашем распоряжении
имеется 5 секунд мигания цифр, чтобы
нажать на клавишу
необходимое время, нажав на клавиши
, (2.6.2). Через пять секунд время
установится, его можно видеть, а под иконкой
запрограммированной конфорки появится
светящаяся точка (2.6.3). Чтобы изменить
время или увидеть, сколько его осталось,
нажмите на иконку запрограммированной
конфорки (2.6.4). Чтобы аннулировать
программу, нажмите одновременно на
клавиши , (2.6.5).
Модели b: Как только включена конфорка
и выбрана мощность, нажмите на клавишу
на часах. Появится 00 и значок
каждой конфорке (2.6.6). Нажмите на
конфорки, которую надо запрограммировать,
и начнет мигать
при помощи
Через пять секунд время установится и
можно будет увидеть попеременно величину
мощности
конфорке. По прошествии времени раздастся
звуковой сигнал и начнет мигать
аннулировать программу, нажми на на
иконке
появится 00 .
Примечание: Таймер погаснет автоматически,
если будете выбирать время более 10 секунд.
Соображения относительно
программирования: Если уровень мощности
составляет 9, то максимальное время
программирования должно равняться 60 мин.
Если уровень иной, то максимальная величина
может составлять 99 мин.
Как только время закончится, прозвучит сигнал,
если Вы не нажмете ни на какую клавишу.
и держи до тех пор, пока не
(2.6.1). Выберите
(2.6.7). Выберите время
, на часах. (2.6.8).
на запрограммированной
00
на
. Чтобы
и
ФУНКЦИИ ПРОГРАММИРОВАВНИЯ
2.7 Быстрый нагрев. Быстро достигает
максимальной температуры, чтобы
автоматически перейти к поддерживаемой
температуре готовки.
Модели b, d: Выберите конфорку и включите
ее на максимальную мощность для чего
нажимайте на
появится 9 и значок (2.7.1). Регулируйте
мощность, нажимая на рекомендуются
уровни от 3 до 6 (2.7.2). Через 5 секунд
установится быстрый нагрев и будет видно
значение мощности, а за ним - точка. (2.7.3).
Как только будет достигнута максимальная
температура, цифровая точка исчезнет и
конфорка продолжит функционировать в
обычном режиме. Для прекращения нажмите
нажим на клавишу запрограммированной
конфорки и выберите новую мощность.
2.8 Выключение конфорки. Выберите
мощность
погасить.
2.9 Остаточное тепло. После окончания
пользования плитой конфорки остаются
нагретыми в течение некоторого времени,
которое зависит от величины выбранной
мощности, и появится значок
еще горячих конфорках. Не прикасайтесь к
этим конфоркам во избежание получения
ожогов.
Внимение: Если вдруг отключится подача
электроэнергии, то по ее возобновлении
указатель
еще будет оставаться горячей. Имей в виду это
обстоятельство.
2.10 Функция блокировки.
Модели b, d: Для избежания пользования
Модели a, c:
Если варочная панель заблокирована, то
плитой детьми. Нажмите и удерживате в
течение 3 секунд клавишу
Вы активируете блокировку. Для снятия
блокировки повторите эту операцию (2.10.1).
случайные переключения прибора. Для
того, чтобы включить или выключить
блокировку органов управления варочной
панели, нажмите и удерживайте кнопки
нагревательных элементов 1 и 2 (
одновременно (2.10.2).
при нажатии на любую кнопку на табло
отображается
блокировки отображается
до тех пор, пока не
конфорки, которую хотите
0
или точка на
не появится, хотя зона готовки
. Этим самым
Функция предотвращает
)
(2.10.3). При снятии
(2.10.4).
9
Page 12

Русский
ПОЛЬЗОВАТЕЛЬСКИЕ НАСТРОЙКИ
2.11. Бесшумный режим. Для того, чтобы
ограничить число звуковых сигналов
(чтобы они подавались только при включении и выключении прибора, а также по
истечении времени таймера), одновременно нажмите кнопки
на выключенной варочной панели.
В экране настроек звука выберите
и
, чтобы включить или отключить
бесшумный режим ( : звуки включены
(2.11.1), : бесшумный режим (2.11.2).
2.12 Включение системы автоматической
блокировки. Одновременно нажмите
кнопки и
ключенной варочной панели. Перейдя
в меню настройки функции автоматической блокировки, выберите и
чтобы включить или отключить функцию
( : автоматическая блокировка включена (2.12.1) : автоматическая блокировка отключена (2.12.2). При включенной
функции автоматической блокировки
варочная панель автоматически блокируется через 15 минут после ее полного
выключения.
Рекомендации:
• Избегайте ударов посудой по стеклянной
поверхности плиты.
• Алюминиевая посуда не рекомендуется для
использования, так как она может оставить
пятна на стеклянной поверхности плиты.
Исключение составляет алюминиевая
посуда с утолщенным защитным слоем дна,
изготовленным из нержавеющей стали.
• Нагретые конфорки не должны
функционировать, если на них нет посуды.
• Дно посуды должно быть ровным и сухим.
• Старайтесь не двигать посуду, так как могут
остаться царапины на стекле.
• Используйте аппарат исключительно для
приготовления пищи. Не используйте плиту в
качестве своего рабочего стола.
• Не наливайте холодную воду непосредственно
на плиту, если она находится в нагретом
состоянии.
Внимание: Прерывающееся функционирование
зон готовки не означает, что случилась авария.
Конфорки функционируют в течение более или
менее продолжительных периодов зажженными
или погашенными в зависимости от выбранной
мощности.
, а затем на вы-
и
, а затем
Содержание и
3
• Не используйте паровой очиститель.
• Регулярно очищайте поверхность своей
• Раз в неделю проводите тщательную чистку
• Сильно приставшая грязь очищается при
• Если по неосторожности на раскаленной
4
Некоторые перечисленные ниже проблемы
Вы можете решить самостоятельно.
• Если на табло отображается
• Действия при разливе жидкости: если при
• Варочная панель не работает, на табло
уход
плиты, когда она остынет. Не используйте
абразивных продуктов чистки и таких
же мочалок. Очищайте поверхность при
помощи влажной ткани и мыльной воды.
(3.1.1).
при помощи специальных продуктов для
изделий из стеклокерамики.
помощи стеклянного скребка (3.1.2).
поверхности плиты сгорит сахар,
засахаренные продукты или изделия из
пластика, удалите их как можно скорей при
помощи скребка с пока еще раскаленной
поверхности плиты. Если этого не сделать,
то пятна могут остаться навсегда.
Поиск и устранение
неисправностей
контролируемой зоне очень высокая
температура. Проследите за тем, чтобы
в этой зоне не было источников тепла.
Сообщение исчезает с табло, когда
температура в контролируемой зоне
возвращается к приемлемому уровню
(4.1.1).
кипении некоторая часть жидкости попала
на варочную панель или если на датчики
помещены какие-либо предметы, то
варочная панель выключается. Подается
звуковой сигнал, а на табло отображается
( .)
. Очистите стеклянную поверхность
или уберите предмет с датчика и вновь
включите варочную панель (4.1.2).
отображается
панель выполняет самодиагностику.
Отключите варочную панель от сети
и вновь включите ее в сеть. Если
сообщение об ошибке не пропало или если
отображается другой код неисправности,
обратитесь в службу технической
поддержки.
. Возможно, варочная
, в
10
Page 13

Окружающая
5
Плита сконструирована с учетом
сохранения окружающей среды.
Относись с уважением к окружающей
среде.
Используйте мощности, соответствующие
каждой готовке, и выбирайте посуду, размеры
которой соответствуют количеству пищи,
которую собираетесь готовить. Когда дно
посуды и диаметр зоны готовки совпадают
по размерам, то передача тепла является
оптимальной.
По окончании готовки, если необходимо,
можете оставить посуду на том же
месте, чтобы использовать остаточное
аккумулированное тепло. Таким образом Вы
сэкономите электроэнергию.
Используйте крышку всякий раз, когда это
возможно, чтобы уменьшить потерю тепла
из-за испарения.
Использование отслуживших
электрических и электронных аппаратов.
Не смешивайте отслужившие аппараты
с обычными домашними хозяйственными
отходами.
Сдайте свою плиту в специальный пункт
приемки.
Переработка электробытовых товаров
способствует избежанию негативных
последствий для здоровья, для окружающей
среды и позволяет сберегать электроэнергию
и ресурсы.
Для получения более детальной информации
свяжитесь с местными властями или с
торговой точкой, где была приобретена плита.
среда
Русский
11
Page 14

 Loading...