

Page 1

CONSUMER CAMERA Quick Start Guide
V 1.0.0
Page 2
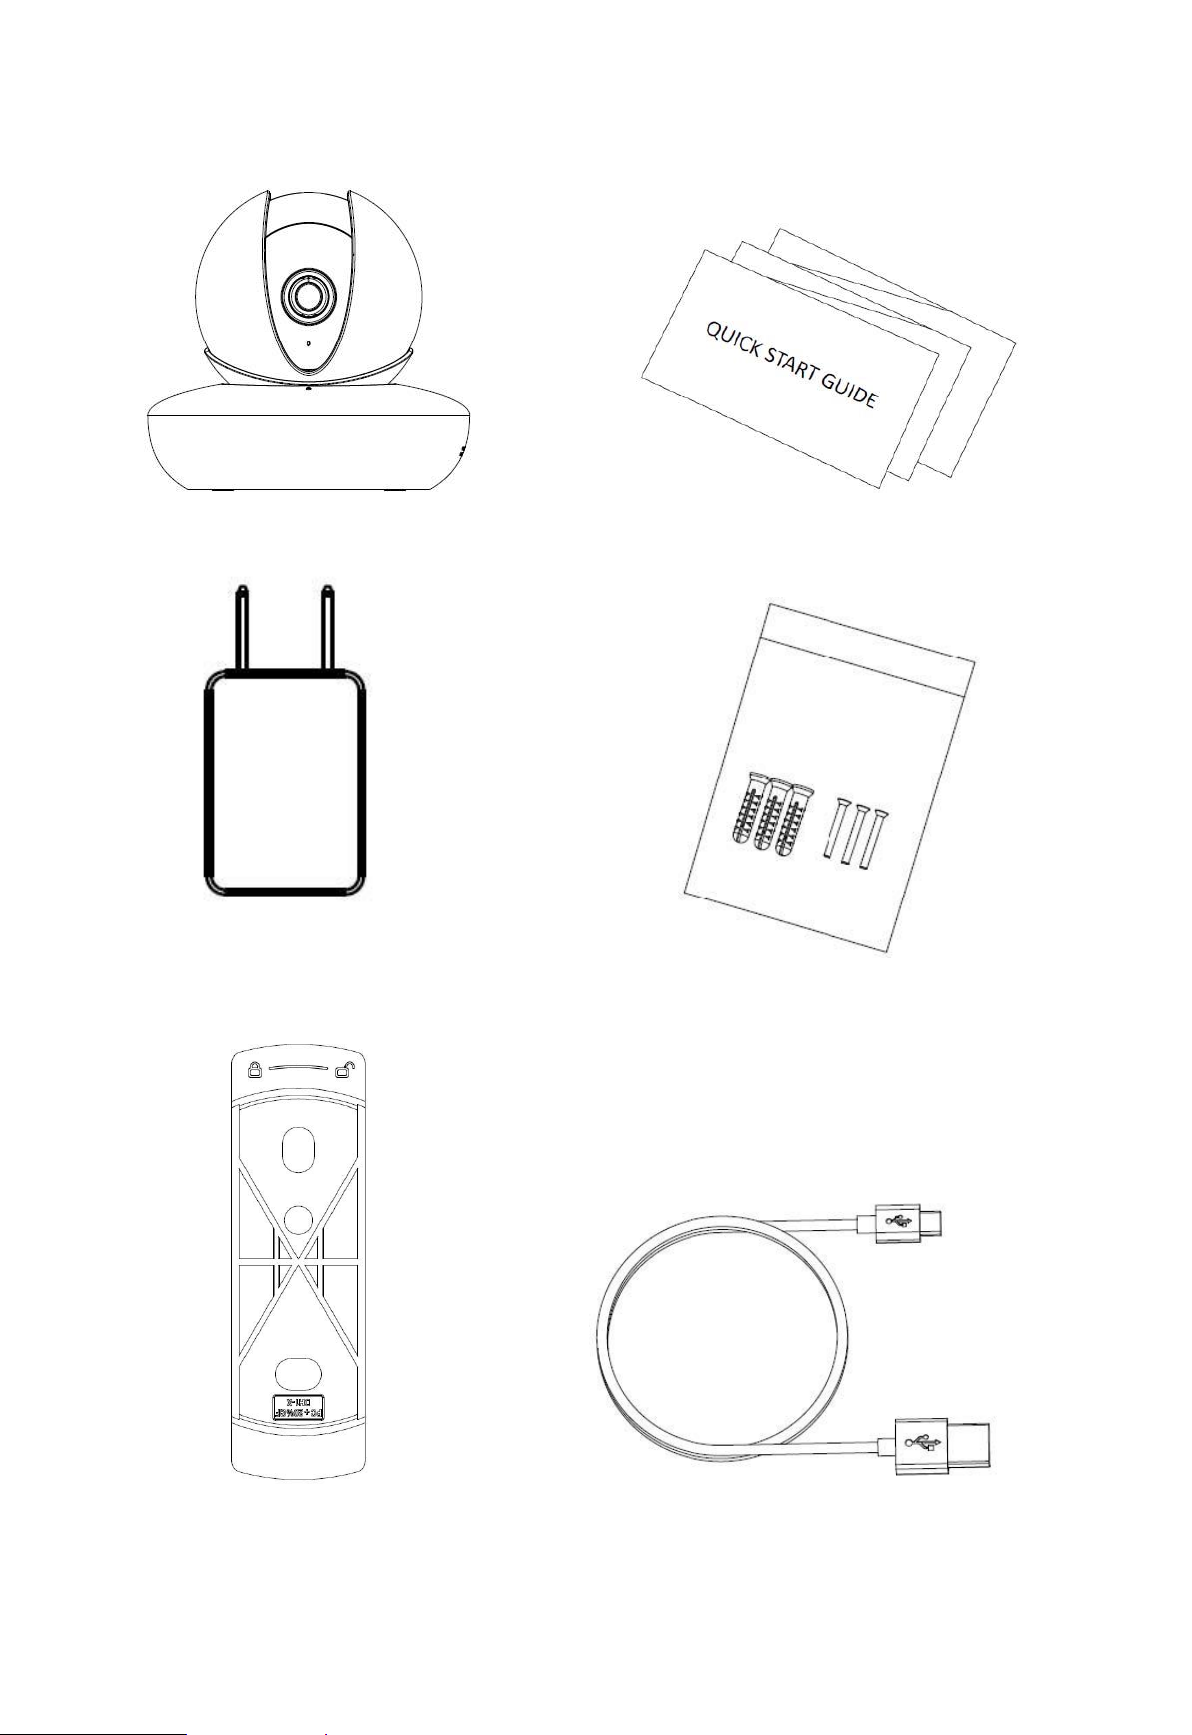
1 Packing List
Device × 1 QSG ×1
Power Adapter ×1
Screw Package ×1
Quick Installation
Board ×1
USB ×1
Page 3

2 Product Appearance
SN
Name
1
Micro SD card slot
2
Reset/WPS (Wi-Fi Protected Setup) button
3
USB port
4
MIC
5
LED indicator light
6
Speaker
Indicator light status
Device status
Red light normally on
Device malfunction or booting
Green light slow flashing
Booting completed, await wifi config,
enter smart config status;
Green light quick flashing
Wifi smart config in progress, including
WPS (Wi-Fi Protected Setup),
management frame and etc.
Green light normally on
Wifi connection succeeded, operate
normally.
Figure 2-1
Please refer to Table 2-1 for more details about each port.
Table 2-1
Note:
For reset, long
press for 8
seconds and
then the light
off; For WPS
(Wi-Fi
Protected
Setup) one quick press.
Please refer to Table 2-2 for more details about status of indicator light.
Table 2-2
Page 4

3 Operate by EasyViewer
Step 1
Power on the camera.
Step 2
Connect iphone to a WiFi signal.
Step 3
Open EasyViewer (downloaded from APP Store), choose Device Manager.
Figure 3-1
Step 4
Please select “P2P” when the network cable is connected, select
“WiFi configuration” for wireless connection. Here is an
example of wireless connection.
Page 5

Figure 3-2
Step 5
Input a device name and scan the QR code (on the bottom of the
device chassis) on camera, then “next”.
Figure 3-3
Step 6
Input the WiFi password, then “next”.
Page 6

Figure 3-4
Step 7
Connection succeeds.
Figure 3-5 Figure 3-6
Figure 3-7
Note:
Please try again or check the WiFi password if it failed.
The WiFi configuration will be closed if activating WPS (WI-FI
Protected Setup) function; Please reset the device if you still need to
configure WiFi via EasyViewer.
Page 7

4 Device Installation
Note
The following figures are for reference only, please refer to the actual device for more details.
Before installation, please make sure the installation surface can at least support 3x weight of the camera.
The device can adopt two types of installation mode which are desktop installation and ceiling mount.
Please refer to Figure 4-1 for desktop installation.
Figure 4-1
For desktop installation,
you just need to stick the
device on the installation
surface.
Please refer to Figure 4-2
for ceiling mount.
Figure 4-2
The exact installation
steps are shown as
follows:
Page 8

Step 1
Dig holes on the proper installation surface according to the hole sites on the quick installation board.
Step 2
Knock the expansion bolts into the holes.
Step 3
Use self-tapping screws to fix the quick installation board well.
Step 4
Connect to device power.
Step 5
Adjust the monitoring angle and stick the device on the quick installation board.
Note:
This quick start guide is for reference only. Slight difference may be found in user interface.
All the designs and software here are subject to change without prior written notice.
All trademarks and registered trademarks mentioned are the properties of their respective owners.
If there is any uncertainty or controversy, please refer to the final explanation of us.
Please visit our website or contact your local service engineer for more information.
Page 9

This device complies with Part 15 of the FCC Rules. Operation is subject to the following two conditions:
(1) This device may not cause harmful interference, and
(2) This device must accept any interference received, including interference that may cause undesired
operation.
Attention that changes or modification not expressly approved by the party responsible for compliance
could void the user’s authority to operate the equipment.
Note: This product has been tested and found to comply with the limits for a Class B digital device,
pursuant to Part 15 of the FCC Rules. These limits are designed to provide reasonable protection against
harmful interference in a residential installation. This product generates, uses, and can radiate radio
frequency energy and, if not installed and used in accordance with the instructions, may cause harmful
interference to radio communications. However, there is no guarantee that interference will not occur in
a particular installation. If this product does cause harmful interference to radio or television reception,
which can be determined by turning the equipment off and on, the user is encouraged to try to correct
the interference by one or more of the following measures:
—Reorient or relocate the receiving antenna.
—Increase the separation between the equipment and receiver.
—Connect the equipment into an outlet on a circuit different from that to which the receiver is
connected.
—Consult the dealer or an experienced radio/TV technician for help.
This equipment should be installed and operated with a minimum distance 20cm between the radiator
and your body
ZHEJIANG DAHUA VISION TECHNOLOGY CO., LTD.
Address: No.1199, Bin'an Road, Binjiang District, Hangzhou, P.R. China
Postcode: 310053
Tel: +86-571-87688883
Fax: +86-571-87688815
Email: consumer@global.dahuatech.com
Website: www.dahuaconsumer.com
 Loading...